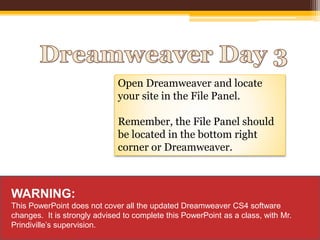
1. Open Dreamweaver and locate
your site in the File Panel.
Remember, the File Panel should
be located in the bottom right
corner or Dreamweaver.
WARNING:
This PowerPoint does not cover all the updated Dreamweaver CS4 software
changes. It is strongly advised to complete this PowerPoint as a class, with Mr.
Prindiville’s supervision.
2. By now you should have created 6 webpages for your site, and you should have
created hotspots for the Navbars on each page. If you need to catch up, please do so
before continuing with this powerpoint.
You need to do this for
each of those 6 pages,
not just once.
3. Once you’re caught up and
ready to go, make sure you
are working on your home
page (index.html)
You can easily see which page
your working by checking the
tab at the top of the
document window
If you are not working on
your home page, double click
index.html in the File Panel
to open it up
Notice the index.html is the tab you working on
4. In this
Powerpoint we’re
going to go over
AP Elements
But what is an AP Element?
Excellent question!
I should have expected
that coming from such a
smart individual like
yourself. Allow me to
explain…
5. AP Element stands for Absolute Position Element.
These are elements that can be put anywhere you want, without using
things like tables or frames.
They have a fixed or Absolute Position, and work as containers for
things like text and/or images
Think of it as an element that is Positioned Absolutely where you
want it.
Ah yes, of Course!
It makes perfect
sense now!
6. To use an AP Element, first you must draw one first. To do this you need to
select the correct tool from the
When you are in the Layout Tab, click here to Draw an AP Element
7. Now click and drag open a box over your text pad
If you open up
the CSS menu
(circled in red)
and select the AP
Elements tab
you can see you
have a new AP
element
We’ll use this
more later.
8. Now please copy all of the text in the yellow box below…
Welcome to Sector 9 Skateboards
This site is dedicated to bringing you only the best quality skateboards. Most
of our skateboards are made from maple veneers which have been glued and
pressed together to form the decks. That's the simple answer. The
complicated answer is that we use a wide variety of materials to make a wide
verity of skateboards. So be sure to check out all of our products to see what
will best fits your needs.
Oh one more thing…
This is not the official Sector 9 webpage, and we are not actually selling
Sector 9 products. This is an educational site helping students learn the
basics of building a website. This site should not be uploaded to the web.
However, if by some act of wizardry it does show up on the web, please do
not sue. For actual Sector 9 information and products please visit their
official website at www.sector9.com
Thank you
9. And paste it into you AP Element.
Now before we continue, lets go over some of the properties for an AP Element…
10. Here are some of the properties you will be working with…
1
2
3
4
5
1. Dimensions of your AP Element: Length, Width, Height, and distance from the
top of your page
2. Z-Index: This is the stacking order of your elements. A Z-Index of 1 will be on
the bottom, 2 will be on top of 1, and so on. Think of it like layers in Photoshop
3. Visibility: This determines whether your element is visible in your web browser
4. Background: You can add background image and/or color for your element
5. Overflow: If you create an AP Element and then put something that will not fit
inside this determines how it handles it.
1. Visible: Makes the element as big as it needs to be to make everything
visible
2. Hidden: hides what won’t fit
3. Scroll: adds scroll bars so you can scroll to see all the content
12. Please format the text as follows…
1. The entire text should have Arial
font (if a window pops up asking
you to create a new CSS rule,
that’s ok. I would name the
selector arial and click ok)
2. There should be a space between
all headings and paragraphs and 2
space separating the first
paragraph and the 2nd heading
(“oh one more thing”)
3. “Welcome to Sector 9
Skateboards” should be sized
medium and bold
4. “Oh one more thing…” should be
set to small, bold, and italic
5. The body text should be sized
small
If your text doesn’t look similar to the
picture above, you need to re-format
your text.
14. You bet it’s a good time to SAVE ALL.
Now minimize Dreamweaver and access my
folder
In the Dreamweaver Practice folder copy
and paste the footer.png and
new products.png files into your images file
15. 1. Draw a New AP element below the text.
2. Then Drag and drop the footer.png file into the AP Element
If it don’t look like this, you messed up. No worries, just try it again.
16. Then do the same thing with the new products.png file as shown below
Notice this AP Element is on top of
the AP Element with the text.
If you go back to your CSS Panel
and open the AP Element Tab you
can easily see this
17. This is your CSS Panel
(usually located at the top right of
Dreamweaver)
These are the Z-Indexes for each shape (we mentioned these earlier)
Notice the Main Text has a Z-Index of 1. These means it will be on the
bottom. If for any reason you need to change the Z-Index you can double
click and change it here, or change it in the properties menu (refer to slide
10 of this Powerpoint). Please leave the Z-Indexes as they pictured above
These are your AP Elements
So you don’t get confused, double
click on them and rename them as
shown here.
18. Click on your new products image, and create an oval hotspot around it.
Then link it to your products page.
19. Congratulations!
That’s all for today. Make
sure you save all and preview
your site, so you can see what
it looks like so far.