
Recommended
More Related Content
What's hot
What's hot (19)
Viewers also liked
Viewers also liked (10)
Similar to Editing Vox Pops with Transitions and Audio Effects
Similar to Editing Vox Pops with Transitions and Audio Effects (20)
Recently uploaded
Recently uploaded (20)
Editing Vox Pops with Transitions and Audio Effects
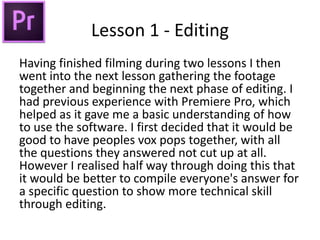
- 1. Lesson 1 - Editing Having finished filming during two lessons I then went into the next lesson gathering the footage together and beginning the next phase of editing. I had previous experience with Premiere Pro, which helped as it gave me a basic understanding of how to use the software. I first decided that it would be good to have peoples vox pops together, with all the questions they answered not cut up at all. However I realised half way through doing this that it would be better to compile everyone's answer for a specific question to show more technical skill through editing.
- 2. Lesson 2 - Editing Continued After changing my mind on how I wanted my vox pop production to be edited, I then went on to cutting up the footage. I did this using the split tool to cut out unnecessary footage and then added cross dissolves between the clips to make it look more professional. I also added text into the video, once again using cross dissolve between the clips, and cut out me saying the question to the people in the vox pops.
- 3. Lesson 3 – Editing Continued Once I had begun to edit the video, I decided it was also time to rename the clips that I had so that I could easily locate clips if I needed to. For example, I named the intro ‘Intro Clip’ instead of the default ‘Segment_001’ that it would normally have. I wanted my vox pops video to also have some background music too, which was the next and last thing I would do in this lesson. The background music did what I wanted it to do which was to add an element to the video that would make it more interesting. I did this by downloading the mp3 file and then dragging and placing it onto the timeline of the video.
- 4. Lesson 3 – Editing Continued Once I had added the instrumental into my vox pops it was time to make my vox pops video a bit more interesting and technical. I did this by using various video transition and audio effects available on Adobe Premiere. Between each clip I inserted a cross dissolve to have a more fluid movement from one clip to another instead of just a simple cut. Not only does this show some technical ability but it also improves the overall feel of the vox pops. I also added audio transitions to make the instrumental louder during some sections (such as the text sections displaying the question) and then quieter during the sections where I had people talking.
- 5. Lesson 3 – Editing Continued Use of cross dissolve effects on audio and video for transitions. Lots of quick cuts with cross dissolves, keeps it quick concise and nice to watch. Use of instrumental track to make the video more interesting, technical and engaging.
- 6. Lesson 4 – Vox Pops Finished; Exporting and Uploading Now that I had finished the vox pops and the editing involved in production it was time to export the file from Premiere Pro. I exported it in the format of Windows Media and the preset of 720 HD. After that, it was then time to upload the video to YouTube. This was relatively easy and soon my completed video was on YouTube and I had completely finished my vox pops. This gave me a good taste of what was to come when it comes to production and editing of my actual music video.