지브라프린터 Zebra iMZ320 감열 3인치 모바일프린터 매뉴얼

지브라 iMZ320 모바일 프린터는 경량의 초소형 디자인으로 필요할 때 언제든 영수증과 청구서를 인쇄할 수 있어 업무 처리가 간소화하는 바코드프린터 입니다. 지브라 iMZ320 모바일 프린터는 스마트폰 또는 태블릿PC (애플 iOS, 안드로이드, Windows® Mobile 및 BlackBerry®) 플랫폼에 블루투스 연결을 지원합니다. A Sidekick That Won't Weigh You Down At ¾ of a pound (0.34 kg) or less, these lightweight printers can be worn a full shift without any burden or bother Comfortably wear the printer via belt clip or shoulder strap for unobtrusive and convenient printing Simple to Operate Single push-button media access for simple reloading Intuitive LEDs indicate on/off, error, and connectivity status Economical Alternative A simple, reliable and affordable printer alternative Each iMZ printer comes standard with USB and Bluetooth connectivity, allowing you to communicate with mobile devices running on iOS, Windows® Mobile, Android and BlackBerry operating systems Palm-Sized Printing Power High-speed processor and extensive memory for printing complex barcodes, fonts and graphics iMZ printers now come with an 802.11n option with dual-band support (2.4 GHz?802.11b/g/n and 5 GHz-802.11a/n) for those overcrowded wireless networks in retail environments where business operations need communication at the less-crowded 5 GHz band Secure Bluetooth 2.0, 802.11a/b/g/n (optional) or USB (client) connectivity, Wi-Fi® and Cisco® CCX V4 ASD-certified STANDARD FEATURES Direct thermal printing of barcodes, text and graphics 203 dpi/8 dots per mm resolution Print speed: Up to 4"/102 mm per second CPCL and ZPL® programming languages Resident fixed and scalable fonts 400MHz 32-bit ARM® processor with 128 MB RAM memory 128 MB Flash memory supports downloadable programs, receipt formats, fonts, and graphics USB port 1.6Ahr Li-Ion battery Built-in battery charger Optical out-of-media sensing using fixed center-position sensor Tear bar for easy receipt dispensing Supports vertical and horizontal printing Printer can be used in any orientation Fixed media-roll width Clamshell design for easy media loading Printer Management: Mirror, SNMP, Web server (with customizable HTML pages), Wavelink Avalanche® [Future firmware update] Four LEDs as user interface indicators 4'/1.2 m drop to concrete (multiple times) Label odometer Bluetooth 2.1 Security modes 1?4 Bluetooth printing from Apple devices (iOS5, iOS6) IP42-rated for dust and water resistance (IP54 with durability-enhancing case) Print Touch via NFC?One touch to pair and print via Bluetooth PRINTER SPECIFICATIONS Resolution : 203 dpi/8 dots per mm Memory : 128 MB RAM; 128 MB Flash (standard) Print width : 2.9"/73.7 mm Print length : Maximum: Continuous Print speed : Up to 4"/102 mm per second Physical Characteristics Width : 4.11"/104.4 mm Height : 5.34"/135.6 mm Depth : 2.26"/57.4 mm Weight : 0.75 lbs/0.34 kg with battery with battery >하이온아이티 주소 : 서울 금천구 가산디지털2로 165, 1304호 (백상스타타워2차) 대표번호 : 02-2038-0018 / 이메일 : hion@hionit.com 홈페이지 : http://hionsmart.com/

Recommended
More Related Content
What's hot
What's hot (18)
Similar to 지브라프린터 Zebra iMZ320 감열 3인치 모바일프린터 매뉴얼
Similar to 지브라프린터 Zebra iMZ320 감열 3인치 모바일프린터 매뉴얼 (20)
More from HION IT
More from HION IT (20)
Recently uploaded
Recently uploaded (20)
지브라프린터 Zebra iMZ320 감열 3인치 모바일프린터 매뉴얼
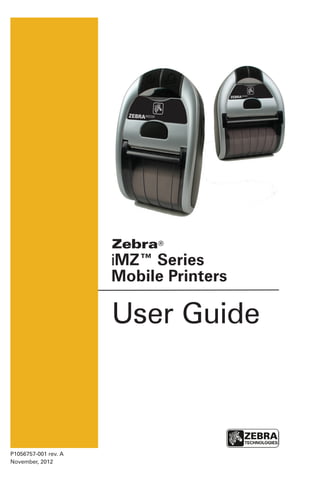
- 1. i User Guide P1056757-001 rev. A November, 2012
- 2. 2 iMZ Series User Guide continued Table of Contents Proprietary Statements.............................................................................................4 Document Conventions............................................................................................6 Introduction to the iMZ Series................................................................................7 Unpacking and Inspection................................................................ 7 Reporting Damage............................................................................ 7 Getting Ready to Print...............................................................................................9 Battery................................................................................................ 9 Installing and Removing the Battery.............................................................9 iMZ Series Quad Power Station..................................................................13 Battery Safety...............................................................................................14 Charger Safety..............................................................................................14 Loading the Media (All models)..................................................... 15 Using Pre-Printed Receipt Media................................................... 16 Operator Controls........................................................................... 18 Normal Boot-up LED Behavior....................................................................20 Diagnostic (Two key) Report LED Behavior................................................20 Forced Download Description and LED Behavior......................................21 Rebooting After a Firmware Download or Forced Firmware Download (Description and LED Behavior)..................................................................22 Shutting Down LED Sequence....................................................................22 Communication (Blue) LED Behavior..........................................................22 Verify the Printer Is Working..........................................................23 Printing a Configuration Label.....................................................................23 Cable Communication..................................................................................24 Wireless Communications with Bluetooth®............................................................. 26 Bluetooth® Personal Area Network (PAN)...................................................26 Bluetooth® Connections..............................................................................26 Bluetooth pairing requiring Man-In-The-Middle (MITM) protection..........27 Connecting to Apple Devices......................................................................28 WLAN Overview..............................................................................29 Setting Up the Software.................................................................29 Wearing the Printer..................................................................................................30 Belt Clip.........................................................................................................30 Adjustable Shoulder Strap...........................................................................31 Preventive Maintenance........................................................................................32 Extending Battery Life....................................................................32 General Cleaning Instructions........................................................33 Troubleshooting.......................................................................................................35 Interpreting Indicators....................................................................35 Troubleshooting Topics..................................................................35 Resetting an iMZ Series Printer.....................................................37 Information On Back Of Printer......................................................37 Troubleshooting Tests....................................................................38 Printing a Configuration Label.....................................................................38 Communications Diagnostics......................................................................38 Calling Technical Support............................................................................39 Specifications.............................................................................................................42 Printing Specifications ................................................................................42
- 3. 3 iMZ Series User Guide Memory and Communications Specifications, iMZ series.........................42 Media Specifications....................................................................................42 ZPL Bar Code Specifications and Commands............................................43 CPCL and ZPL Font Specifications ............................................................44 Fonts..........................................................................................................44 Matrix (in dots) (HxW)...............................................................................44 Min. Char. Size (HxW)...............................................................................44 Max. CPI.....................................................................................................44 Font............................................................................................................45 Matrix (in dots) (HxW)...............................................................................45 Type*.........................................................................................................45 Min. Char. Size (HxW)...............................................................................45 Maz. C.P.I....................................................................................................45 USB Communications Port..........................................................................46 Pin#...........................................................................................................46 Signal Name..............................................................................................46 Type...........................................................................................................46 Description................................................................................................46 Physical, Environmental and Electrical Specifications...............................46 iMZ Series Accessories ...............................................................................48 Appendix A.................................................................................................................49 Interface Cables............................................................................................49 USB Cable.....................................................................................................49 More Interface Cables .................................................................................49 Appendix B.................................................................................................................50 Media Supplies.............................................................................................50 iMZ Series Media.........................................................................................50 Appendix C.................................................................................................................51 Battery Disposal...........................................................................................51 Product Disposal..........................................................................................51 Appendix D.................................................................................................................52 Product Support...........................................................................................52 Product Support Contacts...........................................................................53 Appendix E..................................................................................................................54 Using zebra.com..........................................................................................54 Index..............................................................................................................................56 Patent Numbers........................................................................................................57
- 4. 4 iMZ Series User Guide Proprietary Statements This manual contains proprietary information of Zebra Technologies Corporation. It is intended solely for the information and use of parties operating and maintaining the equip- ment described herein. Such proprietary information may not be used, reproduced, or dis- closed to any other parties for any other purpose without the expressed written permission of Zebra Technologies Corporation. Product Improvements Since continuous product improvement is a policy of Zebra Technologies Corporation, all specifications and signs are subject to change without notice. Agency Approvals and Regulatory Information • Design certified by TUV • FCC part 15 Class B • Canadian STD RSS-210 • EN55024:2003 European Immunity Standard • EN60950: 2006 Safety Standard • NOM (Mexico) • C-Tick (Australia) • EN55022:2006 Class B European Electromagnetic Radiation Standard Liability Disclaimer Inasmuch as every effort has been made to supply accurate information in this manual, Zebra Technologies Corporation is not liable for any erroneous information or omissions. Zebra Technologies Corporation reserves the right to correct any such errors and disclaims liability resulting therefrom. No Liability for Consequential Damage In no event shall Zebra Technologies Corporation or anyone else involved in the creation, production, or delivery of the accompanying product (including hardware and software) be liable for any damages whatsoever (including, without limitation, damages for loss of business profits, business interruption, loss of business information, or other pecuniary loss) arising out of the use of or the results of use of or inability to use such product, even if Zebra Technologies Corporation has been advised of the possibility of such damages. Because some states do not allow the exclusion of liability for consequential or incidental damages, the above limitation may not apply to you. Copyrights The copyrights in this manual and the label print engine described therein are owned by Zebra Technologies Corporation. Unauthorized reproduction of this manual or the software in the label print engine may result in imprisonment of up to one year and fines of up to $10,000 (17 U.S.C.506). Copyright violators may be subject to civil liability. This product may contain ZPL® , ZPL II® , and ZebraLinktm programs; Element Energy Equal- izer® Circuit; E3® ; and AGFA fonts. Software © ZIH Corp. All rights reserved worldwide. ZebraLink and all product names and numbers are trademarks, and Zebra, the Zebra logo, ZPL, ZPL II, Element Energy Equalizer Circuit, and E3 Circuit are registered trademarks of ZIH Corp. All rights reserved worldwide. Monotype® , Intellifont® and UFST® are trademarks of Monotype Imaging, Inc. registered in the United States Patent and Trademark Office and may be registered in certain jurisdic- tions. AndyTM , CG PalacioTM , CG Century SchoolbookTM , CG TriumvirateTM , CG TimesTM , Monotype KaiTM , Monotype MinchoTM and Monotype SungTM are trademarks of Monotype Imaging, Inc. and may be registered in some jurisdictions. HY Gothic HangulTM is a trademark of Hanyang Systems, Inc. AngsanaTM is a trademark of Unity Progress Company (UPC) Limited. Andale® , Arial® , Book Antiqua® , Corsiva® , Gill Sans® , Sorts® and Times New Roman® are trademarks of The Monotype Corporation registered in the United States Patent and Trade- mark Office and may be registered in certain jurisdictions. Century Gothic™, Bookman Old StyleTM and Century SchoolbookTM are trademarks of The Monotype Corporation and may be registered in certain jurisdictions. HGPGothicB is a trademark of the Ricoh company, Ltd. and may be registered in some juris- dictions. continued
- 5. 5 iMZ Series User Guide UniversTM is a trademark of Heidelberger Druckmaschinen AG, which may be registered in certain jurisdictions, exclusively licensed through Linotype Library GmbH, a wholly owned subsidiary of Heidelberger Druckmaschinen AG. Futura® is a trademark of Bauer Types SA registered in the United States Patent and Trade- mark Office and may be registered in some jurisdictions. TrueType® is a trademark of Apple Computer, Inc. registered in the United States Patent and Trademark Office and may be registered in certain jurisdictions. All other product names are the property of their respective owners. © 1996–2009, QNX Software Systems GmbH & Co. KG. All rights reserved. Published un- der license by QNX Software Systems Co. All other brand names, product names, or trademarks belong to their respective holders. © 2012 ZIH Corp.
- 6. 6 iMZ Series User Guide Document Conventions The following conventions are used throughout this docu- ment to convey certain information: If you are viewing this guide online, click the underlined text to jump to a related Web site. Click on italic text (not under- lined) to jump to that location in this manual. Cautions, Important, and Note Caution • Warns you of the potential for electrostatic discharge. Caution • Warns you of a potential electric shock situation. Caution • Warns you of a situation where excessive heat could cause a burn Caution • Advises you that failure to take or avoid a specific action could result in physical harm to you. Caution • Advises you that failure to take or avoid a specific action could result in physical harm to the hardware. Important • Advises you of information that is essential to complete a task. Note • Indicates neutral or positive information that emphasizes or supplements important points of the main text.
- 7. 7 iMZ Series User Guide Introduction to the iMZ Series Thank you for choosing our Zebra® iMZ™ Series Mobile Printers. These rugged printers will surely become productive and efficient additions to your workplace thanks to their inno- vative design. Zebra Technologies is the leader in industrial printers with world-class support for all of your bar code print- ers, software, and supplies. This user’s guide gives you the information you will need to operate the iMZ320 and iMZ220 printers. These printers use CPCL and ZPL programming languages. To create and print labels using the CPCL and ZPL languages, refer to the Mobile Printing Systems CPCL Programming Manual and ZPL Programming Guide (See Appendix G for instructions on how to access manuals.) iMZ Series Software Utilities: • Zebra Net Bridge™ : printer configuration, fleet management • Zebra Setup Utility: single printer configuration, quick setup • Zebra Designer Pro: label design • Zebra Designer Drivers: Windows® driver • OPOS Driver: Windows driver • Multiplatform SDK • Zebra Downloader (These utilities can be found on the product CD that comes with the printer and at www.zebra.com . See Appendix F.) Unpacking and Inspection • Check all exterior surfaces for damage. • Open the media cover (refer to “Loading the Media” in the Getting Ready to Print section) and inspect the media compartment for damage. In case shipping is required, save the carton and all packing material. Reporting Damage If you discover shipping damage: • Immediately notify and file a damage report with the ship- ping company. Zebra Technologies Corporation is not re- sponsible for any damage incurred during shipment of the printer and will not cover the repair of this damage under its warranty policy. • Keep the carton and all packing material for inspection. • Notify your authorized Zebra re-seller.
- 8. 8 iMZ Series User Guide Note: Tapping the Zebra Print TouchTM icon with a Near Field Communication (NFC) enabled smartphone will provide instant access to printer-specific information. For more information about NFC and Zebra products, go to http://www.zebra.com/nfc. Bluetooth pairing applications via NFC is also possible. Please see Zebra Multi- platform SDK for more information. http:www.zebra.com/nfc www.zebra.com/imz-info 1 2 3 4 5 6 7 8 9 10 1. Feed Switch 2. Media Status Light 3. USB Port 4. Battery Charging Receptacle 5. Media/Black Bar Sensor 6. Media Cover 7. Platen 8. Printhead 9. Latch Release Button 10. Communications Status Indicator 11. Charge Status Indicator 12. Power Switch 13. Power Indicator 14. Belt Clip 15. Battery Door Latch 16. Battery Compartment Cover 17. Battery Pack 18. External Charge Contacts Figure 1: iMZ Series Overview (iMZ220 Illustrated) 14 1718 16 11 12 13 15
- 9. 9 iMZ Series User Guide Getting Ready to Print Battery Installing and Removing the Battery Important • Batteries are shipped partially charged. Remove any protective packaging from new battery packs prior to use. www.zebra.co m/imz-info www.zebra.com/imz-info www.zebra.com/imz-info Figure 2.1: Installing the Battery 1. Use a coin to rotate the Battery Compartment lock 1 /4 turn as shown. 2. Remove the Battery Compartment Cover 3. Plug the Battery Packconnectorintothe Printer. Battery Pack Notelocationoflabel 4. Re-install the Battery Compartment Cover and rotate the lock back 1 /4 turn to lock it in place . Ensure the battery leads are not pinched prior to replacing the battery cover. Note: Scanning the QR code with a smartphone will provide printer- specific information at www.zebra.com/imz-info.
- 10. 10 iMZ Series User Guide www.zebra.com /imz-info Figure 2.2: Removing the Battery 1. Use a coin to rotate the Battery Compartment lock1 /4 turnasshown. 2. Remove the Battery Compartment Cover Battery Pack Connector Squeeze lock to release before unplugging con- nector. 3. Lift Battery pack free from the printer. 4. Install a replacement battery by following the procedure described in Figure 2.1 Always release the locking barb before unplugging the battery connector. Do not attempt to remove the connector by force, or by using pliers, etc. as this could cause damage to the printer’s CPU assembly.
- 11. 11 iMZ Series User Guide When the battery is first installed, the printer power and charge indicators should indicate the battery is not fully charged (see “Charging the Battery” below and “Operator Controls”). You must charge the battery fully before using the printer for the first time. Charging the Battery Preparing the Charger Power Supply Before charging the battery for the first time, you must pre- pare the Charger Power Supply. Refer to Figure 3 below: Figure 3: Preparing the Charger Power Supply continued 1.Removethepowersup- ply from its box. Remove anddiscardtheshipping ringfromthemainsrecep- tacle cavity. Shipping Ring Remove and discard 2. Verify that the mains adapter shippedwithyourPrinteristhecorrect one for your region. Mains Adapter 3.Installthemainsadapterinto the Power Supply by hooking the top edge into the mains receptaclecavity,androtating it until it snaps into place. US/Japan-100-110 VAC China-220 VACUK -230 VAC Euro/Brazil -230 VAC Aust-240 VAC
- 12. 12 iMZ Series User Guide Charging the battery Refer to Figure 4. 1. Plug the Charger Power Supply into the appropriate A.C. wall receptacle. Then insert the charge cable into the printer’s charger jack. 2. The printer’s charger indicator will indicate the status of the charger as follows: • An Amber light indicates the battery is charging, and that the battery is less than 90% charged. • A Green light indicates the battery is fully charged. The battery is ready for use. Approximate Charge Times : Batteries are fully charged after 3.5 hours from the low-bat- tery shut-off state. Partially discharged batteries will take less time to charge. NOTES: Use of the printer while charging will increase charge times. Charge times are for completely discharged batteries. As a safety feature the battery will stop charging after 4.5 hours regardless of the battery’s charge state. www.zebra.com/imz-info Charger Jack 12 VDC Figure 4: Charging the Battery iMZ Series Charger Power Supply p/n AT17947-TAB 110-240 VAC 50-60 Hz 0.6A Input; 12 VDC 1.25 A output Plug into AC receptacle
- 13. 13 iMZ Series User Guide iMZ Series Quad Power Station The iMZ series Quad Power Station is designed to dock and charge up to four iMZ series printers of either type simultane- ously. 1. Ensure that the Power Station has been installed properly per its instruction manual. Ensure that the power supply is properly connected and its power indicator light is on. 2. Slide a printer into any one of the four docking bays as shown in Figure 5. NOTES: If you are using a shoulder strap, ensure it is pulled away from the printer when installing in the Power Station. Do not use the printer when it is installled in the Power Station The printer’s charge status indicator will turn amber if the printer is properly inserted and the battery is less than 90% charged. The printer’s charge indicators will allow you to monitor the Figure 5: iMZ Series Quad Power Station Green (Power) Indicator SlidePrinterintodockingbay iMZ220 Printer iMZ320 Printer Amber/Green (Charge) Indicator
- 14. 14 iMZ Series User Guide charging process. Refer to the Controls section of this manual for more information. Battery Safety Caution • Avoid accidental short circuiting of any battery. Allowing battery terminals to contact conductive material will create a short circuit which could cause burns and other injuries or could start a fire. Important • Always dispose of used batteries properly. Refer to Appendix D for more battery recycling information. Caution • Use of any charger not approved specifically by Zebra for use with its batteries could cause damage to the battery pack or the printer and will void the warranty. Read carefully and always observe the safety guidelines for Li-Ion batteries provided with each Battery Pack. Charger Safety Do not place the Power Station in locations where liquids or metallic objects may be dropped into the charging bays. Use care when installing either the Charger Power Supply shipped with the printer or the power supply supplied with the iMZ series Power Station. Do not block the ventilating slots on the top and bottom covers of either power supply. Ensure that the Charger Power Supply is plugged into a power source which will not accidently be turned off if you will be charging batteries overnight.
- 15. 15 iMZ Series User Guide Loading the Media (All models) 1. Open the printer: Refer to Figure 6. • Press the latch release button on the top of the printer as shown at “1” below. The media cover will flip open auto- matically revealing the media compartment. 2. Load the media: Refer to Figure 8 • Insert the roll of media into the media compartment. Ensure that the media pulls off the core in the direction shown in Figure 8. 3. Close the Media Cover: Refer to Figure 9. • Pull a short length of media out of the printer • Close the Media Cover firmly and ensure it is securely latched on both sides.. • Turn on the printer and press the Feed button. The printer will advance media until the Feed button is re- leased. Verify the media is feeding properly and without binding or skewing sideways. Figure 6: Opening the iMZ Printer (IMZ220 shown) continued Media Compartment Latch Release Button
- 16. 16 iMZ Series User Guide Figure 7: Media Black Bar Dimensions Using Pre-Printed Receipt Media iMZ series printers support alignment of pre-printed receipts by using the out of paper sensor located near the printhead. Please be aware of the following factors: 1) Note the black bar location and dimensions as detailed below and in the Specifications section of this manual. 2) Complete information on using pre-printed media can be found in the FORM command topic in the CPCL Programming Manual. The CPCL manual is available on the iMZ Product CD or on the Zebra Web site at http://www.zebra.com/manuals. 0.19 - 0.24 in. (3,0 - 6,0 mm) 0.59 in. (15 mm) 3 inch media (76.2 mm) 0.19 - 0.24 in. (3,0 - 6,0 mm) 0.59 in. (15 mm) 3 inch media (76.2 mm)
- 17. 17 iMZ Series User Guide Figure 8: Installing Media Media Roll Notedirectionmedia pulls off the roll. Media Cover Pullashortlengthofmedia out of the Printer Figure 9: Closing the Media Cover Ensurebothsidesofthemedia cover are securely latched when closed.
- 18. 18 iMZ Series User Guide Operator Controls iMZ series printer controls are detailed below and in Figure 10. The printer has two control buttons and four multipurpose indicators. The Power Button turns the printer on and off. The Feed Button advances a length of media until it is re- leased. The Green/Amber indicator to the left of the Power Button indicates the status of the printer’s built-in charger: • If the indicator is off the battery is not being charged. • If the indicator is Amber the battery is being charged. • If the indicator is Green, the battery is fully charged. The Green Indicator between the Power and Feed buttons has two states: • A rapidly blinking light indicates a low battery condition. • A steadily lit indicator means that power is on and the battery charge level is sufficient for use The Amber Indicator to the right of the Feed button is an er- ror indicator. • An un-lit indicator means there is no error condition and the printer can be used. • A blinking indicator could mean one of two conditions ex- ist, which will inhibit printer operation: 1. There is no media loaded. 2. The media cover is open. 3. If both the above conditions are met and the error light is still flashing, there could be no application load- ed in the printer, or the application could have become corrupted. The Blue Indicator just above the product I.D. label is a com- munications indicator. Its functions vary depending on the wireless communications option installed in the printer. • If the printer has a Bluetooth® radio option: 1. A solid blue LED indicates the printer has paired with another Bluetooth device. 2. A fast blinking LED indicates that the printer is receiv- ing data via Bluetooth communications. 3. Blue LED is off until communication is established.
- 19. 19 iMZ Series User Guide • If the printer has an 802.11n radio installed: 1. A slow blinking blue light indicates the printer is searching for a wireless Local Area Network (WLAN). 2. A solid blue light indicates the printer has established communication with a WLAN. 3. A fast blinking light indicates that a data transmission is taking place. iMZ220 Figure 10: Printer Controls Power Button PressuntilPowerLightturnson,then release. Press again to turn unit off. Feed Button Press to advance the media. Re- lease to stop. Communication Light (Blue) WLAN: 1) Slow blink = searching for AP; 2) Solid blue = com- munication with AP established; 3) Fast blink = data transmis- sion in progress. Bluetooth: 1) LED off until communication with other BT de- vice is established; 2) Once paired, LED is solid blue; Fast blink = data transmission in progress. Charge Light (Green/Amber) Greenindicatesafullycharged battery. Amber indicates the battery is less than 90% charged. Media Status Light (Amber) When off indicates normal op- eration.Blinking indicates either no media or that the media compartment is open. Power Light (Green) Indicatespowerstatusandbatterycondition. A steadily lit indicator means the battery has morethana30%chargeremaining.Ablinking indicator means the battery has less than a 30% charge remaining.
- 20. 20 iMZ Series User Guide Normal Boot-up LED Behavior 1. Press Power (on/off) button for 1.5 seconds until Green power LED becomes solid. 2. When Power button is released within 1 second, the Green power LED starts blinking to indicate start of pow- er-up sequence. 3. Once 1/3 of the total boot-up time has elapsed (approx. 4-5 seconds), the Amber media status LED becomes sol- id, and the Green power LED continues blinking. 4. Once 2/3 of the total boot-up time has elapsed (approx. 8-10 seconds), the Blue communication LED becomes solid, the media status LED continues to be solid Amber, and the Green power LED continues blinking. 5. When the boot-up sequence is successfully complet- ed, the power LED turns solid Green, the media status (Amber) and communication (Blue) LEDs turn off. Note: If continue to hold down the power button without releasing, the LED will remain illuminated solid green until the power button is released and the printer will not power on. Only when power button is pressed for 1.5 seconds and released before 2.5 seconds the printer will proceed to the power up sequence. This behavior was design to avoid accidentally power up the printer when the power button is pressed against an object for long periods of time when carrying the printer in a bag. Diagnostic (Two key) Report LED Behavior 1. Press Feed and Power buttons (see Fig. 10) simultane- ously to activate printing of two key report. 2. Green power LED starts blinking. 3. After 6 seconds the printer prints Zebra logo and the words “Building Two Key Report”, indicating the user to wait. Building Two-Key Report.....
- 21. 21 iMZ Series User Guide 5. LED lighting sequence replicates the one described above while waiting for the two key report to print. 6. Once boot-up time sequence permits the two key report to start printing, then the two key report prints. 7. Power LED turns solid Green once two key is complete. Forced Download Description and LED Behavior If for some reason the printer becomes inoperable, or the end-user wants to put the printer into forced download mode, follow the steps below. Note: Connect the printer to a PC via a USB cable as shown in Fig. 12 before you start a forced firmware download. Part 1: Set the Printer in Forced Download Mode and Wait for Data 1. Press and hold the Feed button. 2. Press and hold the Power button for 2 seconds and re- lease while still pressing the Feed button. 3. The Green power LED will blink. 4. Continue pressing the Feed button for 16 seconds and then release. 5. The Amber LED will start blinking and the Green LED will turn solid. This indicates the printer is in forced down- load mode and waiting for data. Part 2: Receiving Data 1. Connect the printer to a PC via a USB cable as indicated above. 2. When a firmware download is initiated, the Green power LED stays solid, and the Blue communication LED blinks indicating the printer is receiving data. Part 3: Writing New Firmware to Flash Memory 1. The Green power LED will remain solid and the Amber media status LED will blink slowly when recently sent firmware is being written to the printer’s flash memory. 2. The printer will automatically reboot. (See the following section.)
- 22. 22 iMZ Series User Guide Rebooting After a Firmware Download or Forced Firmware Download (Description and LED Behavior) When the user downloads an application (via either a normal or forced download), the firmware file is written to the printer flash memory and the printer is automatically rebooted. When the printer is rebooted, the following occurs in the printer: 1. Decompression of the downloaded application. 2. Writing process of all the executables, libraries and sup- port files to the file system. 3. Starting of the normal application start-up process. Steps 1 and 2 will take approximately 30 seconds. During those 30 seconds the Green power LED will blink. The normal boot-up will follow which will take the stan- dard boot time of approximately 15 seconds. Therefore, af- ter a firmware download (either normal or forced) the user will see the Green power LED blink for approximately 35 seconds, followed by a solid Amber LED and solid Blue LED for a final overall reboot time of 45 seconds. Shutting Down LED Sequence To shut off the printer, press and release the Power button. Communication (Blue) LED Behavior Printers with WLAN radio 1. Slow blinking Blue means searching for AP. 2. Solid Blue, means communication with AP established. 3. Fast blinking Blue (data transmission is taking place). Printers with Bluetooth radio 1. Blue LED is off until communication with other BT device is established. 2. Once paired, communication LED is solid Blue. 3. Fast blinking Blue (data transmission is taking place).
- 23. 23 iMZ Series User Guide Verify the Printer Is Working Before you connect the printer to your computer, portable data terminal or wireless LAN, make sure that the printer is in proper working order. You can do this by printing a configu- ration label using the “two key reset” method. If you can’t get this label to print, refer to “Troubleshooting”. Printing a Configuration Label 1. Press Feed and Power buttons (see Fig. 10) simultane- ously. 2. Release the Power button after approximately one sec- ond. 3. Release the Feed button approximately one second after Green power LED is illuminated. 4. After 6 seconds the printer prints Zebra logo and the words “Building Two Key Report” indicating the user to wait. 5. LED lighting sequence replicates the one described in steps 3) and 4) above while waiting for the two key re- port to print. 6. Once boot-up time sequence permits the two key report to start printing, then the two key report prints. 7. Power LED turns solid Green once two key is com- plete. Note: Refer to Fig. 18 for details on configuration report content.
- 24. 24 iMZ Series User Guide Connecting the Printer The printer must establish communications with a host ter- minal which sends the data to be printed. Communications occur in four basic ways: • Via a cable using the USB 2.0 protocol. Windows drivers are available through Zebra Designer Driver. Zebra Setup Utilities can be used to configure the printer settings us- ing a USB cable. • By means of a wireless LAN (Local Area Network) using an optional radio per 802.11n specifications. • By means of a Bluetooth short range radio link. • WinMobile® , Blackberry® , and Android® devices use standard Bluetooth® protocol. • iMZ Series printers are compatible with iOS devic- es, therefore printing via Bluetooth to an Apple® device is possible. Cable Communication Caution • The printer should be turned off before connecting or disconnecting the communications cable. The small connector on the USB cable plugs into the printer. The connectors are keyed to assure correct alignment; do not try to force the cable if it does not plug in. The other end of the cable must be plugged into the host terminal as shown in Figure 11, or the USB port on a computer as shown in Figure 12. The iMZ series utilizes the USB Open HCI interface driver allowing it to communicate with Windows® based devices.
- 25. 25 iMZ Series User Guide USB drivers are included in the Zebra Designer Driver which can be downloaded from the Zebra Web site. Other terminals or communications devices may require the installation of special drivers to use the USB connection. Consult the factory for further details. www.zebra.com/imz-info www.zebra.com/imz-info USB Communications Cable to Terminal Refer to Appendix A for details. Figure 11: Cable Communications Figure 12: Communications with a P.C. Communications Port USB Communications Cable to Computer Refer to Appendix A for details. Communications Port
- 26. 26 iMZ Series User Guide Wireless Communications with Bluetooth Bluetooth is a worldwide standard for the exchange of data between two devices via radio frequencies. Bluetooth radios are relatively low powered to help prevent interference with other devices running at similar radio frequencies. This limits the range of a Bluetooth device to about 10 meters (32 feet). Both the printer and the device it communicates with must fol- low the Bluetooth standard. Bluetooth Personal Area Network (PAN) Each Bluetooth enabled iMZ series printer is identified by a unique Bluetooth Device Address (BDA) loaded into the printer when manufactured. In order to exchange data, two Bluetooth enabled devices must establish a connection. Bluetooth software is always running in the background, ready to respond to connection requests. One device (known as the master) must request a connection with another. The second device (the slave) then accepts or rejects the connec- tion. A Bluetooth enabled iMZ series printer will normally act as a slave creating a PAN with the handheld terminal. Up to seven (7) devices can create a PAN with Bluetooth technology, and this PAN is referred to as a “Piconet”. Bluetooth Connections Bluetooth connections to the iMZ can be created by using the default user interface for Bluetooth communication that comes in the handheld device (the master device). Normally, this process has several steps including “discover the slave devices nearby”, selecting the printer among those devic- es and pairing the two devices. The Bluetooth radio in the iMZ complies to BT spec v.2.1, therefore it supports security modes 1,2,3, and 4. By default the printer comes with security mode ”1” (no security). To change the security mode and se- curity settings in the printer use Zebra Setup Utilities. If the master device trying to connect to the iMZ only sup- ports Bluetooth Specification 2.0 or earlier, the iMZ will con- nect since the Bluetooth standard is backwards compatible with previous standard versions. If the master device is BT 2.0 or earlier and Authentication is set to “on” from the master side, then the master device will require a PIN from the printer.
- 27. 27 iMZ Series User Guide By default the PIN is not set in the printer. To a set your own PIN in the printer connect the printer with a cable to a PC or Laptop and use a Set-up Utility to set a PIN of your choice in the printer which can be up to 16 characters. The discovery and pairing routine can be bypassed in cus- tom applications. Software developers may use Zebra’s Multiplatform SDK to aid them in coding the connection to the printer. Bluetooth pairing requiring Man-In-The-Middle (MITM) protection Some devices may require an authenticated Bluetooth con- nection between themselves and the iMZ printer. By requiring authentication, you can guarantee that the link occurs be- tween only the two devices involved, and that no third device (the Man-In-The-Middle) can view the data being passed be- tween them. MITM protection is possible in Bluetooth security mode 3 or above. To authenticate the link, the two devices must demonstrate that they have each seen the same six digit number during the pairing process. On the iMZ, the only means of displaying a six digit number during pairing is to print the value. Therefore, there is a new SGD provided allowing a set of options: ! U1 setvar “bluetooth.allow _ no _ display _ nu- meric _ comparison” The three options are: 1. “off”: Bluetooth pairing uses “Just Works”, with no MITM protection. 2. “print” (default): The user will compare the six digit value printed by the printer with the value displayed on the pairing device. If the values match, the user will accept on the pairing device and pairing will succeed with MITM protection. If the values do not match, the user will reject on the pairing device. Note: Android devices require MITM protection therefore Android devices will negotiate the connection to Bluetooth security mode 3.
- 28. 28 iMZ Series User Guide 3. “no print”: The user will accept or reject the value dis- played on the pairing device. If accepted, the pairing will suc- ceed. There is a security risk that this connection could be monitored by another device which interfered during the pair- ing process. In addition, the iMZ Series supports Near Field Communication (NFC) technology. With the new “Print Touch” feature, end-users can automatically connect via Bluetooth from a handheld device that supports NFC technology. Simply touching the NFC handheld device to the “Print Touch” icon on the printer will connect and pair the handheld device to the printer. Bluetooth pairing via NFC is supported by the Multiplatform SDK. Connecting to Apple Devices The iMZ Series has the required technology to directly con- nect via Bluetooth to an Apple device. If the device has iOS 5, the user must tap the Settings icon in the Apple device and then select Bluetooth. The discovery routine will happen automatically from this screen. Once the printer is discovered, select the printer to finish the pairing process. Once the iMZ printer is paired, the user will be able to use the printer in any application that supports the iMZ printer. A demo application is available in the Apple store. iM Z320 http://www.zebra.com/nfc Figure 13: NFC Connectivity
- 29. 29 iMZ Series User Guide In iOS 6 pairing the printer within the application that sup- ports printing to a Zebra iMZ device is now possible. The user of an iOS 6 device does not need to pair the printer via Bluetooth outside the application. WLAN Overview iMZ Series printers can be equipped with a radio using the industry standard 802.11 protocols. They will have the FCC ID number on the serial number label on the back of the unit. • iMZ Series Wireless Network Printers with the Zebra 802.11 WLAN radio module can be identified by the text “Wireless Network Printer” on the serial number label on the back of the printer. • These printers allow communication as a node within a wireless local area network (WLAN). Methods of estab- lishing communications to the printer will vary with each application. General information on establishing WLAN communica- tions can be found in the ”CPCL Programming Manual” which is available on-line. More information and LAN configuration utilities are included in Zebra’s Net Bridge™ program (version 2.8 and later). Zebra Setup Utilities (ZSU) can also be used to configure WLAN communications settings. Both Net Bridge and ZSU may be downloaded from the Zebra Web site. Setting Up the Software iMZ Series printers use Zebra’s CPCL and ZPL Programming languages which were designed for mobile printing ap- plications. CPCL and ZPL are fully described in the ”CPCL Programming Manual” and the “ZPL Programming Guide” available on-line at www.zebra.com/manuals. You can also use Designer Pro, Zebra’s Windows® based la- bel creation program which uses a graphical interface to cre- ate and edit labels in either language. Refer to Appendix E for tips on downloading the Designer Pro application from Zebra’s Web site.
- 30. 30 iMZ Series User Guide Wearing the Printer Belt Clip All iMZ Series printers are have a belt clip installed as a stan- dard feature. To use: hook the clip over your belt, and ensure that the clip is securely attached to the belt. The belt clip will pivot slightly to allow you to move freely while wearing the printer. continued Figure 14: Using the Belt Clip Clipprintertobelt
- 31. 31 iMZ Series User Guide Adjustable Shoulder Strap Refer to Figure 15 if you have ordered the shoulder strap op- tion for your printer. Secure each end of the shoulder strap as shown below. Use the main buckle on the shoulder strap to adjust to the desired length. NOTE: If you are using a shoulder strap, ensure it is pulled away from the printer when installing in the Power Station. See page 13. www.zebra.com/imz-info Hold Buckle Pull Strap here to lengthen Pull Strap here to shorten Figure 15: Using the Optional Shoulder Strap Oncetheshoulderstrapissecured, slidethebuckleasshownuntil you achieve the desired length. Thread the free end of the shoulder strap through one of the slots on the belt clip Threadthefreeendoftheshoulderstrapthroughthe buckle and pull tight to adjust. Secure the other end of the strap in the remaining slot on the belt clip.
- 32. 32 iMZ Series User Guide Preventive Maintenance Extending Battery Life • Always observe the safety precautions in the Lithium- Ion Battery Technical Bulletin included with each Battery Pack. • Never expose the battery to direct sunlight or tempera- tures over 104° F (40° C). • Do not charge the battery when the temperature exceeds 113° F (45° C). • Always use a Zebra power supply designed specifically for the iMZ series printers. Use of any other kind of pow- er supply may damage the battery. • Use the correct media for your printing requirements. An authorized Zebra re-seller can help you determine the op- timum media for your application. • If you print the same text or graphic on every label, con- sider using a pre-printed label. • Choose the correct print darkness, and print speed for your media. NOTE: Use of label media in an iMZ series printer requires a “Tone” setting of 50 for best results. The Tone setting can be modified by connecting the printer to a PC and using the Label Vista application. Refer to the Cable Communications section of “Connecting the Printer” in this manual. • Use software handshaking (XON/XOFF) whenever possi- ble. • Remember that any rechargeable battery will lose its ability to maintain a charge over time. It can only be re- charged a finite number of times before it must be re- placed. Always dispose of batteries properly. Refer to Appendix D for more information on battery disposal. • If you print while charging the battery, charge times will be prolonged. Extensive printing while charging could de- plete the battery enough to cause the low battery warn- ing indicator to turn on. You should suspend printing at that time and allow the battery to re-charge completely. continued
- 33. 33 iMZ Series User Guide General Cleaning Instructions Caution • To avoid possible personal injury or damage to the printer, never insert any pointed or sharp objects into the printer. Always turn the printer off before performing any cleaning procedures. Use care when working near the tear bar. The edges are very sharp. Caution • The printhead can be very hot after prolonged printing. Allow it to cool off before attempting any cleaning procedures. Only use a Zebra cleaning pen or a cotton swab saturated with alcohol for cleaning the printhead. Caution • Use only cleaning agents specified in the following tables. Zebra Technologies Corporation will not be responsible for damage caused by any other cleaning materials used on this printer. Area Method Interval Printhead Use a Zebra cleaning pen or a 70% isopropyl alcohol solution on a cotton swab to clean the print elements from end to end (the print elements are located in the thin gray line on the printhead). After every five rolls of media (or more often, if needed) Linerless media requires more frequent cleaning.Platen Use a soft lint-free cloth to wipe the platen roller when dirty. Avoid using alcohol or solvents on the surface of linerless platens as they will damage the platen roller. Tear bar Clean thoroughly with a Zebra cleaning pen or a 70% isopropyl alcohol solution and a cotton swab. Exterior Water dampened cloth As needed Media Compartment Interior Brush/air blow. Units with linerless platens: Clean inside surfaces with a Zebra cleaning pen or 70% Isopropyl alcohol on cotton swab. After every five rolls of media (or more often, if needed) Media/Black Bar Sensor iMZ Series Cleaning Instructions
- 34. 34 iMZ Series User Guide continued Figure 16: iMZ Series Cleaning Caution • To avoid possible personal injury or damage to the Printer, never insert any pointed or sharp objects into the Printer. Media Compartment Printhead Elements Tear Bar Platen Surface Media/Black Bar Sensor
- 35. 35 iMZ Series User Guide Troubleshooting Interpreting Indicators The printer’s indicators display various printer functions and their status. Check the indicator status, then refer to the Troubleshooting topic referenced in the chart. Function Indicator Color Indicator Status: Steady Indicator Status: Blinking Troubleshooting Topic Power Green Indicates printer is on and battery condition is OK to use. Blinking signifies Low Battery 3 Charger Amber/ Green Off indicates battery is not charging. Am- ber indicates battery is charging. Green indicates battery is charged. N/A 1,6,10 Error Amber Off indicates no error condition No media or media door is open. Application may be missing or corrupted 2,4,7,9 Commu- nications Blue Bluetooth: Printer has paired with another Bluetooth device. Data is being received 5,8 802.11n: Radio is asso- ciated with a WLAN Radio is trying to as- sociate with a WLAN. 5,8 Troubleshooting Topics 1. No power: • Ensure you press and hold the Power switch until the Power light comes on. • Check that battery is installed properly. • Recharge or replace battery as necessary. 2. Media does not feed: • Be sure Media Cover is closed and latched. • Check media compartment. Ensure media is not binding on the sides of the compartment. 3. Poor or faded print: • Clean printhead. • Check battery for possible damage. Recharge or replace as necessary. • Check quality of media. • If using label media, ensure the “Tone” setting is set to 50. 4. Partial or missing print:
- 36. 36 iMZ Series User Guide • Check media alignment. • Clean printhead. • Ensure Media Cover is properly closed and latched. 5. No print: • Replace battery. • Check cable to terminal. • (Wireless units only) Restore wireless connection. 6. Reduced battery life: • Check battery date code — if battery is one to two years old, short life may be due to normal aging. • Recharge or replace battery. 7. Flashing Amber indicator: • Check that media is loaded and that printhead is closed and securely latched. • If media is present and latch is closed, indicates that no application is present or application is corrupted. Program must be re-loaded. 8. Communication Error: • (Wireless units only) Check that media is loaded, head is closed and blue communication link light is on. •(USB) Replace cable to terminal. 9. Label Jam: • Open media cover. • Generously apply alcohol to Printer in area of jammed label. 10. Battery Pack Is Hard to Install: • Do not force the battery into place. Verify you have not pinched any wires between the battery and the printer. • Verify you are plugging the battery connector into the printer correctly.
- 37. 37 iMZ Series User Guide Resetting an iMZ Series Printer If the printer has locked up and is not responding to any operator inputs or external commands, either from a connected terminal or from a linked LAN, you can perform a forced reset as follows: Press and hold the Power (on/off) button for approx. 4.5 sec- onds until the printer shuts down. Information On Back Of Printer The printer build date is identified by the Year and Week codes of the printer serial number label located on the bottom of the unit. (See Figure 17 below). Figure 17: Determining Your Printer Version (iIMZ320 illustrated) UID# PLACE BAR CODE HERE XXXXSYYWWNNNNNS/N: PLACE BAR CODE HERE XXX-XXXXXXXX-XXPCC: Serial Number encoded in 128 symbology Product Configuration Code (PCC) encoded in 128 symbology Customer Code 2 Digit Product Code 2 Digit UID Number encoded in Datamatrix ECC 200 symbology Contains FCC ID: I28MD-ZBR4WA; IC ID:3798B-ZBR4WA ZBR4 Date Code YYWWNNNNN Sequential number (00001-99999),resets each week Week (01-52) Last two digits of year (00-99)Site 1 Digit
- 38. 38 iMZ Series User Guide Troubleshooting Tests Printing a Configuration Label To print out a listing of the printer’s current configuration fol- low these steps: 1. Turn the printer off. Load the media compartment with journal media (media with no black bars printed on the back) 2. Follow the steps outlined in Diagnostic (Two key) Report LED Behavior on Page 20. Refer to Figures 18 and 18a for a sample configuration print- out. Communications Diagnostics If there is a problem transferring data between the computer and the printer, try putting the printer in the Communications Diagnostics Mode (also referred to as the “DUMP” mode). The printer will print the ASCII characters and their text represen- tation (or the period ‘.’, if not a printable character) for any data received from the host computer To enter Communications Diagnostics Mode: 1. Print a configuration label as described above. 2. At the end of 2nd diagnostics report, the printer will print: “Press FEED key to enter DUMP mode”. 3. Press the FEED key. The printer will print: “Entering DUMP mode”. Note • If the FEED key is not pressed within 3 seconds, the printer will print “DUMP mode not entered” and will resume normal operation. 4. At this point, the printer is in DUMP mode and will print the ASCII hex codes of any data sent to it, and their text representation (or “.” if not a printable character). Additionally, a file with a “.dmp” extension containing the ASCII information will be created and stored in the printer’s memory. It can be viewed, “cloned” or deleted using the Label Vista application. (Refer the Label Vista documentation for more information.) To terminate the Communications Diagnostics Mode and re-
- 39. 39 iMZ Series User Guide turn the printer to normal operations: 1. Turn the printer OFF. 2. Wait 5 seconds. 3. Turn the printer ON. Calling Technical Support If the printer fails to print the configuration label, or you en- counter problems not covered in the Troubleshooting Guide, contact Zebra Technical Support. Technical Support ad- dresses and phone numbers for your area can be found in Appendix D of this manual. You will need to supply the fol- lowing information: • Model number and type (e.g. iMZ220) • Unit serial number (Found on the large label on the back of the printer, also found in the configuration label print- out. Refer to Figure18.) • Product Configuration Code (PCC) (15 digit number found on the label on the back of the unit)
- 40. 40 iMZ Series User Guide Identifies Printer as a iMZ320 Firmware Version Print Head Test Bluetooth™ Radio Address Figure 18: Configuration Label Example (iMZ320 illustrated) Report ap- pears only on units with wireless op- tions installed. Units with no wireless op- tions will print an empty line and resume Unit Serial Number
- 41. 41 iMZ Series User Guide continued Resident Human Readable fonts installed. Files Loaded in Printer Memory (will include Pre- scaled or Scal- able Fonts). Figure18a: Configuration Label Example (continued) Flash and RAM Memory Installed Maximum Label Size CCL (CPCL) and ZPL programming language is supported
- 42. 42 iMZ Series User Guide Specifications Note.- Printer specifications are subject to change without notice. Printing Specifications Parameter iMZ220 iMZ320 Print Width Up to 1.89 in. (48,0 mm) Up to 2.9 in. (71,2 mm) Print Speed (max) 3” per second (76,2 mm/second) Print Speed (normal) 2” per second (5,0 mm/second) Print Head Life, calculated 1 x 106 in. (25,4 Km) nominal Print Density 203 dots/inch (8 dots/mm) Printhead Burn Line to Tear Edge 0.2 in. (5,08 mm) Memory and Communications Specifications, iMZ series Flash Memory 128 MB SRAM 128 MB Standard Communications USB 2.0 Full Speed Interface (12 Mbps) Optional Wireless Communications Standard Bluetooth compatible module Optional 802.11a/b/g/n SRRF module Dual radio option (802.11a/b/g/n & BT 3.0 available in Q1-2013 Media Specifications Parameter iMZ220 iMZ320 Width 2.0 ± .03 in. (50,8 ±0,8 mm) 3.0 ± .03 in. (76,2 mm ±0,8 mm) Max. Printable Area Width Length 1.9” (48,3 mm) 2.9” (73,7 mm) Maximum length will vary with the size of loaded applications. Refer to the configuration label for actual maximum label size. Label Thickness .002 in to .004 in (0,050 mm to 0,102 mm) Max. Media Roll dia. 1.88 in. (47,8 mm) O.D. Label Inner Core Diameter 0.40 to 0.75 in.. (10,2 to 19,0 mm) Black Mark Dimensions The reflective media black marks should extend past the centerline of the roll on the front side of the media. Minimum mark width: 0.59 in. (15 mm) perpendicular to edge of media, centered within the width of the roll. Mark length: 0.19 - 0.24 in. (3,0-6,0 mm) parallel to edge of media. (See Fig. 7) UseZebrabranddirectthermalorUVresistantcoatedmediathatisoutsidewound. RefertoAppendix “B” for more details.
- 43. 43 iMZ Series User Guide ZPL Bar Code Specifications and Commands Linear & 2-D Bar Codes Available Barcode (ZPL Command) Aztec (^B0) Codabar (^BK) Codablock (^BB) Code 11 (^B1) Code 39 (^B3) Code 49 (B4) Code 93 (^BA) Code 128 (^BC) DataMatrix (^BX) EAN-8 (^B8) EAN-13 (^BE) GS1 DataBar Omnidirectional (^BR) Industrial 2 of 5 (^BI) lnterleaved 2 of 5 (^B2) ISBT-128 (^BC) LOGMARS (^BL) Micro-PDF417 (^BF) MSI (^BM) PDF-417 (^B7) Planet Code (^B5) Plessey (^BP) Postnet (^BZ) Standard 2 of 5 (^BJ) TLC39 (^BT) UPC/EAN extensions (^BS) UPC-A (^BU) UPC-E (^B9) Maxi Code (^BD) QR Code (^BQ) Rotation Angles 0°, 90°, 180°, and 270° *Contains UFST from Agfa Monotype Corporation
- 44. 44 iMZ Series User Guide CPCL and ZPL Font Specifications CPCL Font Specification: 203 dpi (8 dots/mm) Fonts Matrix (in dots) (HxW) Min. Char. Size (HxW) Max. CPI 0 (Standard) 9 x 8 .044" x .039" 25.4 1 (min. width) 48 x 13 .236" x .064" 15.6 1 (max. width) 48 x 39 .236” x .192” 5.2 2 (OCR-A) 12 x 20 .059" x .099" 10.2 4 Size 0 (min. width) 47 x 11 .232" x .054" 18.5 4 Size 0 (max. width) 47 x 43 .232” x .212” 4.7 5 Size 0 (min. width) 24 x 7 .118" x .034" 29 5 Size 0 (max. width) 24 x 23 .118” x .113” 8.8 6 (MICR) 27 x 28 .133" x .138" 7.3 7 24 x 12 .118” x .059” 16.9 • Standard Fonts: 25 bitmapped, 1 smooth, scalable (CG Triumvirate Bold Condensed*) • Optional Fonts: downloadable bitmapped/scalable fonts. • International Character Sets (optional): Chinese 16x16 (tra- ditional), 16x16 (simplified), 24x24 (simplified); Japanese 16x16, 24x24; Korean Mincho, Meong; Russian. • Scalable text feature. • Standard resident fonts can be rotated in 90° increments. • Supports user defined fonts, and graphics and logos. • Text concatenation to assign different character styles. • Allows text magnification 1-16 times the original size. • Proportional and fixed-width fonts. *Contains UFST from Agfa Monotype Corporation
- 45. 45 iMZ Series User Guide ZPL Font Specification: 203 dpi (8 dots/mm) Font Matrix (in dots) (HxW) Type* Min. Char. Size (HxW) Maz. C.P.I. A 9 x 5 U-L-D .044" x .030" 33.3 B 11 x 7 U .054" x .044" 22.7 C,D 18 x 10 U-L-D .089" x .059" 16.9 E 28 x 15 OCR-B .138" x .098" 10.2 F 26 x 13 U-L-D .128" x .079" 12.7 G 60 x 40 U-L-D .295" x .236" 4.2 H 21 x 13 OCR-A .103" x .093" 10.8 GS 24 x 24 SYMBOL .118" x .118" 8.5 P 20 x 18 U-L-D 0.098 x 0.089 N/A Q 28 x 24 U-L-D 0.138 x 0.118 N/A R 35 x 31 U-L-D 0.172 x 0.153 N/A S 40 x 35 U-L-D 0.197 x 0.172 N/A T 48 x 42 U-L-D 0.236 x 0.207 N/A U 59 x 53 U-L-D 0.290 x 0.261 N/A V 80 x 71 U-L-D 0.394 x 0.349 N/A Ø 15 x 12 U-L-D Scalable (Smooth) Font *U=upper case, L=lower case, D=descenders • Character Fonts: Standard bitmapped Zebra fonts: A, B, C, D, E (OCR-B), F, G, H, (OCR-A), GS, P, Q, R, S, T, U, V & Ø Smooth font (CG Triumvirate Bold Condensed). • Supports Unicode UTF-8, UTF-16, and several other single and multi-byte international character sets (See ZPL pro- gramming guide for more details). • Supports user defined fonts and graphics – including cus- tom logos. • Bitmap fonts are expandable up to 10 times, height and width independent. Fonts E and H (OCR-B and OCR-A), however, are not considered in spec when expanded. • Smooth scalable font Ø (CG Triumvirate Bold Condensed) is expandable dot-by-dot, height and width independent. • Unicode Swiss 721 font available.
- 46. 46 iMZ Series User Guide continued Figure 19: USB Communications Port 5 1 Physical, Environmental and Electrical Specifications Parameter IMZ220 IMZ320 Weight w/ battery, excluding media .70 lbs. (317,5 g. ) .75 lbs. (340,2 kg.) Temperature Operating : 14° to 122° F (-10° to 50° C) Charging: 32° to 104° F (-0° to 40° C) Storage w/o battery: -4° to 140° F (-25° to 60° C) Storage w/ battery: -4° to 113° F (-25° to 45°C) Relative Humidity Operating: 10% to 90% (non- condensing) Storage: 10% to 90% (non- condensing) Battery Lithium-Ion, 7.4 VDC (nominal); 1500 mAHr. Printer Input Power 12.0 VDC; 1.25A Ingression Protection (IP) Rating 42 USB Communications Port Pin# Signal Name Type Description 1 VBUS - USB Bus Power 2 USB - bi-directional I/O Signals 3 USB + bi-directional I/O Signals 4 USB_ID - Identifies A/B connector 5 Return - Ground
- 47. 47 iMZ Series User Guide iMZ220 iMZ320 Figure 20 iMZ220 Overall Dimensions Figure 21: iMZ320 Overall Dimensions 5.34”(135,6mm) 3.18” (80,7 mm) 2.26” (57,4 mm) 2.47” (62,7 mm) 5.34”(135.6mm) 2.26” (57,4 mm) 2.47” (62,7 mm) 4.11” (104,4 mm)
- 48. 48 iMZ Series User Guide iMZ Series Accessories Description IMZ220 IMZ320 Adjustable shoulder strap • • Protective soft case • • Vehicle Adapter Cable • • Extra battery packs • • iMZ Series Quad Power Station 100-240 VAC • • Refer to Appendix A for information on Data I/O Cables For more details on available accessories, contact your authorized Zebra re-seller.
- 49. 49 iMZ Series User Guide Appendices Appendix A Interface Cables USB Cable Part Number AT17010-1; USB A to USB Mini B Cable More Interface Cables Contact the Factory or your Zebra Sales Representative for more information on interface cables to most major manufacturer’s data terminals. You may also visit the Zebra Web site at http://www.zebra.com for a listing of interface cables for all series of Zebra mobile printers
- 50. 50 iMZ Series User Guide Appendices Appendix B Media Supplies To insure maximum printer life and consistent print qual- ity and performance for your individual application, it is rec- ommended that only media produced by Zebra be used. Advantages include: • Consistent quality and reliability of media products. • Large range of stocked and standard formats. • In-house custom format design service. • Large production capacity which services the needs of many large and small media consumers including major retail chains world wide. • Media products that meet or exceed industry standards. iMZ Series Media Z-Select 4000D 3.2 mil Receipt Width x Length Part # Length Rolls/Carton Wt/Carton 2.00” (50,8 mm) x Cont. 10011043 55’ (16,76 M) 36 9 lbs. 3.00” (76,2 mm) x Cont. 10011044 55’ (16,76 M) 36 13 lbs. Z-Select 1000D 2.4 mil Receipt Width x Length Part # Length Rolls/Carton Wt/Carton 2.00” (50,8 mm) x Cont. 10011041 80’ (24,39 M) 36 9 lbs. 3.00” (76,2 mm) x Cont. 10011042 80’ (24,39 M 36 13 lbs. For more information call Zebra Technologies Corporation at +1.866.230.9495 (U.S., Canada and Mexico) and ask to speak to a Media Sales Representative.
- 51. 51 iMZ Series User Guide Appendices Appendix C Battery Disposal The EPA certified RBRC® Battery Recycling Seal on the Lithium-Ion (Li-ion) battery supplied with your printer indicates Zebra Technologies Corporation is voluntarily participating in an in- dustry program to collect and recycle these batteries at the end of their useful life, when taken out of service in the United States or Canada. The RBRC program provides a convenient alternative to placing used Li-ion batteries into the trash or the municipal waste stream, which may be illegal in your area. Important • When the battery is worn out, insulate the terminals with tape before disposal Please call 1-800-8-BATTERY for information on Li-ion bat- tery recycling and disposal bans/restrictions in your area. Zebra Technologies Corporation’s involvement in this program is part of our commitment to preserving our environment and conserving our natural resources. Outside North America, please follow local battery recycling guidelines. Product Disposal Do not dispose of this product in unsorted municipal waste. This product is recyclable. Please recycle according to your local stan- dards. For more information, please see our web site at: http://www.zebra.com/recycle.
- 52. 52 iMZ Series User Guide Appendices Appendix D Product Support When calling with a specific problem regarding your printer, please have the following information on hand: • Model number/type (e.g. iMZ220) • Unit serial number • Product Configuration Code (PCC) For Product Support Contacts, see the table on the next page or contact your local re-seller. iMZ Series Serial Number Label iMZ 220 illustrated www.zebra.com/imz-info Serial Number Bar Code PCC Bar Code
- 53. 53 iMZ Series User Guide Appendices Product Support Contacts In the Americas contact Regional Headquarters Technical Support Customer Service Dept. Zebra Technologies Corporation 475 Half Day Road, Suite 500 Lincolnshire, Illinois 60069 U.S.A T: +1 847 634 6700 Toll-free +1 866 230 9494 F: +1 847 913 8766 T: +1 877 275 9327 F: +1 847 913 2578 Hardware: ts1@zebra.com Software: ts3@zebra.com Forprinters,parts,media, and ribbon, please call your distributor, or contact us. T: +1 877 275 9327 E: clientcare@zebra.com In Europe, Africa, the Middle East, and India contact Regional Headquarters Technical Support Internal Sales Dept. Zebra Technologies Europe Limited Dukes Meadow Millboard Road Bourne End Buckinghamshire SL8 5XF, UK T: +44 (0)1628 556000 F: +44 (0)1628 556001 T: +44 (0) 1628 556039 F: +44 (0) 1628 556003 E: Tseurope@zebra.com For printers, parts, media, and ribbon, p l e a s e c a l l y o u r distributor, or contact us. T: +44 (0) 1628 556032 F: +44 (0) 1628 556001 E: cseurope@zebra.com In the Asia Pacific region contact Regional Headquarters Technical Support Customer Service Zebra Technologies Asia Pacific Pte. Ltd. 120 Robinson Road #06-01 Parakou Building Singapore 068913 T: +65 6858 0722 F: +65 6885 0838 T: +65 6858 0722 F: +65 6885 0838 E: (China) tschina@zebra.com All other areas: tsasiapacific@zebra.com For printers, parts, media, and ribbon, please call your distributor, or contact us. T: +65 6858 0722 F: +65 6885 0836 E: (China) order-csr@zebra.com All other areas: csasiapacific@zebra.com
- 54. 54 iMZ Series User Guide Appendices continued Appendix E Using zebra.com The following examples use the search functions on Zebra’s Web site for finding specific documents . Example1: Find the iMZ Series User Guide. Go to http://www.zebra.com/us/en/support-downloads.html Select the appropriate printer in the Printer Support dropdown menu. Select Printer Click on the Manuals tab and select the desired language from the dropdown menu. Select language
- 55. 55 iMZ Series User Guide Appendices Example 2: Find the ZebraNet Bridge Enterprise download page: Go to http://www.zebra.com/us/en/products-services/software.html and click on Manage under Software in the Products and Services section. Or click on Manage Software where shown. Click on “Download” in the Downloads tab where shown to access the latest soft- ware. Click on Download Select the “ZebraNet Bridge Enterprise
- 56. 56 iMZ Series User Guide Index A Accessories Belt clip 30 list of 48 Shoulder Strap 31 Appendix G 54 B Battery, charging 11 MZ Series Charger Power Supply 12 using Quad Power Station 13 Battery, installing 9 Battery life, tips for extending 32 Battery, removing 10 Bluetooth Device Address (BDA) 26 Bluetooth™ Networking Overview 26 C Cable Communication 25 Cleaning general instructions 33 Communications infrared (IR) 25 with a cable 24 Communications diagnostics 38 Configuration Label printing 38 to determine maximum label size 42 F Font & Barcode Specs ZPL 43 I iMZ Series Quad Power Station 13 Information on Back of Printer 37 L Label Vista use in troubleshooting 38 M Manual CPCL Programming 29 Media loading 15 pre-printed 16 N NFC Tag 8 O Operator Controls 18 P Preventive Maintenance 32 Programming language CPCL 7 R Radio options.?See Wireless communications Resetting an iMZ Series Printer 37 S Safety Precautions placement of charger 14 while charging batterys 14 Software 29 Specifications Memory/communications 42 Physical 46 printing 42 T Technical Support, contacting 39 Troubleshooting Communications Diagnostics Mode 38 control panel indicators 35 Troubleshooting tests 38 printing a configuration label 23,?38 QL configuration label example 37,?40 Troubleshooting Topics 35 W Wearing the Printer 30 Wireless communications Bluetooth™ radio 26 Infrared (IrDA) 25 WLAN Overview 28 Z ZPL Font and Bar Code Specifications and Com- mands 43
- 57. 57 iMZ Series User Guide Patent Numbers D275,286 D347,021 D389,178 D430,199 D433,702 D549,768 3,964,673 4,019,676 4,044,946 4,360,798 4,369,361 4,387,297 4,460,120 4,496,831 4,593,186 4,607,156 4,673,805 4,736,095 4,758,717 4,816,660 4,845,350 4,896,026 4,897,532 4,923,281 4,933,538 4,992,717 5,015,833 5,017,765 5,021,641 5,029,183 5,047,617 5,103,461 5,113,445 5,140,144 5,132,709 5,142,550 5,149,950 5,157,687 5,168,148 5,168,149 5,180,904 5,229,591 5,230,088 5,235,167 5,243,655 5,247,162 5,250,791 5,250,792 5,262,627 5,267,800 5,280,163 5,280,164 5,280,498 5,304,786 5,304,788 5,321,246 5,335,170 5,364,133 5,367,151 5,372,439 5,373,148 5,378,882 5,396,053 5,396,055 5,399,846 5,408,081 5,410,139 5,410,140 5,412,198 5,415,482 5,418,812 5,420,411 5,436,440 5,444,231 5,449,891 5,449,893 5,468,949 5,479,000 5,479,002 5,479,441 5,486,057 5,503,483 5,504,322 5,528,621 5,532,469 5,543,610 5,545,889 5,552,592 5,570,123 5,578,810 5,589,680 5,612,531 5,642,666 5,657,066 5,768,991 5,790,162 5,791,796 5,806,993 5,813,343 5,816,718 5,820,279 5,848,848 5,860,753 5,872,585 5,874,980 5,909,233 5,976,720 5,978,004 5,995,128 5,997,193 6,004,053 6,010,257 6,020,906 6,034,708 6,036,383 6,057,870 6,068,415 6,068,415 6,095,704 6,109,801 6,123,471 6,147,767 6,151,037 6,201,255 B1 6,231,253 B1 6,261,009 6,261,013 6,267,521 6,270,072 B1 6,285,845 B1 6,292,595 6,296,032 6,364,550 6,379,058 B1 6,409,401 B1 6,411,397 B1 6,428,227 B2 6,530,705 6,540,122 6,607,316 6,609,844 6,874,958 6,899,477 This product and/or its use may be covered by one or more of the following US patents and corresponding international patents worldwide
- 58. Zebra Technologies Corporation 475 Half Day Road, Suite 500 Lincolnshire, IL 60069 USA T: +1 847.634.6700 or +1 800.423.0442