
Recommended
Recommended
More Related Content
Similar to Development_of_3rd_Generation_400kV_Chainette_Towers.pdf
Similar to Development_of_3rd_Generation_400kV_Chainette_Towers.pdf (20)
Recently uploaded
Recently uploaded (20)
Development_of_3rd_Generation_400kV_Chainette_Towers.pdf
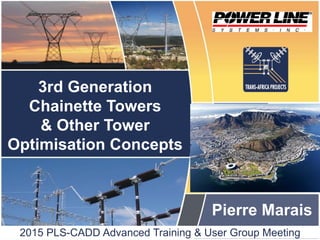
- 1. Slide 1 of 32 3rd Generation Chainette Towers & Other Tower Optimisation Concepts 2015 PLS-CADD Advanced Training & User Group Meeting Pierre Marais
- 2. Slide 2 of 32 Optimisation of chainette towers • Evolution of 400kV crossrope structures in South Africa • Chainette Tower Variants • Understanding the performance • Modelling in Tower 1st & 2nd generation Chainette towers • Further potential efficiencies 3rd generation ideas Optimisation of a narrow base 132kV lattice tower
- 3. Slide 3 of 32 100% Cost Self - Supporting Suspension Pre- 1985 1985 65% Cost Guyed Vee Suspension Evolution of EHV Structures in Eskom
- 4. Slide 4 of 32 2003 Evolution of EHV Structures in Eskom 55% Cost 1st Gen Cross-rope Suspension 1995 50% Cost 2nd Gen Cross-rope Suspension
- 5. Slide 5 of 32 Chainette Tower Variants 2005 50% Cost Cross-rope Suspension 1998 Compact Cross-rope Suspension “Flat Delta” Cross- rope Suspension Efficient Long Distance Transmission
- 6. Slide 6 of 32 Chainette Tower Variants 0-15 degree structures R0 R75,000 R150,000 R225,000 R300,000 R375,000 R450,000 Misc Costs Insulation Hardware Tower Erection Tower Supply Foundations 52% Saving • 0-15 Degree guyed strain
- 7. Slide 7 of 32 Chainette Tower Variants 30m 50m $0 $20,000 $40,000 $60,000 $80,000 $100,000 $120,000 Insulators Conductor Hardware Cables & Stays Tower Hardware Foundation Cost Tower Erection Tower Supply 43% Double Circuit 380kV
- 8. Slide 8 of 32 Chainette Tower Variants 970km 350kV DC line 2007
- 9. Slide 9 of 32 • Crossrope / chainette towers have the lowest fault rate of any tower type on the Eskom grid 1 2 1 1 1 2 HYDRA HYDRA PEGASUS WITKOP VENUS VENUS DROERIVIER DROERIVIER TUTUKA TABOR GEORGEDALE GEORGEDALE 1 2 1 2 1 1 2 VENUS VENUS MIDAS MIDAS PLUTO SPITSKOP SPITSKOP MAJUBA MAJUBA MATIMBA MATIMBA MATIMBA MATIMBA MATIMBA 1 1 1 PEGASUS VENUS PEGASUS MAJUBA ARIADNE ATHENE 1 1 1 1 1 3 1 1 KOKERBOOM MAPUTO SPITSKOP DUVHA EDWALENI HYDRA MAPUTO WITKOP ARIES ARNOT BIGHORN CAMDEN CAMDEN DROERIVIER EDWALENI SPENCER AVERAGE VALUE 275kV Line 275kV Line 275kV Line 275kV Line MINIMUM PORTION OF LINE FUALTS DUE TO PIGYBACK FAILURE SELF SUPPORTING GUYED VEE CROSSROPE MIX 1 2 3 4 5 6 7 8 5.4 FAULTS/100KM/YEAR 3.0 FAULTS/100KM/YEAR 2.8 FAULTS/100KM/YEAR 1.2 FAULTS/100KM/YEAR
- 10. Slide 10 of 32 • A naturally high electric strength HV Impulse tests confirm a higher electrical strength compared to conventional towers 3.10 m
- 11. Slide 11 of 32 • Bird pollution flashovers virtually eliminated Birds do not perch on crossrope No possibility of nesting No bird pollution on insulators
- 12. Slide 12 of 32 • Excellent shielding from Lightning Strikes Phases well protected against lightning strikes NEGATIVE SHIELDING ANGE
- 13. Slide 13 of 32 • Multiple earth contacts produce lower superior connection to earth Reduced back-flashover rate 6 Earth connections over a large area
- 14. Slide 14 of 32 • Low weight Rapid re-construction
- 15. Slide 15 of 32 • Compact phase spacing is electrically efficient Capacitance Inductance Lower losses 7m 7m 7m
- 16. Slide 16 of 32
- 17. Slide 17 of 32 60m 80m 40-50m • Solution to wide tower footprint: Standard right of way required for line (40-50m) 80x60m building restriction around every tower site
- 18. Slide 18 of 32 Welding Eliminated Be careful to avoid eccentricities Replicate the original Tower FEM model as far as possible 1st Generation 2nd Generation
- 19. Slide 19 of 32 • What is the optimal attachment height? • Possibly taller than you think (Unless you have flat terrain) – Taller suspensions can eliminate in line strain structures – Optimum spotting will reveal the optimal height 33.4m 1st Generation 18.3m 20.0m 28.9m 2nd Generation Optimal height for flat terrain Optimal height for “normal” terrain
- 20. Slide 20 of 32 • Staggered bracing shown to be the most effective bracing pattern • Take note of RLX ratio (see also ex5.tow)
- 21. Slide 21 of 32 • Offset peaks can provide some structural efficiency But also can induce torsional loads – choose extent carefully Heavily loaded mast Lightly loaded mast Wind direction Bending induced by wind load Bending induced by offset peak
- 22. Slide 22 of 32 • Hot rolled 60 degree angles Hot rolled 60o angle “Schifflerized” 60o angle • Potentially more cost effective material cost • Lower drag coefficient SAPS wind used to benchmark current (square) design with proposed (triangular) mast
- 23. Slide 23 of 32 • Compared to 90 degree angles of the same size: 60o angle 90o angle Ix, rx decreases Iz, rz increases 90o ANGLE 60o ANGLE % change rx 21.3 19.1 -10% rz 13.7 16.8 22% • This impacts the relative efficiency of different bracing patterns SECTION PROPERTIES OF COMPLEX SHAPES CAN BE DETERMINED IN AUTOCAD USING “REGION” AND “MASSPROP” FUNCTIONS
- 24. Slide 24 of 32 • 2 different bracing patterns investigated Symmetrical bracing (1.2L/rz controls) • Staggered bracing still more efficient than Symmetrical bracing L1 Staggered bracing (2.4L/rx controls) L2 10% Lighter (L1 can = 1.75L2 for same main leg size)
- 25. Slide 25 of 32 • Utilising higher steel grades (on main legs) can produce further efficiency • Gr. 450MPa compared with Gr.355MPa steel • Viability dependant on relative fabrication costs Fy = 450MPa (65ksi) Fy = 355MPa (51ksi)
- 26. Slide 26 of 32 • Combination of steel grade and 60o hot rolled angles produce a 15% reduction in weight • Alternatively structural efficiency can be translated into increased strength • Viability dependant on fabrication cost implications
- 28. Conventional Integrated Hardware Design Superstructure Design Electrical Testing Mechanical Testing Electrical Design Foundation Design Electrical Testing Mechanical Testing Electrical Design Collaboration with stakeholders Insulation & Hardware Design Superstructure Design Foundation Design Suppliers Contractors End Users
- 29. Slide 29 of 32 Base width OPTIMAL WIDTH CONSIDERING SUPERSTRUCTURE ONLY OPTIMAL WIDTH CONSIDERING TOTAL COST Base width
- 30. Slide 30 of 32 Staggered Bracing Redundants Staggered Bracing with redundants X - Bracing - Different bracing patterns may have slightly different optimal base widths - Minimal difference in overall cost between options - For standard width towers more significant differences expected 2.5m 2.6m 2.5m
- 31. Slide 31 of 32 1. Determine load vs. position on main leg (max of all load cases) 2. Determine compression load curve for main leg 3. Calculate bracing interval incrementally with successive locations down the main leg DISTANCE BELOW X-ARM VARIABLE SPACING 1M SPACING COMMON BODY BODY & LEG EXTENSIONS - Variable spacing on common body provides additional efficiency
- 32. Slide 32 of 32 “Tusk Tower” 400kV Multi-Circuit Sculpture Tower