How To Read A Weather Map
•Download as PPTX, PDF•
2 likes•343 views

This is the basic step by step process of How to Read A Weather Map. You can see here in a nice presentation the basic knowledge how to analyze a weather map AKA Synoptic charts.

Recommended
More Related Content
What's hot
What's hot (20)
Similar to How To Read A Weather Map
Similar to How To Read A Weather Map (20)
More from Ezra Dave Ignacio
Recently uploaded
Recently uploaded (20)
How To Read A Weather Map
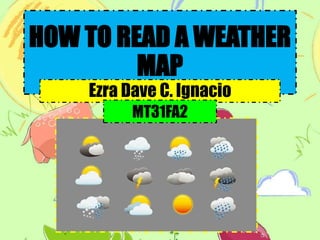
- 1. HOW TO READ A WEATHER MAP Ezra Dave C. Ignacio MT31FA2
- 2. 1. Understand general concepts of precipitation. What most people are concerned with is precipitation, in meteorology (the study of weather), is any form of water that falls onto the Earth's surface. Forms of precipitation include rain, hail, snow, and sleet.
- 3. 2. A major aspect of weather interpretation involves being able to understand the actions caused by differences in air pressure. High pressure implies dry weather and low pressure is usually associated with humid air-perhaps precipitating.
- 4. 3. Study a weather map. Watch out for one on the TV news, online, or in your local newspaper. Newspapers are a convenient method to find a weather map as are cheap, reliable, and can be cut apart so you can carry them with you while learning to interpret the symbols.
- 5. 4. Analyze a small portion of your weather map. If possible, find a map covering a smaller area – these can be easier to interpret. Focusing on a larger scale may be difficult for a beginner. On the map, notice location, lines, arrows, patterns, colors, and numbers. Every sign counts and all are different.
- 6. 5. Understand what air pressure measures. This is the weight or pressure the air exerts on the ground and is measured in millibars. It is important to be able to air pressure because pressure systems are associated with certain weather patterns.
- 7. 6. Learn the air pressure symbols. To read air pressure on a surface analysis weather map, check for isobars (iso = equal, bar = pressure) – plain, curved lines that indicate areas of equal air pressure. Isobars play a major role in determining the speed and direction of wind.
- 8. 7. Learn how to interpret a Low Pressure System (Cyclone). These storms are characterized by increased cloudiness, winds, temperatures, and chance of precipitation. They are represented on a weather map by isobars that are close together with arrows traveling clockwise (Southern Hemisphere) or counter-clockwise (Northern Hemisphere).
- 9. 8. Learn how to interpret a High Pressure System. These conditions indicate clear, calm weather with reduced chance of precipitation. Drier air usually results in a greater range of high and low temperatures.
- 10. 9. Observe the types and movement of fronts. These mark the boundary between warmer air on one side and colder air on the other. If you are close to a front and you know the front is moving towards you, you can expect a change in weather when the front boundary passes over you.
- 11. 10. Analyze a Cold front. With these weather patterns, rainfall can be torrential and wind speeds can be high. Blue lines with triangles on one side represents cold fronts on weather maps. The direction the triangles point is the direction in which the cold front is
- 12. 11. Analyze a Warm front. These often bring a gradual increase in rainfall as the front approaches, followed by prompt clearing and warming after the front passes. If the warm air mass is unstable, the weather might be characterized by prolonged thunderstorms. A red line semi-circles on one side represents warm fronts.
- 13. 12. Study an Occluded front. These are formed when a cold front overtakes a warm front. They are associated various weather events (possibly thunderstorms) depending on whether it is a warm or cold occlusion. A purple line with semi-circles and triangles both on the side represents occluded fronts.
- 14. 13. Analyze a Stationary front. These indicate a non- moving boundary between two different air masses. fronts have long continuous rainy periods that linger for extended periods in one area and move in waves. A semi- circle bordering one side and triangles along the opposite side represents that the front is not moving in any
- 15. 14. Read the station models at each point of observation. If your weather map has station models, each one will plot the temperature, dew- point, wind, sea level pressure, pressure tendency, and ongoing weather with a series of symbols.
- 16. 15. Study the lines on the weather map. There are many other lines on weather maps. Two of the most important kinds of lines indicate isotherms and isotachs.
- 17. 16. Analyze the pressure gradient. A number on the isobars, such as "1008", is the pressure (in millibars) along that line. The distance between isobars is referred to as the pressure gradient. A large change in pressure over a short distance (i.e. close isobars) indicates strong winds.
- 18. 17. Analyze wind strength. Wind barbs point in the direction of the wind. Lines or triangles coming off the main line at an angle indicate wind strength: knots for every triangle, 10 knots for every full line, 5 knots for every half line