
Recommended
Recommended
More Related Content
Similar to How to Create Video Application for an EdTech Platform
Similar to How to Create Video Application for an EdTech Platform (20)
More from Enablex1
More from Enablex1 (12)
Recently uploaded
Recently uploaded (20)
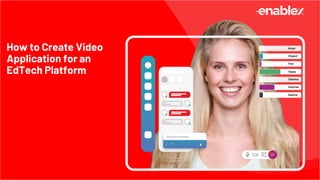
How to Create Video Application for an EdTech Platform
- 1. How to Create Video Application for an EdTech Platform
- 2. Online classes have become an increasingly popular way to deliver education. To create a seamless online learning experience, many educational institutes are also turning to video applications. In this blog, we will guide you through the process of building a video application for online classes using the EnableX Low-Code Platform and REST APIs. Solution Outline
- 3. Creating a video application using EnableX is a simple process that can be done through the EnableX Portal. By following a few steps, you can have a video application ready to use for online classes or other purposes. ● Sign up for an EnableX account ● Create a video project. ● Select Low Code as your preference. Create a Video Application
- 4. Create a Video Application
- 5. Select a ready-made template for your use case or customise your own template.
- 6. Enter the sub-domain name you want to use for the hosting basis your business needs.
- 7. Enter the sub-domain name you want to use for the hosting basis your business needs. ● You can go further and edit the appearance and other configuration settings to customise it before deploying. If you choose our ready-made virtual classroom template, it provides a bouquet of features that are essential for the online classroom.
- 8. ● Once you have built your video meeting application with EnableX, you will receive Video Embed codes for Moderators and Participants’ entry to the Session. ● Export the embed code snippet from the low-code platform. ● Insert the code into your institute’s/ organisation’s web page to get connected to the video session. ● This will allow students and teachers to access the video meetings directly from the institute’s webpage, making it more convenient for everyone. Obtain Low Code Snippets
- 9. Obtain Low Code Snippets
- 10. ● Configure the UI and settings using the visual builder provided. ● Access customization tools and configuration settings to ensure your video application is tailored to your needs. Customize UI and Configure Settings
- 11. Managing configuration is an important aspect of using a low-code platform for building video applications. With the EnableX low code platform, you can easily manage and customize various features, such as webhook, recording, and sub- domain settings, to suit your specific needs. This allows you to create a fully functional video application that meets your unique requirements, without the need for extensive coding knowledge. Manage Configuration
- 13. The EnableX Low code platform allows you to create up to 10 permanent rooms without coding or making any API calls. However, if you want to create more permanent rooms or other types of rooms, you will need to use the EnableX Rest API. As an educational institution, you may require different types of rooms for your online classes and meetings. EnableX provides the following room types that are suitable for education: Create meeting Rooms: Use EnableX REST APIs
- 14. ● Permanent rooms that can be used for ongoing classes, office hours, or recurring meetings with fixed schedules. These rooms can be set up in advance and will always be available for students and teachers to join. ● Scheduled rooms that can be reserved for specific times and dates. These rooms are useful for classes or meetings that occur on a regular but not ongoing basis. Teachers can schedule the room in advance and send out invitations to students. ● Ad-hoc rooms that can be created on the fly for impromptu meetings or discussions. These rooms are perfect for student group work or quick check-ins with teachers. Ad-hoc rooms can be created and shared instantly, allowing for spontaneous collaboration. Create meeting Rooms: Use EnableX REST APIs
- 15. ● When you create a video project with EnableX, an App Id and App key are sent to your registered mail ID. How to create meeting rooms using Rest APIs
- 16. ● Use the App credentials to authenticate API requests. ● Send a POST request to the EnableX server API with the required parameters to create a room. ● In the Request Body section, enter the required parameters such as name, type and duration of the room. You can specify the type of room as permanent, scheduled, or ad-hoc. ● The EnableX server API will respond with a JSON Payload containing the unique room-id for the created room. How to create meeting rooms using Rest APIs
- 17. For Example, An API Request To Create A Scheduled Room
- 18. EnableX server responds with JSON containing a unique Room-Id. ● Use the room-id to create a Meeting Room URL
- 19. ● Once you have created a meeting room, you can access the video meeting using its Meeting URL. ● The Meeting URL will contain two key components: the Room ID and the Domain. ● Use the Meeting URL as the source URL in the IFRAME Embed Code to access the video meeting taking place in the meeting room. Generate Meeting Room URLs
- 20. Example Of Meeting URLs Note: The #HASH*# is a base64 encoded string that includes the Room ID and App ID separated by a dash (-).
- 21. By passing Query String Parameters, the Meeting URL used in WebView or IFRAME Source can be customized to update UI elements and User Experience, making it easy to alter the Low Code Embed settings. ● Qualified Meeting URLs can be used directly from the browser’s address bar or as an IFRAME Embed. ● Different parameters can be passed for different participants or a moderator in the same meeting. ● Using the associated parameters overwrites the feature list through the portal as described in the Select Preferred Features. If associated parameters are not used, pre-set feature setting remains the same. Modify Meeting Room URLs
- 22. Modify Meeting Room URLs
- 23. EnableX Low code also supports webhooks, which allows organisations to extend the functionality of the video embedding and add new features or update existing ones. ● Create a Webhook URL in the EnableX Portal to receive the webhook notifications. ● Define the webhook events you want to listen to and configure the corresponding webhook endpoints in your application. Setup Webhook
- 24. Setup Webhook
- 25. • When a webhook event is triggered in a video room, EnableX sends an HTTP POST request to your configured webhook endpoint, containing a JSON payload with information about the event. • Your application can then process the webhook data and perform custom actions, such as updating UI elements or integrating with other services. • You can also use external CSS and JS libraries to customize the video embed and add new features or functions to the video room. • The external CSS and JS libraries can be provisioned to work along with the video embed and get executed with associated video room events, allowing you to create a highly customized video experience for your users. Setup Webhook
- 26. • Once you obtain the video meeting URL you want to embed. Follow these steps to embed your URL to a web application: • Create An HTML File: create an HTML file that will contain the iFRAME code to embed the URL in your application. You can create this file using any text editor or HTML editor. • Set Up The iFRAME: In the HTML file, create an IFRAME tag and specify the meeting URL as the source of the IFRAME. You should also include the permissions necessary for the meeting to function correctly. Here is an example of the IFRAME code: Embed this Meeting URL in Your Application
- 27. Embed this Meeting URL in Your Application
- 28. Embed this Meeting URL in Your Application
- 29. Embed this Meeting URL in Your Application Host The HTML File: Once you have completed the HTML file, you will need to host it on a web server. You can use a hosting service, or you can host the file within your own web application. Embed The Meeting URL: Finally, you can embed the meeting URL in your application by referencing the HTML file with the IFRAME code. For example, in a web application, you can include the HTML file in an HTML page using an iframe tag:
- 30. Embed this Meeting URL in Your Application Host The HTML File: Once you have completed the HTML file, you will need to host it on a web server. You can use a hosting service, or you can host the file within your own web application. Embed The Meeting URL: Finally, you can embed the meeting URL in your application by referencing the HTML file with the IFRAME code. For example, in a web application, you can include the HTML file in an HTML page using an iframe tag:
- 31. Embed this Meeting URL in Your Application By following these steps, you have successfully added embed a video meeting URL in your web using an IFRAME. Once you successfully created an ad-hoc meeting room and set up the webhook, now provide the generated meeting room URL to the client who will be joining the room. You can provide the client with either the Participant Meeting URL or the Moderator Meeting URL. This could be done via email, text message, or any other means of communication.
- 32. Embed this Meeting URL in Your Application Creating a video application for online classes using a low code platform and EnableX REST APIs is a straightforward process that can be completed in just a few steps. By following the steps outlined here, you can create a video app that is tailored to your specific needs and provides a seamless online learning experience for students and faculty members. In case you have any questions, our extensive developer document for video API is available here.
- 33. ENABLEX Ready to Get Started? Open a Free Trial Account Read Video Developer Documentation