
Recommended
More Related Content
What's hot
What's hot (20)
Viewers also liked
Viewers also liked (15)
Similar to Clay & Ceramic Colours - Cafe colours application
Similar to Clay & Ceramic Colours - Cafe colours application (20)
Recently uploaded
Recently uploaded (20)
Clay & Ceramic Colours - Cafe colours application
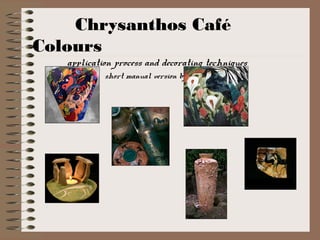
- 1. Chrysanthos Café Colours application process and decorating techniques short manual version by Christine Dehn
- 2. Café Colours What are they? Café Colours are primarily underglazes designed to be applied under neath the glaze onto a clay body or bisque surface (fired clay body), and then fired in a kiln to maturity e.g. 1080 degrees Celsius, depending on manufacturer’s recommendations and the type of clay used. Although as you will discover there are some exceptions…
- 3. Café Colours 1 2 3 General Application Process Opaque and Soft finish Café colours are ideal for both an opaque finish (full cover of colour – 3 coats) and a Translucent wash (transparent ‘see through’ finish – 1 coat). Depending on the surface area that you wish to paint it is generally a good idea to use the appropriate size brush for that area. For example when you are applying colour to a large area, it is recommended that a ‘large mop’ or ‘soft glaze’ brush be used to apply the paint. Soft glaze or mop brushes are ideal as they will give both an even and soft ‘smooth’ cover and finish (see images 1 & 3). Whereas a bristle brush can create texture and Transfer Design
- 4. Café Colours Application Techniques (1) Full cover An all over cover or opaque finish can be achieved with either a mop or soft glaze Brush. Shake or stir the paint before hand, then fully load the brush with colour, and apply a generous coat to the surface of the ware. Three coats should be applied in total. Allow each coat to semi-dry before proceeding to the next. Ideally it is recommended that a ‘cross-hatch' technique is applied when wishing to achieve a near flawless finish. Application Techniques (2) Another method used to create an even-flawless finish, is with an ‘air gun’. The aim was to spray a light coat of colour mixed with water, and with the aid of an air gun and compressor the paint was sprayed evenly and effortlessly onto the surface of the ware, giving a flawless soft finish. This method is often still practiced in the commercial ceramics industry achieving quick and favorable results. Safety precautions must be followed and it is not recommended to be practiced by pregnant women. Application Techniques (3) The ‘Sponge Technique’ is a favorable technique or application method used by ‘first time’ ceramic painters, as its easy, and achieves good, interesting and favorable results. Using either 1 colour or several different colours, the colour is applied using a soft sea sponge. The sponge is dipped into the colour and then applied to the surface of the ware using a pouncing motion for an even colour application. Opaque finishes
- 5. Café Colours the wash ‘transparent’ technique A transparent or translucent finish can be achieved via applying ‘1’ coat only of the Café Colours, to create this effect. If a wash or very pastel ‘watery’ effect is desired then apply large amounts of water, or more than usual to the colour and mix to a watery consistency. Using a relatively large soft, round or square shader brush (depending on the surface area to be covered), allow the brush to soak or be saturated with the pre-mixed colour, then apply to the ware, taking extra care not to create any unwanted runs or bleeding of the colour. This could take some practice and its a good idea to practice this method beforehand on some unwanted clay or bisque ware. If working on a piece such as a vase, it would be advisable to lay it flat whilst applying this ‘watery’ paint to the surface. Wash technique on Crystallite Glaze
- 6. Café Colours Sponge “Stencil work & Stamping” For this step most soft sponges like a sea sponges, make ideal shapes, templates or stencils. With a scissors cut the sponge into the shape you wish to create. Apply desired colour to a tile, mix with a little water to create a smooth cream consistency. Dip the sponge into the colour, making sure the entire surface of the shape is saturated in colour, then gently place the sponge onto the bisque surface area and lightly with your finger press the sponge into the ware. Remove the sponge carefully by gently peeling the sponge off. Sponge “Overall cover” As mentioned earlier, The ‘Sponge Technique’ is a favorable technique or application method used by ‘first time’ ceramic painters, as its easy, and achieves good, interesting and favorable results. Using either 1 colour or several different colours, the colour is applied using a soft sea sponge. Apply 1 or more colours onto a tile mix each colour with a little water, but do not allow the colours to mix into one another. Dip the sponge into the colour(s) and then apply to the surface of the ware using a ‘pouncing’ motion for an even colour application. Cover the entire area with colour creating a smooth yet textured finish.
- 7. Café Colours Bubbling Effect For this step add to a tall container a little water, a drop of detergent and some colour. Place the item on a turn table or banding wheel for easier application. Stir the mixture and with a straw begin to blow creating soapy bubbles. Then either scoop or allow these soapy bubbles to fall onto your item, beware of runs. Add more or other colours, if desired and continue until happy with the result. Allow item to thoroughly dry before glazing. This technique is very popular with children. Splatter & Stipple Fairly straight forward and simple task of either splattering or stippling colour onto your ware. This can be achieved with either a toothbrush or hard bristle brush. Apply your chosen colour(s) to a tile and add water only if necessary. Saturate your brush with colour and with your finger brush gently against the brush flicking colour onto your ware. Again be aware of too much colour or water on your brush, which could result in runs or too much splatter. For best results start with very little colour and gradually build up.
- 8. Café Colours Banding This can be a tough technique to attempt for the first time. But with practice, you will make perfect. Place item on to a banding or potter’s wheel. Mix colour to a milky like consistency so the colour will freely cover the area. Using a soft large glaze or mop brush saturate the brush with colour and whilst turning your item on the wheel apply the colour. Many coats will be required to achieve a good even opaque finish. Sgraffito This method is fairly simple but needs to be done soon after the last coat has been applied and allowed to dry a little, as this could cause the paint to crack or split if too dry. Using a skewer or stylus made of wood or metal, begin carving or incising into the top colour to reveal the original clay body underneath. Once completed brush away the dust particles from the sgraffito with a bristle brush. This is very important prior to glazing. Creating a banding effect with a` banding or potter’s wheel Using a wooden or metal skewer and incising or carving through the surface to reveal the clay or colour underneath Samples of sgraffito
- 9. Café Colours Brushwork & handpainting Detail & line work For opaque finish apply 2 to 3 generous coats, allowing each coat to dry in between. Apply a small amount of colour to a tile and mix with water to an ‘ink’ like consistency. With a detail or fine liner brush apply 1 coat using the tip of the brush. The brush should be washed in water frequently and re-loaded with colour often for a best results.
- 10. Café Colours Majolica The method to paint ‘Café Colours’ over a ‘white non-moving glaze’. Once fired a soft pastel finish is achieved, as with the famous Italian glaze decorations. Although it’s a fairly straight forward and simple technique, it may take a ‘few’ practice runs before accomplishing the desired result. Apply 3 coats of white non-moving (White Superior Glaze), to the bisque ware and allow to dry thoroughly before applying any colour. Applying colour is similar as to a wash or transparent finish. Add more water to the colours than usual and mix thoroughly. With a soft round brush apply the colour to the glazed surface. Taking care not to create any colour bleeds or runs, blot with tissue paper if this occurs and add more colour to the mix. Satin Cafe To create a satin or low sheen finish to your ware, refer back to the earlier notes in regards to ‘full cover or opaque finish. Adding 3 generous coats to your ware and firing as recommended by the glaze manufacturer….e.g. 1000O C and soak time for approx 30-40 minutes, although a test should be done before hand to achieve best results. Generally this technique will not render your items to be food safe, but the overall result is striking..
- 11. Café Colours Final Notes Antiquing This is one of the simplest and ‘fun’ techniques to try on ceramics. Although there is one problem, you need an item with texture or raised surfaces like the one in the image – left. Transparent glazes will give the best result simply by applying to a textured item, or…... Apply chosen colour to a tile and add water (more than usual) and mix. With a soft glaze brush apply the colour to the ware, taking care to fill colour into any gaps or crevices. Using a ‘barely damp’ sponge wipe away colour from the ware until you reach the desired effect. Wash your sponge frequently to avoid a ‘muddy’ finish. It is always advisable to add a little Water or ‘brushing medium’ to the “Café Colours” prior to painting . A few drops and mix well onto a tile or palette, will help with a better finish. Avoid dipping the brush into the paint container as this could promote contamination. Allow each coat to dry in between applications. Use appropriate size brush for the surface area for good even results. Always clean brushes in warm soapy water and allow to dry bristle/ferrule of brush standing up. For a gloss finish, glaze items either with dipping or brush on glaze and fire. For satin finish fire item to 1000o C and allow to soak for approximately 30-40 minutes for best results (follow glaze/firing recommendations by the manufacturer). Or use low sheen glazes. Kilns fire differently, always do your own pre-test fires to determine best results. Always stilt items for firing and use cones every now and again to ensure that kiln is firing to correct temperature.
- 12. Café Colours Wax n Glaze This is one of the simplest and ‘fun’ techniques to try on ceramics. Apply colour to your ware as per usual. Once dry apply the wax with a sea sponge. To create a similar effect as seen in the image on the left, pour a generous amount of was to a tile and with sea sponge with large holes, place the sponge into the wax and carefully apply to your piece. Avoid covering the entire area with wax and leave sections bare and not covered with the wax. Allow to dry thoroughly before glazing. Wax will fire off in the kiln. Wash sponge in warm soapy water to remove all traces of the wax. Designed to create a ‘3D’ dimensional textured effect. Ideal for creating a ‘leadlight effect’ or ‘embossed’ design work on the surface of ceramic wares. Generally this is a simple procedure, the difficulty here is usually with the ease or functionality of the ‘syringe’ or ‘nozzle’ used to apply the slip trail. Although considered ‘food safe’ once glazed it is not recommended to be applied to the inside of food containers. 3D texture and dimension
- 13. Café Colours Café Gallery Items completed using ‘Café Colours’
- 14. Café Colours Glazes and decorating Products Chrystallites Fantasy Glazes 3D Trail Glaze (alias slip trail) Similar to Fantasy Glazes, with the exception of a matt finish with clear shiny flecks or specks. Ideal for decorative and textured finishes. These products are not suitable for use on items intended for functional purposes, due to the porosity of the clay body once fired. A coloured glaze containing coloured crystals which tend to ‘burst’ in the kiln, creating a mirage of different colours to the surface of the ware. Ideal for items of a tall nature such as a vase or tall figurine, to see the full effect of this medium. These glazes tend not to be ideal for wares considered for functional purposes as the crystals do tend to craze (creating small cracks on the surface), due to the ‘two’ different mediums bonding here. If choosing to apply this glaze to a functional item, apply this glaze only to the outside of the ware and a ‘food safe’ glaze on the interior of the ware such as a Superior Glaze. Designed to create a ‘3D’ dimensional textured effect. Ideal for creating a ‘leadlight effect’ or ‘embossed’ design work on the surface of ceramic wares. Generally this is a simple procedure, the difficulty here is usually with the ease or functionality of the ‘syringe’ or ‘nozzle’ used to apply the slip trail.
- 15. Loading Kiln Tips Kiln shelves and furniture posts Kiln Interior “Top Loader” Thermocouple can be seen in the image, far right. Bottom shelf with item When firing a large flat object such as a platter place item between elements and not directly in line with the elements as this can cause stress to the item. Glazed Items loaded on shelf with posts in place., ready for the next shelf to be placed on top. Always allow plenty of space between glazed items and kiln furniture, walls and elements. Front view of stacked items in kiln, including cones Half shelf It;s common to use only half a shelf if necessary Using cones are important to ensure a successful firing as they determine the correct firing temp, more so than a thermocouple. Stilt in place prior to firing Stilt in place after firing. Stilts should be used on all glazed surfaces to avoid item ‘sticking’ to a shelf.
- 16. Detecting Firing Faults Application firing Crazing - fine cracks commonly appearing after firing. The cause usually from incompatible glaze for the clay body. In this case more tests should be carried out with either different clay bodies or glaze. Crawling – is usually as a result from either dirt or dust trapped beneath the surface of the clay and glaze. There is very little one can do to fix this problem once fired. Milky glaze – commonly caused by an ‘under firing’, or not soaking long enough during the firing to allow the glaze to even out and reach maturity which will create a glossy and more favorable finish. Try re firing for a longer period of time and or soak longer. Shelling or peeling – is most commonly the cause from either glaze incompatibility or incorrect cleaning of the item, creating an unfavorable polished surface and therefore the colour and glaze cannot fully adhere and bond to the surface of the ware. This problem has also been known to happen from over cleaning the item or allowing too much water to settle on the ware again creating problems with the surface to adhere the colour or glaze to the ware. Product
- 17. Ceramic Check List Ceramics 1. Clean bisq with sponge. 2. Apply transfer with pencil. 3. Choose colours and decorate. 4. When items are completed, ask client to sign their name on the item. 5. Take item to counter and check name, code and receipt number. Also check any errors and correct, such as item too wet, too much paint etc. Glazing Ceramics 1. Remove any dust and sgraffito fettling from wares to be glazed. 2. Never remove dust near kiln. 3. Prepare glaze with water and stir thoroughly. Glaze should be fluid like milk. Test an item before proceeding to dip. 4. When glazing, hold items at one end and place item half way into glaze, allow to dry and do the other side. 5. When dry smooth over any drips, pinholes or other thick areas. Ceramics 1. Organise your items, to be fired and place where appropriate in height and size per shelf. 2. Always place glaze items on stilts. 3. Space items 2cm apart from each other and leave enough space between items from shelf above. 4 Items should never come in contact with elements, walls of kiln and furniture posts. 5. When placing shelves into kiln, be careful not to touch ‘thermocouple’ or elements as they are easily damaged. Never splash water, glaze or dust particles near kiln or inside the kiln Cones help to determine the temperature of the kiln and should be used frequently Kilns should be serviced at least once a year by a qualified technician. Kiln Wash should be applied to ‘only’ the shelves and recoated annually