PAM 1 MK2 Audio Monitoring Unit Training 2015
•Download as PPTX, PDF•
1 like•456 views

TSL Products' latest PAM1 MK2 Audio Monitoring Unit Training slides

Recommended
Recommended
More Related Content
What's hot
What's hot (20)
Viewers also liked
Viewers also liked (14)
Similar to PAM 1 MK2 Audio Monitoring Unit Training 2015
Similar to PAM 1 MK2 Audio Monitoring Unit Training 2015 (20)
Recently uploaded
Recently uploaded (20)
PAM 1 MK2 Audio Monitoring Unit Training 2015
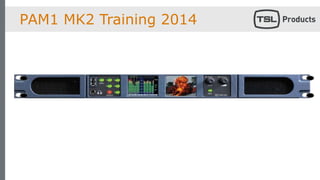
- 1. PAM1 MK2 Training 2014
- 2. Front Panel Control Explained • USB port for configuration save/recall and system update • Menu access • Preset hotkey switches 1-5 Presets 1 to 4 default to SDI1,SDI2, AES, and Analog • Headphone socket • ‘Home’ Button – shortcut access
- 3. • Master Volume – Push to Cut/Dim • Scroll Encoder – Push/Hold and turn to select audio channels and Push/Select for menu navigation • Back Button to navigate ‘up’ menu levels and hold to exit Front Panel Control Explained
- 4. Shortcut Mode Selection • Press ‘Shortcut’ to display the shortcut menu • Navigate to change Inputs • Select Display options • Choose Monitor Settings • Manage User Presets
- 5. Saving Hotkey Presets • PAM1-MK2 features 5 Hotkey preset buttons • Push and hold any Hotkey to Save instantly to the desired location • Instantly recall up to five saved settings via short presses of the relevant Hotkeys
- 6. Main Menu • Accessed via the Menu button • ‘Setup’ used for engineering and ‘set and forget’ functions • ‘Input’ is usually not required if preset defaults are maintained or Shortcut used • ‘Monitor’ modes can also be accessed via Shortcut button • Assign Matrix – detail to follow • Loudness – detail to follow • Metadata – view Dolby and S2020 Metadata
- 7. Setup 1 Menu – Key Features • Meter scale, reference, colours, peak level and hold • External Monitor On/Off and display quadrant select • System Mute defeat mode • USB device save and load • Audio Delay – detail to follow • SMPTE 2020 menu
- 8. Setup 2 Menu – Key Features • User and Hotkey Preset Lock • Auxiliary Mixer – detail to follow • Preset Standard Switching – detail to follow • External / Internal Loudspeaker Mute – detail to follow
- 9. Aux Input Mixer • Ideal for mixing Comms audio with monitored SDI • Aux Mixer is accessed via Setup Menu 2 • Select input source analogue or AES • Select whether source is mono or stereo • Adjust gain as required • Gain can be adjusted from the Input Menu
- 10. Split Mono Selection • Split Mono allows the user to listen to a left and right signal from non-paired audio channels • Use ‘Scroll’ to select the first mono signal • Within the next 3 seconds, scroll the encoder (without pushing) to the second mono channel
- 11. Loudness Measurement – Screen Overview ‘Target Value’ ‘Measured Dynamic Value’ ‘Measured Value’ Moving Cursor ‘Target Value’ Reference Line ‘Channel Under Test’ Measured Audio
- 12. Loudness Setup Menu Overview • Loudness Setup Menu Overview – Source Selection • ‘Fixed’ mode – Audio measured is defined by manual channel selection • ‘Follow’ mode – Audio measured is defined by ‘Scroll’ selection • ‘Dolby’ mode – Audio measured is Dolby encoded channel defined Source Selection
- 13. Loudness Setup Menu Overview • ‘Target’ sets desired loudness target value between range -13 and -34 LU • Dialnorm is automatically selected when ‘Source’ is set to Dolby Target Value
- 14. Loudness Setup Menu Overview • Loudness measurement is activated and may be paused and reset as required • Start measuring loudness from the targeted channels via the ‘button’ or from a GPI closure • ‘Stop’ pauses the measurement. Toggle this button or use a GPI to control • ‘Reset’ discards any previously measured values or history and may be activated via the button or GPI Start/Stop/Reset
- 15. Loudness Setup Menu Overview • Display Modes define measurement integration settings • ‘3 Sec’ activates a 3 second sliding window (sample at 400 ms) • ‘Integrated’ mode measures loudness across the entire duration of the audio programme (as defined by start/stop/reset) • ‘Gated’ is similar to Integrated but discards audio 10dB below target level Display Modes
- 16. Loudness Setup Menu Overview • ‘Limit’ sets a threshold value above Target at which the LU reading ‘red lines’ within a range 0 to +6LU • An ‘over limit’ reading activates an output GPI trigger Limit Threshold
- 17. Loudness Histogram • To access Histogram from top level, press ‘Shortcut’ button • Then press ‘Loudness’
- 18. Loudness Histogram • Loudness Histogram provides an instant overview of channel loudness behaviour • The time constant can be adjusted to display 2, 7, 15, 30 and 60 minute history • The ‘Loudness History’ button is used to access the Loudness Setup Menu • The ‘Display’ button changes the time constant of the graphical view between 3 second, Integral and Gated modes retrospectively
- 19. Assign Matrix - Overview • The Assign Matrix is designed for use in applications where audio is delivered or transported in ‘non standard’ channel orders and where multiple commentary or language soundtracks are present within a common embedded video signal • Assign Matrix functionality is based around a 16 into 6 user configurable tool which exclusively routes input audio channels to monitoring busses defined as Left, Right, Centre, LFE, Left Surround and Right Surround • The key to use of the Assign Matrix is the ability to save complex setups as User Presets for instant recall
- 20. Assign Matrix • The Assign Matrix can be accessed from the Main Menu • Any of 16 input channels can be routed to the 6 output busses • As shown in this typical example; Channel 3,4, 5 and 6 are clean surround channels, Centre (dialogue) is routed from channel 16. LFE is ‘Off’ • Press ‘Active’ to turn on the Assign Matrix
- 21. Assign Matrix – Bargraph Views • From the previous example – The Left screen displays the routing selections with a stereo downmix activated • From the previous example – The Left screen displays the routing selections with a stereo downmix activated
- 22. Audio Delay • The Audio Delay feature can be accessed from the Setup Menu • A delay between 1 and 250ms can be applied to the audio output busses • The audio delay feature is not a system default. It should be applied as a User Preset as required • This feature is designed as a means to compensate for video processing and display latency helping to ensure that lip sync is maintained in production and technical monitoring environments
- 23. Loudspeaker Muting • Internal and External Loudspeaker outputs can be muted via the Setup 2 menu • The LS mute feature is not a system default. It should be applied as a User Preset as required • By controlling external and internal speaker outputs independently, it is easy to use PAM1-MK2 in applications where internal speakers are operated for general use and external full range systems for more critical listening – typically in Ingest or QC Suites
- 24. Preset Standard Switching - Overview • Preset Standard switching was introduced into PAM1-MK2 following a request to be able to configure a condition where the audio monitoring unit automatically switches between listening states depending on the input signal format • PAM1-MK2 is capable of determining which audio channels to monitor depending on whether the input video signal is SD or HD, Dolby encoded or PCM audio • This feature is aimed for use in monitoring applications where outgoing video is switched between SD/stereo and HD/surround sound, with or without Dolby encoding – the operator no longer has to change audio selection manually as PAM1-MK2 will automatically choose the correct audio channel to monitor
- 25. Preset Standard Switching • The Preset Standard Option can be found within the Setup 2 menu • There are 3 criteria that can be set to define the system behaviour when a signal changes • Define a Hotkey Preset to be selected automatically when incoming video or audio is SD/HD/PCM/Dolby • Define a further Hotkey Preset to be selected automatically when incoming video or audio changes • Typical conditions might exist where one preset defaults to an HD signal with Dolby E 5.1 and another is SD stereo
- 26. Preset Standard Switching • User Presets will automatically switch as the input signal standard changes • SD Only• HD Only