
Recommended
More Related Content
What's hot
What's hot (20)
Similar to Yeast bread
Similar to Yeast bread (20)
Recently uploaded
Recently uploaded (20)
Yeast bread
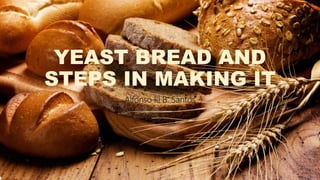
- 1. YEAST BREAD AND STEPS IN MAKING IT Alfonso III B. Santos
- 2. BASIC INGREDIENTS 1. FLOUR - The flour will form the basic structure of the bread. The gluten in flour help a yeast risen bread to become nice and airy and hold onto air inside the dough. 2. WATER - The water will bring those gluten molecules together and it will ensure the bread becomes soft. 3. YEAST - The yeast will contribute to the flavor and it will form gas which will create the desired air bubbles in bread. It does this through fermentation.
- 3. STEPS/ PROCEDURES 1. MISE EN PLACE (SCALING) Before starting the bread-making process, it is important to gather all of your ingredients (mise en place) and measure them accurately. Measuring ingredients by weight is a much more accurate way to measure and is the preferred method for bread making. OPTIONAL STEP: PROOFING YEAST Some bread recipes include a step prior to mixing the dough called “proofing the yeast.” This step involves hydrating dry yeast in some or all of the liquid used in the recipe and adding a pinch of sugar. The water wakes the dry yeast up from its dormant state and the sugar gives the yeast something to feed on. After mixed, you will allow the mixture to sit for 5-10 minutes to check for foaming. Bubbles and foaming are signs that the yeast is alive, and you can add it to your dough.
- 4. STEPS/ PROCEDURES 2. MIXING The order in which ingredients are combined varies based on the types of bread. The straight dough method, the modified straight dough method, and the sponge method are the three mixing methods for combining ingredients for a bread dough. 3. KNEADING After the ingredients for the bread dough are combined the dough is kneaded. Dough can be kneaded in a stand mixer using a dough hook, or by hand. Knead the dough until it is smooth and elastic. The length of time dough is kneaded depends on what kind of bread you are making. Doughs without any fat (lean dough) will be kneaded longer, while bread dough that contains fat (enriched dough) will be kneaded for a shorter period of time.
- 5. STEPS/ PROCEDURES Kneading Dough: Kneading bread dough is an important process to developing a gluten structure which strengthens the bread. It also creates a more even crumb for the final product and improves the flavor of the bread. 4. BULK FERMENT (1ST RISE) After the dough is mixed and kneaded, it is allowed to rest and ferment. Fermentation occurs when the yeast begins to feed on the starches and sugar present in the dough. As the yeast feeds, carbon dioxide is produced which makes the dough rise and develops the texture and flavor of the bread. Punching the dough When dough is light, punch it down to release the carbon dioxide, then fold and turn dough to smooth side. Sometimes the recipe will call for a second rise at this time.
- 6. STEPS/ PROCEDURES 5. SHAPING After the dough has bulk fermented, it is shaped into rolls, loaves, or specialty shapes likes braids. 6. PROOFING OR PROVING (2ND RISE) The term proofing also called proving, refers to the rise that happens after the dough is shaped. The same fermentation process is happening during this step as it is in step 3, but this is where the shaped dough gains the bulk of its volume. Typically, shaped bread dough should rise until double in size. 7. BAKING After the bread has proofed sufficiently it should be baked. If you wait too long to bake the bread dough after it has proofed, it can overproof which will cause a sour taste and large holes in the final product. Bread is cooked through when its internal temperature reaches 190-200 F (99-94 C).