
Recommended
More Related Content
What's hot
What's hot (20)
Similar to steps of cavity preparation for class 1
Similar to steps of cavity preparation for class 1 (20)
Recently uploaded
Recently uploaded (20)
steps of cavity preparation for class 1
- 3. Steps In Cavity Preparation For Class I Restorations Guided by: Dr. Anubhav Sood Presented by: H. Parikshit 14D0959
- 4. Cavity preparation Definition (Acc to Sturdevant): Tooth preparation is the mechanical alteration of a defective, injured, or diseased tooth to receive a restorative material that re- establishes a healthy state for the tooth, including esthetic corrections where indicated and normal form and function.
- 5. STAGES IN CAVITY PREPARATION INITIAL STAGES 1. OUTLINE FOR AND INITIAL DEPTH 2. PRIMARY RESISTANCE FORM 3. PRIMARY RETENTION FORM 4. CONVENIENCE FORM FINAL STAGES 5. REMOVAL OF ANY INFECTED DENTIN OR OLD RESTORATIONS 6. PULP PROTECTION 7. SECONDARY RESISTANCE AND RETENTION FORM 8. PROCEDURES FOR FINISHING EXTERNAL WALLS 9. FINAL PROCEDURES- CLEANING, INSPECTING AND SEALING
- 6. Step 1: Outline Form And Initial Depth Definition (Acc to Sturdevant): : Placing the preparation margins in the positions they will occupy in the final preparation, preparing an initial depth of 0.2-0.8mm pulpally of the DEJ Principles: 1. All the friable or weakened enamel usually should be removed. 2. All faults should be included 3. All margins should be placed in a position to afford good finishing of the margins of the restorations
- 7. Features: 1. Preserving cuspal strength. 2. Prserving marginal ridge strength. 3. Minimizing faciolingual extensions. 4. Using enameloplasty. 5. Connecting two faults or tooth preparation. 6. Restricting the depth of the preparation into dentin to be maximum of 0.2mm.
- 8. Step 2: Primary resistance form Definition (Acc to Sturdevant): : Defined as the shape and placement of the preparation walls that best enable the restoration and the tooth to withstand without fracture, masticatory forces delivered principally in the long axis of the tooth. Principles: 1. Box shape with a relatively flat floor 2. To restrict the extension of external walls 3. Slight rounding of internal line angles 4. To cap weak cusps and include enough of weakened tooth within the restoration 5. To provide enough thickness of restorative material 6. To bond the material to tooth structure when appropriate
- 9. Features: 1. Relatively flat floors. 2. Box shape. 3. Inclusion of weakened tooth structure. 4. Preservation of cusps and marginal ridges. 5. Rounded internal line angles. 6. Adequate thickness of restorative material.
- 10. Step 3: Primary retention form Definition (Acc to Sturdevant): : It is the shape or form of the conventional preparation that resists displacement of removal of the restoration by tipping or lifting forces . Principles: 1. Material is retained in the tooth by developing external tooth walls that converge occlusally. 2. Cavosurface angle = 90⁰. Features : 1. Occlusal convergence 2. Elastic deformation of dentin 3. Dovetails 4. Parallel walls for inlays 5. Frictional retention of dentin
- 11. Step 4: convenience form Definition (Acc to Sturdevant): : convenience form is the shape or form of the preparation that provides for adequate observation, accessibility, and ease of operation in preparing and restoring the tooth Features: 1. Adequate extensions for filling and finishing 2. Contra angling of the hand instrument.
- 12. Step 5: Removal of any infected dentin or old restorations. Definition (Acc to Sturdevant): : It is the elimination of any infected carious tooth structure or faulty restorative material left in the tooth after initial tooth preparation. Infected dentin: It is the irreversible demineralized and denatured layer with bacterial invasion. Very soft, moist and easy to remove with a spoon excavator. Affected dentin: Dentin is partially demineralized (leatherysofter than normal), collagen is not denatured and contains minimal to no bacteria.
- 13. Step 6: Pulp Protection When remaining dentin thickness is less, pulpal injury can occur because of: 1. Heat production, 2. high speed burs with less effective coolants, 3. Irritating restorative materials, 4. Galvanic currents, 5. Excessive masticatory forces transmitted through restorative material, 6. Ingress of microorganisms and their noxious products through microleakage. Pulp protection is achieved using liners, varnishes and bases depending upon: 1. The amount of remaining dentin thickness 2. Type of restorative material used
- 14. Step 7: . Secondary resistance and retention form The Secondary resistance and retention forms are of two types: 1. Mechanical preparation features 2. Treatments of the preparation walls with etching, priming and adhesive materials. Mechanical features 1. Retention locks, grooves and coves 2. Groove extensions – for cast metal 3. Skirts – for cast gold 4. Beveled enamel margins – for cast gold, composite 5. Pins, slots, steps and amalgam pins
- 15. Step 8. Procedures for finishing external walls Definition (Acc to Sturdevant): : It is the further development, when indicated, of a specific cavosurface design and degree of smoothness and roughness that produces the maximum effectiveness of the restorative material being used. Objectives: 1. To create the best marginal seal. 2. Afford a smooth marginal junction. 3. Provide maximal strength of the tooth and the restorative material at and near the margin.
- 16. Step 9: Cleaning, inspecting and sealing • This includes the removal of debris, drying of the preparartion and final inspection before placing restorative materials. • Cleaning of the preparation can be done by using warm water. • Drying can be done using air, dry cotton pellets. It is important that teeth are not dehydrated by overuse of air or hot air.
- 17. FEATURES AMALGAM COMPOSITE OUTLINE FORM • INCLUDE FAULT • MAY EXTEND TO PROXIMAL AREA • INCLUDE ADJACENT SUSPICIOUS AREA • SAME • SAME • NO PULPAL DEPTH UNIFORM, 1.5 mm REMOVE FAULT AXIAL DEPTH UNIFORM 0.2-0.5mm INTO DEJ REMOVE FAULT CAVOSURFACE MARGIN = 90⁰ >/= 90⁰ BEVELS NONE EXCEPT GINGIVAL MAY REQUIRE FOR LARGE PREPARATIONS TEXTURE OF PREPARED WALLS SMOOTH ROUGH 1⁰ RETENTION FORM OCCLUSAL CONVERGENCE BONDING 2⁰ RETENTION FORM GROOVES, SLOTS, LOCKS, PINS BONDING RESISTANCE FORM FLAT FLOORS, ROUNDED ANGLES NO SPECIAL FORM BASE MATERIAL Zn3(PO4)2 ZINC POLYCARBOXYLATE RMGIC SEALER GLUMA DESENSITIZER BINDING SYSTEM USED
- 18. Clinical steps in amalgam restoration
- 19. Clinical steps in amalgam restoration
- 20. CLINICAL STEPS IN COMPOSITE RESTORATION
- 21. ETCHING APPLICATION OF BONDING AGENT CURING CLINICAL STEPS IN COMPOSITE RESTORATION
- 22. conclusion Cavity: • Retention • Resistance Receive a restorative material: • Proper form, function and esthetics
- 23. Bibilography • Sturdevant 5th Edition • Images: Google
Editor's Notes
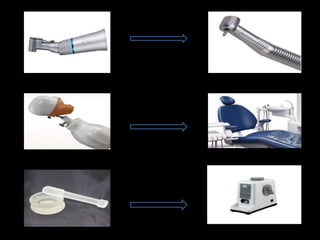
- Since our first year to final year……… We moved from micromotor to airotor, phantom head to patients head …. Morter pestle in PCO to amalgamator in clinics. So many things have changed. But there is one thing that been the same since then.
- That’s nothing but … CAVITY PREPARATION
- A very good morning to one and all. I parikshit harnoor, final yr BDS is here to present my seminar on STEPS IN CAVITY PREPARATION FOR CLASS 1 RESTORATIONS