
Recommended
Recommended
More Related Content
What's hot
What's hot (20)
Similar to https://www.slideshare.net/lovetshering/suture-materials-and-suturing-techniques
Similar to https://www.slideshare.net/lovetshering/suture-materials-and-suturing-techniques (20)
Recently uploaded
Recently uploaded (20)
https://www.slideshare.net/lovetshering/suture-materials-and-suturing-techniques
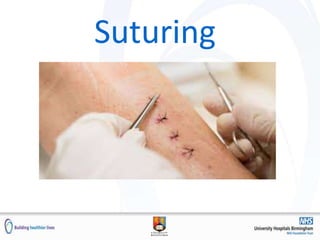
- 1. Suturing
- 2. Learning Outcomes By the end of the session you will be able to: • Discuss the stages of wound healing • Identify indications and contraindications • Understand the different suture materials available • Understand the technique for insertion of local anaesthetic • Be familiar with two techniques for suturing
- 3. Protocols and Competency • Guides and protects practice • Supports update of knowledge • Act within your limitations • Supervised Practice must be documented in your clinical procedural passport until graduation • Keep clinical procedural passport in your portfolio as evidence of clinical supervision and practice
- 4. Wound closure • The aim of effective wound care is to achieve healing without infection, scarring and deformity • Determining mechanism of injury is critical to assessing a wound and how it should be managed • Aesthetic closure is based on knowledge of healing mechanisms and skin anatomy • Appropriate suture material and wound closure technique also helps ensure optimal healing
- 5. Wound Healing Three sequential but overlapping phases of wound healing have been identified: • Inflammation – occurs in the first 2-5 days – Initial haemostasis of the wound • Proliferation – Occurs in the first 12 hours to 3 weeks – Epithelialisation has been shown to occur within the first 12-24 hours, further tissue formation occurs over the next 10-14 days • Remodelling – Occurs in the first 6 to 12 months – The wound contracts and tensile strength is achieved as new collagen forms
- 6. Indications for Suturing • Wounds/lacerations not suitable for alternative closure with glue or steri strips • Securing lines and drains
- 7. Contraindications • Foreign bodies are present • Wounds older than 8 hours • Poor blood supply • Grossly contaminated wounds including animal or human bites • Surgical debridement necessary • Larger, deeper wounds or damage to underlying structures
- 8. Preparing the patient • Confirm patient identity and allergies • Consent and explain procedure • Indication • Acquire a through history including mechanism of injury • Inspect the wound and assess for analgesia
- 9. Choice of Suture Characteristics of sutures include: • Absorbable/non absorbable • Memory • Tensile strength • Elasticity • Knot strength • Tissue reaction • Monofilament/multifilament • Suture size of repair
- 10. Duration of Sutures Size Uses Recommended duration in days ≤7/0 Ophthalmology, microsurgery Usually absorbable 6/0 Face, blood vessels Face 5-7 5/0 Face, neck, hand-dorsum, blood vessels Face, Neck 5-7 4/0 Mucosa, scalp, neck, trunk, hands, limbs, feet, tendons, blood vessels Hand-palm 5-7. Scalp 5-7. Arms 7. Legs 7 Back 7-10. Foot-sole 10-14 3/0 Limbs, trunk, gut, blood vessels Scalp 5-7. Arms 7, Legs 7. Back 7-10 2/0 Fascia, viscera, blood vessels Usually absorbable > 0 Abdominal wall closure, fascia, drain sites, arterial lines, orthopaedic surgery Usually to secure drain or arterial line, duration dependent on drain or line
- 11. Local Anaesthetic Drug Max dose Side effects Lidocaine 1% (Assess effectiveness every 3 minutes) 200mg 20mls 1% (max 5ml at a time) Arrhythmia CNS toxicity Refer to the British National Formulary (BNF) for further information • Anaesthetic requirement is subjective • Lidocaine takes approximately lidocaine with adrenaline can be useful to reduce bleeding 5-10 minutes to take effect • Lidocaine with adrenaline can be useful to reduce bleeding but should not be used on extremities • Can be inserted via direct wound infiltration or parallel margin infiltration
- 12. Direct Wound Infiltration • Less painful than penetrating through the skin • Insert the needle into the open wound directly into the subcutaneous tissue • If necessary gently hold the tissue; minimal handling essential to prevent damage • Depress the plunger to deposit small quantity of anaesthetic into the wound • Direct infiltration is achieved with multiple adjacent deposits of the anaesthetic solution along the length of the wound
- 13. Parallel Margin Infiltration • Appropriate for contaminated wounds • Ensure skin has been cleaned prior to infiltration • Infiltrate the anaesthetic parallel to the wound into the dermis (pierce the skin around the wound) • At one end of the wound insert the needle through the skin immediately into the dermis • A tracking technique can be used; advance needle to hub draw back plunger to ensure not in a vessel • As the needle is withdrawn gently push anaesthetic into the tissue until length of wound anaesthetised
- 14. Suture placement and Knot Formation • When placing a suture- the operator rotates their wrist to allow the needle to enter the skin at 90 degrees and 0.5cm form the wound edge • The needle passes to the base of the wound prior to exiting the centre of the wound • Second bite placed at an equal depth • A throw refers to the rotation of the suture material around the needle holder • Number of throws depends on risk of suture material/knot slippage • More resistance is created by increasing the initial throws • Usually a know its made up of a minimum of 5 throws e.g. 2,2,1
- 15. Simple Interrupted Suture • Start in the middle of the wound, place sutures at 0.5cm intervals until wound is approximated without tension • For each suture, grasp and evert the skin edge (gently with the non-dominant hand) • Pronate the dominant hand so that the needle will pierce perpendicular to the skin and drive the needle through the skin by supinating the hand before picking up the needle (2/3 from the tip) with the needle holders. A no touch needle technique is important, reducing sharps injury and infection risk • Tie off
- 16. Vertical mattress suture • For closure of deep wounds to minimise dead space • Helps to evert the wound edges for optimal wound healing • Ideal for wounds that are not deep enough for internal sutures but require deep/superficial closure
- 17. Alternative methods of closure • Steri strips – Sterile adhesive tapes – Available in different widths – Frequently used with subcuticular sutures – Should not be used in areas of tension – Can be used on ‘V’ flap lacerations • Surgical glue – For simple wounds – Can be applied rapidly – Relativley painless – Dressing not required – Do not use on contaminated wounds
- 18. Post suture care • Give Tetanus vaccination if required • Cover with appropriate dressing • Give patient advice
- 19. Any Questions?
- 20. Learning Outcomes You are now able to: • Discuss the stages of wound healing • Identify indications and contraindications • Understand the different suture materials available • Understand the technique for insertion of local anaesthetic • Be familiar with two techniques for suturing