
Recommended
More Related Content
What's hot
What's hot (20)
Viewers also liked
Similar to Automate Access Tasks with Macros & Navigation Forms
Similar to Automate Access Tasks with Macros & Navigation Forms (20)
Recently uploaded
Recently uploaded (20)
Automate Access Tasks with Macros & Navigation Forms
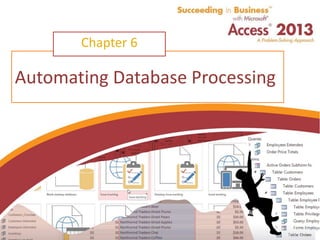
- 1. Succeeding in Business with Microsoft Access 2013 Automating Database Processing Chapter 6
- 2. Succeeding in Business with Microsoft Access 2013 Chapter Introduction • Design and implement user-friendly menu – Called navigation form • Macros – Automate repetitive tasks – Add functionality to reports and forms 2
- 3. Succeeding in Business with Microsoft Access 2013 Tools Covered in This Chapter • Access Options • Action Catalog • AutoExec macro • AutoKeys • Breakpoints • Events • Macros 3
- 4. Succeeding in Business with Microsoft Access 2013 Tools Covered in This Chapter (cont’d.) • Macro groups • Macro security • Navigation Forms • Splash screen • Trust Center • Visual Basic for Applications (VBA) 4
- 5. Succeeding in Business with Microsoft Access 2013 Level 1 Objectives: Automating Tasks with Navigation Forms and Macros • Create a well-designed navigation form to provide a user interface for a database • Automate tasks by creating basic macros • Specify what happens when a database opens 5
- 6. Succeeding in Business with Microsoft Access 2013 Understanding Navigation Forms • Navigation Form – Special kind of form – Appears when database opened – Makes database navigation similar to a web site • Main navigation form and subform control automatically built in 6
- 7. Succeeding in Business with Microsoft Access 2013 Understanding Navigation Forms (cont’d.) • Can add buttons to main navigation form to work with – Tables – Forms – Queries – Reports • Drag and drop object to form and create tab – Selecting tab allows instant view of the objects • Appear in hierarchical format 7
- 8. Succeeding in Business with Microsoft Access 2013 8
- 9. Succeeding in Business with Microsoft Access 2013 Designing Navigation Forms • Main navigation form serves as menu for users when database is opened • Review objects, plan categories to organize the objects on tabs • Control user access to tables • Sketch a design for the navigation form 9
- 10. Succeeding in Business with Microsoft Access 2013 Creating Navigation Forms • Create lower level of the hierarchy first – Create tabs by drag and drop of object onto form • Then create navigation form to be used as main menu • Click Navigation button in Forms group of CREATE tab – Select tab layout – Change title and change format, if necessary – Drag forms from Navigation Pane to the [Add New] tab – Use Layout view and Form Selector button to change form location or size • Repeat until all needed forms are on the navigation form 10
- 11. Succeeding in Business with Microsoft Access 2013 Creating Navigation Forms (cont’d.) • Preview all forms in Form View – Test to ensure working correctly • Create forms for reports as created for forms – Preview and test all tabs to ensure working correctly • Create main form to provide easy navigation through database • Last item on main form should be a button to close the database 11
- 12. Succeeding in Business with Microsoft Access 2013 Formatting a Main Menu • Steps to changing the format of a main menu – Open the navigation form in Design view – Change formatting elements • Color • Labels • Images • Lines – To change size and position properties, double click Form Selector button and change entries on form’s Property Sheet 12
- 13. Succeeding in Business with Microsoft Access 2013 Understanding Basic Macros • Macro – Action or series of actions – Save time and ensure accuracy – Automate repetitive tasks – Composed of series of actions organized in sequence in which they should be performed • Create macro – Using Macro window 13
- 14. Succeeding in Business with Microsoft Access 2013 14
- 15. Succeeding in Business with Microsoft Access 2013 Creating a Macro • Create Access macro in Macro window • Select the CREATE tab, and then click the Macro button in the Macro & Code group • Action catalog – Select features wanted – Actions to be performed – Click the Add New Action list arrow in the Macro Builder – Scroll through list to action you want 15
- 16. Succeeding in Business with Microsoft Access 2013 Creating a Macro (cont’d.) • Action arguments – Provide additional information for performing macro action – Arguments needed vary depending on selected action chosen • Save macro with descriptive name, using mcr prefix 16
- 17. Succeeding in Business with Microsoft Access 2013 Running a Macro • Three ways to run a macro: – In MACRO TOOLS DESIGN tab, click the Run button in the Tools group – On DATABASE TOOLS Tab, click the Run Macro button in the Macro group • Select the macro in the Run Macro dialog box, click OK – In the Navigation Pane, click Macros, right-click the macro name, and then click Run 17
- 18. Succeeding in Business with Microsoft Access 2013 Editing a Macro • Use Macro Builder to edit • Rearrange order of actions – Move up or Move down arrow or drag action line to new position • Insert new action between two existing actions – Click Add New Action and select the action – Move or drag the new action between the two other actions • Delete action – Click action then click the Delete button 18
- 19. Succeeding in Business with Microsoft Access 2013 Setting Start-up Options • Start-up options – Access performs when database opens • Set options using Access Options feature • Bypass Start-up Options – Press and hold down Shift key when opening database 19
- 20. Succeeding in Business with Microsoft Access 2013 Specifying Current Database Options • Options – Display Form – Display Navigation pane – Allow Full Menus 20
- 21. Succeeding in Business with Microsoft Access 2013 21 Figure 6.21: Access Options dialog box with options for the current database
- 22. Succeeding in Business with Microsoft Access 2013 Creating a Splash Screen • Splash screen – Displays when database opens – Contains • Logo • Text such as contact information • Can only display splash screen or Navigation form automatically 22
- 23. Succeeding in Business with Microsoft Access 2013 Creating a Splash Screen (cont’d.) • AutoExec – Special macro – Runs when database opens – Before Access Options dialog box options – Can use to display splash screen • Create splash screen form in Design view 23
- 24. Succeeding in Business with Microsoft Access 2013 Creating an AutoExec Macro • Click the Macro button in the Macros & Code group on the CREATE tab • In the Macro Builder, select the actions you want the macro to perform • Select or enter the appropriate arguments • Save the macro using the name AutoExec 24
- 25. Succeeding in Business with Microsoft Access 2013 Level 1 Summary • Navigation Form – Special kind of form – Appears when database opened • Macro – Use to automate repeated actions • Access Options dialog box • Splash screen 25
- 26. Succeeding in Business with Microsoft Access 2013 Level 2 Objectives: Creating Advanced Macros • Consolidate automated tasks by creating a macro group • Specify conditions and events for macros • Troubleshoot macros 26
- 27. Succeeding in Business with Microsoft Access 2013 Understanding Macro Groups • Macro group – Two or more macros placed in same macro file – Consolidate related macros – Manage large numbers of macros • Only group name displayed as macro object in Navigation pane 27
- 28. Succeeding in Business with Microsoft Access 2013 Creating a Macro Group • Logical to organize similar macros within group • To create: – Click CREATE tab on the ribbon, click Macro button in the Macros & Code group – Click the Action Catalog button in the Show/Hide group on the DESIGN tab – Add the Submacro Action to the Macro Builder – Enter unique name in the Submacro box – Click Add New Action arrow and select an action, select or enter the arguments – Repeat for each macro you want in group – Save the macro group using mcr prefix 28
- 29. Succeeding in Business with Microsoft Access 2013 Running the Macros in a Macro Group • Clicking Run Button on the DESIGN tab runs only the first macro in the group • Run particular macro within group – Click the Run Macro button in the Macro group on the DATABASE TOOLS tab – Select the list arrow to choose the macro name – Click the macro name – Click OK 29
- 30. Succeeding in Business with Microsoft Access 2013 Assigning AutoKeys to Macros in a Macro Group • AutoKeys macro group – Assign macro to key or key combination • Type key or key combination • Use special notation – ^ for CTRL – + for Shift • Uses subset of SendKeys command – Built-in commands to send keystrokes to Access databases • Save group as AutoKeys 30
- 31. Succeeding in Business with Microsoft Access 2013 31
- 32. Succeeding in Business with Microsoft Access 2013 Creating the Navigation Form to Run Macros Using Command buttons • Command button executes a series of actions • Use a command button to run a macro – Create the macro that specifies the actions you want to perform – Add a command button, assigning the macro 32
- 33. Succeeding in Business with Microsoft Access 2013 Assigning a Macro to a Command Button Control • Click the Button control in the Controls group on the DESIGN tab • Click in form where button is to be placed – Command Button Wizard starts • Select Miscellaneous category and the Run Macro action • Select from available macros – Repeat until all desired buttons are on form – Save form 33
- 34. Succeeding in Business with Microsoft Access 2013 Specifying Conditions and Events for Macros • Specify conditions for performing macro actions • Associate macro with controls • Event-driven programming – Running macro when user interacts with object • Event – State, condition, or occurrence that Access recognizes • Event property – Specifies how object responds when event occurs 34
- 35. Succeeding in Business with Microsoft Access 2013 Specifying Where Conditions in a Macro • Where condition argument • Refer to controls on form that are not currently active – Use control’s complete name – Format • [control]![objectName]![controlName] 35
- 36. Succeeding in Business with Microsoft Access 2013 Troubleshooting Macros • Macros containing arguments – Especially error prone • Error types – Syntax error – Logic error – Run-time error • Troubleshooting tools – Print macro code – Single stepping through execution of macro – Use Visual Basic Editor 36
- 37. Succeeding in Business with Microsoft Access 2013 Printing Macros • On DATABASE TOOLS tab, click the Database Documenter button – The Documenter dialog box opens – Click the Macros tab, select one or more macros to print – Click the Options button to select which details you want to print • Properties, actions and arguments, permissions – Open report in Print Preview; print 37
- 38. Succeeding in Business with Microsoft Access 2013 Single Stepping a Macro • In the Macro design window, select MACRO TOOLS DESIGN tab – Click the Single Step button – Click the Run button in the Tools group – Macro Single Step dialog box opens; Access performs the first action in the macro – Click the Step button to execute the next action • Click Continue to stop single stepping and resume normal operation of the macro • Click the Stop All Macros button to stop running 38
- 39. Succeeding in Business with Microsoft Access 2013 Setting Breakpoints • Breakpoint – Code inserted in macro – Signals where to stop macro • Examine values of actions, controls, and arguments macro using • Open macro in the Microsoft Visual Basic for Applications window – Shows macro as it appears in VBA code – Examine details of macro code in VBA window 39
- 40. Succeeding in Business with Microsoft Access 2013 Setting Breakpoints (cont’d.) • Immediate pane – Displays current value of controls and arguments – Display and evaluate using ? Operator 40
- 41. Succeeding in Business with Microsoft Access 2013 Level 2 Summary • Macro group • Conditions for macros • Assign macro to buttons • Debug macros 41
- 42. Succeeding in Business with Microsoft Access 2013 Level 3 Objectives: Macro Conditions • Assign a macro to an object event • Run a macro when a form opens or a report prints • Use a macro to validate data 42
- 43. Succeeding in Business with Microsoft Access 2013 Exploring Macro Conditions • Macro conditions – Logical expressions that result in true or false answer – Depending on outcome • Macro can perform one set of actions or another • Select a macro that contains an If condition – Drag the program flow action to Macro Builder • Set condition to test 43
- 44. Succeeding in Business with Microsoft Access 2013 Exploring Macro Conditions (cont’d.) • If condition true – Use SetValue action – Two arguments: Item and Expression • If condition false – Use Else If condition – Provides alternate action to perform 44
- 45. Succeeding in Business with Microsoft Access 2013 Assigning a Macro to an Object Event • Assign macro to object – By specifying macro name in event property of object • Event categories – Report – Section 45
- 46. Succeeding in Business with Microsoft Access 2013 46 Table 6.4: Report events Table 6.5: Section events
- 47. Succeeding in Business with Microsoft Access 2013 Using Message Boxes with Forms • Form events can also trigger macros • Use to – Validate data – Set values – Navigate between forms – Filter, find, and print records 47
- 48. Succeeding in Business with Microsoft Access 2013 48
- 49. Succeeding in Business with Microsoft Access 2013 Using Message Boxes with Forms (cont’d.) • MessageBox command • Opens message box – Displays warning or informational message – MessageBox(“Message”, Sum of button and icon values, “Title”) – Returns value depending on which button clicked – Create condition that checks to see which button users click 49
- 50. Succeeding in Business with Microsoft Access 2013 Using Message Boxes with Reports • When conditions in macro references name of control from source – Source must be open when condition tested – Can hide window while macro tests condition • MessageBox action – Opens message box and displays warning or informational message – Similar to using MessageBox command 50
- 51. Succeeding in Business with Microsoft Access 2013 Using Message Boxes with Reports (cont’d.) • MessageBox action arguments – Message – Beep – Type – Title 51
- 52. Succeeding in Business with Microsoft Access 2013 Validating Data with Macros • Validation field properties have limits • Validate data using more than one rule and more than one validation message – Create macro • Domain aggregate functions – Calculate statistics for set of records (recordset) or domain, from table or query • DCount function – DCount(expression, table or query, condition) 52
- 53. Succeeding in Business with Microsoft Access 2013 53
- 54. Succeeding in Business with Microsoft Access 2013 Level 3 Summary • Conditional expressions in macros • Assign macros to events • Message boxes – MessageBox command – MessageBox action • Validate data with macros 54
- 55. Succeeding in Business with Microsoft Access 2013 Chapter Summary • Navigation Form – Provides main menu for Access application • Macro – Automates repetitive tasks – Can use conditional expressions – Associate with command buttons or other controls • Troubleshooting – Find errors in macros by stepping though each statement 55