SlideShare a Scribd company logo
1 of 20
Download to read offline
New Mexico State University is an equal opportunity/affirmative action employer and educator. Doña Ana County, NMSU and USDA cooperating.!
Contents: Page
• Plant-of-the-Month 1-4
…Description 1-2
…History 2
…Habitat, Culture, History, Wildlife, Pests 2
& Propagation
…Growing Instructions & Tips 3
…Plant Facts 3
…Article References 4
• March Lunch & Learn Presentation 4
• Got Ideas? (For MG Magazine) 4
• March Honey-Do List 5-6
• UTEP FloraFest: April 27-28 7
• March MG Birthdays 7
• Thanks for the Goodies 7
• Timeline for April 2013 Magazine Info 7
• MG Contact Information: Keep Current 7
• Species Tulips 8-9
• Hybrid Tulip: Did You Know? 9
• Species vs. Hybrid Tulips 10-11
• Species Tulips Facts 11
• Tomatoes
…Topsy Turvy Tomatoes & Peppers 12-13
…Planning & Planting Outstanding Harvest 13
…Super-Sturdy Tomato Cage 14
• When to Plant Vegetable Seed Charts 15
…Seed Starter Chart by Temperature
…Days To Germinate According to Temperature
• Invasives: Oxeye Daisy 16
• MG Intern Profiles: Gail & David Ross 17 17
• Book: Lavender Lover’s Handbook 17
• MG Monthly Meeting Minutes 18-19
• Educational Program: Survey Results 19
• Hotline Assignments 20
!
!!!!!
!
Doña Ana County Master Gardener Monthly Magazine
• Doña Ana County
• U.S. Department of Agriculture
• NMSU College of Agricultural, Consumer and
Environmental Sciences!
Doña Ana County Cooperative Extension Office
530 North Church Street, Las Cruces, NM 88001
Phone: (575) 525-6649 Fax: (575) 525-6652
MG Program Administrator: Jeff Anderson
Editor: Ann Shine-Ring, Certified Master Gardener
!Magazines can be downloaded at the NMSU website: http://aces.nmsu.edu/damg
! MARCH 2013 ! Vol. 14, Issue 3
Plant-of-the-Month
Master Gardener Hotline Client Data
(February 1 to February 28, 2013)
# Total Contacts 21 Geographic Area Subject of Inquiry
# Telephone Calls 21 Las Cruces 20 Bio-solids 0 Shrubs 8
# Emails 0 Mesilla Park 1 Disease 1 Soils 2
# Issues Addressed 49 Fertilizer 7 Trees 9
Insects 2 Vegetables 4
Irrigation/Water 7 Weeds 2
Lawns 2 Misc. 1
Pruning 4 (Houseplant)
Thank you to Certified Master Gardener Joan Lane for collecting this data.
!
APACHE PLUME (Fallugia paradoxa)
Apache Plume is a southwest native plant of the Rose Family (Rosaceae) that is found
in abundance throughout the Chihuahuan desert, growing wild in arroyos and dry rocky
slopes in pinyon-juniper woodland at elevations of 3,000-8,000 feet. It’s a small deciduous
to semi-evergreen shrub that has the ability to grow throughout the driest areas of the
Southwest—it can be found growing in the four southwestern deserts of the United States:
Mojave, Chihuahuan, Great Basin, and Sonoran with a range from southeastern California
and southern Nevada, to southern Colorado, west Texas, New Mexico and Arizona, to
northern Mexico. Named after famed 19th Century Italian botanist, Abbot Fallugi.
Apache Plume’s eye-catching beauty makes it a plant that would be very desirable for
anyone seeking the look of the southwest in their landscaping. Ideal in a xeriscape setting,
Apache Plume has a lacy, fine texture. It is hardy to about 7,500 to 8,000 feet in elevation.
Apache Plume’s stems are multi-branched and are light colored with flaky, shredded
bark. Flowering occurs between April and June, bringing little white flowers with yellow
centers. Small gray leaves, about 3/4" long cover this plant. Its fruit has long feathery
plumes that can be a white or pink and grow up to 2" long. Apache Plume leaves are very
small, and may remain on the shrub through mild winters.
Article Continues on Page 2
Doña Ana County Master Gardener Monthly Magazine—March 2013 Page 2
Apache Plume—Continued from Front Page
This shrub can grow up to 6 feet tall and wide and usually requires
no special caring other than being watered occasionally. Under ideal
conditions this plant can reach 8 feet in height and width.
Apache Plume (shown above) bears small, lobed leaves, which are
deep green on top, and rusty beneath. It bears flowers resembling
single white roses, which bloom in spring and summer.
Apache Plume is sometimes confused with the Cliffrose, Cowania
mexicana, (shown below) but can be distinguished by its more shrub-
like appearance, having numerous branches at the base.
Cliffrose (Cowania mexicana)
Apache Plume is drought-tolerant when well established and also
very tolerant of reflected heat. It should be planted only in soil that
drains well and should not be over watered. Don't plant an Apache
plume in or adjacent to irrigated lawns. Instead, plant it in dry spots with
south or west exposures.
Apache Plume is normally semi-evergreen in the Las Cruces area,
although very harsh winter conditions will cause it to drop most of its
leaves. It blooms in the spring and sometimes again in the fall, with 2
inch white rose-like flowers. Plants prefer full sun, are extremely
drought-tolerant, and are hardy to minus 0°F degrees.
The Apache Plume gets its name from the 1-2" long feathery styles
that persist after the petals of the flowers have dropped. When the fruit
has matured, wind carries the seeds by the styles to new locations.
Culture: This native shrub can be pruned into a hedge, although its
natural form is tame and well shaped. Apache Plume is also excellent
for erosion control due to its spreading root system. It is dense and fast
growing, spreading by woody rhizomes, so it will also form an informal
hedge relatively quickly. In good garden soil with organic matter it looks
rangy and produces fewer flowers. Although it naturally forms a
rounded shape, it can look somewhat messy and benefits from
selective pruning once or twice a year, or being cut back to the ground
every few years.
The name Apache Plume is derived from its feathery, delicate-
looking fruits or seeds, which appear after the flowers starting in
the summer. These "plumes" are pinkish-purple in color, about 2
1/2" in diameter grow from a seed-like base at the tips of tangled,
slender branches.
History: This plant's common name is derived from the fact that it
resembled Apache war bonnets. Tewa and other native peoples
used the stem/branches of Apache Plumes to make brooms and
arrow shafts. The Tewa used an infusion of leaves as a shampoo
to promote the growth of hair. The Navajo used Apache Plume as
a tool of witchcraft to cause insanity. They also used the leaves as
an emetic (to cause vomiting) in various ceremonies.
Best Habitat: The Apache Plume prefers full sun, is extremely
drought tolerant, and is hardy to 0°F degrees. It prefers well-
drained soil, although it will tolerate many different types of soil. It
looks best in a landscape if given deep monthly watering through
the hottest time of year once it is established. The regular deep
watering will promote faster growth, fuller foliage and more flowers,
although it actually will live without any extra water (except for
natural rainfall) once established.
Wildlife: The flowers of Apache Plume attract bees and
butterflies, the plants shelter wildlife, and the seeds attract birds.
Pests: None known
Propagation:
Germinates readily from fresh, untreated seed that has not been
allowed to dry out. Seed that has dried must be stratified. Easily
propagated from layers and separation of suckers from horizontal
roots.
…Seed Collection: Collect from August to November when pink
styles of fruits turn white and seed is easily stripped or shaken from
tree. Air-dry seeds and store in cloth bags in dry, well-ventilated
place.
…Seed Treatment: Stratify 30 days at 41 degrees. However, no
treatment may give satisfactory results.
To grow plants from seeds, collect them in the fall and chill them
for 3 months before sowing in the early spring. Sow seeds anytime
or start from softwood cuttings, layering or root suckers.
A better choice, however, is to buy mature plants in 1 gallon to 5
gallon containers at local nurseries in the Southwest where they
are usually found in the nursery’s selection of water-wise plants.
Article Continues on Page 3
Doña Ana County Master Gardener Monthly Magazine—March 2013 Page 3
Apache Plume—Continued from Page 2
Growing Instructions
1) Plant Apache Plume in a south or west portion of your landscape
that receives the warmest temperatures. Choose a spot that
receives full, direct sunlight and contains extremely well-draining,
sandy soil. Space the plant six feet away from other vegetation.
2) Water young, newly planted Apache Plumes once a week. Flood the
soil surrounding the shrub with a garden hose. Reduce supple-
mental watering once the shrub becomes established and starts to
produce new foliage and stems. Water mature, established shrubs
once a month during hot summer months and periods of no rainfall
3) Fertilize the Apache Plume in the early spring when the plant is no
longer dormant and new leaves begin to emerge. Apply a 10-10-10
(N-P-K) slow-release fertilizer at a rate of 1 tablespoon per square
foot of soil. Spread the fertilizer evenly in a ring around the shrub,
just outside the perimeter of the plant's branches. Mix the fertilizer
granules into the top 1 to 3 inches of soil using a rake. Water the
area thoroughly to activate the fertilizer.
4) Prune the Apache Plume in the late winter while it is still dormant.
Cut out any broken, damaged or diseased stems using a pair of
pruning shears. Make each cut 1/4 inch above a growth node or
dormant bud. Thin the plant by no more than one-third, removing the
oldest stems first.
5) Trim the shrub in the early summer after it flowers. Clip back any
excessive long or straggly stems to shape the plant and keep it
looking presentable.
Growing Tips/Transplanting: The best time to plant most native
shrubs and trees is in the fall, although early spring is the next best
choice. It is very difficult to transplant a mature Apache Plume plant
from its natural habitat in the desert. Digging up the plant will usually kill
it, mainly due to the fact that it separates the plant from its massive root
system. Since the Apache Plume spreads by rhizomes (spreading
stems from underground) a mature plant usually depends on this
spreading root system for survival. However, root sprouts can be
collected with rhizomes in early spring, with better success.
Your best choice, however, is to buy a mature Apache Plume plant at
your local nursery. Nursery stock of Apache Plume in 1 gallon to 5
gallon containers are readily available at your favorite local nursery, and
will transplant successfully into your garden.
Summary: Apache Plume one of the showiest of the Southwestern
native shrubs. It really stands out when the pink, silky-plumed seed
heads develop and cover the tips of the branches for many months. As
a result, Apache plume has become a favorite xeriscape plant in the
Southwest."
APACHE PLUME FACTS
(Fallugia paradoxa)
Botanical name: Fallugia paradoxa
Family Name: Rosaceae
Habit: Semi-evergreen, medium shrub; loosely
branched
Origin: Rocky slopes, open woods & dry washes of
central Texas, New Mexico, Colorado and
Southern California.
Flowers: Five-petaled round white flowers 1”-2” wide with
yellow centers appear from April through June
through the summer. Seedheads are pinkish,
fluffy and long lasting.
Foliage: Aromatic—smells like an attar (i.e. fragrant
essential oil) of roses crossed with quinine.
Heat Tolerance: Plant in a place where plant will get full sun.
Fruit: Feathery achene
Hardiness: Hardy to 0°F; USDA Zones 6a to 10a; very
tolerant of drought, heat, wind and poor soil.
Blooming: For better flowering, some afternoon shade,
especially in desert heat; blooms continually;
flowers on new spring growth
Soil and Water: Requires no irrigation once established; needs
gritty and well-drained soil; does poorly in heavy
clay; extremely drought-tolerant and tolerant to
reflected sun; occasional watering helps
flowering, but watch for root rot.
Fertilization: In spring before new growth, use general
fertilizer.
Pruning: Prune 1-2 times a year or cut to ground if it has
too much dead wood. Usually, pruning is not
needed.
Wildlife: Provides shelter/cover for small mammals and
ground-dwelling birds. Flowers used by
butterflies and bees; cover for packrat middens.
Comments: Fibrous root system--easy to transplant. Takes
a few years for shrubs to root out and develop
some character.
Disadvantages: Tendency to sucker and can be slow to get
established.
Uses: Good companion plant to Yucca glauca
(Soapweed) & Callirhoe involucrate (WineCup)
Doña Ana County Master Gardener Monthly Magazine—March 2013 Page 4
APACHE PLUME
−Article References−
Apache Plume (Fallugia paradoxa) on Desert USA at link:
http://www.desertusa.com/mag98/aug/papr/du_aplume.html
Apache Plume (Fallugia paradoxa) on EasyBloom.com at link:
http://www.easybloom.com/plantlibrary/plant/apache-plume
Apache Plume on Celebrating Wildflowers, USDA Forest Service, at link:
http://www.fs.fed.us/wildflowers/plant-of-the-
week/fallugia_paradoxa.shtml
Apache Plume on NMSU Low Water Plants at link:
http://aces.nmsu.edu/pes/lowwaterplants/apache-plume.html
Apache Plume on Plant Talk Colorado at link:
http://www.ext.colostate.edu/ptlk/1742.html
Apache Plume Photos on SW Colorado Wild Flowers.com at link:
http://www.swcoloradowildflowers.com/white%20enlarged%20photo%2
0pages/fallugia%20paradoxa.htm
Apache Plume, Ponil on Texas Native Plants Database at link:
http://aggie-
horticulture.tamu.edu/ornamentals/nativeshrubs/fallugiaparadox.htm
Apache Plume: Fact Sheet on Intermountain Native Plant Growers Assn.
at link: http://www.fs.fed.us/wildflowers/plant-of-the-
week/fallugia_paradoxa.shtml
Fallugia paradoxa on Sunset Magazine at link:
http://plantfinder.sunset.com/searchPlants.action?srch=apache+plume&
input.x=20&input.y=7
Fallugia paradoxa on Texas Native Plants Database, Lady Bird Johnson
Wildflower Center, University of Texas at Austin at link:
http://www.wildflower.org/gallery/species.php?id_plant=FAPA
How To Grow Apache Plume on HomeGuides.sfgate.com at link:
http://homeguides.sfgate.com/grow-apache-plume-38001.html
Landscaping with Native Plants of the Southwest by George Oxford Miller,
Voyageur Press, 2007
Native Gardens for Dry Climates by Sally & Andy Wasowski, Clarkson
Potter Publishers, 1995
Plant of the Month (March 1998) by Kerry Krumrine, Co-Owner of J & K
Growers, Inc. at link:
http://weather.nmsu.edu/nmcrops/ornamentals/apache.htm
Plants We Love: Apache Plume on Horticulture at link:
http://www.hortmag.com/plants/plants-we-love/apacheplume
Xeriscape Plant Guide by Denver Water, American Waterworks
Association, Fulcrum Press, 1996
BRANIGAN MEMORIAL LIBRARY
“LUNCH & LEARN” PRESENTATION
Date: Thursday, March 21, 2013
Time: 12:00-1:00 p.m.
Place: Branigan Memorial Library
Location: Roadrunner Meeting Room
Don't forget to bring your lunch!
Topic: STARTING SEEDS INDOORS
Speaker: Dave Turner, El Paso Master Gardener
Summary: Learn how to get a jump-start on your
summer veggie gardening by starting
seeds indoors.
Information provided by Sylvia Hacker,
Certified Master Gardener
GOT IDEAS?
If you have a gardening-related article or idea about
a Plant-of-the-Month, a vegetable, tree or weed to
share for our MG Magazine, please send me a link or
email me about your idea. Anyone can submit
information or an article for inclusion in our monthly
magazine. FYI, I do try to put in information that is
seasonal in nature to insure that MGs and others get
the resources on a timely basis.
Email: asring@powerc.net
Mobile: (575) 640.7177
Doña Ana County Master Gardener Monthly Magazine—March 2013 Page 5
Honey-Do List for March 2013
GENERAL: We are all eager to get outside and start planting but remember our average last freeze date is between April 1 and April 20!
Be prepared to protect young plants from the desiccating winds and cold nights of March. Row covers, old blankets, and walls of water
come to mind. Check your irrigation systems and add more drip emitters if needed to water under the drip line of plants. Irrigate
established shrubs and trees, preferably to a depth of 2 feet. Use a soil probe to determine depth.
ORNAMENTALS
• Plant cannas, crinum, dahlia transplants, verbena, gaillardia, gazania, marigold seeds, Mexican and
Maximilian sunflower, aster, coreopsis, statice, petunia and zinnia.
• Plant hollyhocks now through May.
• Divide and replant perennials such as chrysanthemum, daylily, and Shasta daisy.
• Seed of warm-season annuals that were planted in February should be germinated, and the small
seedlings will be growing quickly. This regularly to keep the plants from crowding each other.
• Plant Carolina Jessamine, Virginia creeper, trumpet vines, silver lace vine, and Lady Banks roses.
• After the last day of freezing weather, prune frost-damaged foliage and branches.
FRUIT, NUT, CITRUS & SHADE TREES
• Begin mid-month to fertilize established fruit and nut trees. Be careful not to fertilize fruit while it’s
blooming; this can shock the plant, causing blossom drop and subsequent loss of fruit.
• Be careful about spraying fruit trees and other blooming edible plants. Bees and other insects are
working hard to pollinate flowers so there will be a good fruit set.
• As soon as fruit has set on deciduous fruit trees, especially apples, peaches, pears and apricots,
and is about the size of a walnut, begin to thin the fruit.
• Continue to harvest citrus.
• Finish planting bareroot material before mid-month.
• Irrigate established shrubs and trees, preferably to a depth of 2 feet. Use a soil probe to determine
depth.
• After the last day of freezing weather, prune frost-damaged foliage and branches.
VEGETABLES, FRUIT & HERBS
• Finish planting Cole crops, radishes, parsley, lettuces, kohlrabi, and leafy greens.
• Plant garlic, beets, Brussels sprouts, and Chinese cabbage.
• Late March, plant tomatoes, eggplant, peppers, summer squash, sweet corn, and ‘New Zealand’ summer
spinach.
• Cut back frost-damaged perennials herbs such as mint and sage, then fertilize and water.
• Plant strawberries and grape vines. Grapes begin to grow rapidly at this time of year. Thin out extra
shoots and tendrils to continue to train the vine to the arbor or trellis.
!
LAWNS / TURF / ORNAMENTAL GRASSES
• If you didn’t fertilize cool-season grass in February, do so now.
• Clean up cool-season ornamental grasses by “combing” with your fingers or a rake. If plant is large and ratty-
looking, cut it back also.
• Scalp warm-season grasses, lower mower height and mow to remove dead leaf tissue. Rake or bag clippings.
Clean air filter often during this process and be sure to wear a dust mask.
• Cut back pampas grass and other warm-season ornamental grasses.
• Take your lawn mower to the shop for a tune up.
Much of our suggested garden task information comes directly from Month-by-Month Gardening in the
Desert Southwest by Mary Irish (2002). We wanted you to know that this is an outstanding gardening
resource book. Also, some of our recommendations come from Southwest Planting Tips by the Month
and the Tucson Gardening Calendar both of which are produced by the Tucson Botanical Gardens.
Another resource used in our Honey-Do List is The Desert Gardener’s Calendar: Your Month-by-Month
Guide by George Brookbank (1999.) Recommendations from Sunset Magazine’s monthly Southwest
Garden Guides are also included.
Doña Ana County Master Gardener Monthly Magazine—March 2013 Page 6
Honey-Do List for March—Continued
CACTI & SUCCULENTS
• Begin to plant warm-season succulents now through May.
• Watch newly planted succulents like agaves and cactus to be sure they are not being sunburned.
Protect the south or west side of these plants with a sunscreen a shade cloth or a light-colored
cloth. Protection can be draped directly on the plant or laid over a frame. Pale-skin or yellowed
patches that appear suddenly on the plant are the first signs of sunburn.!
• Remove dead ocotillo canes. Bend cane gently; if it snaps off, it’s dead. Then make a clean cut
with loppers.!
• Increase watering of warm-season succulents to twice a month. As with most plants, it is better to
water deeply but infrequently.!
• Water winter-dormant succulents only when leaves first show, then begin to water regularly.!
• Prune any frost damage from succulents with a clean cut, dusting the cut with sulfur when
complete. Cut back cholla and prickly pears if they have become too large as they will begin to
grow quickly by the end of the month.
Some of the above recommendations came from the Tucson Botanical Garden’s monthly “calendar of care” for cacti and succulents.!
ROSES
• To encourage larger flowers, remove any side buds that arise out of Hybrid teas. On
shrub roses, Floribunda or Grandiflora roses, remove the center bud of the cluster to
increase flower size.
• Renew a regular fertilization schedule for established roses. Many gardeners fertilize
once a month, but discontinue it during the hottest part of the summer. Roses are
heavy feeders, and those grown in containers or in soils that have not been heavily
amended when the roses where planted, may need more frequent fertilization.
• In late March, fertilize newly planted roses with a mild fertilizer of fish emulsion. Do
not use granular-formulated fertilizers, even if they are geared for roses, until mid-April
when the red-colored new budding begins as it could burn your roses and stunt
blooming.
• Organic fertilizers like alfalfa meal, compost or other formulations for roses that blend many ingredients, work more slowly and can be
applied more frequently.
• Finish up any roses that still need some pruning. Remove all leaves and week crossing, diseased or damaged canes, and cut back the
entire rose plant to approximately 24 inches tall. Leave three to five healthy canes.
• Every 5-7 days, water established roses to a depth of 16”-18”. Remember, it is more important to water deeply than to water often.
• Continue to monitor for aphids and powdery mildew on your roses. Keep the area around your roses free of debris, and mulch heavily to
prevent splashing from any overhead watering.
PESTS
• Keep an eye out for aphids on the new succulent growth of roses, lilacs, and others. Hose them off with a strong jet of water.
• To reduce problems with powdery mildew, water susceptible plants in the early morning. Also, clean leaf litter from under plants. This
will reduce pathogens.
• Flea beetles can attack Mexican evening primrose foliage and tender spring vegetables.
• Look for caterpillars on flowering plants.
It is always important to correctly identify any insect you suspect may have caused damage to your plants. If you do not know what the
insect is, collect one in a plastic bag or small jar and take it to the Doña Ana County Cooperative Extension Office located at 530 N.
Church in Las Cruces (located just north of the Main Post Office downtown.)
MISCELLANEOUS
• Check irrigation systems. Add more dry emitters if needed to water under drip line of plants.
• Spread mulch under and around plants.
• Be prepared to protect young plants from the desiccating winds and cold nights of March. Row covers, old blankets, and walls of water
come to mind.!!
Doña Ana County Master Gardener Monthly Magazine—March 2013 Page 7
MARCH BIRTHDAYS
Russ Boor March 1
Mary Andrews March 8
Linden Ranels March 19
Jeff Anderson March 30
MANY THANKS FOR THE GOODIES
We appreciate your thoughtfulness
March Goodies April Goodies
Bonnie Eisenberg Ann Shine-Ring
Deb Tallent Bonnie Eisenberg
Jill Klann Marjie Snell
The deadline for submitting information for the
April 2013 MG Monthly Magazine will be
Friday, March 29th
Contact Info: Ann Shine-Ring, Editor
asring@powerc.net
(575) 640-7177
MG#CONTACT#INFORMATION#
Be sure your email address is current
so that you will receive important
information throughout the month from
the MG Program.
If you have an update to your email
or contact information, please contact:
Ann Shine-Ring, Editor
asring@powerc.net
(575) 640-7177
!
Doña Ana County Master Gardener Monthly Magazine—March 2013 Page 8
SPECIES TULIPS
Author: Sherri Ribbey, Garden Gate Magazine, April 2013
Whoever said good things come in small packages must have had species tulips in
mind. The photos shown in this article should give you an idea of why it’s worth the
effort to track down some at one of the mail-order sources available—check out
Internet sources too. These wild cousins of hybrids come back year after year without
any fuss. Some will even naturalize, or spread into small colonies. Most bloom early in
spring, opening with daffodils and grape hyacinths. Besides that, these tough little
bulbs are disease-resistant and quite cold hardy.
Species tulips do best with full sun and cold winters. Plant them in the fall where
they’ll get good drainage and a dry summer. That’s not to say they don’t need any
water. If it’s a dry spring, water regularly as soon as the foliage breaks through the soil
then stop as the foliage fades. A few species, such as tarda tulip, crocus tulip and
Florentine tulip, will tolerate extra summer watering. Here are some great species
tulips for your garden.
1. TARDA TULIP Hugging the ground at only 4 to 6 inches tall, Tarda Tulip works
best near a path or patio where you can enjoy it up close. There can be up to eight
flowers growing from one bulb. It blooms later in spring than other species tulips and is
cold-hardy in USDA Zones 3 and 8 and heat-tolerant in AHS Zones 8 to 1.
2. CROCUS TULIP This is a big group of wild tulips. The one shown below on the
left has a yellow center, or base. But there’s another one shown on the right that has a
black base. Both bloom early in spring and grow 4-6 inches tall. They’re cold-hardy in
USDA Zones 4 to 8 and heat-tolerant in AHS Zones 8 to 1.
3. FLORENTINE TULIP Here’s one of the best
species for naturalizing. It spreads both by seed and
stolon, a stem that runs along the ground and roots at
the tip. Florentine Tulip grows 6 to 12 inches tall and is
cold-hardy in USDA Zones 3 to 8 and heat-tolerant in
AHS Zones 8 to 1.
4. TULIPA ORPHANIDEA Whitallii Groups
The flowers of this species tulip pack a surprise.
Buff-colored on the outside, the buds open to a vivid
burnt orange in midspring. Slender stems are 6 to 12
inches tall and planted in groups of five or more make
a big impact. It’s cold-hardy in USDA Zones 4 to 8 and
heat-tolerant in AHS Zones 8 to 1.
5. TULIPA HUMILIS PULCHELLA
Albocaerulea Oculata Group
For such a tiny tulip, the name is a mouthful. It’s
only 6 to 8 inches tall, but the white-and-blue flowers
are so striking you can’t miss them. It’s cold-hardy in
USDA Zones 4 to 8 and heat-tolerant in AHS Zones 8
to 1.
Article Continued on Page 9
Doña Ana County Master Gardener Monthly Magazine—March 2013 Page 9
Species Tulips—Continued from Page 8
6. TURKESTAN TULIP If you have clay soil, this is the species
tulip for you. It tolerates this troublesome situation much better than
others. Clusters of creamy white flowers with yellow centers bloom in
early spring. These bulbs are quite vigorous, growing 6 to 12 inches
tall and producing up to 12 flowers from one bulb. It’s cold-hardy in
USDA Zones 3 to 8 and heat-tolerant in AHS Zones 8 to 1.
7. LADY TULIP Soft yellow flowers brushed with a splash of red sit
on top of 6 to 12 inch stems in midspring. There’s also a white form
with a pink blotch that’s very popular. Both are cold-hardy in USDA
Zones 3 to 8 and heat-tolerant in AHS Zones 8 to 1.
8. KOLPAKOWSKI’S TULIP Each of these bulbs produces a single
flower on its 6 to 12 inch tall stem in early spring. These bulbs do
best when they get very hot, dry soil while they’re dormant in summer
so containers are a great place to grow and keep them.
Kolpakowski’s tulip is cold-hardy in USDA Zones 3 to 8 and heat-
tolerant in AHS Zones 8 to 1.
These wild tulips are perfect for tucking into the nooks and
crannies of your garden. And why not? They’re practically no-care,
come in a wide variety of colors and will fill your garden with color
every spring for years.#
DID YOU KNOW?
Facts About Hybrid Tulips
Source: Birds & Blooms, May 2012
$ The number one tulip color is red.
$ Two countries claim the tulip as their own. The
Turks were the first to have the bulb, but the Dutch
embraced it centuries later.
$ Planting tulips according to their three bloom
times—early,midseason, and late spring—will give
you a longer show.
$ Take your pick—there are more than 3,000 tulip
cultivars to choose from.
$ Most tulips should be planted at least 6 inches
deep. If yours didn’t come up this year, the problem
may have been shallow planting.
$ If you want to force tulips inside or in a pot, first
store them in a cold place for 12 to 16 weeks.
$ The trade in tulips hit a frenzied peak in the 1630’s.
Some traders earned as much as 60,000 florins a
month—about $44,000—selling tulip futures.
$ Carolus Clusius is credited with planting the first
tulip in the Netherlands in 1593. Ever since then,
the Dutch have been associated with the flower.
Doña Ana County Master Gardener Monthly Magazine—March 2013 Page 10
SPECIES vs. HYBRID TULIPS
There are so many hybrid tulips to choose from that it can be very
difficult to choose. But, today your choice is not of the color kind, but
of the specific kind of tulips to plant—hybrid or species. Of course
there are the traditional hybrids we all know and love, with their
stately stems and big, colorful flowers. But then there are special
tulips (as shown above), the ones that remain the way nature
intended them to be. They are less obvious and less familiar but no
less pleasing. These species tulips, also called botanical tulips, are
the parents of the spectacular hybrids that drove the seventeenth-
century Dutch frenzy—what was then termed tulip mania—for buying
single bulbs at enormous sums.
Differences.
There are a few notable differences between hybrid tulips and
species tulips in general. Hybrid tulips are usually pretty flashy and
some have variegation. The next notable difference is in the foliage.
Hybrid tulips have bold, large foliage. These leaves are quite wide
and get quite long. They are thick and hefty too. Whereas species
tulips have finer leaves which are quite a bit shorter and narrower.
Species tulips are different from the hybridized garden tulips,
seen in gardens worldwide, in that they are less widely grown—and
known—than the garden hybrids, and are unlikely to ever outsell or
even approach their level of popularity. However, more and more
species are becoming available each year.
Species tulips are frequently listed under the heading ‘botanical
tulips’, which makes them sound dull or specialized, and probably
difficult to grow. Tulip species are not difficult to grow and they are
certainly not dull.
But the real difference comes between blooms and the lasting
power of hybrid tulips versus species tulips. You do not have to buy
species tulips new every year to guarantee flowers. Plant the bulbs in
the right place and they will re-bloom year after year with colorful
flowers, and, in time, may even increase by themselves to form
sizeable colonies.
Species tulips last only a handful of weeks from early April to early
May, depending on the tulip and on where you live. Species tulips are
a classic choice to tuck into rock gardens. They're also beautiful
when planted in casual drifts (they seem to look unnatural in fussy,
geometric shapes). To extend the delight of species tulips, plant
groups composed of early and late bloomers; for each swath use at
least 25 of the larger bulbs or 50 of the smaller.
Myriad variations in appearance, color, and structure exist
among species tulips, and many interesting ones are
available to the home gardener who makes the effort to seek
them out. While most local nurseries offer mainly those
familiar standard Dutch hybrids, species tulips can be bought
from bulb specialists through the Internet and catalogs and
delivered to you with ease. The phrase "Well, they don't take
much space" is another justification to try just a couple more
every year—if you must have a mania, this is a pretty good
one to have.
Species tulips are smaller in size than their hybrid relatives.
Most grow just 4 to 12 inches in height and do not like the
competition of other plants around them. Species tulips
spread by self-sown seed or stolons. Their foliage is
attractive. Many have foliage, which is mottled or gray to blue
green in color. Species tulips offer more in the way of bloom.
Many have multiple blooms per stem, some have up to seven.
Species tulips require full sun, and well-drained, almost
gravelly soils that drain quickly between rains. When
preparing the site, amend the area several inches wider and
deeper than the bulbs will occupy with sand or gravel.
Planting on a gentle slope or in a raised bed assures good
drainage. Plant the bulbs 5 to 8 inches deep.
If you give them a home they like, species tulips succeed
and can perennialize—they return spring after spring. In fact,
they do so in a wider variety of garden soils than their hybrid
relatives. The bulbs for species tulips should be planted in
autumn, no more than three to four inches apart, at a depth
that's three to four times the height of the bulb. To thrive, they
need full sun and good drainage, and a baking-hot, dry
summer. If you can, avoid siting them in areas where you
already have plants that need frequent summer watering.
Impossible? Don't worry. Plant a few bulbs each in some six-
to eight-inch-diameter plastic pots (choose ones with lots of
drainage holes). Cover the pots with half-inch wire screening,
which will frustrate the mice and voles that so love tulip bulbs.
Plant the pots, and when the foliage dies back, dig the pots
up and lay them on their sides. Leave them to dry all summer,
and then replant in fall. During winter they need a cold period
to rest.
Species tulips can be used with other spring blooming
plants such as pasque flower or grape hyacinth. Siberian iris
and crestediris also make excellent companions. Species
tulips are also suitable for containers.
Article Continues on Page 11
Doña Ana County Master Gardener Monthly Magazine—March 2013 Page 11
Species vs. Hybrid Tulips (Continued from Page 10)
Even in warmer areas, such as Zones 7, 8, and 9, where mild winters
make some bulbs difficult to grow, there are botanical tulips that do well.
Specialty suppliers can recommend other varieties. In warmer parts of
the United States (Zones 8 to 10), if your soil does not stay below 50
degrees for several weeks at any time during the year, try digging up
the bulbs after the foliage dies back in late spring and store them in a
dry, quite cool place. Then replant them in November or early
December in a spot with only morning or partial sun.
If you want long-lived tulips, pick the species types. These include
wild varieties and selections developed from those species. Most are
smaller in stature and bloom size than hybrid tulips. Because they are
variants of wildflowers, species tulips are usually long-lived, hardy, and
withstand stormy spring weather conditions. Many multiply and spread
from year to year.
Species tulips are especially suited for growing in rock gardens or
tucked (see photo below) into beds and borders. Many open only in
sunny conditions, keeping their blooms closed on cloudy days or in the
evening.
History: Tulip species are the starting point in the long story of the
garden tulip and they are still out there, growing in the wild—in Europe,
North Africa, and Asia. They are usually smaller and less bold than the
garden hybrids, and extra care may be needed to grow some of them
successfully, but they amaze with the intensity of their color and
surprise with the size of their flowers. Growing in distant mountain
ranges, hidden gorges, and remote meadows are plants that wouldn’t
look out of place in the brightest, most flamboyant garden.
About a hundred species of botanical tulips grow wild across the
mountains of Central Asia, particularly in an area spanning from Turkey
to Afghanistan. In the isolated mountain valleys and peaks of these
windswept parts, many species emerged. It is said that botanical tulips
do well where goats revel but cattle stay away. True or not, they also,
happily, are able to thrive in much of the United States. These dainty
flowers grow well so long as winter is neither too warm nor too wet;
they're recommended for USDA Zones 4 to 7.
After hundreds of years of breeding and cultivating, we have tulip
hybrids so spectacular that they may have blinded us to the quieter
elegance of species tulips. But species tulips are, after all, where all
tulips got their start, and in many ways, they've never been improved
upon.#
Species Tulip Facts
Light: Sun and partial sun
Zones: USDA 3-8
Plant Type: Bulb
Plant Height: 4-14 inches tall
Plant Width: To 6 inches wide
Flower Color: White, Pink/Rose,
Blue/Violet/Lavender, Red,
Yellow/Gold, Orange, Green, Bicolor,
Blue/Blue-Green Leaves
Bloom Time: Spring
Landscape Uses: Containers, beds and borders
Special Features: Flowers, attractive foliage, fragrant,
cut flowers, drought- and heat-
tolerant, easy to grow
%Article References&
Hybrid Tulips vs. Species Tulips on In the Garden at link:
http://tinaramsey.blogspot.com/2009/04/hybrid-tulips-
vs-species-tulips.html
Species Tulip on Wikipedia at link:
http://en.wikipedia.org/wiki/Species_Tulips
Species Tulips on Horticulture and Home Pest News at link:
http://www.ipm.iastate.edu/ipm/hortnews/1994/9-16-
1994/sptul.html
Species Tulips on Martha Stewart Living, April 2006, at link:
http://www.marthastewart.com/266982/species-tulips
Tulips, Species on Better Homes & Gardens at link:
http://www.bhg.com/gardening/plant-
dictionary/bulb/tulip/
Doña Ana County Master Gardener Monthly Magazine—March 2013 Page 12
TOPSY TURVY® UPSIDE DOWN TOMATOES & PEPPERS
Source: Dave’s Garden, May 2012 • Author: Sharon Brown
Last year my three tomato plants did very well. They produced fruit, boundless numbers,
all green and beautiful, and the minute they began to turn slightly red, the squirrels, rabbits,
dogs, cats, mocking birds and probably mosquitoes feasted upon them, one by one. And it
wasn't as if the critters were hungry, because they only took a small bite out of each slightly
red tomato, and threw the rest to the ground. When I took my morning coffee walk, there I
would find them, all smashed to smithereens with one little bite missing. I swore I would
never plant another tomato—those critters could very well plant their own!
This spring rolled around and I had no tomato plants. I would beg, borrow, buy or steal,
but I would not grow a tomato. Until Mother's Day, when my son said: "Mom, I ordered a
couple of those Topsy Turvy® tomato planters for you, they should be there in a week."
And so they were, all nicely packaged in boxes looking about the size of a hardcover
circular book. I opened the first box, unsure of what to expect, unwrapped all the wires and
pieces and held it up in front of me. It uncoiled itself and looked like a giant slinky covered in
green plastic. The instructions that came with it were fairly clear. I was told how to open the
planter up, add the small pencil sized stemmed plant to the partially split styrofoam circle,
poke the whole thing through the hole in the bottom, then add the soil. So if the plant is
poking out of the bottom, that means it will need to be in its hanging position first, otherwise
putting the soil in on top of it would crush the plant below. Smart thinking, I thought, hang the
thing up first!
Now the instructions warned that it would be heavy when the soil was added, yep, so
true, so we better have it in its exact home to be before even thinking of the plant that would
be growing from its bottom. I have a post to which my trellised potting bench is attached. It is
well grounded, sitting in cement, and seemed to be strong. Another wooden post stood in
the yard, and at one time held one end of a clothesline, so it would be a good place to put a
second planter. I attached a metal plant hanger from each, but had to have help from dear
son to do so, since he is much taller than I am, and I was determined to get the planters up
high and away from the critters. Of course, having done that, I had to stand on a ladder to
add the soil. (I think detailed mental images are important in learning experiences!) Let me
tell you, the start up for this wonderful planter is not for the faint of heart.
The soil does not come with the planter, nor does the plant, so that is something to
consider. I used Miracle Gro® potting soil with continuous release plant food first, adding it
to the bottom where the roots would be. Then I added some homemade compost that had
been brewing for a year or two, and finished off with a mix of more of the potting soil plus a
bit of topsoil added, just to get the soil mix up to within the required two inches of the top rim.
I think it worked!
So I had the hangers up, one tomato in the one by the potting bench, and one pepper in
the one on the clothesline pole, both filled with soil, and now it was time to attach the round
tops. Difficult. They were a little hard to center and to fit onto the wired rim, one finally found
its rightful place, but the other is still a little off kilter. Having done that, it was time to water.
There are mixed opinions about watering, some say a couple of gallons a day is fine,
others say more, still others, less. There is no way I could hold a gallon of water up above
my head to water either of them, so I use the water hose and sing a song or two, and I figure
since they have not wilted yet, that might be working.
I really have no idea how much a song or two
equates into gallons. But neither the pepper nor the
tomato has complained. I do know that quite often,
with the roots of the plants at the bottom, a short
supply of water will not dwindle down to them
quickly enough to prevent some wilt. So water, and
water often and a lot, would be my advice.
Strangely enough, by about the second day those
pencil sized stemmed plants began to curl upward
from the bottom, reaching their heads to the sun,
and once that happened, it was off to the races for
both of them. Those things grew by leaps and
bounds and bloomed like crazy. Today I am
watching two wonderful tomatoes and two even
bigger bell peppers forming on the vines. I am also
eyeing the tiny ones that are just now forming. They
aren't quite ready yet, but my mouth waters
whenever I walk past them.
I had only one worry during the growth spurt
when the pepper plant decided to turn its head
upward and hit head first into the bottom of the
planter. Pepper plant stems are stubborn, and I was
afraid it would break in my hands if I forced the
issue. I left it alone for a day or two until it was
finally long enough to reach the rim of the bottom of
the planter then I gently suggested to it that it might
be nice if it continued its trek out beyond the rim.
And so it did.
I don't know if you have tried these Topsy Turvy®
upside down planters or not, but I thought it an
adventure worth sharing. If I have a problem, it
might be yet to come, because my tomato planter
hanger seems to be bending a bit downward with
the weight of the planter, and all the water just adds
more weight. If bending is all it does, that'll be fine.
It won't hurt the tomatoes a bit.
There is no ending to this story just yet, but in
another week or two, I might be enjoying the fruits
of my labor. The only part I dread is at the very end,
when it is recommended that the planter be emptied
of all its pounds of soil.
Article Continues on Page 13
Doña Ana County Master Gardener Monthly Magazine—March 2013 Page 13
!
Topsy Turvy Upside Down Tomatoes & Peppers (Cont. from Page 12)
You'll find me on the ladder again scooping, one little spoonful at a time. The
planter must be stored away for the winter, and with Kentucky's unpredictable
weather patterns these days, that's a pretty good rule to follow for most things.
And by the way, I have seen no critters eyeing my upside down tomatoes
yet. I might have won this battle. I'll be sure to let you know.
One week later: Here's a tiny update for you, I made black bean/corn salad
today, and in it I chopped up the very first of my bell peppers. I am telling you, it
was worth waiting for. The second one will be ready soon, and I am watching
some very healthy looking smaller ones as they form. The bad news is that one
of my tiny green tomatoes is missing. I know the culprit is out there somewhere,
is it possible I have a flying squirrel in my yard? I am keeping a close watch,
and I'll let you know. The black bean salad was excellent though!#
TOMATOES:
Planning & Planting For An Outstanding Harvest
Source: Dave’s Garden, April 2011 ! Author: Jill M. Nicolaus
Tomato plants get pretty big so a little planning can be a big help. Draw a
plan on graph paper or use another method to figure out how many plants will
fit in your garden and still leave room for peppers, beans, or whatever else
you'd like to grow. If you stake or cage your tomatoes, you can plant them 2
feet apart, which gives each plant about four square feet of growing space. If
you have more space for your tomatoes, you might let them sprawl, in which
case you'll want to plant them at least 3 feet apart.
For me, a single long row of tomatoes does better than multiple shorter rows.
Picking the fruit is easier than in a tomato "jungle," and the improved air
circulation helps prevent fungal disease. If your summers are humid also, either
stick with single or staggered double rows, or allow extra space between rows
of tomatoes. You could also just scatter your tomato plants one by one
throughout your garden, staking or caging them to keep them from overrunning
other plants. Some plants such as lettuce will appreciate a little shade from the
tomatoes, but mostly you'll want to try to plant your tomatoes where they won't
hog all the sunshine.
Tomato plants appreciate good garden soil with plenty of organic matter, but
too much nitrogen could give you huge plants without many tomatoes. We built
a new little raised bed one year and filled it with top-quality "topsoil" and leaf
mold; our tomato plants were 14 feet tall, green and lush, and completely
tomato-free. One soil preparation myth is that tomatoes need extra calcium to
prevent blossom end rot. "B.E.R" actually results when the plant is unable to
take up enough calcium, and adding eggshells or other calcium sources won't
fix an uptake problem. Just take the same steps for digging and amending the
soil in your tomato patch as you do for the rest of your veggie garden, and your
plants will do just fine.
As you're getting your garden ready for your tomatoes, plan
ahead for their water needs. If you run a soaker hose along
your row of plants, it's easy to give the roots a good drink
(which they love) without getting the foliage wet (which can
encourage disease). Tomato plants appreciate a deep drink
twice a week, maybe three times in hot, dry weather.
You can purchase tomato plants at your local garden
center or big box store, or you can grow an astonishing
variety of tomatoes starting from seed. Some people swear by
the flavor of heirloom varieties, while others think hybrids give
them better yields. However you get your tomato plants, it's a
good idea to harden them off by getting them gradually used
to outside conditions. Even plants that have been on outdoor
nursery shelves for weeks may need a day or two to get used
to conditions in your garden.
When you plant your tomato seedlings, be sure to bury
some of the stem. The plant will grow extra roots all along the
buried stem, and you'll have a stronger, healthier plant. If your
plants are tall or leggy, you don't have to dig a hole to China.
The soil probably hasn't started warming up more than 5 or 6
inches below the surface, and planting into colder, deeper dirt
won't do your plant any favors. Instead, dig a shallow, sloping
trench. I like to add a sprinkling of polymer moisture crystals
and time-release fertilizer all along the planting hole.
Lay the plant along the trench, and bury it up to the last few
pairs of leaves. Gently bend the top of the plant upright, but
don't worry about getting it exactly vertical. Don't bother
pruning off any branches or leaves that you're burying;
pinching them off would just make unnecessary wounds along
the stem. Your tomato plant will look awfully tiny in your
garden now, but just think of the vigorous root system it will
have with all that buried stem.
If you're using stakes or cages, put them in place now. I
tend to procrastinate and then regret it when I'm wrestling a
cage onto a plant half my height. Mulching around the plants
will conserve moisture and help prevent disease. The mulch
should form a fat "doughnut," with a ring of clear dirt around
the stem of the plant. Grass clippings make great mulch for
your veggie garden! Your plants might not look like they're
growing for the first week or two, but don't worry, they are
busy developing an awesome root system. Hold off on
fertilizing until you see new growth on top. Then watch them
take off.
I hope this will be your best tomato-growing season ever!#
Doña Ana County Master Gardener Monthly Magazine—March 2013 Page 14
Building Your Super-Sturdy Tomato CageSuper-Sturdy Tomato Cage
Strong enough to stand up to summer storms and bumper crops.
Source: Organic Gardening.com ! Author: Doug Hall
At the Organic Gardening Test Garden, tomato plants grow in heavy-
duty wire cages we’ve used for years. These square, vertical columns
keep our tomatoes standing tall, even when wind whips through the farm.
We expect to get a few more decades of use out of our tomato cages—
they’re that durable.
What’s the secret of their strength and longevity? Our cages are
constructed from livestock panels—rigid, 16-foot-long fence sections,
made of heavy-gauge galvanized wire and sold at farm-supply stores. The
panels are designed with different sizes of openings for various types of
farm animals. For this project, we chose cattle panels that are 50 inches
tall with openings 8 inches by 6 inches. Panels with wider-spaced wires
cost less and are easier to work with, and it’s easier to pick ripe tomatoes
through the larger openings.
This is a two-person project. It requires a bolt cutter (and the strength to
use it). You’ll also need a plank, 2-by-6 or larger and about 6 feet long,
and a 5⁄8-inch box wrench. Each 16-foot panel makes two tomato cages
with a small section left over. (Use leftover panel pieces to construct
compost bins or A-frame trellises, or mount a rectangle of wire grid on the
garage wall and add hooks for hanging garden tools.)
One disadvantage to this style of tomato cage: They don’t collapse or
nest for storage. That’s no problem for gardeners who live in deer country,
where the cages can be employed in winter to protect young trees and
shrubs from browsing deer.
1. Using a bolt cutter, cut a
section of panel 6 1⁄2 feet
long, leaving the horizontal
wire stubs along the cut edge.
If you plan to use a pickup
truck to transport the panels
home, do this step at the store
where you purchase them.
2. Lay the section on the
ground. Measure and mark a
line 18” from side of the panel
without wire stubs; this is
where you’ll make the first
bend. Place plank so its edge
aligns with the marks. With
two people standing on the
plank, bend the panel upward
to make a 90-degree angle.
!
3. Repeat the measuring
and bending twice more.
After the third bend, the two
panel sides will meet.
4. To connect the two sides, slip the ring end of the box
wrench over a wire stub; bend the stub until it loops around
the vertical wire of the other panel side. Repeat with the
remaining wire stubs. Cut the stubs with the bolt cutter,
taking care to leave no sharp points protruding.
5. Cut off the horizontal wire at the base of the cage, leaving
vertical wire ends to help stabilize the cage in the ground. If
you live where the wind is exceptionally fierce, you might
want to reinforce each cage with a length of rebar pounded
18 inches into the ground and tied to the cage.
Article Contributed by Mona Nelson, Certified MG
Doña Ana County Master Gardener Monthly Magazine—March 2013 Page 15
When To Plant Vegetable Seeds
Source: Knowledge Weighs Nothing.com
Link: http://knowledgeweighsnothing.com/when-to-plant-vegetable-seeds-2-excellent-printable-charts/
Go to this link and you can print out full page copies of each chart.)
Knowing when to plant seeds is crucial to successful germination and healthy plants. I don’t know about you, but I am always eager to
get sowing seeds indoors this time of year. Trouble is I always sow too many and too soon. They shoot up in the seed trays indoors and
they are ready to be transplanted outdoors in no time. Problem is – it is still too cold outdoors to plant them out…
These two charts have been created by the lovely folks at Roots Nursery and I don’t need to tell you how useful the charts will be. If
you are like me you’ll have them printed out in no time.
SEED STARTER CHART BY TEMPERATURE DAYS TO GERMINATE ACCORDING TO TEMPERATURE
This information was contributed by Mona Nelson, Certified Master Gardener
Doña Ana County Master Gardener Monthly Magazine—March 2013 Page 16
OXEYE DAISY
(Leucanthemum vulgare)
Description: Oxeye Daisy (Leucanthemum vulgare) is an herbaceous
perennial in the aster (sunflower) family (Asteraceae) with numerous stems
that measure from 1 to 3 feet tall by 1 foot in width. It looks similar to a
Shasta Daisy but is smaller and much more aggressive. It spreads by seeds
and surface rhizomes.
This plant smells like sage and a single plant can produce from 1-40
flowering stems. The stem is mostly unbranched and sprouts laterally from a
creeping rhizomatous rootstock. Its leaves are dark green on both sides.
Leucanthemum vulgare blooms from late spring to autumn. The small
flower head, no larger than 2 inches consists of about 20 white ray florets
that surround a yellow disc, growing on the end of 1 to 3 ft. tall stems. The
plant produces an abundant number of flat seeds, without pappus, that
remain viable in the soil for 2 to 3 years. It also spreads vegetatively by
rhizomes.
Many people consider Oxeye Daisy to be a pretty wildflower, but
wildflower does not mean native; in fact, it is an invasive noxious weed.
Class A Noxious Weed in New Mexico: Currently has a limited
distribution in the state, but there is a need to prevent any new infestations or
to eradicating existing infestations. It is noxious and highly invasive.
Habitat: Oxeye Daisy has escaped cultivation and is now common in
grasslands, pastures, fields, disturbed area, waste areas, open woods,
meadows, and roadsides. It has adapted to coarse and medium textured soil.
Distribution: This species has been reported in all states and is considered
invasive in seventeen.
Other Names: Margarite, white daisy, bull daisy, moon flower, dog daisy,
field daisy, and goldens.
History: This perennial is a native to Europe and was introduced to the U.S.
as an ornamental in the 1800”s. Unfortunately, Oxeye Daisy is still currently
used as an ornamental and is often sold commercially in seed packets
labeled as wildflower seed. (If you want to bring nature back to your garden
with wildflowers, try to choose wildflower seed mixes carefully, as many
contain invasive plants like Oxeye Daisy. Wildflower mixes do not tend to list
the species they contain, and colorful photos on package covers mislead
consumers into purchasing invasive plant seeds that are native to Europe
and other parts of North America. Avoid wildflower mixes unless you are
buying them from a reputable plant nursery that has collected seeds locally.)
Why It Is Considered A Problem? Oxeye Daisy displaces native plant
species, growing so densely it excludes other vegetation. While not
considered poisonous to cows, it does impart a disagreeable taste to
their milk. It is difficult to control or eradicate because of its large seed
bank, long seed viability and its ability to resprout if not completely
removed.
Also these plants have been shown to carry several viral crop diseases
Identification:
Flowers: White daisies with 2” wide yellow central disc
that blooms all summer.
Seeds: Tufted, dispersed by the wind. When flower
heads are dry, the seeds drop or are shattered
easily by touch or movement. Water, human
and animal foot traffic and cultivating and
earth-moving machinery can carry the seeds to
new areas.
Stems/Leaves: Stems sprout laterally from a creeping
rootstock. The number of flower stalks ranges
from 1 to 40 per plant. Its leaves are dark
green on both sides.
Roots: Spread vegetatively with horizontal stems
growing below the soil surface, called
rhizomes, forming roots and producing new
plants.
Reproduction: The plant reproduces by roots and seeds. A
typical plant can produce over 500 seeds that
spread by wind, animals and remain viable for
2-3 years.
Management & Control:
• Prevention and early detection most effective control
methods.
• Physical removal before flowering for single plants/small
infestations. Because of its shallow roots, small infestations
can be easily hand pulled or dug up before seed heads are
produced.
• Can be effectively controlled using any of several readily
available general use herbicides such as picioram, imazapyrp
and dicamba. Some herbicides may damage non-target
species. Be sure to follow label and state requirements.
• Chemical applications in the rosette or pre-bloom stages of
growth are most effective.
−ARTICLE REFERENCES−
Leucanthemum vulgare on Wikipedia at link:
http://en.wikipedia.org/wiki/Leucanthemum_vulgare
Oxeye Daisy (Chrysanthemum leucanthemum) on Minnesota
Dept. of Natural Resources at link:
http://www.dnr.state.mn.us/invasives/terrestrialplants/herbac
eous/oxeyedaisy.html
Oxeye Daisy, Leucanthemum vulgare (Asterales/ Asteraceae)
on Invasives.Org at link:
http://www.invasive.org/browse/subinfo.cfm?sub=5937
Weed of the Week: Oxeye Daisy on Invasive Species of British
Columbia at link: http://www.bcinvasives.ca/general/weed-of-
the-week-oxeye-daisy
Doña Ana County Master Gardener Monthly Magazine—March 2013 Page 17
INTERN PROFILE: GAIL & DAVID ROSS
New Master Gardener interns David and Gail Ross have a combined
history of more than a century of gardening experience. David planted his
first vegetable garden when he was nine years old; Gail got her first taste
of homegrown vegetables at ten and knew then that she had to start her
own garden.
The Rosses now live on the East Mesa in Las Cruces where they have
a quarter-acre to keep them busy. Gail and David have called Las Cruces
home for more than five years. David began gardening in Washington
State and continued in California and Nevada.
Gail has “played in the dirt” in Chicago, Wisconsin and Las Vegas, NV.
They both like to grow vegetables and fruit trees but Gail adds flowers and
herbs to her “things I like to grow” list. Gail recalls that she used to grow
flowers for her mother to use in flower arrangements she made and sold.
They signed up for the Master Gardener Program because they wanted
to gain additional knowledge for successful gardening in this climate.
They were also anxious to volunteer in the community and work with the
Extension Service, which they have done in previous locales.
David is especially interested in outreach programs to the schools. He
loves seeing children’s faces light up when they taste fresh fruits and
vegetables, especially if they have been involved in growing them.
David believes all gardening experiences are enjoyable but admits that
his most “memorable” one probably was when, as a 10 year-old boy, he
was seriously stung by bees while picking his parents’ raspberries to share
with their neighbors.
Both Gail and David are now retired. David’s career included working for
the State Department of Health in Washington and then as a research
biochemist in Davis, California. He also taught in the School of Public
Health and Medicine. Gail owned a travel agency for ten years and
worked as a pharmacy technologist.
Gail and David have jumped into the Doña Ana County Extension
Master Gardener Program with all four feet. Their volunteer list for the
month of March includes the Pecan Growers Conference, the Home and
Garden Show, and the Senior Expo in addition to the monthly Master
Gardener meetings.
Profile Provided by Ann Palormo, Certified Master Gardener
!
LAVENDER LOVER’S HANDBOOK
!"
Author Sarah Berringer Bader started with 365 lavender
plants (Lavandula spp. and hybrids) on her five-acre farm in
Oregon. Just a few years later, she was growing nearly 5,000
and her collection represented 90 different cultivars. In this
book, she shares what she learned about starting from seed
and growing cuttings, flower and foliage variation and the best
lavenders to cook with. You’ll find recipes for treats like
lavender-infused jam too.
With its intoxicating scent, gorgeous wands of purple
flowers, and silvery foliage, lavender is one of the most
sought-after plants. But the horticultural reasons for choosing
lavender go far beyond its beauty. Lavender attracts
beneficial insects, requires little water once established, and
is deer resistant.
In The Lavender Lover's Handbook, lavender grower Sarah
Bader teaches gardeners how they can successfully grow this
beloved plant. Featuring the 100 easiest, most stunning
lavenders available today, this beginner's guide provides a
complete checklist of the color, fragrance, size, and foliage of
each plant, in addition to basic pruning, spacing, and planting
requirements. The text is rounded out with tips on how to
harvest, cook, and craft with this wonderful herb.
Its abundant variety, hardiness, fragrance, and culinary
uses make lavender one of the most popular and versatile
plants. And now, with this practical and accessible guide in
hand, it's easier than ever to grow at home.
Publisher: Timber Press, May 2012
Doña Ana County Master Gardener Monthly Magazine—March 2013 Page 18
MASTER GARDENER MONTHLY MEETING: FEB. 13, 2013
Notetaker: Sue Styer
Introduction and Welcome: Jeff Anderson
Awards: Various people were recognized for their volunteer time contributions to the Master Gardener Program:
Master Gardener Contribution Area/Program
' Dixie LaRock Chair, Farmer’s Market and Chair, MG Plant Sales plus our “sunshine lady” who has a
heart of gold which has been demonstrated by her help for Sherman and Myles, etc.
' Bonnie Eisenberg Liaison, Annual Tour of Gardens
' Mary Ann Pribillo Chair, Annual Home and Garden Show
' Linda Schukei Chair, Hospice Garden
' David Hutchinson Chair, Hospice Garden
' Sherman Levenson Hospice Garden and Community Garden
' Darrel Shillingburg Chair, Community Gardens
' J. Myles Munoz Chair, Annual Chile Conference and Pecan Conference (MG portions of Conferences)
' Russ Boor Chair, State Master Gardener Conference
' Sylvia Hacker Chair, Hotline and Chair of monthly Lunch & Learn Presentations
' Solange Graham Notetaker for our Monthly MG Meetings
' Eric Graham Creator, Online MG Volunteer Hours Program
' Pamela Crane Chair, MG Recertification
' Linda Morgan MG Graduation Banquet Coordinator and Education Program Chair
' Ann Shine-Ring Editor, monthly Master Gardener Magazine
' Juliet Williams 4-H Program Coordinator and new MG Student Class Coordinator
' Alberta Morgan Chair, CoCoRaHS (Community Collaborative Rain, Hail & Snow Network)
' Jeff Anderson Ag Program Director/Master Gardener Program Administrator
COMMITTEE/PROJECT REPORTS
MG Hotline (Louis Worley) We have a few dates open where we need certified MGs 2/15, 3/15, 3/19, 3/26,3/29. We need to update the MG
Hotline substitute list with new people or with current designates if they wish to remain.
MG Magazine (Ann Shine-Ring) No report as Ann was ill. Our MG Magazine will be distributed later this month.
Lunch & Learn at Branigan Library (Sylvia Hacker) Presentation will be the Why, When, How of Pruning Roses and Other Plants, etc. The
presenter will be MG, Russ Boor.
Gomez Garden and Hospice Garden (Dixie LaRock) There will be a meeting on Saturday, Feb. 16th to install the border and irrigation
system. It is looking good. There are beets and radishes coming up. We need to see if they survive.
Monthly Education Programs (Lynn Bryant) Lynn is our new Education Program Chair. She passed out a survey that listed topics and
asked for input on our interest in these areas. (See the Survey Results listed on Page 19 of this Magazine)
NEW & CONTINUING PROJECTS:
Chile Conference - Salsa contest - Feb. 4 and 5th at Hotel Encanto - Myles explained that the salsa contest was cancelled this year
because of new food safety laws. Individuals bring entries that have made offsite and the new law requires they be made onsite in a certified
kitchen. If the food had consisted of baked goods, there would not have been an issue. There were 200 attendees and the one-day event
was deemed a success. Jeff mentioned that Karim Martinez suggested that in the future we could do a Chile salsa cook-off onsite.
High on the Desert Conference - Sierra Vista, AZ - Feb. 14-15 to be held at the Windermere Hotel in Sierra Vista, AZ.
Rainwater Harvesting Workshop - Jeff - Feb. 18-19 at Doña Ana Workforce Center. We have close to 40 people signed up. The first day
entails a speaker from Austin and the second day the group will build a 1,500-gallon system at Jeff’s House.
Pecan Conference - March 3, 4, 5, 2013 at Hotel Encanto. Myles will need volunteers for different days and times. There will be about 600
people attending.
Home and Garden Show - March 9-10, 2013 at Las Cruces Convention Center. Tracy Thompson is coordinating this event and she will
need volunteers for various slots.
Water Festival – March 16. It is being held at Young Park and Myles volunteered to coordinate. There will be about 1,000 kids. Volunteers
are needed.
Senior Expo – March 23 & 24. Gail and David Ross volunteered to coordinate.
Minutes Continued on Page 19
!
Doña Ana County Master Gardener Monthly Magazine—March 2013 Page 19
MG Monthly Meeting, February 13, 2013 (Continued)
NEW & CONTINUING PROJECTS (CONTINUED):
Arbor Day April 6th City of Las Cruces needs tree stewards to transplant trees on various dates. They will be transplanted into 5-gallon
containers then planted at a later time. If interested call Jeff. The trees are currently bare root and in storage. No help needed at downtown
event on mall on Arbor Day itself.
School Gardens Holy Cross and Tombaugh need help with garden design and plant selections for new gardens. Volunteers needed. Work
for MG involves design not digging. Holy Cross’s garden will be a flower garden. Jeff has visited and said containers would be appropriate.
Tombaugh (located on Carver Road by Aldershot) will have a courtyard garden with two raised 5’ X 8’ beds with water plus drip lines on the
side for containers and will involve vegetables. They want to know what to grow etc. Talk to Jeff if you are interested.
Tour of Gardens Coordinator needed. Bonnie Eisenberg is stepping down from her position as Liaison for the Annual Tour of Gardens. If you
are interested, please contact Jeff. (Subsequently, James Crouse and Tracy Thompson have volunteered to be Co-Chairs.)
ANNOUNCEMENTS:
—Jeff passed around a flyer on the Agricultural Employees Forum on March 6 from 8-5.
—Joanne discussed Bosque Park Pole Planting on Feb.23 – this activity involves planting about 60 poles for 2 hours.
—Onion Field Day will be held on 7/18/13 this year
—Dec. 3, 2013 Western SARE (Sustainable Agriculture Research & Education) Conference. To be held in either Alamogordo or Deming
—HB 271 (Cooperative Extension Service Funding) Information on this legislation will be sent to us as soon as it is available.
EDUCATION PRESENTATION: JIM TURRENTINE, OWNER OF “THE BIG PICTURE” TOPIC: PHOTOGRAPHING FLOWERS
SNACKS: Thank you to Ann Palormo, Dick Hiss and Sherry Hulsey for our delicious snacks today. Next month’s goodies makers will be
Bonnie Eisenberg, Deb Tallent and Jill Klann. If you haven’t already sign up, please be prepared to sign up for our 2013 Refreshments
list at our next meeting.
Next Meeting: Wednesday, March 13, 2013 – At Branigan Library (9:15am to 11:45am)
Presentation: Native Plants in the White Sands Missile Range
Presenter: David Anderson, WSMR Land Manager & Botanist
EDUCATIONAL TOPICS FOR PRESENTATION Total Count
Companion Gardening to Reduce Pests 24
Ornamental Grasses: What To Plant & How to Care for Them 21
Drought Resistant Plants 20
Edible Landscape 20
Vertical Gardening: Different Uses 20
Raised Beds: How to Build, What to Plant & How to Maintain 20
Designing Your Garden 17
Green Houses 17
Seed Harvesting and Drying 16
The Challenges of Gardening During Extremes in our Weather 16
Growing an Herb Garden 15
Growing Succulents 15
Xeriscaping 15
Creating Garden Junk (aka: Y’art) 14
Different Forms of Garden Art 14
Growing Houseplants: Special Occasions 14
Growing the Three Sisters 14
How to Get a Tropical Look in Southern New Mexico 14
Hypertufa (lightweight material used in garden pots and ornaments) 14
Weed Control 14
Winterizing Your Yard 14
Benefits of Growing Produce: Home Gardening 13
Butterflies and Moths 13
Canning and Preserving Vegetables and Fruits 13
Growing Orchids 12
Water Harvesting 12
From the Grape Vine to the Table 11
Bird Feathers 9
Using Herbs in Recipes 8
Vermi-Composting 8
Pecans: From the Tree to Your Table 7
!
ADDITIONAL SUGGESTIONS FOR TOPICS
How to use Stone for a Patio
How to Build and Plant in a Berm
Small Space Gardening: Flowers & Vegetables
Container Gardening: Flowers and Vegetables
Oriental Vegetable Gardening
Community and School Gardens
Gardening for Birds and Wildlife
First Aid and CPR
!
Doña Ana County Master Gardener Monthly Magazine—March 2013 Page 20
IMPORTANT: Please remember to be present on your assigned date for the Hotline. If another MG forgets, please give him
or her a “reminder” call. Be sure to get a copy of the Subs List, for your information.
As of Monday, March 11, 2013, the Doña Ana County Extension Office hours will change to 8am–12 and 1–5pm
Monday through Friday. This will impact our Hotline hours and we will discuss options on Wednesday, March 13, at
our monthly MG meeting.
URGENT: We need at least 2 MGs at each Hotline Day. Please consider volunteering for at least one, four-hour
assignment to ensure we have adequate coverage for our Hotline. Thank you for your help.
The assignments listed below were current as of February 28, 2013
MG Hotline Assignments for March 2013
Friday, Mar. 1 Deb Tallent Certified MG
Eileen Roberts 2013 Intern
Tracy Thompson 2013 Intern
Tuesday, Mar. 5 Dorian Dodson Certified MG
Sylvia Hacker Certified MG
Grace Foster 2013 Intern
Friday, Mar. 8 Alberta Morgan Certified MG
Certified MG
Tamara Fetzer 2013 Intern
Phyllis Radtke 2013 Intern
Tuesday, Mar. 12 B.G. Hosie Certified MG
Deb Tallent Certified MG
Tracy Thompson 2013 Intern
Friday, Mar. 15 Dael Goodman Certified MG
Ann Palormo Certified MG
Al Krueger Certified MG
Laura Gordon 2013 Intern
Louis Worley 2013 Intern
Tuesday, Mar. 19 Velma Noland Certified MG
Deb Tallent Certified MG
Gail Ross 2013 Intern
David Ross 2013 Intern
Friday, Mar. 22 Russ Boor Certified MG
Mary Andrews Certified MG
Tamara Fetzer 2013 Intern
Phyllis Radtke 2013 Intern
Tuesday, Mar. 26 Ann Palormo Certified MG
Gail Ross 2013 Intern
David Ross 2013 Intern
Friday, Mar. 29 Velma Noland Certified MG
(Good Friday) Carla Clouser Certified MG
Laura Gordon 2013 Intern
Nancy Sherman 2013 Intern
MG Hotline Assignments for April 2013
Tuesday, Apr. 2 Certified MG
Certified MG
Nancy Carlson 2013 Intern
Tracy Thompson 2013 Intern
Friday, Apr. 5 Alberta Morgan Certified MG
Certified MG
Louis Worley 2013 Intern
Phyllis Radtke 2013 Intern
Tuesday, Apr. 9 B.G. Hosie Certified MG
Certified MG
Nancy Carlson 2013 Intern
Elizabeth Grinnell 2013 Intern
Friday, Apr. 12 Bonnie Eisenberg Certified MG
Nancy Sherman 2013 Intern
Elizabeth Grinnell 2013 Intern
Tuesday, Apr. 16 Dorian Dodson Certified MG
Sylvia Hacker Certified MG
Nancy Carlson 2013 Intern
Friday, Apr.19 Mary Andrews Certified MG
Laura Gordon 2013 Intern
Phyllis Radtke 2013 Intern
Tuesday, Apr. 23 Mary Andrews Certified MG
Certified MG
Elizabeth Grinnell 2013 Intern
Friday, Apr. 26 Certified MG
Certified MG
Elizabeth Grinnell 2013 Intern
Tamara Fetzer 2013 Intern
Tuesday, Apr. 30 Bonnie Eisenberg Certified MG
Laurie Ludeman 2013 Intern
Martha Ludeman 2013 Intern

More Related Content

What's hot

Monthly garden tasks june
Monthly garden tasks   juneMonthly garden tasks   june
Monthly garden tasks junecvadheim
 
Container plants 1-11
Container plants 1-11Container plants 1-11
Container plants 1-11cvadheim
 
January in the southern california garden
January in the southern california gardenJanuary in the southern california garden
January in the southern california gardencvadheim
 
Lilium pardalinum
Lilium pardalinumLilium pardalinum
Lilium pardalinumcvadheim
 
Gardening sheets parish
Gardening sheets   parishGardening sheets   parish
Gardening sheets parishcvadheim
 
Calliandra eriophylla
Calliandra eriophyllaCalliandra eriophylla
Calliandra eriophyllacvadheim
 
Gardening sheets edibles in containers
Gardening sheets   edibles in containersGardening sheets   edibles in containers
Gardening sheets edibles in containerscvadheim
 
Gardening sheets butterfly container
Gardening sheets   butterfly containerGardening sheets   butterfly container
Gardening sheets butterfly containercvadheim
 
BEST FLOWERS IN THE WORLD
BEST FLOWERS IN THE WORLDBEST FLOWERS IN THE WORLD
BEST FLOWERS IN THE WORLDTony Chacko
 
Deschampsia cespitosa
Deschampsia cespitosaDeschampsia cespitosa
Deschampsia cespitosacvadheim
 
Gardening sheet monardella australis
Gardening sheet   monardella australisGardening sheet   monardella australis
Gardening sheet monardella australiscvadheim
 
The 10 Most Amazing Flowers in the World
The 10 Most Amazing Flowers in the WorldThe 10 Most Amazing Flowers in the World
The 10 Most Amazing Flowers in the Worldscrobins
 
Gardening sheets pollinators 2017
Gardening sheets   pollinators 2017Gardening sheets   pollinators 2017
Gardening sheets pollinators 2017cvadheim
 
Presentation on Breeding Techniques of Gaillardia
Presentation on Breeding Techniques of GaillardiaPresentation on Breeding Techniques of Gaillardia
Presentation on Breeding Techniques of GaillardiaDr. Kaushik Kumar Panigrahi
 
Gardening sheets birds 2017
Gardening sheets   birds 2017Gardening sheets   birds 2017
Gardening sheets birds 2017cvadheim
 
Gardening sheet nolina parryi
Gardening sheet   nolina parryiGardening sheet   nolina parryi
Gardening sheet nolina parryicvadheim
 
Prunus virginiana
Prunus virginianaPrunus virginiana
Prunus virginianacvadheim
 
Gardening sheet vaccinium ovatum
Gardening sheet   vaccinium ovatumGardening sheet   vaccinium ovatum
Gardening sheet vaccinium ovatumcvadheim
 

What's hot (20)

Monthly garden tasks june
Monthly garden tasks   juneMonthly garden tasks   june
Monthly garden tasks june
 
Container plants 1-11
Container plants 1-11Container plants 1-11
Container plants 1-11
 
Magnolia
MagnoliaMagnolia
Magnolia
 
January in the southern california garden
January in the southern california gardenJanuary in the southern california garden
January in the southern california garden
 
Lilium pardalinum
Lilium pardalinumLilium pardalinum
Lilium pardalinum
 
Hydrangeas
HydrangeasHydrangeas
Hydrangeas
 
Gardening sheets parish
Gardening sheets   parishGardening sheets   parish
Gardening sheets parish
 
Calliandra eriophylla
Calliandra eriophyllaCalliandra eriophylla
Calliandra eriophylla
 
Gardening sheets edibles in containers
Gardening sheets   edibles in containersGardening sheets   edibles in containers
Gardening sheets edibles in containers
 
Gardening sheets butterfly container
Gardening sheets   butterfly containerGardening sheets   butterfly container
Gardening sheets butterfly container
 
BEST FLOWERS IN THE WORLD
BEST FLOWERS IN THE WORLDBEST FLOWERS IN THE WORLD
BEST FLOWERS IN THE WORLD
 
Deschampsia cespitosa
Deschampsia cespitosaDeschampsia cespitosa
Deschampsia cespitosa
 
Gardening sheet monardella australis
Gardening sheet   monardella australisGardening sheet   monardella australis
Gardening sheet monardella australis
 
The 10 Most Amazing Flowers in the World
The 10 Most Amazing Flowers in the WorldThe 10 Most Amazing Flowers in the World
The 10 Most Amazing Flowers in the World
 
Gardening sheets pollinators 2017
Gardening sheets   pollinators 2017Gardening sheets   pollinators 2017
Gardening sheets pollinators 2017
 
Presentation on Breeding Techniques of Gaillardia
Presentation on Breeding Techniques of GaillardiaPresentation on Breeding Techniques of Gaillardia
Presentation on Breeding Techniques of Gaillardia
 
Gardening sheets birds 2017
Gardening sheets   birds 2017Gardening sheets   birds 2017
Gardening sheets birds 2017
 
Gardening sheet nolina parryi
Gardening sheet   nolina parryiGardening sheet   nolina parryi
Gardening sheet nolina parryi
 
Prunus virginiana
Prunus virginianaPrunus virginiana
Prunus virginiana
 
Gardening sheet vaccinium ovatum
Gardening sheet   vaccinium ovatumGardening sheet   vaccinium ovatum
Gardening sheet vaccinium ovatum
 

Similar to Row Covers & Frost Protection; Gardening Guidebook for Doña Ana County, New Mexico

Asclepias eriocarpa
Asclepias eriocarpaAsclepias eriocarpa
Asclepias eriocarpacvadheim
 
Qm asclepias eriocarpa
Qm asclepias eriocarpaQm asclepias eriocarpa
Qm asclepias eriocarpacvadheim
 
Philadelpus lewisii
Philadelpus lewisiiPhiladelpus lewisii
Philadelpus lewisiicvadheim
 
Tellima grandiflora
Tellima grandifloraTellima grandiflora
Tellima grandifloracvadheim
 
Gardening sheets scent
Gardening sheets   scentGardening sheets   scent
Gardening sheets scentcvadheim
 
Gardening sheets accent plants
Gardening sheets   accent plantsGardening sheets   accent plants
Gardening sheets accent plantscvadheim
 
Gardening sheets may 2013 talk
Gardening sheets   may 2013 talkGardening sheets   may 2013 talk
Gardening sheets may 2013 talkcvadheim
 
Ceanothus megacarpus
Ceanothus megacarpusCeanothus megacarpus
Ceanothus megacarpuscvadheim
 
Heracleum maximum
Heracleum maximumHeracleum maximum
Heracleum maximumcvadheim
 
Straw Bale Gardening ~ South Dakota
Straw Bale Gardening ~ South DakotaStraw Bale Gardening ~ South Dakota
Straw Bale Gardening ~ South DakotaS7W1X
 
Rubus parviflorus
Rubus parviflorusRubus parviflorus
Rubus parvifloruscvadheim
 
Gardening sheet hesperocallis undulata
Gardening sheet   hesperocallis undulataGardening sheet   hesperocallis undulata
Gardening sheet hesperocallis undulatacvadheim
 
Gardening sheets containers 2015
Gardening sheets   containers 2015Gardening sheets   containers 2015
Gardening sheets containers 2015cvadheim
 
Fallugia paradoxa
Fallugia paradoxaFallugia paradoxa
Fallugia paradoxacvadheim
 
Pollinators - 2013 - gardening sheets
Pollinators - 2013 -  gardening sheetsPollinators - 2013 -  gardening sheets
Pollinators - 2013 - gardening sheetscvadheim
 
Gardening sheet heuchera pilosissima
Gardening sheet   heuchera pilosissimaGardening sheet   heuchera pilosissima
Gardening sheet heuchera pilosissimacvadheim
 
Gardening sheets dragonflies
Gardening sheets   dragonfliesGardening sheets   dragonflies
Gardening sheets dragonfliescvadheim
 
Arctostaphylos pajaroensis
Arctostaphylos pajaroensisArctostaphylos pajaroensis
Arctostaphylos pajaroensiscvadheim
 
Gardening sheet caulanthus inflatus
Gardening sheet   caulanthus inflatusGardening sheet   caulanthus inflatus
Gardening sheet caulanthus inflatuscvadheim
 

Similar to Row Covers & Frost Protection; Gardening Guidebook for Doña Ana County, New Mexico (20)

Asclepias eriocarpa
Asclepias eriocarpaAsclepias eriocarpa
Asclepias eriocarpa
 
Qm asclepias eriocarpa
Qm asclepias eriocarpaQm asclepias eriocarpa
Qm asclepias eriocarpa
 
Master Gardeners at Mesilla Valley Bosque, Doña Ana County, Arizona, use Groa...
Master Gardeners at Mesilla Valley Bosque, Doña Ana County, Arizona, use Groa...Master Gardeners at Mesilla Valley Bosque, Doña Ana County, Arizona, use Groa...
Master Gardeners at Mesilla Valley Bosque, Doña Ana County, Arizona, use Groa...
 
Philadelpus lewisii
Philadelpus lewisiiPhiladelpus lewisii
Philadelpus lewisii
 
Tellima grandiflora
Tellima grandifloraTellima grandiflora
Tellima grandiflora
 
Gardening sheets scent
Gardening sheets   scentGardening sheets   scent
Gardening sheets scent
 
Gardening sheets accent plants
Gardening sheets   accent plantsGardening sheets   accent plants
Gardening sheets accent plants
 
Gardening sheets may 2013 talk
Gardening sheets   may 2013 talkGardening sheets   may 2013 talk
Gardening sheets may 2013 talk
 
Ceanothus megacarpus
Ceanothus megacarpusCeanothus megacarpus
Ceanothus megacarpus
 
Heracleum maximum
Heracleum maximumHeracleum maximum
Heracleum maximum
 
Straw Bale Gardening ~ South Dakota
Straw Bale Gardening ~ South DakotaStraw Bale Gardening ~ South Dakota
Straw Bale Gardening ~ South Dakota
 
Rubus parviflorus
Rubus parviflorusRubus parviflorus
Rubus parviflorus
 
Gardening sheet hesperocallis undulata
Gardening sheet   hesperocallis undulataGardening sheet   hesperocallis undulata
Gardening sheet hesperocallis undulata
 
Gardening sheets containers 2015
Gardening sheets   containers 2015Gardening sheets   containers 2015
Gardening sheets containers 2015
 
Fallugia paradoxa
Fallugia paradoxaFallugia paradoxa
Fallugia paradoxa
 
Pollinators - 2013 - gardening sheets
Pollinators - 2013 -  gardening sheetsPollinators - 2013 -  gardening sheets
Pollinators - 2013 - gardening sheets
 
Gardening sheet heuchera pilosissima
Gardening sheet   heuchera pilosissimaGardening sheet   heuchera pilosissima
Gardening sheet heuchera pilosissima
 
Gardening sheets dragonflies
Gardening sheets   dragonfliesGardening sheets   dragonflies
Gardening sheets dragonflies
 
Arctostaphylos pajaroensis
Arctostaphylos pajaroensisArctostaphylos pajaroensis
Arctostaphylos pajaroensis
 
Gardening sheet caulanthus inflatus
Gardening sheet   caulanthus inflatusGardening sheet   caulanthus inflatus
Gardening sheet caulanthus inflatus
 

More from School Vegetable Gardening - Victory Gardens

More from School Vegetable Gardening - Victory Gardens (20)

Behind Enemy Lines - Marthe Cohn - One Woman against Nazi Germany
Behind Enemy Lines - Marthe Cohn - One Woman against Nazi GermanyBehind Enemy Lines - Marthe Cohn - One Woman against Nazi Germany
Behind Enemy Lines - Marthe Cohn - One Woman against Nazi Germany
 
Classical Art School Gardening Posters
Classical Art School Gardening PostersClassical Art School Gardening Posters
Classical Art School Gardening Posters
 
One Teacher Saves her School & her Students
One Teacher Saves her School & her StudentsOne Teacher Saves her School & her Students
One Teacher Saves her School & her Students
 
Coconut Oil helps Heal Children's ADHD - ADD Disease, Autism & Alzheimer Disease
Coconut Oil helps Heal Children's ADHD - ADD Disease, Autism & Alzheimer DiseaseCoconut Oil helps Heal Children's ADHD - ADD Disease, Autism & Alzheimer Disease
Coconut Oil helps Heal Children's ADHD - ADD Disease, Autism & Alzheimer Disease
 
One Teacher Makes Students into Champions
One Teacher Makes Students into ChampionsOne Teacher Makes Students into Champions
One Teacher Makes Students into Champions
 
Good Books help Students Excel in Life & School
Good Books help Students Excel in Life & SchoolGood Books help Students Excel in Life & School
Good Books help Students Excel in Life & School
 
Greening & Restoring the Sahara Desert with the Groasis Waterboxx
Greening & Restoring the Sahara Desert with the Groasis WaterboxxGreening & Restoring the Sahara Desert with the Groasis Waterboxx
Greening & Restoring the Sahara Desert with the Groasis Waterboxx
 
Groasis Waterboxx Lets Trees Grow Up in Unfriendly Places
Groasis Waterboxx Lets Trees Grow Up in Unfriendly PlacesGroasis Waterboxx Lets Trees Grow Up in Unfriendly Places
Groasis Waterboxx Lets Trees Grow Up in Unfriendly Places
 
Explanation of the Groasis Technology for Growing Food in Desert Regions
Explanation of the Groasis Technology for Growing Food in Desert RegionsExplanation of the Groasis Technology for Growing Food in Desert Regions
Explanation of the Groasis Technology for Growing Food in Desert Regions
 
Groasis Waterboxx & the Agua, Vida Naturaleza Project for Growing Food in Des...
Groasis Waterboxx & the Agua, Vida Naturaleza Project for Growing Food in Des...Groasis Waterboxx & the Agua, Vida Naturaleza Project for Growing Food in Des...
Groasis Waterboxx & the Agua, Vida Naturaleza Project for Growing Food in Des...
 
Groasis Waterboxx Handbook on Planting Instructions for Trees & Crops in Dese...
Groasis Waterboxx Handbook on Planting Instructions for Trees & Crops in Dese...Groasis Waterboxx Handbook on Planting Instructions for Trees & Crops in Dese...
Groasis Waterboxx Handbook on Planting Instructions for Trees & Crops in Dese...
 
Groasis Waterboxx Manual for Growing Vegetables in Arid Lands
Groasis Waterboxx Manual for Growing Vegetables in Arid LandsGroasis Waterboxx Manual for Growing Vegetables in Arid Lands
Groasis Waterboxx Manual for Growing Vegetables in Arid Lands
 
Water Saving Measures of Using the Groasis Waterboxx in Organic Gardening in ...
Water Saving Measures of Using the Groasis Waterboxx in Organic Gardening in ...Water Saving Measures of Using the Groasis Waterboxx in Organic Gardening in ...
Water Saving Measures of Using the Groasis Waterboxx in Organic Gardening in ...
 
Making a Week’s Worth of Rain Last the Whole Year
Making a Week’s Worth of Rain Last the Whole YearMaking a Week’s Worth of Rain Last the Whole Year
Making a Week’s Worth of Rain Last the Whole Year
 
Using the Groasis Waterboxx to Plant New Trees in Desert Regions
Using the Groasis Waterboxx to Plant New Trees in Desert RegionsUsing the Groasis Waterboxx to Plant New Trees in Desert Regions
Using the Groasis Waterboxx to Plant New Trees in Desert Regions
 
Greening the World - Desert Restoration, Reduce CO2, Feed the People & Create...
Greening the World - Desert Restoration, Reduce CO2, Feed the People & Create...Greening the World - Desert Restoration, Reduce CO2, Feed the People & Create...
Greening the World - Desert Restoration, Reduce CO2, Feed the People & Create...
 
Groasis Technology Compared to Drip Irrigation
Groasis Technology Compared to Drip IrrigationGroasis Technology Compared to Drip Irrigation
Groasis Technology Compared to Drip Irrigation
 
Groasis Waterboxx - Palm Springs Students Test New Planter Designed to Fight ...
Groasis Waterboxx - Palm Springs Students Test New Planter Designed to Fight ...Groasis Waterboxx - Palm Springs Students Test New Planter Designed to Fight ...
Groasis Waterboxx - Palm Springs Students Test New Planter Designed to Fight ...
 
Groasis Waterboxx Handbook for Planting Methods & Sample of Crop Test Results...
Groasis Waterboxx Handbook for Planting Methods & Sample of Crop Test Results...Groasis Waterboxx Handbook for Planting Methods & Sample of Crop Test Results...
Groasis Waterboxx Handbook for Planting Methods & Sample of Crop Test Results...
 
Groasis Waterboxx Technology Offers Possible Cure for the Deserts
Groasis Waterboxx Technology Offers Possible Cure for the DesertsGroasis Waterboxx Technology Offers Possible Cure for the Deserts
Groasis Waterboxx Technology Offers Possible Cure for the Deserts
 

Recently uploaded

Sanyam Choudhary Chemistry practical.pdf
Sanyam Choudhary Chemistry practical.pdfSanyam Choudhary Chemistry practical.pdf
Sanyam Choudhary Chemistry practical.pdfsanyamsingh5019
 
Interactive Powerpoint_How to Master effective communication
Interactive Powerpoint_How to Master effective communicationInteractive Powerpoint_How to Master effective communication
Interactive Powerpoint_How to Master effective communicationnomboosow
 
APM Welcome, APM North West Network Conference, Synergies Across Sectors
APM Welcome, APM North West Network Conference, Synergies Across SectorsAPM Welcome, APM North West Network Conference, Synergies Across Sectors
APM Welcome, APM North West Network Conference, Synergies Across SectorsAssociation for Project Management
 
The basics of sentences session 2pptx copy.pptx
The basics of sentences session 2pptx copy.pptxThe basics of sentences session 2pptx copy.pptx
The basics of sentences session 2pptx copy.pptxheathfieldcps1
 
Separation of Lanthanides/ Lanthanides and Actinides
Separation of Lanthanides/ Lanthanides and ActinidesSeparation of Lanthanides/ Lanthanides and Actinides
Separation of Lanthanides/ Lanthanides and ActinidesFatimaKhan178732
 
Accessible design: Minimum effort, maximum impact
Accessible design: Minimum effort, maximum impactAccessible design: Minimum effort, maximum impact
Accessible design: Minimum effort, maximum impactdawncurless
 
JAPAN: ORGANISATION OF PMDA, PHARMACEUTICAL LAWS & REGULATIONS, TYPES OF REGI...
JAPAN: ORGANISATION OF PMDA, PHARMACEUTICAL LAWS & REGULATIONS, TYPES OF REGI...JAPAN: ORGANISATION OF PMDA, PHARMACEUTICAL LAWS & REGULATIONS, TYPES OF REGI...
JAPAN: ORGANISATION OF PMDA, PHARMACEUTICAL LAWS & REGULATIONS, TYPES OF REGI...anjaliyadav012327
 
Russian Call Girls in Andheri Airport Mumbai WhatsApp 9167673311 💞 Full Nigh...
Russian Call Girls in Andheri Airport Mumbai WhatsApp  9167673311 💞 Full Nigh...Russian Call Girls in Andheri Airport Mumbai WhatsApp  9167673311 💞 Full Nigh...
Russian Call Girls in Andheri Airport Mumbai WhatsApp 9167673311 💞 Full Nigh...Pooja Nehwal
 
Ecosystem Interactions Class Discussion Presentation in Blue Green Lined Styl...
Ecosystem Interactions Class Discussion Presentation in Blue Green Lined Styl...Ecosystem Interactions Class Discussion Presentation in Blue Green Lined Styl...
Ecosystem Interactions Class Discussion Presentation in Blue Green Lined Styl...fonyou31
 
Mastering the Unannounced Regulatory Inspection
Mastering the Unannounced Regulatory InspectionMastering the Unannounced Regulatory Inspection
Mastering the Unannounced Regulatory InspectionSafetyChain Software
 
Introduction to Nonprofit Accounting: The Basics
Introduction to Nonprofit Accounting: The BasicsIntroduction to Nonprofit Accounting: The Basics
Introduction to Nonprofit Accounting: The BasicsTechSoup
 
The byproduct of sericulture in different industries.pptx
The byproduct of sericulture in different industries.pptxThe byproduct of sericulture in different industries.pptx
The byproduct of sericulture in different industries.pptxShobhayan Kirtania
 
1029-Danh muc Sach Giao Khoa khoi 6.pdf
1029-Danh muc Sach Giao Khoa khoi  6.pdf1029-Danh muc Sach Giao Khoa khoi  6.pdf
1029-Danh muc Sach Giao Khoa khoi 6.pdfQucHHunhnh
 
Q4-W6-Restating Informational Text Grade 3
Q4-W6-Restating Informational Text Grade 3Q4-W6-Restating Informational Text Grade 3
Q4-W6-Restating Informational Text Grade 3JemimahLaneBuaron
 
BAG TECHNIQUE Bag technique-a tool making use of public health bag through wh...
BAG TECHNIQUE Bag technique-a tool making use of public health bag through wh...BAG TECHNIQUE Bag technique-a tool making use of public health bag through wh...
BAG TECHNIQUE Bag technique-a tool making use of public health bag through wh...Sapna Thakur
 
Sports & Fitness Value Added Course FY..
Sports & Fitness Value Added Course FY..Sports & Fitness Value Added Course FY..
Sports & Fitness Value Added Course FY..Disha Kariya
 
POINT- BIOCHEMISTRY SEM 2 ENZYMES UNIT 5.pptx
POINT- BIOCHEMISTRY SEM 2 ENZYMES UNIT 5.pptxPOINT- BIOCHEMISTRY SEM 2 ENZYMES UNIT 5.pptx
POINT- BIOCHEMISTRY SEM 2 ENZYMES UNIT 5.pptxSayali Powar
 
Student login on Anyboli platform.helpin
Student login on Anyboli platform.helpinStudent login on Anyboli platform.helpin
Student login on Anyboli platform.helpinRaunakKeshri1
 
Arihant handbook biology for class 11 .pdf
Arihant handbook biology for class 11 .pdfArihant handbook biology for class 11 .pdf
Arihant handbook biology for class 11 .pdfchloefrazer622
 

Recently uploaded (20)

Sanyam Choudhary Chemistry practical.pdf
Sanyam Choudhary Chemistry practical.pdfSanyam Choudhary Chemistry practical.pdf
Sanyam Choudhary Chemistry practical.pdf
 
Interactive Powerpoint_How to Master effective communication
Interactive Powerpoint_How to Master effective communicationInteractive Powerpoint_How to Master effective communication
Interactive Powerpoint_How to Master effective communication
 
APM Welcome, APM North West Network Conference, Synergies Across Sectors
APM Welcome, APM North West Network Conference, Synergies Across SectorsAPM Welcome, APM North West Network Conference, Synergies Across Sectors
APM Welcome, APM North West Network Conference, Synergies Across Sectors
 
The basics of sentences session 2pptx copy.pptx
The basics of sentences session 2pptx copy.pptxThe basics of sentences session 2pptx copy.pptx
The basics of sentences session 2pptx copy.pptx
 
Mattingly "AI & Prompt Design: Structured Data, Assistants, & RAG"
Mattingly "AI & Prompt Design: Structured Data, Assistants, & RAG"Mattingly "AI & Prompt Design: Structured Data, Assistants, & RAG"
Mattingly "AI & Prompt Design: Structured Data, Assistants, & RAG"
 
Separation of Lanthanides/ Lanthanides and Actinides
Separation of Lanthanides/ Lanthanides and ActinidesSeparation of Lanthanides/ Lanthanides and Actinides
Separation of Lanthanides/ Lanthanides and Actinides
 
Accessible design: Minimum effort, maximum impact
Accessible design: Minimum effort, maximum impactAccessible design: Minimum effort, maximum impact
Accessible design: Minimum effort, maximum impact
 
JAPAN: ORGANISATION OF PMDA, PHARMACEUTICAL LAWS & REGULATIONS, TYPES OF REGI...
JAPAN: ORGANISATION OF PMDA, PHARMACEUTICAL LAWS & REGULATIONS, TYPES OF REGI...JAPAN: ORGANISATION OF PMDA, PHARMACEUTICAL LAWS & REGULATIONS, TYPES OF REGI...
JAPAN: ORGANISATION OF PMDA, PHARMACEUTICAL LAWS & REGULATIONS, TYPES OF REGI...
 
Russian Call Girls in Andheri Airport Mumbai WhatsApp 9167673311 💞 Full Nigh...
Russian Call Girls in Andheri Airport Mumbai WhatsApp  9167673311 💞 Full Nigh...Russian Call Girls in Andheri Airport Mumbai WhatsApp  9167673311 💞 Full Nigh...
Russian Call Girls in Andheri Airport Mumbai WhatsApp 9167673311 💞 Full Nigh...
 
Ecosystem Interactions Class Discussion Presentation in Blue Green Lined Styl...
Ecosystem Interactions Class Discussion Presentation in Blue Green Lined Styl...Ecosystem Interactions Class Discussion Presentation in Blue Green Lined Styl...
Ecosystem Interactions Class Discussion Presentation in Blue Green Lined Styl...
 
Mastering the Unannounced Regulatory Inspection
Mastering the Unannounced Regulatory InspectionMastering the Unannounced Regulatory Inspection
Mastering the Unannounced Regulatory Inspection
 
Introduction to Nonprofit Accounting: The Basics
Introduction to Nonprofit Accounting: The BasicsIntroduction to Nonprofit Accounting: The Basics
Introduction to Nonprofit Accounting: The Basics
 
The byproduct of sericulture in different industries.pptx
The byproduct of sericulture in different industries.pptxThe byproduct of sericulture in different industries.pptx
The byproduct of sericulture in different industries.pptx
 
1029-Danh muc Sach Giao Khoa khoi 6.pdf
1029-Danh muc Sach Giao Khoa khoi  6.pdf1029-Danh muc Sach Giao Khoa khoi  6.pdf
1029-Danh muc Sach Giao Khoa khoi 6.pdf
 
Q4-W6-Restating Informational Text Grade 3
Q4-W6-Restating Informational Text Grade 3Q4-W6-Restating Informational Text Grade 3
Q4-W6-Restating Informational Text Grade 3
 
BAG TECHNIQUE Bag technique-a tool making use of public health bag through wh...
BAG TECHNIQUE Bag technique-a tool making use of public health bag through wh...BAG TECHNIQUE Bag technique-a tool making use of public health bag through wh...
BAG TECHNIQUE Bag technique-a tool making use of public health bag through wh...
 
Sports & Fitness Value Added Course FY..
Sports & Fitness Value Added Course FY..Sports & Fitness Value Added Course FY..
Sports & Fitness Value Added Course FY..
 
POINT- BIOCHEMISTRY SEM 2 ENZYMES UNIT 5.pptx
POINT- BIOCHEMISTRY SEM 2 ENZYMES UNIT 5.pptxPOINT- BIOCHEMISTRY SEM 2 ENZYMES UNIT 5.pptx
POINT- BIOCHEMISTRY SEM 2 ENZYMES UNIT 5.pptx
 
Student login on Anyboli platform.helpin
Student login on Anyboli platform.helpinStudent login on Anyboli platform.helpin
Student login on Anyboli platform.helpin
 
Arihant handbook biology for class 11 .pdf
Arihant handbook biology for class 11 .pdfArihant handbook biology for class 11 .pdf
Arihant handbook biology for class 11 .pdf
 

Row Covers & Frost Protection; Gardening Guidebook for Doña Ana County, New Mexico

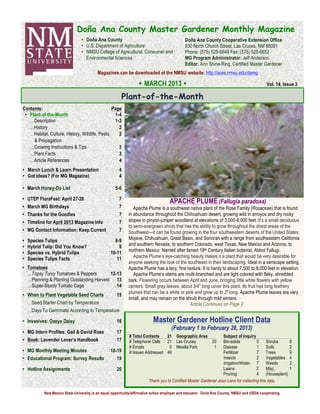
  • 1. New Mexico State University is an equal opportunity/affirmative action employer and educator. Doña Ana County, NMSU and USDA cooperating.! Contents: Page • Plant-of-the-Month 1-4 …Description 1-2 …History 2 …Habitat, Culture, History, Wildlife, Pests 2 & Propagation …Growing Instructions & Tips 3 …Plant Facts 3 …Article References 4 • March Lunch & Learn Presentation 4 • Got Ideas? (For MG Magazine) 4 • March Honey-Do List 5-6 • UTEP FloraFest: April 27-28 7 • March MG Birthdays 7 • Thanks for the Goodies 7 • Timeline for April 2013 Magazine Info 7 • MG Contact Information: Keep Current 7 • Species Tulips 8-9 • Hybrid Tulip: Did You Know? 9 • Species vs. Hybrid Tulips 10-11 • Species Tulips Facts 11 • Tomatoes …Topsy Turvy Tomatoes & Peppers 12-13 …Planning & Planting Outstanding Harvest 13 …Super-Sturdy Tomato Cage 14 • When to Plant Vegetable Seed Charts 15 …Seed Starter Chart by Temperature …Days To Germinate According to Temperature • Invasives: Oxeye Daisy 16 • MG Intern Profiles: Gail & David Ross 17 17 • Book: Lavender Lover’s Handbook 17 • MG Monthly Meeting Minutes 18-19 • Educational Program: Survey Results 19 • Hotline Assignments 20 ! !!!!! ! Doña Ana County Master Gardener Monthly Magazine • Doña Ana County • U.S. Department of Agriculture • NMSU College of Agricultural, Consumer and Environmental Sciences! Doña Ana County Cooperative Extension Office 530 North Church Street, Las Cruces, NM 88001 Phone: (575) 525-6649 Fax: (575) 525-6652 MG Program Administrator: Jeff Anderson Editor: Ann Shine-Ring, Certified Master Gardener !Magazines can be downloaded at the NMSU website: http://aces.nmsu.edu/damg ! MARCH 2013 ! Vol. 14, Issue 3 Plant-of-the-Month Master Gardener Hotline Client Data (February 1 to February 28, 2013) # Total Contacts 21 Geographic Area Subject of Inquiry # Telephone Calls 21 Las Cruces 20 Bio-solids 0 Shrubs 8 # Emails 0 Mesilla Park 1 Disease 1 Soils 2 # Issues Addressed 49 Fertilizer 7 Trees 9 Insects 2 Vegetables 4 Irrigation/Water 7 Weeds 2 Lawns 2 Misc. 1 Pruning 4 (Houseplant) Thank you to Certified Master Gardener Joan Lane for collecting this data. ! APACHE PLUME (Fallugia paradoxa) Apache Plume is a southwest native plant of the Rose Family (Rosaceae) that is found in abundance throughout the Chihuahuan desert, growing wild in arroyos and dry rocky slopes in pinyon-juniper woodland at elevations of 3,000-8,000 feet. It’s a small deciduous to semi-evergreen shrub that has the ability to grow throughout the driest areas of the Southwest—it can be found growing in the four southwestern deserts of the United States: Mojave, Chihuahuan, Great Basin, and Sonoran with a range from southeastern California and southern Nevada, to southern Colorado, west Texas, New Mexico and Arizona, to northern Mexico. Named after famed 19th Century Italian botanist, Abbot Fallugi. Apache Plume’s eye-catching beauty makes it a plant that would be very desirable for anyone seeking the look of the southwest in their landscaping. Ideal in a xeriscape setting, Apache Plume has a lacy, fine texture. It is hardy to about 7,500 to 8,000 feet in elevation. Apache Plume’s stems are multi-branched and are light colored with flaky, shredded bark. Flowering occurs between April and June, bringing little white flowers with yellow centers. Small gray leaves, about 3/4" long cover this plant. Its fruit has long feathery plumes that can be a white or pink and grow up to 2" long. Apache Plume leaves are very small, and may remain on the shrub through mild winters. Article Continues on Page 2
  • 2. Doña Ana County Master Gardener Monthly Magazine—March 2013 Page 2 Apache Plume—Continued from Front Page This shrub can grow up to 6 feet tall and wide and usually requires no special caring other than being watered occasionally. Under ideal conditions this plant can reach 8 feet in height and width. Apache Plume (shown above) bears small, lobed leaves, which are deep green on top, and rusty beneath. It bears flowers resembling single white roses, which bloom in spring and summer. Apache Plume is sometimes confused with the Cliffrose, Cowania mexicana, (shown below) but can be distinguished by its more shrub- like appearance, having numerous branches at the base. Cliffrose (Cowania mexicana) Apache Plume is drought-tolerant when well established and also very tolerant of reflected heat. It should be planted only in soil that drains well and should not be over watered. Don't plant an Apache plume in or adjacent to irrigated lawns. Instead, plant it in dry spots with south or west exposures. Apache Plume is normally semi-evergreen in the Las Cruces area, although very harsh winter conditions will cause it to drop most of its leaves. It blooms in the spring and sometimes again in the fall, with 2 inch white rose-like flowers. Plants prefer full sun, are extremely drought-tolerant, and are hardy to minus 0°F degrees. The Apache Plume gets its name from the 1-2" long feathery styles that persist after the petals of the flowers have dropped. When the fruit has matured, wind carries the seeds by the styles to new locations. Culture: This native shrub can be pruned into a hedge, although its natural form is tame and well shaped. Apache Plume is also excellent for erosion control due to its spreading root system. It is dense and fast growing, spreading by woody rhizomes, so it will also form an informal hedge relatively quickly. In good garden soil with organic matter it looks rangy and produces fewer flowers. Although it naturally forms a rounded shape, it can look somewhat messy and benefits from selective pruning once or twice a year, or being cut back to the ground every few years. The name Apache Plume is derived from its feathery, delicate- looking fruits or seeds, which appear after the flowers starting in the summer. These "plumes" are pinkish-purple in color, about 2 1/2" in diameter grow from a seed-like base at the tips of tangled, slender branches. History: This plant's common name is derived from the fact that it resembled Apache war bonnets. Tewa and other native peoples used the stem/branches of Apache Plumes to make brooms and arrow shafts. The Tewa used an infusion of leaves as a shampoo to promote the growth of hair. The Navajo used Apache Plume as a tool of witchcraft to cause insanity. They also used the leaves as an emetic (to cause vomiting) in various ceremonies. Best Habitat: The Apache Plume prefers full sun, is extremely drought tolerant, and is hardy to 0°F degrees. It prefers well- drained soil, although it will tolerate many different types of soil. It looks best in a landscape if given deep monthly watering through the hottest time of year once it is established. The regular deep watering will promote faster growth, fuller foliage and more flowers, although it actually will live without any extra water (except for natural rainfall) once established. Wildlife: The flowers of Apache Plume attract bees and butterflies, the plants shelter wildlife, and the seeds attract birds. Pests: None known Propagation: Germinates readily from fresh, untreated seed that has not been allowed to dry out. Seed that has dried must be stratified. Easily propagated from layers and separation of suckers from horizontal roots. …Seed Collection: Collect from August to November when pink styles of fruits turn white and seed is easily stripped or shaken from tree. Air-dry seeds and store in cloth bags in dry, well-ventilated place. …Seed Treatment: Stratify 30 days at 41 degrees. However, no treatment may give satisfactory results. To grow plants from seeds, collect them in the fall and chill them for 3 months before sowing in the early spring. Sow seeds anytime or start from softwood cuttings, layering or root suckers. A better choice, however, is to buy mature plants in 1 gallon to 5 gallon containers at local nurseries in the Southwest where they are usually found in the nursery’s selection of water-wise plants. Article Continues on Page 3
  • 3. Doña Ana County Master Gardener Monthly Magazine—March 2013 Page 3 Apache Plume—Continued from Page 2 Growing Instructions 1) Plant Apache Plume in a south or west portion of your landscape that receives the warmest temperatures. Choose a spot that receives full, direct sunlight and contains extremely well-draining, sandy soil. Space the plant six feet away from other vegetation. 2) Water young, newly planted Apache Plumes once a week. Flood the soil surrounding the shrub with a garden hose. Reduce supple- mental watering once the shrub becomes established and starts to produce new foliage and stems. Water mature, established shrubs once a month during hot summer months and periods of no rainfall 3) Fertilize the Apache Plume in the early spring when the plant is no longer dormant and new leaves begin to emerge. Apply a 10-10-10 (N-P-K) slow-release fertilizer at a rate of 1 tablespoon per square foot of soil. Spread the fertilizer evenly in a ring around the shrub, just outside the perimeter of the plant's branches. Mix the fertilizer granules into the top 1 to 3 inches of soil using a rake. Water the area thoroughly to activate the fertilizer. 4) Prune the Apache Plume in the late winter while it is still dormant. Cut out any broken, damaged or diseased stems using a pair of pruning shears. Make each cut 1/4 inch above a growth node or dormant bud. Thin the plant by no more than one-third, removing the oldest stems first. 5) Trim the shrub in the early summer after it flowers. Clip back any excessive long or straggly stems to shape the plant and keep it looking presentable. Growing Tips/Transplanting: The best time to plant most native shrubs and trees is in the fall, although early spring is the next best choice. It is very difficult to transplant a mature Apache Plume plant from its natural habitat in the desert. Digging up the plant will usually kill it, mainly due to the fact that it separates the plant from its massive root system. Since the Apache Plume spreads by rhizomes (spreading stems from underground) a mature plant usually depends on this spreading root system for survival. However, root sprouts can be collected with rhizomes in early spring, with better success. Your best choice, however, is to buy a mature Apache Plume plant at your local nursery. Nursery stock of Apache Plume in 1 gallon to 5 gallon containers are readily available at your favorite local nursery, and will transplant successfully into your garden. Summary: Apache Plume one of the showiest of the Southwestern native shrubs. It really stands out when the pink, silky-plumed seed heads develop and cover the tips of the branches for many months. As a result, Apache plume has become a favorite xeriscape plant in the Southwest." APACHE PLUME FACTS (Fallugia paradoxa) Botanical name: Fallugia paradoxa Family Name: Rosaceae Habit: Semi-evergreen, medium shrub; loosely branched Origin: Rocky slopes, open woods & dry washes of central Texas, New Mexico, Colorado and Southern California. Flowers: Five-petaled round white flowers 1”-2” wide with yellow centers appear from April through June through the summer. Seedheads are pinkish, fluffy and long lasting. Foliage: Aromatic—smells like an attar (i.e. fragrant essential oil) of roses crossed with quinine. Heat Tolerance: Plant in a place where plant will get full sun. Fruit: Feathery achene Hardiness: Hardy to 0°F; USDA Zones 6a to 10a; very tolerant of drought, heat, wind and poor soil. Blooming: For better flowering, some afternoon shade, especially in desert heat; blooms continually; flowers on new spring growth Soil and Water: Requires no irrigation once established; needs gritty and well-drained soil; does poorly in heavy clay; extremely drought-tolerant and tolerant to reflected sun; occasional watering helps flowering, but watch for root rot. Fertilization: In spring before new growth, use general fertilizer. Pruning: Prune 1-2 times a year or cut to ground if it has too much dead wood. Usually, pruning is not needed. Wildlife: Provides shelter/cover for small mammals and ground-dwelling birds. Flowers used by butterflies and bees; cover for packrat middens. Comments: Fibrous root system--easy to transplant. Takes a few years for shrubs to root out and develop some character. Disadvantages: Tendency to sucker and can be slow to get established. Uses: Good companion plant to Yucca glauca (Soapweed) & Callirhoe involucrate (WineCup)
  • 4. Doña Ana County Master Gardener Monthly Magazine—March 2013 Page 4 APACHE PLUME −Article References− Apache Plume (Fallugia paradoxa) on Desert USA at link: http://www.desertusa.com/mag98/aug/papr/du_aplume.html Apache Plume (Fallugia paradoxa) on EasyBloom.com at link: http://www.easybloom.com/plantlibrary/plant/apache-plume Apache Plume on Celebrating Wildflowers, USDA Forest Service, at link: http://www.fs.fed.us/wildflowers/plant-of-the- week/fallugia_paradoxa.shtml Apache Plume on NMSU Low Water Plants at link: http://aces.nmsu.edu/pes/lowwaterplants/apache-plume.html Apache Plume on Plant Talk Colorado at link: http://www.ext.colostate.edu/ptlk/1742.html Apache Plume Photos on SW Colorado Wild Flowers.com at link: http://www.swcoloradowildflowers.com/white%20enlarged%20photo%2 0pages/fallugia%20paradoxa.htm Apache Plume, Ponil on Texas Native Plants Database at link: http://aggie- horticulture.tamu.edu/ornamentals/nativeshrubs/fallugiaparadox.htm Apache Plume: Fact Sheet on Intermountain Native Plant Growers Assn. at link: http://www.fs.fed.us/wildflowers/plant-of-the- week/fallugia_paradoxa.shtml Fallugia paradoxa on Sunset Magazine at link: http://plantfinder.sunset.com/searchPlants.action?srch=apache+plume& input.x=20&input.y=7 Fallugia paradoxa on Texas Native Plants Database, Lady Bird Johnson Wildflower Center, University of Texas at Austin at link: http://www.wildflower.org/gallery/species.php?id_plant=FAPA How To Grow Apache Plume on HomeGuides.sfgate.com at link: http://homeguides.sfgate.com/grow-apache-plume-38001.html Landscaping with Native Plants of the Southwest by George Oxford Miller, Voyageur Press, 2007 Native Gardens for Dry Climates by Sally & Andy Wasowski, Clarkson Potter Publishers, 1995 Plant of the Month (March 1998) by Kerry Krumrine, Co-Owner of J & K Growers, Inc. at link: http://weather.nmsu.edu/nmcrops/ornamentals/apache.htm Plants We Love: Apache Plume on Horticulture at link: http://www.hortmag.com/plants/plants-we-love/apacheplume Xeriscape Plant Guide by Denver Water, American Waterworks Association, Fulcrum Press, 1996 BRANIGAN MEMORIAL LIBRARY “LUNCH & LEARN” PRESENTATION Date: Thursday, March 21, 2013 Time: 12:00-1:00 p.m. Place: Branigan Memorial Library Location: Roadrunner Meeting Room Don't forget to bring your lunch! Topic: STARTING SEEDS INDOORS Speaker: Dave Turner, El Paso Master Gardener Summary: Learn how to get a jump-start on your summer veggie gardening by starting seeds indoors. Information provided by Sylvia Hacker, Certified Master Gardener GOT IDEAS? If you have a gardening-related article or idea about a Plant-of-the-Month, a vegetable, tree or weed to share for our MG Magazine, please send me a link or email me about your idea. Anyone can submit information or an article for inclusion in our monthly magazine. FYI, I do try to put in information that is seasonal in nature to insure that MGs and others get the resources on a timely basis. Email: asring@powerc.net Mobile: (575) 640.7177
  • 5. Doña Ana County Master Gardener Monthly Magazine—March 2013 Page 5 Honey-Do List for March 2013 GENERAL: We are all eager to get outside and start planting but remember our average last freeze date is between April 1 and April 20! Be prepared to protect young plants from the desiccating winds and cold nights of March. Row covers, old blankets, and walls of water come to mind. Check your irrigation systems and add more drip emitters if needed to water under the drip line of plants. Irrigate established shrubs and trees, preferably to a depth of 2 feet. Use a soil probe to determine depth. ORNAMENTALS • Plant cannas, crinum, dahlia transplants, verbena, gaillardia, gazania, marigold seeds, Mexican and Maximilian sunflower, aster, coreopsis, statice, petunia and zinnia. • Plant hollyhocks now through May. • Divide and replant perennials such as chrysanthemum, daylily, and Shasta daisy. • Seed of warm-season annuals that were planted in February should be germinated, and the small seedlings will be growing quickly. This regularly to keep the plants from crowding each other. • Plant Carolina Jessamine, Virginia creeper, trumpet vines, silver lace vine, and Lady Banks roses. • After the last day of freezing weather, prune frost-damaged foliage and branches. FRUIT, NUT, CITRUS & SHADE TREES • Begin mid-month to fertilize established fruit and nut trees. Be careful not to fertilize fruit while it’s blooming; this can shock the plant, causing blossom drop and subsequent loss of fruit. • Be careful about spraying fruit trees and other blooming edible plants. Bees and other insects are working hard to pollinate flowers so there will be a good fruit set. • As soon as fruit has set on deciduous fruit trees, especially apples, peaches, pears and apricots, and is about the size of a walnut, begin to thin the fruit. • Continue to harvest citrus. • Finish planting bareroot material before mid-month. • Irrigate established shrubs and trees, preferably to a depth of 2 feet. Use a soil probe to determine depth. • After the last day of freezing weather, prune frost-damaged foliage and branches. VEGETABLES, FRUIT & HERBS • Finish planting Cole crops, radishes, parsley, lettuces, kohlrabi, and leafy greens. • Plant garlic, beets, Brussels sprouts, and Chinese cabbage. • Late March, plant tomatoes, eggplant, peppers, summer squash, sweet corn, and ‘New Zealand’ summer spinach. • Cut back frost-damaged perennials herbs such as mint and sage, then fertilize and water. • Plant strawberries and grape vines. Grapes begin to grow rapidly at this time of year. Thin out extra shoots and tendrils to continue to train the vine to the arbor or trellis. ! LAWNS / TURF / ORNAMENTAL GRASSES • If you didn’t fertilize cool-season grass in February, do so now. • Clean up cool-season ornamental grasses by “combing” with your fingers or a rake. If plant is large and ratty- looking, cut it back also. • Scalp warm-season grasses, lower mower height and mow to remove dead leaf tissue. Rake or bag clippings. Clean air filter often during this process and be sure to wear a dust mask. • Cut back pampas grass and other warm-season ornamental grasses. • Take your lawn mower to the shop for a tune up. Much of our suggested garden task information comes directly from Month-by-Month Gardening in the Desert Southwest by Mary Irish (2002). We wanted you to know that this is an outstanding gardening resource book. Also, some of our recommendations come from Southwest Planting Tips by the Month and the Tucson Gardening Calendar both of which are produced by the Tucson Botanical Gardens. Another resource used in our Honey-Do List is The Desert Gardener’s Calendar: Your Month-by-Month Guide by George Brookbank (1999.) Recommendations from Sunset Magazine’s monthly Southwest Garden Guides are also included.
  • 6. Doña Ana County Master Gardener Monthly Magazine—March 2013 Page 6 Honey-Do List for March—Continued CACTI & SUCCULENTS • Begin to plant warm-season succulents now through May. • Watch newly planted succulents like agaves and cactus to be sure they are not being sunburned. Protect the south or west side of these plants with a sunscreen a shade cloth or a light-colored cloth. Protection can be draped directly on the plant or laid over a frame. Pale-skin or yellowed patches that appear suddenly on the plant are the first signs of sunburn.! • Remove dead ocotillo canes. Bend cane gently; if it snaps off, it’s dead. Then make a clean cut with loppers.! • Increase watering of warm-season succulents to twice a month. As with most plants, it is better to water deeply but infrequently.! • Water winter-dormant succulents only when leaves first show, then begin to water regularly.! • Prune any frost damage from succulents with a clean cut, dusting the cut with sulfur when complete. Cut back cholla and prickly pears if they have become too large as they will begin to grow quickly by the end of the month. Some of the above recommendations came from the Tucson Botanical Garden’s monthly “calendar of care” for cacti and succulents.! ROSES • To encourage larger flowers, remove any side buds that arise out of Hybrid teas. On shrub roses, Floribunda or Grandiflora roses, remove the center bud of the cluster to increase flower size. • Renew a regular fertilization schedule for established roses. Many gardeners fertilize once a month, but discontinue it during the hottest part of the summer. Roses are heavy feeders, and those grown in containers or in soils that have not been heavily amended when the roses where planted, may need more frequent fertilization. • In late March, fertilize newly planted roses with a mild fertilizer of fish emulsion. Do not use granular-formulated fertilizers, even if they are geared for roses, until mid-April when the red-colored new budding begins as it could burn your roses and stunt blooming. • Organic fertilizers like alfalfa meal, compost or other formulations for roses that blend many ingredients, work more slowly and can be applied more frequently. • Finish up any roses that still need some pruning. Remove all leaves and week crossing, diseased or damaged canes, and cut back the entire rose plant to approximately 24 inches tall. Leave three to five healthy canes. • Every 5-7 days, water established roses to a depth of 16”-18”. Remember, it is more important to water deeply than to water often. • Continue to monitor for aphids and powdery mildew on your roses. Keep the area around your roses free of debris, and mulch heavily to prevent splashing from any overhead watering. PESTS • Keep an eye out for aphids on the new succulent growth of roses, lilacs, and others. Hose them off with a strong jet of water. • To reduce problems with powdery mildew, water susceptible plants in the early morning. Also, clean leaf litter from under plants. This will reduce pathogens. • Flea beetles can attack Mexican evening primrose foliage and tender spring vegetables. • Look for caterpillars on flowering plants. It is always important to correctly identify any insect you suspect may have caused damage to your plants. If you do not know what the insect is, collect one in a plastic bag or small jar and take it to the Doña Ana County Cooperative Extension Office located at 530 N. Church in Las Cruces (located just north of the Main Post Office downtown.) MISCELLANEOUS • Check irrigation systems. Add more dry emitters if needed to water under drip line of plants. • Spread mulch under and around plants. • Be prepared to protect young plants from the desiccating winds and cold nights of March. Row covers, old blankets, and walls of water come to mind.!!
  • 7. Doña Ana County Master Gardener Monthly Magazine—March 2013 Page 7 MARCH BIRTHDAYS Russ Boor March 1 Mary Andrews March 8 Linden Ranels March 19 Jeff Anderson March 30 MANY THANKS FOR THE GOODIES We appreciate your thoughtfulness March Goodies April Goodies Bonnie Eisenberg Ann Shine-Ring Deb Tallent Bonnie Eisenberg Jill Klann Marjie Snell The deadline for submitting information for the April 2013 MG Monthly Magazine will be Friday, March 29th Contact Info: Ann Shine-Ring, Editor asring@powerc.net (575) 640-7177 MG#CONTACT#INFORMATION# Be sure your email address is current so that you will receive important information throughout the month from the MG Program. If you have an update to your email or contact information, please contact: Ann Shine-Ring, Editor asring@powerc.net (575) 640-7177 !
  • 8. Doña Ana County Master Gardener Monthly Magazine—March 2013 Page 8 SPECIES TULIPS Author: Sherri Ribbey, Garden Gate Magazine, April 2013 Whoever said good things come in small packages must have had species tulips in mind. The photos shown in this article should give you an idea of why it’s worth the effort to track down some at one of the mail-order sources available—check out Internet sources too. These wild cousins of hybrids come back year after year without any fuss. Some will even naturalize, or spread into small colonies. Most bloom early in spring, opening with daffodils and grape hyacinths. Besides that, these tough little bulbs are disease-resistant and quite cold hardy. Species tulips do best with full sun and cold winters. Plant them in the fall where they’ll get good drainage and a dry summer. That’s not to say they don’t need any water. If it’s a dry spring, water regularly as soon as the foliage breaks through the soil then stop as the foliage fades. A few species, such as tarda tulip, crocus tulip and Florentine tulip, will tolerate extra summer watering. Here are some great species tulips for your garden. 1. TARDA TULIP Hugging the ground at only 4 to 6 inches tall, Tarda Tulip works best near a path or patio where you can enjoy it up close. There can be up to eight flowers growing from one bulb. It blooms later in spring than other species tulips and is cold-hardy in USDA Zones 3 and 8 and heat-tolerant in AHS Zones 8 to 1. 2. CROCUS TULIP This is a big group of wild tulips. The one shown below on the left has a yellow center, or base. But there’s another one shown on the right that has a black base. Both bloom early in spring and grow 4-6 inches tall. They’re cold-hardy in USDA Zones 4 to 8 and heat-tolerant in AHS Zones 8 to 1. 3. FLORENTINE TULIP Here’s one of the best species for naturalizing. It spreads both by seed and stolon, a stem that runs along the ground and roots at the tip. Florentine Tulip grows 6 to 12 inches tall and is cold-hardy in USDA Zones 3 to 8 and heat-tolerant in AHS Zones 8 to 1. 4. TULIPA ORPHANIDEA Whitallii Groups The flowers of this species tulip pack a surprise. Buff-colored on the outside, the buds open to a vivid burnt orange in midspring. Slender stems are 6 to 12 inches tall and planted in groups of five or more make a big impact. It’s cold-hardy in USDA Zones 4 to 8 and heat-tolerant in AHS Zones 8 to 1. 5. TULIPA HUMILIS PULCHELLA Albocaerulea Oculata Group For such a tiny tulip, the name is a mouthful. It’s only 6 to 8 inches tall, but the white-and-blue flowers are so striking you can’t miss them. It’s cold-hardy in USDA Zones 4 to 8 and heat-tolerant in AHS Zones 8 to 1. Article Continued on Page 9
  • 9. Doña Ana County Master Gardener Monthly Magazine—March 2013 Page 9 Species Tulips—Continued from Page 8 6. TURKESTAN TULIP If you have clay soil, this is the species tulip for you. It tolerates this troublesome situation much better than others. Clusters of creamy white flowers with yellow centers bloom in early spring. These bulbs are quite vigorous, growing 6 to 12 inches tall and producing up to 12 flowers from one bulb. It’s cold-hardy in USDA Zones 3 to 8 and heat-tolerant in AHS Zones 8 to 1. 7. LADY TULIP Soft yellow flowers brushed with a splash of red sit on top of 6 to 12 inch stems in midspring. There’s also a white form with a pink blotch that’s very popular. Both are cold-hardy in USDA Zones 3 to 8 and heat-tolerant in AHS Zones 8 to 1. 8. KOLPAKOWSKI’S TULIP Each of these bulbs produces a single flower on its 6 to 12 inch tall stem in early spring. These bulbs do best when they get very hot, dry soil while they’re dormant in summer so containers are a great place to grow and keep them. Kolpakowski’s tulip is cold-hardy in USDA Zones 3 to 8 and heat- tolerant in AHS Zones 8 to 1. These wild tulips are perfect for tucking into the nooks and crannies of your garden. And why not? They’re practically no-care, come in a wide variety of colors and will fill your garden with color every spring for years.# DID YOU KNOW? Facts About Hybrid Tulips Source: Birds & Blooms, May 2012 $ The number one tulip color is red. $ Two countries claim the tulip as their own. The Turks were the first to have the bulb, but the Dutch embraced it centuries later. $ Planting tulips according to their three bloom times—early,midseason, and late spring—will give you a longer show. $ Take your pick—there are more than 3,000 tulip cultivars to choose from. $ Most tulips should be planted at least 6 inches deep. If yours didn’t come up this year, the problem may have been shallow planting. $ If you want to force tulips inside or in a pot, first store them in a cold place for 12 to 16 weeks. $ The trade in tulips hit a frenzied peak in the 1630’s. Some traders earned as much as 60,000 florins a month—about $44,000—selling tulip futures. $ Carolus Clusius is credited with planting the first tulip in the Netherlands in 1593. Ever since then, the Dutch have been associated with the flower.
  • 10. Doña Ana County Master Gardener Monthly Magazine—March 2013 Page 10 SPECIES vs. HYBRID TULIPS There are so many hybrid tulips to choose from that it can be very difficult to choose. But, today your choice is not of the color kind, but of the specific kind of tulips to plant—hybrid or species. Of course there are the traditional hybrids we all know and love, with their stately stems and big, colorful flowers. But then there are special tulips (as shown above), the ones that remain the way nature intended them to be. They are less obvious and less familiar but no less pleasing. These species tulips, also called botanical tulips, are the parents of the spectacular hybrids that drove the seventeenth- century Dutch frenzy—what was then termed tulip mania—for buying single bulbs at enormous sums. Differences. There are a few notable differences between hybrid tulips and species tulips in general. Hybrid tulips are usually pretty flashy and some have variegation. The next notable difference is in the foliage. Hybrid tulips have bold, large foliage. These leaves are quite wide and get quite long. They are thick and hefty too. Whereas species tulips have finer leaves which are quite a bit shorter and narrower. Species tulips are different from the hybridized garden tulips, seen in gardens worldwide, in that they are less widely grown—and known—than the garden hybrids, and are unlikely to ever outsell or even approach their level of popularity. However, more and more species are becoming available each year. Species tulips are frequently listed under the heading ‘botanical tulips’, which makes them sound dull or specialized, and probably difficult to grow. Tulip species are not difficult to grow and they are certainly not dull. But the real difference comes between blooms and the lasting power of hybrid tulips versus species tulips. You do not have to buy species tulips new every year to guarantee flowers. Plant the bulbs in the right place and they will re-bloom year after year with colorful flowers, and, in time, may even increase by themselves to form sizeable colonies. Species tulips last only a handful of weeks from early April to early May, depending on the tulip and on where you live. Species tulips are a classic choice to tuck into rock gardens. They're also beautiful when planted in casual drifts (they seem to look unnatural in fussy, geometric shapes). To extend the delight of species tulips, plant groups composed of early and late bloomers; for each swath use at least 25 of the larger bulbs or 50 of the smaller. Myriad variations in appearance, color, and structure exist among species tulips, and many interesting ones are available to the home gardener who makes the effort to seek them out. While most local nurseries offer mainly those familiar standard Dutch hybrids, species tulips can be bought from bulb specialists through the Internet and catalogs and delivered to you with ease. The phrase "Well, they don't take much space" is another justification to try just a couple more every year—if you must have a mania, this is a pretty good one to have. Species tulips are smaller in size than their hybrid relatives. Most grow just 4 to 12 inches in height and do not like the competition of other plants around them. Species tulips spread by self-sown seed or stolons. Their foliage is attractive. Many have foliage, which is mottled or gray to blue green in color. Species tulips offer more in the way of bloom. Many have multiple blooms per stem, some have up to seven. Species tulips require full sun, and well-drained, almost gravelly soils that drain quickly between rains. When preparing the site, amend the area several inches wider and deeper than the bulbs will occupy with sand or gravel. Planting on a gentle slope or in a raised bed assures good drainage. Plant the bulbs 5 to 8 inches deep. If you give them a home they like, species tulips succeed and can perennialize—they return spring after spring. In fact, they do so in a wider variety of garden soils than their hybrid relatives. The bulbs for species tulips should be planted in autumn, no more than three to four inches apart, at a depth that's three to four times the height of the bulb. To thrive, they need full sun and good drainage, and a baking-hot, dry summer. If you can, avoid siting them in areas where you already have plants that need frequent summer watering. Impossible? Don't worry. Plant a few bulbs each in some six- to eight-inch-diameter plastic pots (choose ones with lots of drainage holes). Cover the pots with half-inch wire screening, which will frustrate the mice and voles that so love tulip bulbs. Plant the pots, and when the foliage dies back, dig the pots up and lay them on their sides. Leave them to dry all summer, and then replant in fall. During winter they need a cold period to rest. Species tulips can be used with other spring blooming plants such as pasque flower or grape hyacinth. Siberian iris and crestediris also make excellent companions. Species tulips are also suitable for containers. Article Continues on Page 11
  • 11. Doña Ana County Master Gardener Monthly Magazine—March 2013 Page 11 Species vs. Hybrid Tulips (Continued from Page 10) Even in warmer areas, such as Zones 7, 8, and 9, where mild winters make some bulbs difficult to grow, there are botanical tulips that do well. Specialty suppliers can recommend other varieties. In warmer parts of the United States (Zones 8 to 10), if your soil does not stay below 50 degrees for several weeks at any time during the year, try digging up the bulbs after the foliage dies back in late spring and store them in a dry, quite cool place. Then replant them in November or early December in a spot with only morning or partial sun. If you want long-lived tulips, pick the species types. These include wild varieties and selections developed from those species. Most are smaller in stature and bloom size than hybrid tulips. Because they are variants of wildflowers, species tulips are usually long-lived, hardy, and withstand stormy spring weather conditions. Many multiply and spread from year to year. Species tulips are especially suited for growing in rock gardens or tucked (see photo below) into beds and borders. Many open only in sunny conditions, keeping their blooms closed on cloudy days or in the evening. History: Tulip species are the starting point in the long story of the garden tulip and they are still out there, growing in the wild—in Europe, North Africa, and Asia. They are usually smaller and less bold than the garden hybrids, and extra care may be needed to grow some of them successfully, but they amaze with the intensity of their color and surprise with the size of their flowers. Growing in distant mountain ranges, hidden gorges, and remote meadows are plants that wouldn’t look out of place in the brightest, most flamboyant garden. About a hundred species of botanical tulips grow wild across the mountains of Central Asia, particularly in an area spanning from Turkey to Afghanistan. In the isolated mountain valleys and peaks of these windswept parts, many species emerged. It is said that botanical tulips do well where goats revel but cattle stay away. True or not, they also, happily, are able to thrive in much of the United States. These dainty flowers grow well so long as winter is neither too warm nor too wet; they're recommended for USDA Zones 4 to 7. After hundreds of years of breeding and cultivating, we have tulip hybrids so spectacular that they may have blinded us to the quieter elegance of species tulips. But species tulips are, after all, where all tulips got their start, and in many ways, they've never been improved upon.# Species Tulip Facts Light: Sun and partial sun Zones: USDA 3-8 Plant Type: Bulb Plant Height: 4-14 inches tall Plant Width: To 6 inches wide Flower Color: White, Pink/Rose, Blue/Violet/Lavender, Red, Yellow/Gold, Orange, Green, Bicolor, Blue/Blue-Green Leaves Bloom Time: Spring Landscape Uses: Containers, beds and borders Special Features: Flowers, attractive foliage, fragrant, cut flowers, drought- and heat- tolerant, easy to grow %Article References& Hybrid Tulips vs. Species Tulips on In the Garden at link: http://tinaramsey.blogspot.com/2009/04/hybrid-tulips- vs-species-tulips.html Species Tulip on Wikipedia at link: http://en.wikipedia.org/wiki/Species_Tulips Species Tulips on Horticulture and Home Pest News at link: http://www.ipm.iastate.edu/ipm/hortnews/1994/9-16- 1994/sptul.html Species Tulips on Martha Stewart Living, April 2006, at link: http://www.marthastewart.com/266982/species-tulips Tulips, Species on Better Homes & Gardens at link: http://www.bhg.com/gardening/plant- dictionary/bulb/tulip/
  • 12. Doña Ana County Master Gardener Monthly Magazine—March 2013 Page 12 TOPSY TURVY® UPSIDE DOWN TOMATOES & PEPPERS Source: Dave’s Garden, May 2012 • Author: Sharon Brown Last year my three tomato plants did very well. They produced fruit, boundless numbers, all green and beautiful, and the minute they began to turn slightly red, the squirrels, rabbits, dogs, cats, mocking birds and probably mosquitoes feasted upon them, one by one. And it wasn't as if the critters were hungry, because they only took a small bite out of each slightly red tomato, and threw the rest to the ground. When I took my morning coffee walk, there I would find them, all smashed to smithereens with one little bite missing. I swore I would never plant another tomato—those critters could very well plant their own! This spring rolled around and I had no tomato plants. I would beg, borrow, buy or steal, but I would not grow a tomato. Until Mother's Day, when my son said: "Mom, I ordered a couple of those Topsy Turvy® tomato planters for you, they should be there in a week." And so they were, all nicely packaged in boxes looking about the size of a hardcover circular book. I opened the first box, unsure of what to expect, unwrapped all the wires and pieces and held it up in front of me. It uncoiled itself and looked like a giant slinky covered in green plastic. The instructions that came with it were fairly clear. I was told how to open the planter up, add the small pencil sized stemmed plant to the partially split styrofoam circle, poke the whole thing through the hole in the bottom, then add the soil. So if the plant is poking out of the bottom, that means it will need to be in its hanging position first, otherwise putting the soil in on top of it would crush the plant below. Smart thinking, I thought, hang the thing up first! Now the instructions warned that it would be heavy when the soil was added, yep, so true, so we better have it in its exact home to be before even thinking of the plant that would be growing from its bottom. I have a post to which my trellised potting bench is attached. It is well grounded, sitting in cement, and seemed to be strong. Another wooden post stood in the yard, and at one time held one end of a clothesline, so it would be a good place to put a second planter. I attached a metal plant hanger from each, but had to have help from dear son to do so, since he is much taller than I am, and I was determined to get the planters up high and away from the critters. Of course, having done that, I had to stand on a ladder to add the soil. (I think detailed mental images are important in learning experiences!) Let me tell you, the start up for this wonderful planter is not for the faint of heart. The soil does not come with the planter, nor does the plant, so that is something to consider. I used Miracle Gro® potting soil with continuous release plant food first, adding it to the bottom where the roots would be. Then I added some homemade compost that had been brewing for a year or two, and finished off with a mix of more of the potting soil plus a bit of topsoil added, just to get the soil mix up to within the required two inches of the top rim. I think it worked! So I had the hangers up, one tomato in the one by the potting bench, and one pepper in the one on the clothesline pole, both filled with soil, and now it was time to attach the round tops. Difficult. They were a little hard to center and to fit onto the wired rim, one finally found its rightful place, but the other is still a little off kilter. Having done that, it was time to water. There are mixed opinions about watering, some say a couple of gallons a day is fine, others say more, still others, less. There is no way I could hold a gallon of water up above my head to water either of them, so I use the water hose and sing a song or two, and I figure since they have not wilted yet, that might be working. I really have no idea how much a song or two equates into gallons. But neither the pepper nor the tomato has complained. I do know that quite often, with the roots of the plants at the bottom, a short supply of water will not dwindle down to them quickly enough to prevent some wilt. So water, and water often and a lot, would be my advice. Strangely enough, by about the second day those pencil sized stemmed plants began to curl upward from the bottom, reaching their heads to the sun, and once that happened, it was off to the races for both of them. Those things grew by leaps and bounds and bloomed like crazy. Today I am watching two wonderful tomatoes and two even bigger bell peppers forming on the vines. I am also eyeing the tiny ones that are just now forming. They aren't quite ready yet, but my mouth waters whenever I walk past them. I had only one worry during the growth spurt when the pepper plant decided to turn its head upward and hit head first into the bottom of the planter. Pepper plant stems are stubborn, and I was afraid it would break in my hands if I forced the issue. I left it alone for a day or two until it was finally long enough to reach the rim of the bottom of the planter then I gently suggested to it that it might be nice if it continued its trek out beyond the rim. And so it did. I don't know if you have tried these Topsy Turvy® upside down planters or not, but I thought it an adventure worth sharing. If I have a problem, it might be yet to come, because my tomato planter hanger seems to be bending a bit downward with the weight of the planter, and all the water just adds more weight. If bending is all it does, that'll be fine. It won't hurt the tomatoes a bit. There is no ending to this story just yet, but in another week or two, I might be enjoying the fruits of my labor. The only part I dread is at the very end, when it is recommended that the planter be emptied of all its pounds of soil. Article Continues on Page 13
  • 13. Doña Ana County Master Gardener Monthly Magazine—March 2013 Page 13 ! Topsy Turvy Upside Down Tomatoes & Peppers (Cont. from Page 12) You'll find me on the ladder again scooping, one little spoonful at a time. The planter must be stored away for the winter, and with Kentucky's unpredictable weather patterns these days, that's a pretty good rule to follow for most things. And by the way, I have seen no critters eyeing my upside down tomatoes yet. I might have won this battle. I'll be sure to let you know. One week later: Here's a tiny update for you, I made black bean/corn salad today, and in it I chopped up the very first of my bell peppers. I am telling you, it was worth waiting for. The second one will be ready soon, and I am watching some very healthy looking smaller ones as they form. The bad news is that one of my tiny green tomatoes is missing. I know the culprit is out there somewhere, is it possible I have a flying squirrel in my yard? I am keeping a close watch, and I'll let you know. The black bean salad was excellent though!# TOMATOES: Planning & Planting For An Outstanding Harvest Source: Dave’s Garden, April 2011 ! Author: Jill M. Nicolaus Tomato plants get pretty big so a little planning can be a big help. Draw a plan on graph paper or use another method to figure out how many plants will fit in your garden and still leave room for peppers, beans, or whatever else you'd like to grow. If you stake or cage your tomatoes, you can plant them 2 feet apart, which gives each plant about four square feet of growing space. If you have more space for your tomatoes, you might let them sprawl, in which case you'll want to plant them at least 3 feet apart. For me, a single long row of tomatoes does better than multiple shorter rows. Picking the fruit is easier than in a tomato "jungle," and the improved air circulation helps prevent fungal disease. If your summers are humid also, either stick with single or staggered double rows, or allow extra space between rows of tomatoes. You could also just scatter your tomato plants one by one throughout your garden, staking or caging them to keep them from overrunning other plants. Some plants such as lettuce will appreciate a little shade from the tomatoes, but mostly you'll want to try to plant your tomatoes where they won't hog all the sunshine. Tomato plants appreciate good garden soil with plenty of organic matter, but too much nitrogen could give you huge plants without many tomatoes. We built a new little raised bed one year and filled it with top-quality "topsoil" and leaf mold; our tomato plants were 14 feet tall, green and lush, and completely tomato-free. One soil preparation myth is that tomatoes need extra calcium to prevent blossom end rot. "B.E.R" actually results when the plant is unable to take up enough calcium, and adding eggshells or other calcium sources won't fix an uptake problem. Just take the same steps for digging and amending the soil in your tomato patch as you do for the rest of your veggie garden, and your plants will do just fine. As you're getting your garden ready for your tomatoes, plan ahead for their water needs. If you run a soaker hose along your row of plants, it's easy to give the roots a good drink (which they love) without getting the foliage wet (which can encourage disease). Tomato plants appreciate a deep drink twice a week, maybe three times in hot, dry weather. You can purchase tomato plants at your local garden center or big box store, or you can grow an astonishing variety of tomatoes starting from seed. Some people swear by the flavor of heirloom varieties, while others think hybrids give them better yields. However you get your tomato plants, it's a good idea to harden them off by getting them gradually used to outside conditions. Even plants that have been on outdoor nursery shelves for weeks may need a day or two to get used to conditions in your garden. When you plant your tomato seedlings, be sure to bury some of the stem. The plant will grow extra roots all along the buried stem, and you'll have a stronger, healthier plant. If your plants are tall or leggy, you don't have to dig a hole to China. The soil probably hasn't started warming up more than 5 or 6 inches below the surface, and planting into colder, deeper dirt won't do your plant any favors. Instead, dig a shallow, sloping trench. I like to add a sprinkling of polymer moisture crystals and time-release fertilizer all along the planting hole. Lay the plant along the trench, and bury it up to the last few pairs of leaves. Gently bend the top of the plant upright, but don't worry about getting it exactly vertical. Don't bother pruning off any branches or leaves that you're burying; pinching them off would just make unnecessary wounds along the stem. Your tomato plant will look awfully tiny in your garden now, but just think of the vigorous root system it will have with all that buried stem. If you're using stakes or cages, put them in place now. I tend to procrastinate and then regret it when I'm wrestling a cage onto a plant half my height. Mulching around the plants will conserve moisture and help prevent disease. The mulch should form a fat "doughnut," with a ring of clear dirt around the stem of the plant. Grass clippings make great mulch for your veggie garden! Your plants might not look like they're growing for the first week or two, but don't worry, they are busy developing an awesome root system. Hold off on fertilizing until you see new growth on top. Then watch them take off. I hope this will be your best tomato-growing season ever!#
  • 14. Doña Ana County Master Gardener Monthly Magazine—March 2013 Page 14 Building Your Super-Sturdy Tomato CageSuper-Sturdy Tomato Cage Strong enough to stand up to summer storms and bumper crops. Source: Organic Gardening.com ! Author: Doug Hall At the Organic Gardening Test Garden, tomato plants grow in heavy- duty wire cages we’ve used for years. These square, vertical columns keep our tomatoes standing tall, even when wind whips through the farm. We expect to get a few more decades of use out of our tomato cages— they’re that durable. What’s the secret of their strength and longevity? Our cages are constructed from livestock panels—rigid, 16-foot-long fence sections, made of heavy-gauge galvanized wire and sold at farm-supply stores. The panels are designed with different sizes of openings for various types of farm animals. For this project, we chose cattle panels that are 50 inches tall with openings 8 inches by 6 inches. Panels with wider-spaced wires cost less and are easier to work with, and it’s easier to pick ripe tomatoes through the larger openings. This is a two-person project. It requires a bolt cutter (and the strength to use it). You’ll also need a plank, 2-by-6 or larger and about 6 feet long, and a 5⁄8-inch box wrench. Each 16-foot panel makes two tomato cages with a small section left over. (Use leftover panel pieces to construct compost bins or A-frame trellises, or mount a rectangle of wire grid on the garage wall and add hooks for hanging garden tools.) One disadvantage to this style of tomato cage: They don’t collapse or nest for storage. That’s no problem for gardeners who live in deer country, where the cages can be employed in winter to protect young trees and shrubs from browsing deer. 1. Using a bolt cutter, cut a section of panel 6 1⁄2 feet long, leaving the horizontal wire stubs along the cut edge. If you plan to use a pickup truck to transport the panels home, do this step at the store where you purchase them. 2. Lay the section on the ground. Measure and mark a line 18” from side of the panel without wire stubs; this is where you’ll make the first bend. Place plank so its edge aligns with the marks. With two people standing on the plank, bend the panel upward to make a 90-degree angle. ! 3. Repeat the measuring and bending twice more. After the third bend, the two panel sides will meet. 4. To connect the two sides, slip the ring end of the box wrench over a wire stub; bend the stub until it loops around the vertical wire of the other panel side. Repeat with the remaining wire stubs. Cut the stubs with the bolt cutter, taking care to leave no sharp points protruding. 5. Cut off the horizontal wire at the base of the cage, leaving vertical wire ends to help stabilize the cage in the ground. If you live where the wind is exceptionally fierce, you might want to reinforce each cage with a length of rebar pounded 18 inches into the ground and tied to the cage. Article Contributed by Mona Nelson, Certified MG
  • 15. Doña Ana County Master Gardener Monthly Magazine—March 2013 Page 15 When To Plant Vegetable Seeds Source: Knowledge Weighs Nothing.com Link: http://knowledgeweighsnothing.com/when-to-plant-vegetable-seeds-2-excellent-printable-charts/ Go to this link and you can print out full page copies of each chart.) Knowing when to plant seeds is crucial to successful germination and healthy plants. I don’t know about you, but I am always eager to get sowing seeds indoors this time of year. Trouble is I always sow too many and too soon. They shoot up in the seed trays indoors and they are ready to be transplanted outdoors in no time. Problem is – it is still too cold outdoors to plant them out… These two charts have been created by the lovely folks at Roots Nursery and I don’t need to tell you how useful the charts will be. If you are like me you’ll have them printed out in no time. SEED STARTER CHART BY TEMPERATURE DAYS TO GERMINATE ACCORDING TO TEMPERATURE This information was contributed by Mona Nelson, Certified Master Gardener
  • 16. Doña Ana County Master Gardener Monthly Magazine—March 2013 Page 16 OXEYE DAISY (Leucanthemum vulgare) Description: Oxeye Daisy (Leucanthemum vulgare) is an herbaceous perennial in the aster (sunflower) family (Asteraceae) with numerous stems that measure from 1 to 3 feet tall by 1 foot in width. It looks similar to a Shasta Daisy but is smaller and much more aggressive. It spreads by seeds and surface rhizomes. This plant smells like sage and a single plant can produce from 1-40 flowering stems. The stem is mostly unbranched and sprouts laterally from a creeping rhizomatous rootstock. Its leaves are dark green on both sides. Leucanthemum vulgare blooms from late spring to autumn. The small flower head, no larger than 2 inches consists of about 20 white ray florets that surround a yellow disc, growing on the end of 1 to 3 ft. tall stems. The plant produces an abundant number of flat seeds, without pappus, that remain viable in the soil for 2 to 3 years. It also spreads vegetatively by rhizomes. Many people consider Oxeye Daisy to be a pretty wildflower, but wildflower does not mean native; in fact, it is an invasive noxious weed. Class A Noxious Weed in New Mexico: Currently has a limited distribution in the state, but there is a need to prevent any new infestations or to eradicating existing infestations. It is noxious and highly invasive. Habitat: Oxeye Daisy has escaped cultivation and is now common in grasslands, pastures, fields, disturbed area, waste areas, open woods, meadows, and roadsides. It has adapted to coarse and medium textured soil. Distribution: This species has been reported in all states and is considered invasive in seventeen. Other Names: Margarite, white daisy, bull daisy, moon flower, dog daisy, field daisy, and goldens. History: This perennial is a native to Europe and was introduced to the U.S. as an ornamental in the 1800”s. Unfortunately, Oxeye Daisy is still currently used as an ornamental and is often sold commercially in seed packets labeled as wildflower seed. (If you want to bring nature back to your garden with wildflowers, try to choose wildflower seed mixes carefully, as many contain invasive plants like Oxeye Daisy. Wildflower mixes do not tend to list the species they contain, and colorful photos on package covers mislead consumers into purchasing invasive plant seeds that are native to Europe and other parts of North America. Avoid wildflower mixes unless you are buying them from a reputable plant nursery that has collected seeds locally.) Why It Is Considered A Problem? Oxeye Daisy displaces native plant species, growing so densely it excludes other vegetation. While not considered poisonous to cows, it does impart a disagreeable taste to their milk. It is difficult to control or eradicate because of its large seed bank, long seed viability and its ability to resprout if not completely removed. Also these plants have been shown to carry several viral crop diseases Identification: Flowers: White daisies with 2” wide yellow central disc that blooms all summer. Seeds: Tufted, dispersed by the wind. When flower heads are dry, the seeds drop or are shattered easily by touch or movement. Water, human and animal foot traffic and cultivating and earth-moving machinery can carry the seeds to new areas. Stems/Leaves: Stems sprout laterally from a creeping rootstock. The number of flower stalks ranges from 1 to 40 per plant. Its leaves are dark green on both sides. Roots: Spread vegetatively with horizontal stems growing below the soil surface, called rhizomes, forming roots and producing new plants. Reproduction: The plant reproduces by roots and seeds. A typical plant can produce over 500 seeds that spread by wind, animals and remain viable for 2-3 years. Management & Control: • Prevention and early detection most effective control methods. • Physical removal before flowering for single plants/small infestations. Because of its shallow roots, small infestations can be easily hand pulled or dug up before seed heads are produced. • Can be effectively controlled using any of several readily available general use herbicides such as picioram, imazapyrp and dicamba. Some herbicides may damage non-target species. Be sure to follow label and state requirements. • Chemical applications in the rosette or pre-bloom stages of growth are most effective. −ARTICLE REFERENCES− Leucanthemum vulgare on Wikipedia at link: http://en.wikipedia.org/wiki/Leucanthemum_vulgare Oxeye Daisy (Chrysanthemum leucanthemum) on Minnesota Dept. of Natural Resources at link: http://www.dnr.state.mn.us/invasives/terrestrialplants/herbac eous/oxeyedaisy.html Oxeye Daisy, Leucanthemum vulgare (Asterales/ Asteraceae) on Invasives.Org at link: http://www.invasive.org/browse/subinfo.cfm?sub=5937 Weed of the Week: Oxeye Daisy on Invasive Species of British Columbia at link: http://www.bcinvasives.ca/general/weed-of- the-week-oxeye-daisy
  • 17. Doña Ana County Master Gardener Monthly Magazine—March 2013 Page 17 INTERN PROFILE: GAIL & DAVID ROSS New Master Gardener interns David and Gail Ross have a combined history of more than a century of gardening experience. David planted his first vegetable garden when he was nine years old; Gail got her first taste of homegrown vegetables at ten and knew then that she had to start her own garden. The Rosses now live on the East Mesa in Las Cruces where they have a quarter-acre to keep them busy. Gail and David have called Las Cruces home for more than five years. David began gardening in Washington State and continued in California and Nevada. Gail has “played in the dirt” in Chicago, Wisconsin and Las Vegas, NV. They both like to grow vegetables and fruit trees but Gail adds flowers and herbs to her “things I like to grow” list. Gail recalls that she used to grow flowers for her mother to use in flower arrangements she made and sold. They signed up for the Master Gardener Program because they wanted to gain additional knowledge for successful gardening in this climate. They were also anxious to volunteer in the community and work with the Extension Service, which they have done in previous locales. David is especially interested in outreach programs to the schools. He loves seeing children’s faces light up when they taste fresh fruits and vegetables, especially if they have been involved in growing them. David believes all gardening experiences are enjoyable but admits that his most “memorable” one probably was when, as a 10 year-old boy, he was seriously stung by bees while picking his parents’ raspberries to share with their neighbors. Both Gail and David are now retired. David’s career included working for the State Department of Health in Washington and then as a research biochemist in Davis, California. He also taught in the School of Public Health and Medicine. Gail owned a travel agency for ten years and worked as a pharmacy technologist. Gail and David have jumped into the Doña Ana County Extension Master Gardener Program with all four feet. Their volunteer list for the month of March includes the Pecan Growers Conference, the Home and Garden Show, and the Senior Expo in addition to the monthly Master Gardener meetings. Profile Provided by Ann Palormo, Certified Master Gardener ! LAVENDER LOVER’S HANDBOOK !" Author Sarah Berringer Bader started with 365 lavender plants (Lavandula spp. and hybrids) on her five-acre farm in Oregon. Just a few years later, she was growing nearly 5,000 and her collection represented 90 different cultivars. In this book, she shares what she learned about starting from seed and growing cuttings, flower and foliage variation and the best lavenders to cook with. You’ll find recipes for treats like lavender-infused jam too. With its intoxicating scent, gorgeous wands of purple flowers, and silvery foliage, lavender is one of the most sought-after plants. But the horticultural reasons for choosing lavender go far beyond its beauty. Lavender attracts beneficial insects, requires little water once established, and is deer resistant. In The Lavender Lover's Handbook, lavender grower Sarah Bader teaches gardeners how they can successfully grow this beloved plant. Featuring the 100 easiest, most stunning lavenders available today, this beginner's guide provides a complete checklist of the color, fragrance, size, and foliage of each plant, in addition to basic pruning, spacing, and planting requirements. The text is rounded out with tips on how to harvest, cook, and craft with this wonderful herb. Its abundant variety, hardiness, fragrance, and culinary uses make lavender one of the most popular and versatile plants. And now, with this practical and accessible guide in hand, it's easier than ever to grow at home. Publisher: Timber Press, May 2012
  • 18. Doña Ana County Master Gardener Monthly Magazine—March 2013 Page 18 MASTER GARDENER MONTHLY MEETING: FEB. 13, 2013 Notetaker: Sue Styer Introduction and Welcome: Jeff Anderson Awards: Various people were recognized for their volunteer time contributions to the Master Gardener Program: Master Gardener Contribution Area/Program ' Dixie LaRock Chair, Farmer’s Market and Chair, MG Plant Sales plus our “sunshine lady” who has a heart of gold which has been demonstrated by her help for Sherman and Myles, etc. ' Bonnie Eisenberg Liaison, Annual Tour of Gardens ' Mary Ann Pribillo Chair, Annual Home and Garden Show ' Linda Schukei Chair, Hospice Garden ' David Hutchinson Chair, Hospice Garden ' Sherman Levenson Hospice Garden and Community Garden ' Darrel Shillingburg Chair, Community Gardens ' J. Myles Munoz Chair, Annual Chile Conference and Pecan Conference (MG portions of Conferences) ' Russ Boor Chair, State Master Gardener Conference ' Sylvia Hacker Chair, Hotline and Chair of monthly Lunch & Learn Presentations ' Solange Graham Notetaker for our Monthly MG Meetings ' Eric Graham Creator, Online MG Volunteer Hours Program ' Pamela Crane Chair, MG Recertification ' Linda Morgan MG Graduation Banquet Coordinator and Education Program Chair ' Ann Shine-Ring Editor, monthly Master Gardener Magazine ' Juliet Williams 4-H Program Coordinator and new MG Student Class Coordinator ' Alberta Morgan Chair, CoCoRaHS (Community Collaborative Rain, Hail & Snow Network) ' Jeff Anderson Ag Program Director/Master Gardener Program Administrator COMMITTEE/PROJECT REPORTS MG Hotline (Louis Worley) We have a few dates open where we need certified MGs 2/15, 3/15, 3/19, 3/26,3/29. We need to update the MG Hotline substitute list with new people or with current designates if they wish to remain. MG Magazine (Ann Shine-Ring) No report as Ann was ill. Our MG Magazine will be distributed later this month. Lunch & Learn at Branigan Library (Sylvia Hacker) Presentation will be the Why, When, How of Pruning Roses and Other Plants, etc. The presenter will be MG, Russ Boor. Gomez Garden and Hospice Garden (Dixie LaRock) There will be a meeting on Saturday, Feb. 16th to install the border and irrigation system. It is looking good. There are beets and radishes coming up. We need to see if they survive. Monthly Education Programs (Lynn Bryant) Lynn is our new Education Program Chair. She passed out a survey that listed topics and asked for input on our interest in these areas. (See the Survey Results listed on Page 19 of this Magazine) NEW & CONTINUING PROJECTS: Chile Conference - Salsa contest - Feb. 4 and 5th at Hotel Encanto - Myles explained that the salsa contest was cancelled this year because of new food safety laws. Individuals bring entries that have made offsite and the new law requires they be made onsite in a certified kitchen. If the food had consisted of baked goods, there would not have been an issue. There were 200 attendees and the one-day event was deemed a success. Jeff mentioned that Karim Martinez suggested that in the future we could do a Chile salsa cook-off onsite. High on the Desert Conference - Sierra Vista, AZ - Feb. 14-15 to be held at the Windermere Hotel in Sierra Vista, AZ. Rainwater Harvesting Workshop - Jeff - Feb. 18-19 at Doña Ana Workforce Center. We have close to 40 people signed up. The first day entails a speaker from Austin and the second day the group will build a 1,500-gallon system at Jeff’s House. Pecan Conference - March 3, 4, 5, 2013 at Hotel Encanto. Myles will need volunteers for different days and times. There will be about 600 people attending. Home and Garden Show - March 9-10, 2013 at Las Cruces Convention Center. Tracy Thompson is coordinating this event and she will need volunteers for various slots. Water Festival – March 16. It is being held at Young Park and Myles volunteered to coordinate. There will be about 1,000 kids. Volunteers are needed. Senior Expo – March 23 & 24. Gail and David Ross volunteered to coordinate. Minutes Continued on Page 19 !
  • 19. Doña Ana County Master Gardener Monthly Magazine—March 2013 Page 19 MG Monthly Meeting, February 13, 2013 (Continued) NEW & CONTINUING PROJECTS (CONTINUED): Arbor Day April 6th City of Las Cruces needs tree stewards to transplant trees on various dates. They will be transplanted into 5-gallon containers then planted at a later time. If interested call Jeff. The trees are currently bare root and in storage. No help needed at downtown event on mall on Arbor Day itself. School Gardens Holy Cross and Tombaugh need help with garden design and plant selections for new gardens. Volunteers needed. Work for MG involves design not digging. Holy Cross’s garden will be a flower garden. Jeff has visited and said containers would be appropriate. Tombaugh (located on Carver Road by Aldershot) will have a courtyard garden with two raised 5’ X 8’ beds with water plus drip lines on the side for containers and will involve vegetables. They want to know what to grow etc. Talk to Jeff if you are interested. Tour of Gardens Coordinator needed. Bonnie Eisenberg is stepping down from her position as Liaison for the Annual Tour of Gardens. If you are interested, please contact Jeff. (Subsequently, James Crouse and Tracy Thompson have volunteered to be Co-Chairs.) ANNOUNCEMENTS: —Jeff passed around a flyer on the Agricultural Employees Forum on March 6 from 8-5. —Joanne discussed Bosque Park Pole Planting on Feb.23 – this activity involves planting about 60 poles for 2 hours. —Onion Field Day will be held on 7/18/13 this year —Dec. 3, 2013 Western SARE (Sustainable Agriculture Research & Education) Conference. To be held in either Alamogordo or Deming —HB 271 (Cooperative Extension Service Funding) Information on this legislation will be sent to us as soon as it is available. EDUCATION PRESENTATION: JIM TURRENTINE, OWNER OF “THE BIG PICTURE” TOPIC: PHOTOGRAPHING FLOWERS SNACKS: Thank you to Ann Palormo, Dick Hiss and Sherry Hulsey for our delicious snacks today. Next month’s goodies makers will be Bonnie Eisenberg, Deb Tallent and Jill Klann. If you haven’t already sign up, please be prepared to sign up for our 2013 Refreshments list at our next meeting. Next Meeting: Wednesday, March 13, 2013 – At Branigan Library (9:15am to 11:45am) Presentation: Native Plants in the White Sands Missile Range Presenter: David Anderson, WSMR Land Manager & Botanist EDUCATIONAL TOPICS FOR PRESENTATION Total Count Companion Gardening to Reduce Pests 24 Ornamental Grasses: What To Plant & How to Care for Them 21 Drought Resistant Plants 20 Edible Landscape 20 Vertical Gardening: Different Uses 20 Raised Beds: How to Build, What to Plant & How to Maintain 20 Designing Your Garden 17 Green Houses 17 Seed Harvesting and Drying 16 The Challenges of Gardening During Extremes in our Weather 16 Growing an Herb Garden 15 Growing Succulents 15 Xeriscaping 15 Creating Garden Junk (aka: Y’art) 14 Different Forms of Garden Art 14 Growing Houseplants: Special Occasions 14 Growing the Three Sisters 14 How to Get a Tropical Look in Southern New Mexico 14 Hypertufa (lightweight material used in garden pots and ornaments) 14 Weed Control 14 Winterizing Your Yard 14 Benefits of Growing Produce: Home Gardening 13 Butterflies and Moths 13 Canning and Preserving Vegetables and Fruits 13 Growing Orchids 12 Water Harvesting 12 From the Grape Vine to the Table 11 Bird Feathers 9 Using Herbs in Recipes 8 Vermi-Composting 8 Pecans: From the Tree to Your Table 7 ! ADDITIONAL SUGGESTIONS FOR TOPICS How to use Stone for a Patio How to Build and Plant in a Berm Small Space Gardening: Flowers & Vegetables Container Gardening: Flowers and Vegetables Oriental Vegetable Gardening Community and School Gardens Gardening for Birds and Wildlife First Aid and CPR !
  • 20. Doña Ana County Master Gardener Monthly Magazine—March 2013 Page 20 IMPORTANT: Please remember to be present on your assigned date for the Hotline. If another MG forgets, please give him or her a “reminder” call. Be sure to get a copy of the Subs List, for your information. As of Monday, March 11, 2013, the Doña Ana County Extension Office hours will change to 8am–12 and 1–5pm Monday through Friday. This will impact our Hotline hours and we will discuss options on Wednesday, March 13, at our monthly MG meeting. URGENT: We need at least 2 MGs at each Hotline Day. Please consider volunteering for at least one, four-hour assignment to ensure we have adequate coverage for our Hotline. Thank you for your help. The assignments listed below were current as of February 28, 2013 MG Hotline Assignments for March 2013 Friday, Mar. 1 Deb Tallent Certified MG Eileen Roberts 2013 Intern Tracy Thompson 2013 Intern Tuesday, Mar. 5 Dorian Dodson Certified MG Sylvia Hacker Certified MG Grace Foster 2013 Intern Friday, Mar. 8 Alberta Morgan Certified MG Certified MG Tamara Fetzer 2013 Intern Phyllis Radtke 2013 Intern Tuesday, Mar. 12 B.G. Hosie Certified MG Deb Tallent Certified MG Tracy Thompson 2013 Intern Friday, Mar. 15 Dael Goodman Certified MG Ann Palormo Certified MG Al Krueger Certified MG Laura Gordon 2013 Intern Louis Worley 2013 Intern Tuesday, Mar. 19 Velma Noland Certified MG Deb Tallent Certified MG Gail Ross 2013 Intern David Ross 2013 Intern Friday, Mar. 22 Russ Boor Certified MG Mary Andrews Certified MG Tamara Fetzer 2013 Intern Phyllis Radtke 2013 Intern Tuesday, Mar. 26 Ann Palormo Certified MG Gail Ross 2013 Intern David Ross 2013 Intern Friday, Mar. 29 Velma Noland Certified MG (Good Friday) Carla Clouser Certified MG Laura Gordon 2013 Intern Nancy Sherman 2013 Intern MG Hotline Assignments for April 2013 Tuesday, Apr. 2 Certified MG Certified MG Nancy Carlson 2013 Intern Tracy Thompson 2013 Intern Friday, Apr. 5 Alberta Morgan Certified MG Certified MG Louis Worley 2013 Intern Phyllis Radtke 2013 Intern Tuesday, Apr. 9 B.G. Hosie Certified MG Certified MG Nancy Carlson 2013 Intern Elizabeth Grinnell 2013 Intern Friday, Apr. 12 Bonnie Eisenberg Certified MG Nancy Sherman 2013 Intern Elizabeth Grinnell 2013 Intern Tuesday, Apr. 16 Dorian Dodson Certified MG Sylvia Hacker Certified MG Nancy Carlson 2013 Intern Friday, Apr.19 Mary Andrews Certified MG Laura Gordon 2013 Intern Phyllis Radtke 2013 Intern Tuesday, Apr. 23 Mary Andrews Certified MG Certified MG Elizabeth Grinnell 2013 Intern Friday, Apr. 26 Certified MG Certified MG Elizabeth Grinnell 2013 Intern Tamara Fetzer 2013 Intern Tuesday, Apr. 30 Bonnie Eisenberg Certified MG Laurie Ludeman 2013 Intern Martha Ludeman 2013 Intern