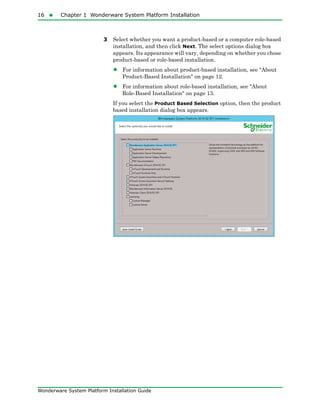
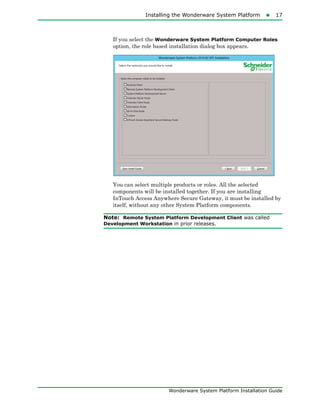
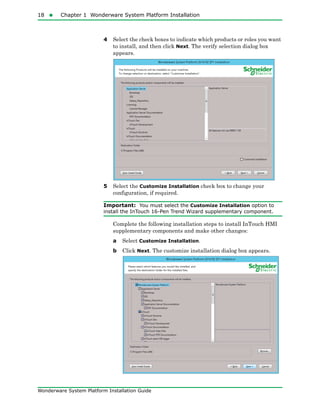
The document provides an overview of preparing for and installing the Wonderware System Platform. It discusses prerequisites for installation, including SQL Server requirements. It describes the two types of installations available - product-based and role-based. It also covers installing prerequisites, selecting installation options, configuring databases and licenses, and upgrading installations.


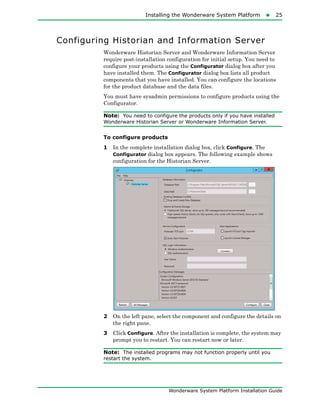
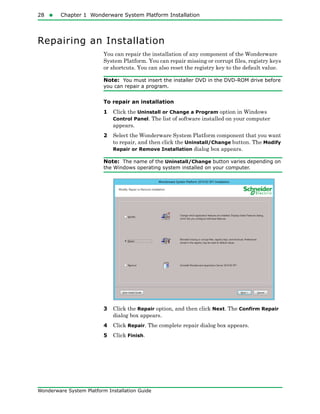
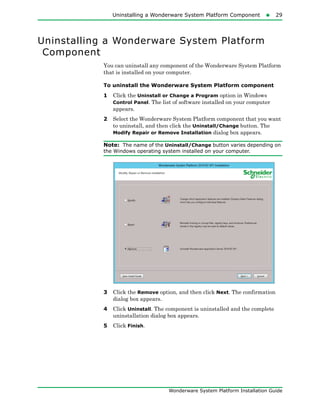
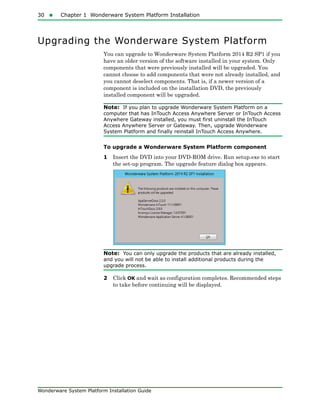


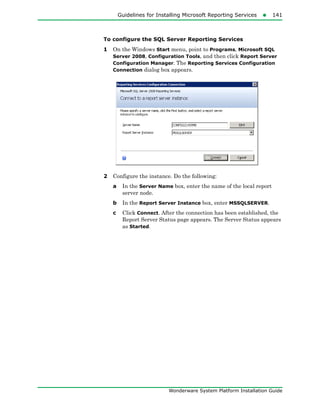

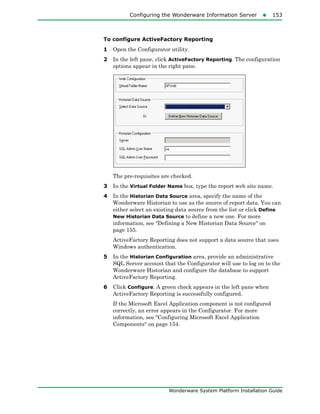
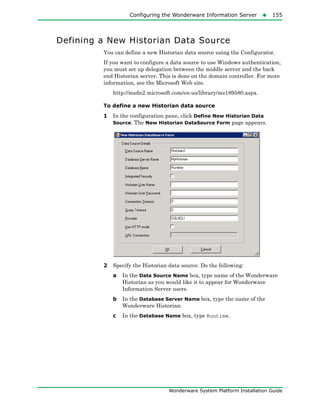
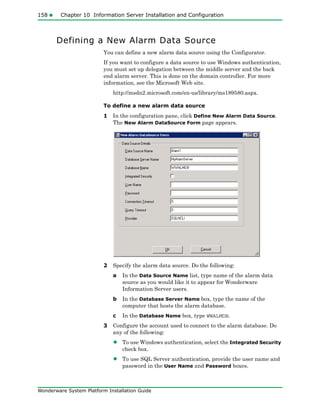


![Datasheet_WW_ArchestrASystemPlatform2012WhatsNewR2_11-12_r04[1]](https://cdn.slidesharecdn.com/ss_thumbnails/41c52ed7-4a26-43eb-9ffc-6e470625d6a5-150716073410-lva1-app6892-thumbnail.jpg?width=640&height=640&fit=bounds)