Download to read offline
![Table ofContent
What is WebdriverIO?
WebdriverIO Architecture: How Does It Work?
Why Choose WebdriverIO forAutomation Testing?
Prerequisite Steps to Create a WDIO + JavaScript Project
▶️
Download & Install Visual Studio Code
▶️
Install Node.js and npm
▶️
Create a New Project Directory
▶️
Install WebdriverIO CLI
▶️
Run WebdriverIO Configuration Wizard
▶️
A Configuration steps for setup framework
▶️
Set Up WebdriverIO Configuration File
[wdio.conf.js]
▶️
Create Test Specifications
[contactUsTests.js]
Running the Test Script
Conclusion
What is WebdriverIO?
WebdriverIO is a robust automation testing framework designed for
web applications, offering a comprehensive set offeatures to
streamline the testing process. Developed in JavaScript and built on
the WebDriver protocol, it provides cross-browsertesting capabilities,
allowing testers to ensure compatibility across various browser
environments such as Chrome, Firefox, Safari, and Edge.With
WebdriverIO, testers can interact with web elements effortlessly,
performing actions like clicking buttons, typing into text fields, and
verifying element visibility. The framework includes built-in assertion
libraries and supports external libraries like Chai for assertions and
expectations, enabling testers to validate expected outcomes with](https://image.slidesharecdn.com/jignect-tech-webdriverio-with-javascript-the-perfect-duo-for-efficient-web-autom-250616114342-2458017d/85/WebdriverIO-JavaScript-The-Perfect-Duo-for-Web-Automation-2-320.jpg)
![Sync/Async Mode: WDIO offers both synchronous and
asynchronous modes oftest execution. Testers can choose
between sync mode, where commands are executed
sequentially, and async mode, where commands are executed
asynchronouslyfor improved performance.
Integrationwith PopularFrameworks: WebdriverIO seamlessly
integrates with populartesting frameworks such as Mocha,
Jasmine, and Cucumber. This offers flexibility in test
development and structure, catering to different testing
preferences and styles.
Strong Communityand Support: WebdriverIO has a strong
community and active support, providing many resources,
tutorials, and plugins. This ensures you can find solutions to
common problems and continuously improve yourtesting
practices.
Comprehensive Reporting: WebdriverIO offers detailed
reporting features, including integration with Allure and other
reporting tools. This helps in tracking test results, identifying
issues, and maintaining comprehensive test documentation.
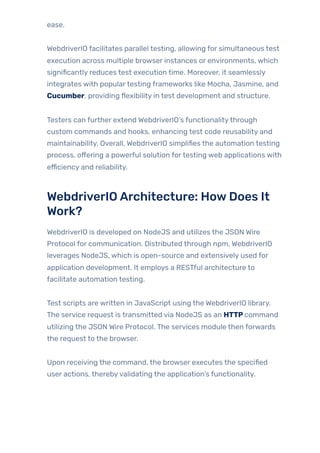
Prerequisite Stepsto Create aWDIO +
JavaScript Project
Throughout this blog, the following versions of libraries and
applications were utilized in our practical examples.
Visual Studio Code [Version 1.89]
Npm [Version 10.5.2]
Node [20.13.1]
Setting up a WebdriverIO (WDIO) project with JavaScript involves
several key steps. Below are the prerequisite steps to get started:
▶️
Download & InstallVisual Studio Code](https://image.slidesharecdn.com/jignect-tech-webdriverio-with-javascript-the-perfect-duo-for-efficient-web-autom-250616114342-2458017d/85/WebdriverIO-JavaScript-The-Perfect-Duo-for-Web-Automation-5-320.jpg)


![▶️
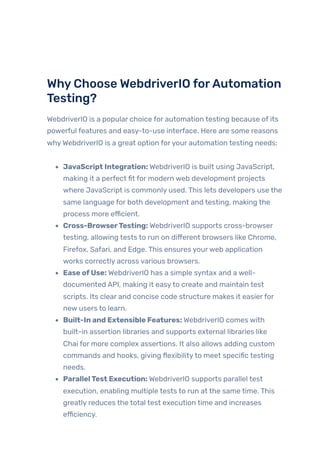
Set Up WebdriverIO Configuration File
Upon finalization, the configuration wizard will produce a
“wdio.conf.js” file within your project directory. Take the opportunity
to review and adjust this file according to your project requirements.
Below is a basic example:
[wdio.conf.js]
export const config = {
runner: 'local',
specs: [
'./test/specs/**/*.js'
],
exclude: [
// 'path/to/excluded/files'
],
maxInstances: 10,
capabilities: [{
browserName: 'chrome'
}],
logLevel: 'info',
bail: 0,
waitforTimeout: 10000,
connectionRetryTimeout: 120000,
connectionRetryCount: 3,
services: ['chromedriver'],
framework: 'mocha',
reporters: ['spec',['allure', {outputDir: 'allure-results'}]],
mochaOpts: {
ui: 'bdd',
timeout: 60000
},
}](https://image.slidesharecdn.com/jignect-tech-webdriverio-with-javascript-the-perfect-duo-for-efficient-web-autom-250616114342-2458017d/85/WebdriverIO-JavaScript-The-Perfect-Duo-for-Web-Automation-9-320.jpg)
![▶️
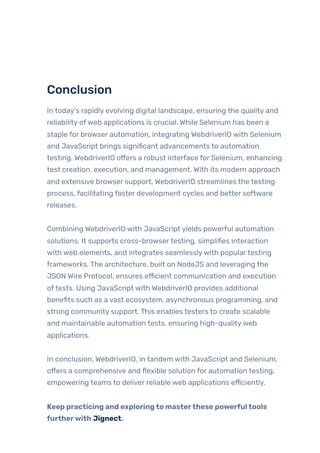
CreateTest Specifications
Establish a directoryforyourtest specifications (e.g., test/specs) and
compose yourtest scripts in JavaScript. Below is a straightforward
example:
[contactUsTests.js]
import { expect, browser, $ } from '@wdio/globals'
describe('Contact Us', () => {
it('verifyThatContactusFormSubmittedSuccessfully', async () =>
{
await browser.url(`https://jignect.tech/contact-us/`);
await browser.maximizeWindow();
await $("//p//input[@type='submit']").click();
await expect($("//div[contains(@class,'response-
output')]")).toBeDisplayed();
})
})
➡️Let’s analyze each line ofthetest script and explain its
functionality:
import { expect, browser, $ } from ‘@wdio/globals’: This line
imports essential functions and objects from the @wdio/globals
package.
expect is used for assertions.
browser represents the browser instance to control
browser interactions.
$ is a shorthand for selecting elements using a CSS or
XPath selector.
describe(‘Contact Us’, () => {: This defines a test suite named
‘Contact Us’. The ‘describefunction groups the related tests,
making it easierto organize and manage them.
The ‘it’ function defines an individual test case named](https://image.slidesharecdn.com/jignect-tech-webdriverio-with-javascript-the-perfect-duo-for-efficient-web-autom-250616114342-2458017d/85/WebdriverIO-JavaScript-The-Perfect-Duo-for-Web-Automation-10-320.jpg)
![“verifyThatContactusFormSubmittedSuccessfully” and
Used to specify a single test. The ‘async’ keyword allows the use
of ‘await’ within the test, enabling asynchronous operations.
The ‘browser.url’ command navigates the browserto the
specified URL (https://jignect.tech/contact-us/). The await
keyword ensures that the browserwaits forthe navigation to
complete before proceeding.
The ‘browser.maximizeWindow’ command maximizes the
browserwindowto ensure that all elements are visible and
interactable. Again, await ensures that the test waits forthe
windowto maximize before continuing.
The await ‘$(“//p//input[@type=’submit’]”).click();’ line
selects the submit button and clicks it to submit the form.
The ‘expect’ and ‘toBeDisplayed()’ assertion verifies that a div
element containing the class ‘response-output’ is displayed on
the page, indicating that the form submission was successful
and closing braces complete the test case and the test suite
definitions.
Running theTest Script
Once yourtest script is prepared, you can execute it by run the
following “npxwdiowdio.conf.js” command in the Command
Prompt:](https://image.slidesharecdn.com/jignect-tech-webdriverio-with-javascript-the-perfect-duo-for-efficient-web-autom-250616114342-2458017d/85/WebdriverIO-JavaScript-The-Perfect-Duo-for-Web-Automation-11-320.jpg)


In today’s dynamic digital landscape, ensuring the quality and dependability of web applications is essential. While Selenium has been a longstanding solution for automating browser tasks, the integration of WebdriverIO (WDIO) with Selenium and JavaScript marks a significant advancement in automation testing. WDIO enhances the testing process by offering a robust interface that improves test creation, execution, and management. This amalgamation capitalizes on the strengths of both tools, leveraging Selenium’s broad browser support and WDIO’s modern, efficient approach to test automation. As automation testing becomes increasingly vital for faster development cycles and superior software releases, WDIO emerges as a versatile framework, particularly potent when paired with JavaScript, making it a preferred choice for contemporary testing teams.


![[Deu] Test Automatisierung Mit Web Driver.io](https://cdn.slidesharecdn.com/ss_thumbnails/deutestautomatisierungmitwebdriverio-191120180803-thumbnail.jpg?width=640&height=640&fit=bounds)