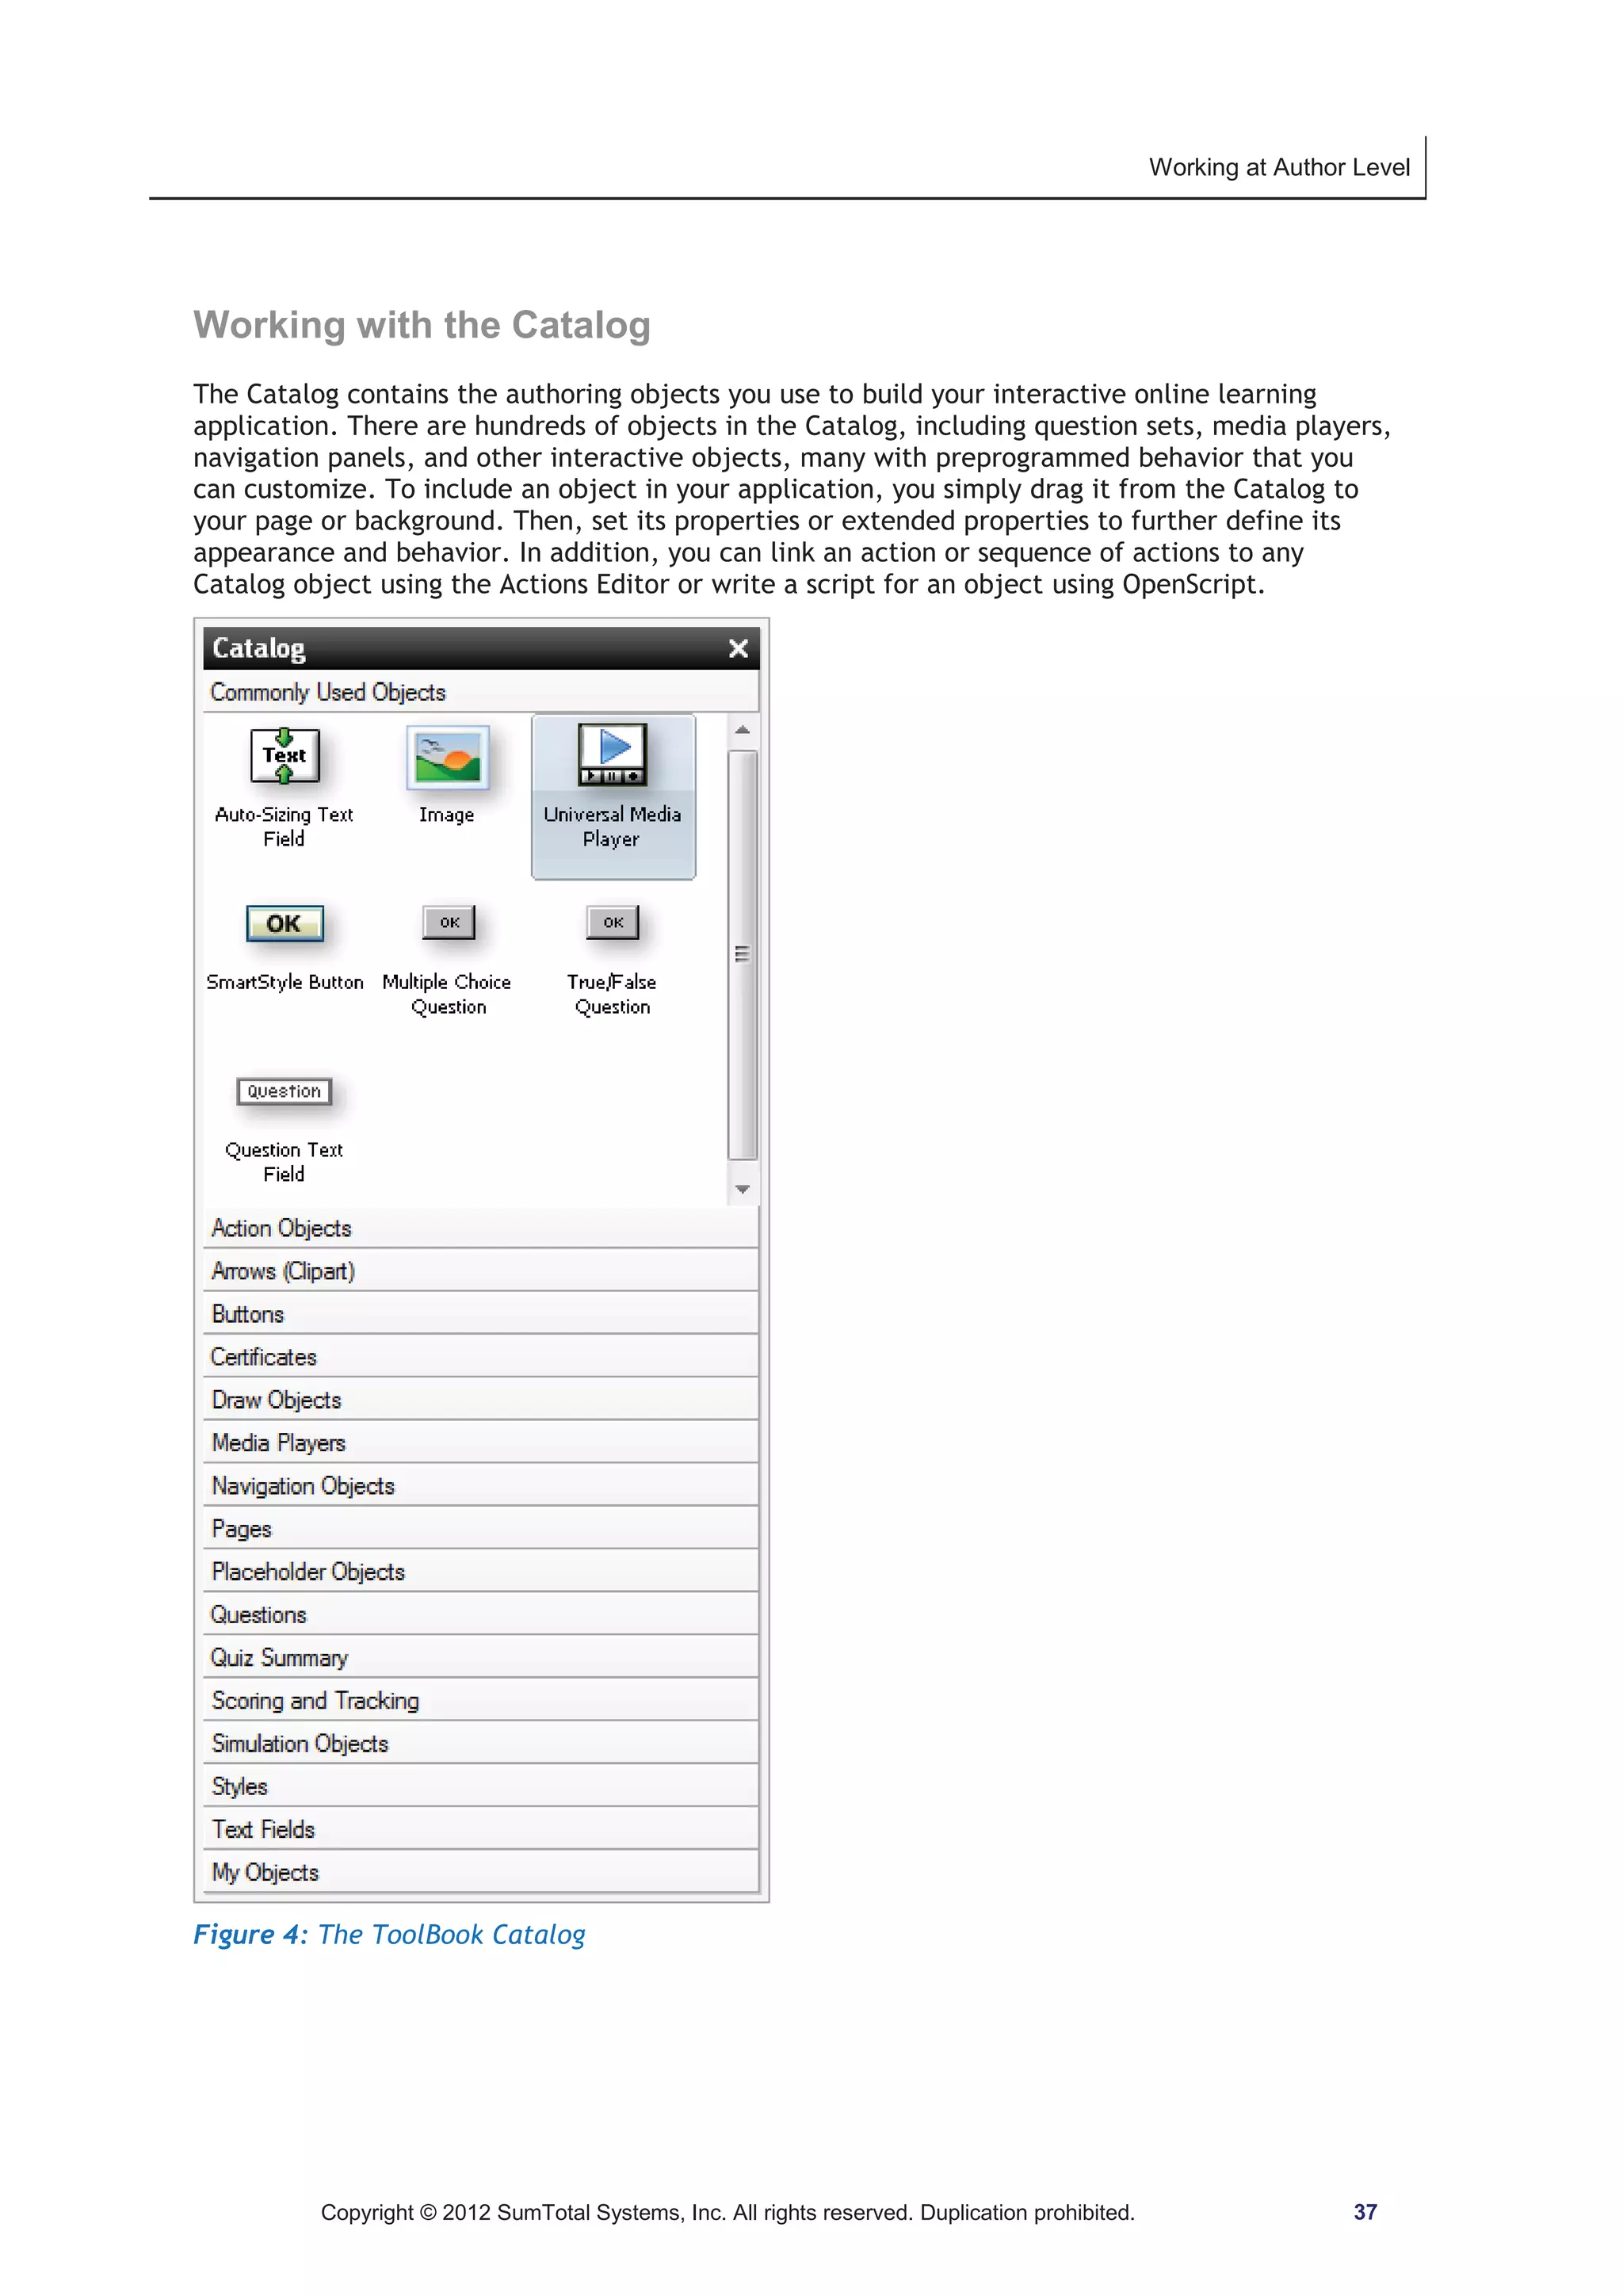
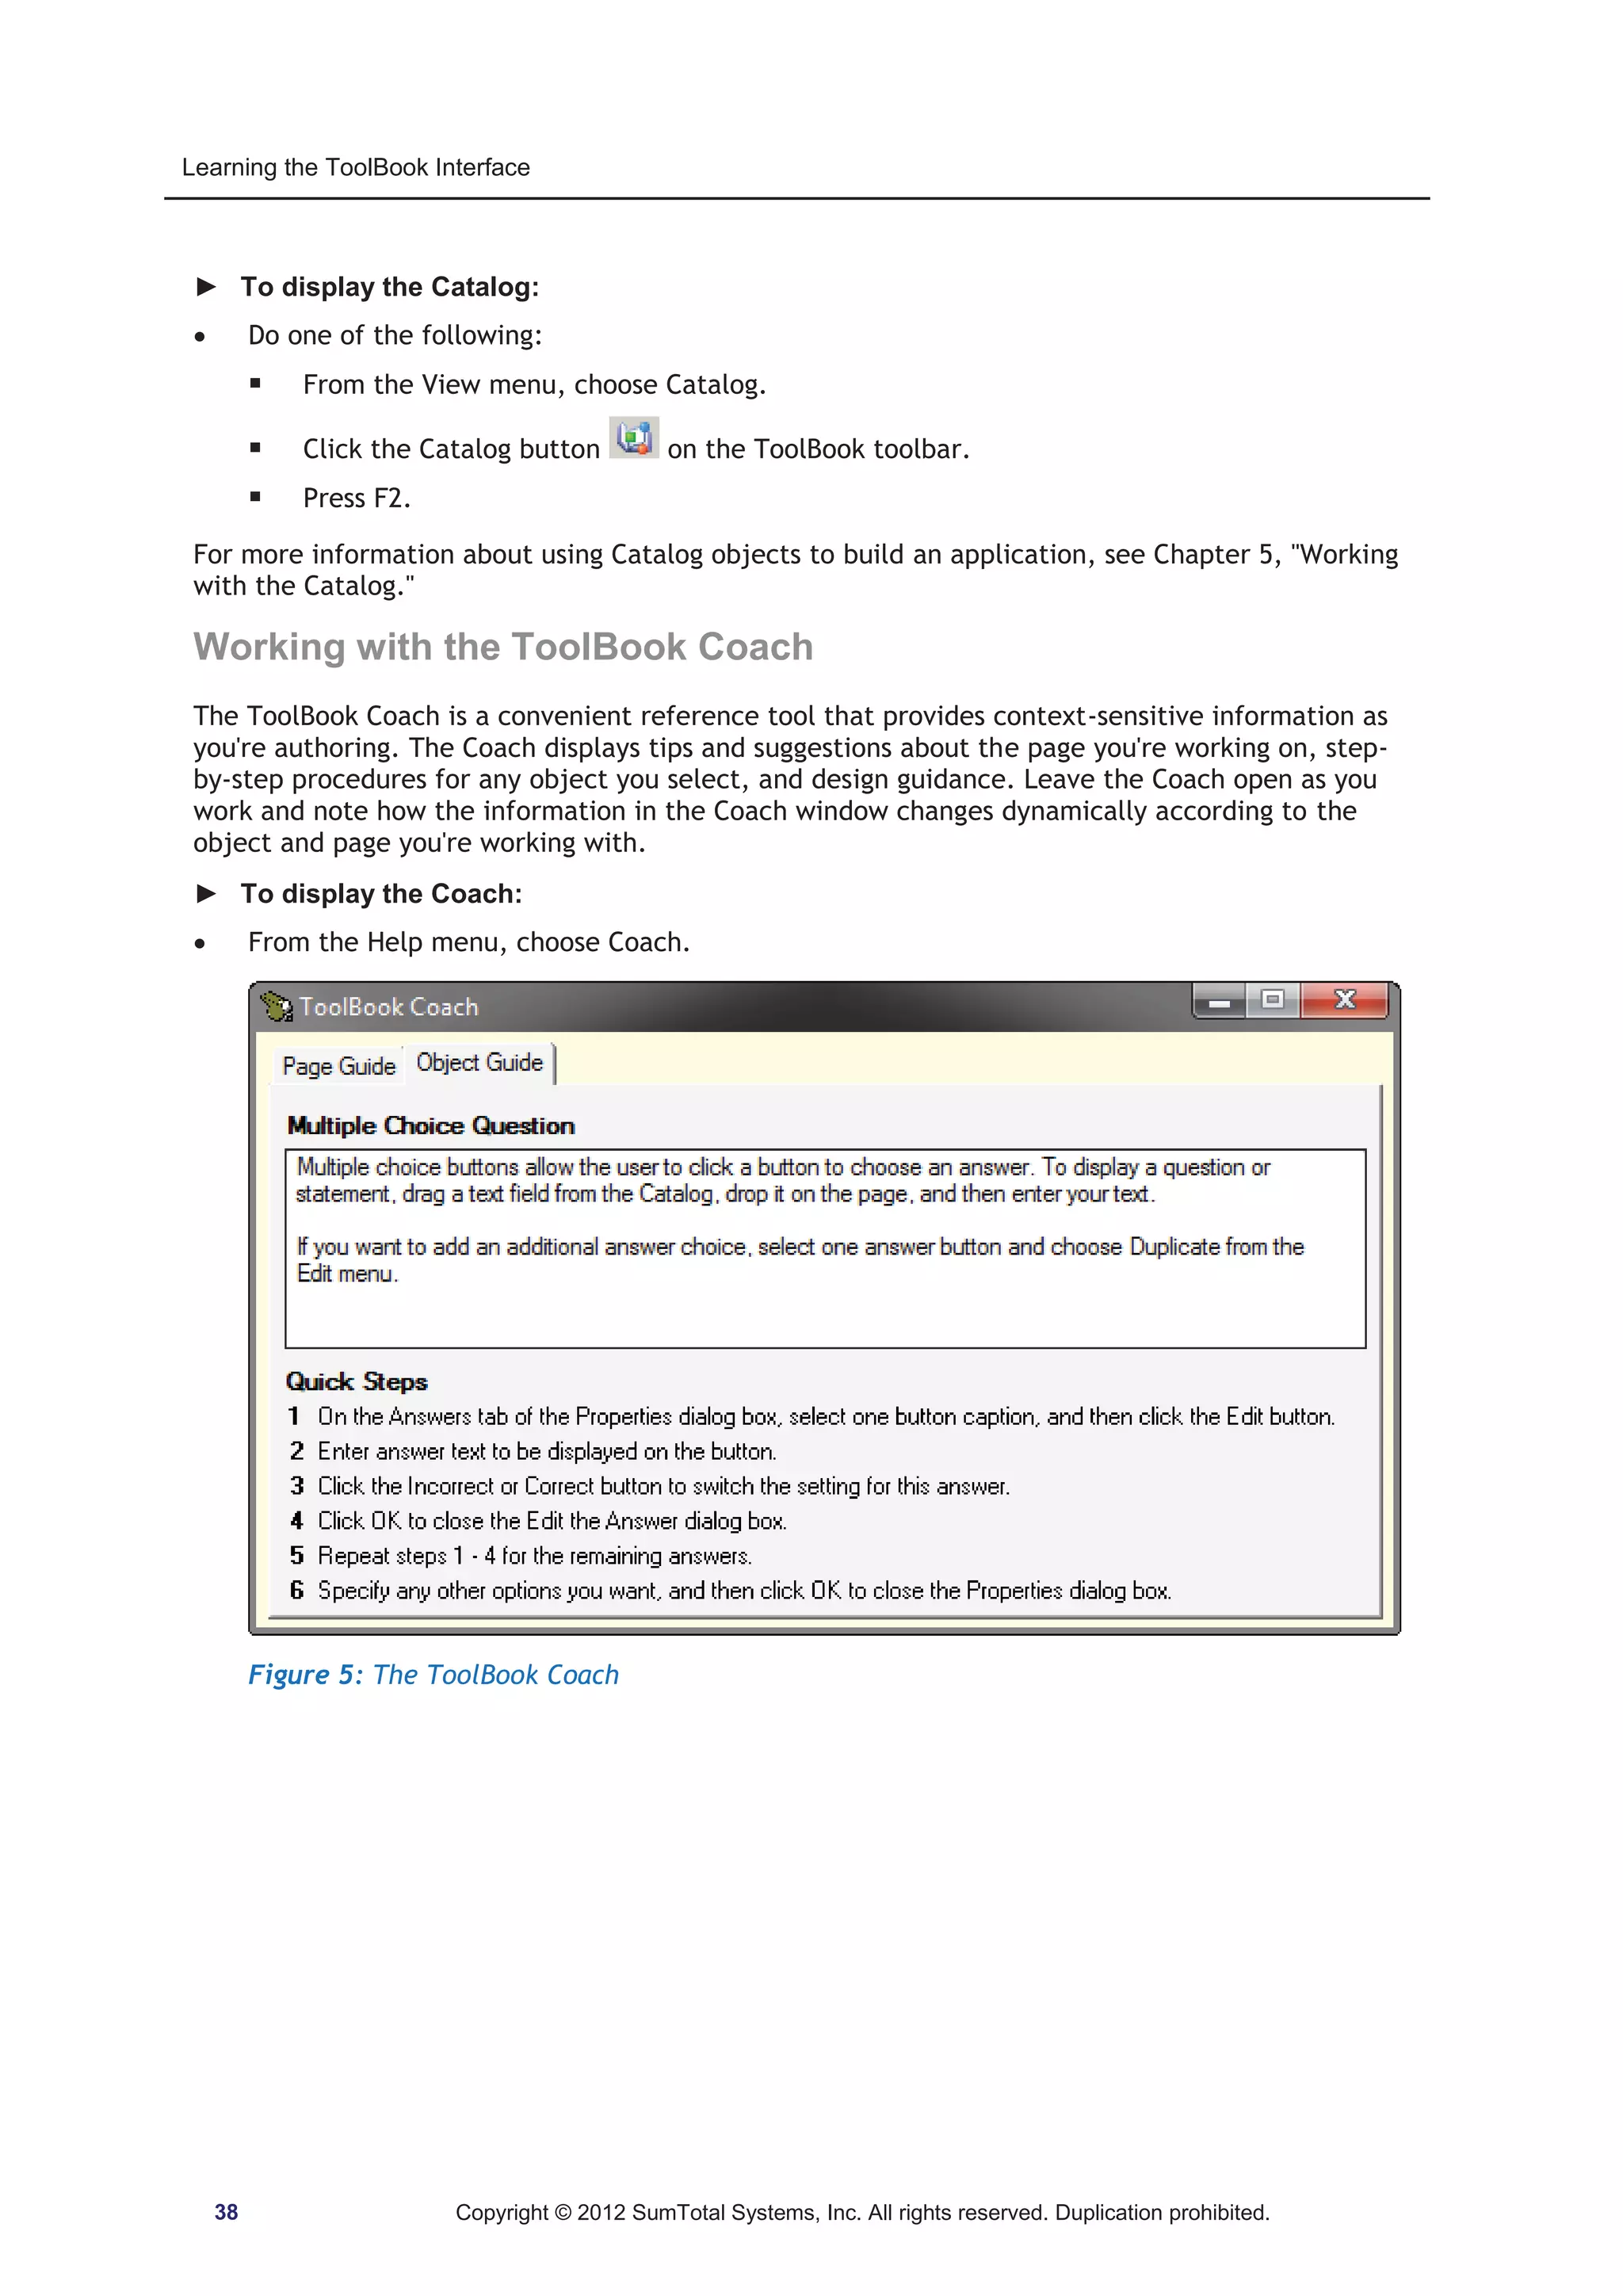
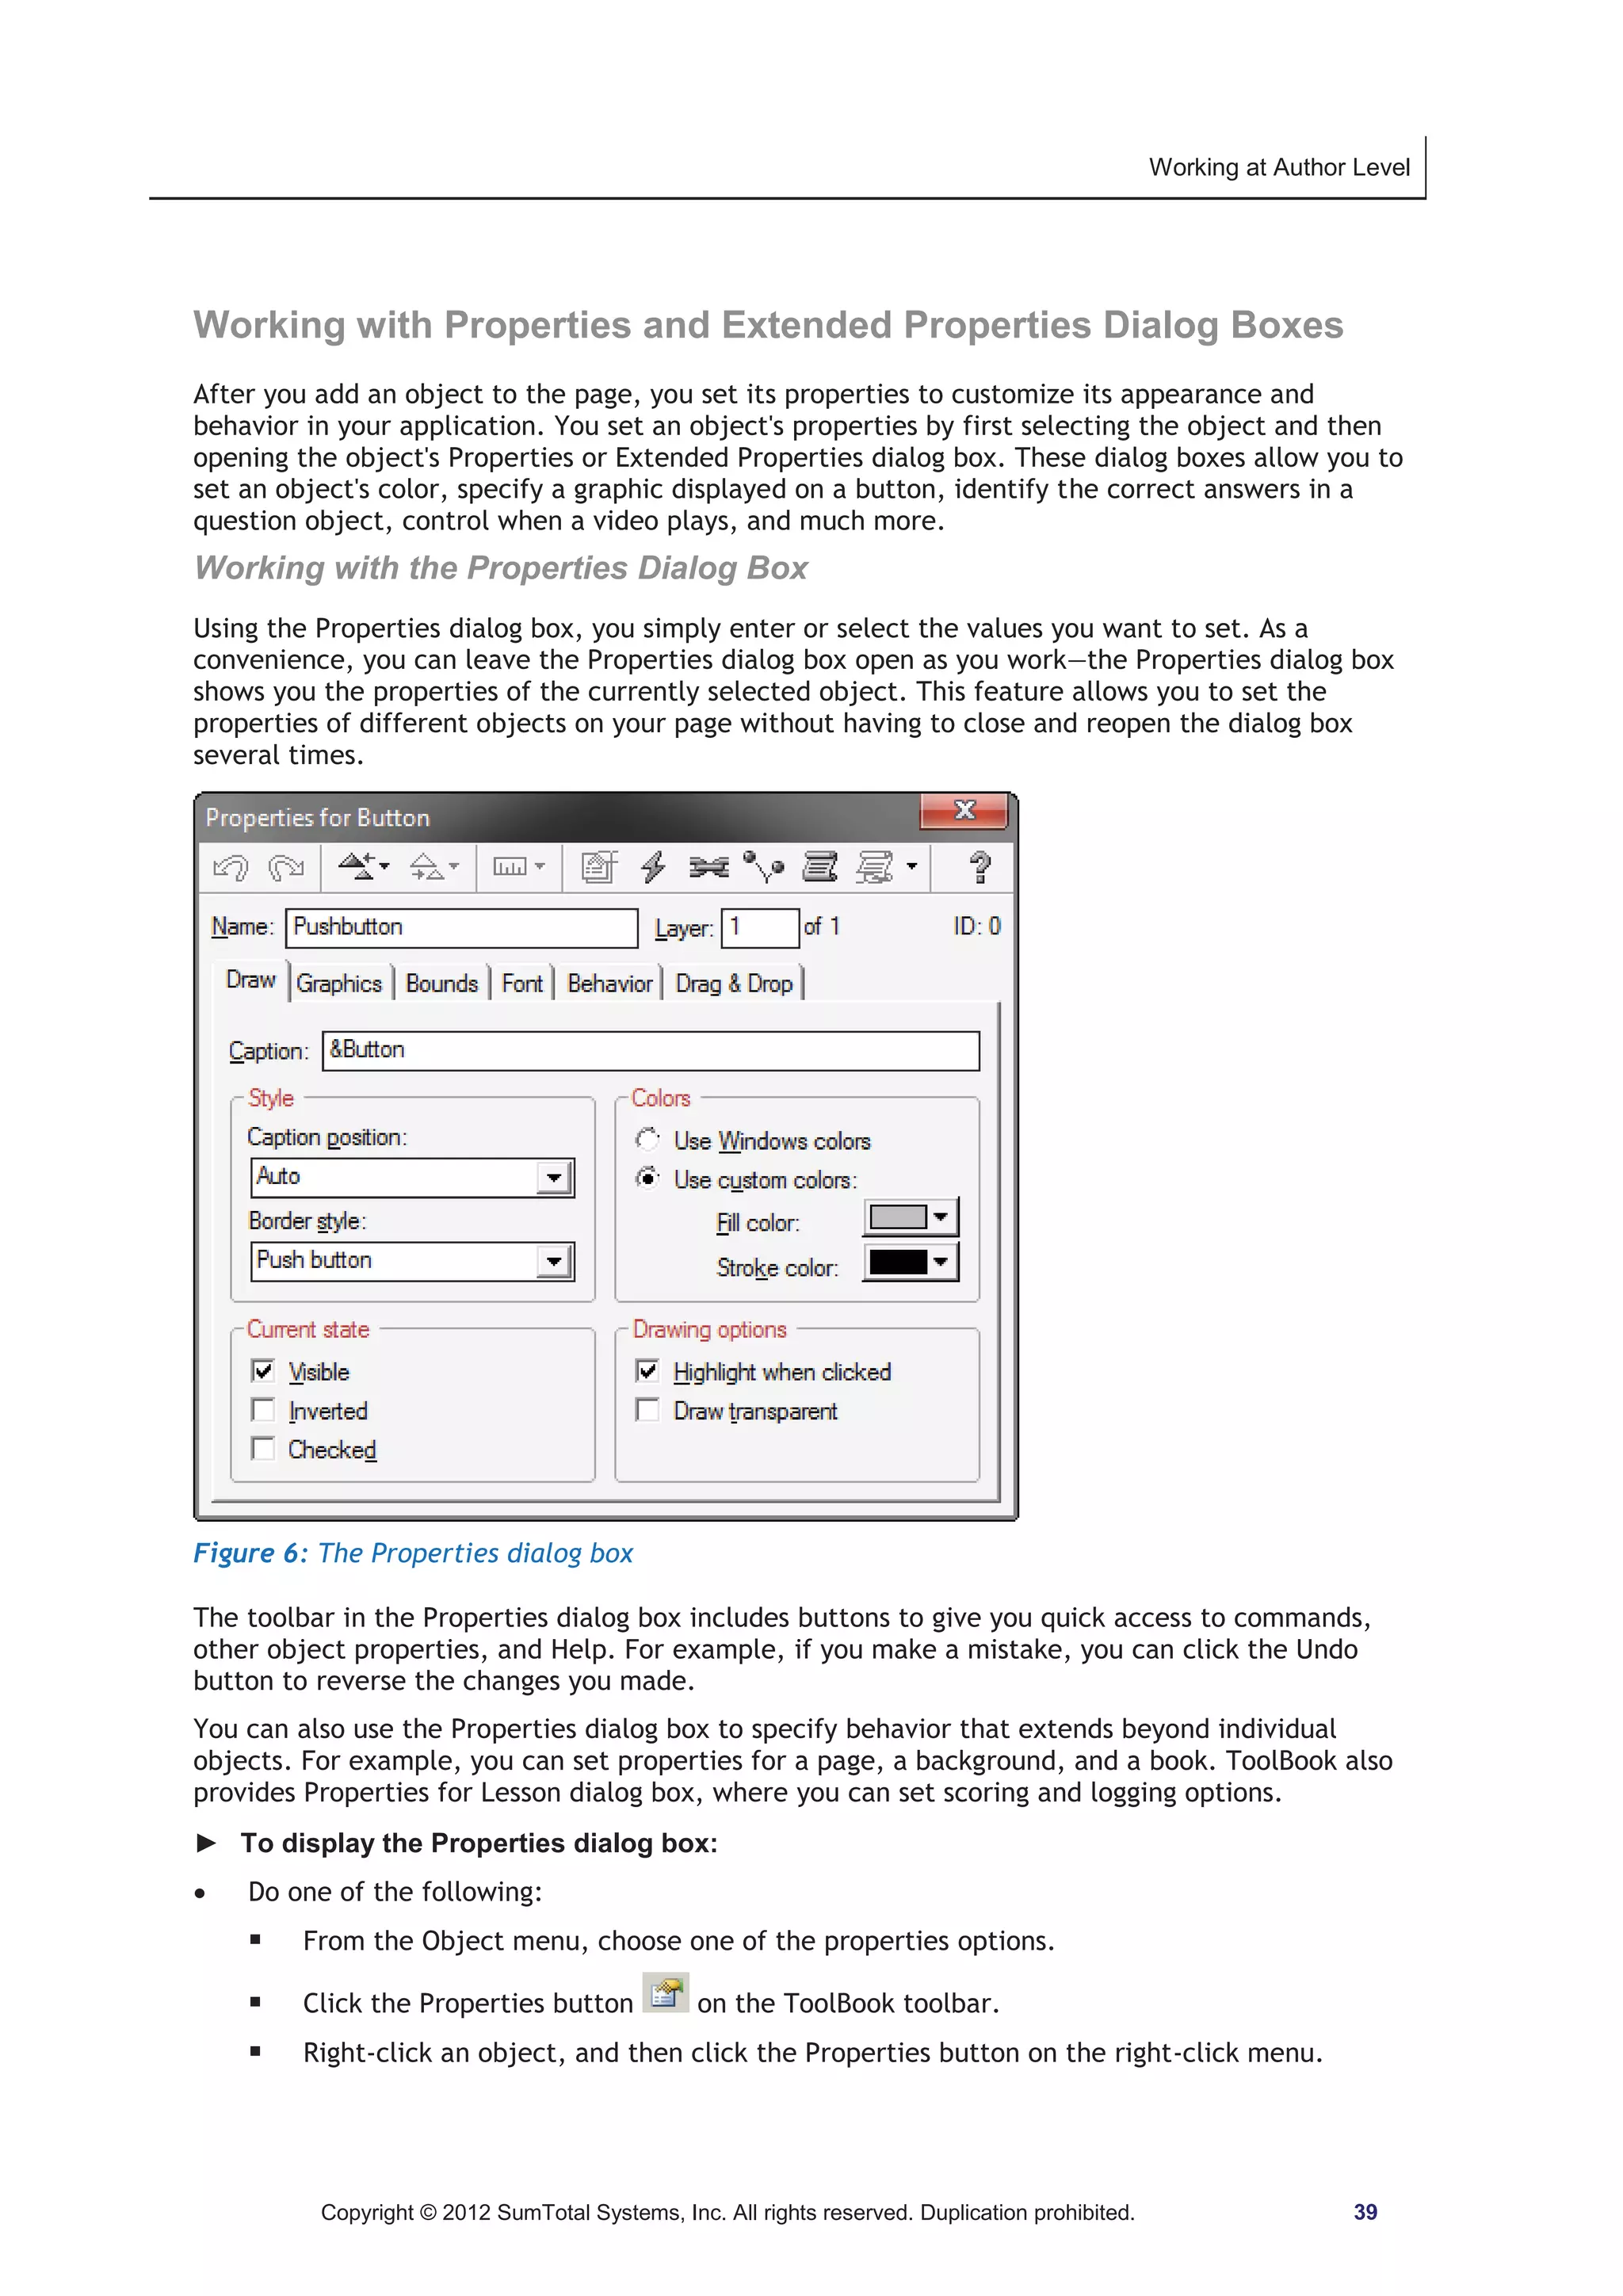
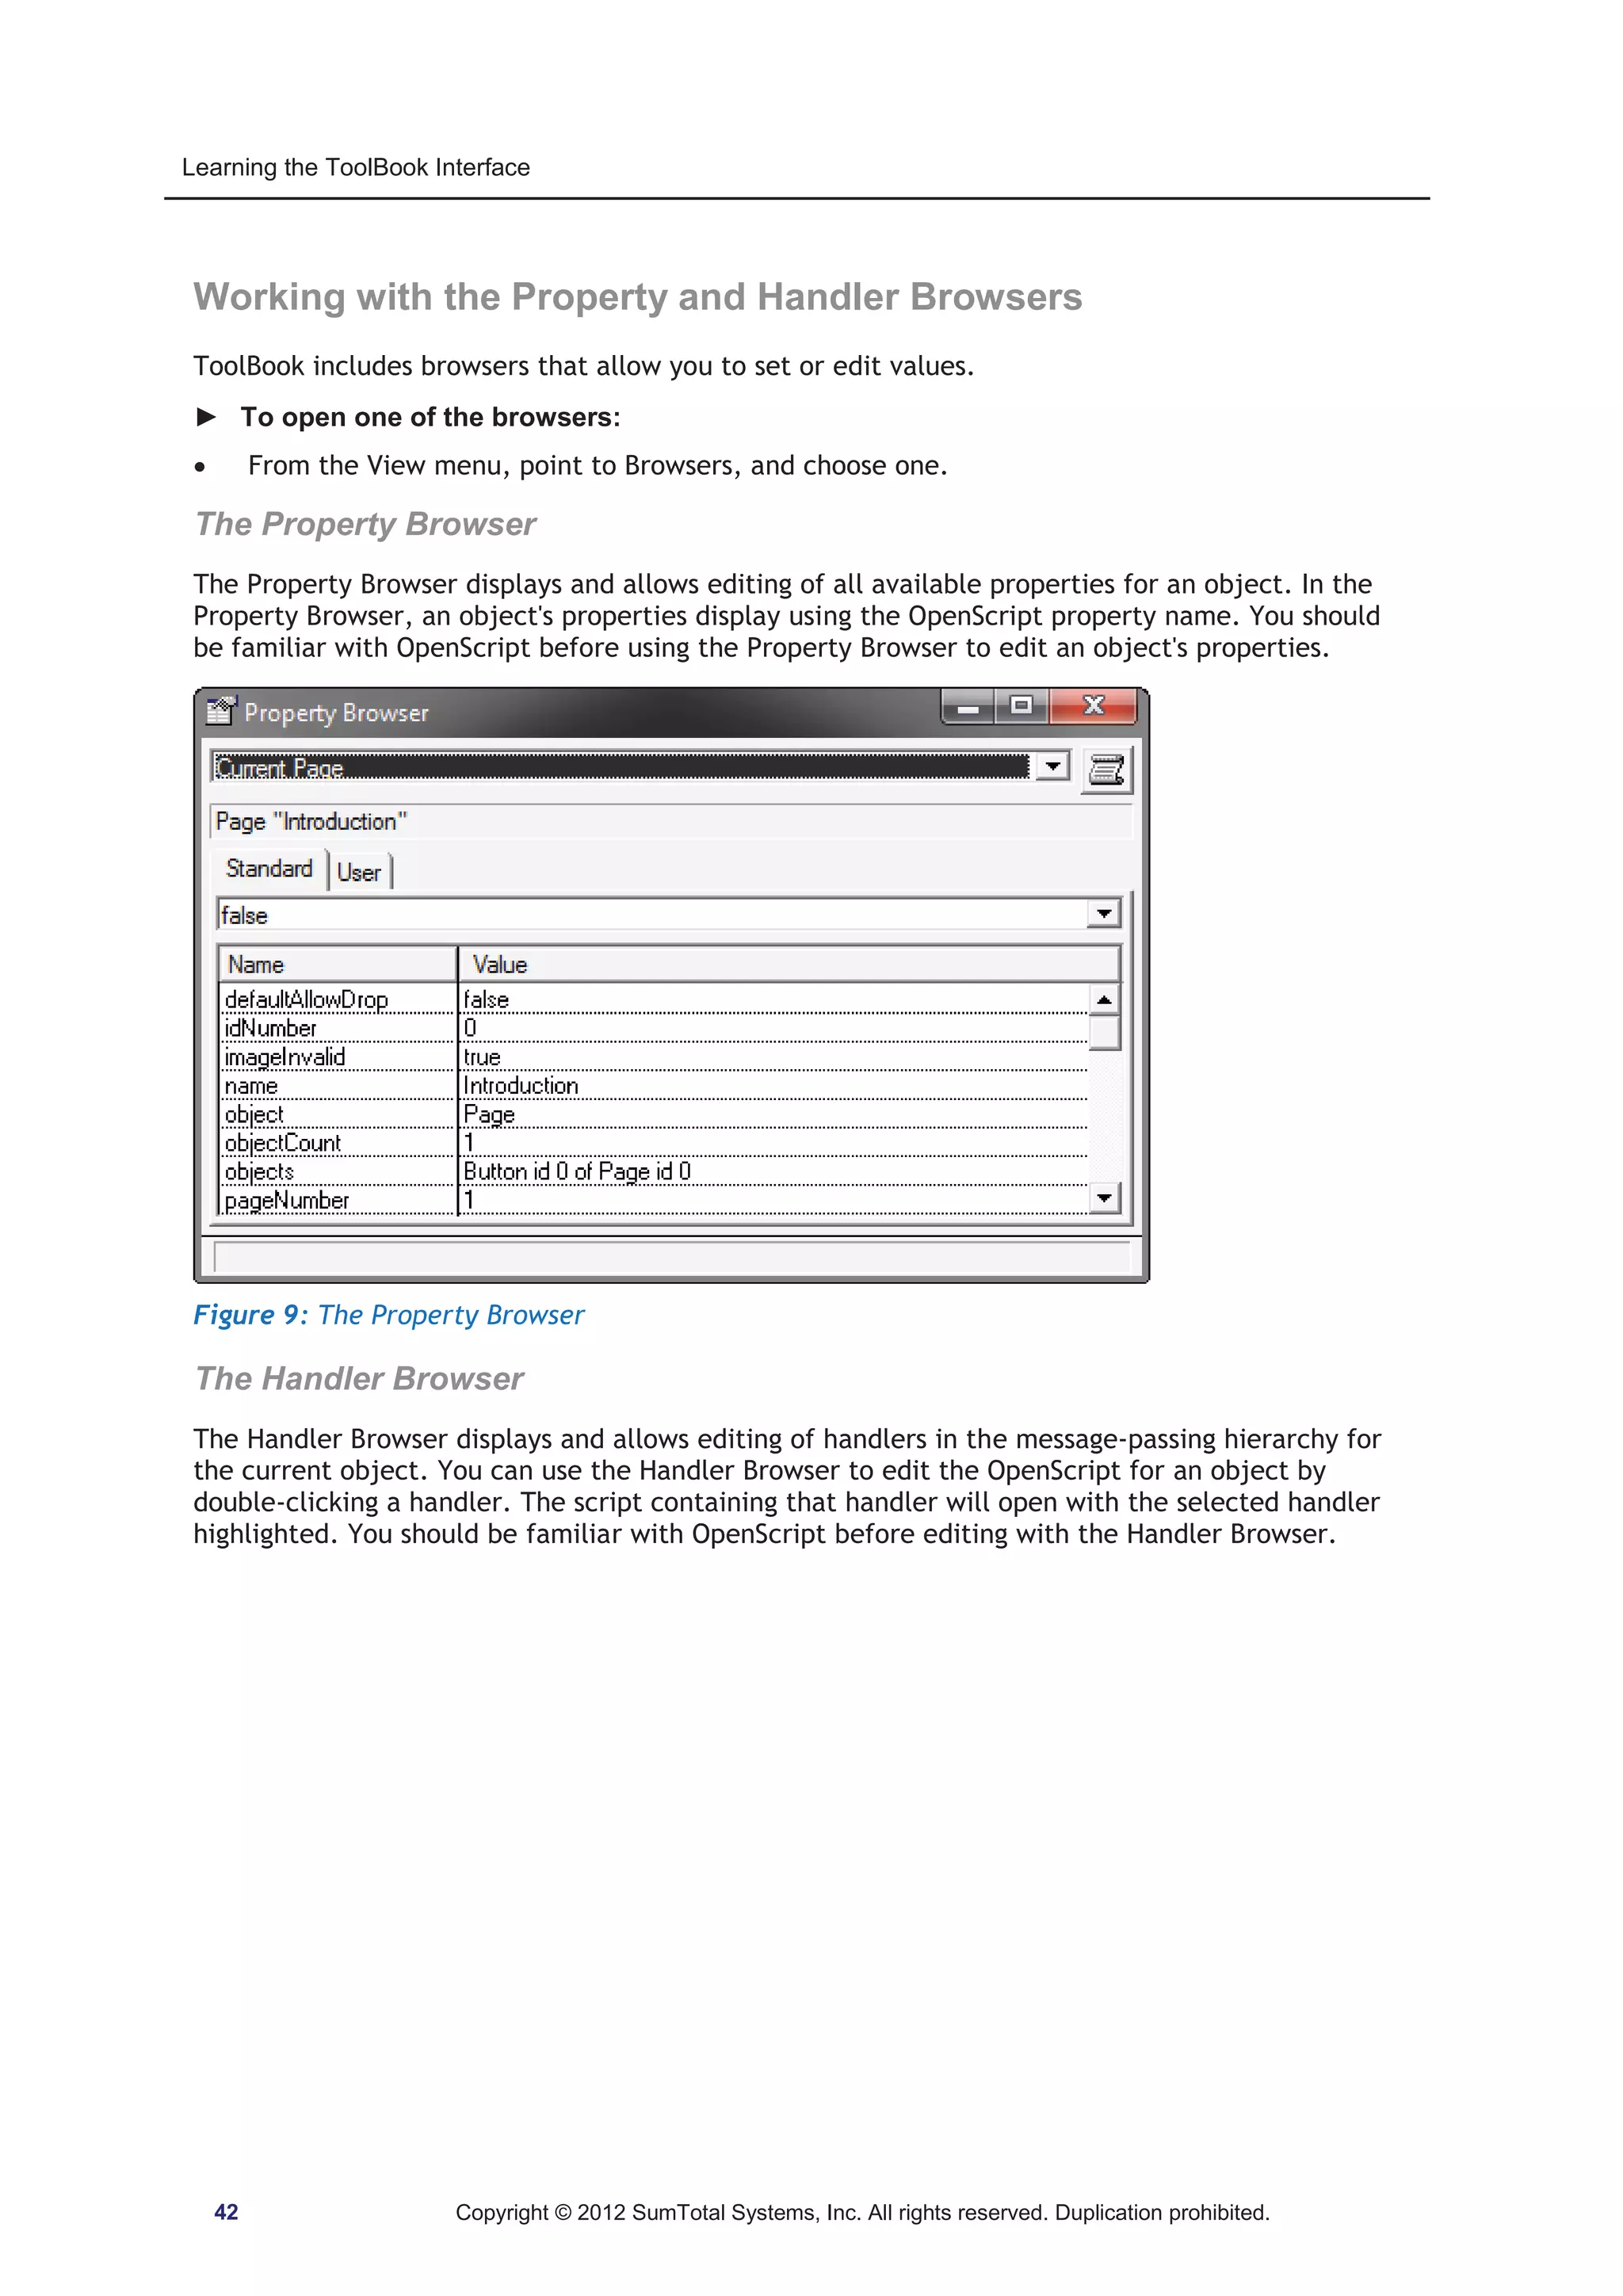
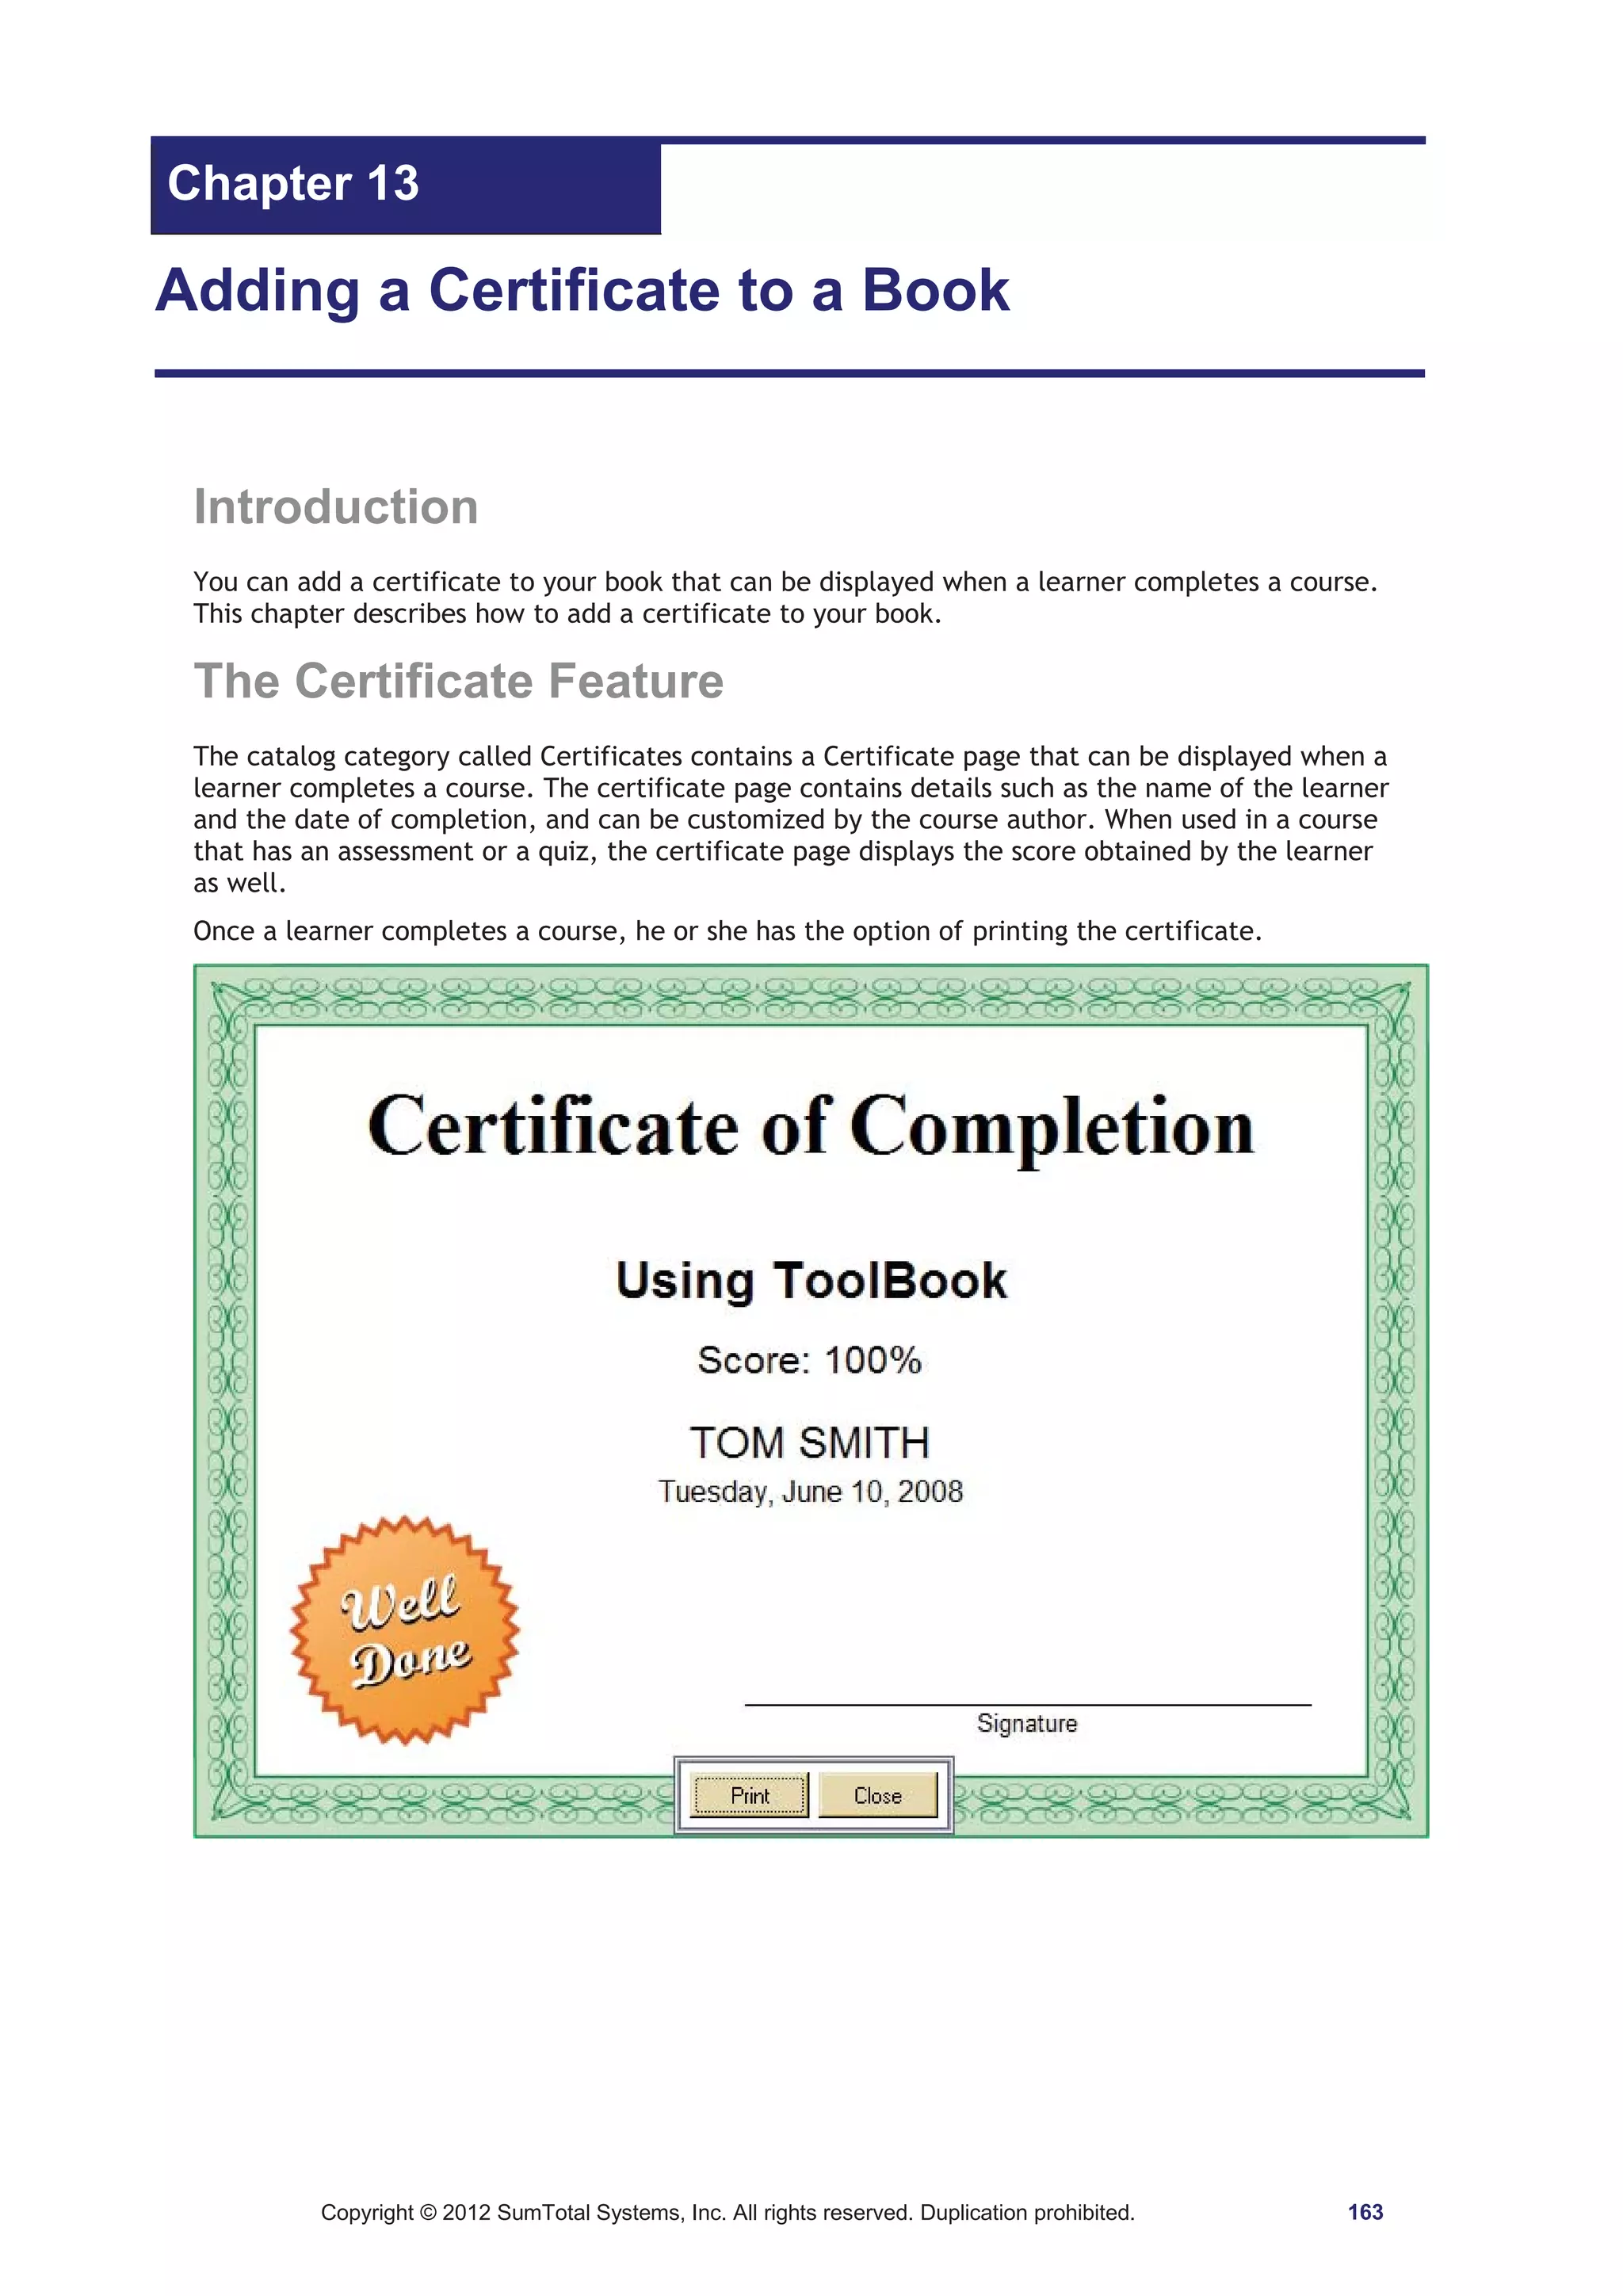
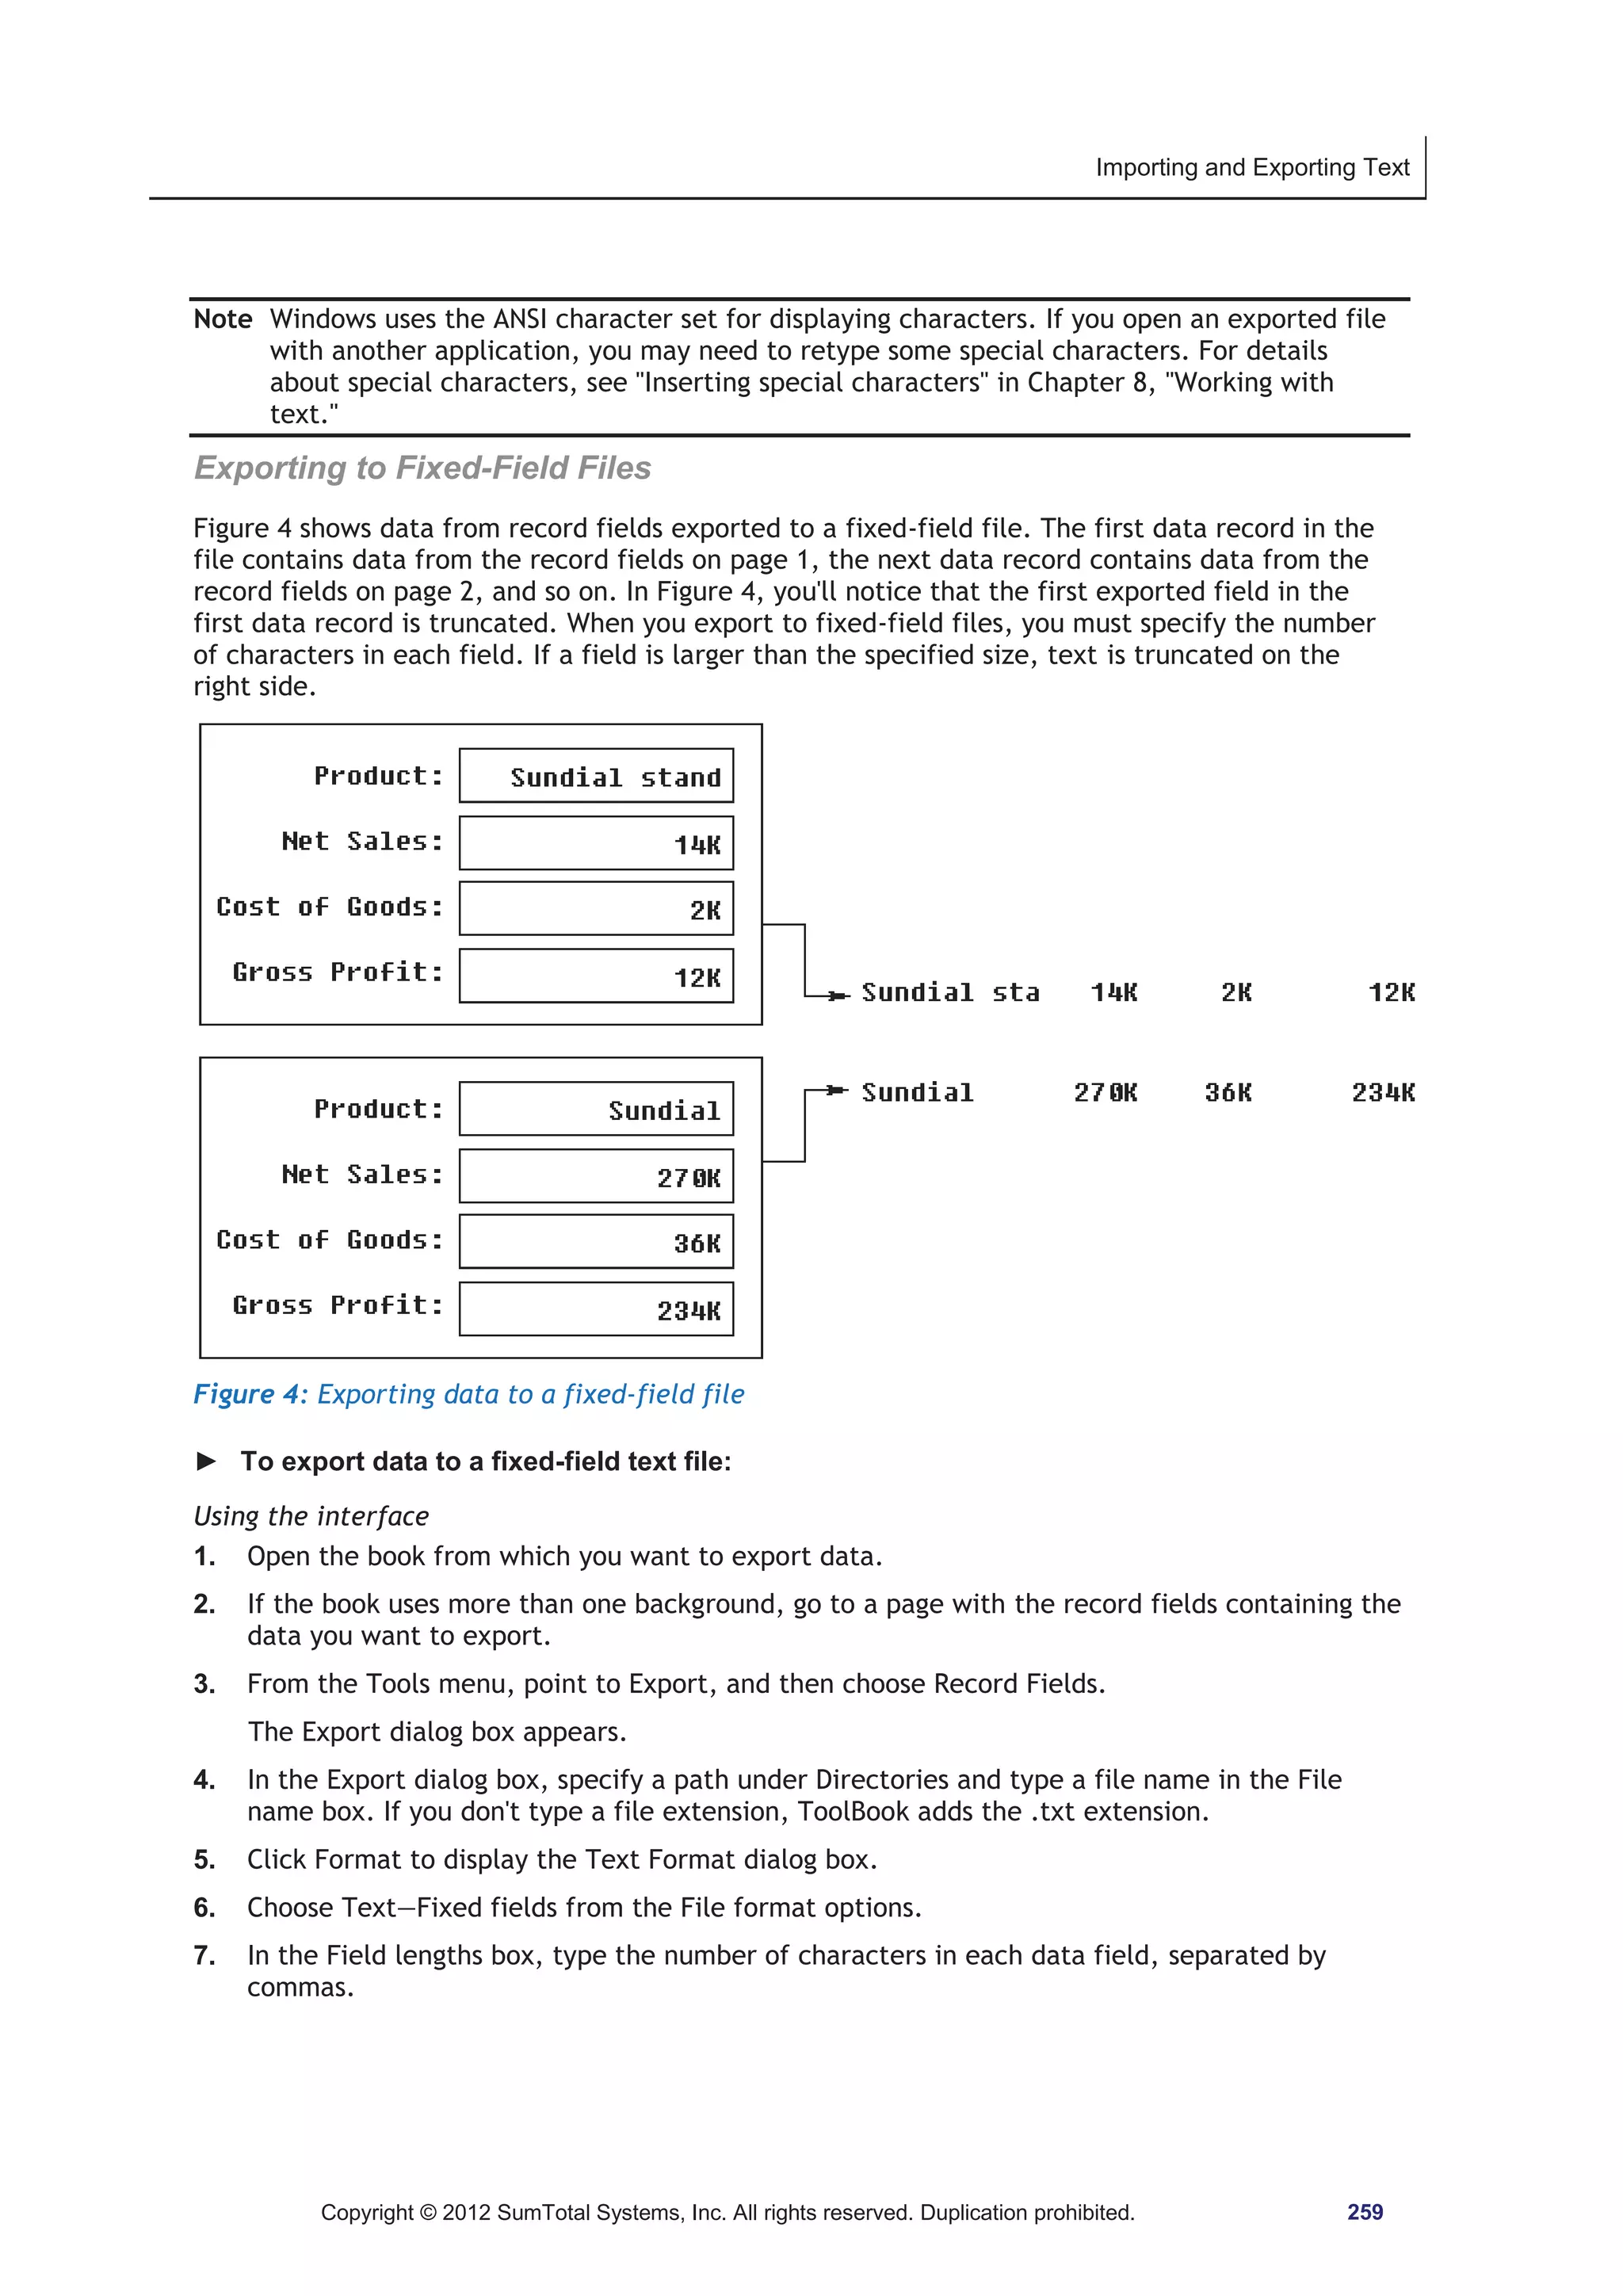
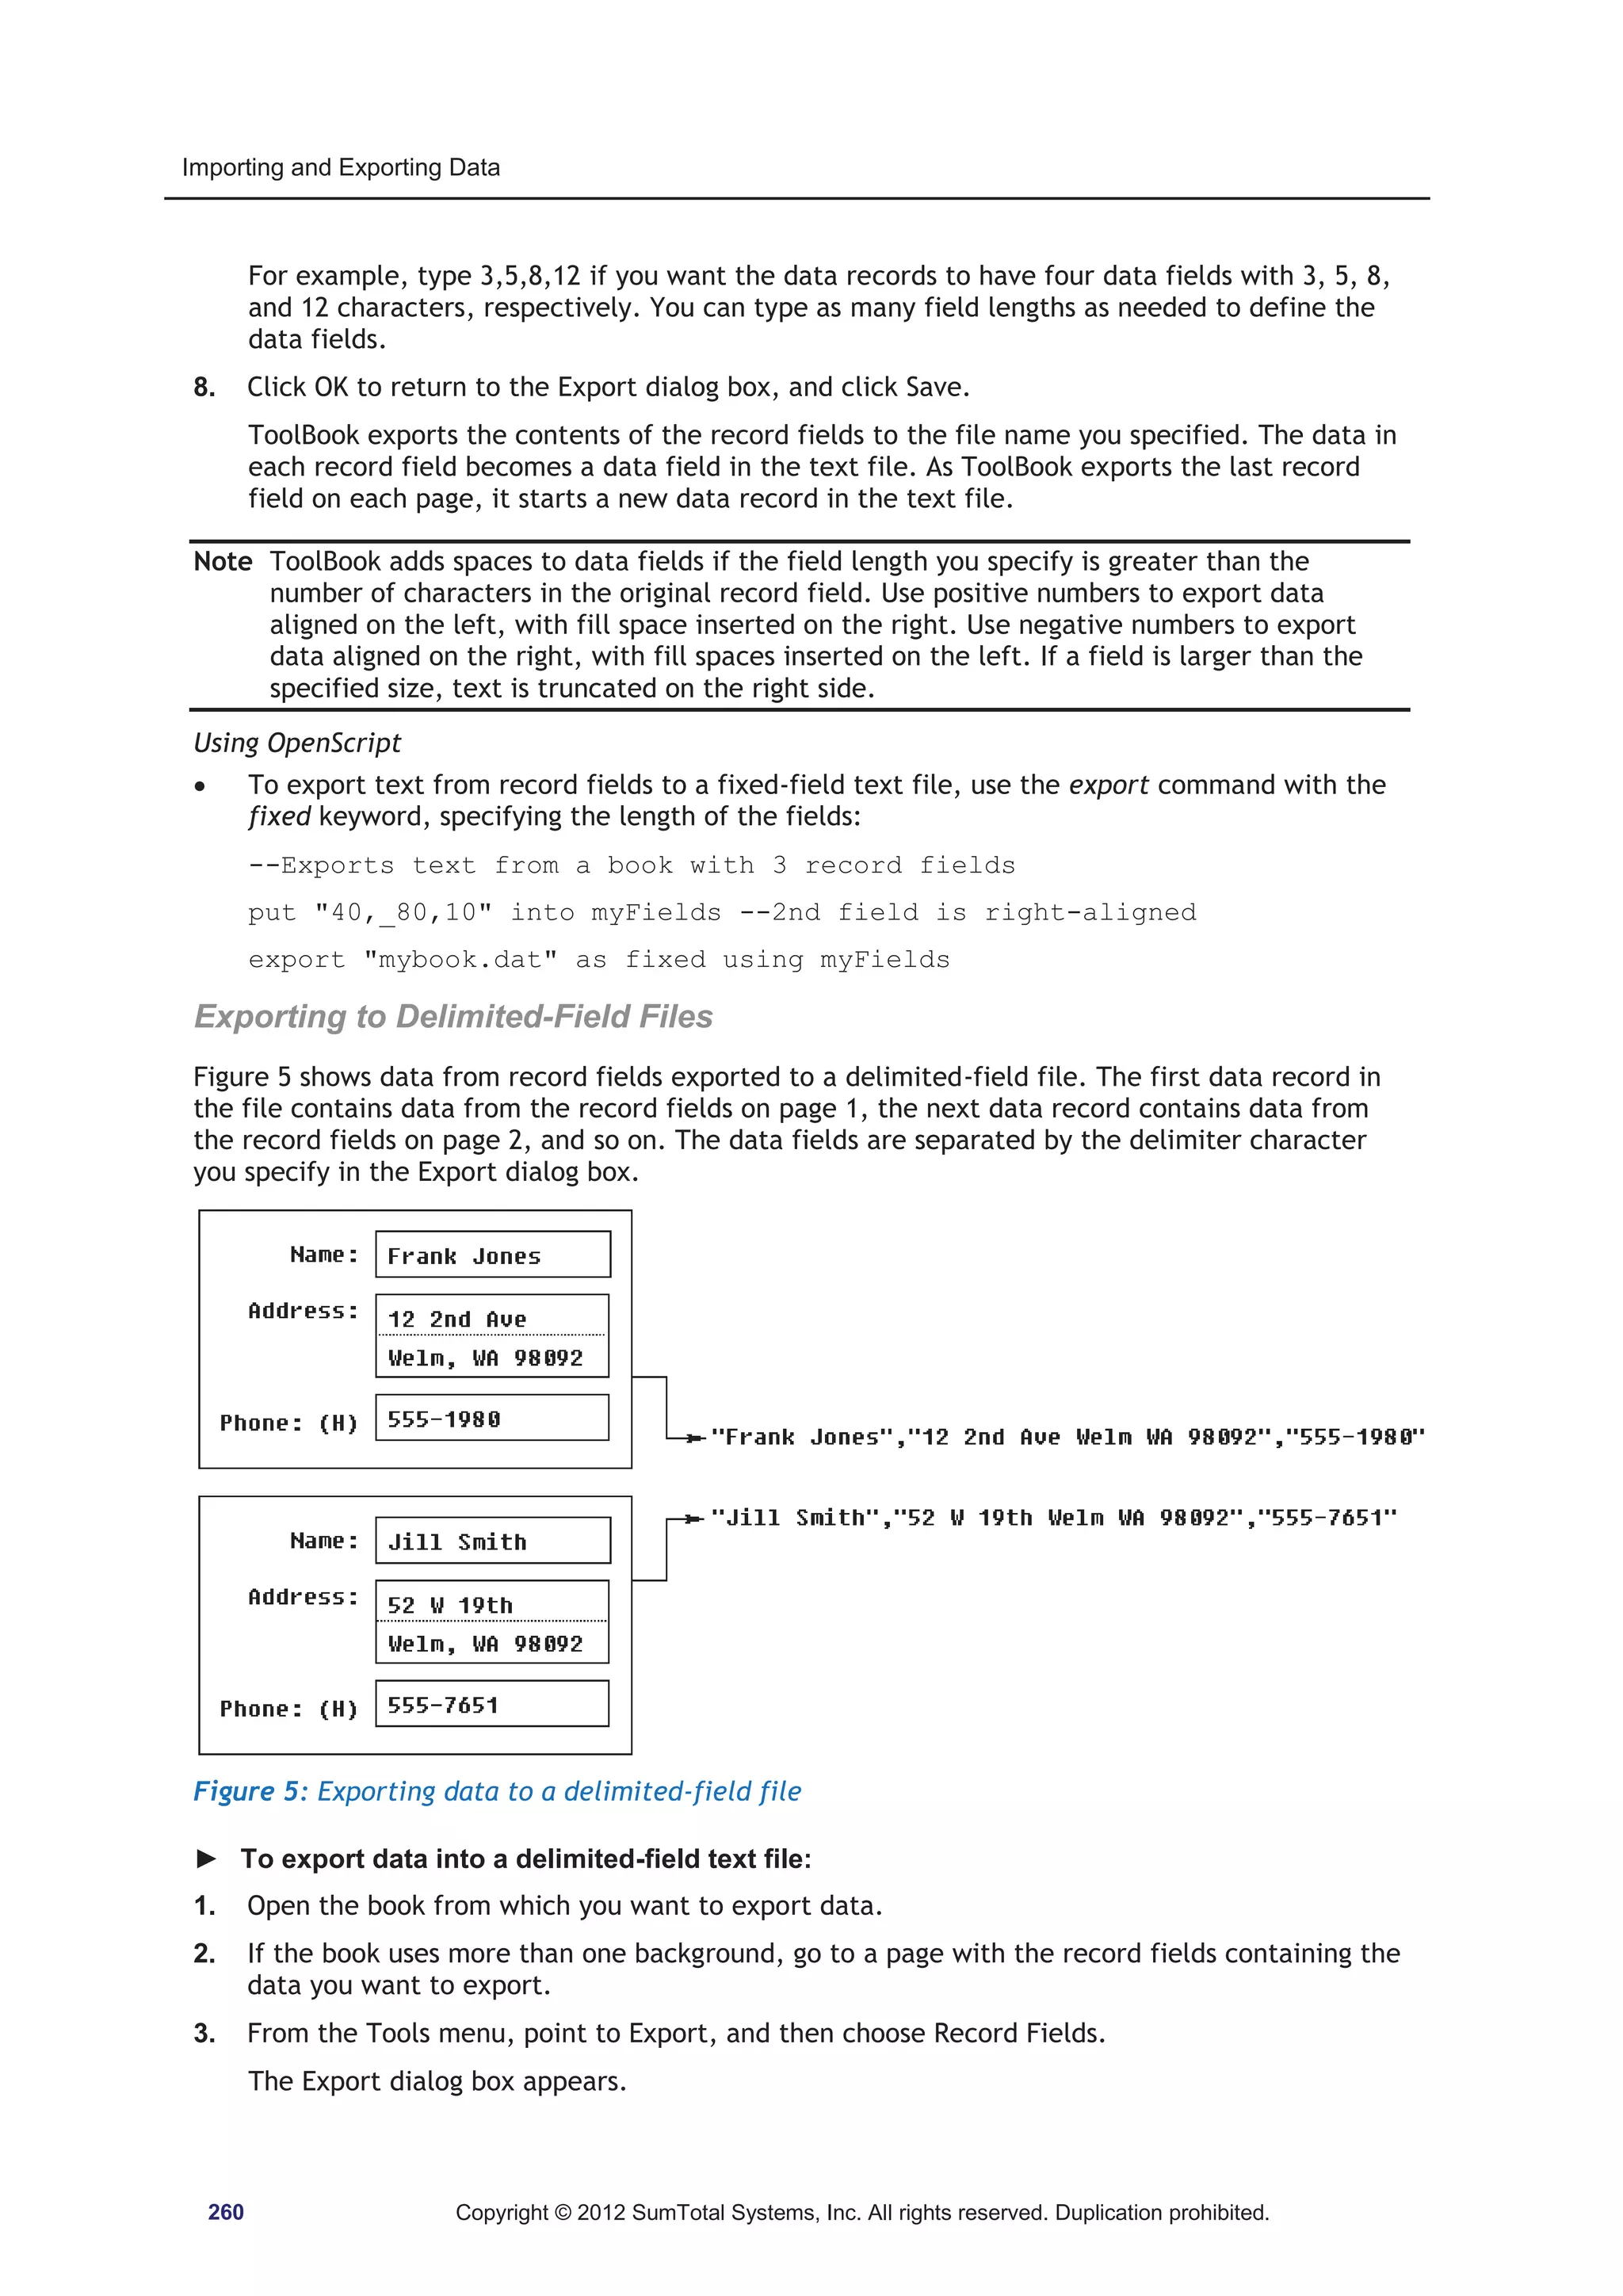
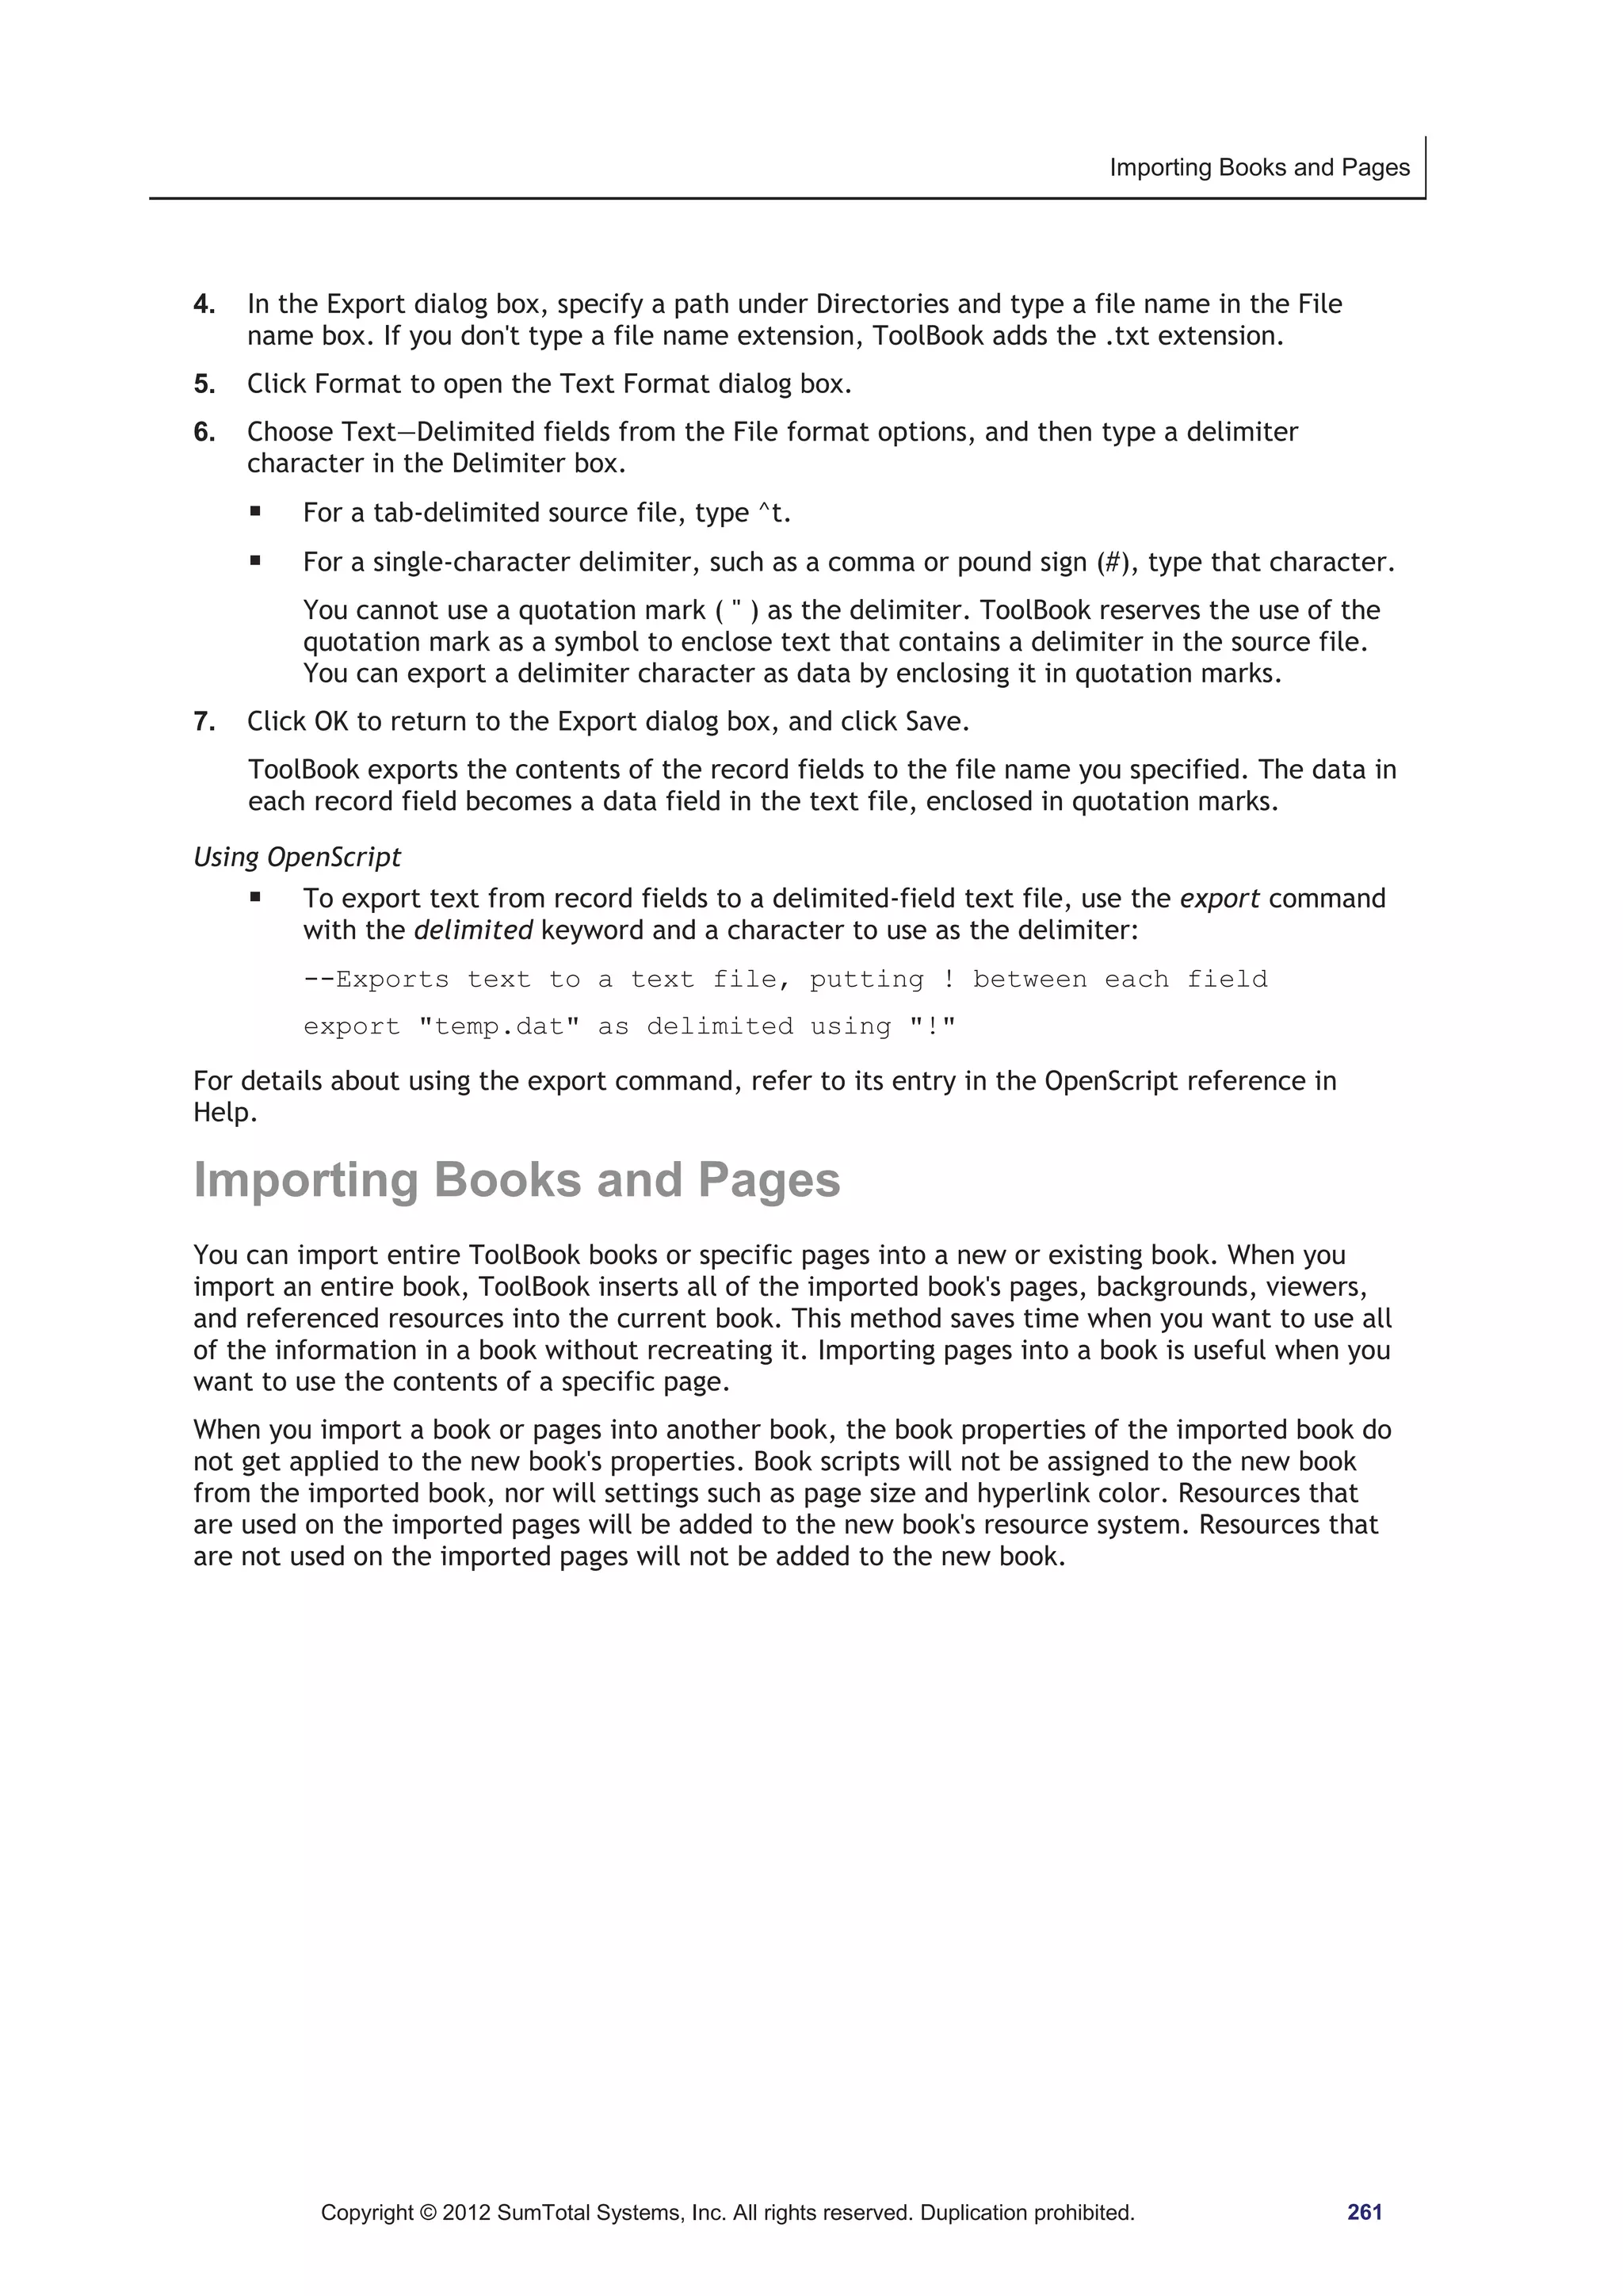
ToolBook is an application development tool used to create interactive software applications. It provides features for building a navigable structure of pages, adding objects like text, images, buttons and fields, and programming behaviors through a visual actions editor or scripting language. The user interface includes palettes for adding objects, properties panels for configuring objects, and tools for laying out pages and organizing the application. Actions can be used to add interactivity like responding to user input. Resources allow importing common assets like images to be shared across objects.

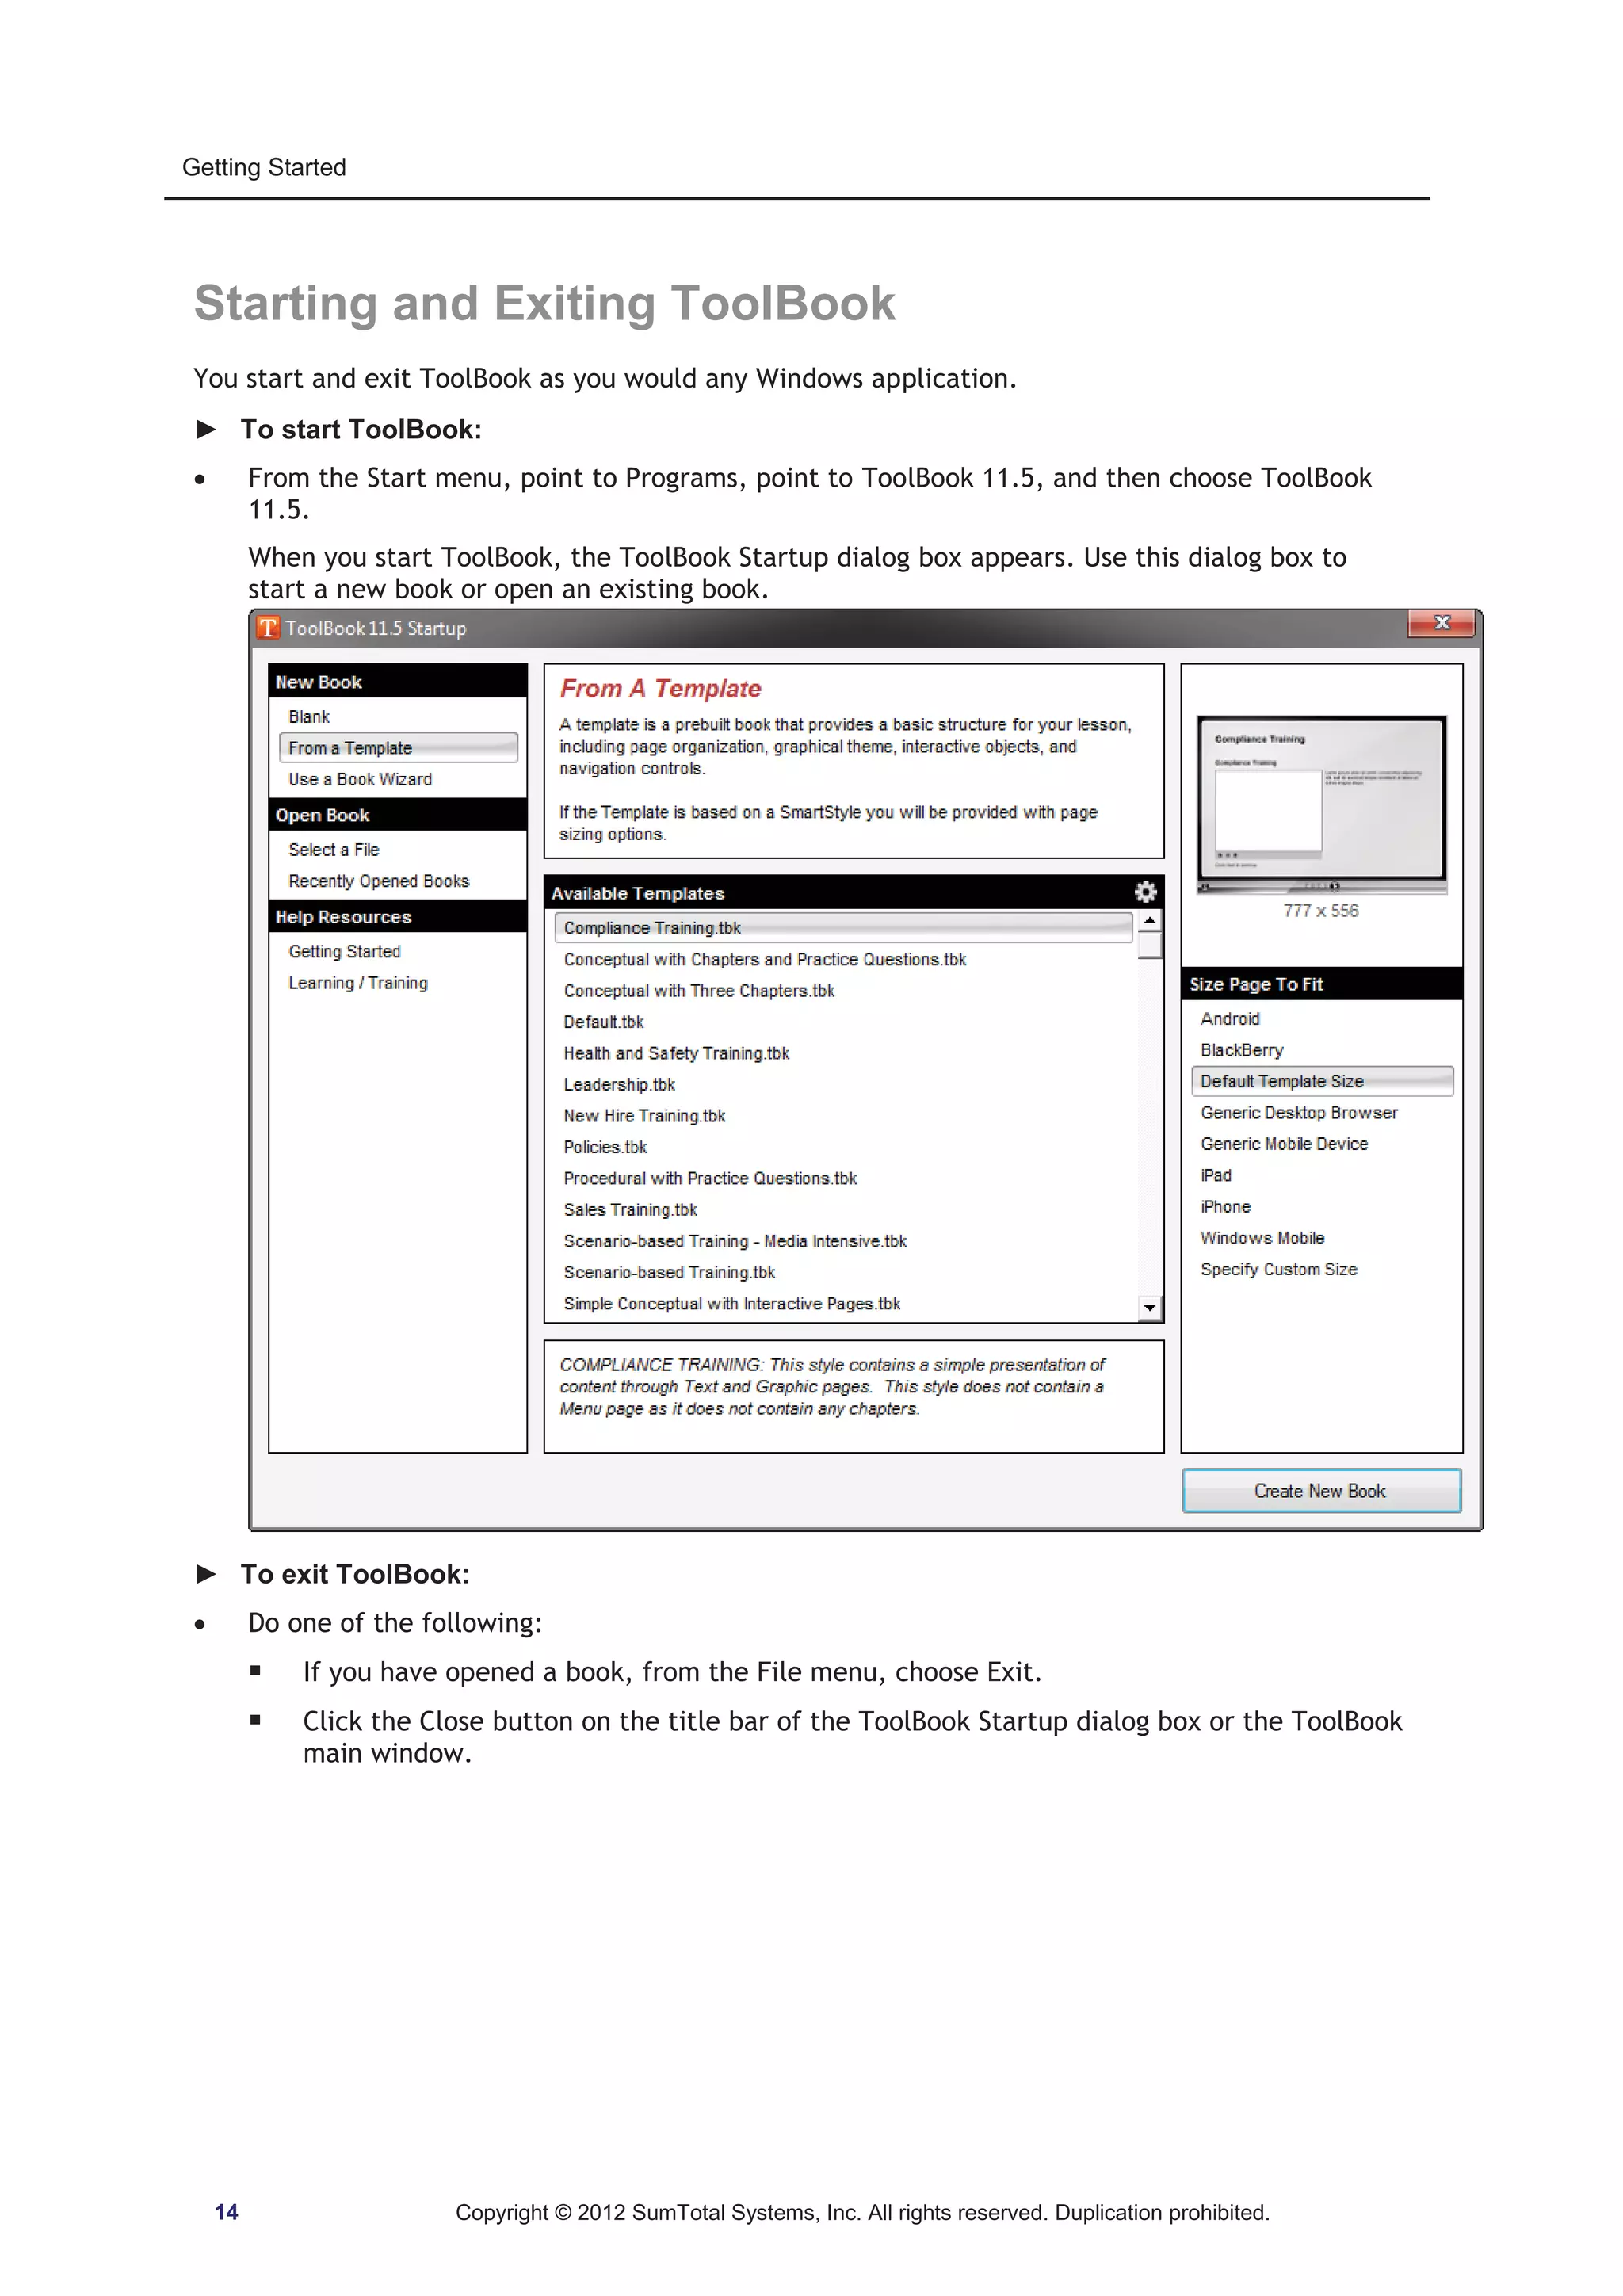
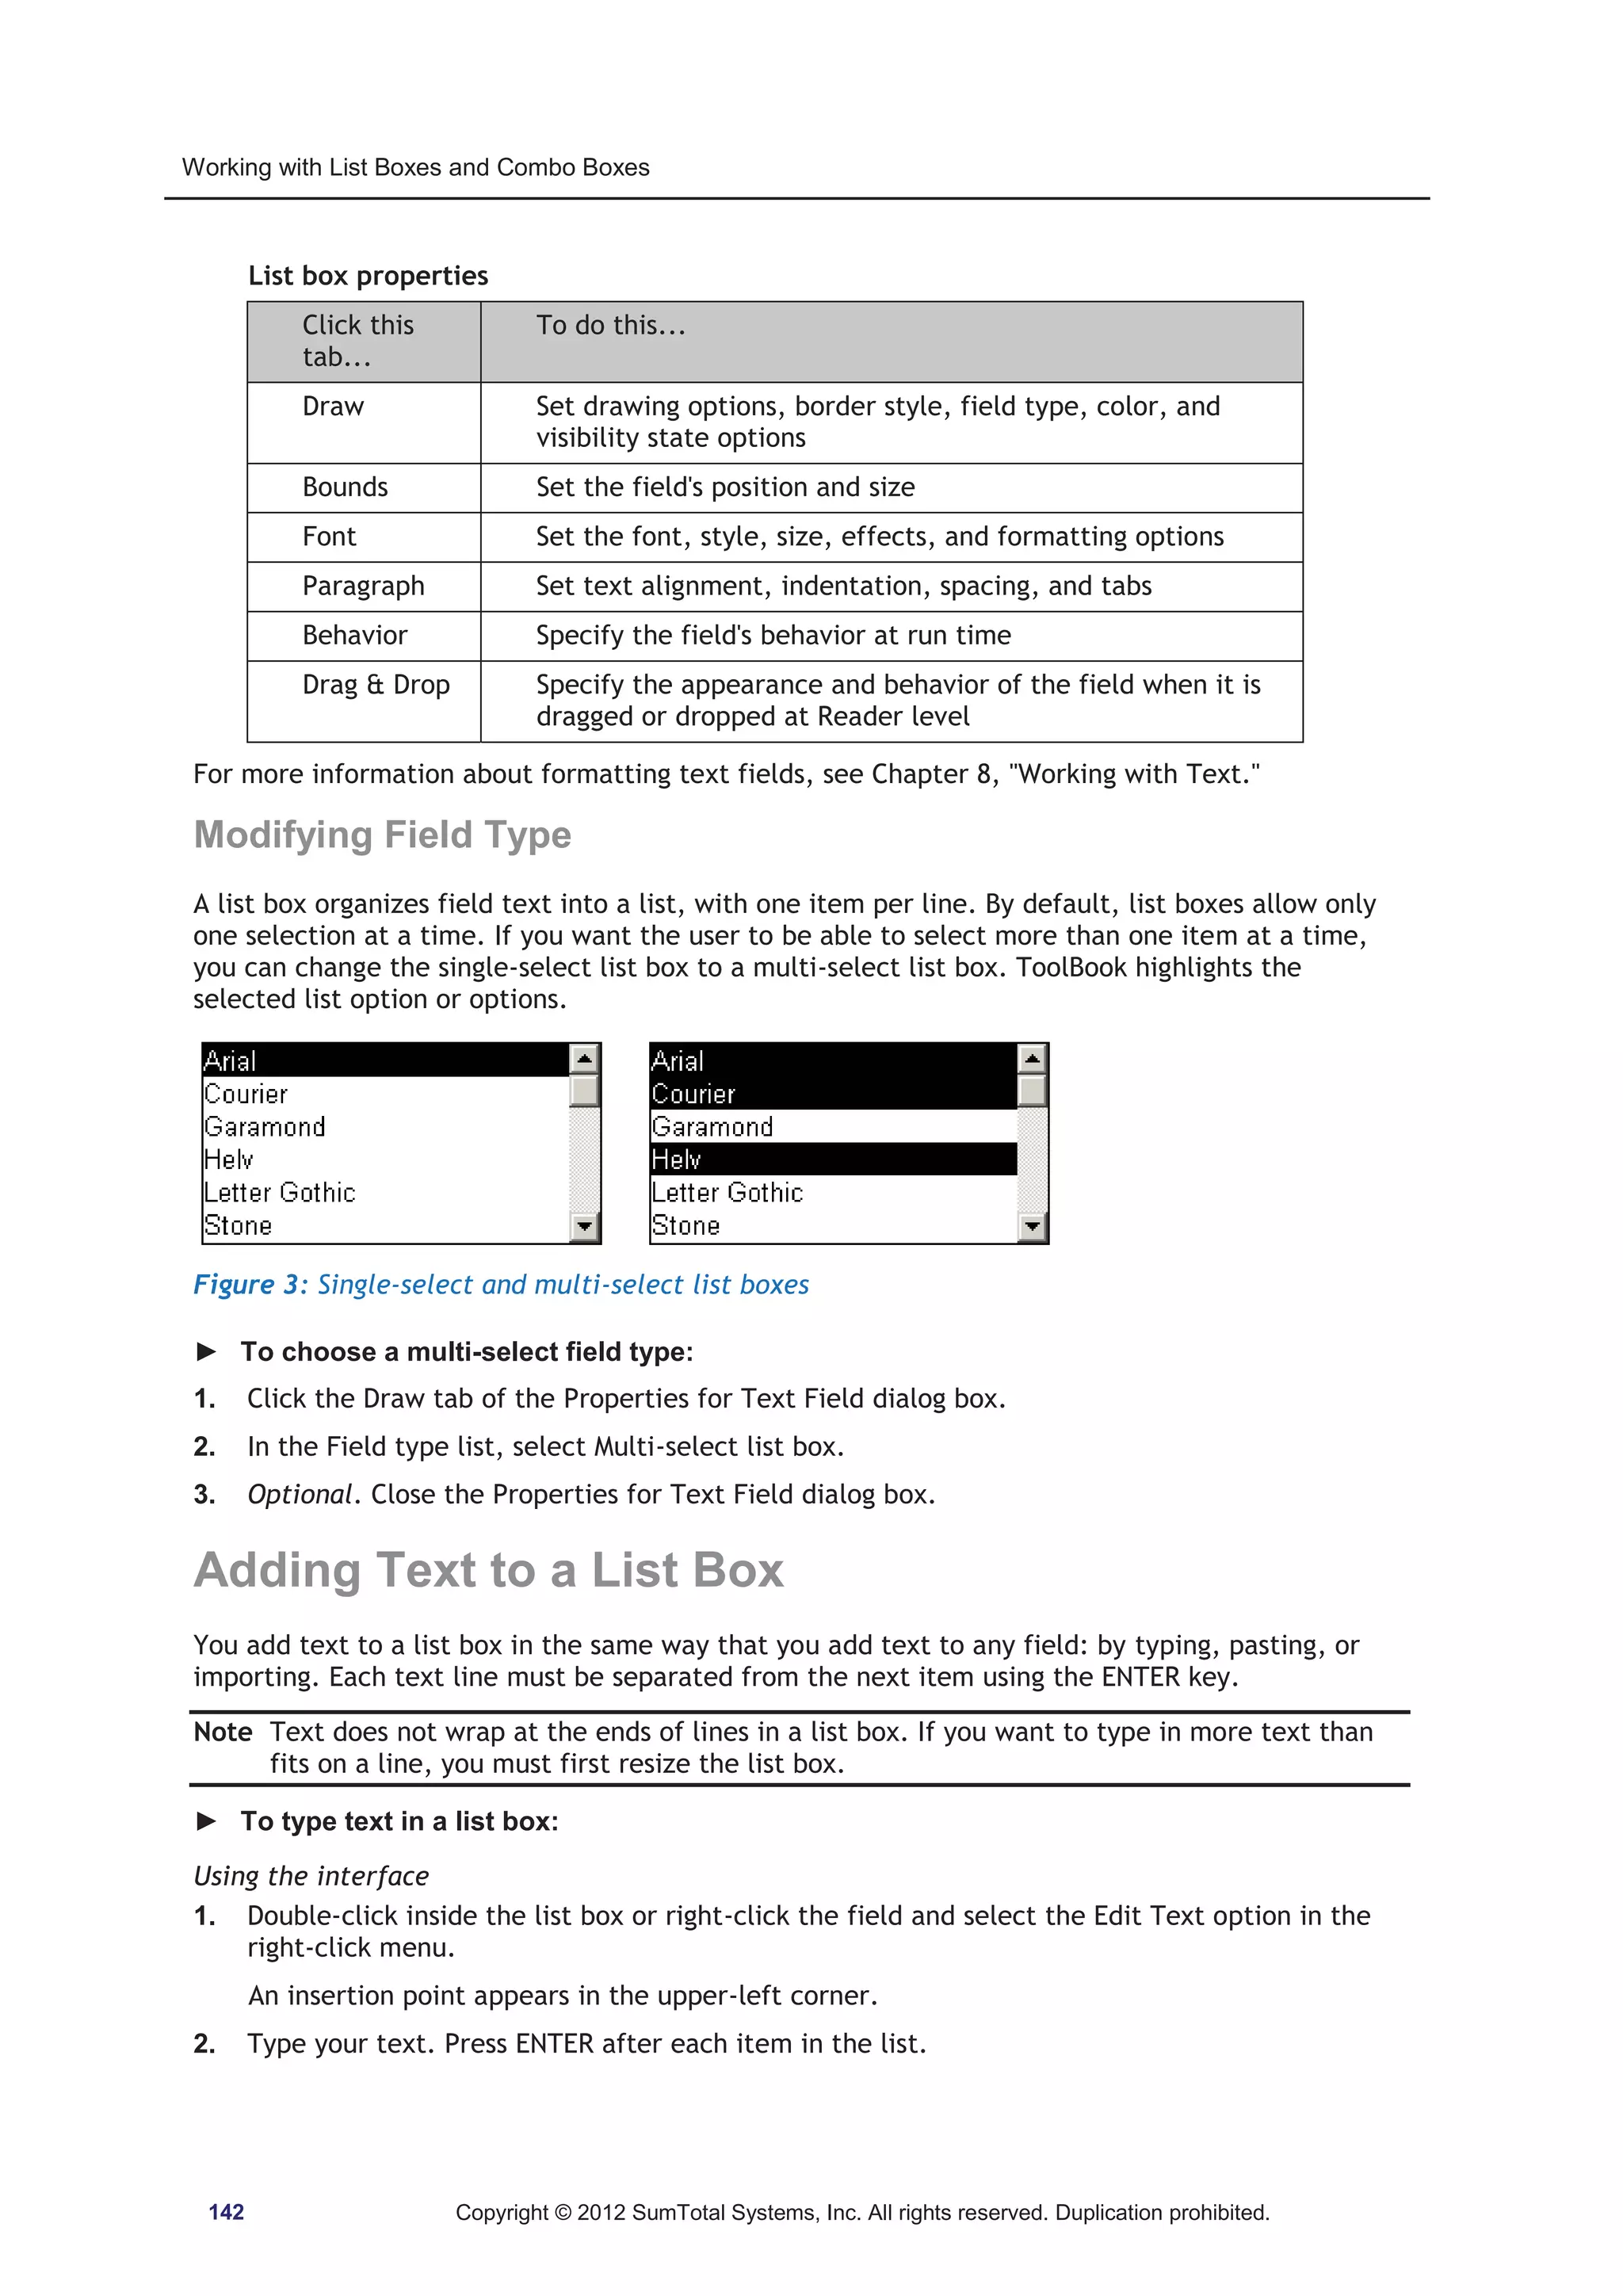
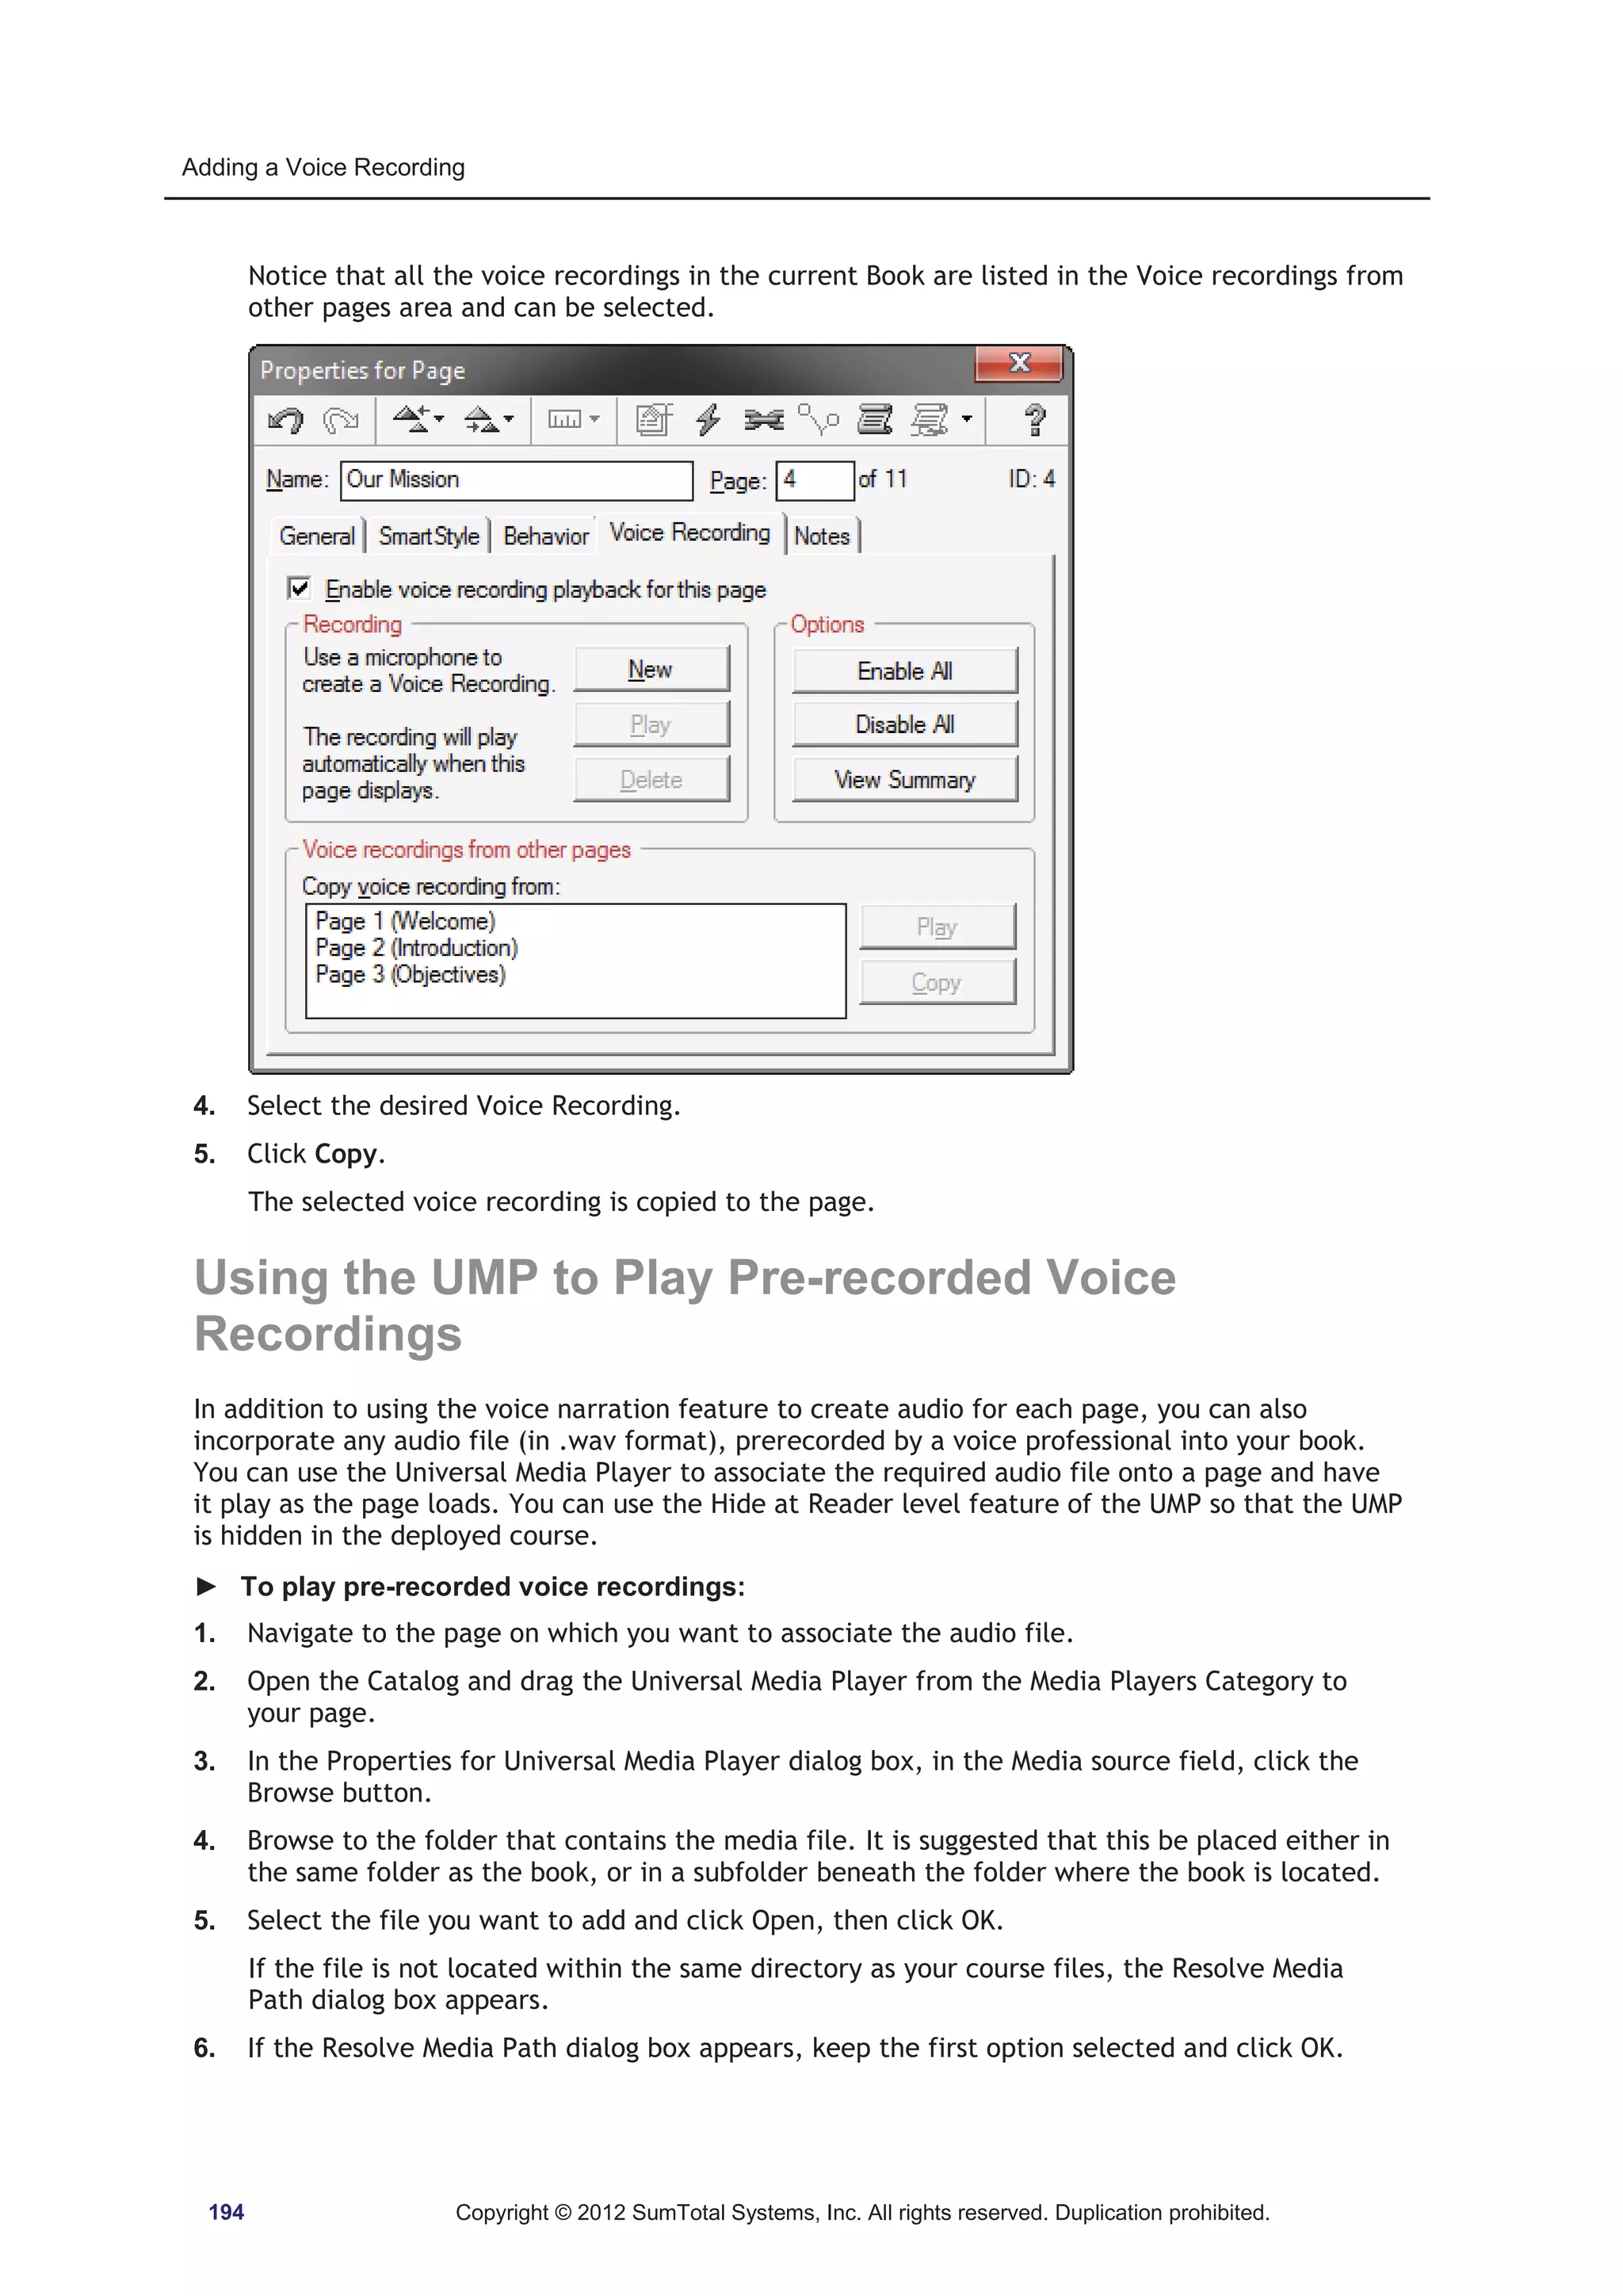
![About this Book
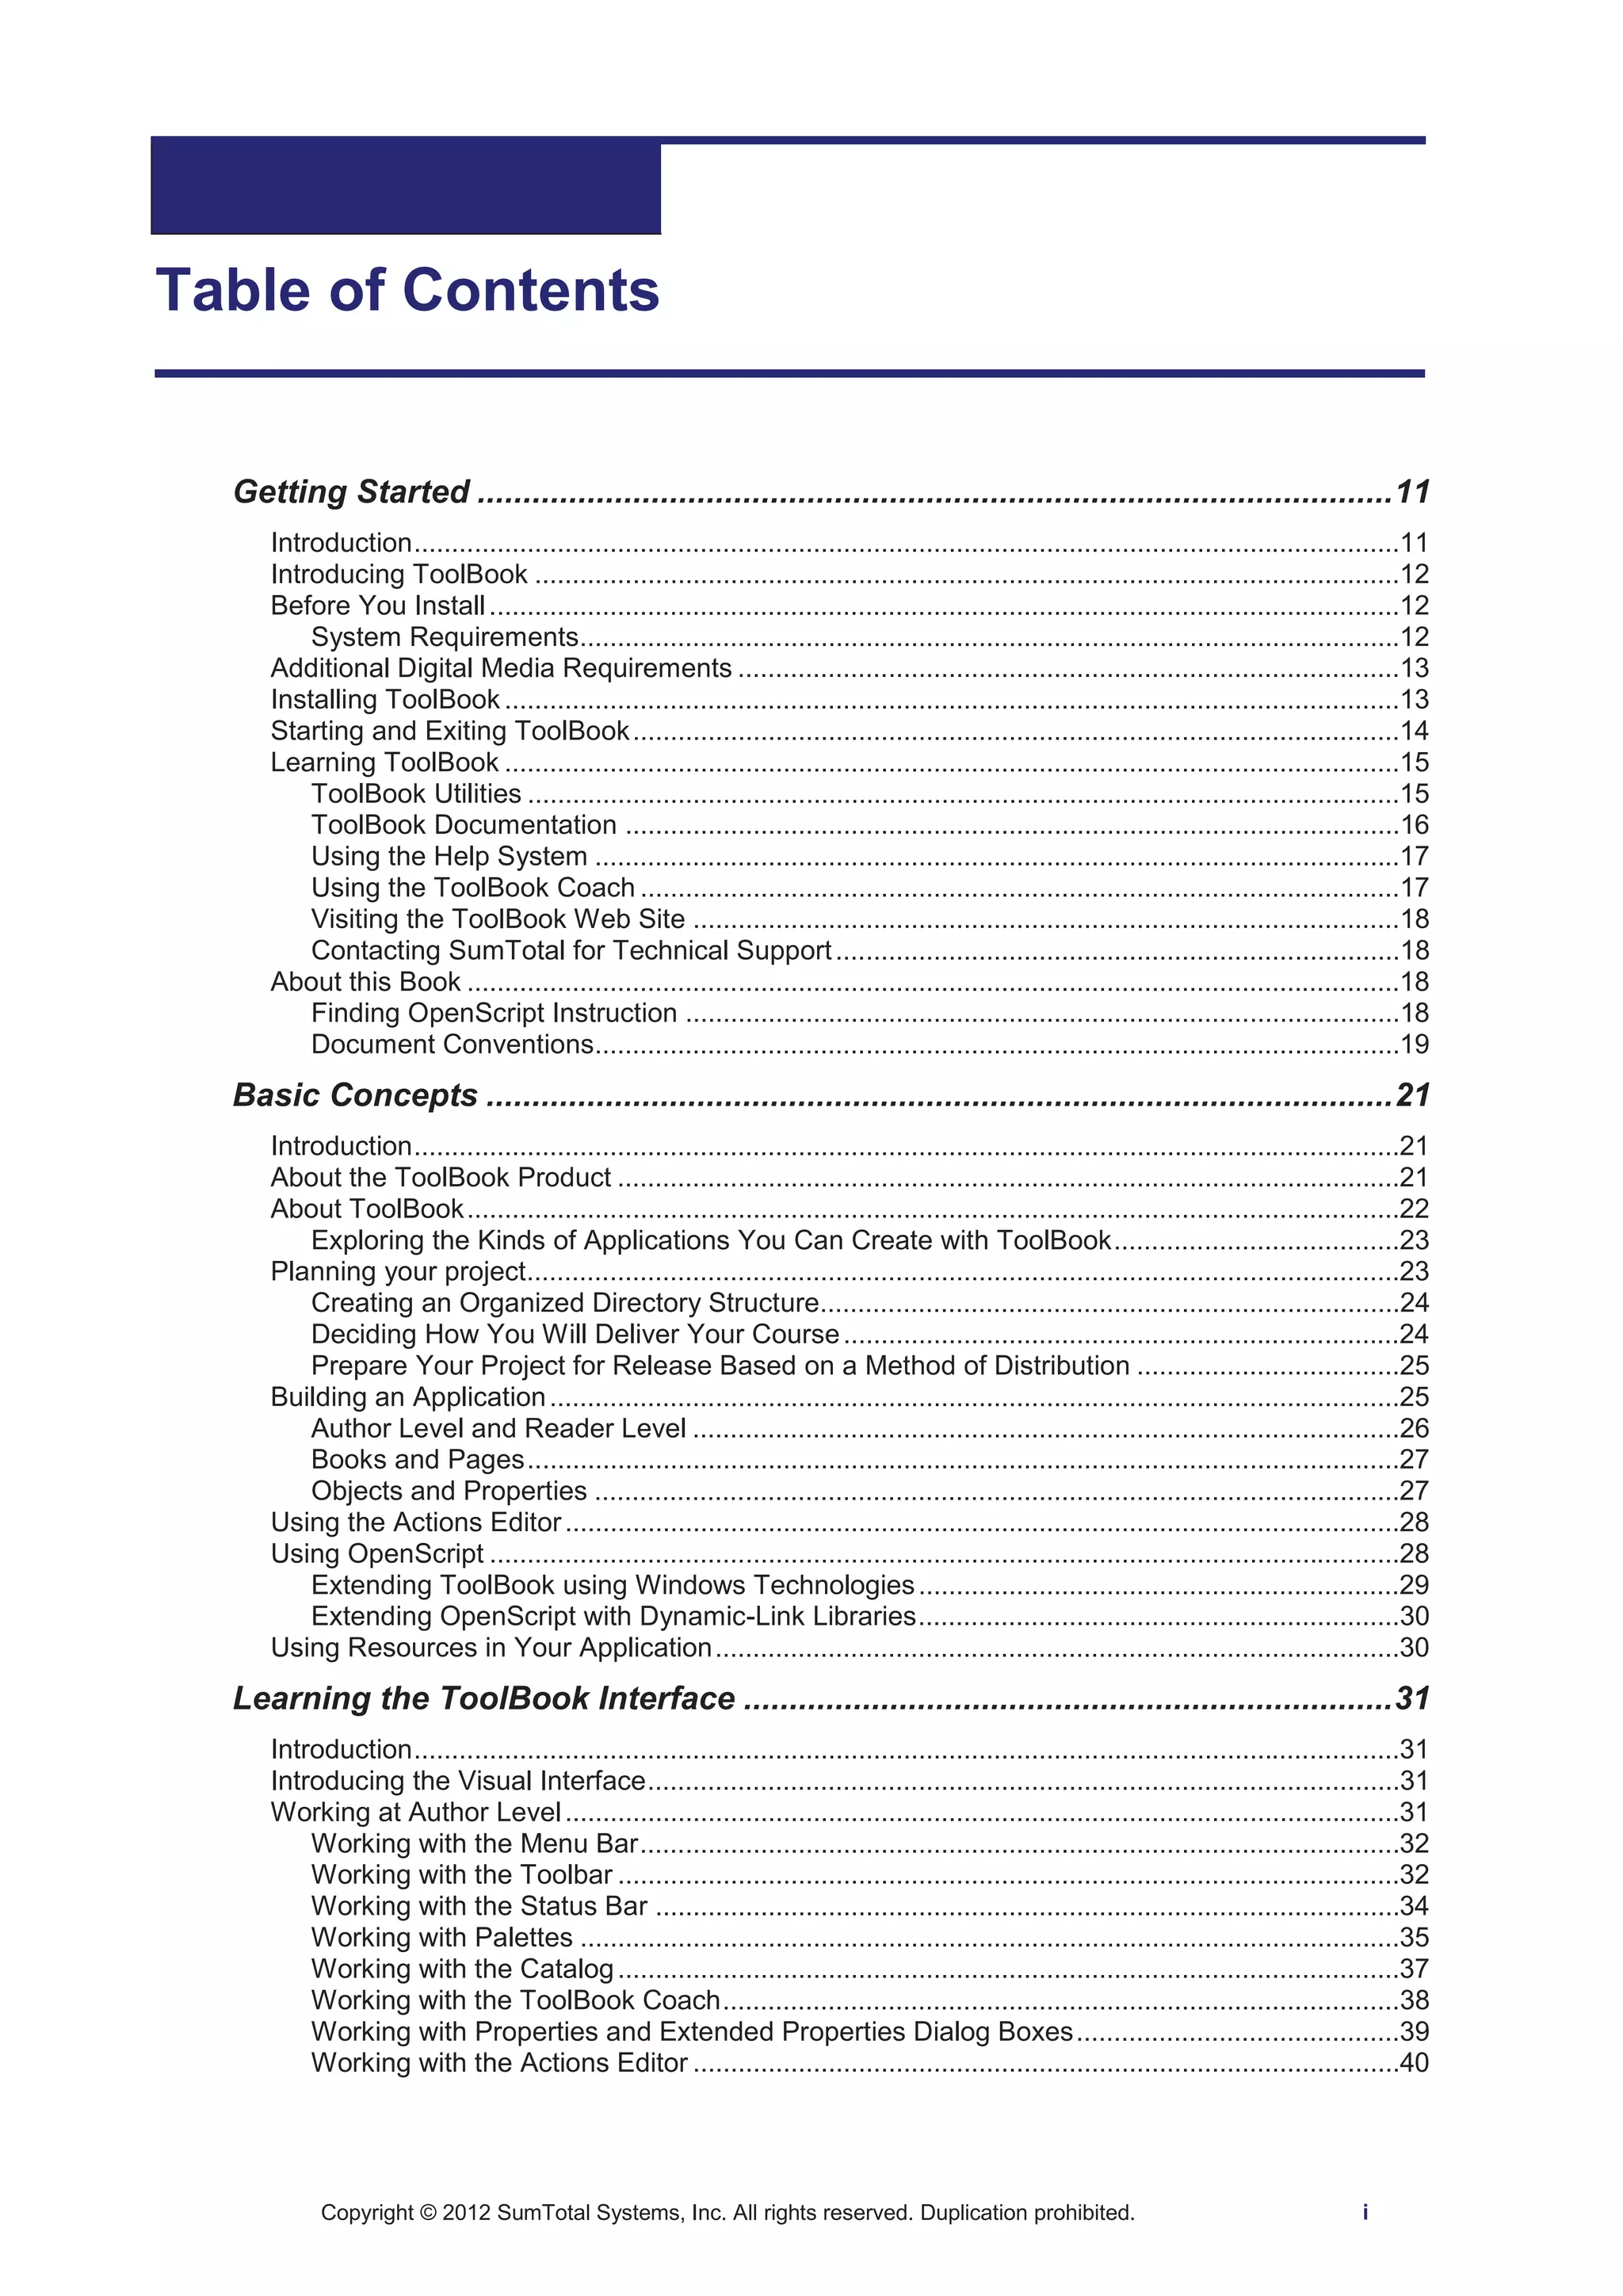
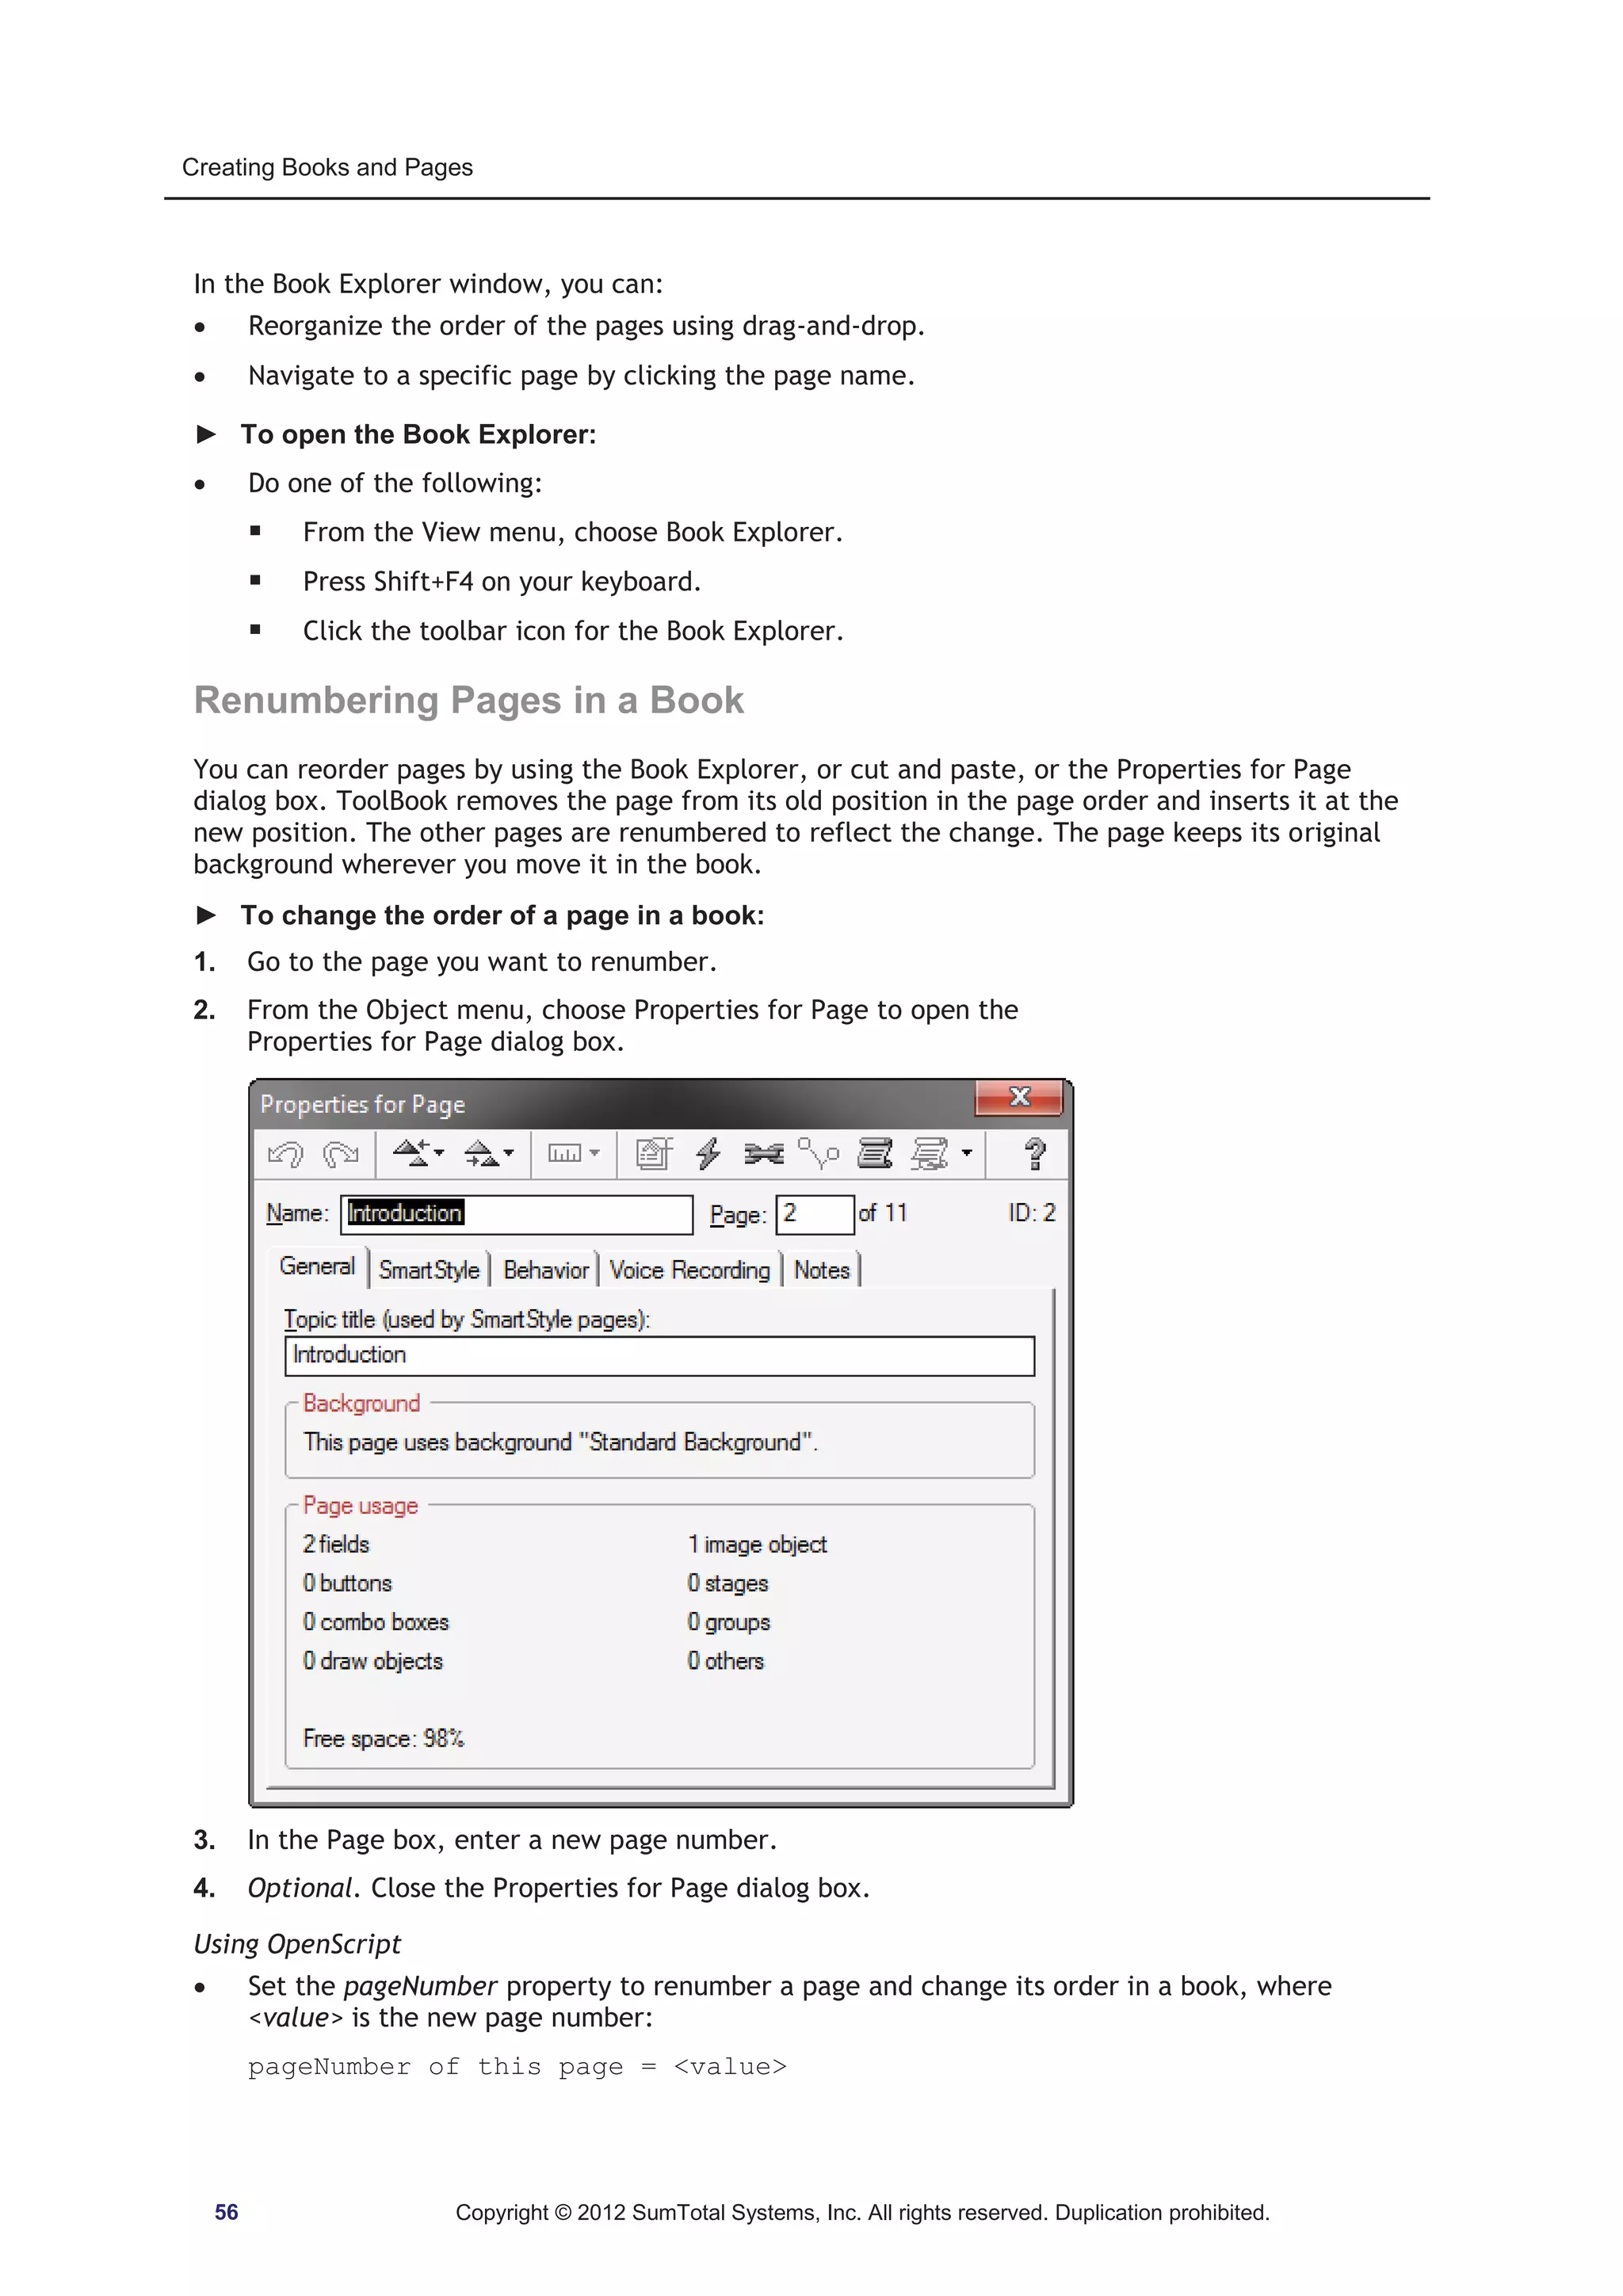
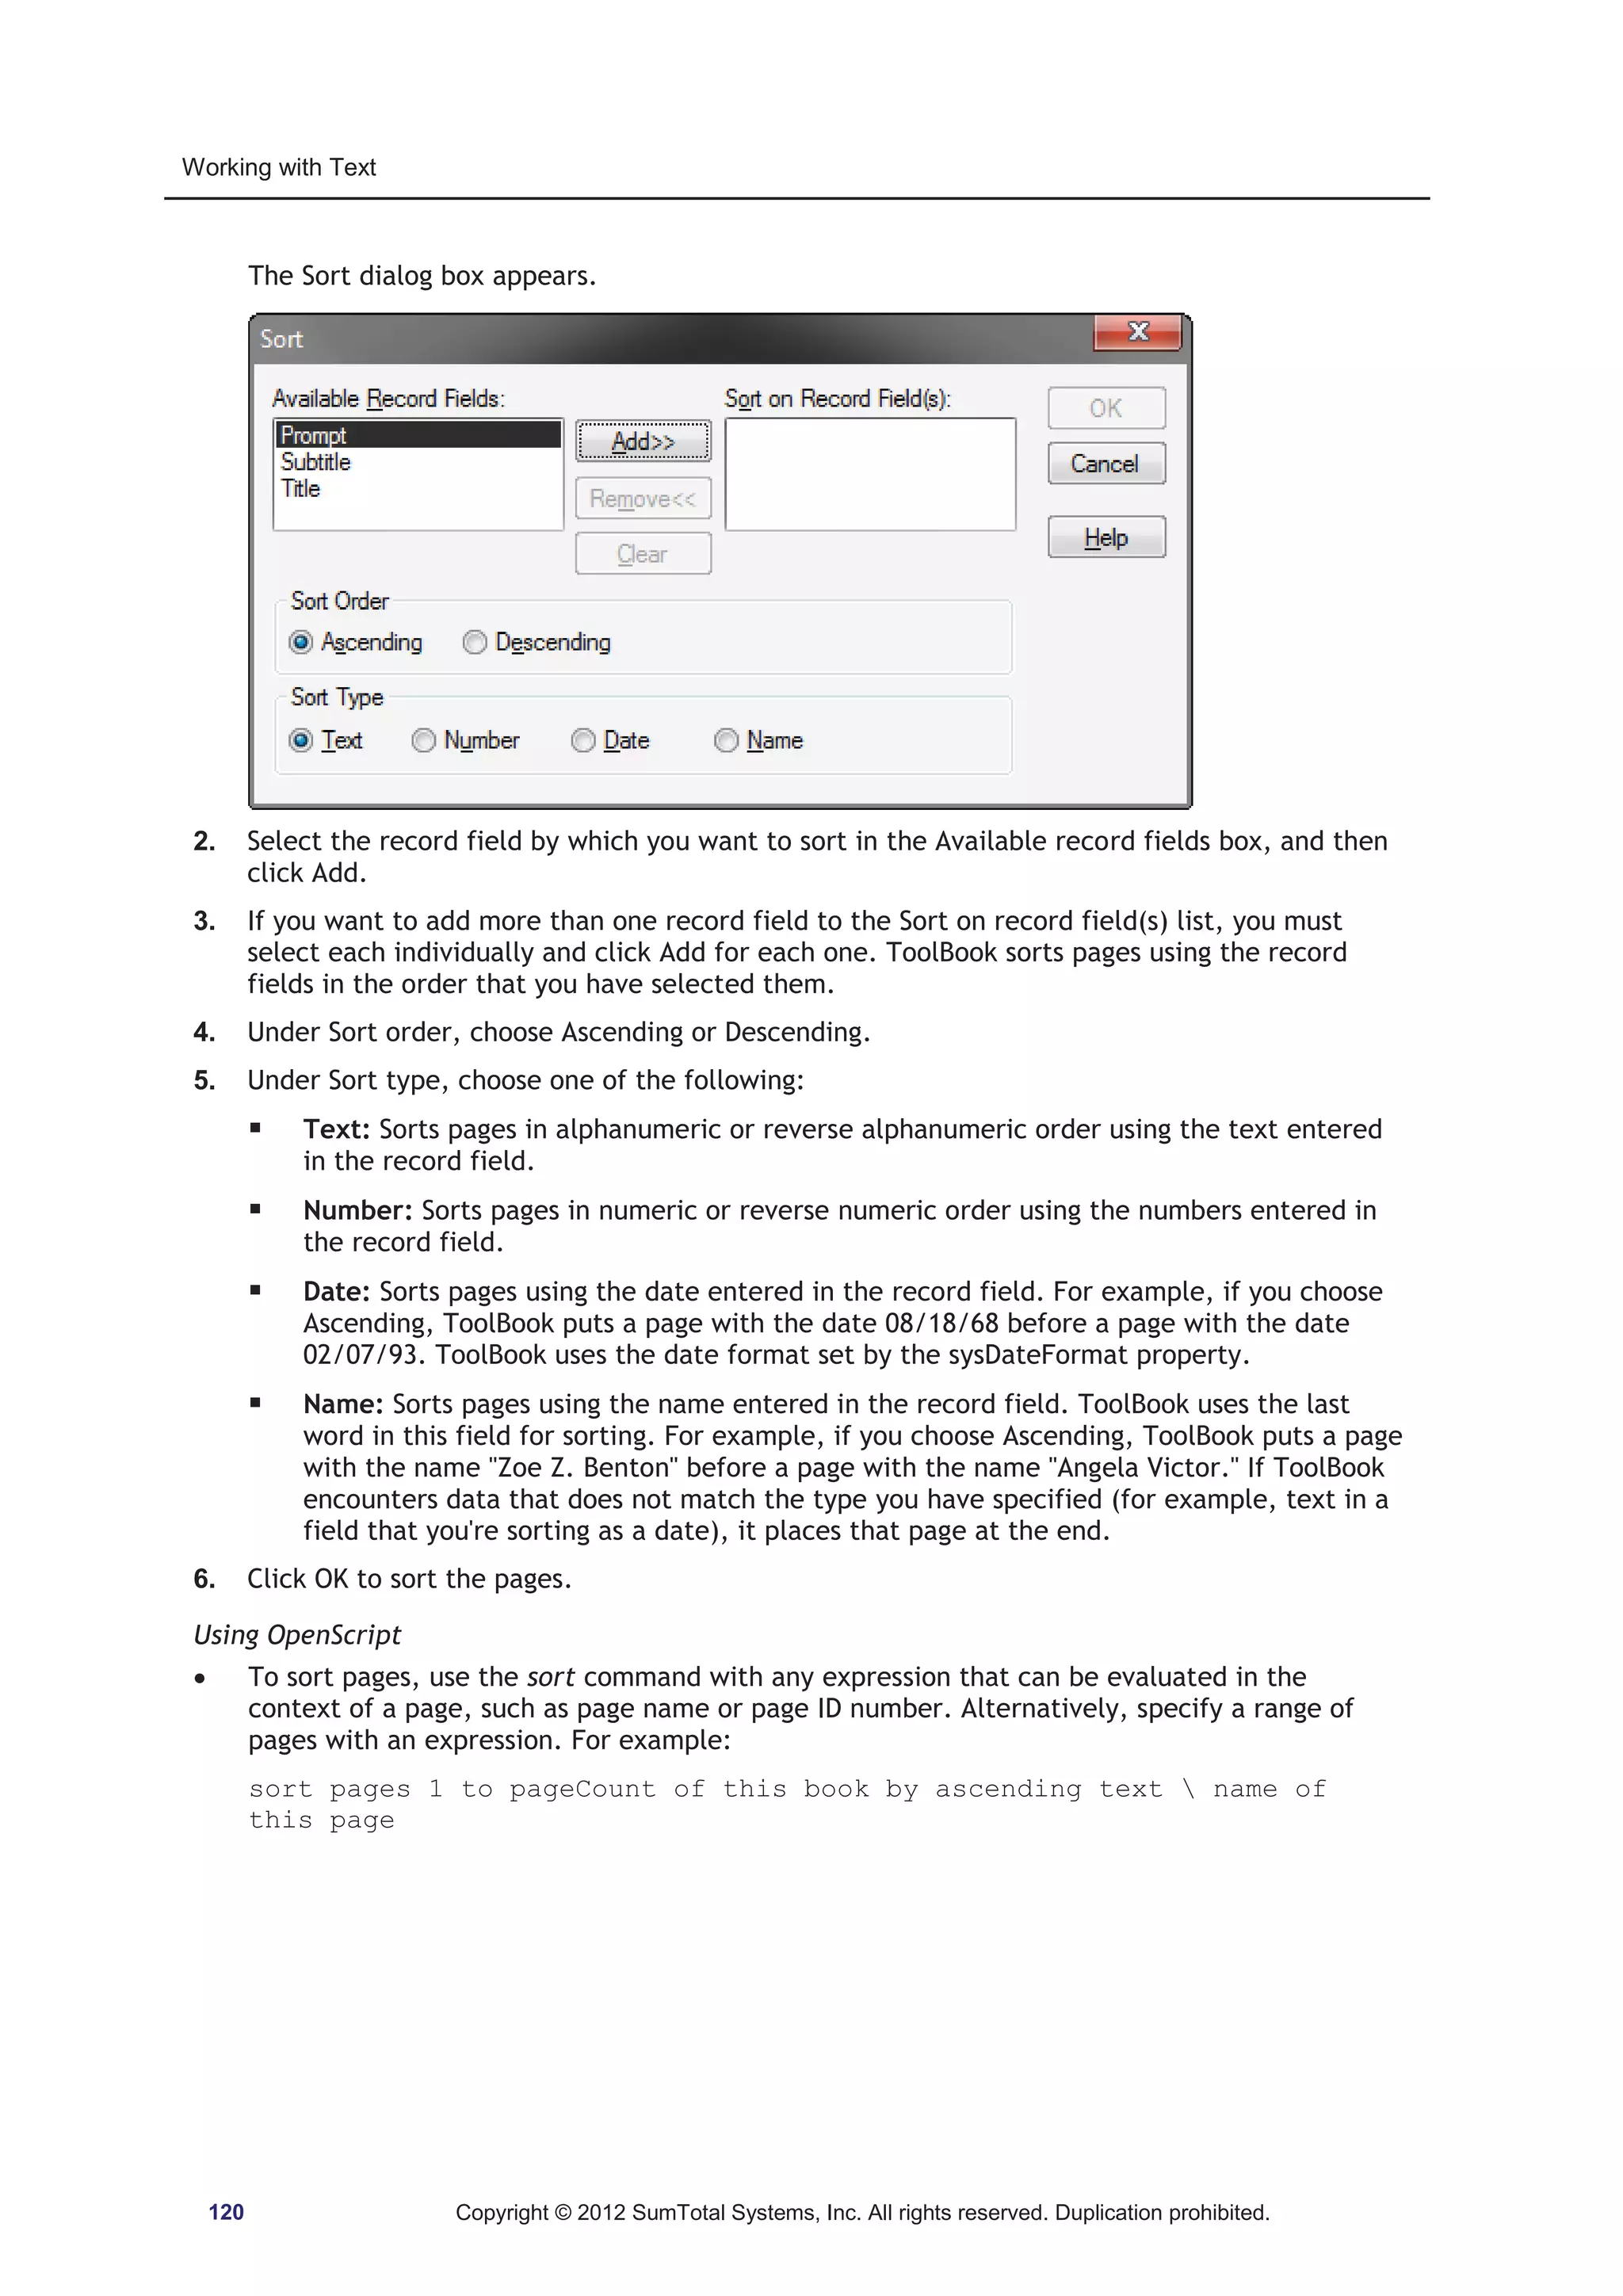
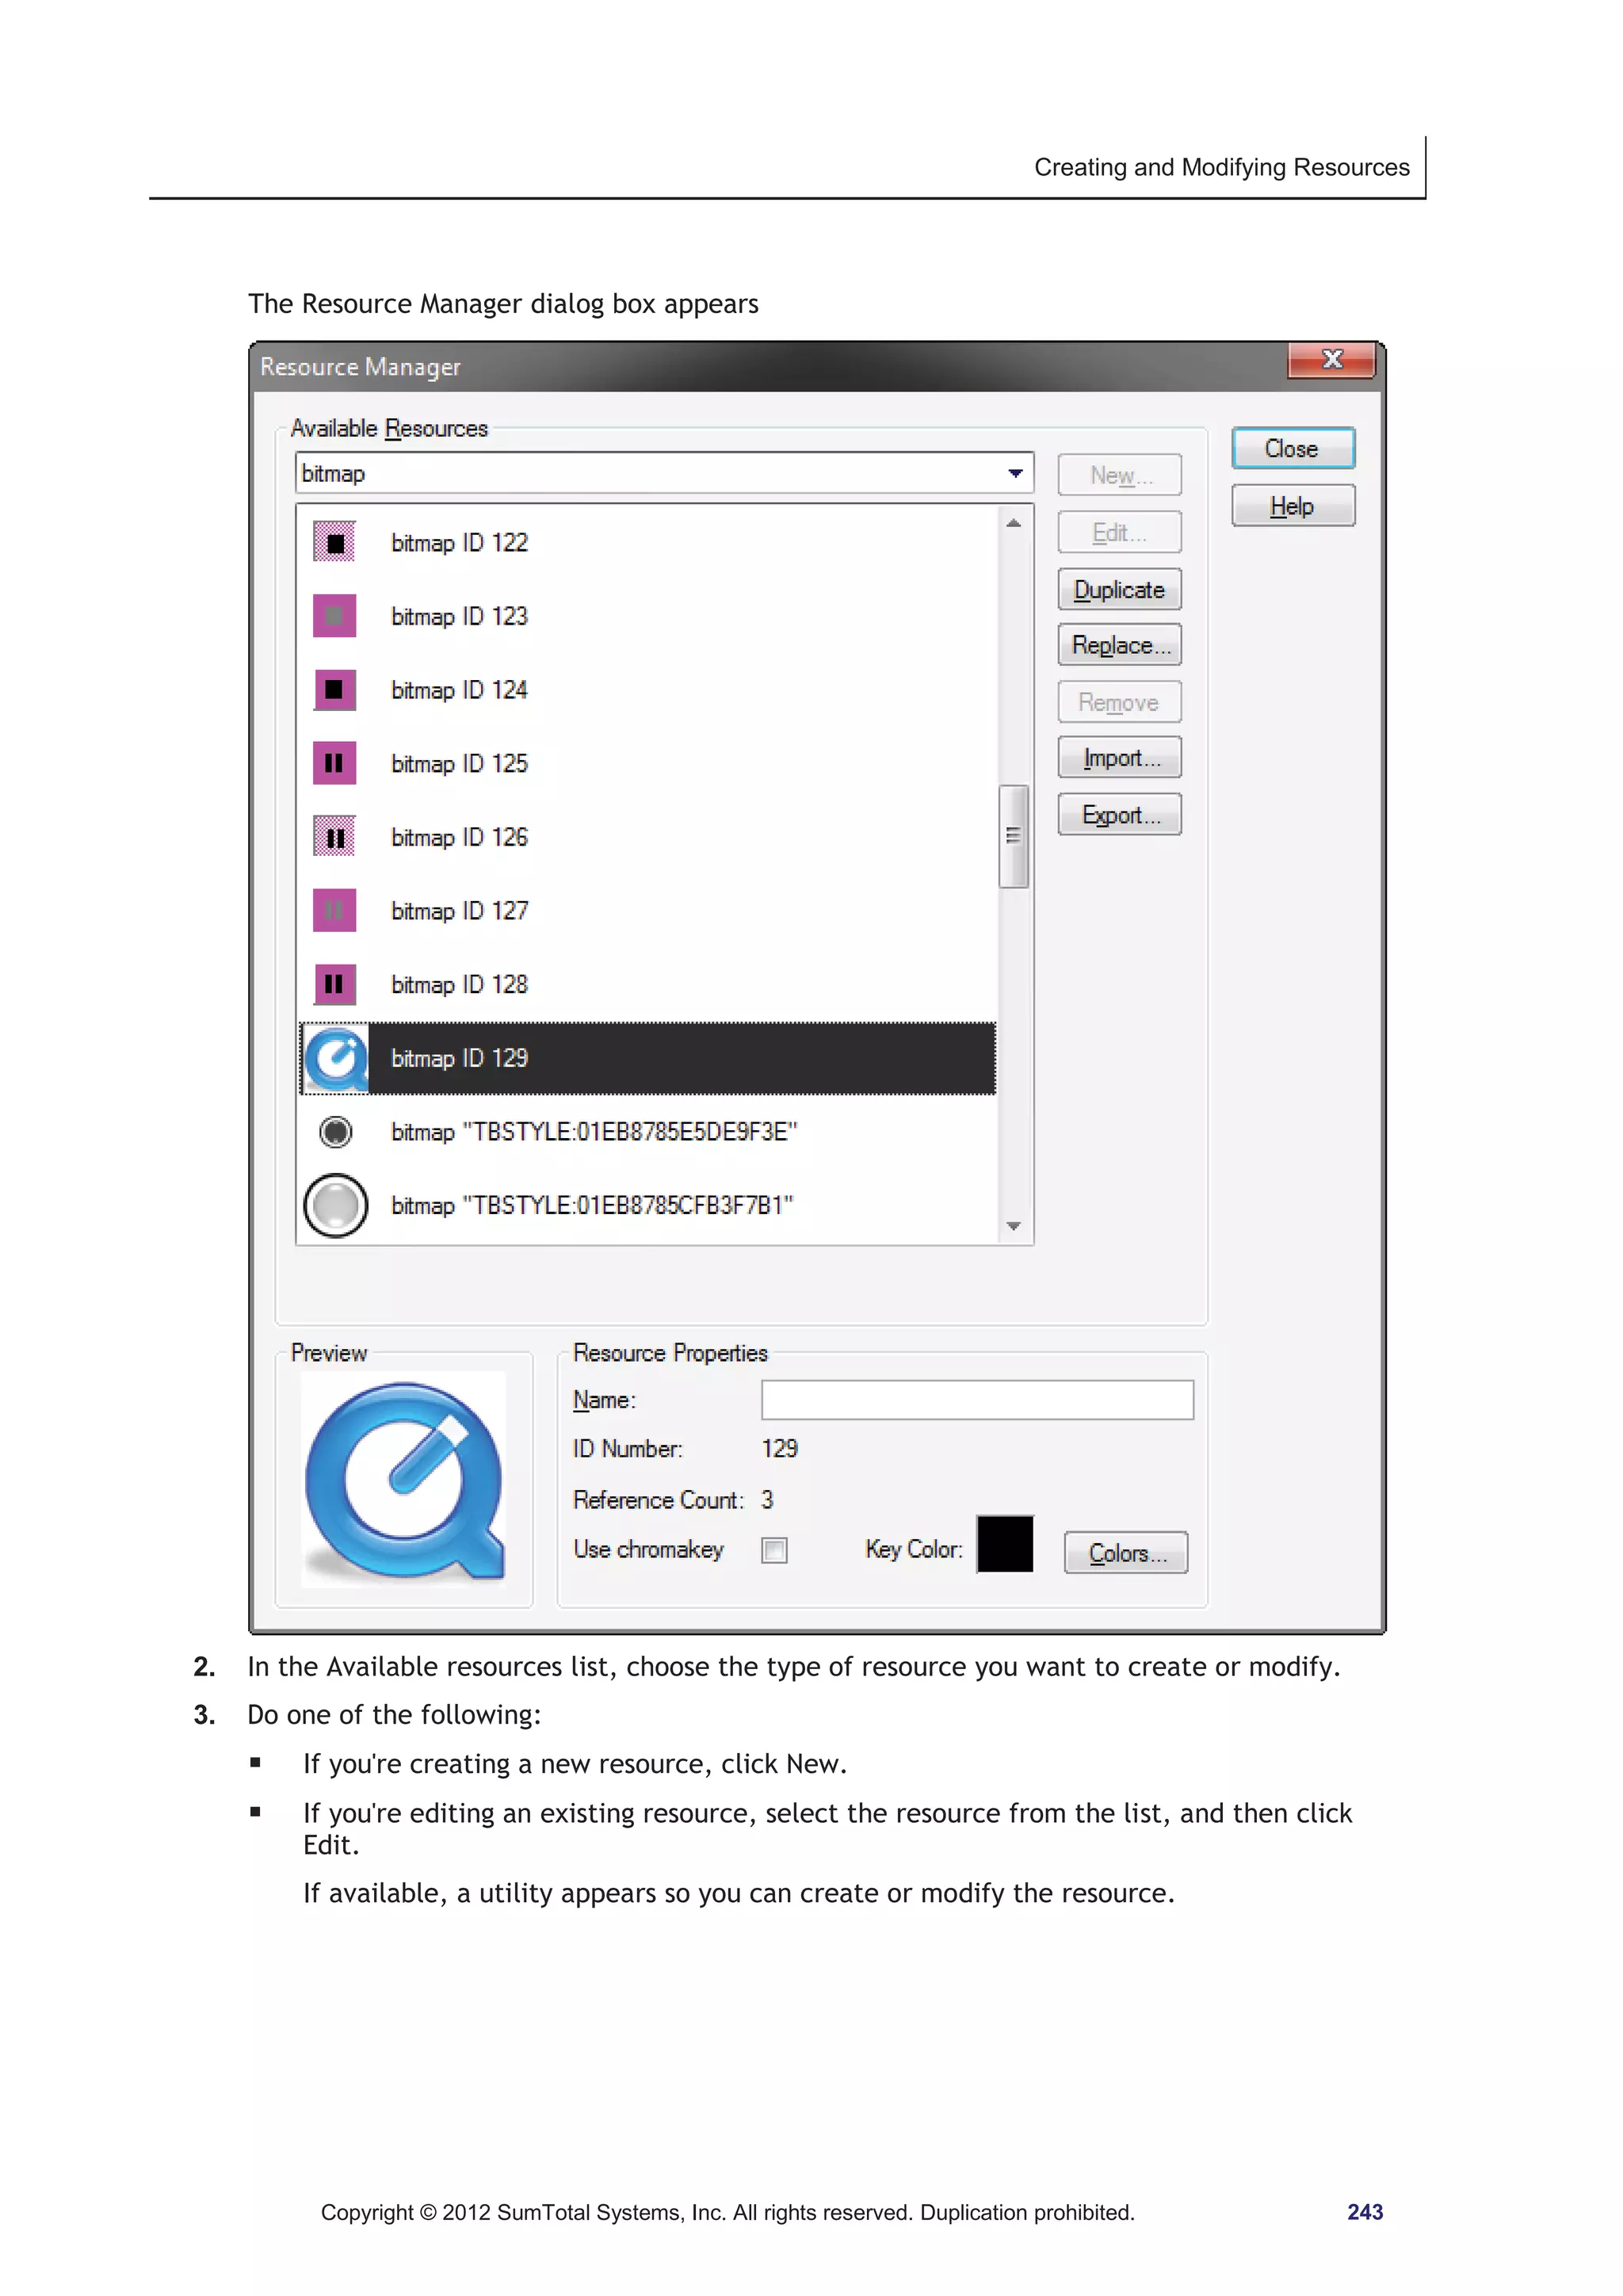
Document Conventions
This book uses the following visual conventions to help you identify and interpret information.
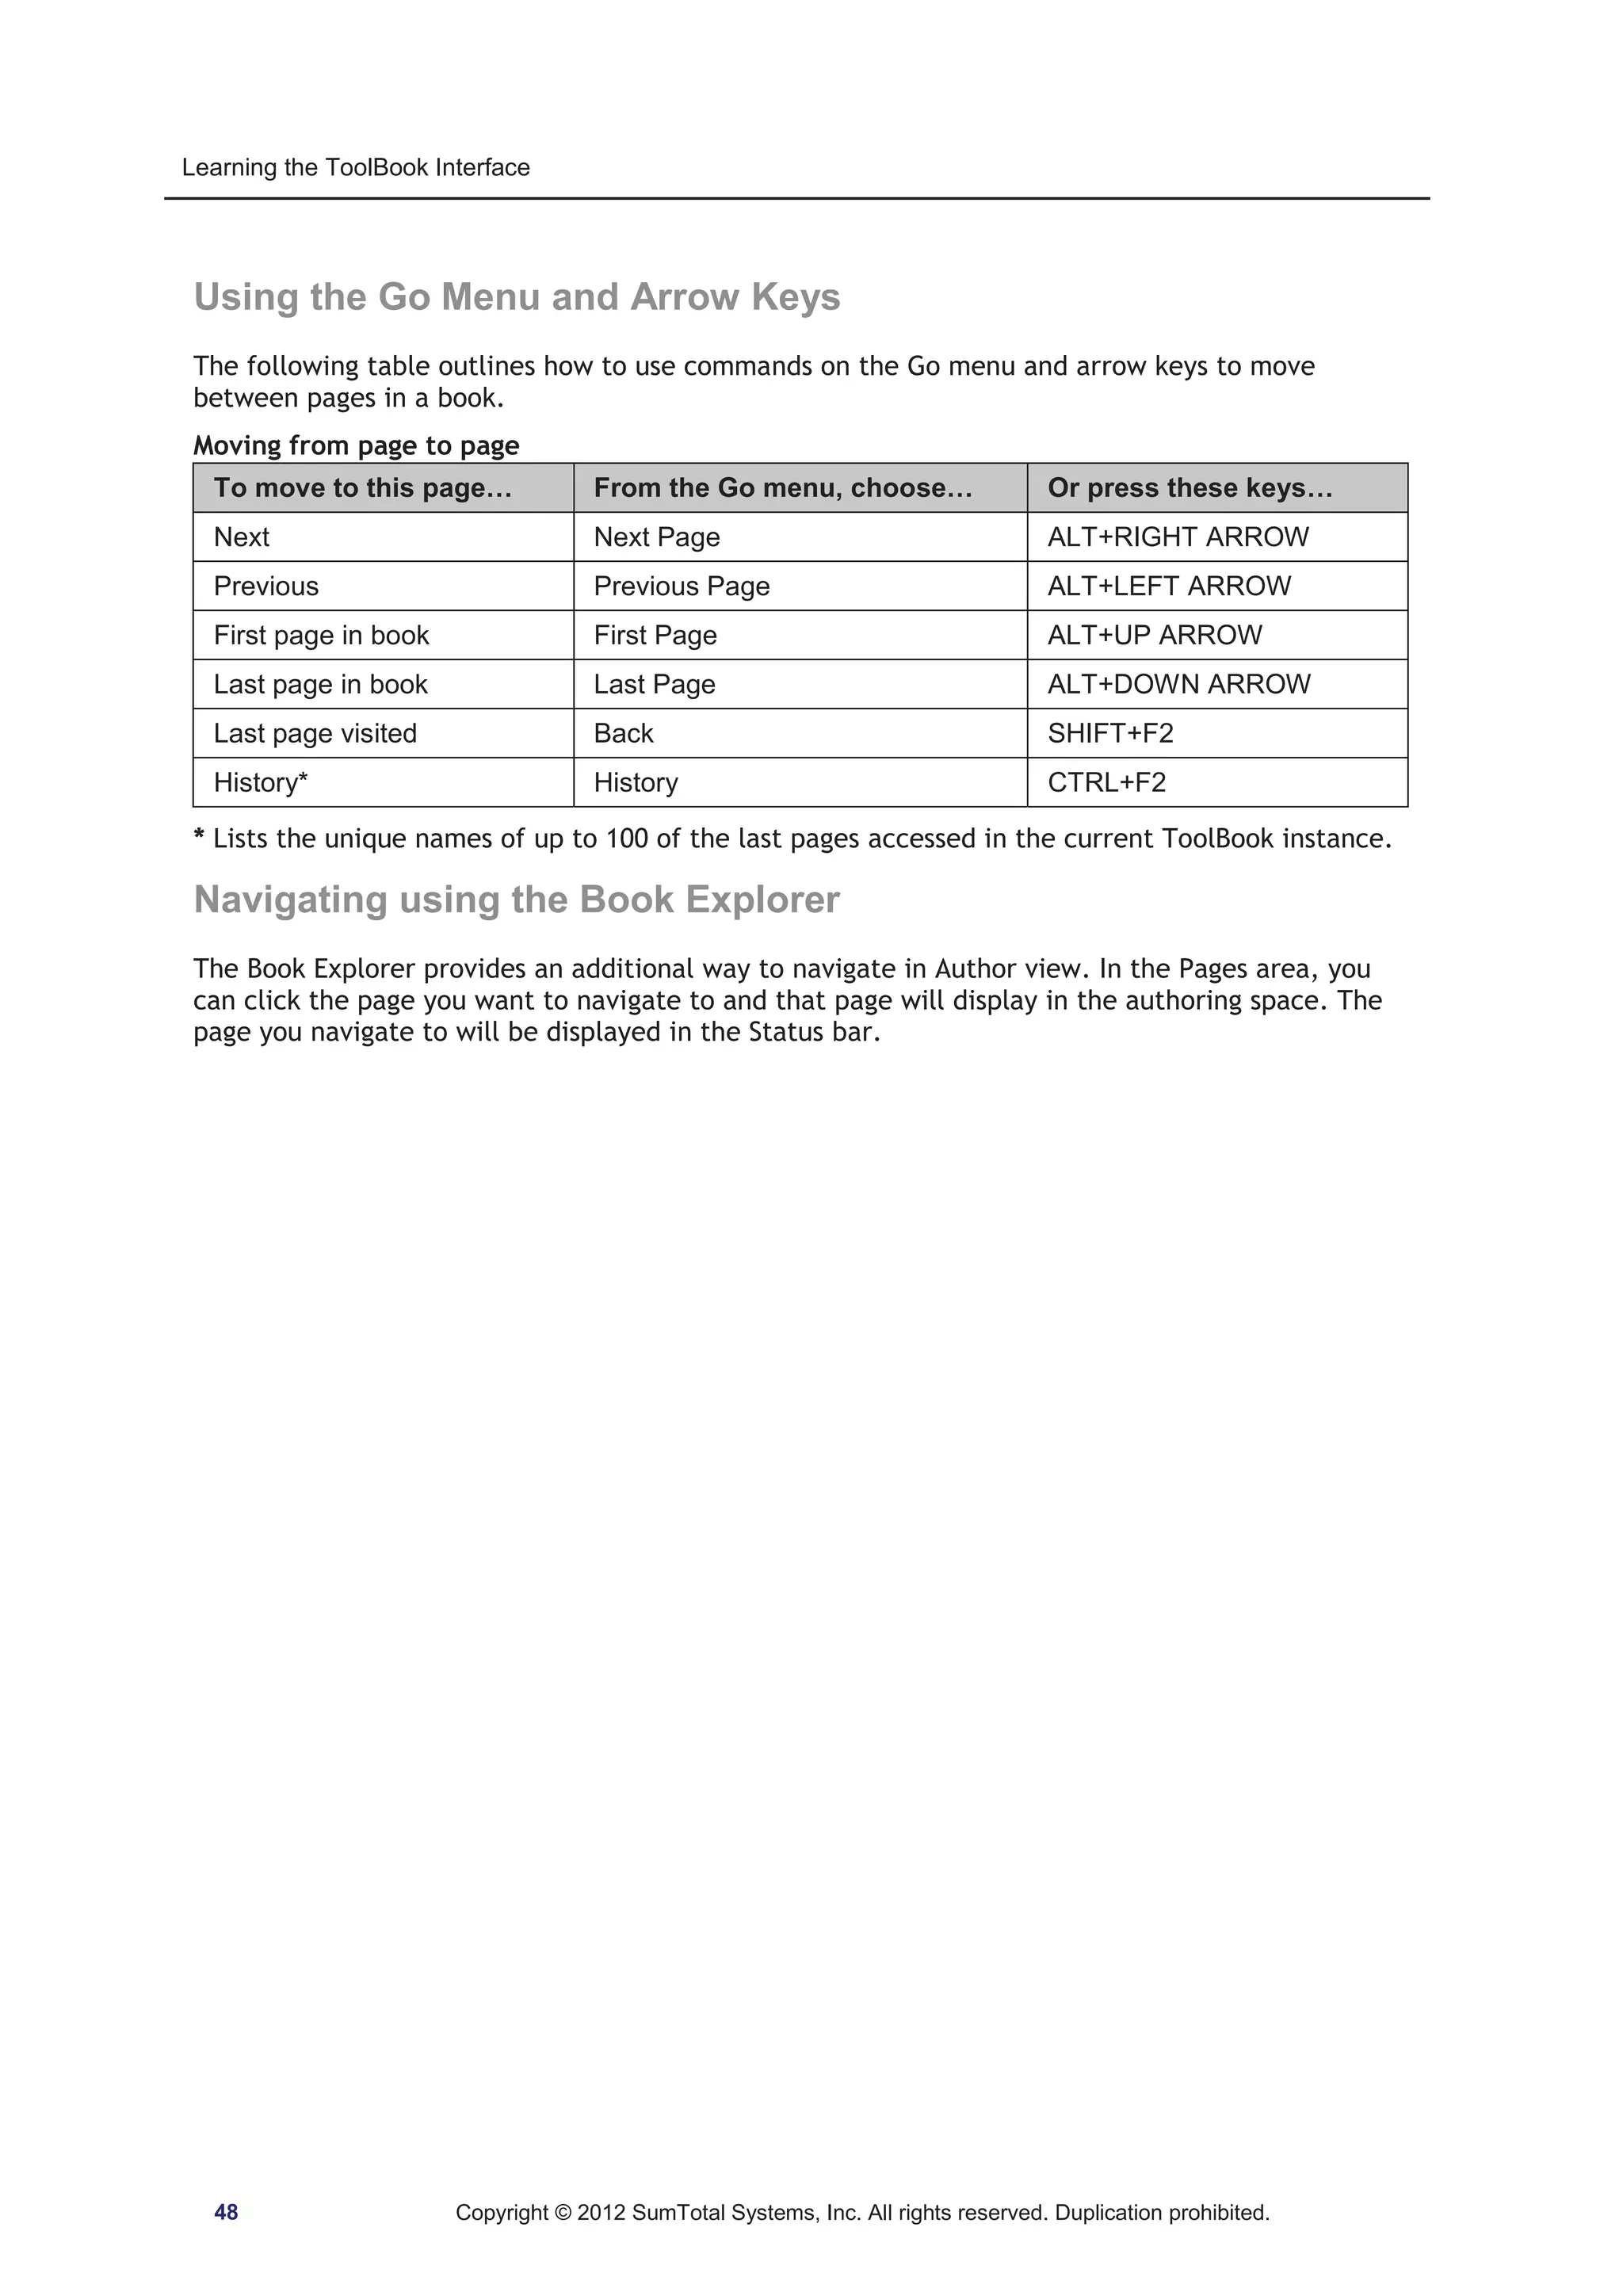
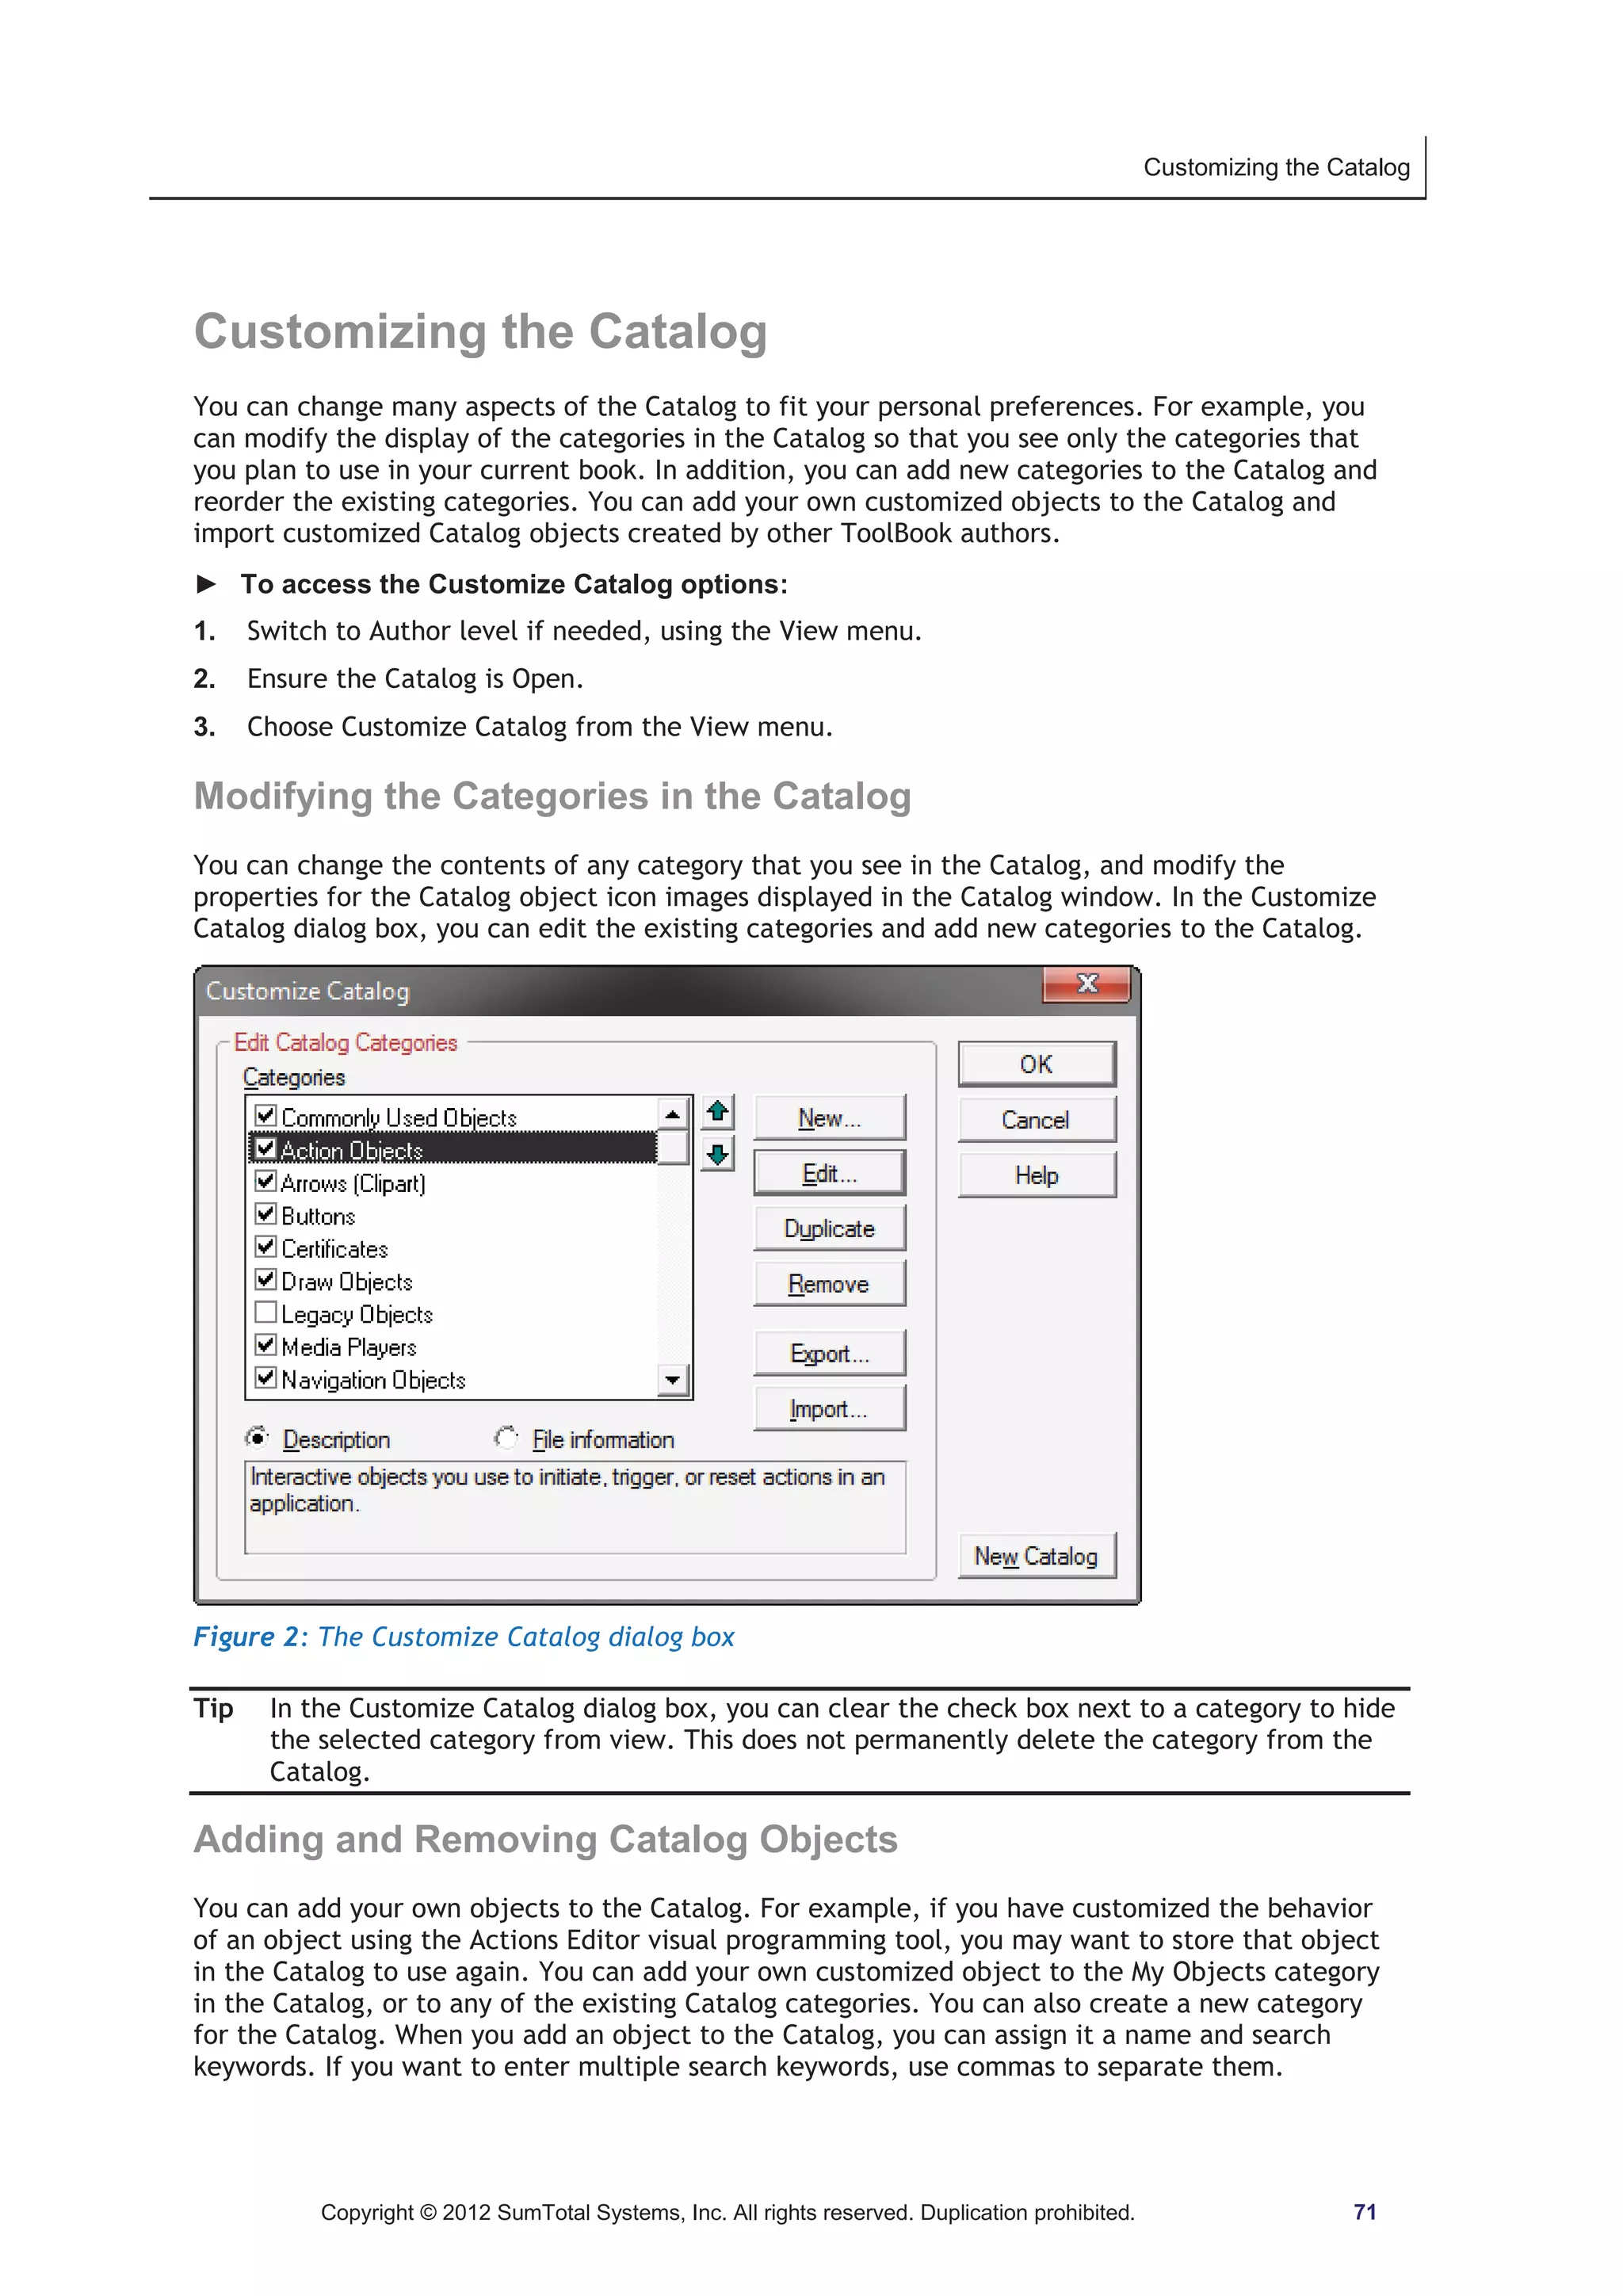
Document conventions
Example Format Meaning
comboBox In a paragraph, italic type indicates OpenScript keywords.
Setup In step-by-step procedures, italic type indicates literal characters to
type.
CTRL+ALT+DEL Keys separated by a plus sign indicate keys to press in
combination.
button id 12 This font indicates an OpenScript code example.
A backslash at the end of a line indicates that an OpenScript
statement continues on the next line.
isShift In a code example or syntax statement, angle brackets indicate a
parameter that represents a literal value or expression.
--Initialize In a code example, two hyphens precede a comment.
before|after In OpenScript syntax, vertical bars separate the options from which
you can choose.
end [step] In OpenScript syntax, square brackets indicate optional words and
parameters.
… In OpenScript syntax, an ellipsis indicates that the parameter can
be repeated. In code examples, ellipses indicate the presence of
any number of statements.
Copyright © 2012 SumTotal Systems, Inc. All rights reserved. Duplication prohibited. 19](https://image.slidesharecdn.com/tb11-5userguide-141118165205-conversion-gate01/75/User-guide-Tool-Book-11-20-2048.jpg)


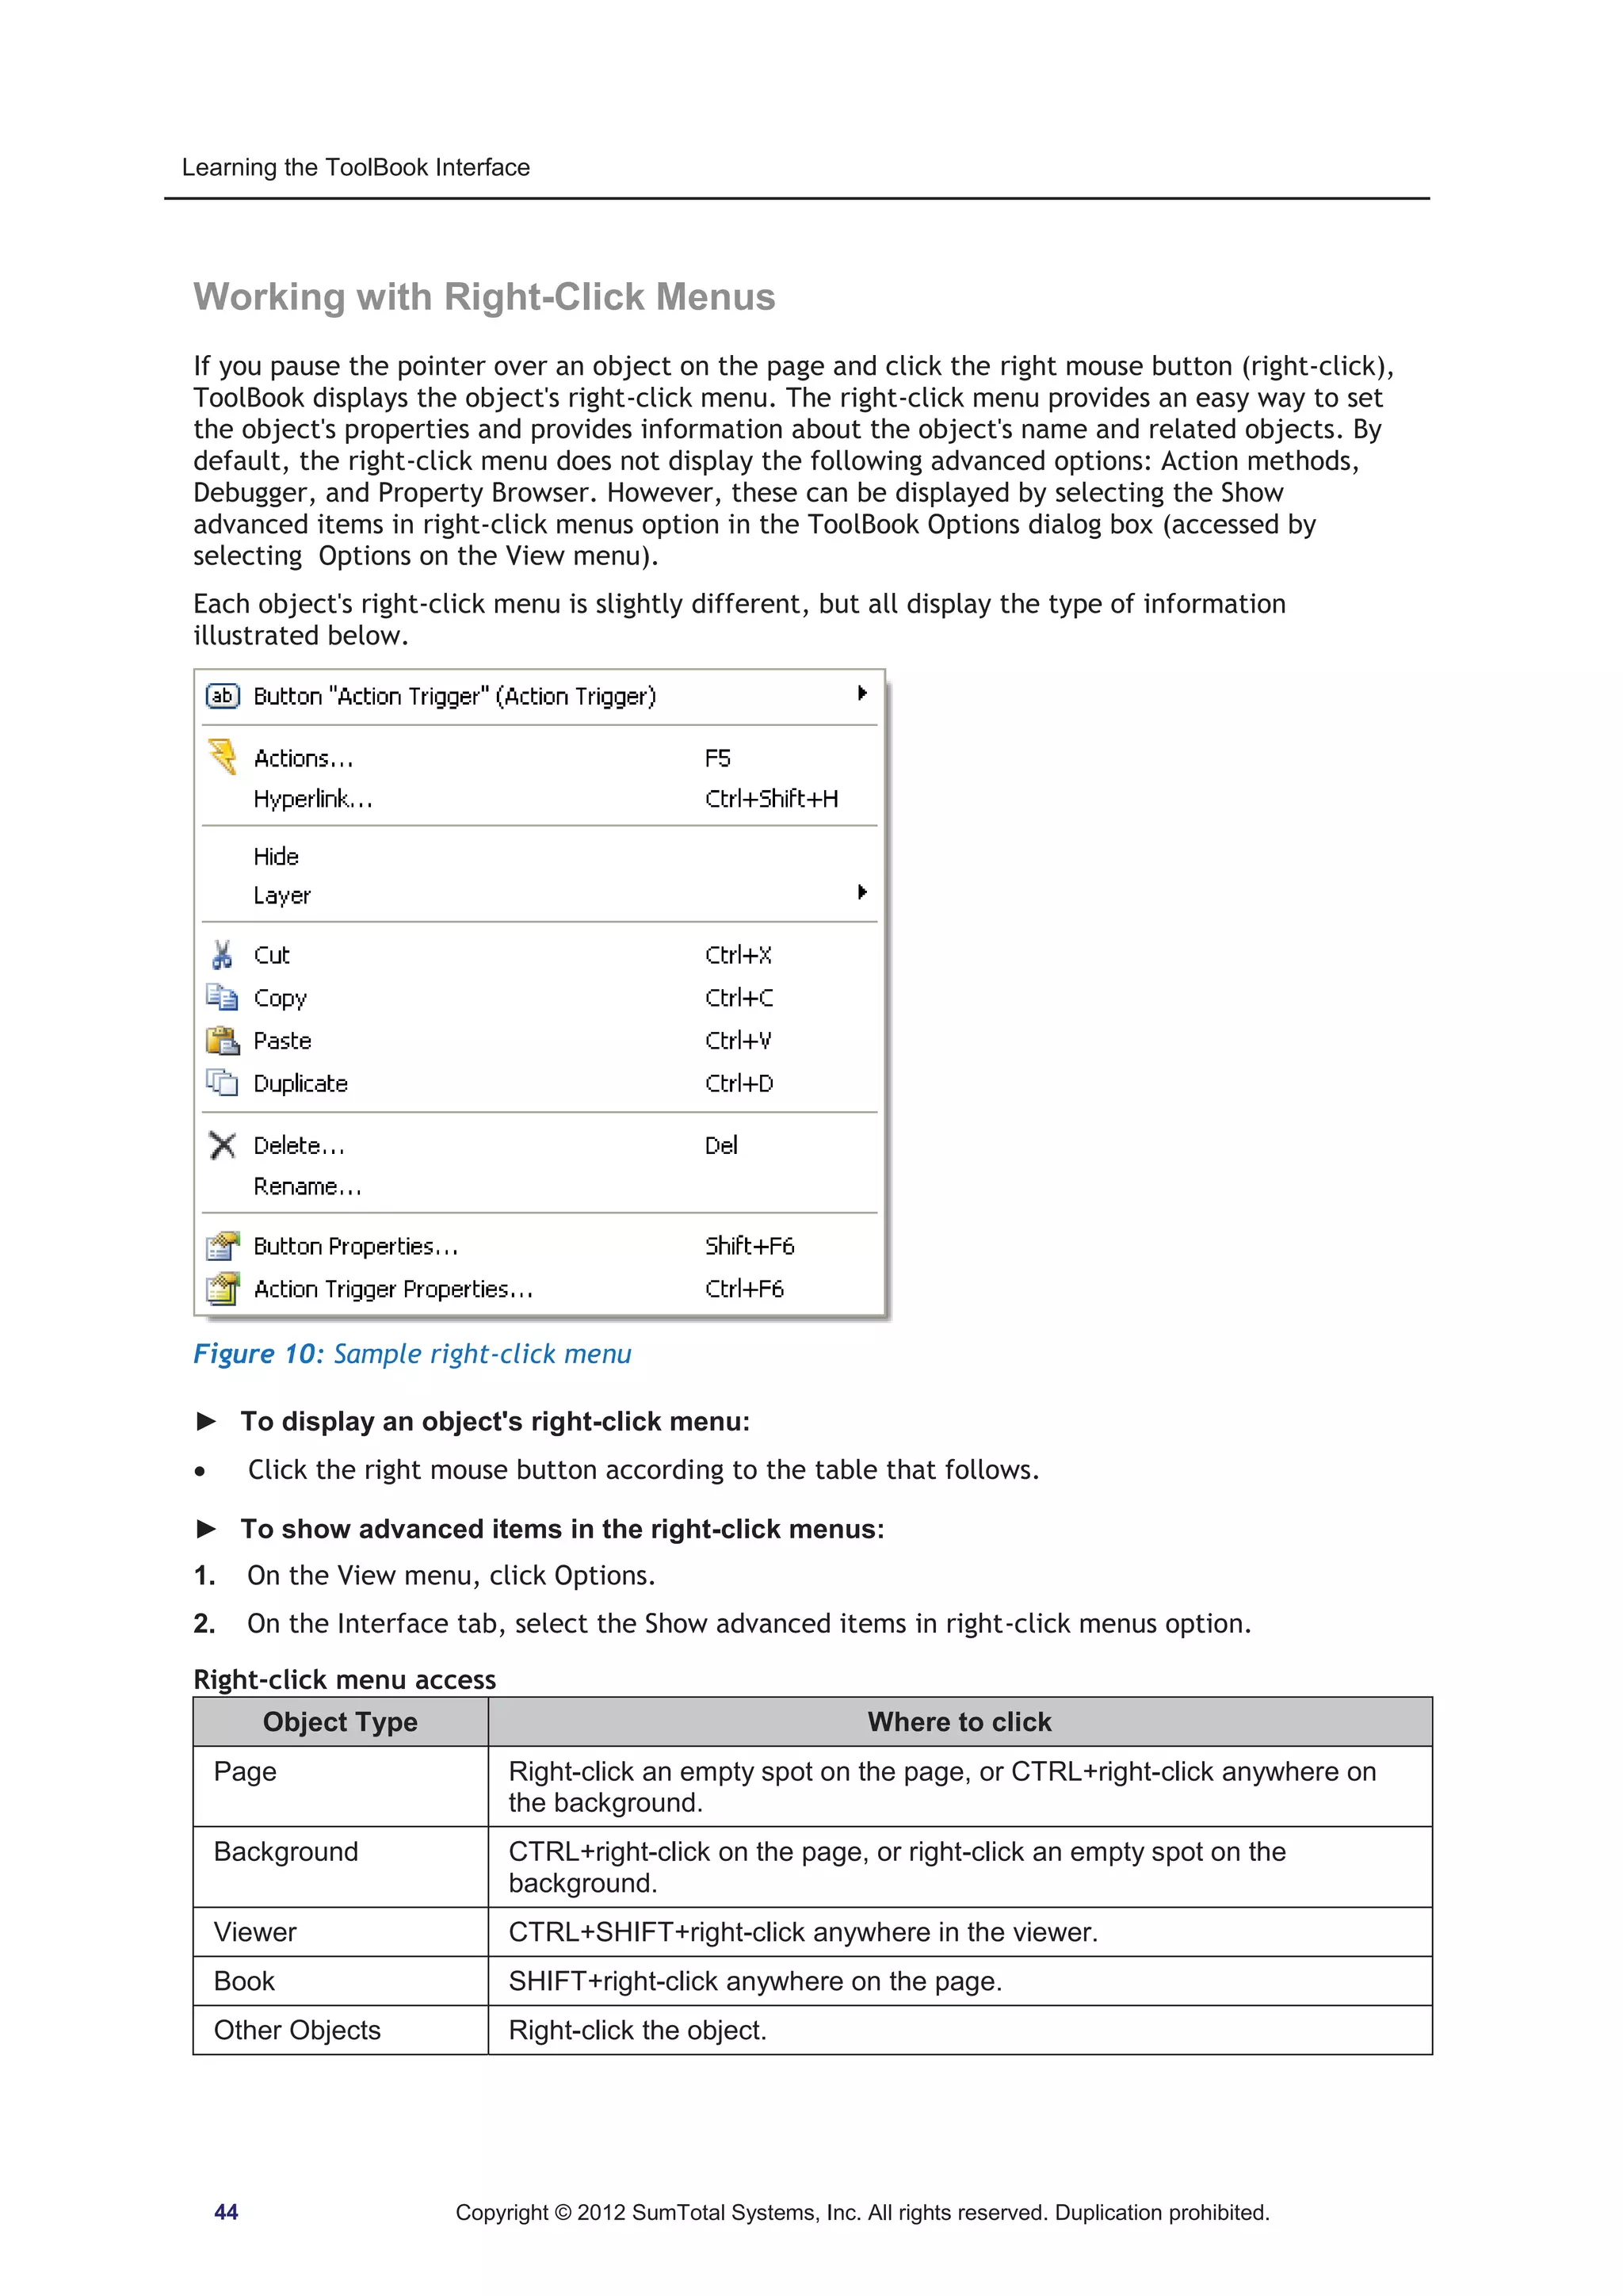


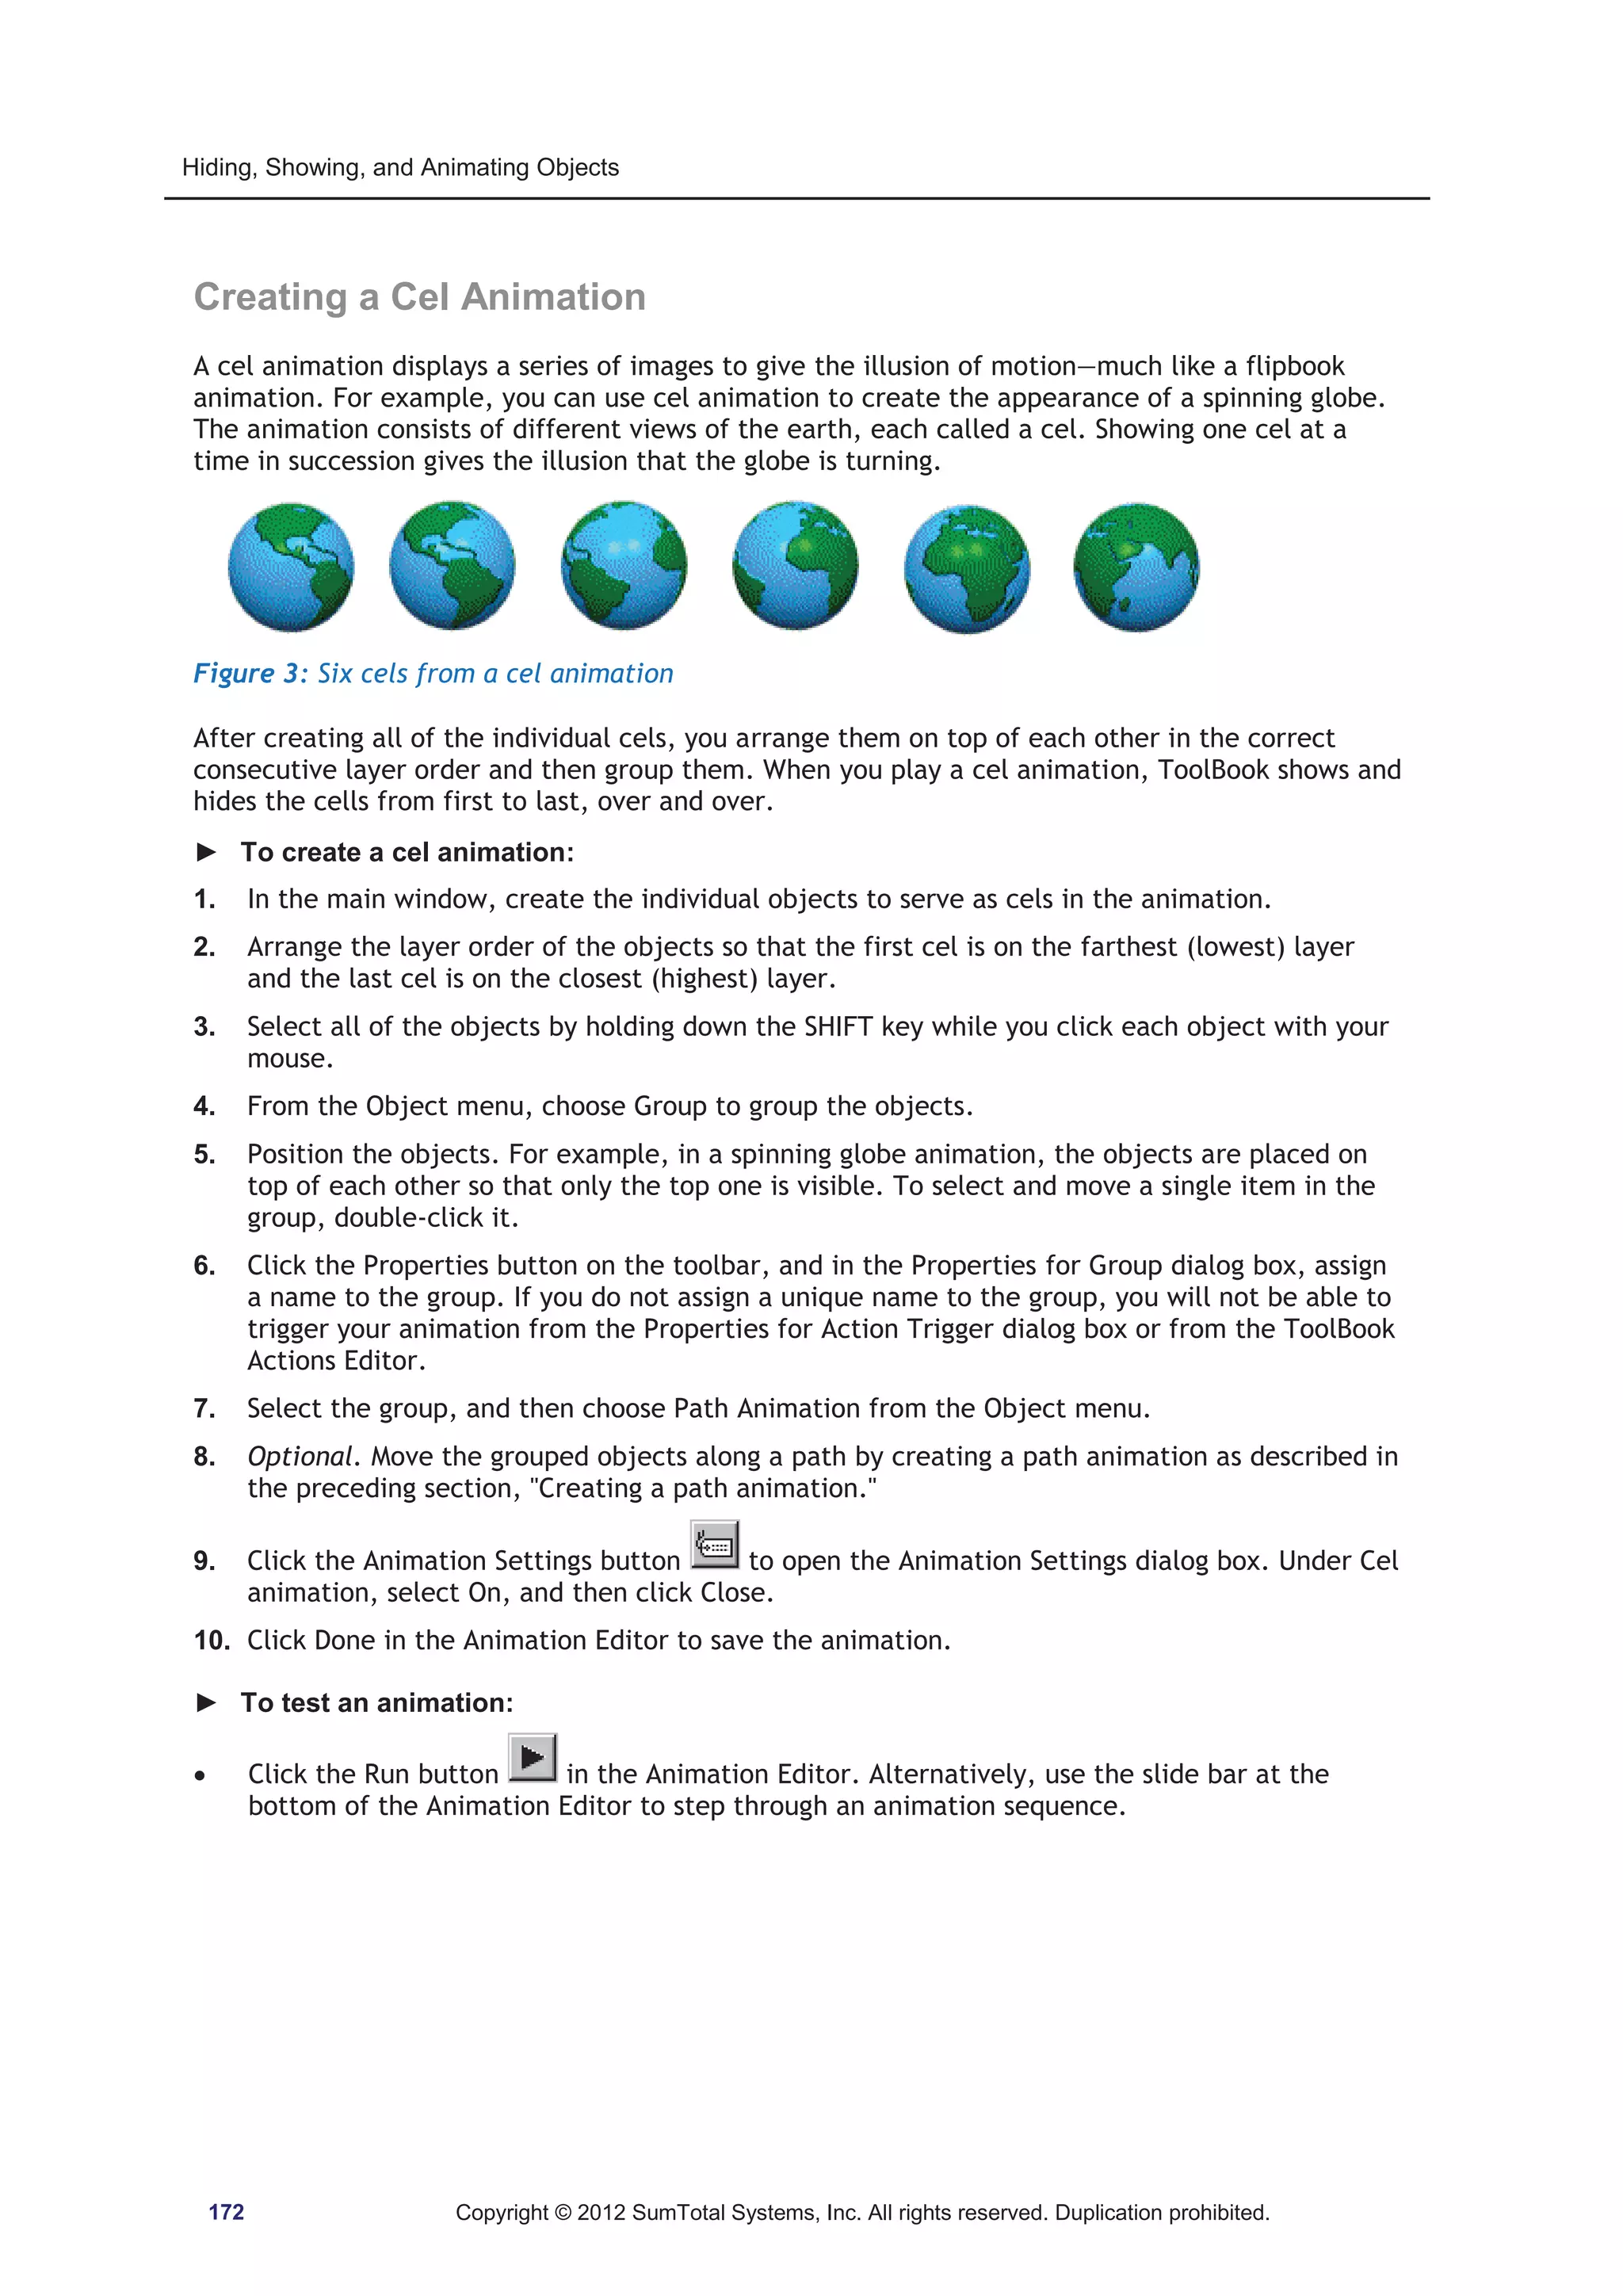


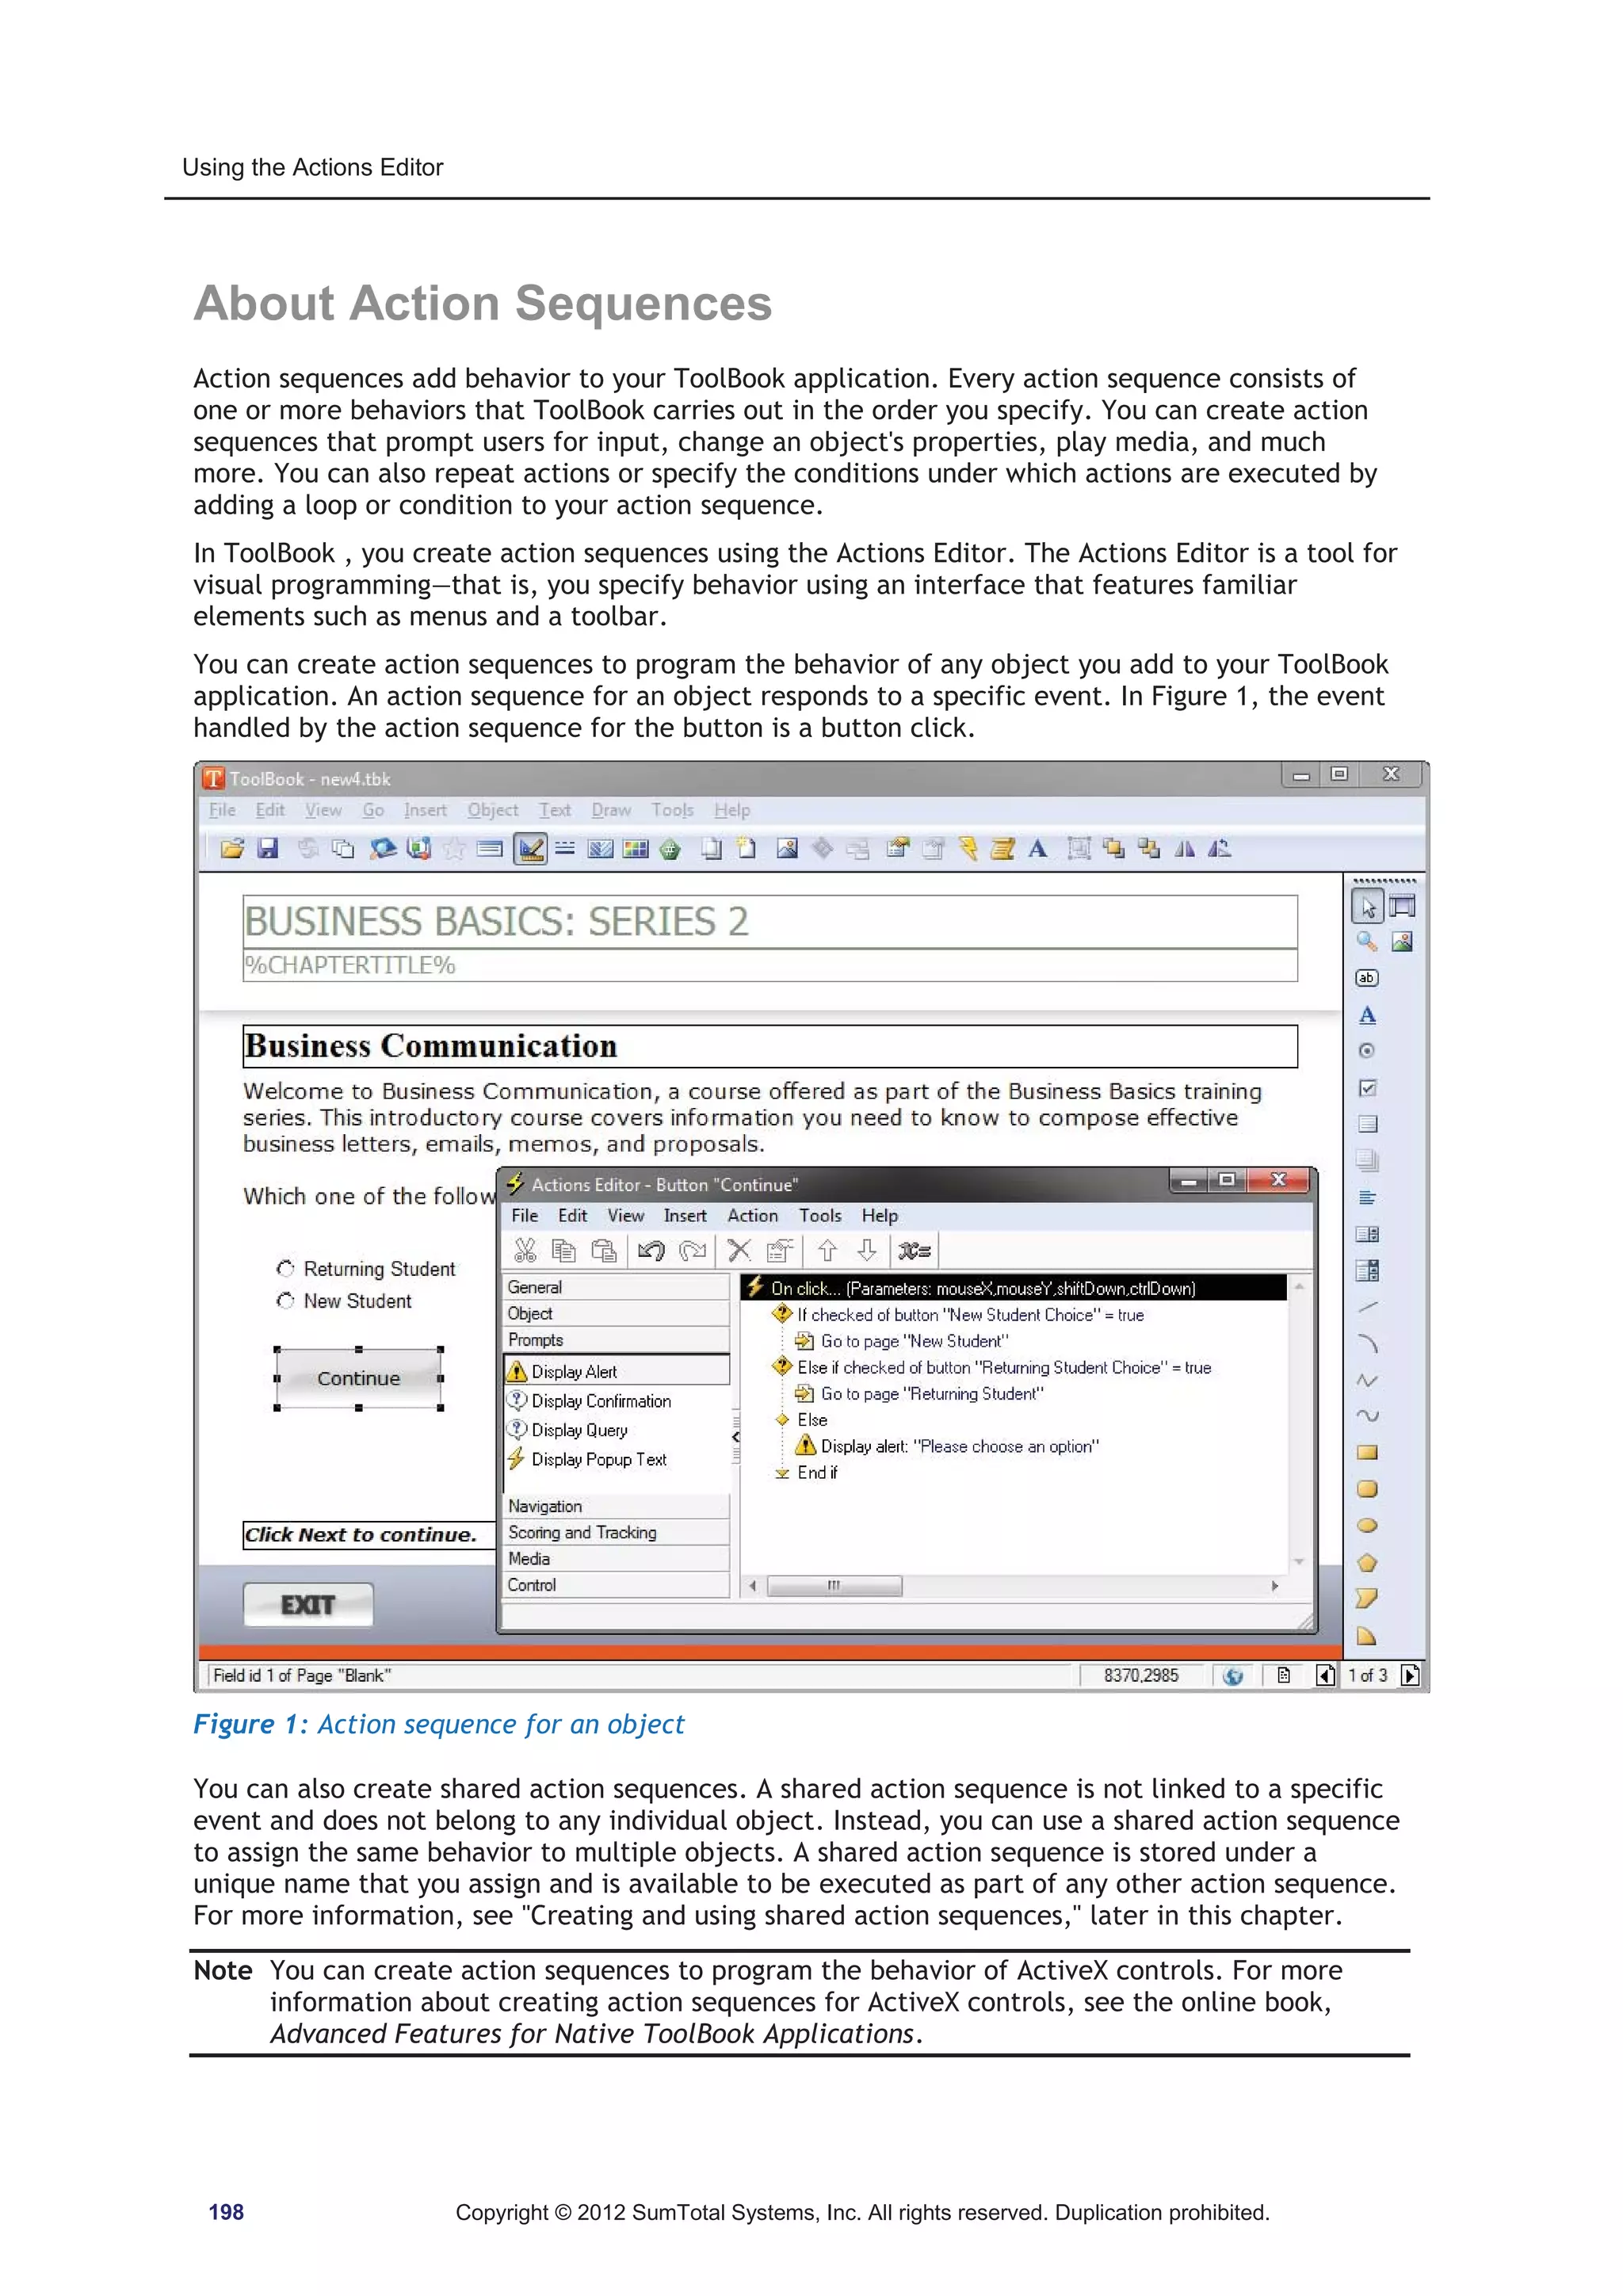

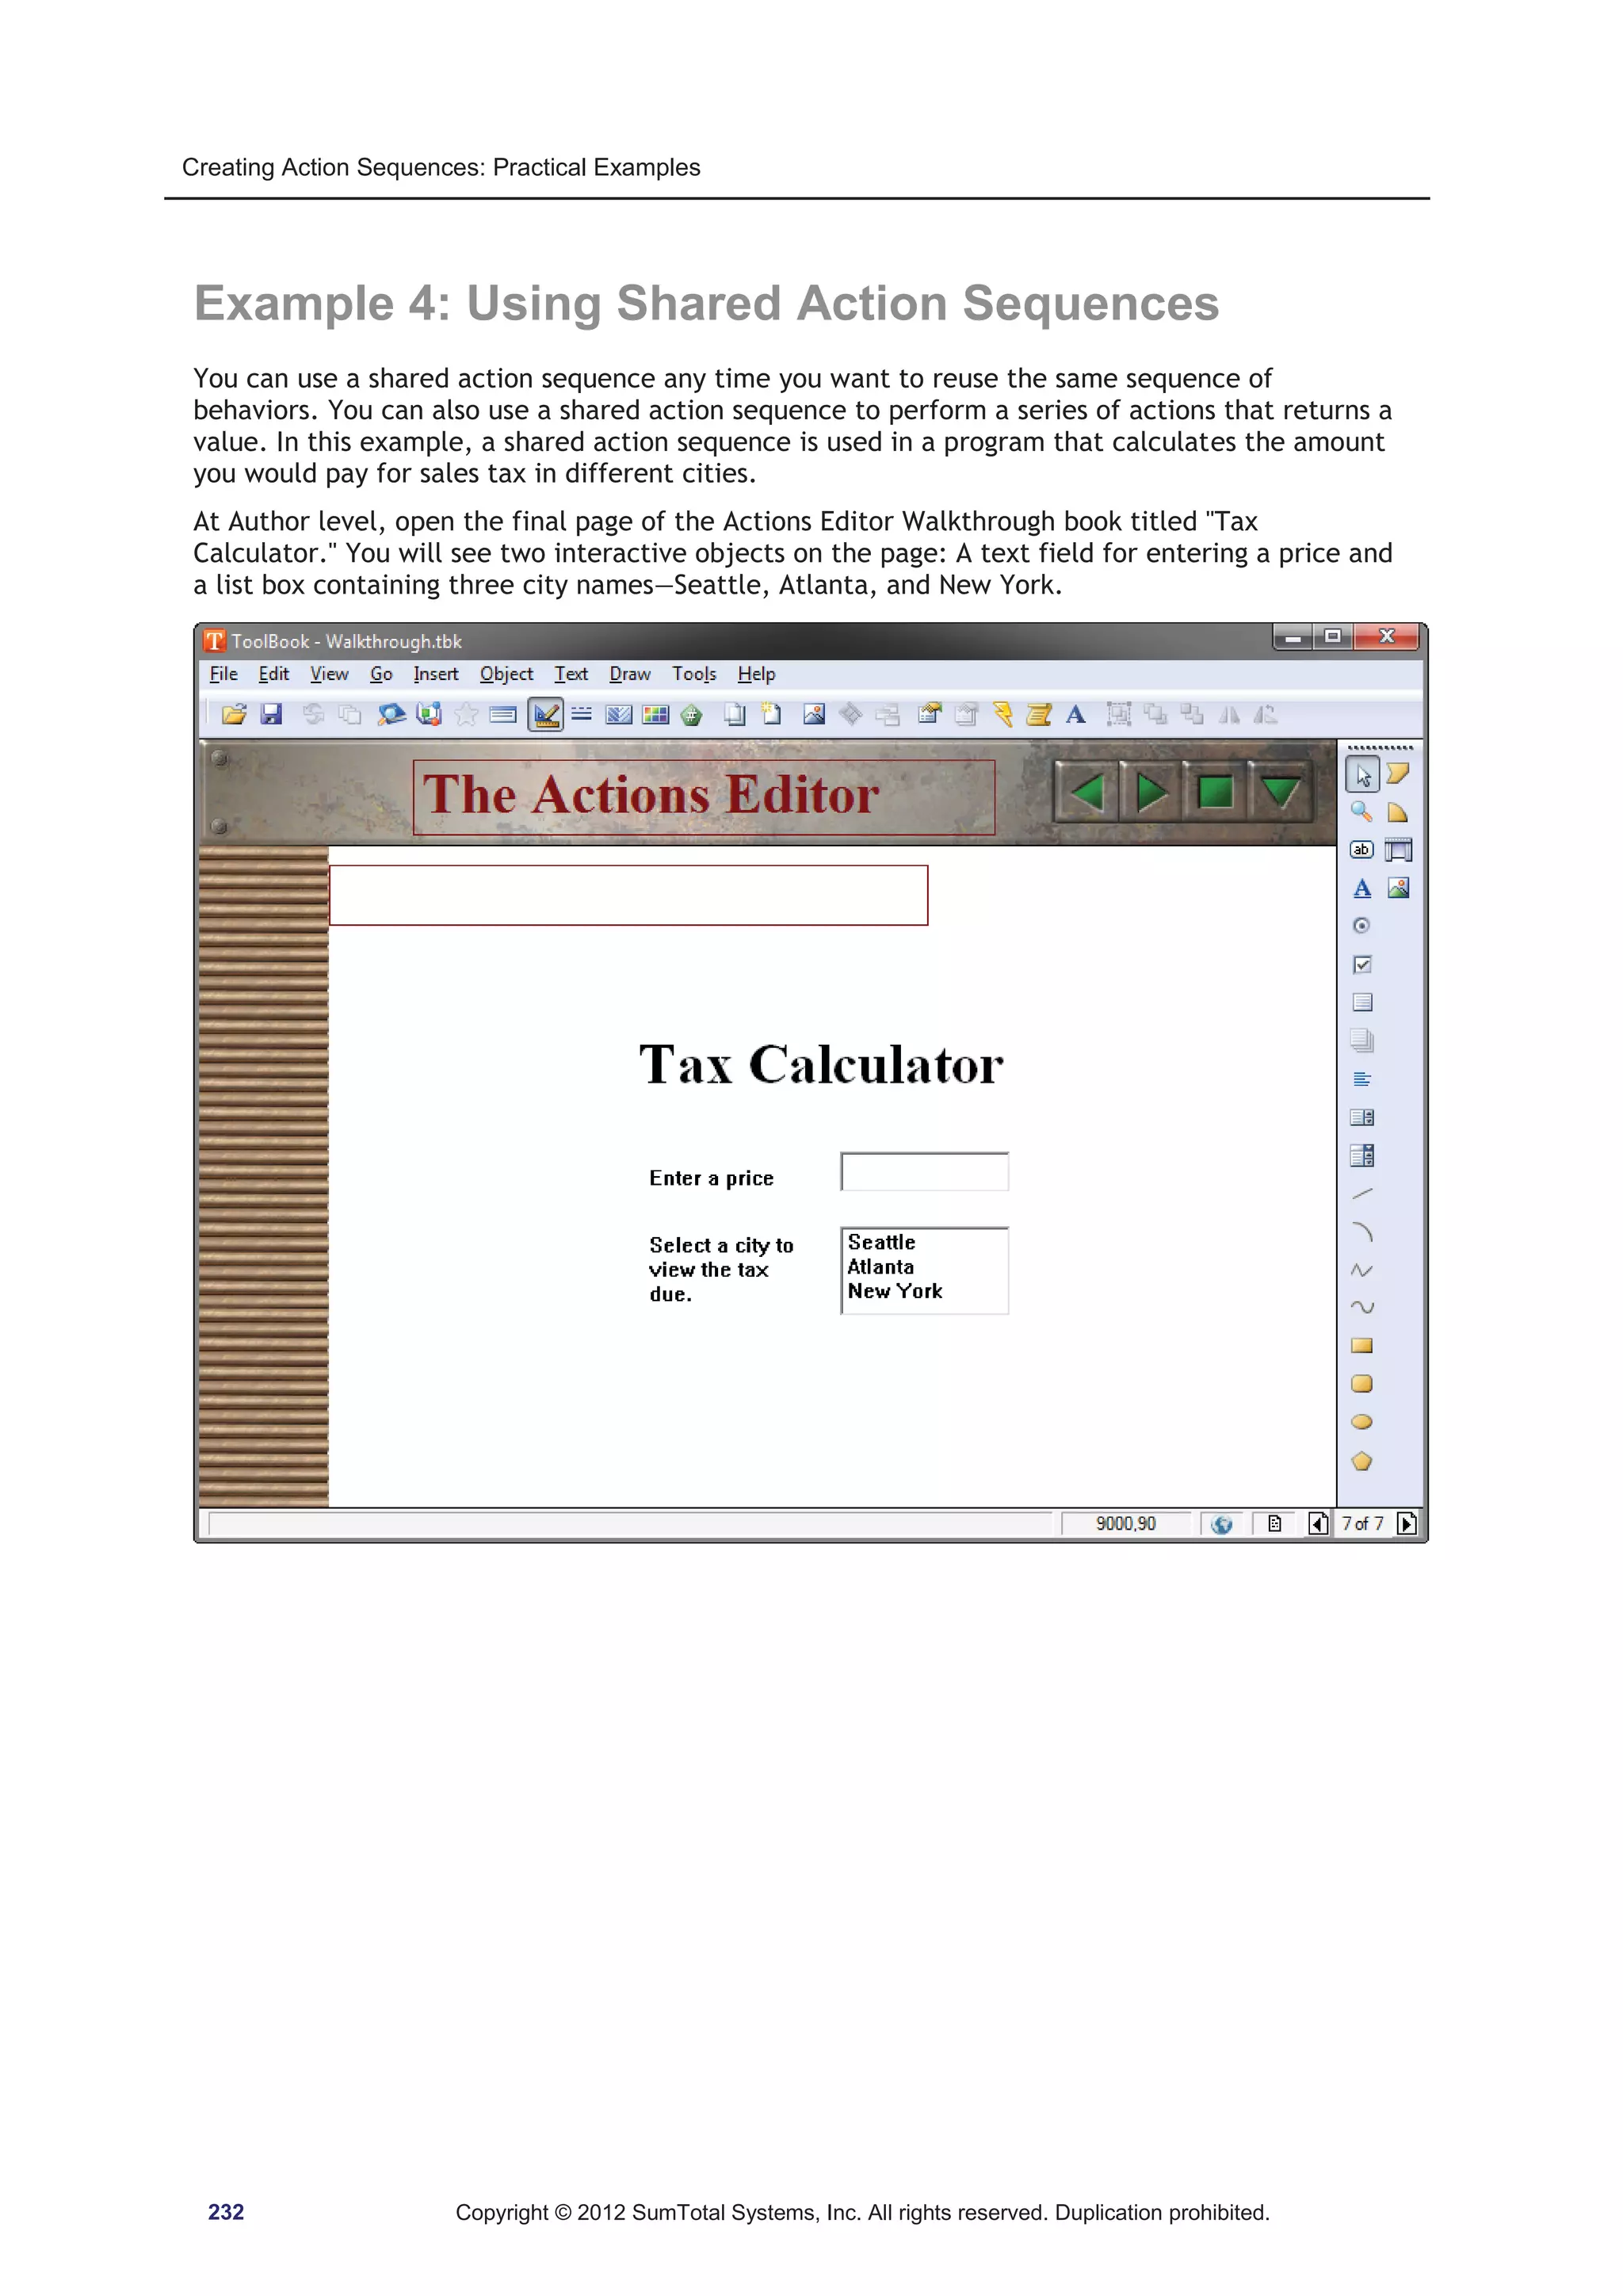
![Using the Actions Editor
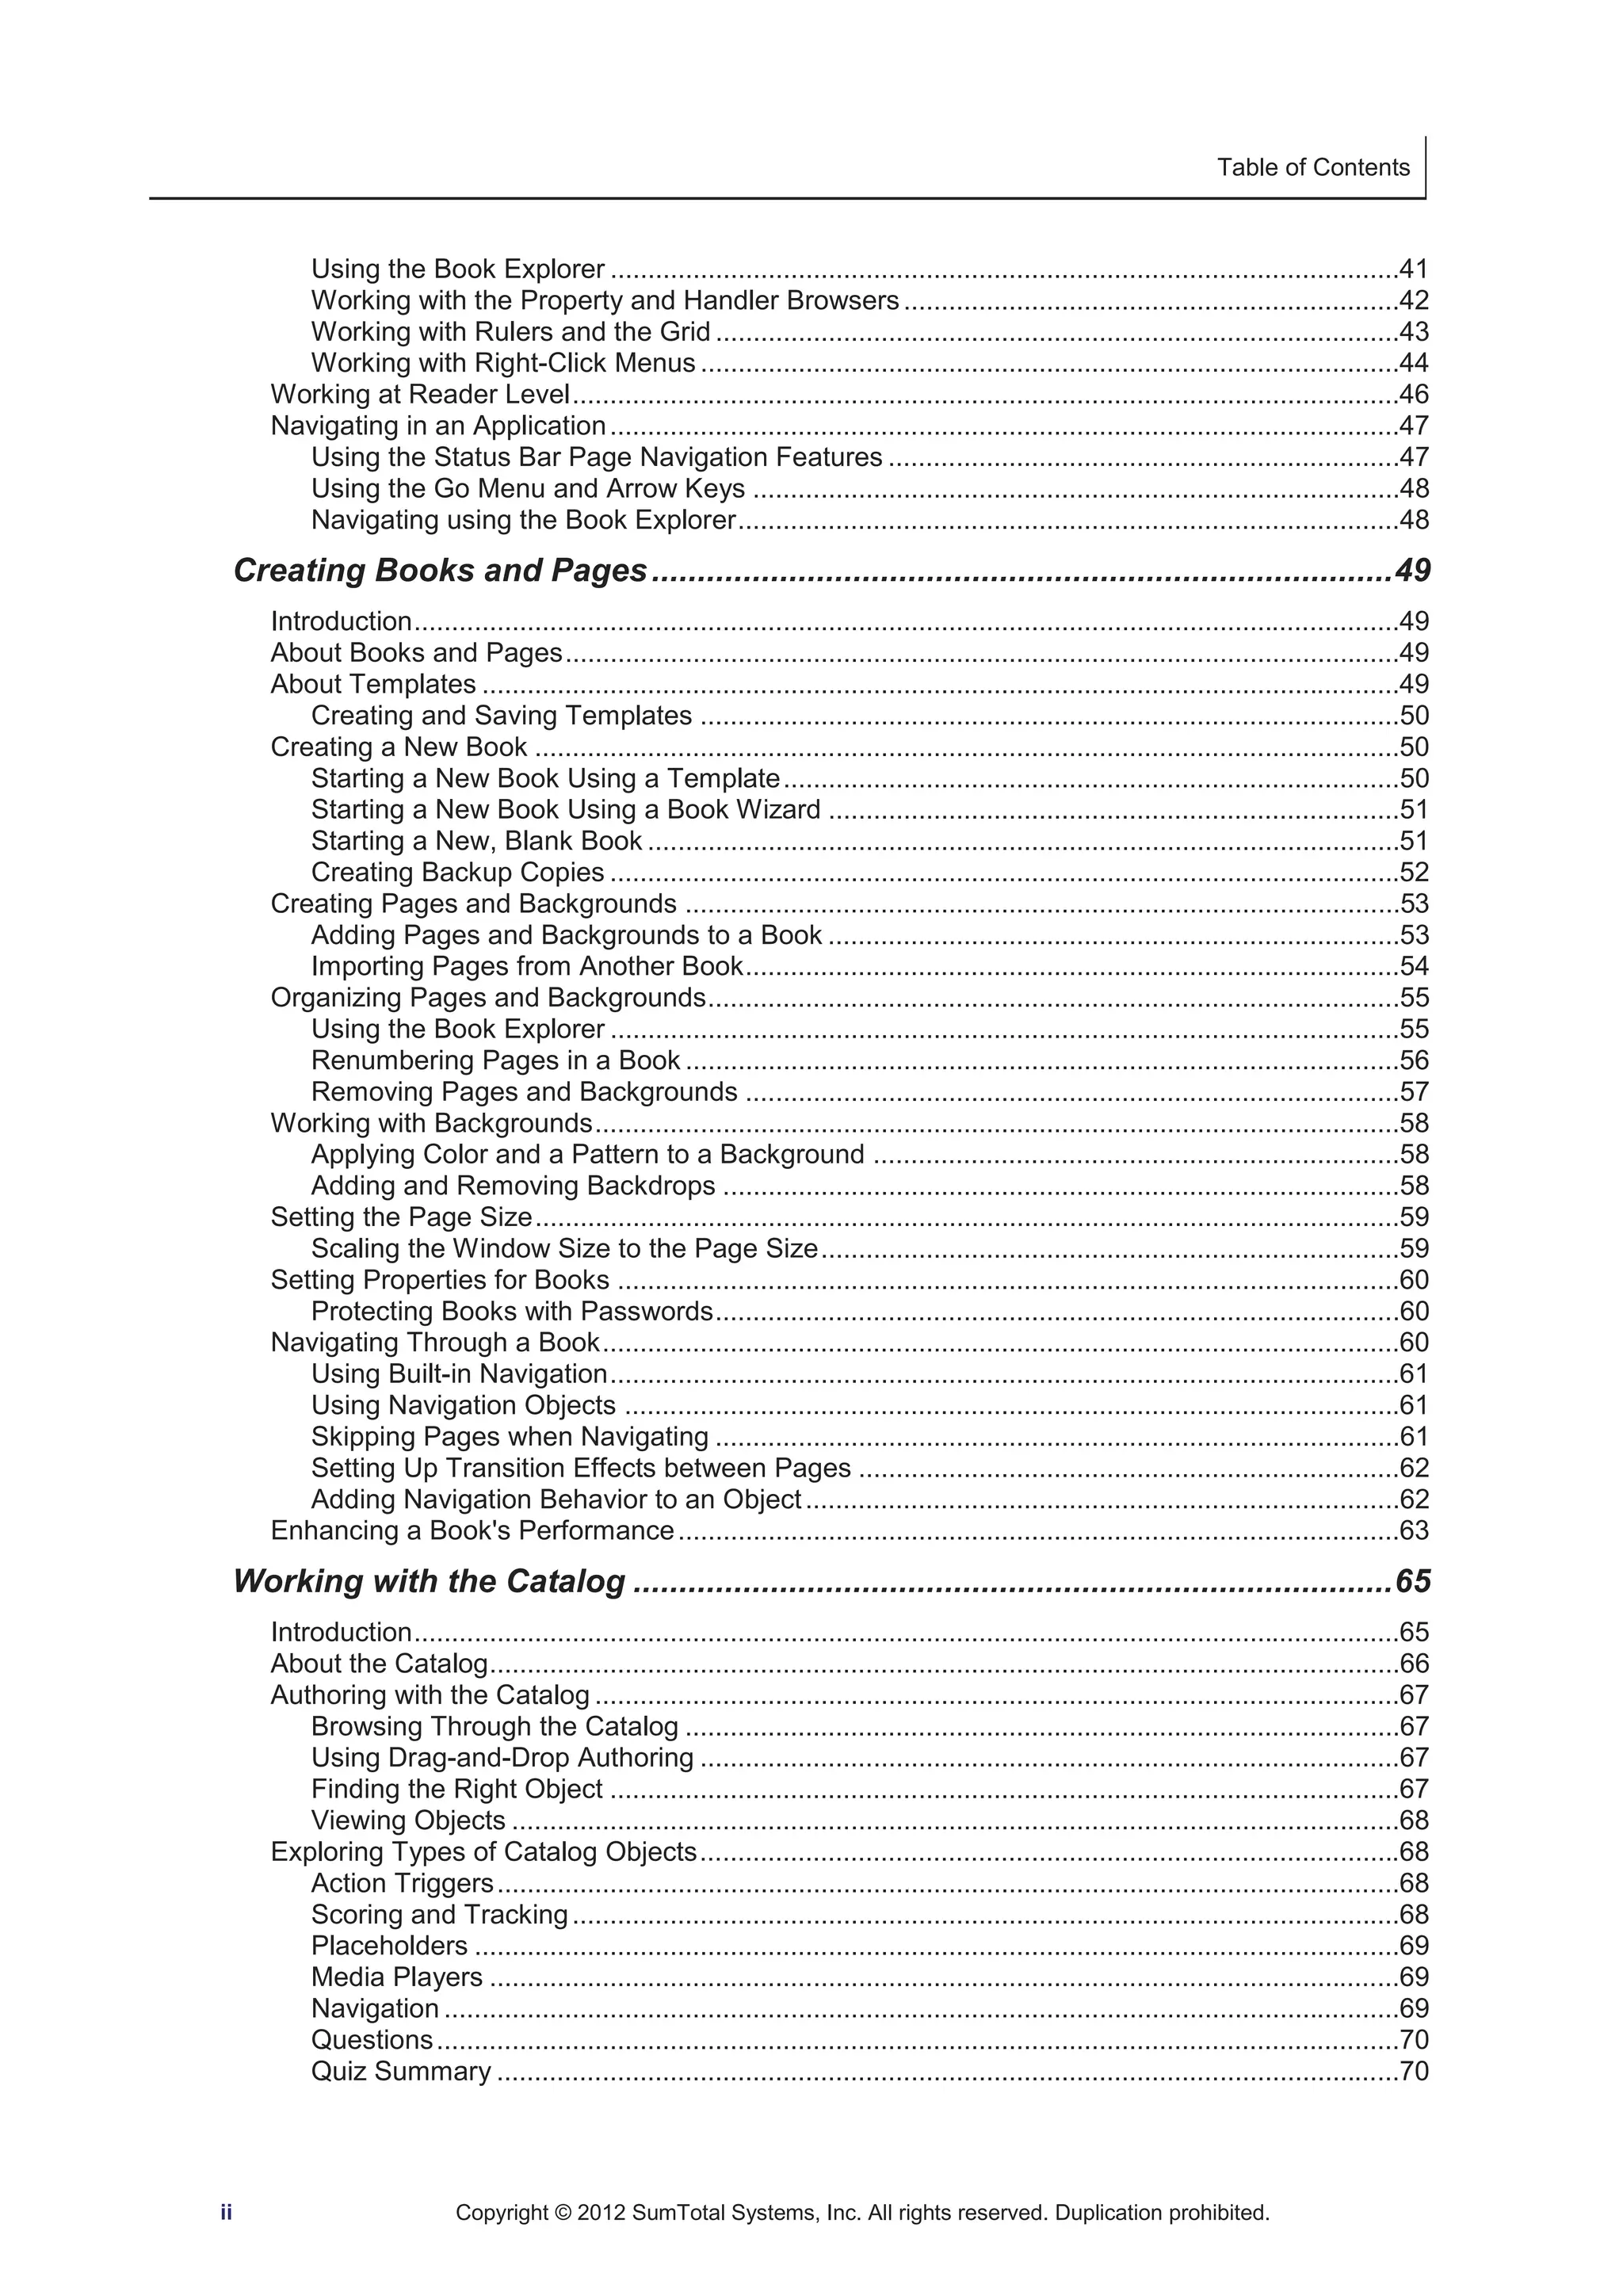
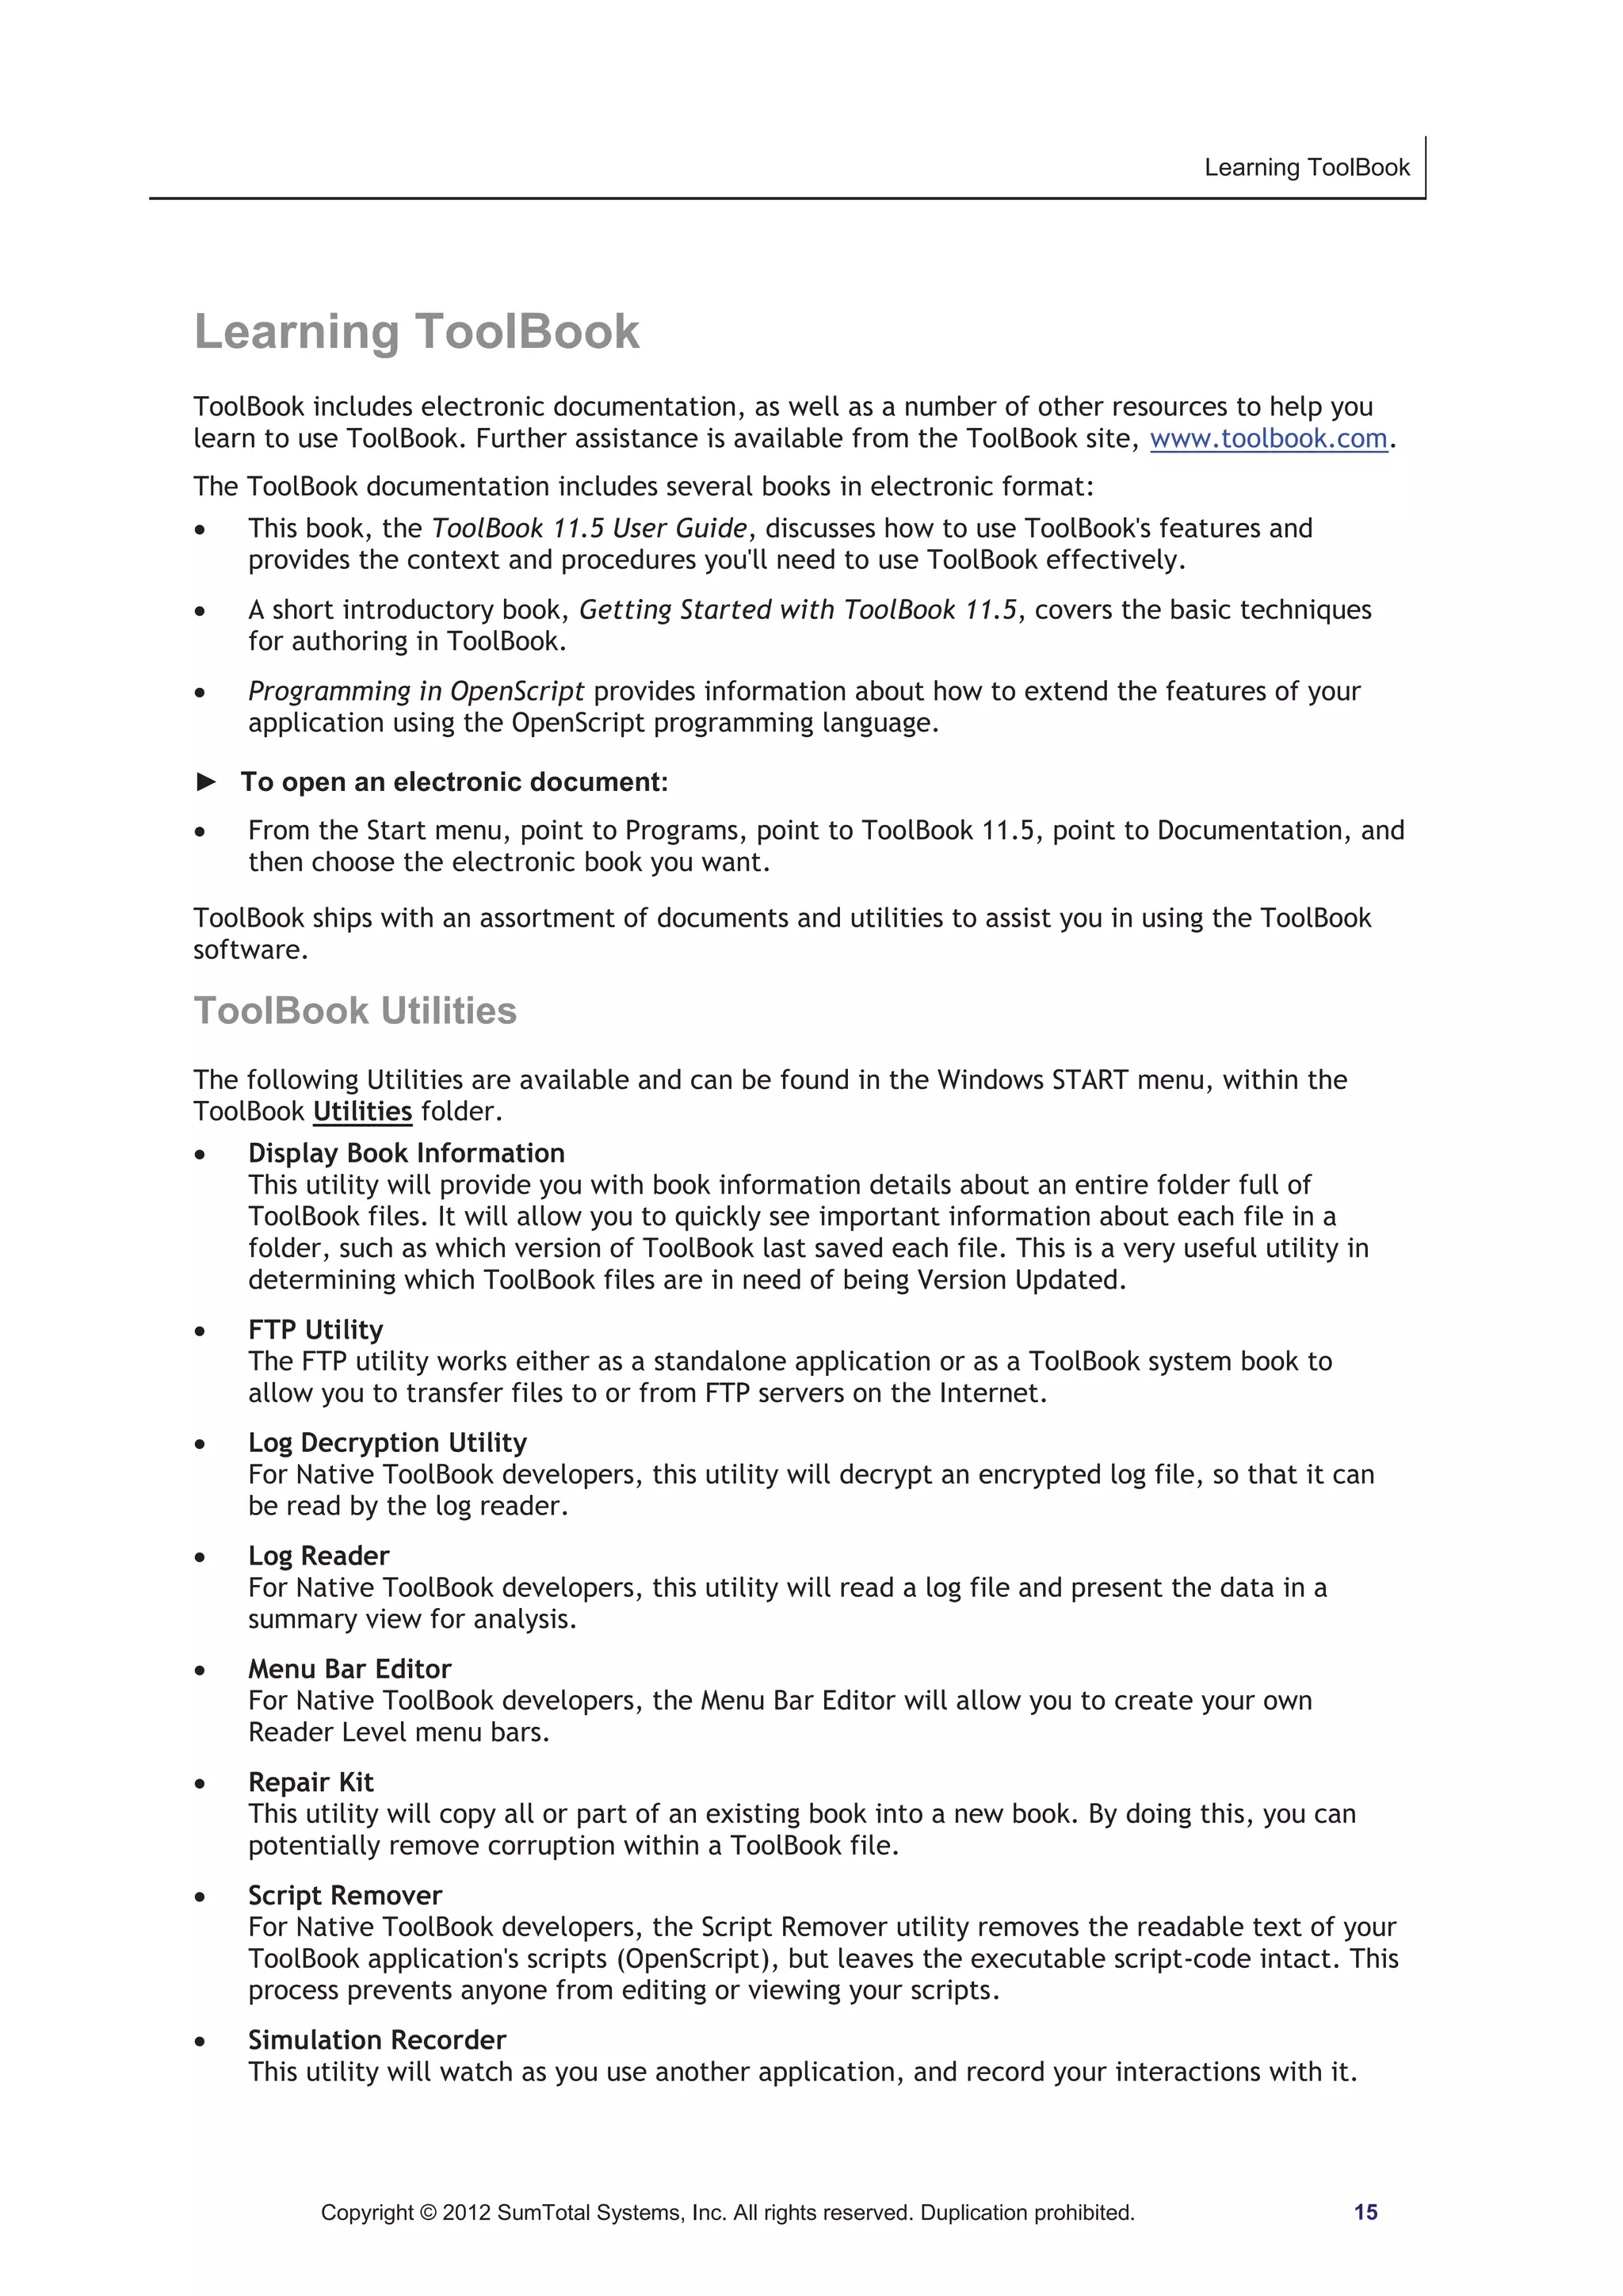
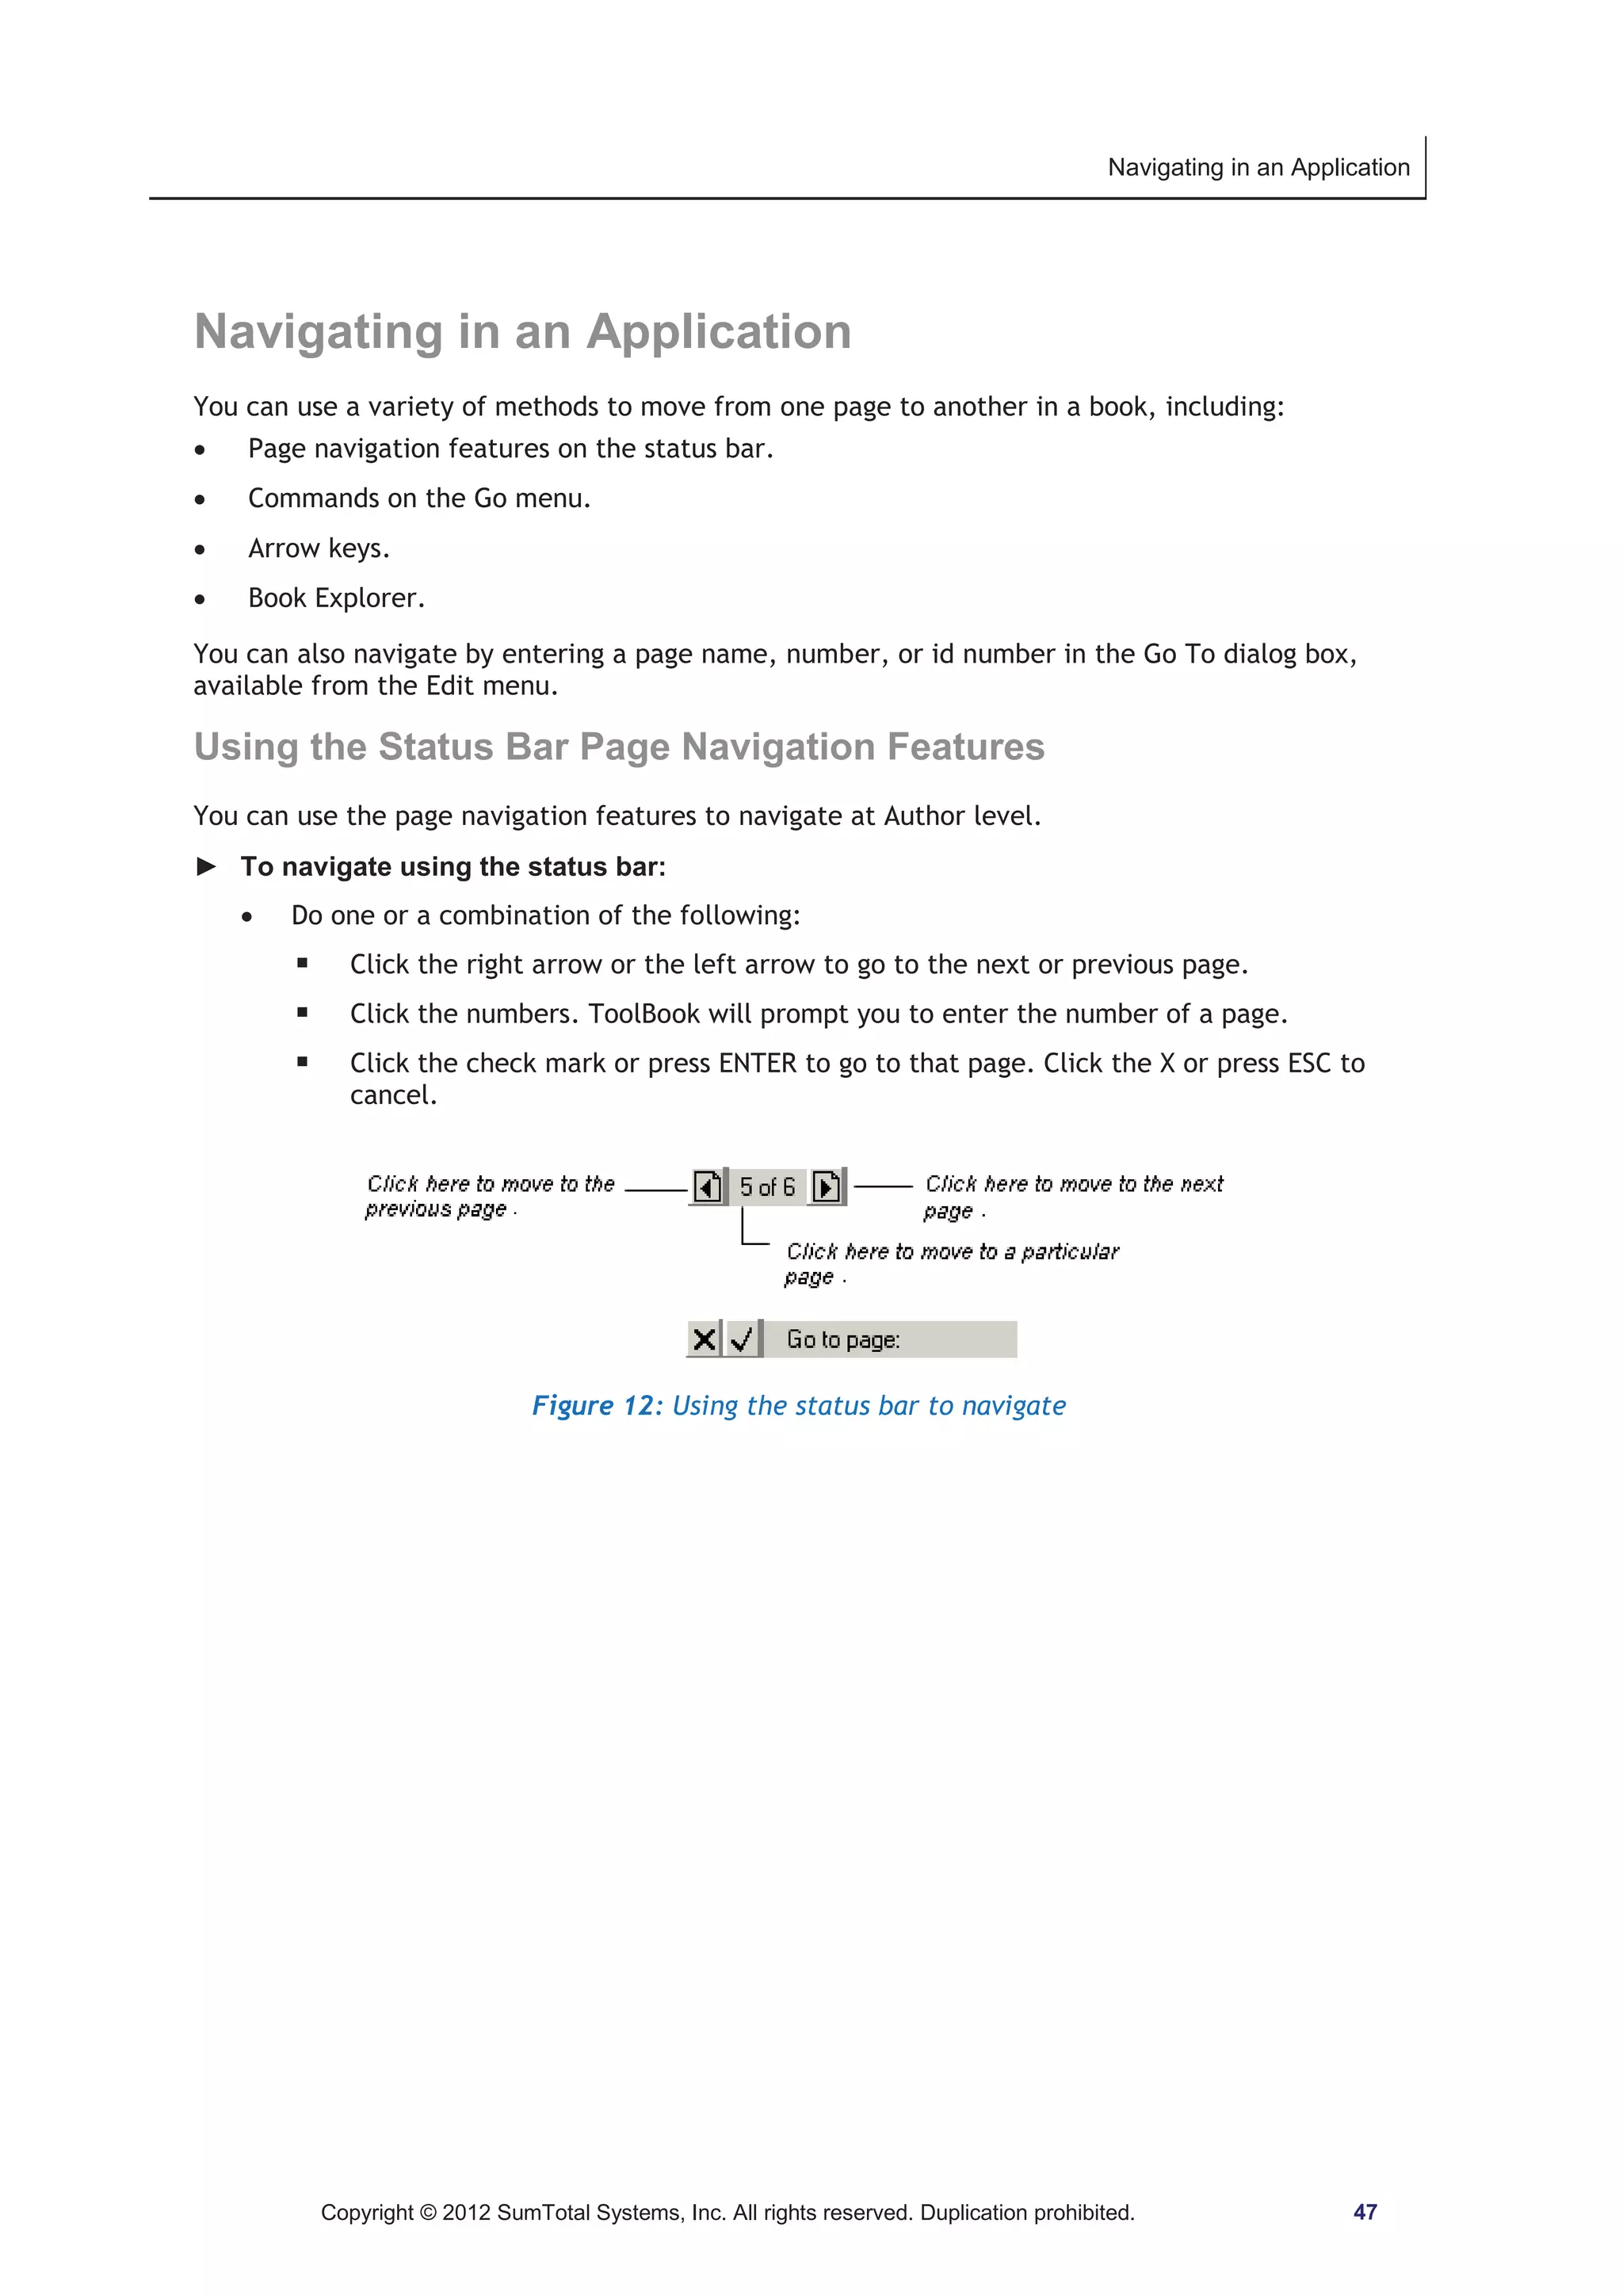
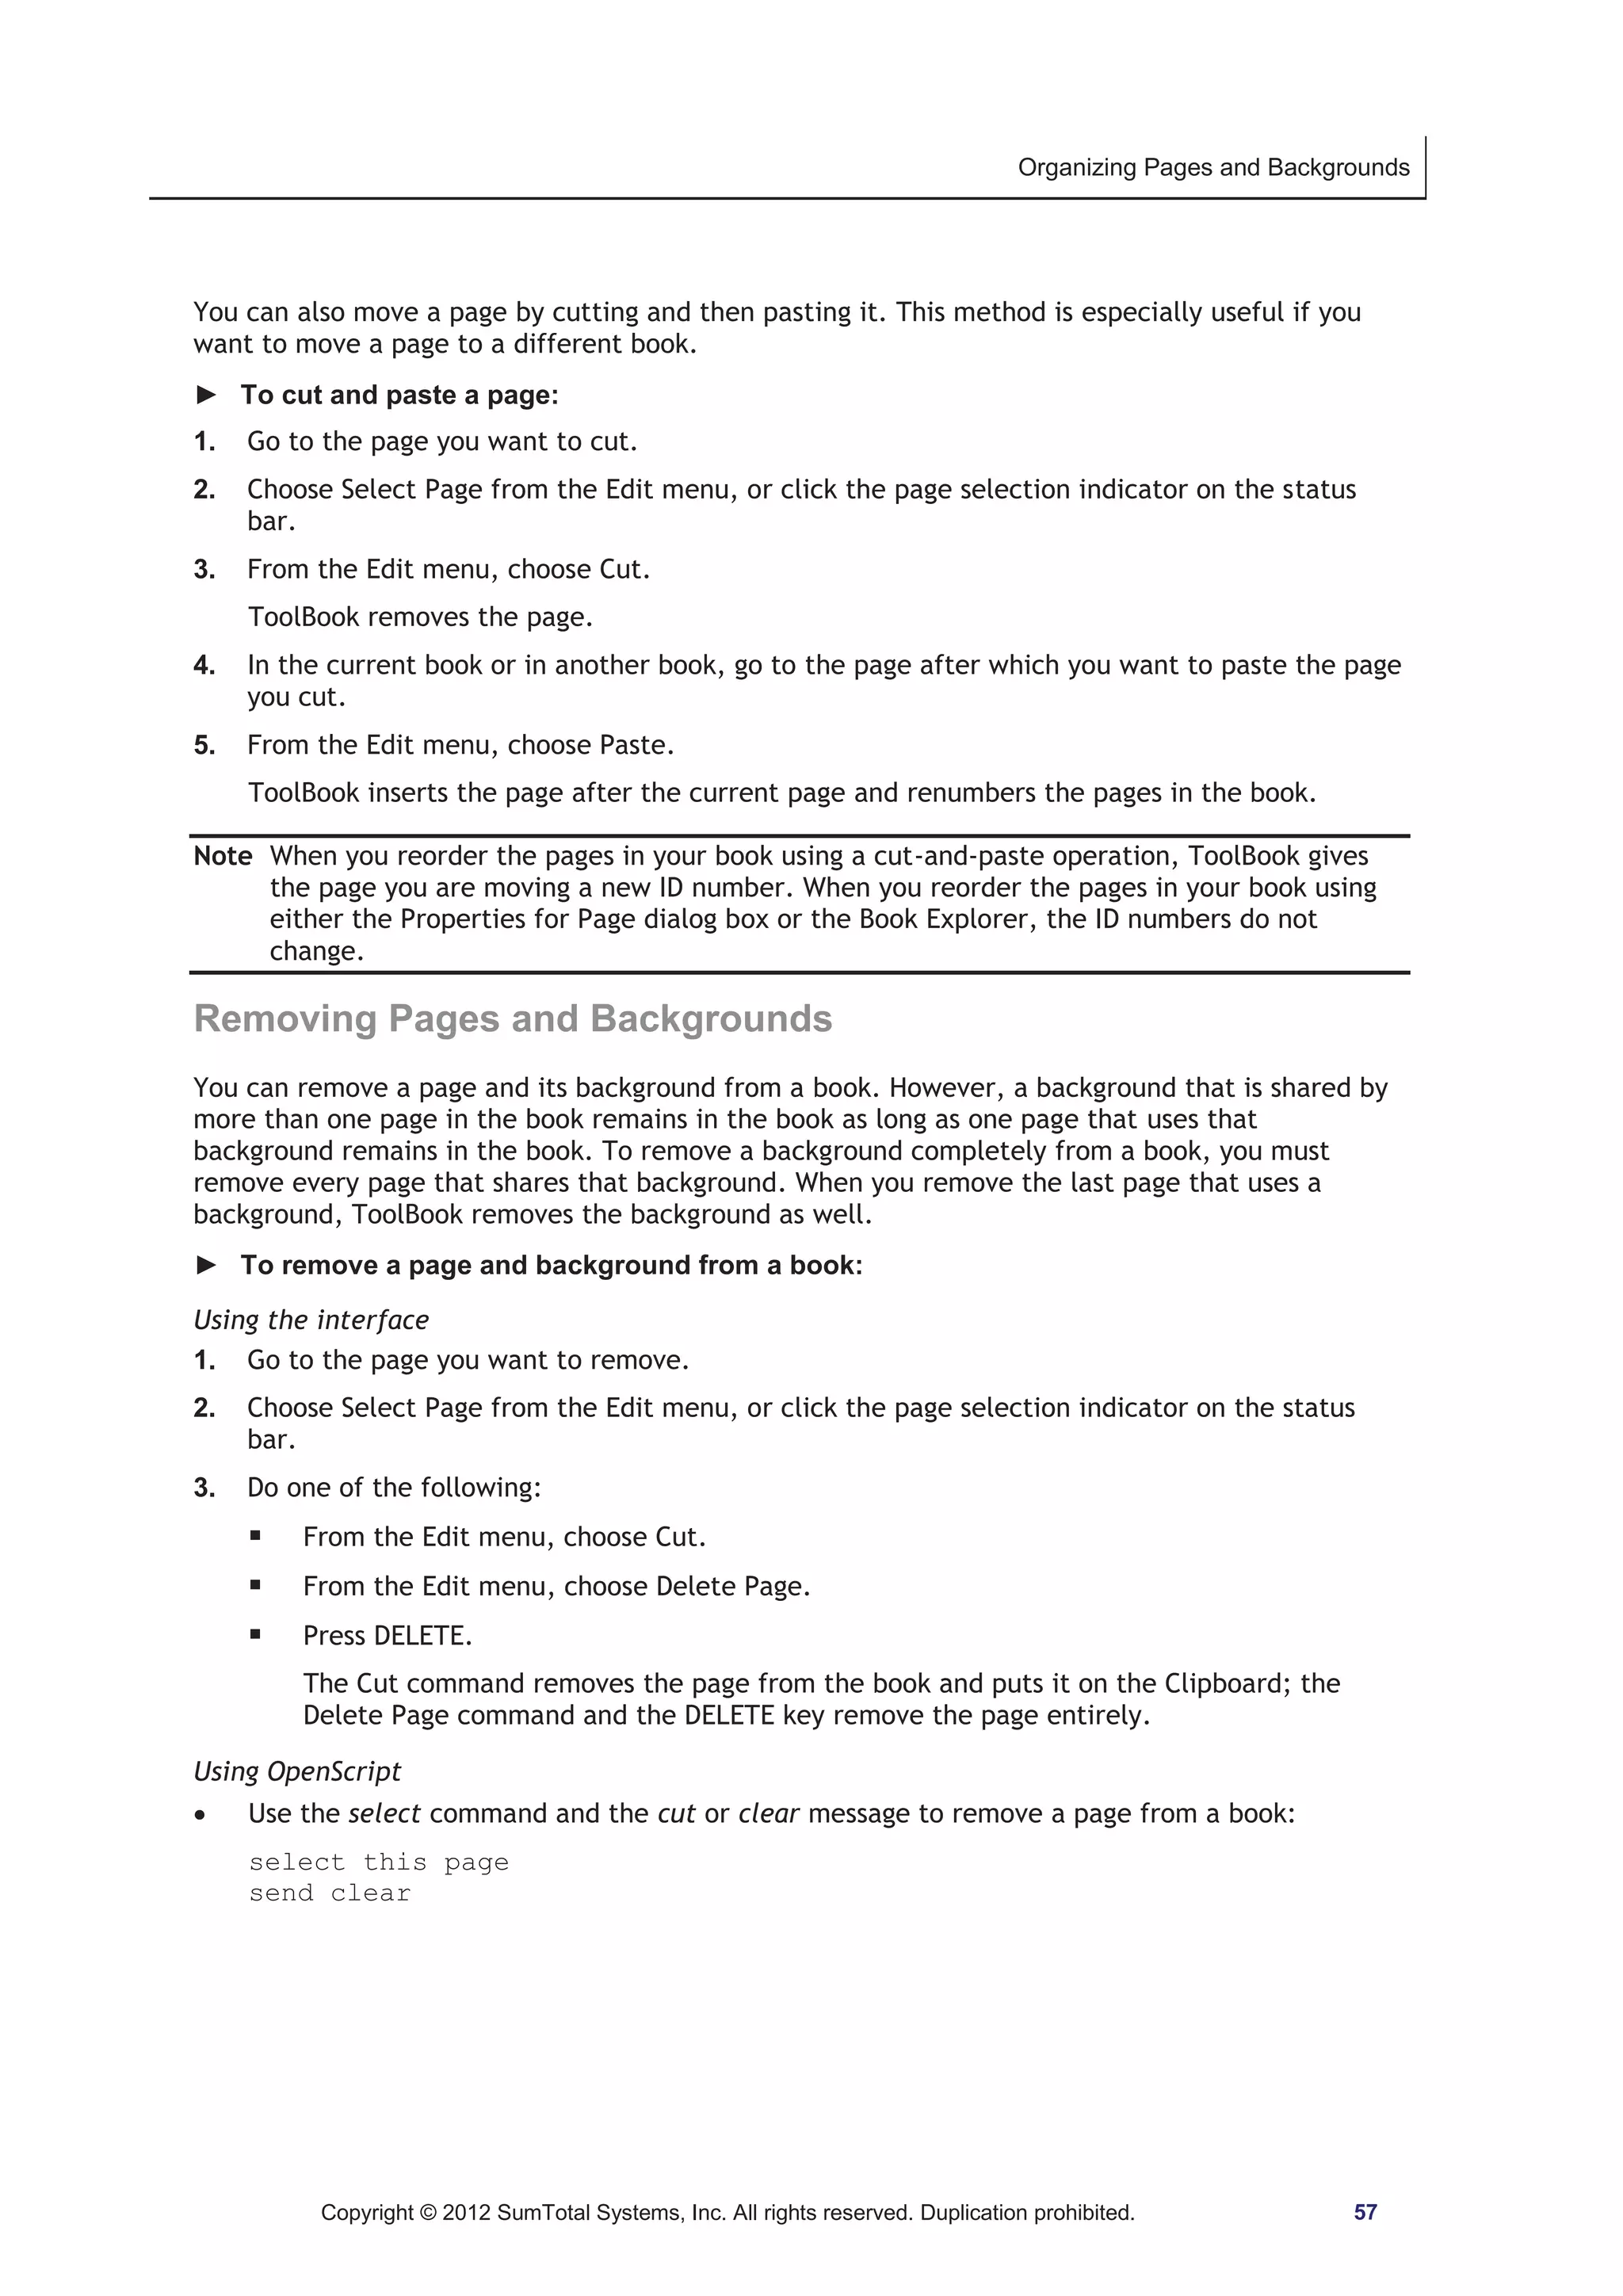
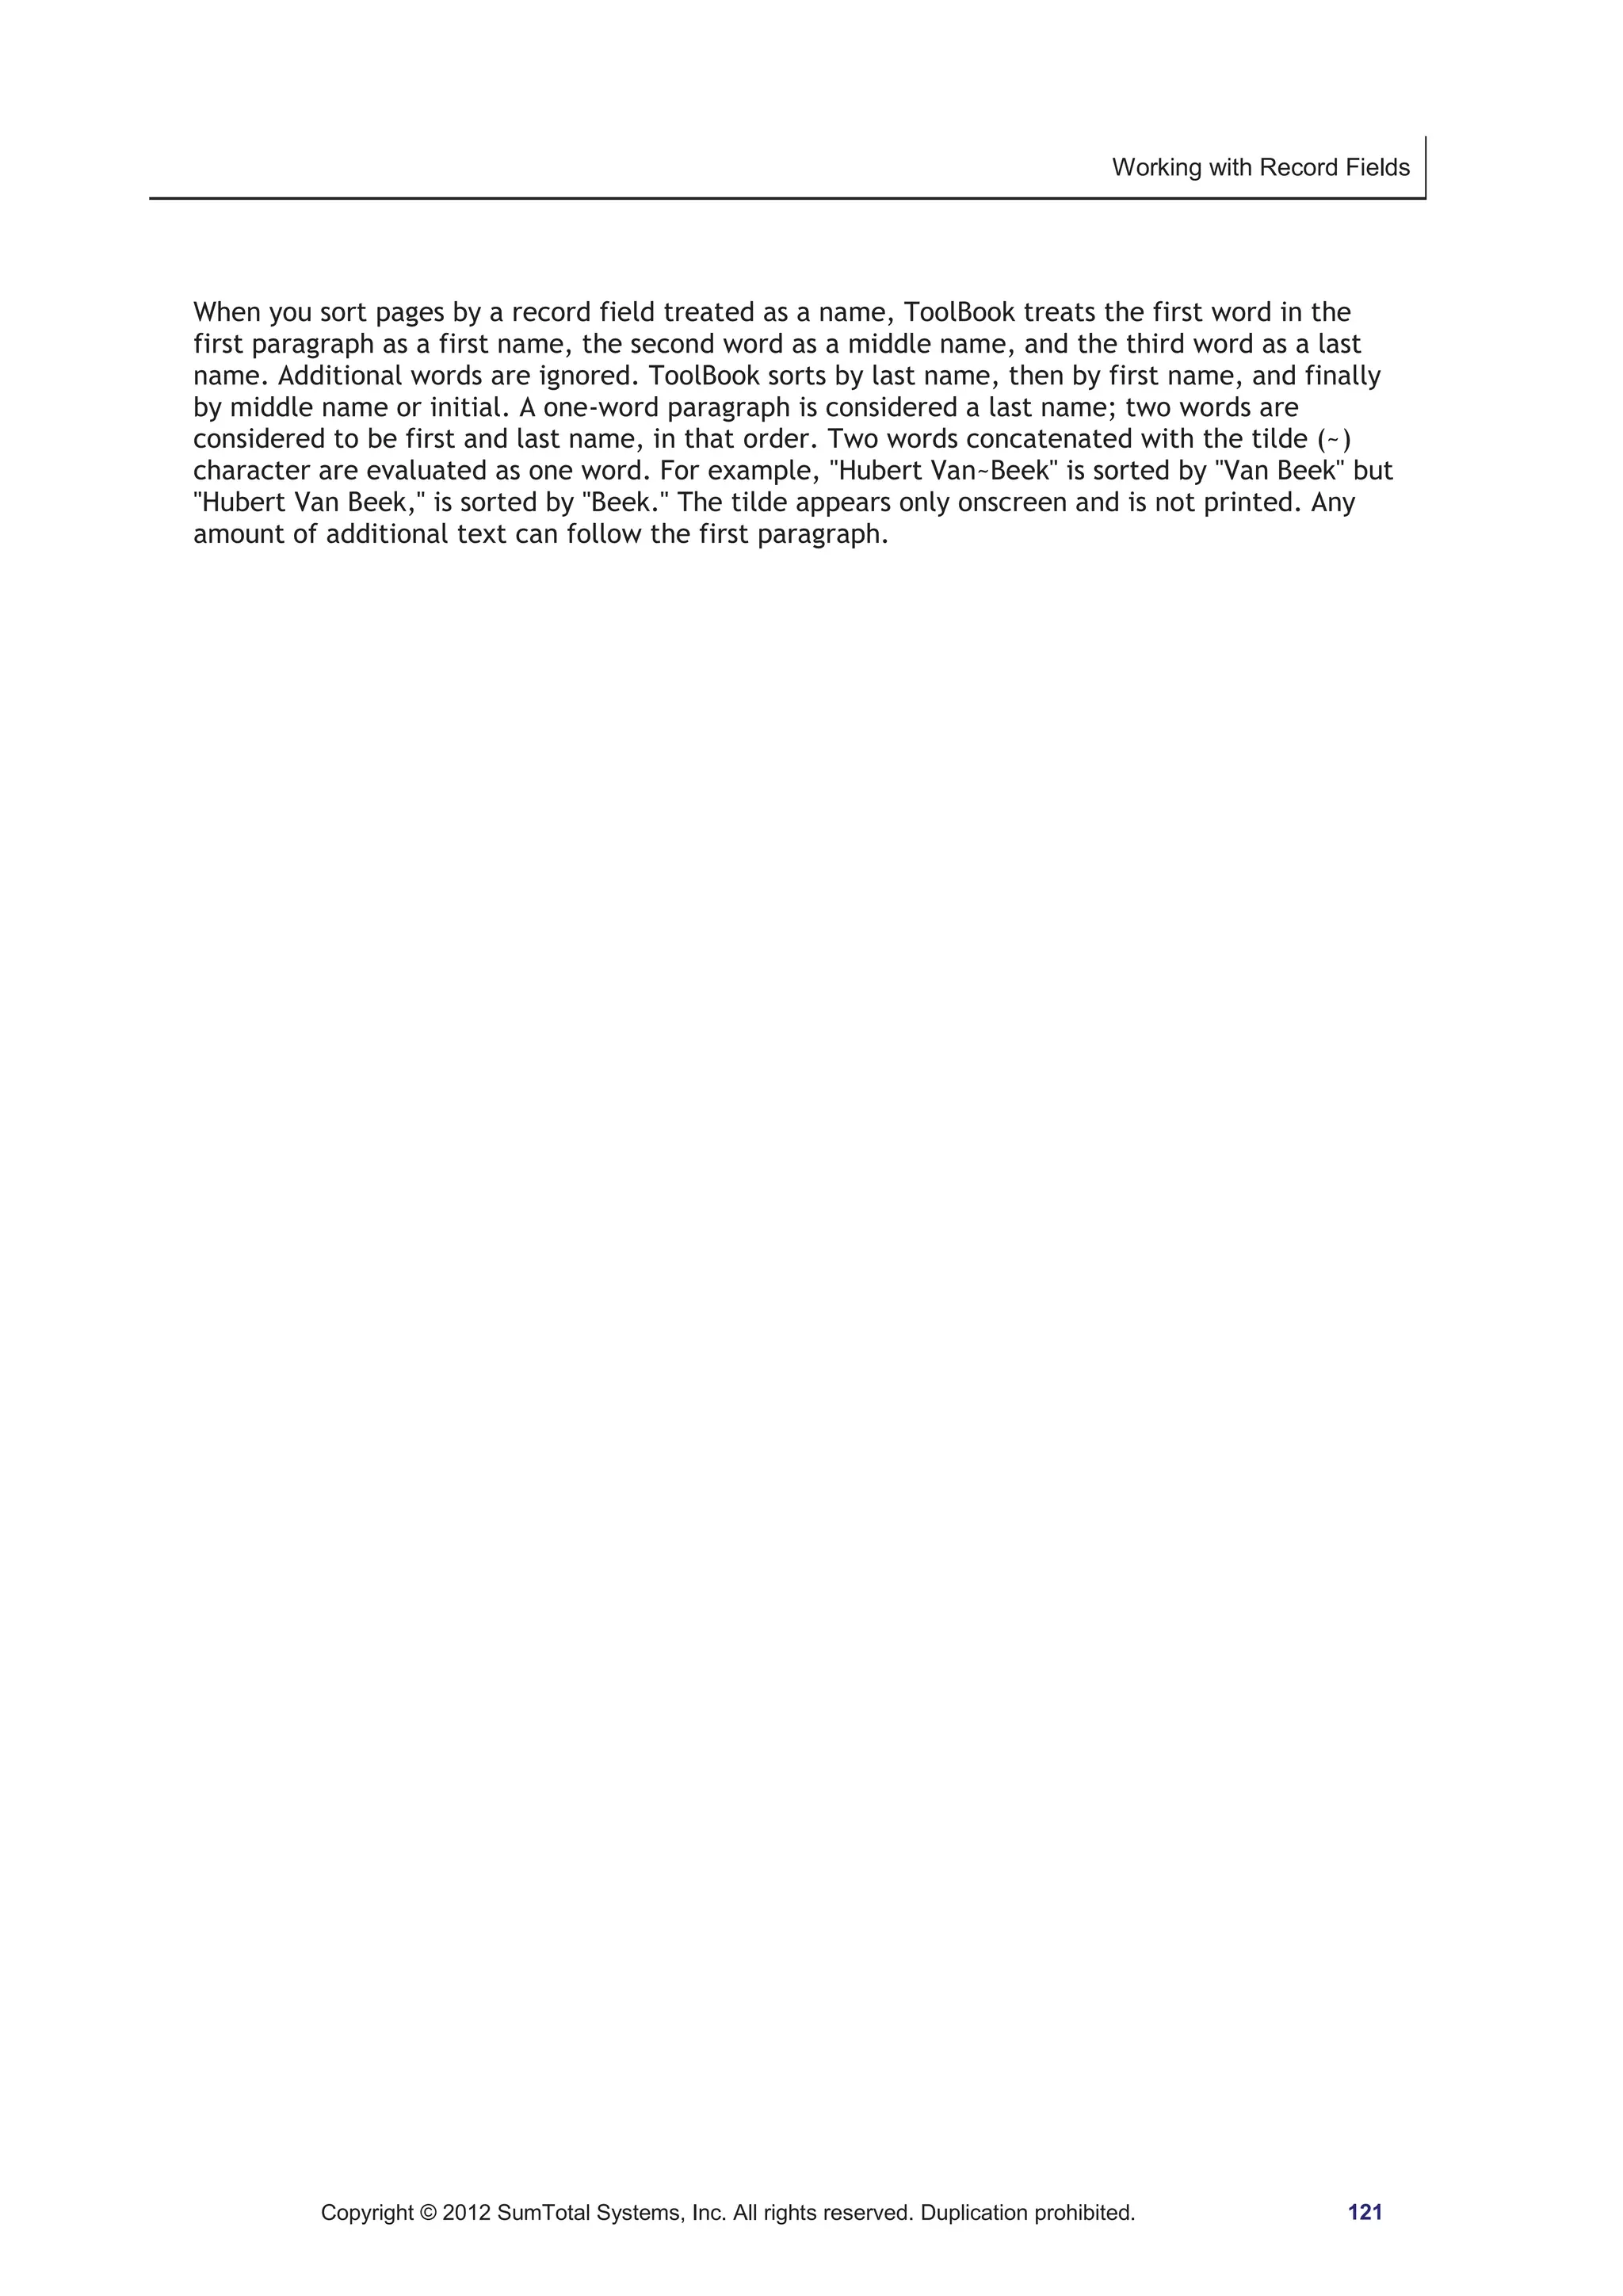
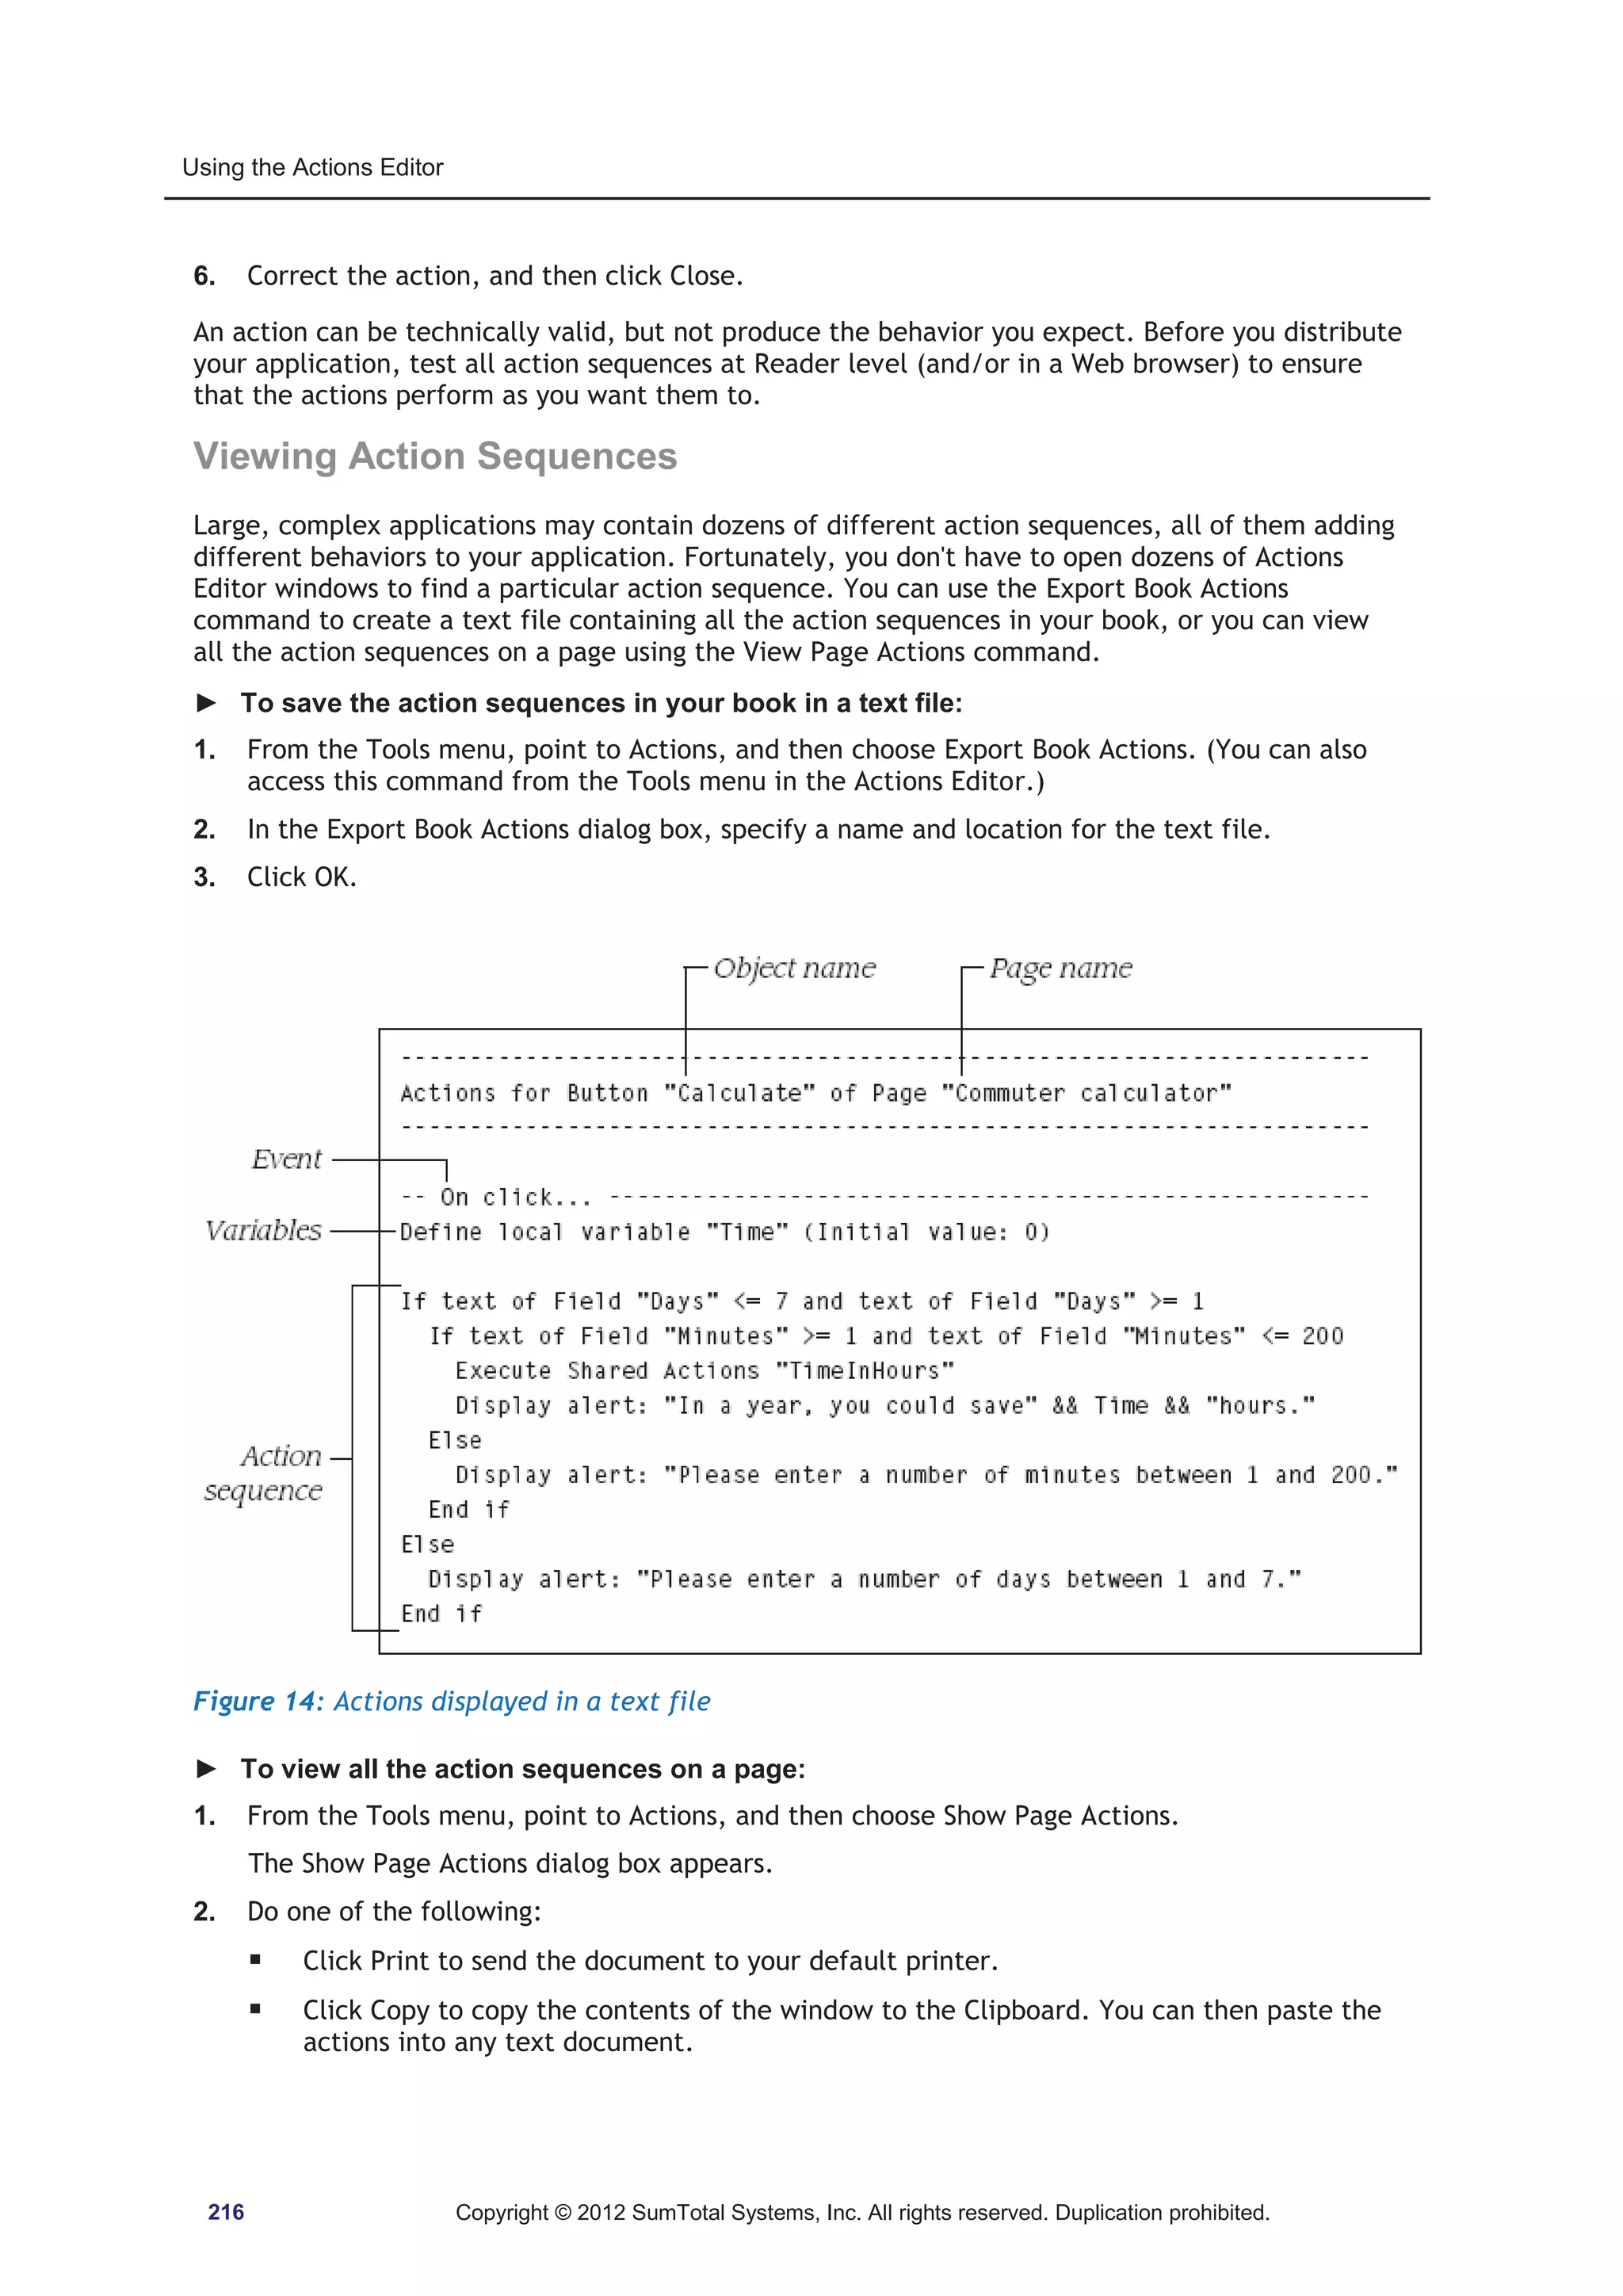
5. Click OK.
Figure 10: The Variables dialog box
Using Arrays
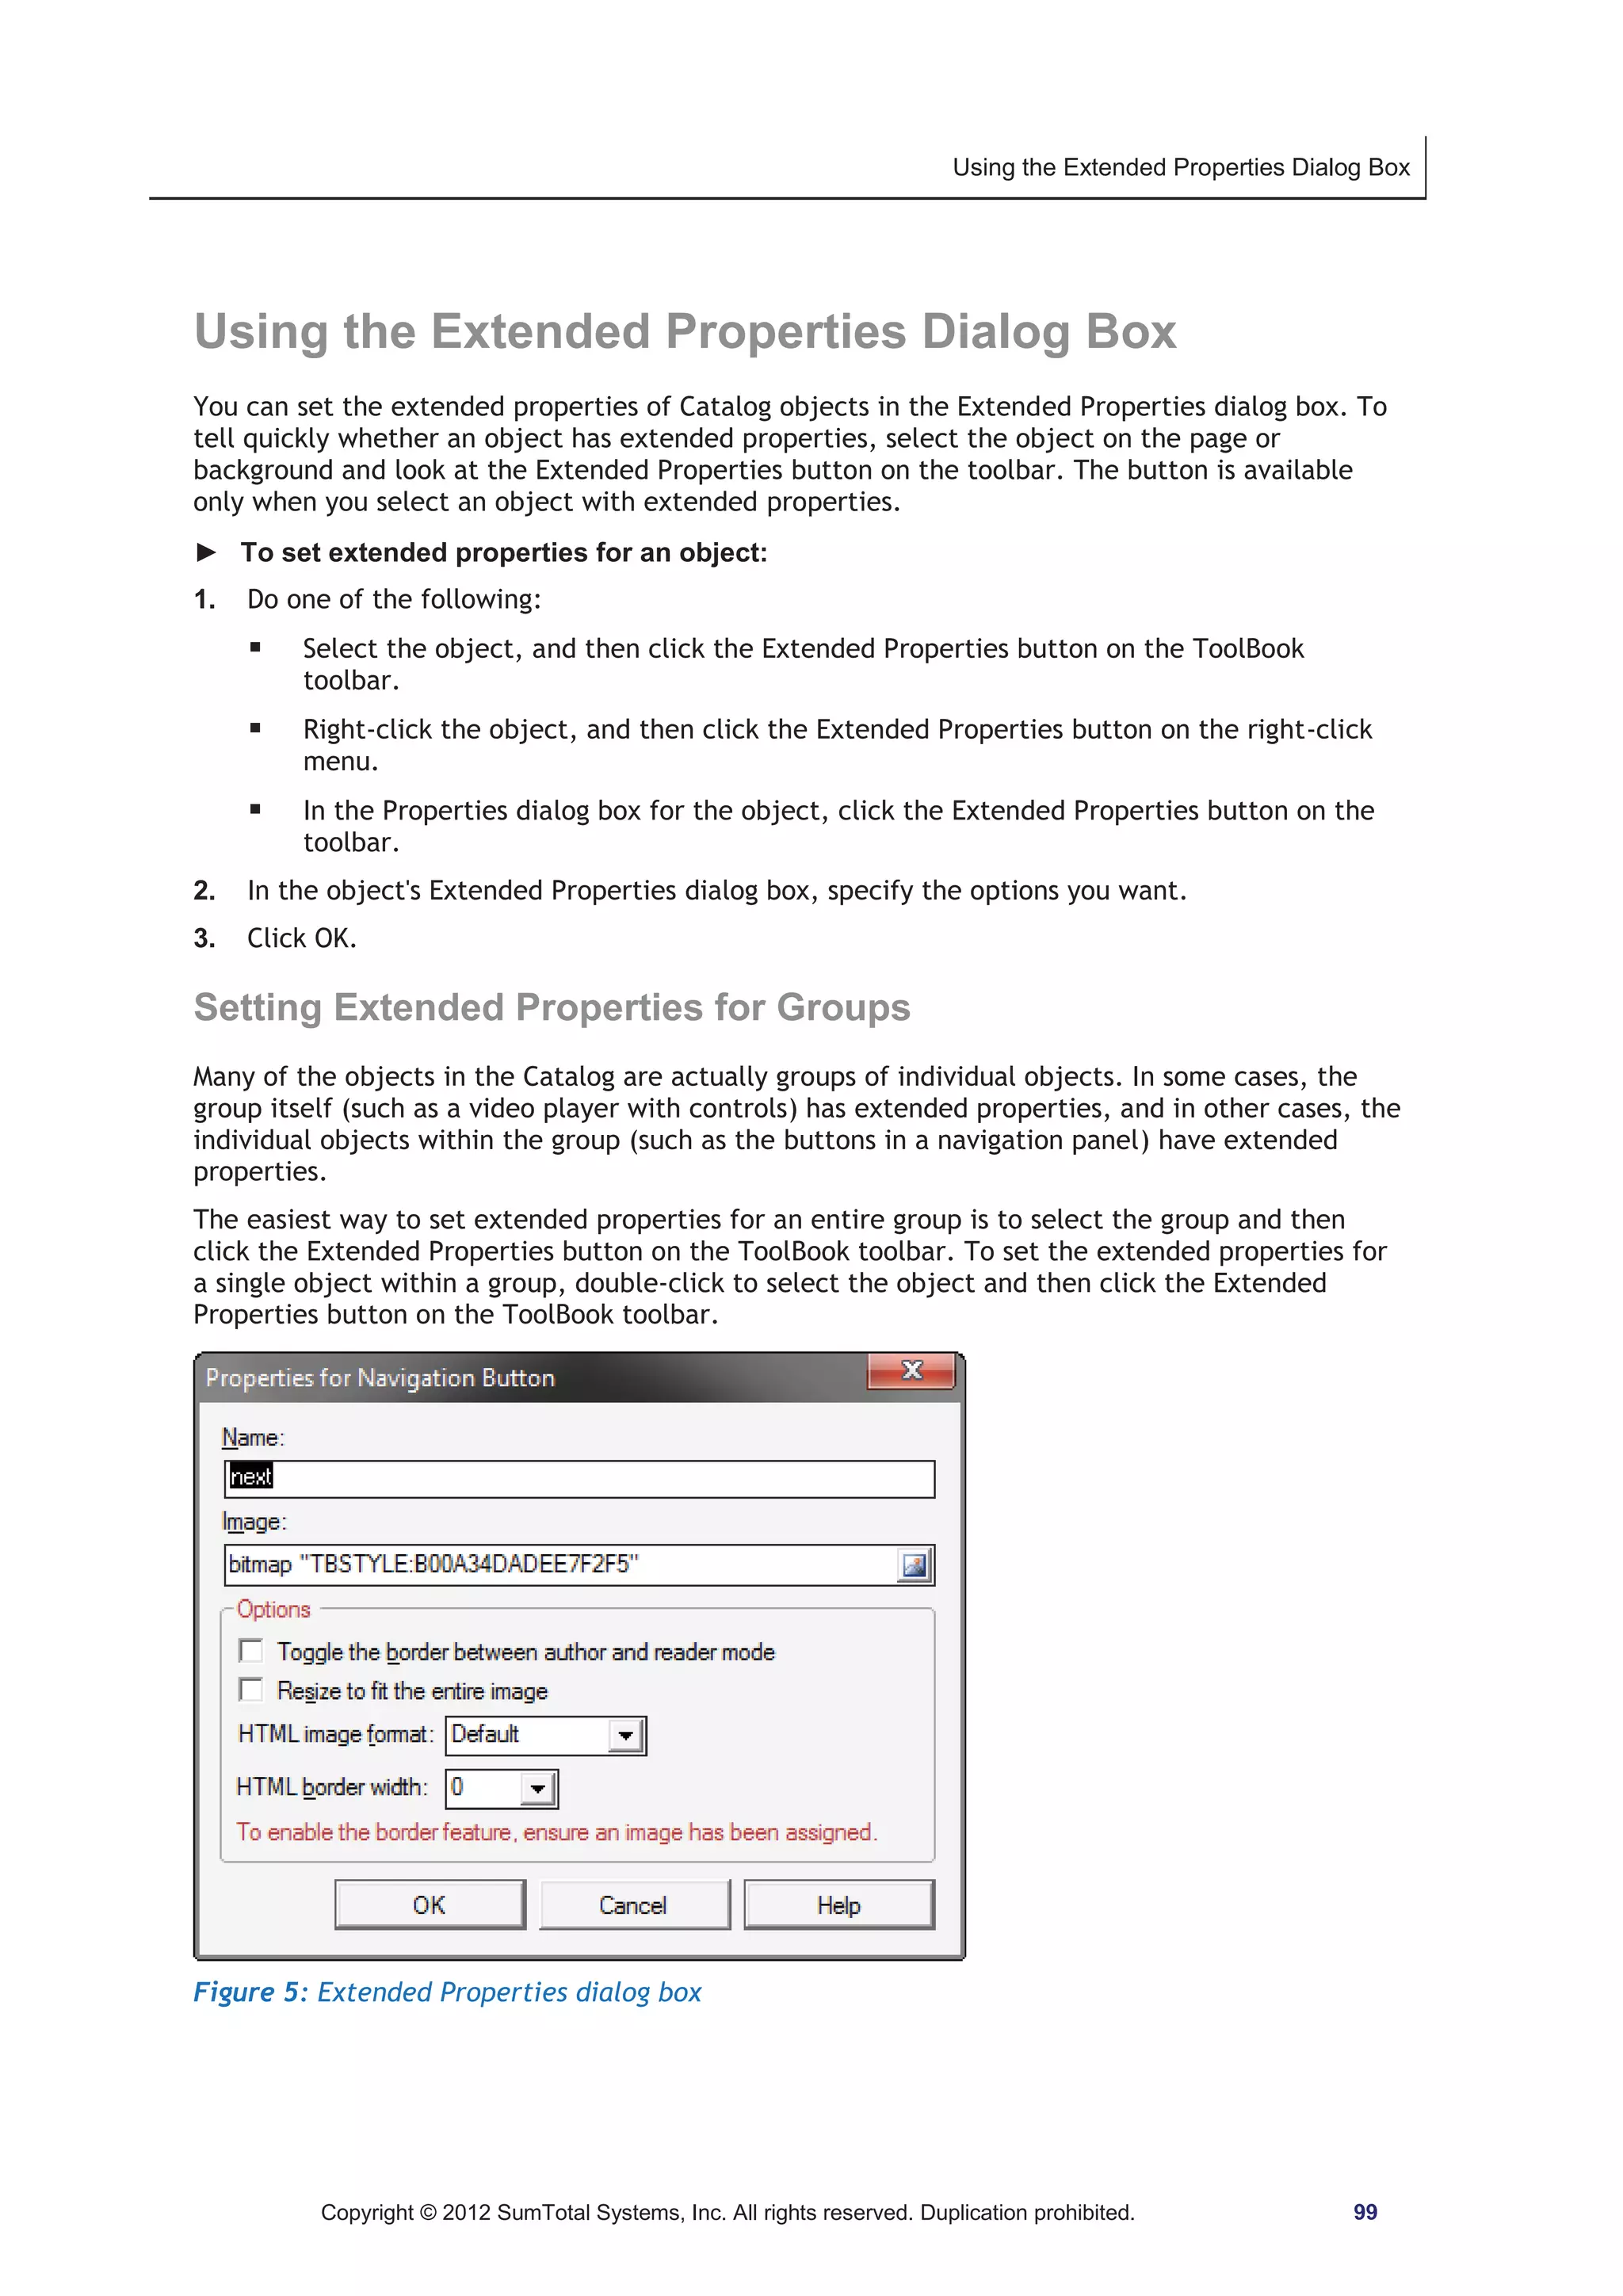
You can define an array to store related data in one variable. An array has a variable name
followed by an index in brackets. The index specifies which element of the array is being
referenced. For example, in an array named city, city[3] references the value stored in the third
element of the array, which could store a value such as Seattle.
In the Actions Editor, an array can have only a single dimension. The array index can be numeric
or any string that does not contain a space, comma, or tab. In the following examples the array
index is a string of characters:
PersonalInfo[FirstName]
PersonalInfo[LastName]
PersonalInfo[Age]
► To define an array:
1. In the Actions Editor, click the Define Variables button on the toolbar.
The Variables dialog box appears.
2. On either the Local Variables of Global Variables tab (depending on the type you want to
define), click the New button.
3. Enter a name for the array.
210 Copyright © 2012 SumTotal Systems, Inc. All rights reserved. Duplication prohibited.](https://image.slidesharecdn.com/tb11-5userguide-141118165205-conversion-gate01/75/User-guide-Tool-Book-11-211-2048.jpg)


![Uninstalling an Application
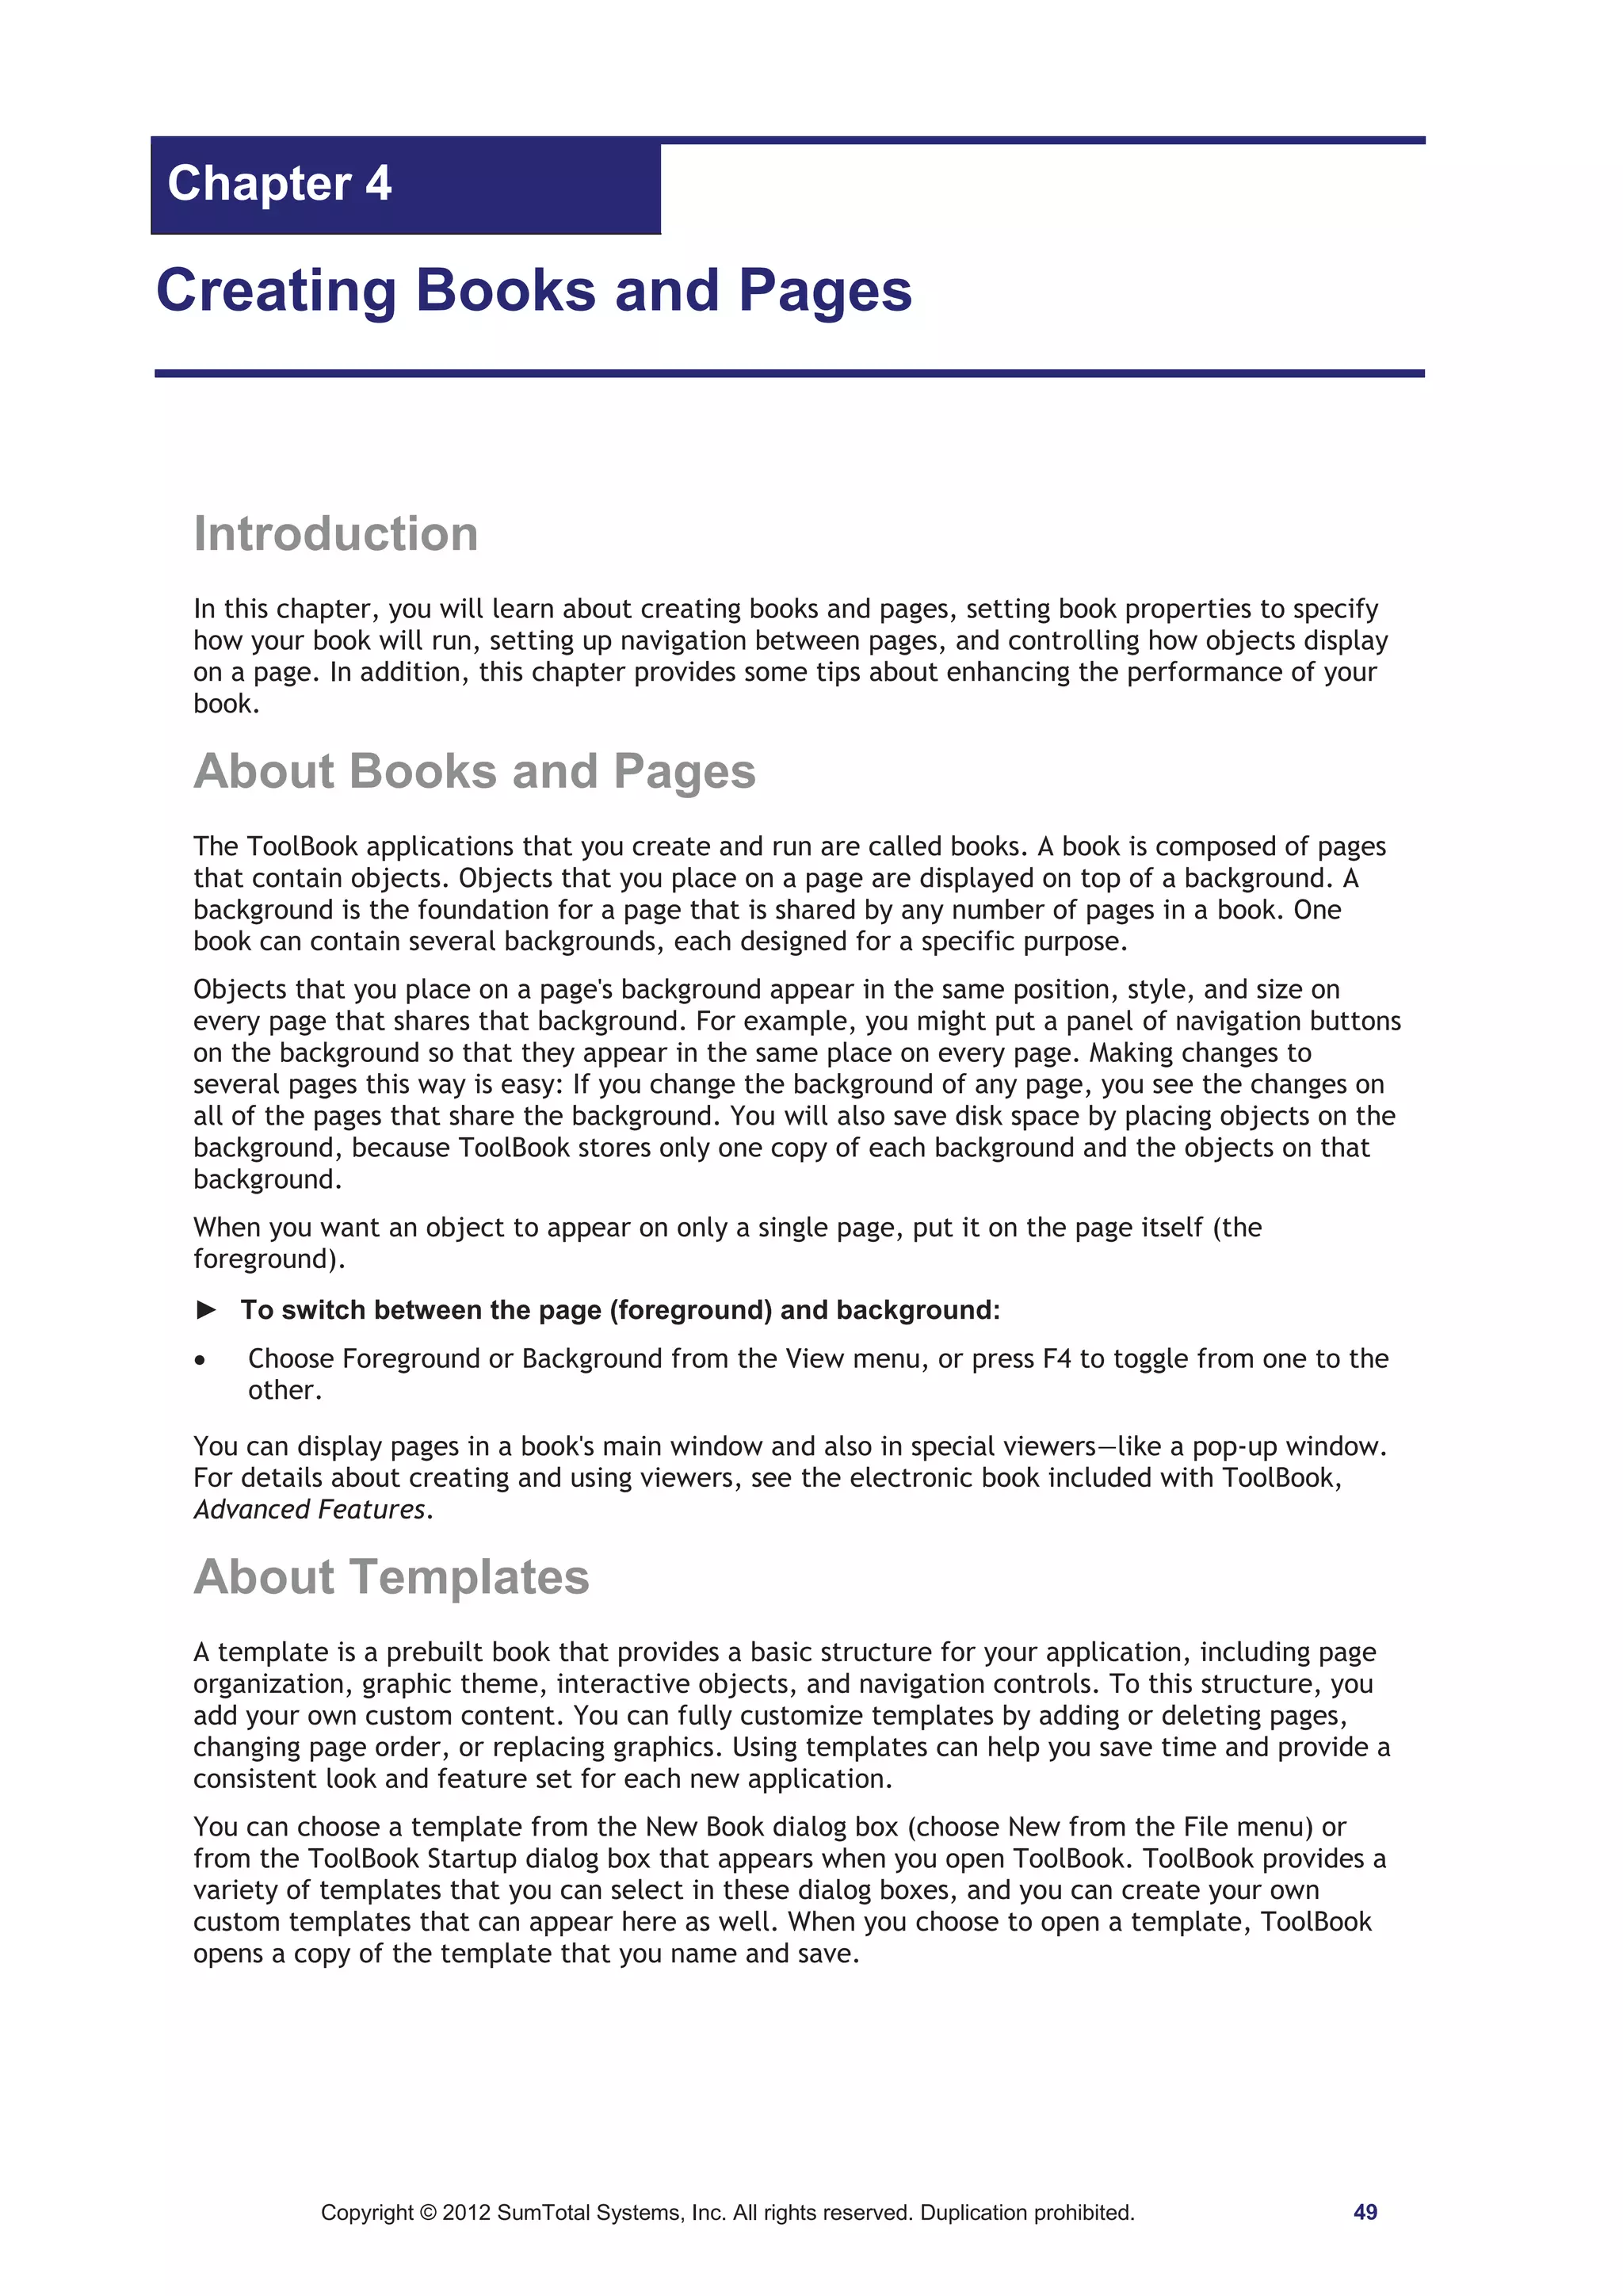
Analog Information that flows in a continuous stream and that can vary in infinitesimal increments.
Most computers cannot manipulate analog data, so it must be converted to digital format by breaking
the continuous flow into discrete steps and assigning numeric values to each step.
Angled Line A single line with three or more points, such as a zigzag. The Catalog contains angled
lines that you can drag and drop onto a page.
Animation A file that you can incorporate as a clip in ToolBook. You can also animate objects in a
book; however, you cannot save an animation created in ToolBook as an animation file or create a clip
from it.
ANSI See American National Standards Institute.
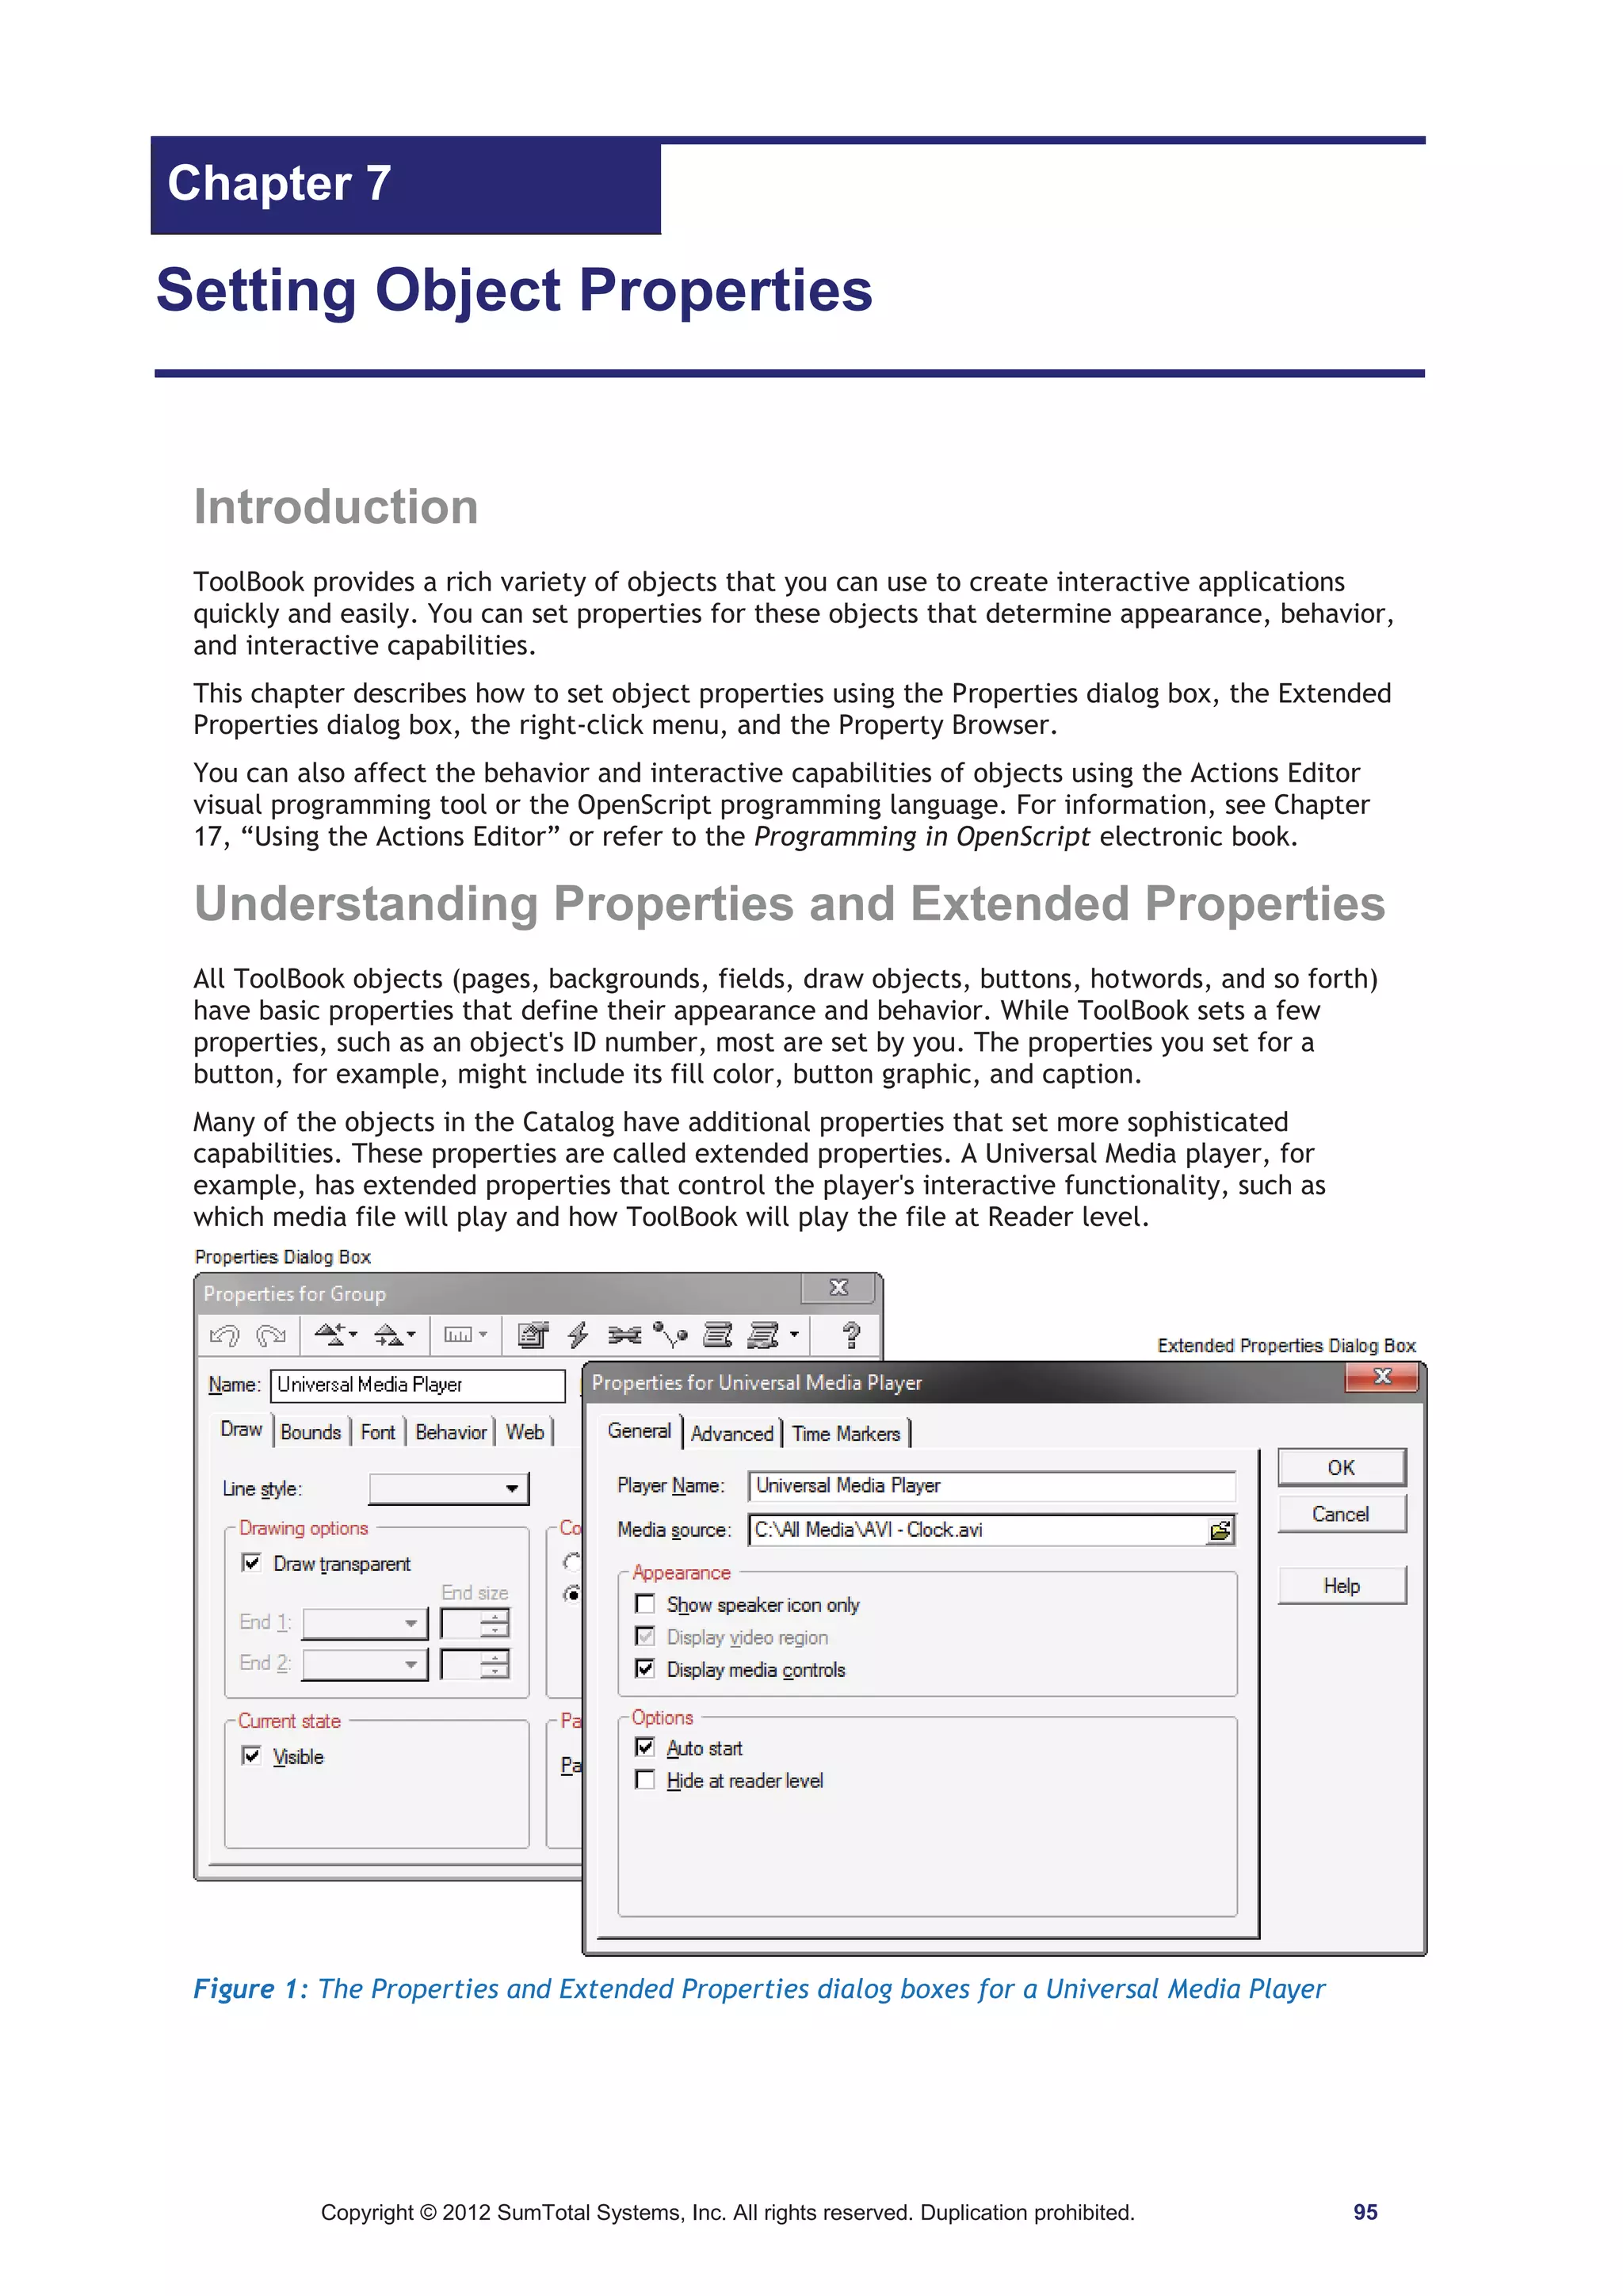
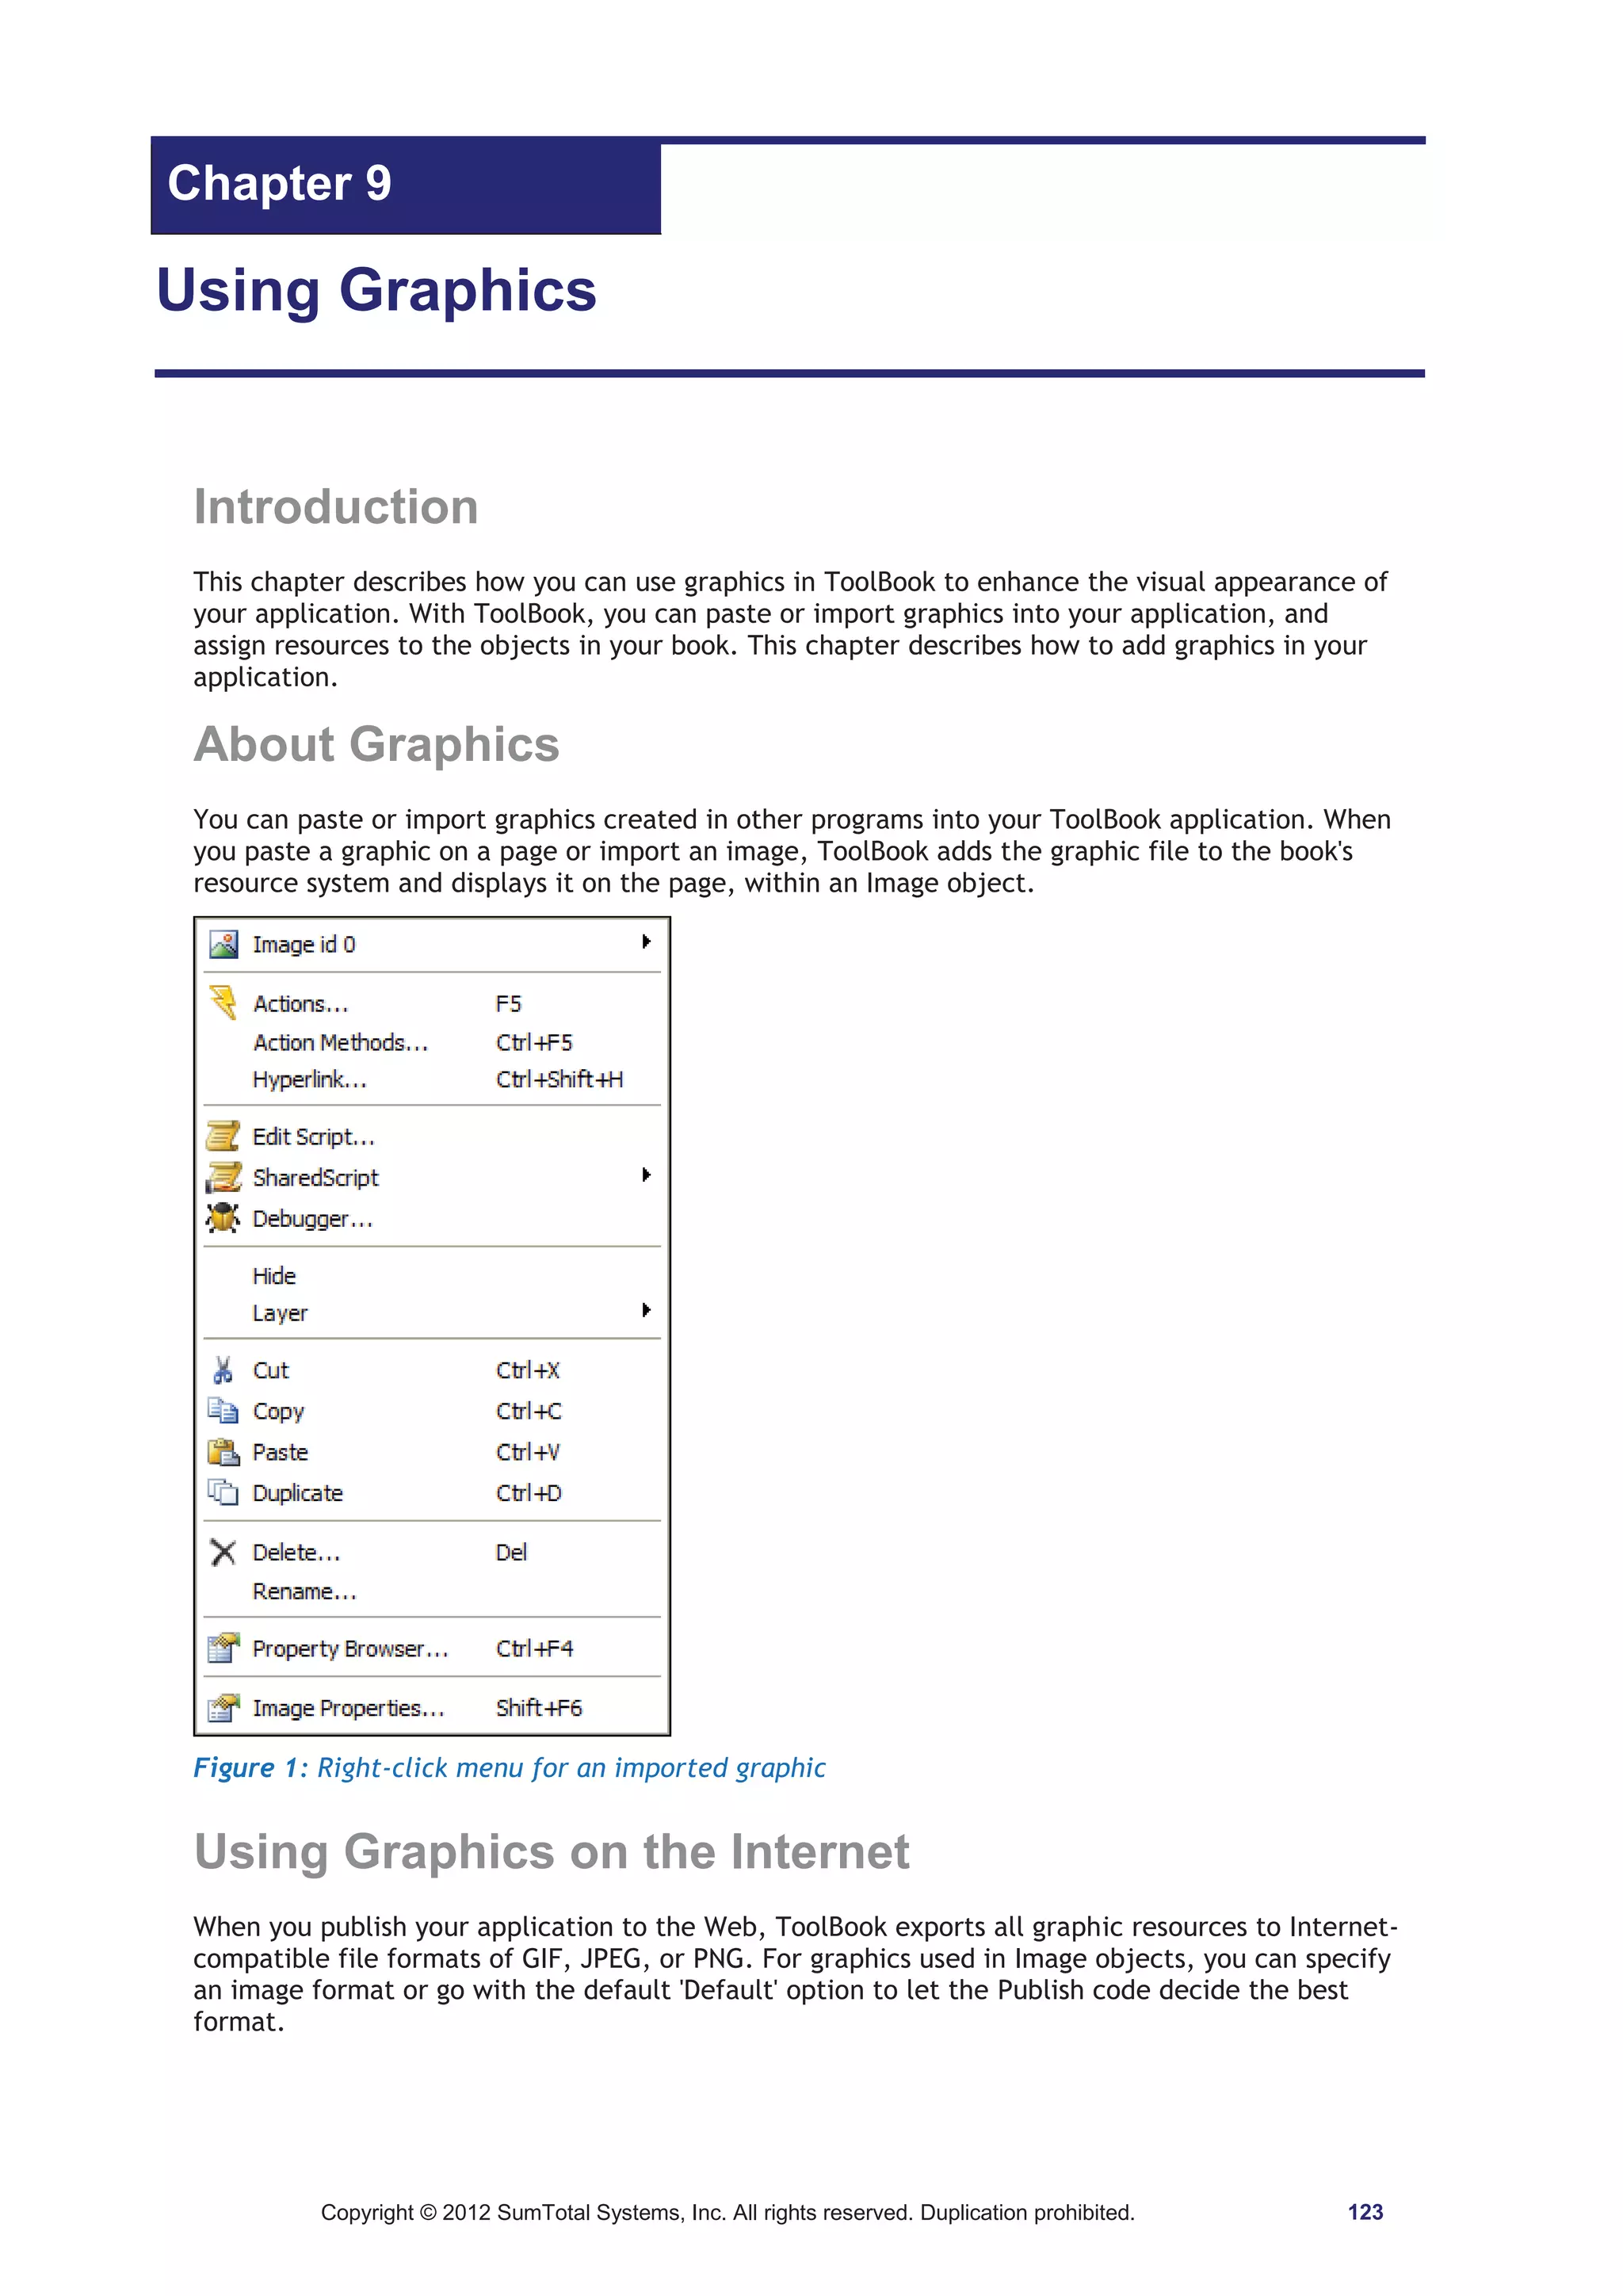
Application In ToolBook, one or more books designed for a particular purpose, such as online learning
or information management.
Argument A constant, variable, or expression passed to a function or handler. In the following
example, 33 is an argument:
x = sin(33)
See also constant, function, handler.
Array A Variable configured to work like a list or table of individual elements. For example, the
following specifies the value of one element in an array:
x[3] = x[1] text of field names
See also variable.
ASCII See American Standard Code for Information Interchange.
Audio CD Sound stored as tracks on a compact disc and played from the compact disc. Audio CD is
stored in digital format (as a series of binary values), converted to analog sound within the CD-ROM
drive, and then played back.
Audio Video Interleaved (AVI) A format for storing digital video in a file that alternates blocks of
visual and sound information. AVI files are particularly suited for storing on CD-ROM because their
interleaved format allows them to be efficiently retrieved by CD-ROM drives.
Author Level One of two working levels in ToolBook. Author level provides tools and commands for
creating and modifying objects, including pages, books, and backgrounds. Applications are built at
Author level and run at Reader level.
Automation A technology that allows you to access and manipulate the objects, properties, and
methods of other Windows applications from a ToolBook application.
AVI See Audio Video Interleaved.
Aviation Industry Computer-Based Training Committee (AICC) An industry standards group that
publishes guidelines for interaction between course management systems and computer-based
training.
Backdrop A bitmap image placed onto one or all of a book's backgrounds. Each backdrop becomes a
property of its background.
Background A design shared by pages in a book. Every book has at least one background. Objects on a
background appear on every page sharing that background. Several pages can share the same
background, and a book can contain several backgrounds.
Copyright © 2012 SumTotal Systems, Inc. All rights reserved. Duplication prohibited. 309](https://image.slidesharecdn.com/tb11-5userguide-141118165205-conversion-gate01/75/User-guide-Tool-Book-11-310-2048.jpg)