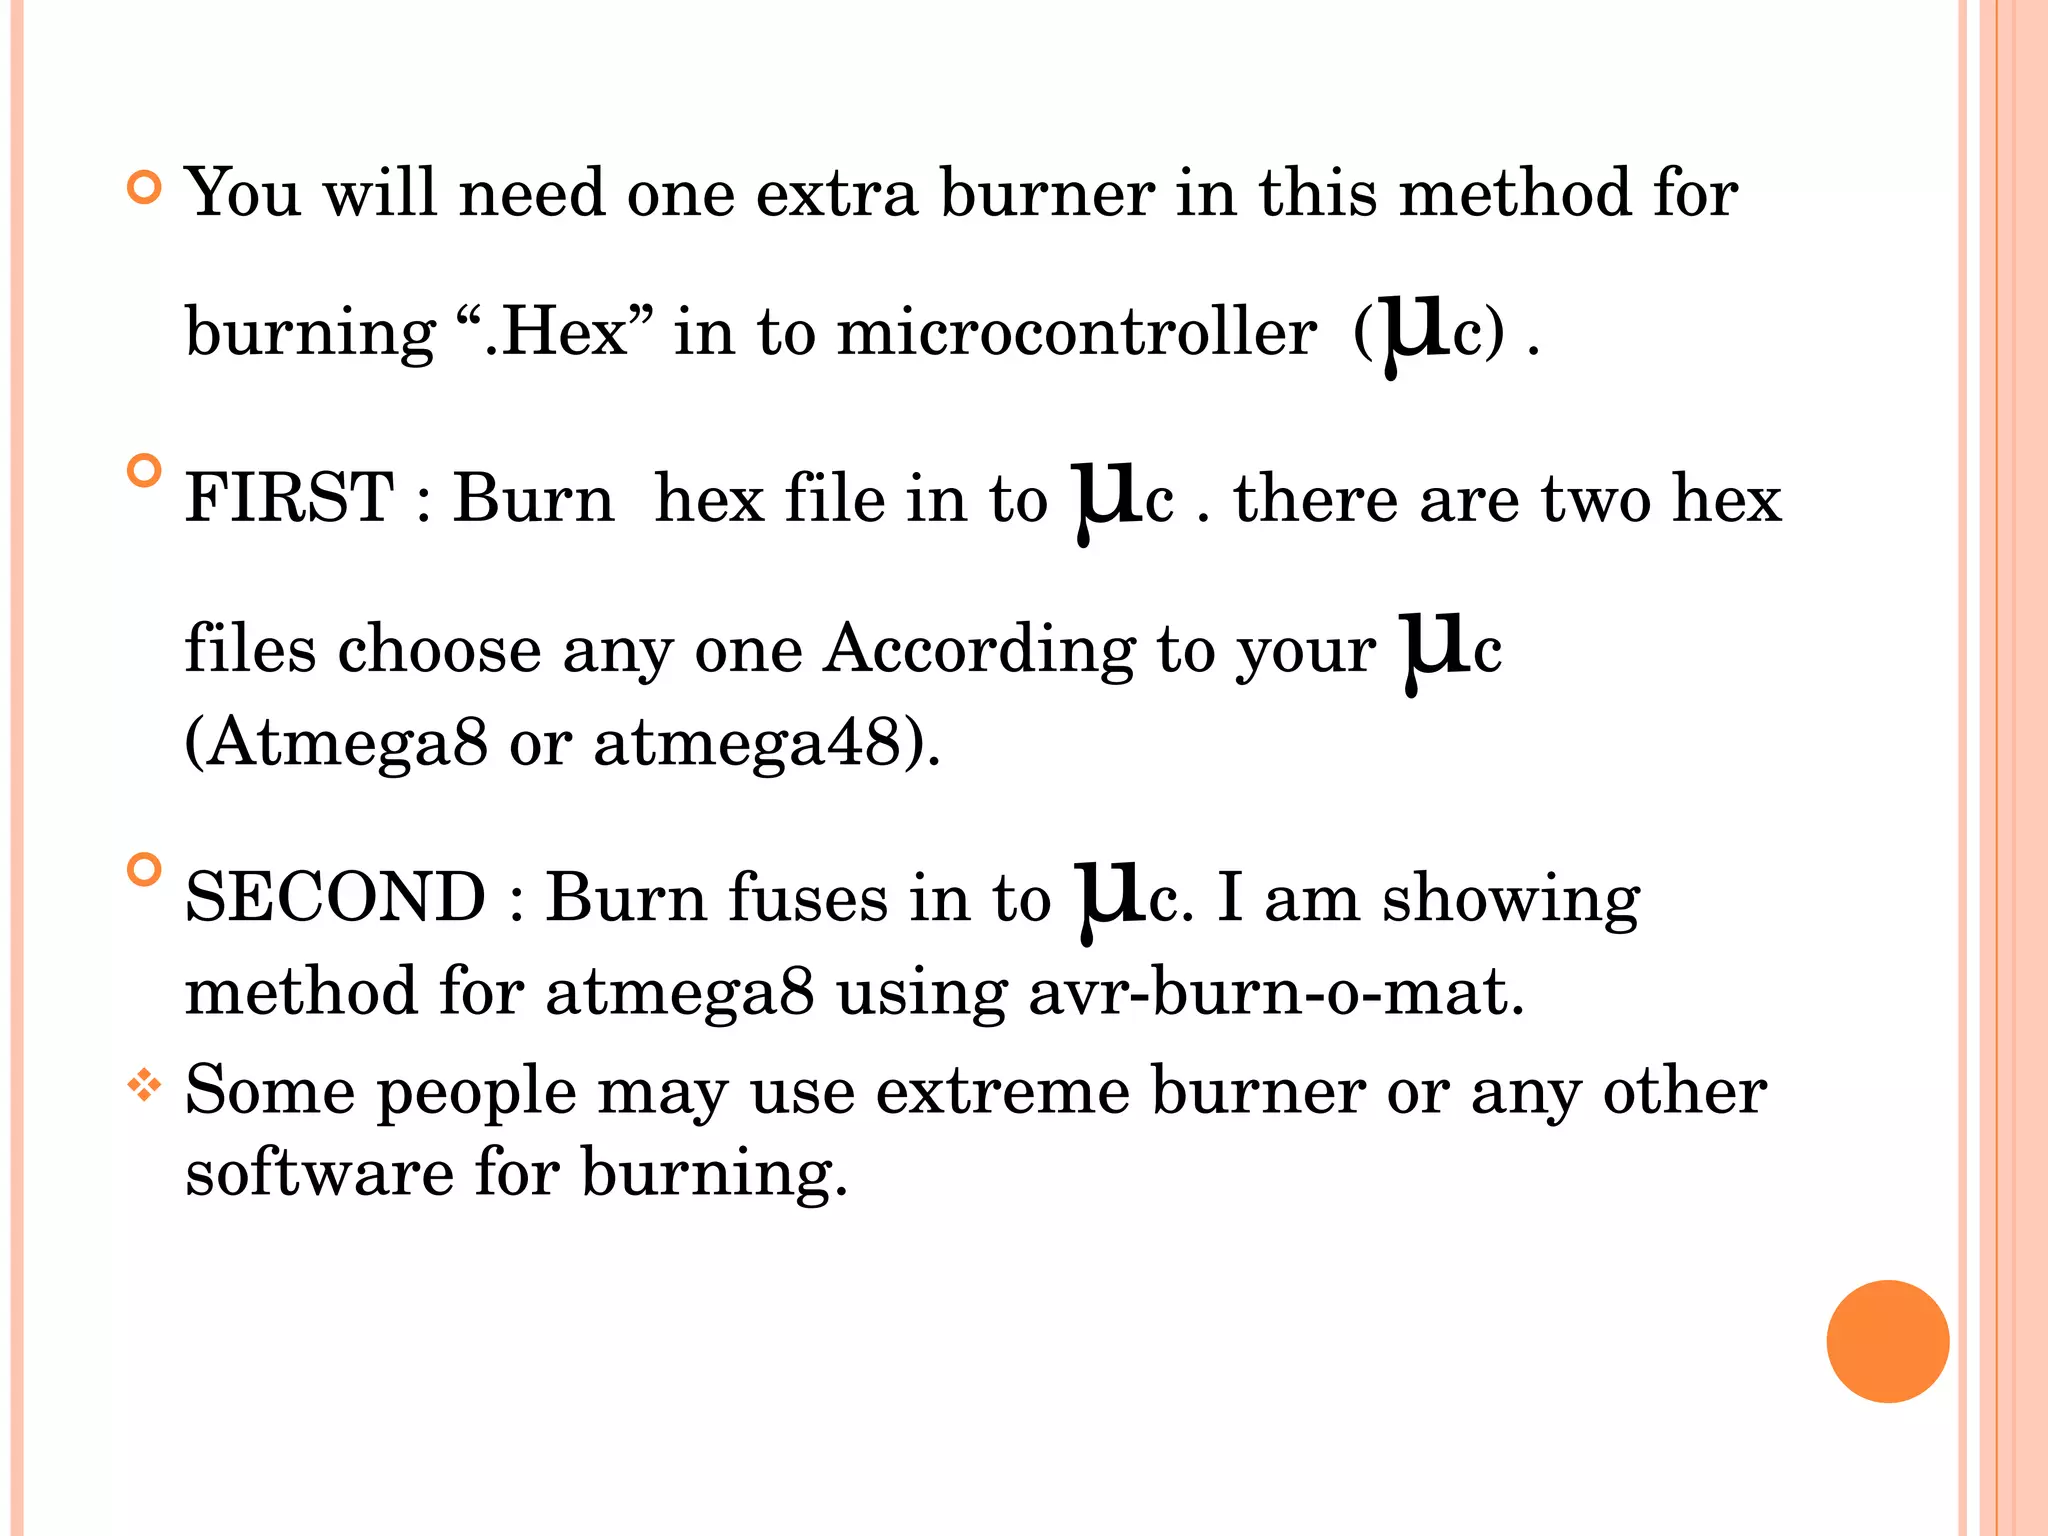
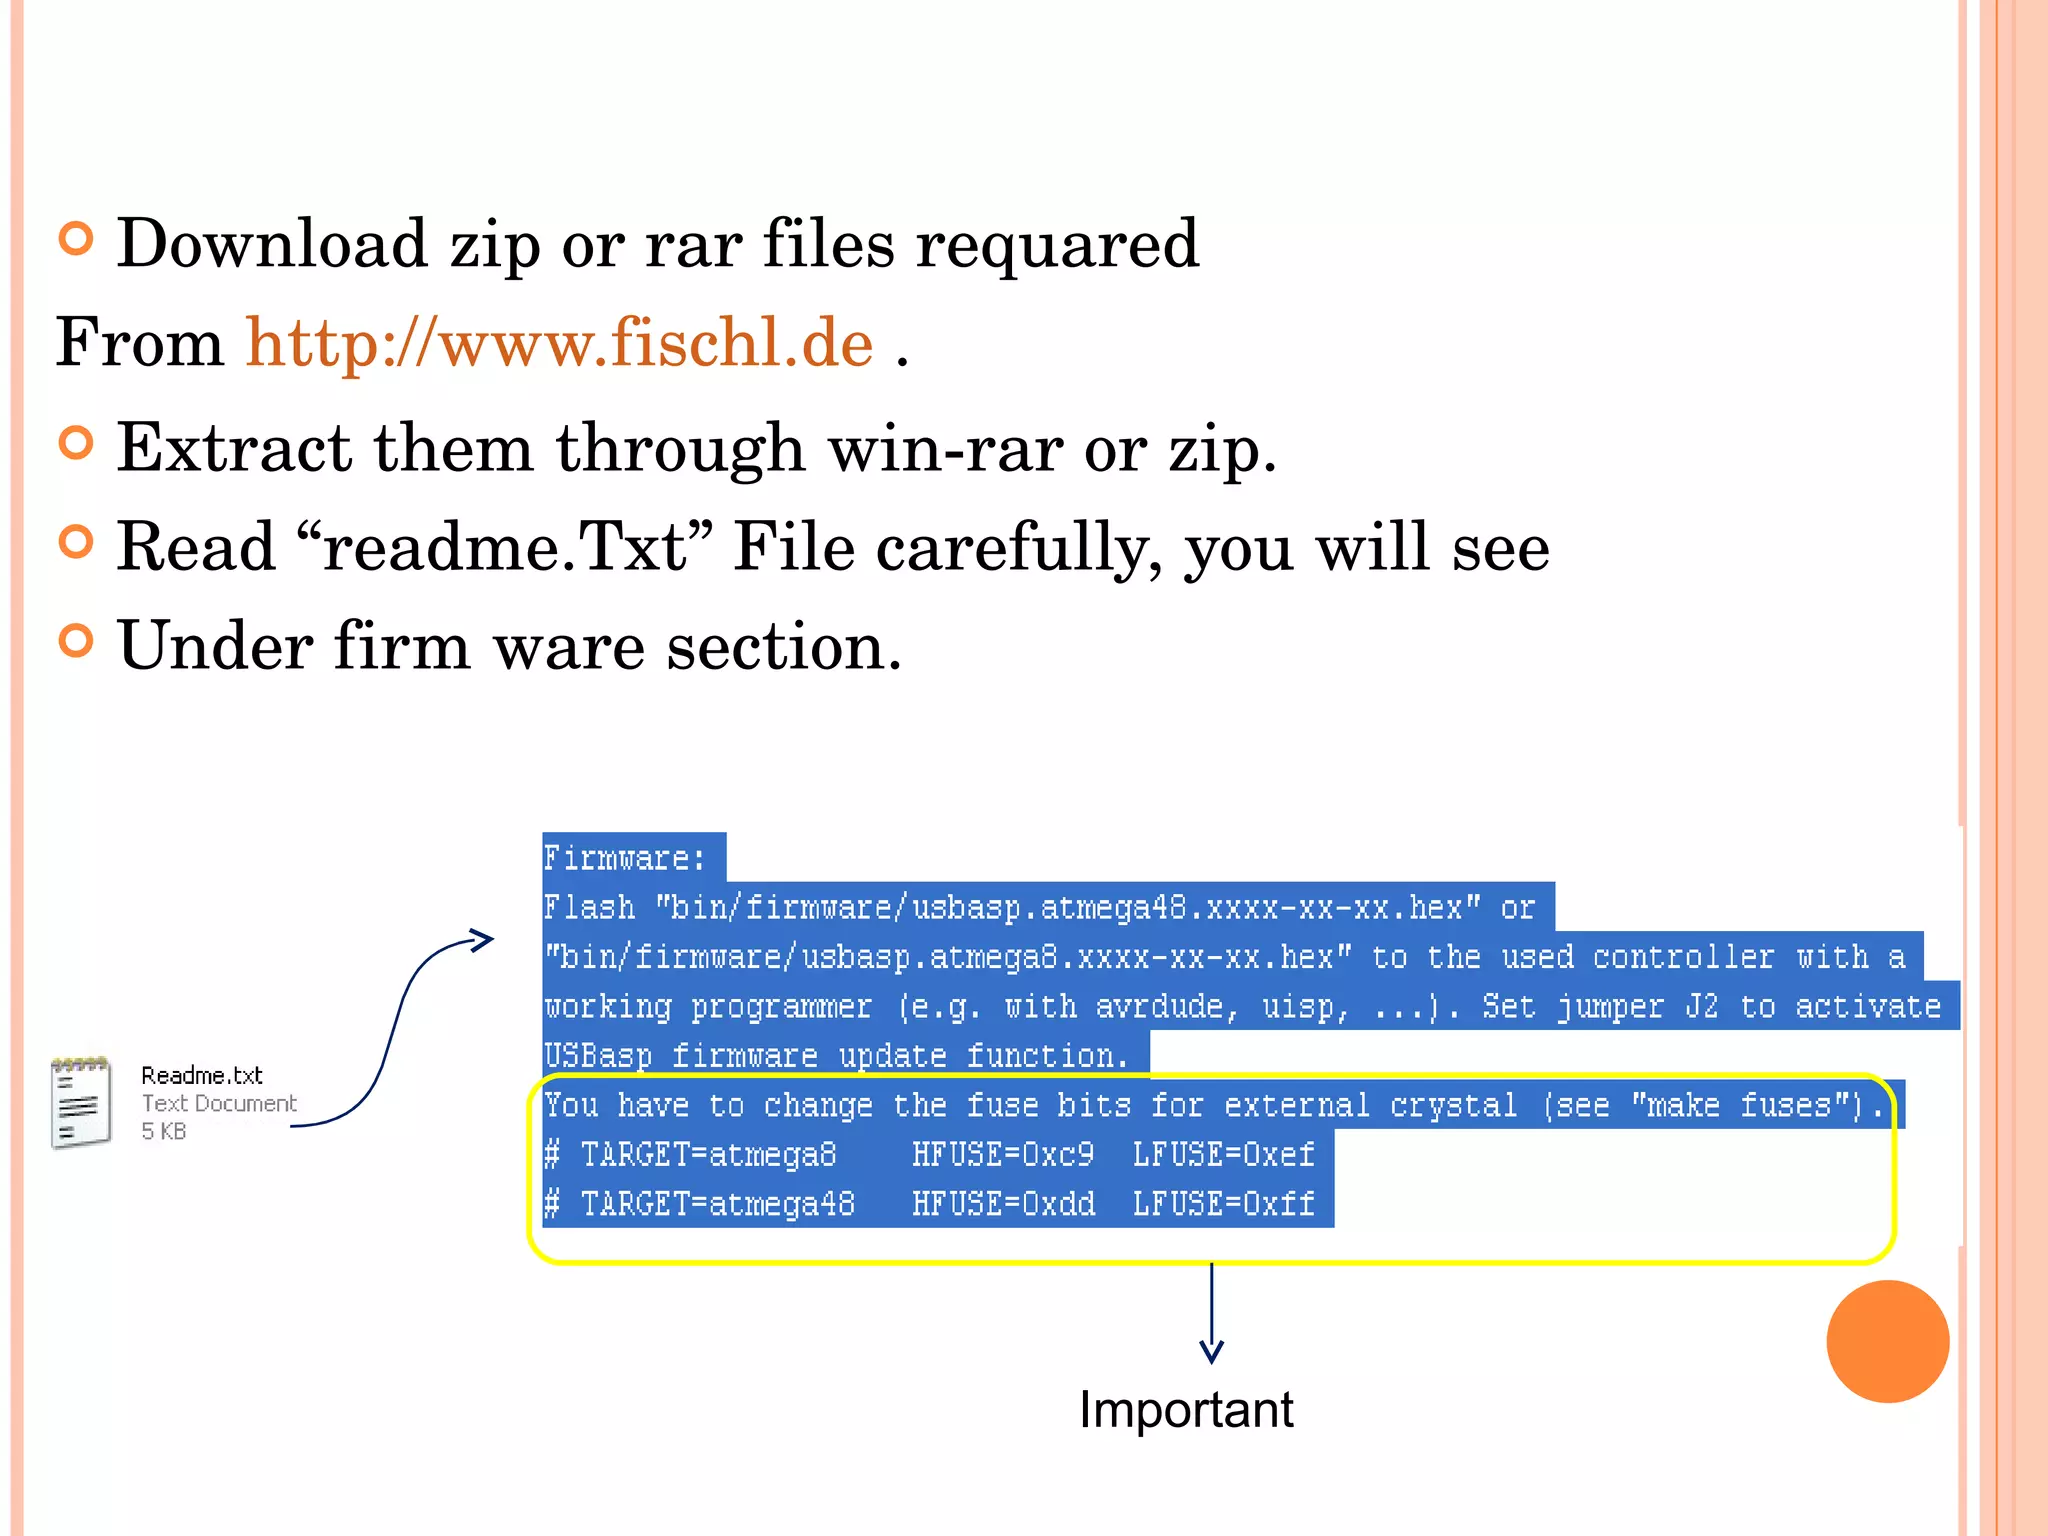
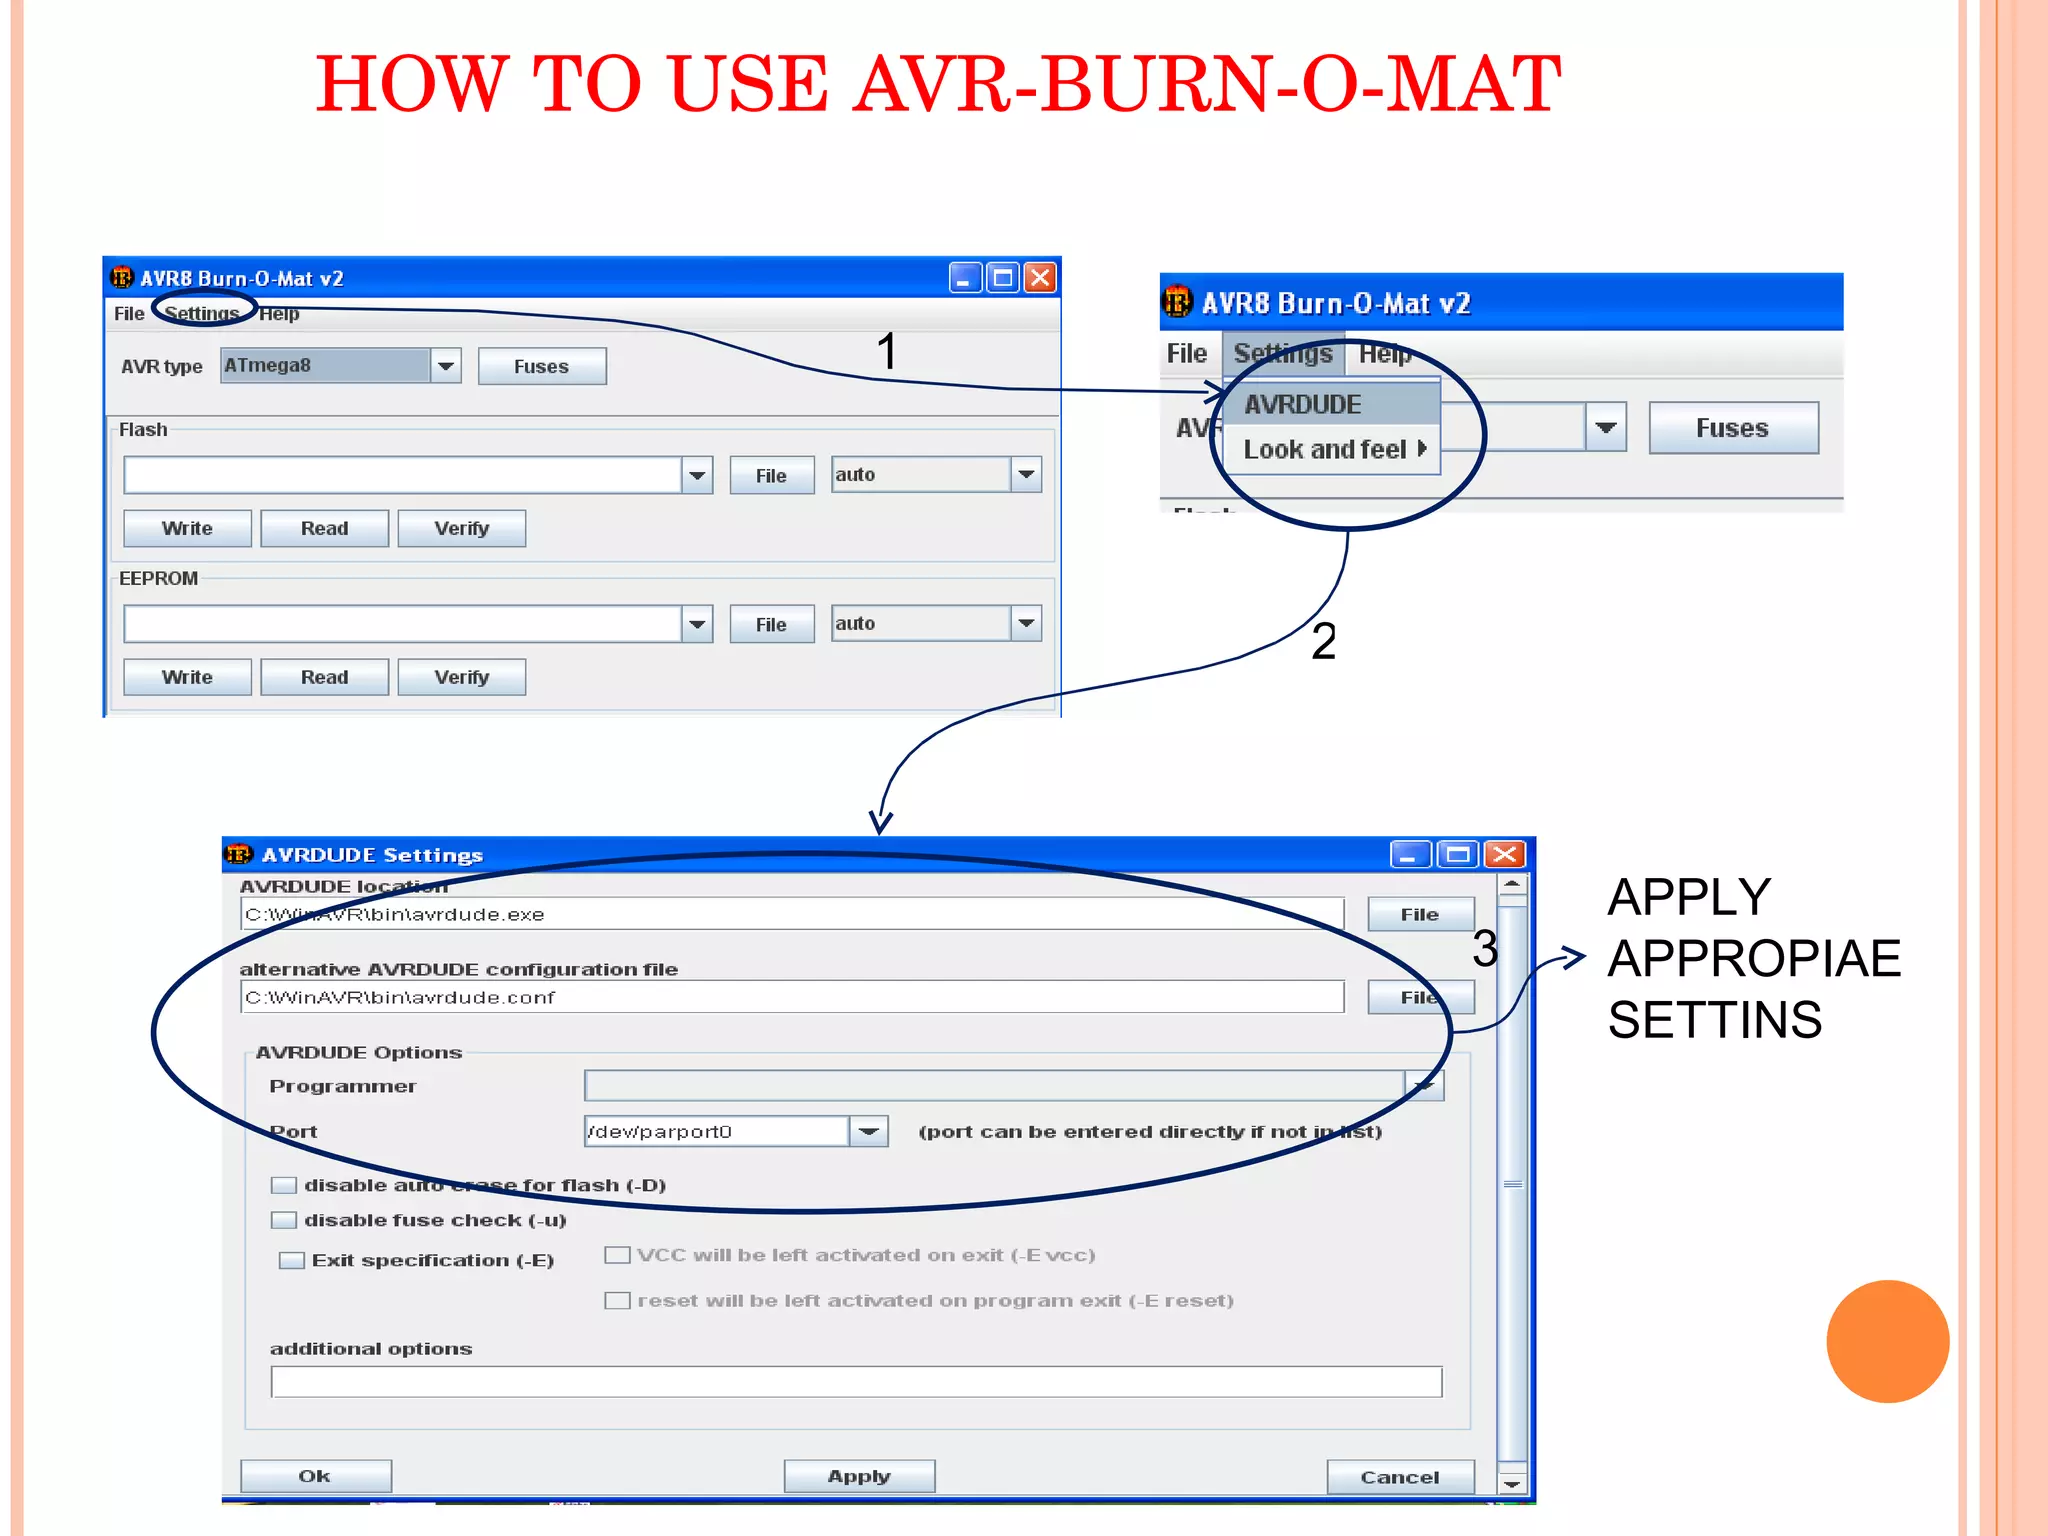
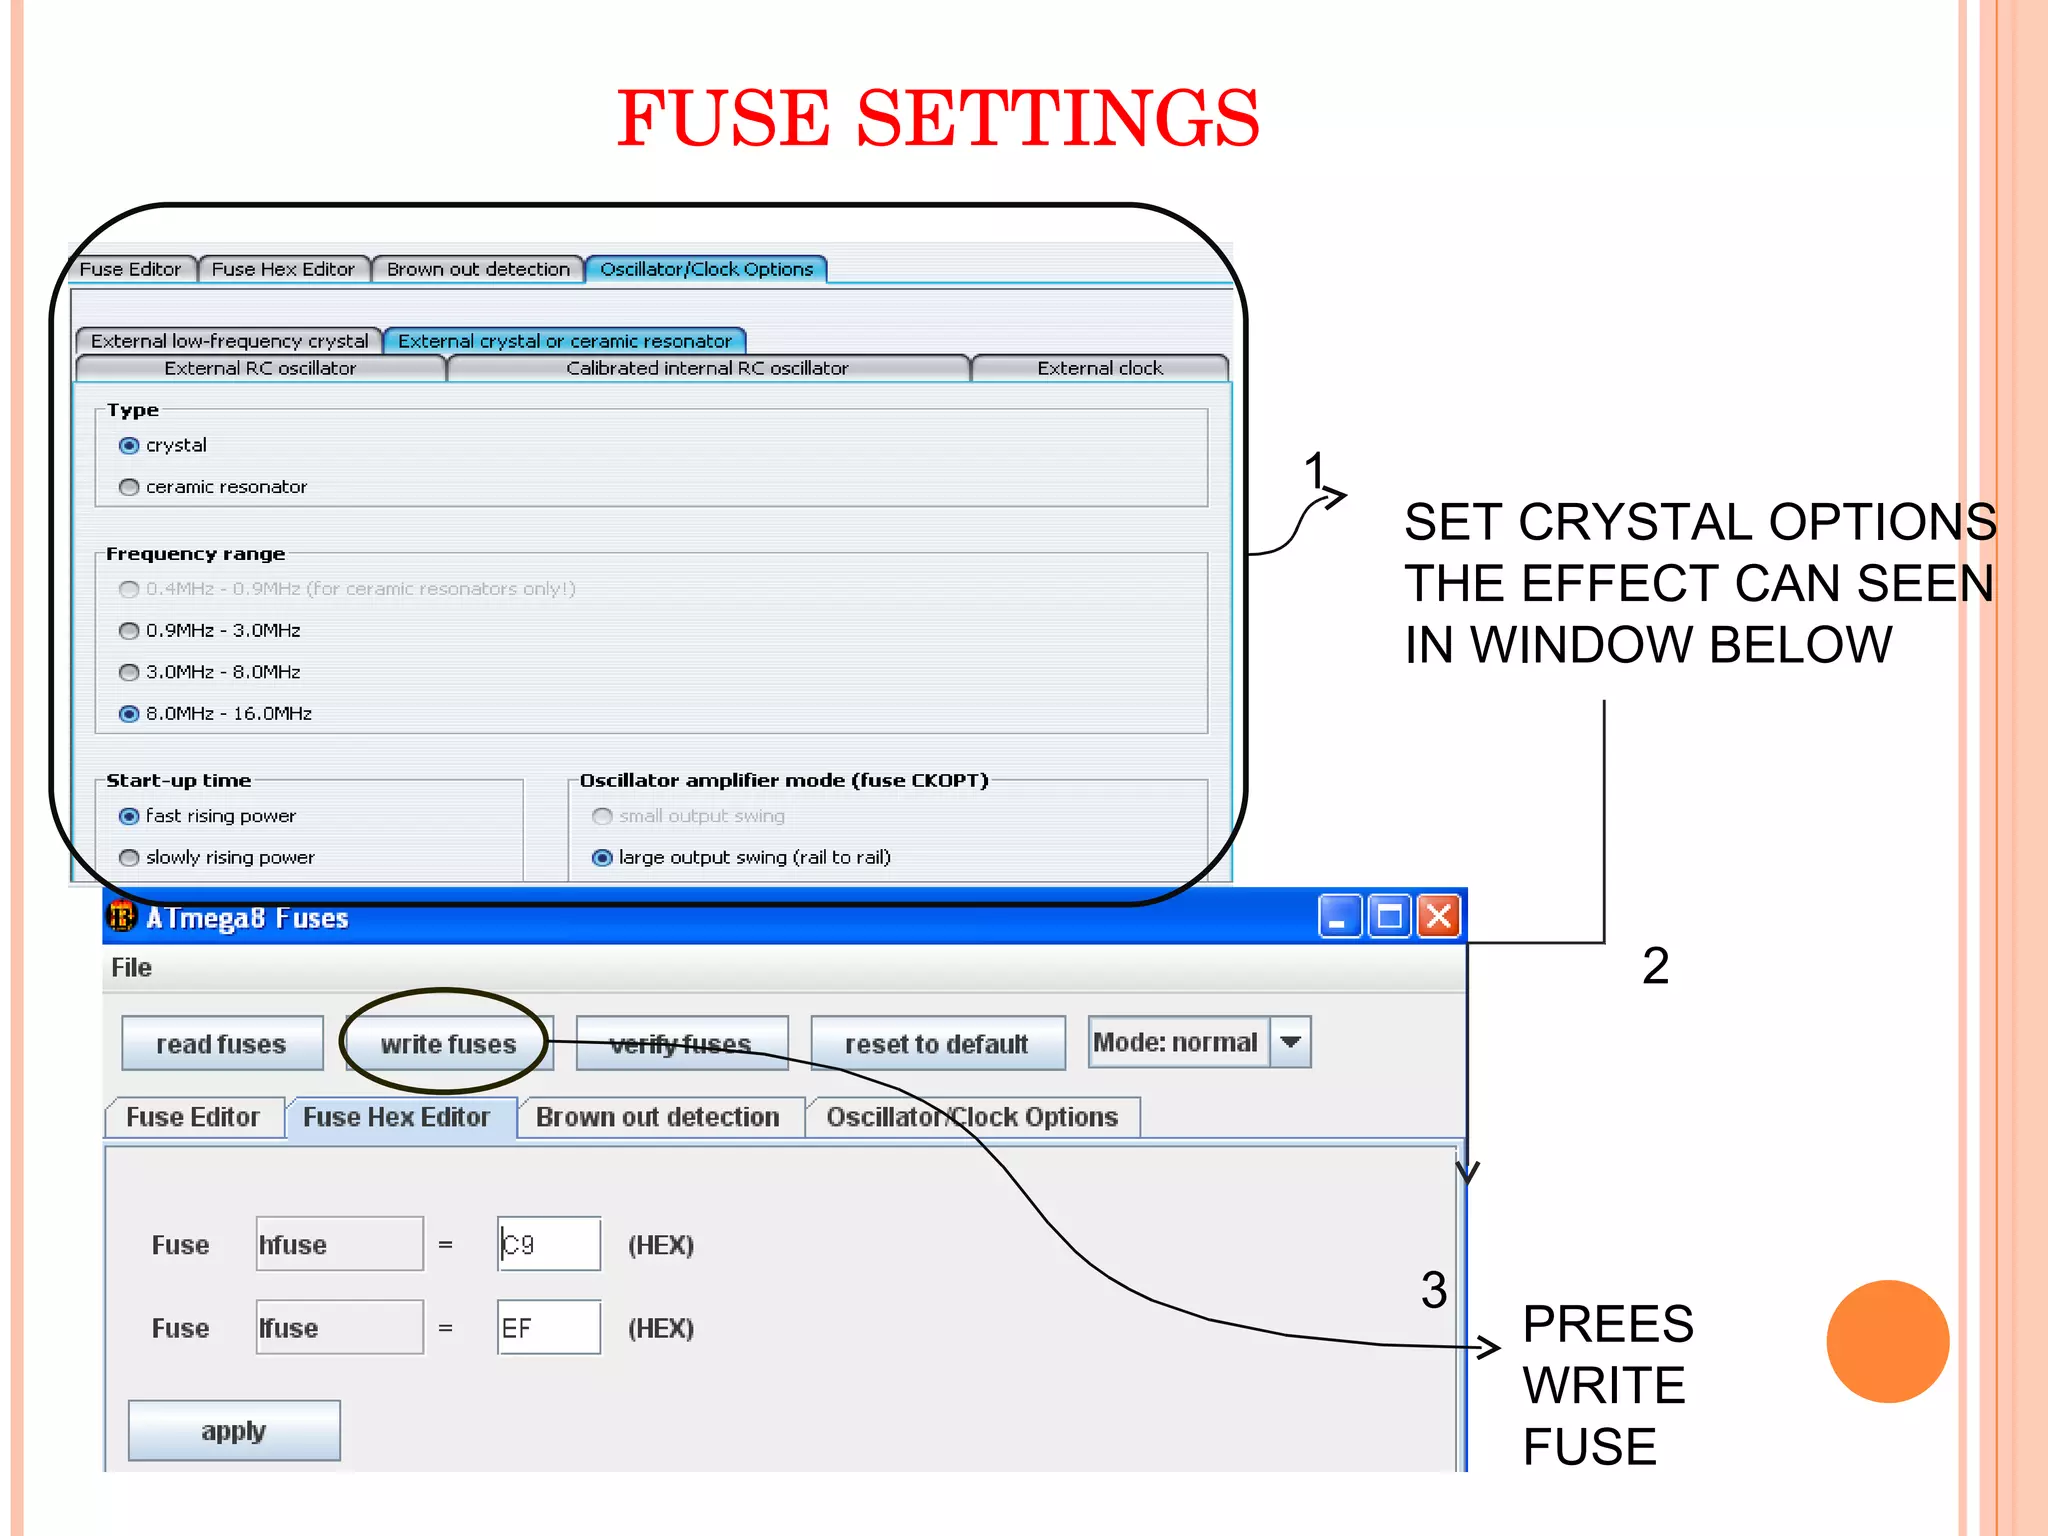
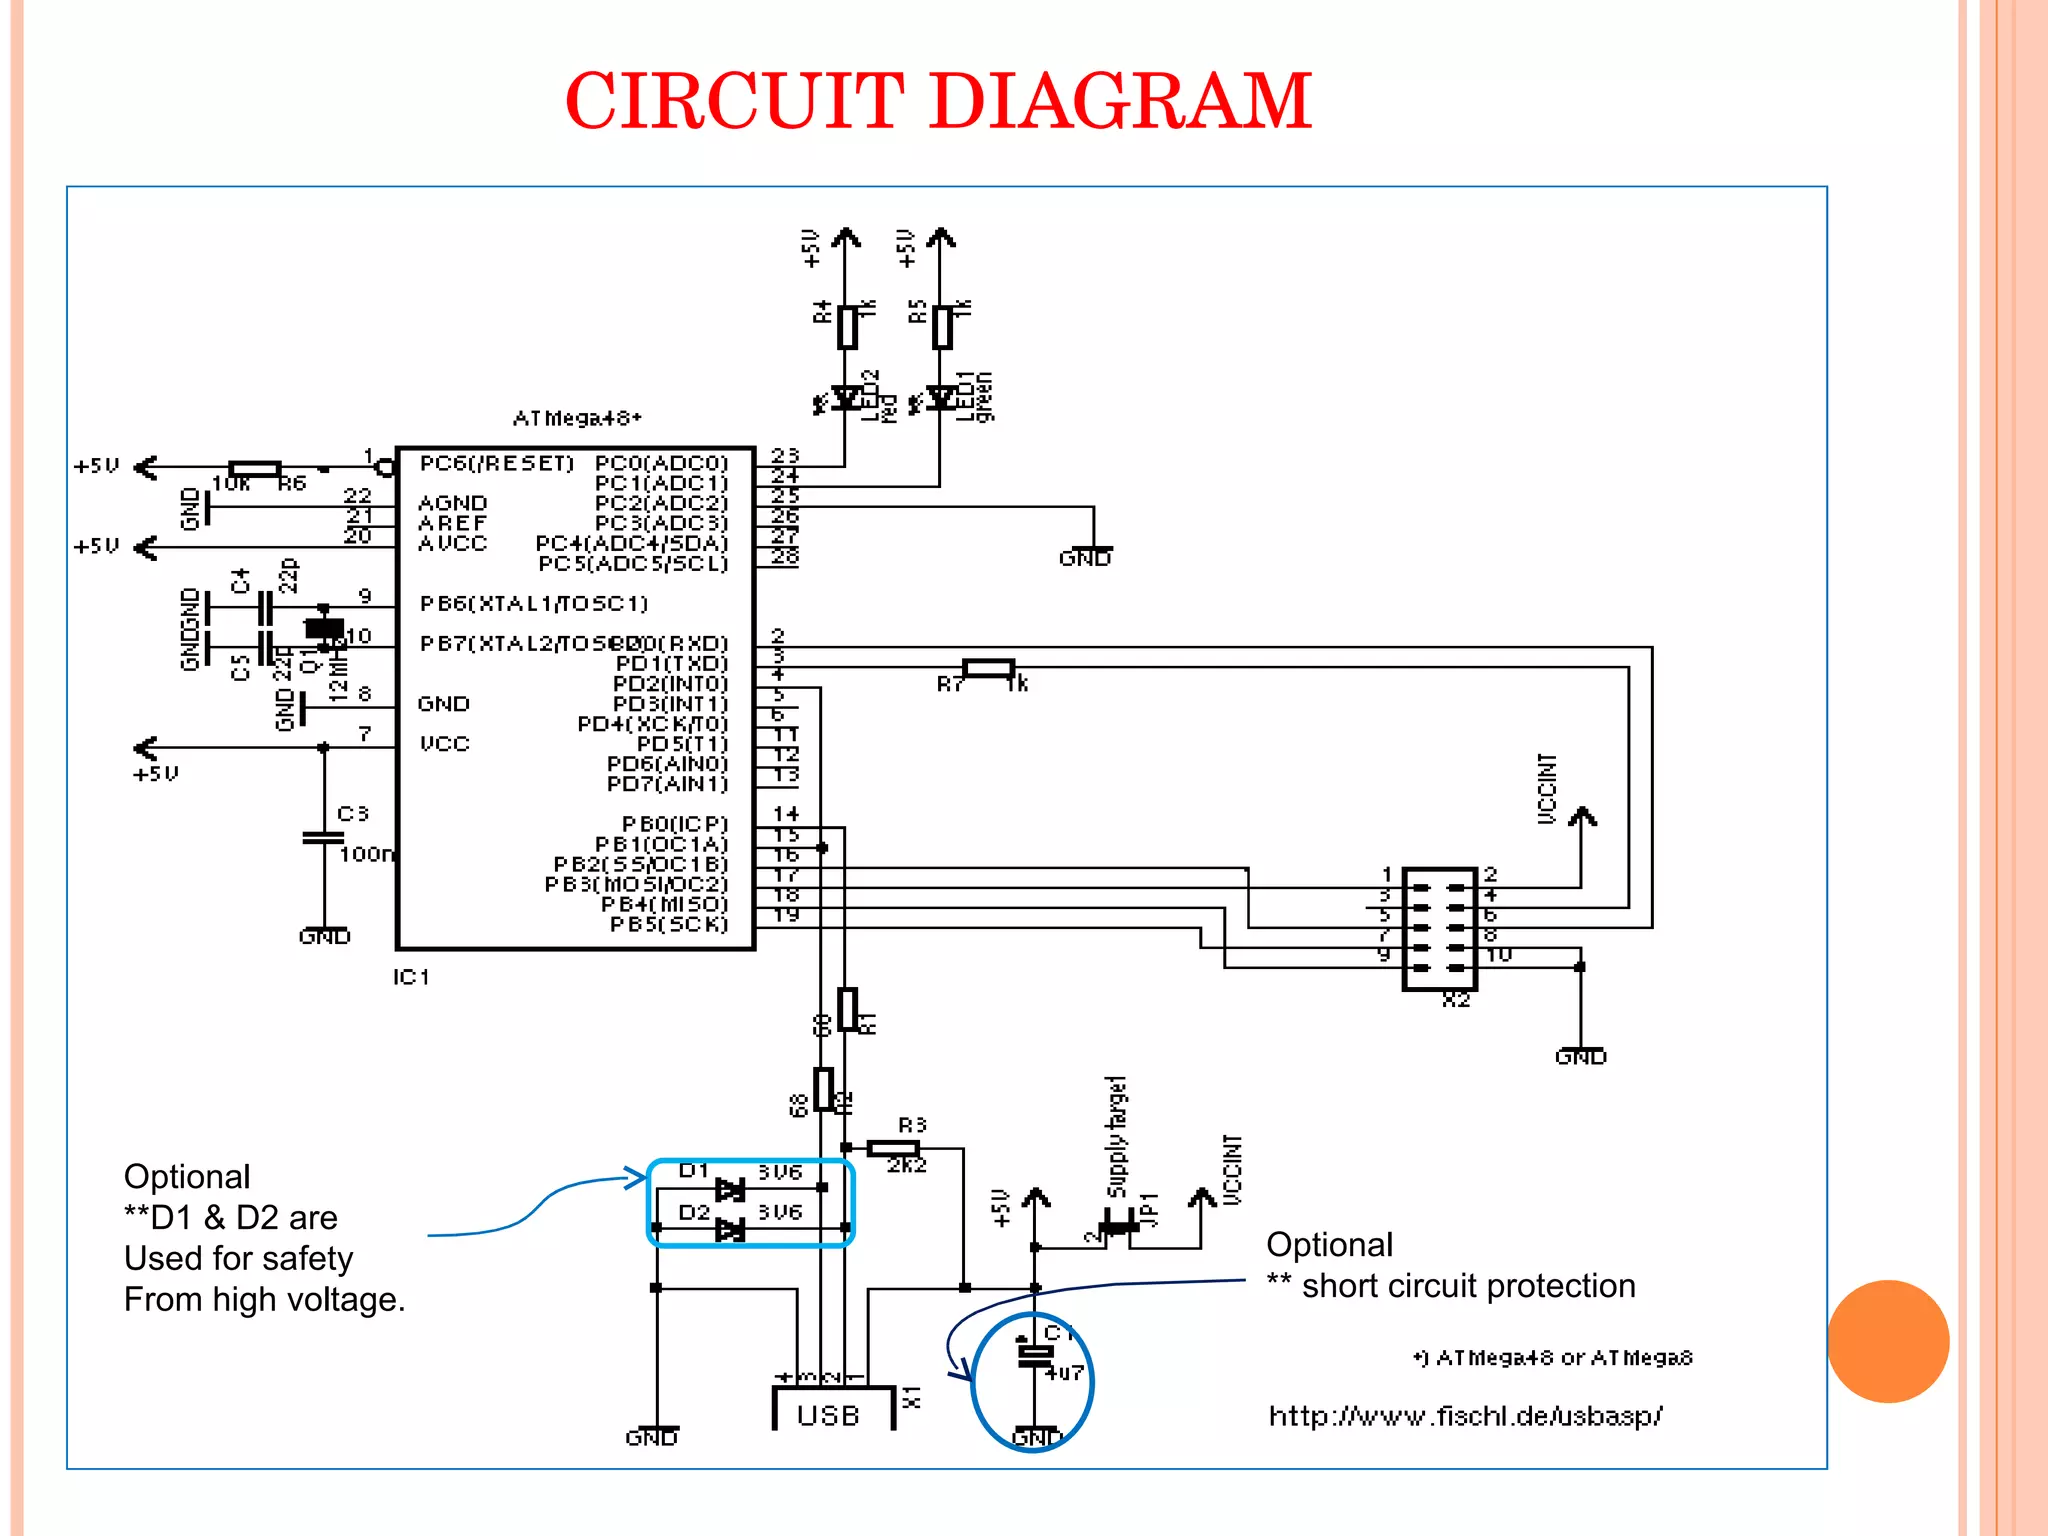
USB-ASP 10 EASY STEPS TO MAKE IT
WHY I MADE THIS? I made this project(usbasp) as secondary project during my main final year project (dtmf + computer controlled project). During my main final year project I used avr atmega8 microcontroller. Although I bought one burner from market , but I decided to make it of my own one time investment and as an effective alternative. I am sharing that process with all of you.
SOFTWARES WINAVR ( www.thoughtcrackers.blogspot.com ) AVR STUDIO (FROM ATMEL SITE) AVR-BURN-O-MAT ( www.thoughtcrackers.blogspot.com ) GO TO  http://www.fischl.de  FOR INFORMATION  ON USBASP.
You will need one extra burner in this method for burning “.Hex” in to microcontroller   ( µ c) . FIRST : Burn  hex file in to  µ c . there are two hex files choose any one According to your  µ c (Atmega8 or atmega48). SECOND : Burn fuses in to  µ c. I am showing method for atmega8 using avr-burn-o-mat. Some people may use extreme burner or any other software for burning.
Download zip or rar files requared From  http://www.fischl.de  . Extract them through win-rar or zip. Read “readme.Txt” File carefully, you will see  Under firm ware section. Important
HOW TO USE AVR-BURN-O-MAT APPLY APPROPIAE  SETTINS 1 2 3
FUSE SETTINGS SET CRYSTAL OPTIONS THE EFFECT CAN SEEN IN WINDOW BELOW PREES WRITE FUSE 1 2 3
CIRCUIT DIAGRAM Optional **D1 & D2 are  Used for safety From high voltage. Optional  ** short circuit protection
Now make wire connections on pcb , using circuit diagram( I am going to give you circuit diagram which was used by me in my project). During my project I  had removed all optional components from circuit shown. After applying all components ; Apply  µ c (In which you have burnt .Hex)on circuit.
THANK YOU MANGAL DAS WWW.THOUGHTCRACKERS.BLOGSPOT.COM SHARE THE KNOWLEDGE.

USBASP

  • 1.
    USB-ASP 10 EASYSTEPS TO MAKE IT
  • 2.
    WHY I MADETHIS? I made this project(usbasp) as secondary project during my main final year project (dtmf + computer controlled project). During my main final year project I used avr atmega8 microcontroller. Although I bought one burner from market , but I decided to make it of my own one time investment and as an effective alternative. I am sharing that process with all of you.
  • 3.
    SOFTWARES WINAVR (www.thoughtcrackers.blogspot.com ) AVR STUDIO (FROM ATMEL SITE) AVR-BURN-O-MAT ( www.thoughtcrackers.blogspot.com ) GO TO http://www.fischl.de FOR INFORMATION ON USBASP.
  • 4.
    You will needone extra burner in this method for burning “.Hex” in to microcontroller ( µ c) . FIRST : Burn hex file in to µ c . there are two hex files choose any one According to your µ c (Atmega8 or atmega48). SECOND : Burn fuses in to µ c. I am showing method for atmega8 using avr-burn-o-mat. Some people may use extreme burner or any other software for burning.
  • 5.
    Download zip orrar files requared From http://www.fischl.de . Extract them through win-rar or zip. Read “readme.Txt” File carefully, you will see Under firm ware section. Important
  • 6.
    HOW TO USEAVR-BURN-O-MAT APPLY APPROPIAE SETTINS 1 2 3
  • 7.
    FUSE SETTINGS SETCRYSTAL OPTIONS THE EFFECT CAN SEEN IN WINDOW BELOW PREES WRITE FUSE 1 2 3
  • 8.
    CIRCUIT DIAGRAM Optional**D1 & D2 are Used for safety From high voltage. Optional ** short circuit protection
  • 9.
    Now make wireconnections on pcb , using circuit diagram( I am going to give you circuit diagram which was used by me in my project). During my project I had removed all optional components from circuit shown. After applying all components ; Apply µ c (In which you have burnt .Hex)on circuit.
  • 10.
    THANK YOU MANGALDAS WWW.THOUGHTCRACKERS.BLOGSPOT.COM SHARE THE KNOWLEDGE.