Downloaded 12 times
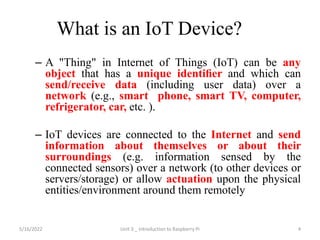


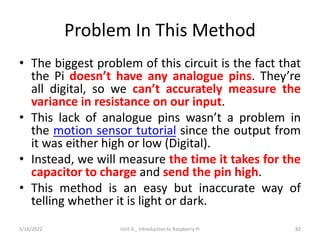


![Python Code (Contd.,)
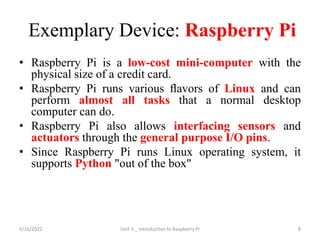
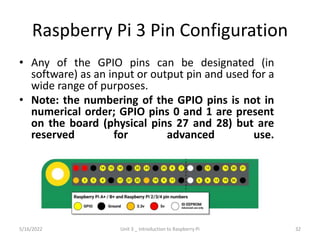
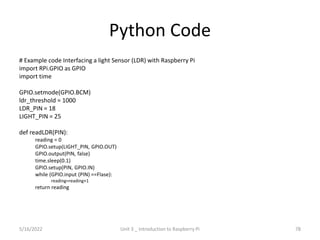
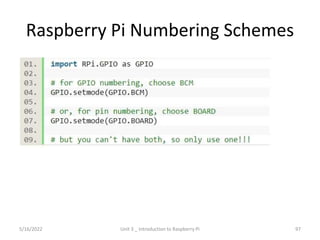
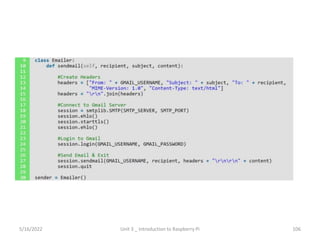
class Emailer:
def sendmail(self, recipient, subject, content):
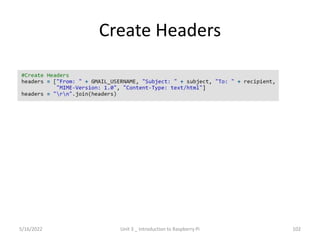
#Create Headers
headers = ["From: " + GMAIL_USERNAME, "Subject: " + subject, "To: " + recipient,
"MIME-Version: 1.0", "Content-Type: text/html"]
headers = "rn".join(headers)
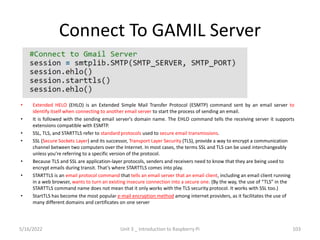
#Connect to Gmail Server
session = smtplib.SMTP(SMTP_SERVER, SMTP_PORT)
session.ehlo()
session.starttls()
session.ehlo()
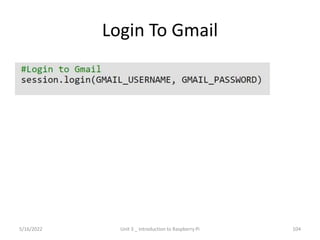
#Login to Gmail
session.login(GMAIL_USERNAME, GMAIL_PASSWORD)
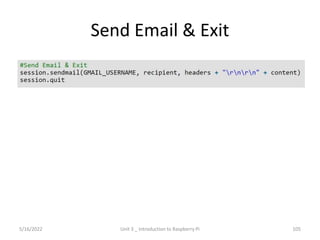
#Send Email & Exit
session.sendmail(GMAIL_USERNAME, recipient, headers + "rnrn" + content)
session.quit
sender = Emailer()
112
5/16/2022 Unit 3 _ Introduction to Raspberry Pi](https://image.slidesharecdn.com/unit3complete-220516120136-2c633c64/85/Unit-3-Complete-pptx-112-320.jpg)

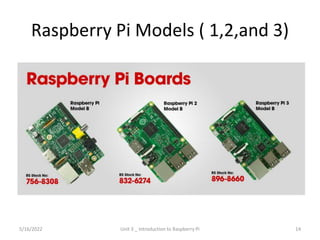
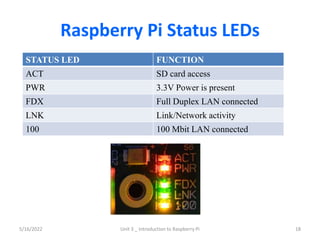
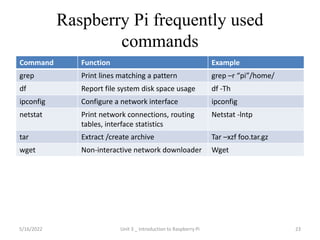
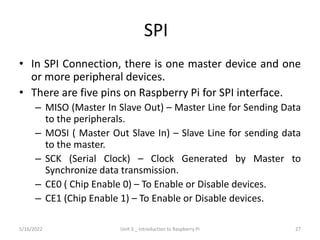
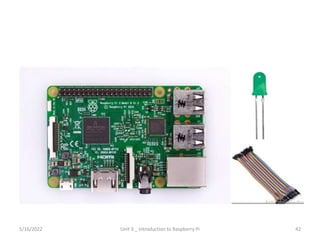
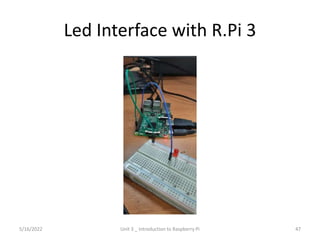
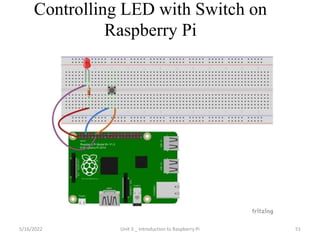
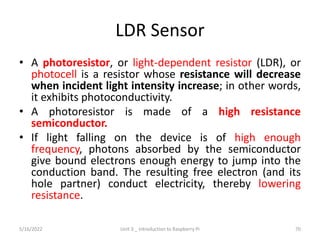
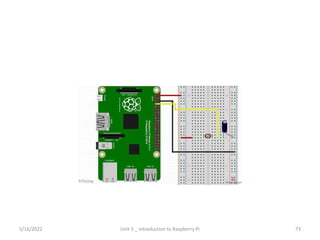
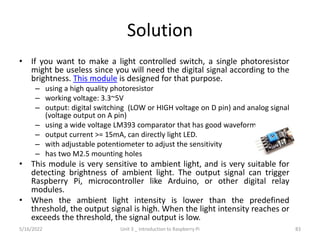
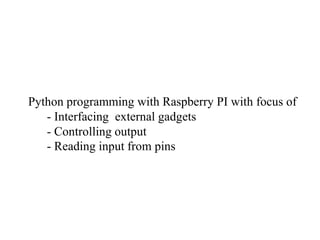
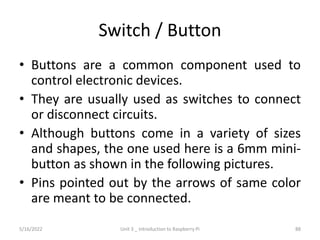
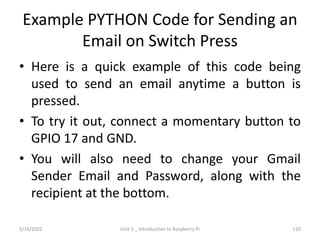
This document provides an introduction to using Raspberry Pi for Internet of Things applications. It begins with defining IoT devices and their basic building blocks. Raspberry Pi is presented as an exemplary IoT device due to its low cost, small size, and ability to interface with sensors and actuators via GPIO pins. Programming Raspberry Pi with Python for applications like controlling outputs and reading inputs from pins is discussed. Interfaces like serial, SPI, and I2C are also introduced. Examples provided include blinking an LED, building a traffic light, and controlling an LED with a switch.


![[PPT] _ Unit 2 _ Complete PPT.pptx](https://cdn.slidesharecdn.com/ss_thumbnails/pptunit2completeppt-220516115836-332a1107-thumbnail.jpg?width=640&height=640&fit=bounds)


![[PPT] _ Unit 5 _ Evolve.pptx](https://cdn.slidesharecdn.com/ss_thumbnails/pptunit5evolve-220707120639-5c6df843-thumbnail.jpg?width=640&height=640&fit=bounds)
![[PPT] _ Unit 4 _ Engage.pptx](https://cdn.slidesharecdn.com/ss_thumbnails/pptunit4engage-220707115545-9dce3530-thumbnail.jpg?width=640&height=640&fit=bounds)
![[PPT] _ Unit 3 _ Experiment.pptx](https://cdn.slidesharecdn.com/ss_thumbnails/pptunit3experiment-220707114954-1996fe08-thumbnail.jpg?width=640&height=640&fit=bounds)


![[PPT] _ UNIT 1 _ COMPLETE.pptx](https://cdn.slidesharecdn.com/ss_thumbnails/pptunit1complete-220516121012-45cab1a3-thumbnail.jpg?width=640&height=640&fit=bounds)

![[PPT] _ Unit 2 _ 9.0 _ Domain Specific IoT _Home Automation.pdf](https://cdn.slidesharecdn.com/ss_thumbnails/pptunit29-220516115946-098632b6-thumbnail.jpg?width=640&height=640&fit=bounds)
![[PPT] _ 1.3 Bluetooth.pptx](https://cdn.slidesharecdn.com/ss_thumbnails/ppt1-220516115531-7277fcc6-thumbnail.jpg?width=640&height=640&fit=bounds)


