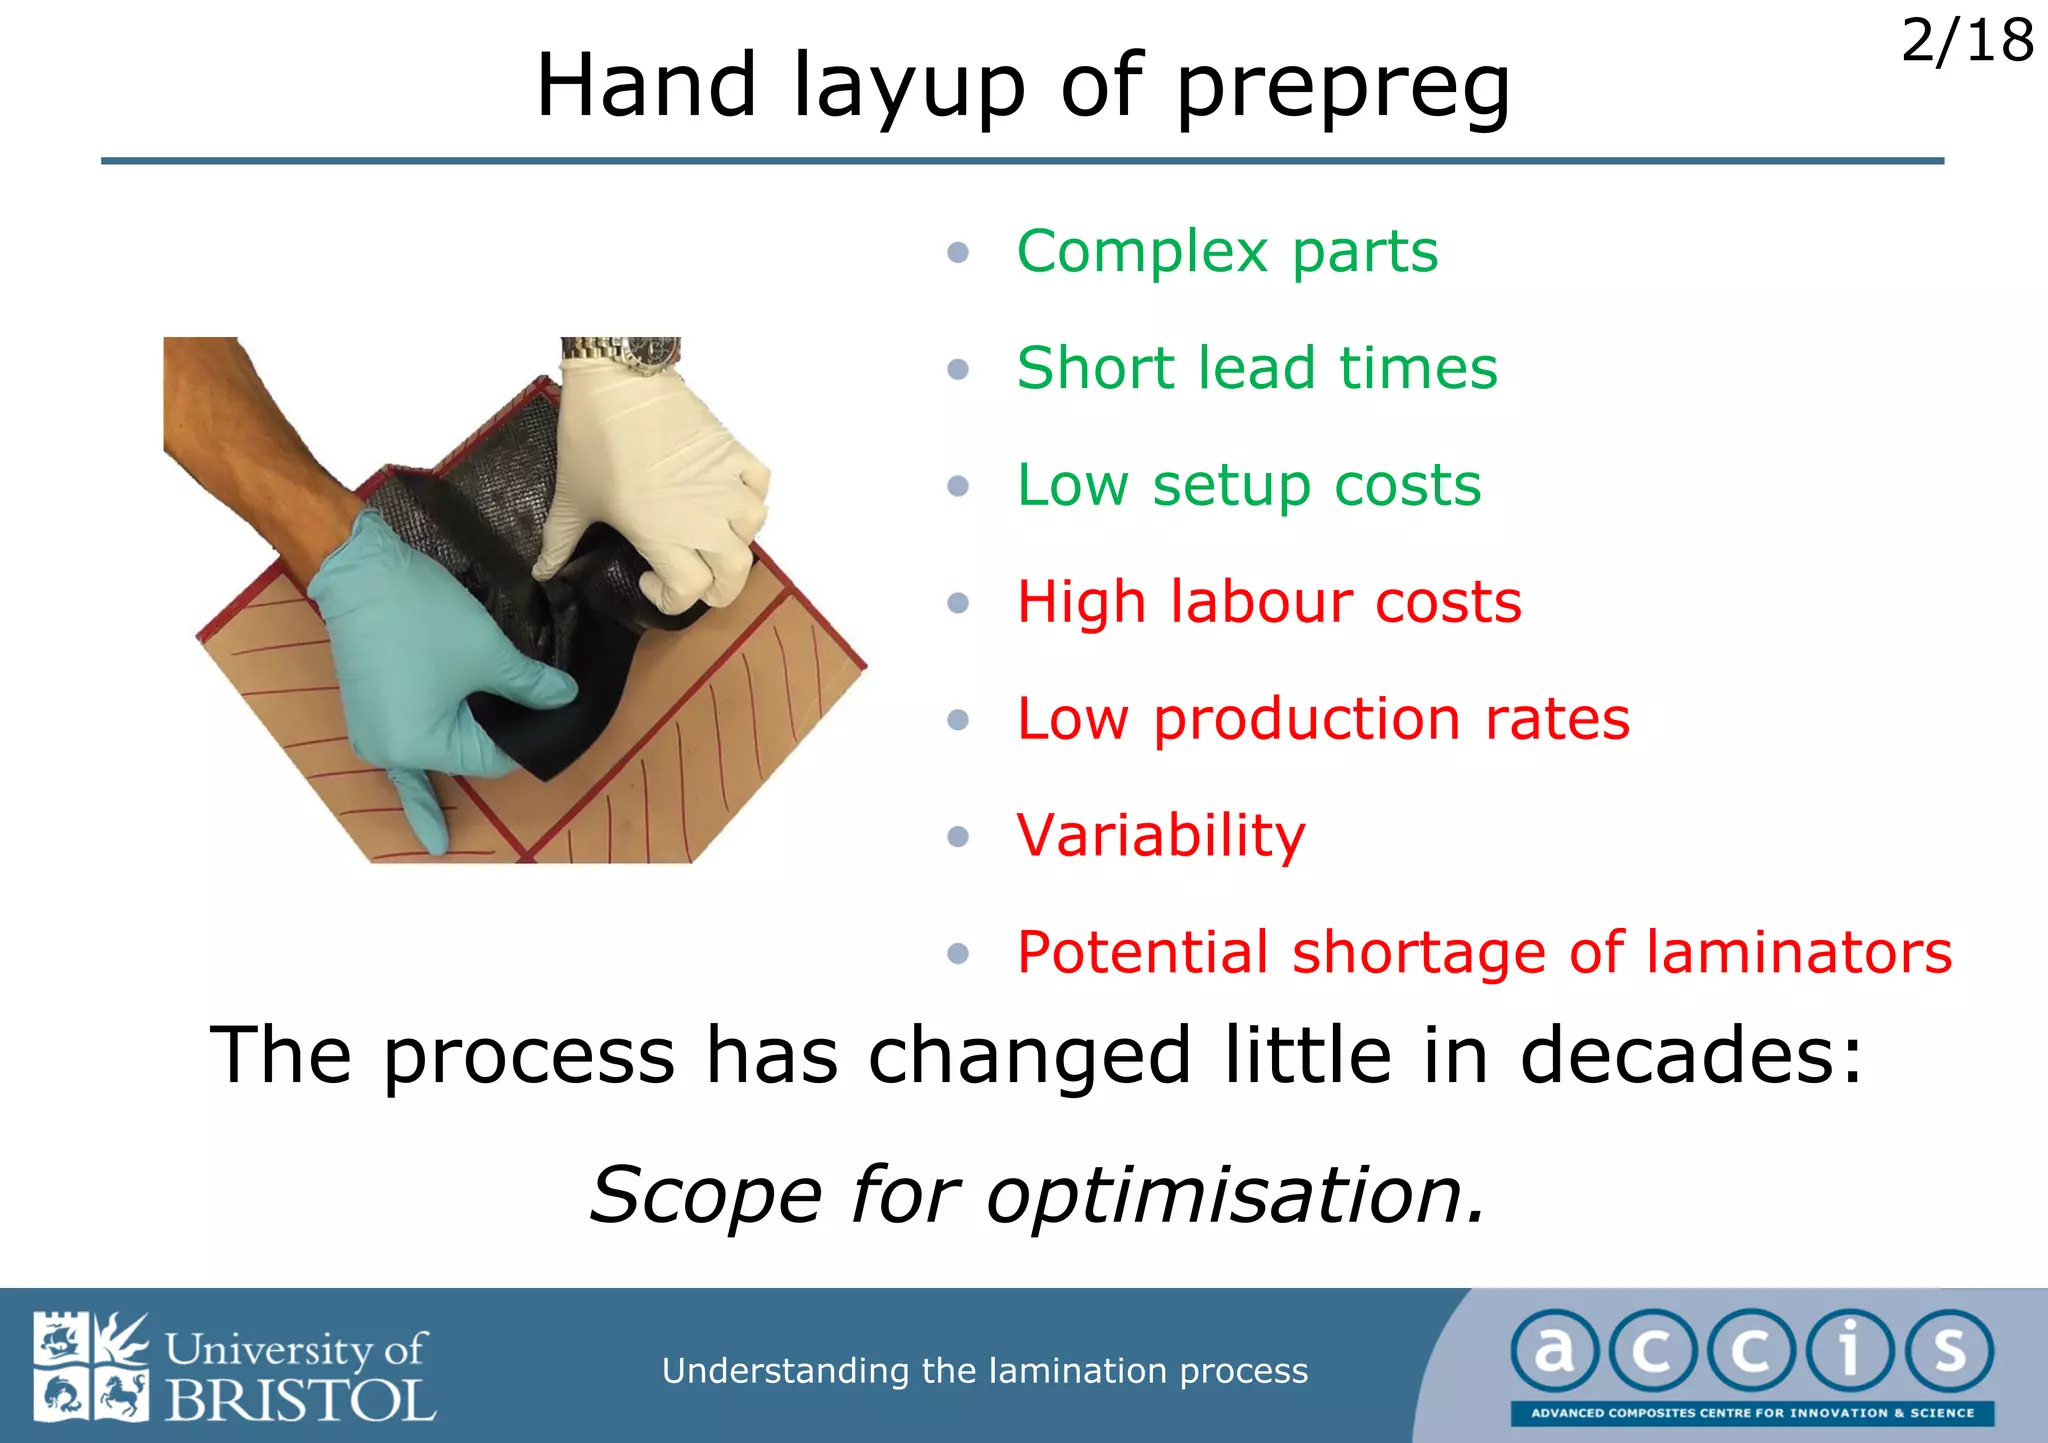
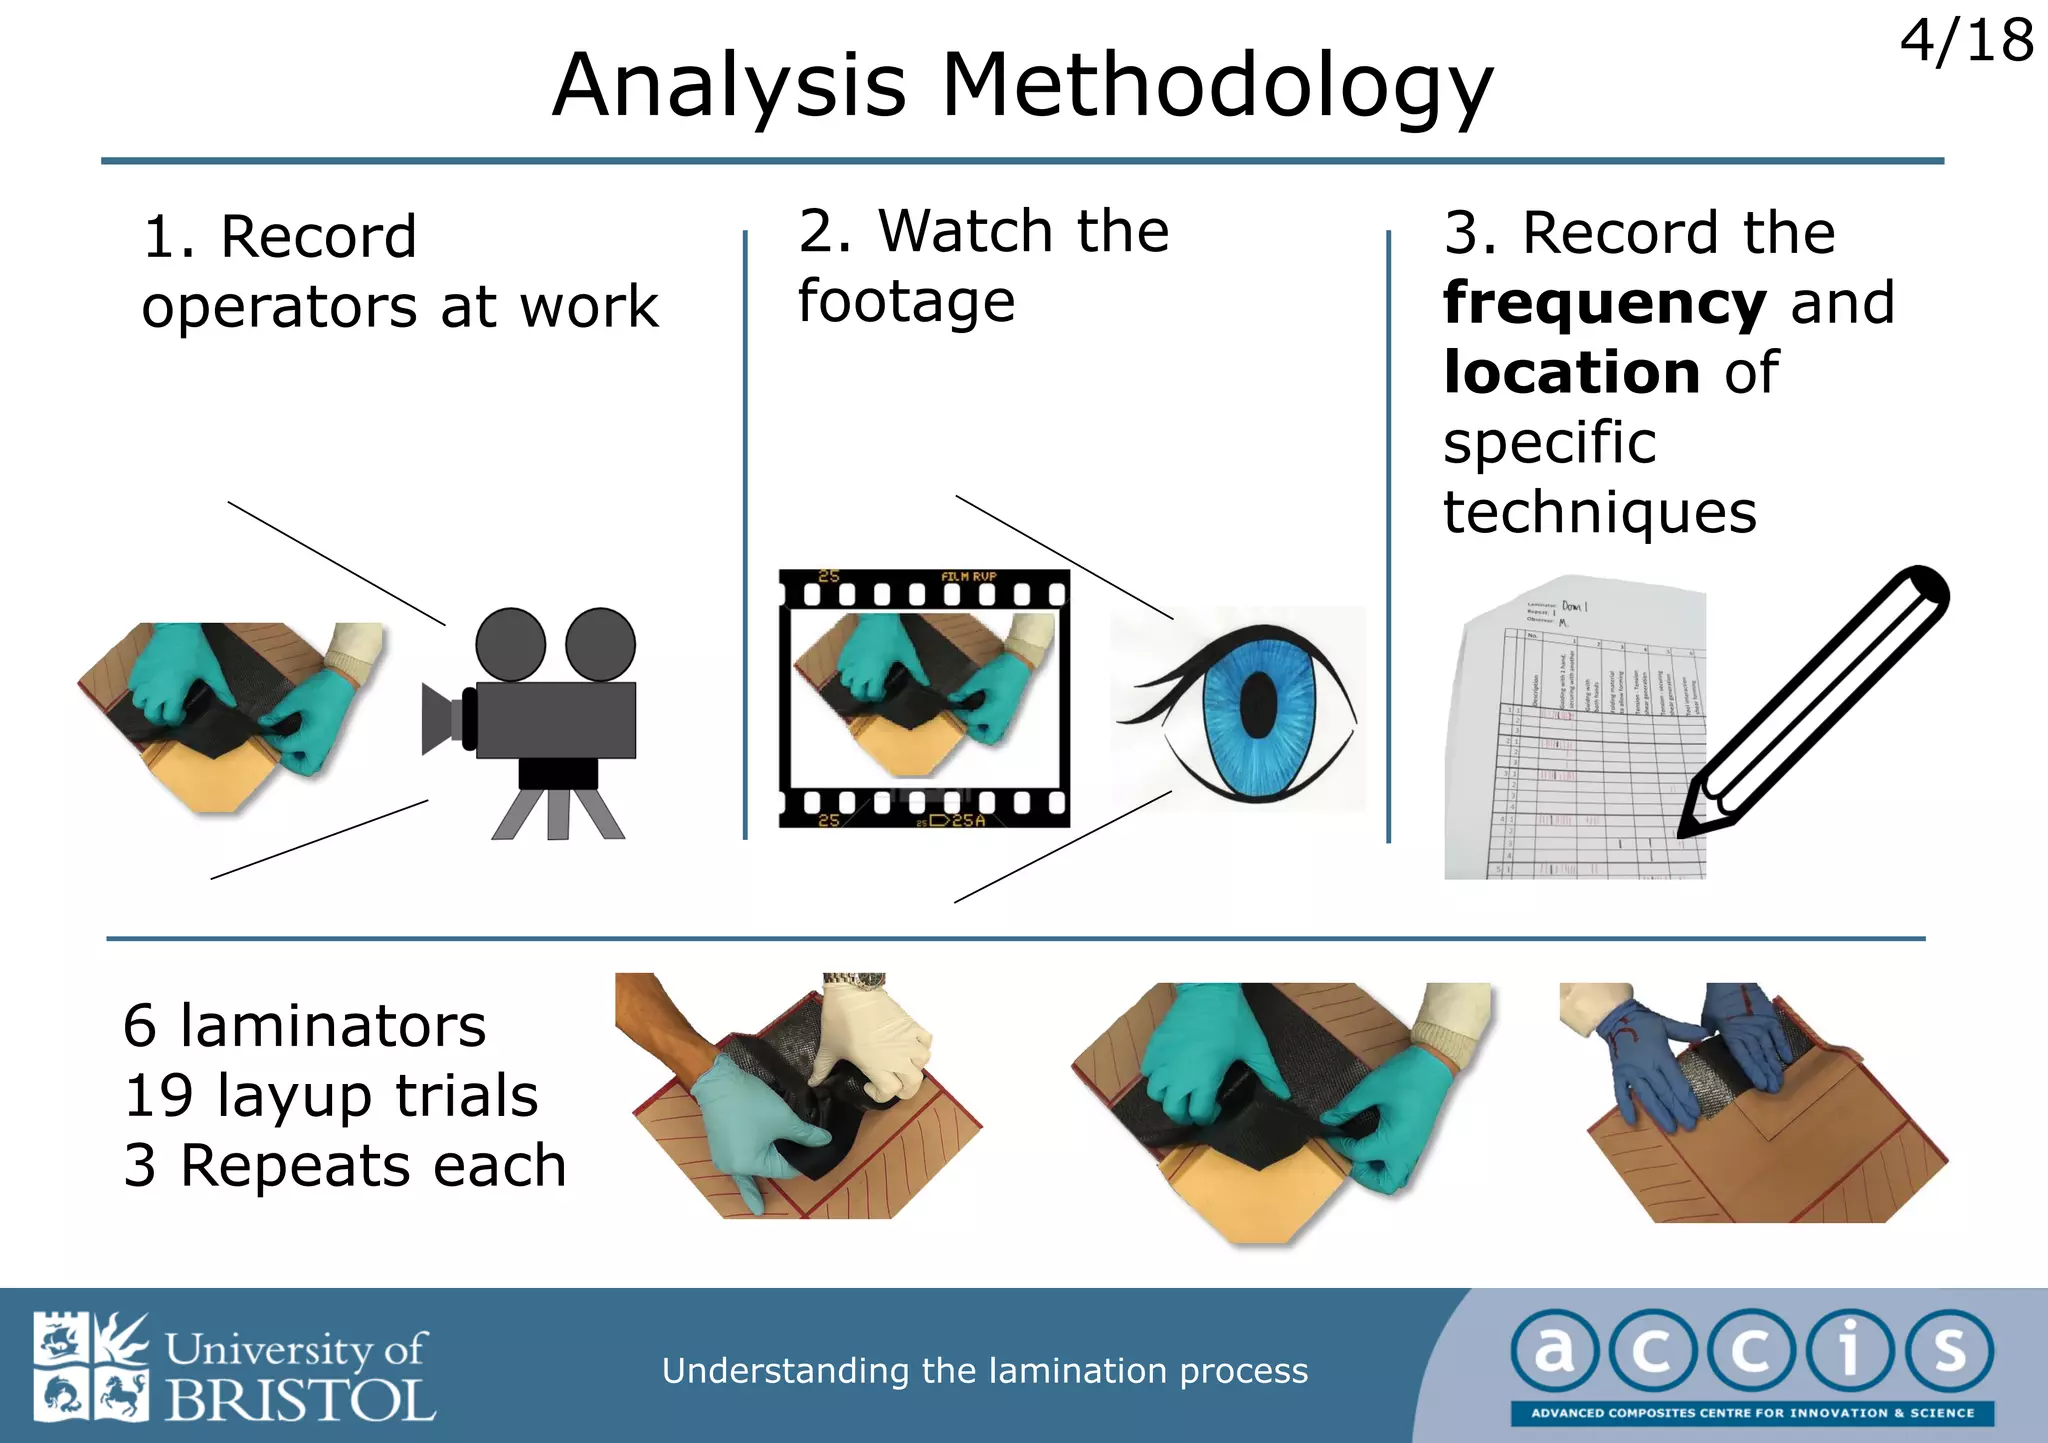
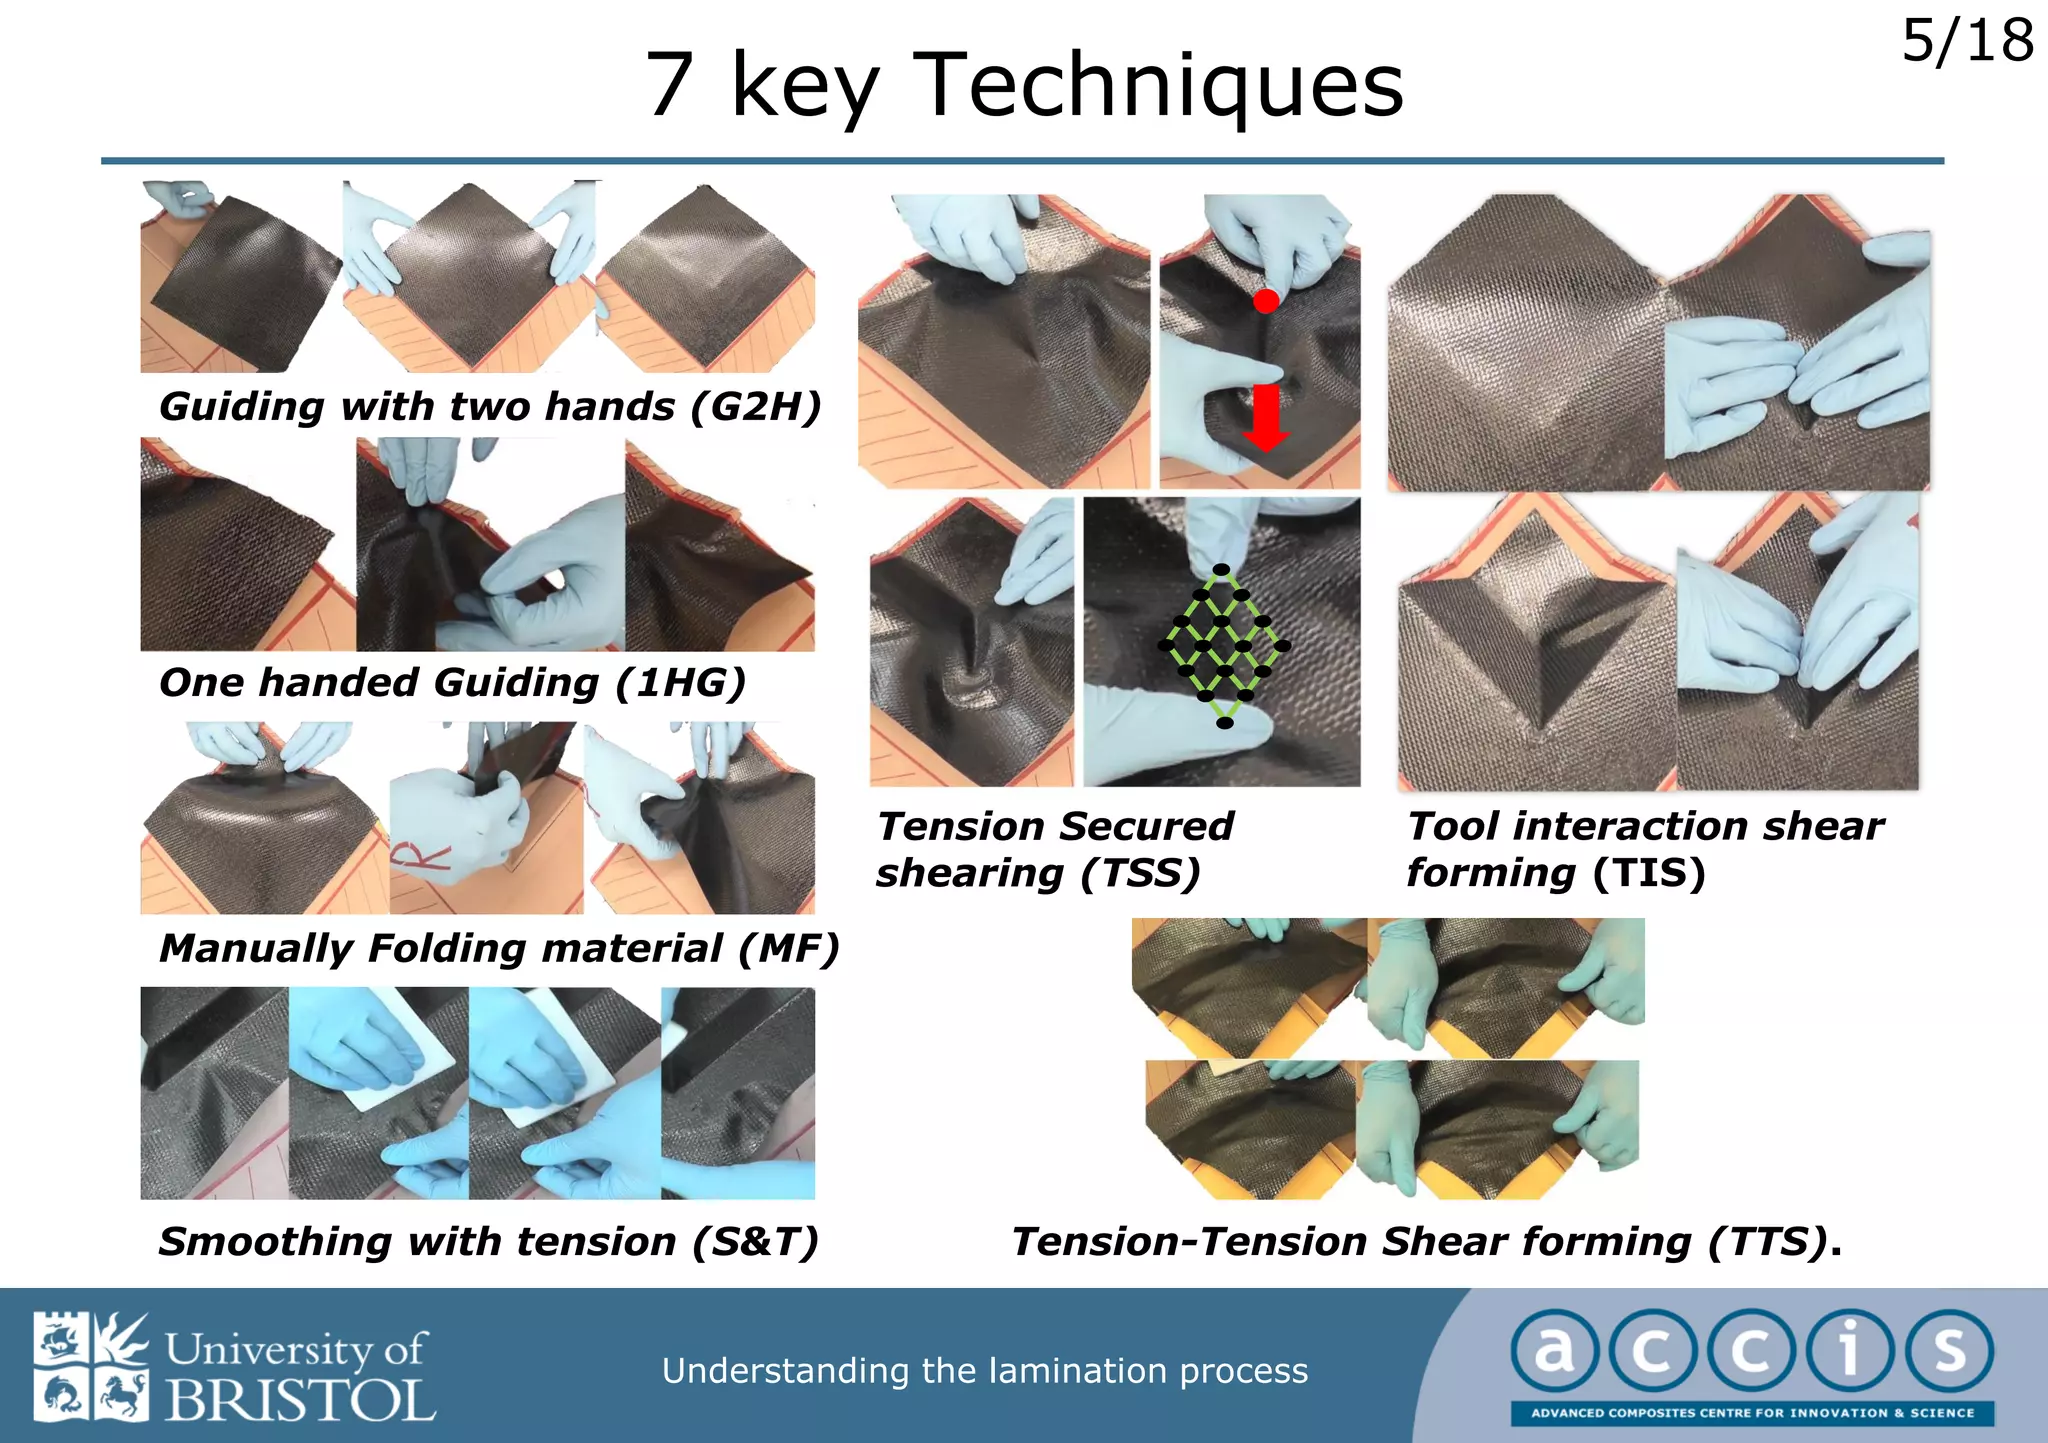
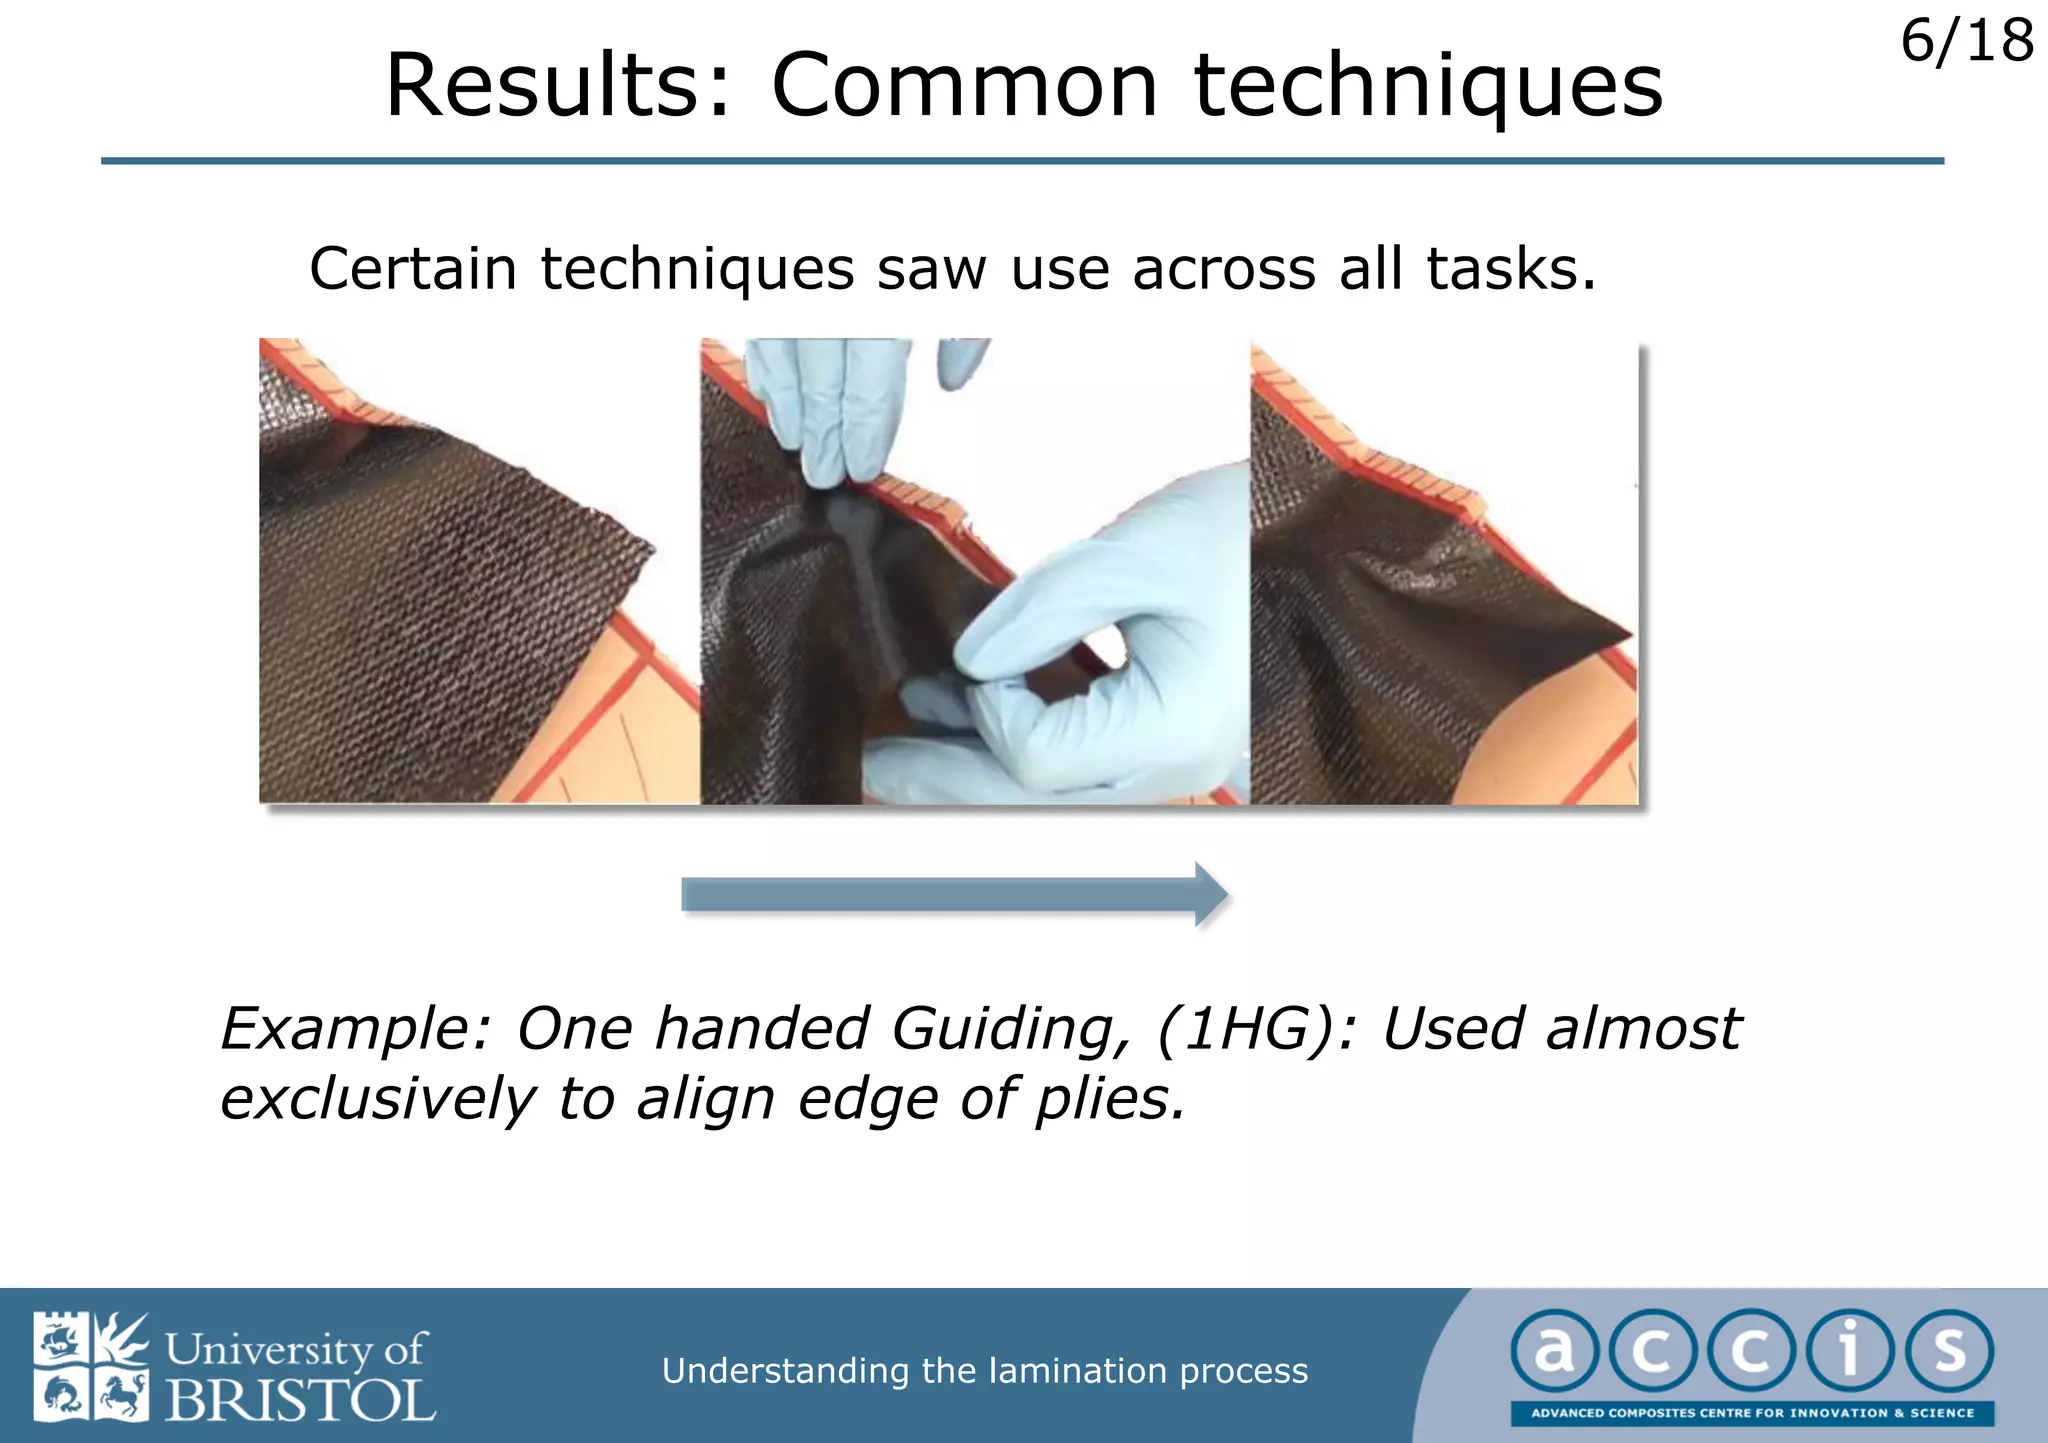
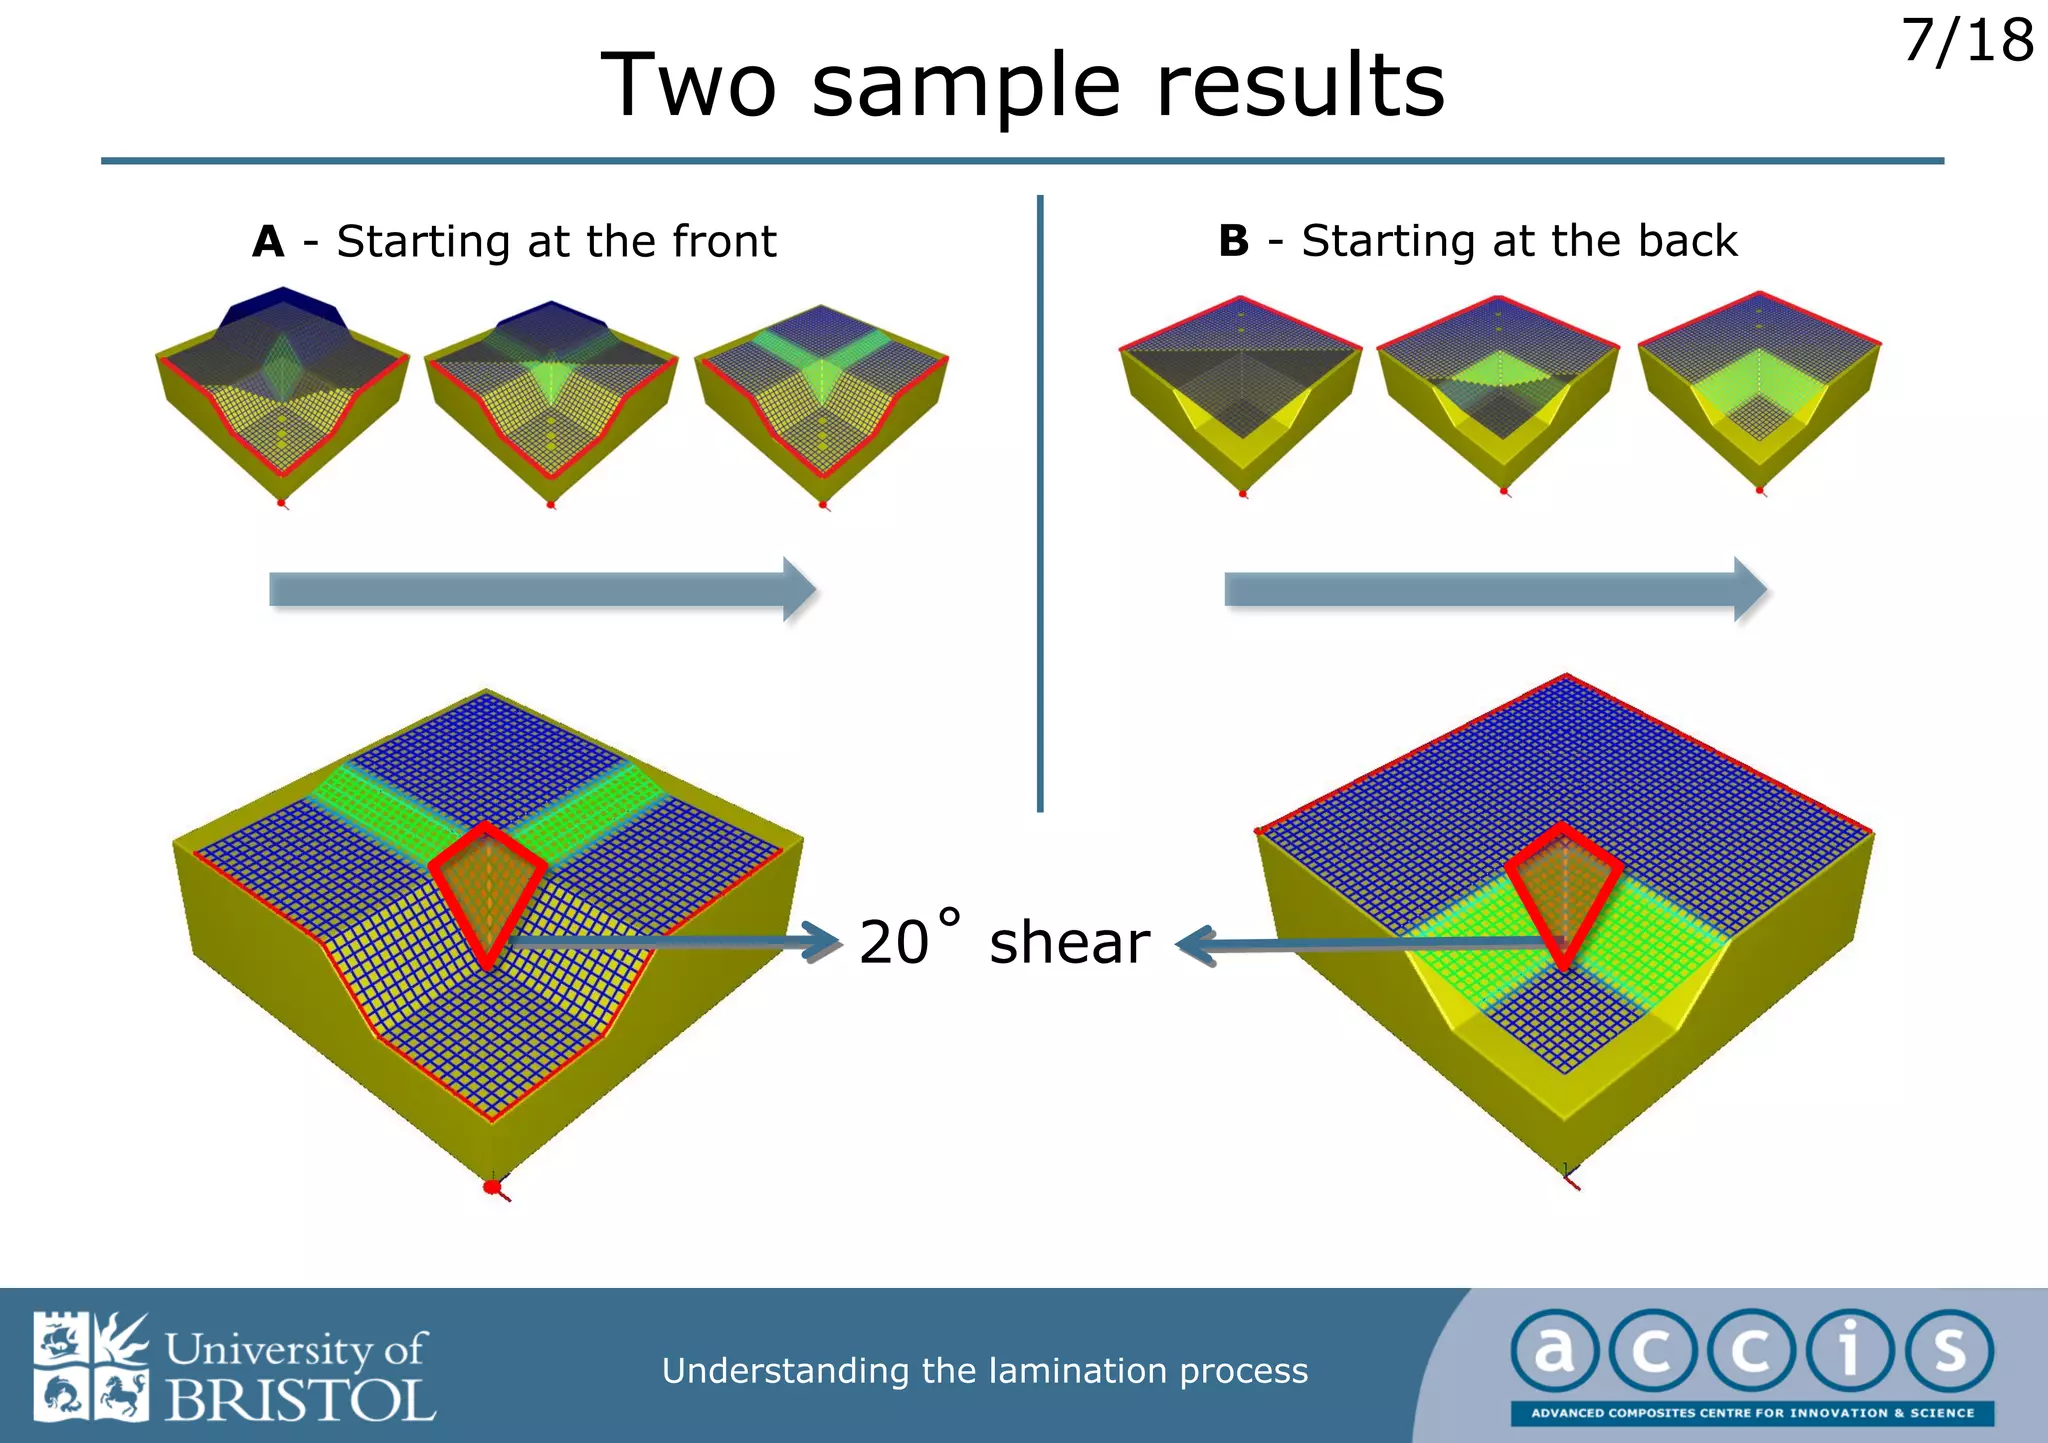
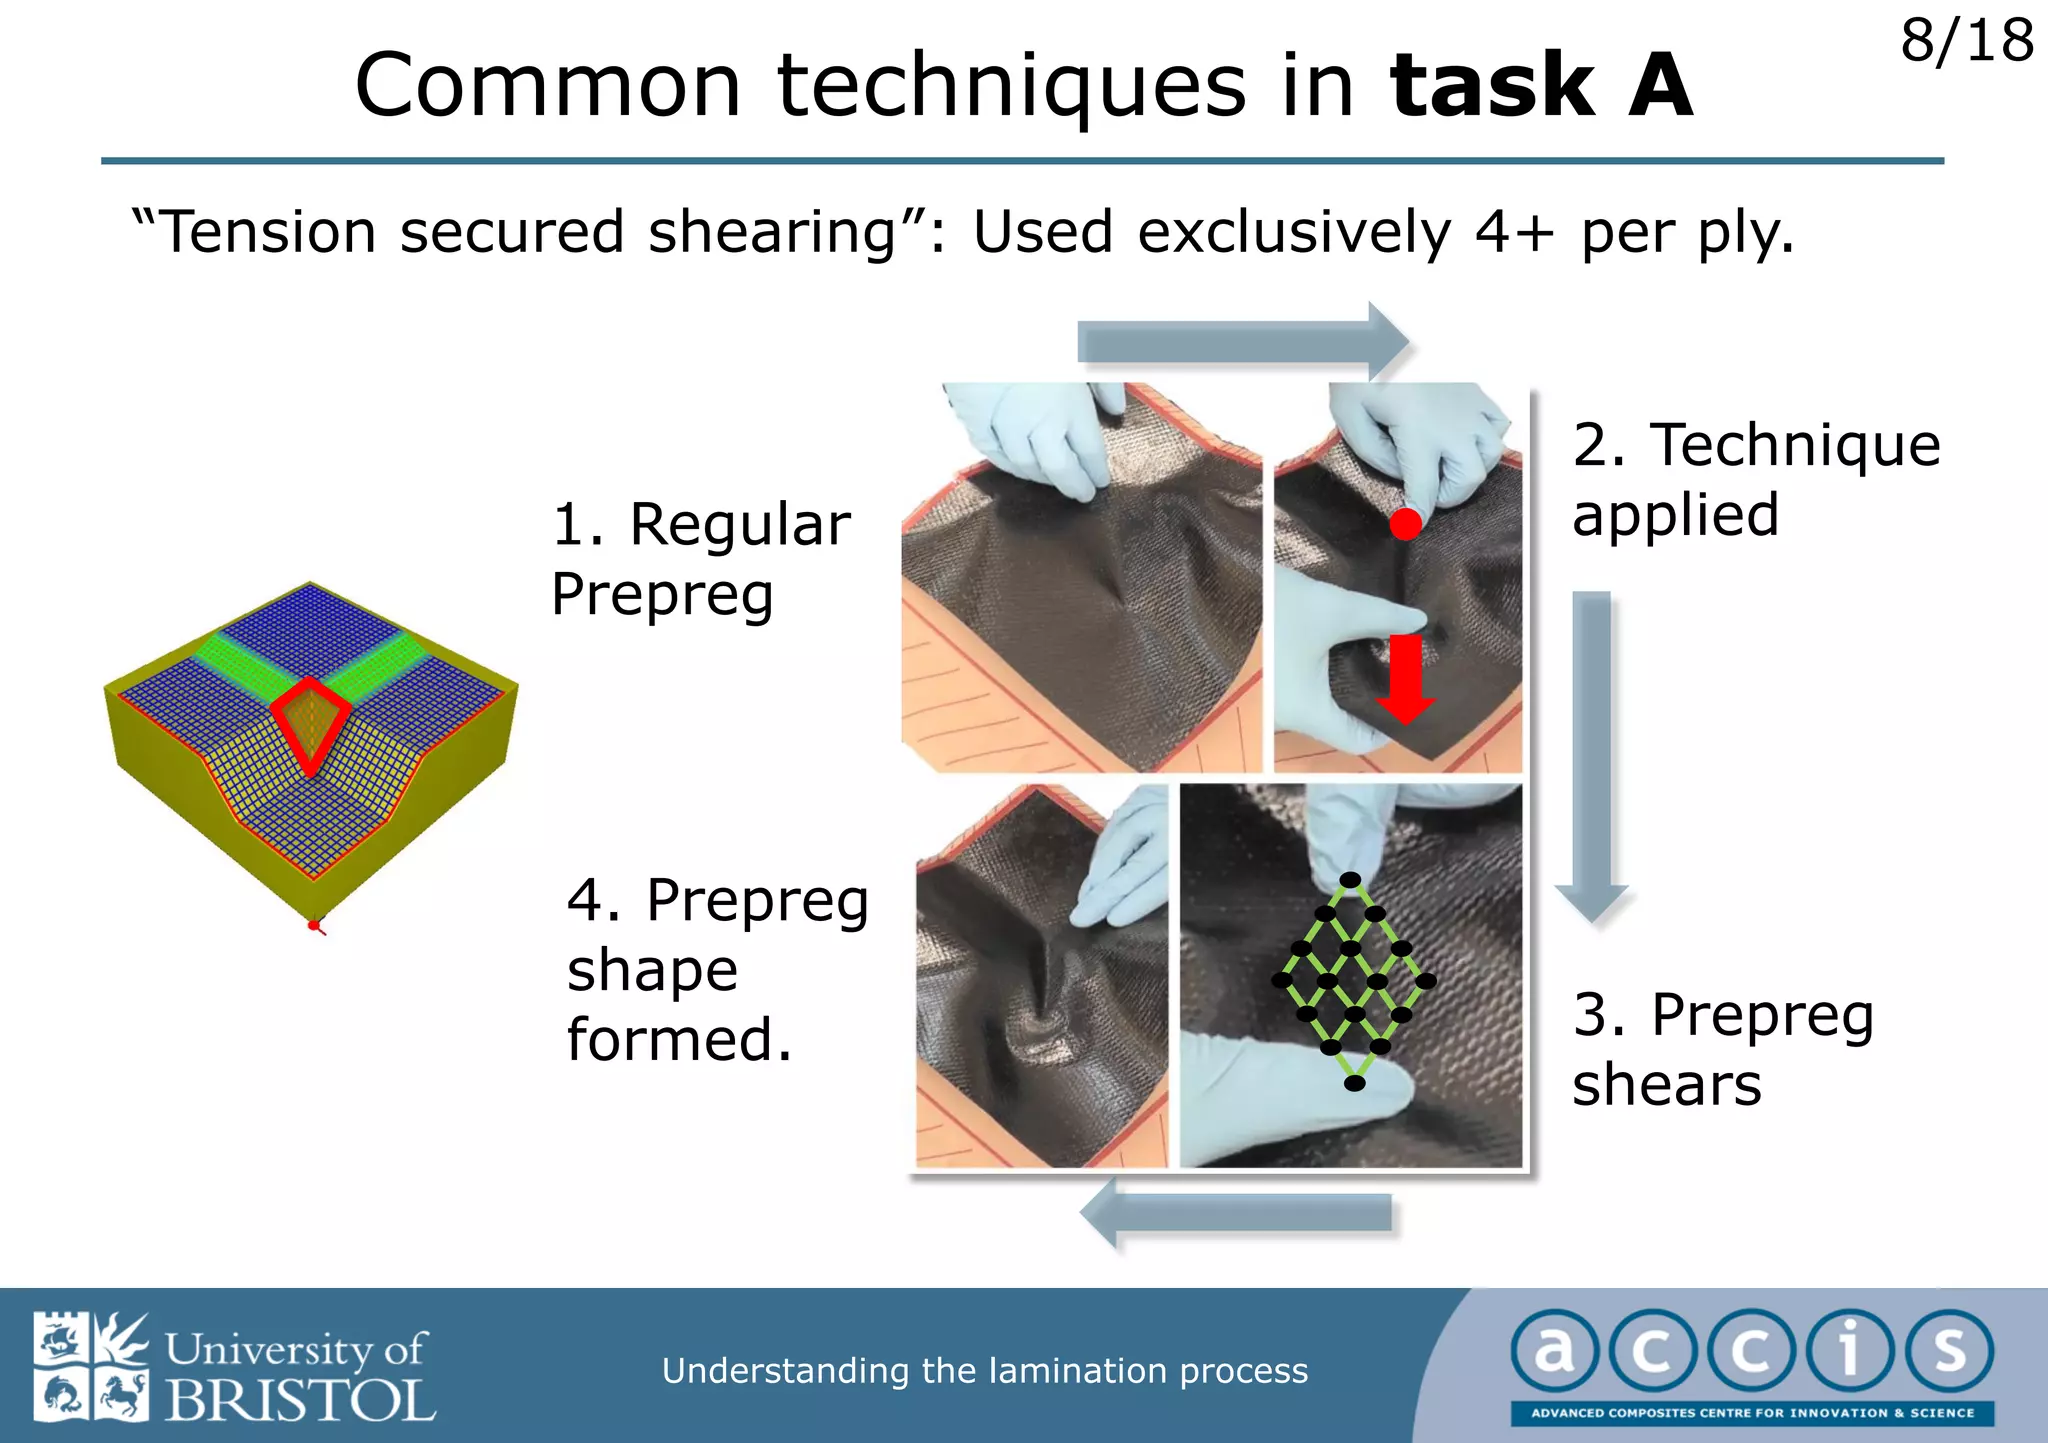
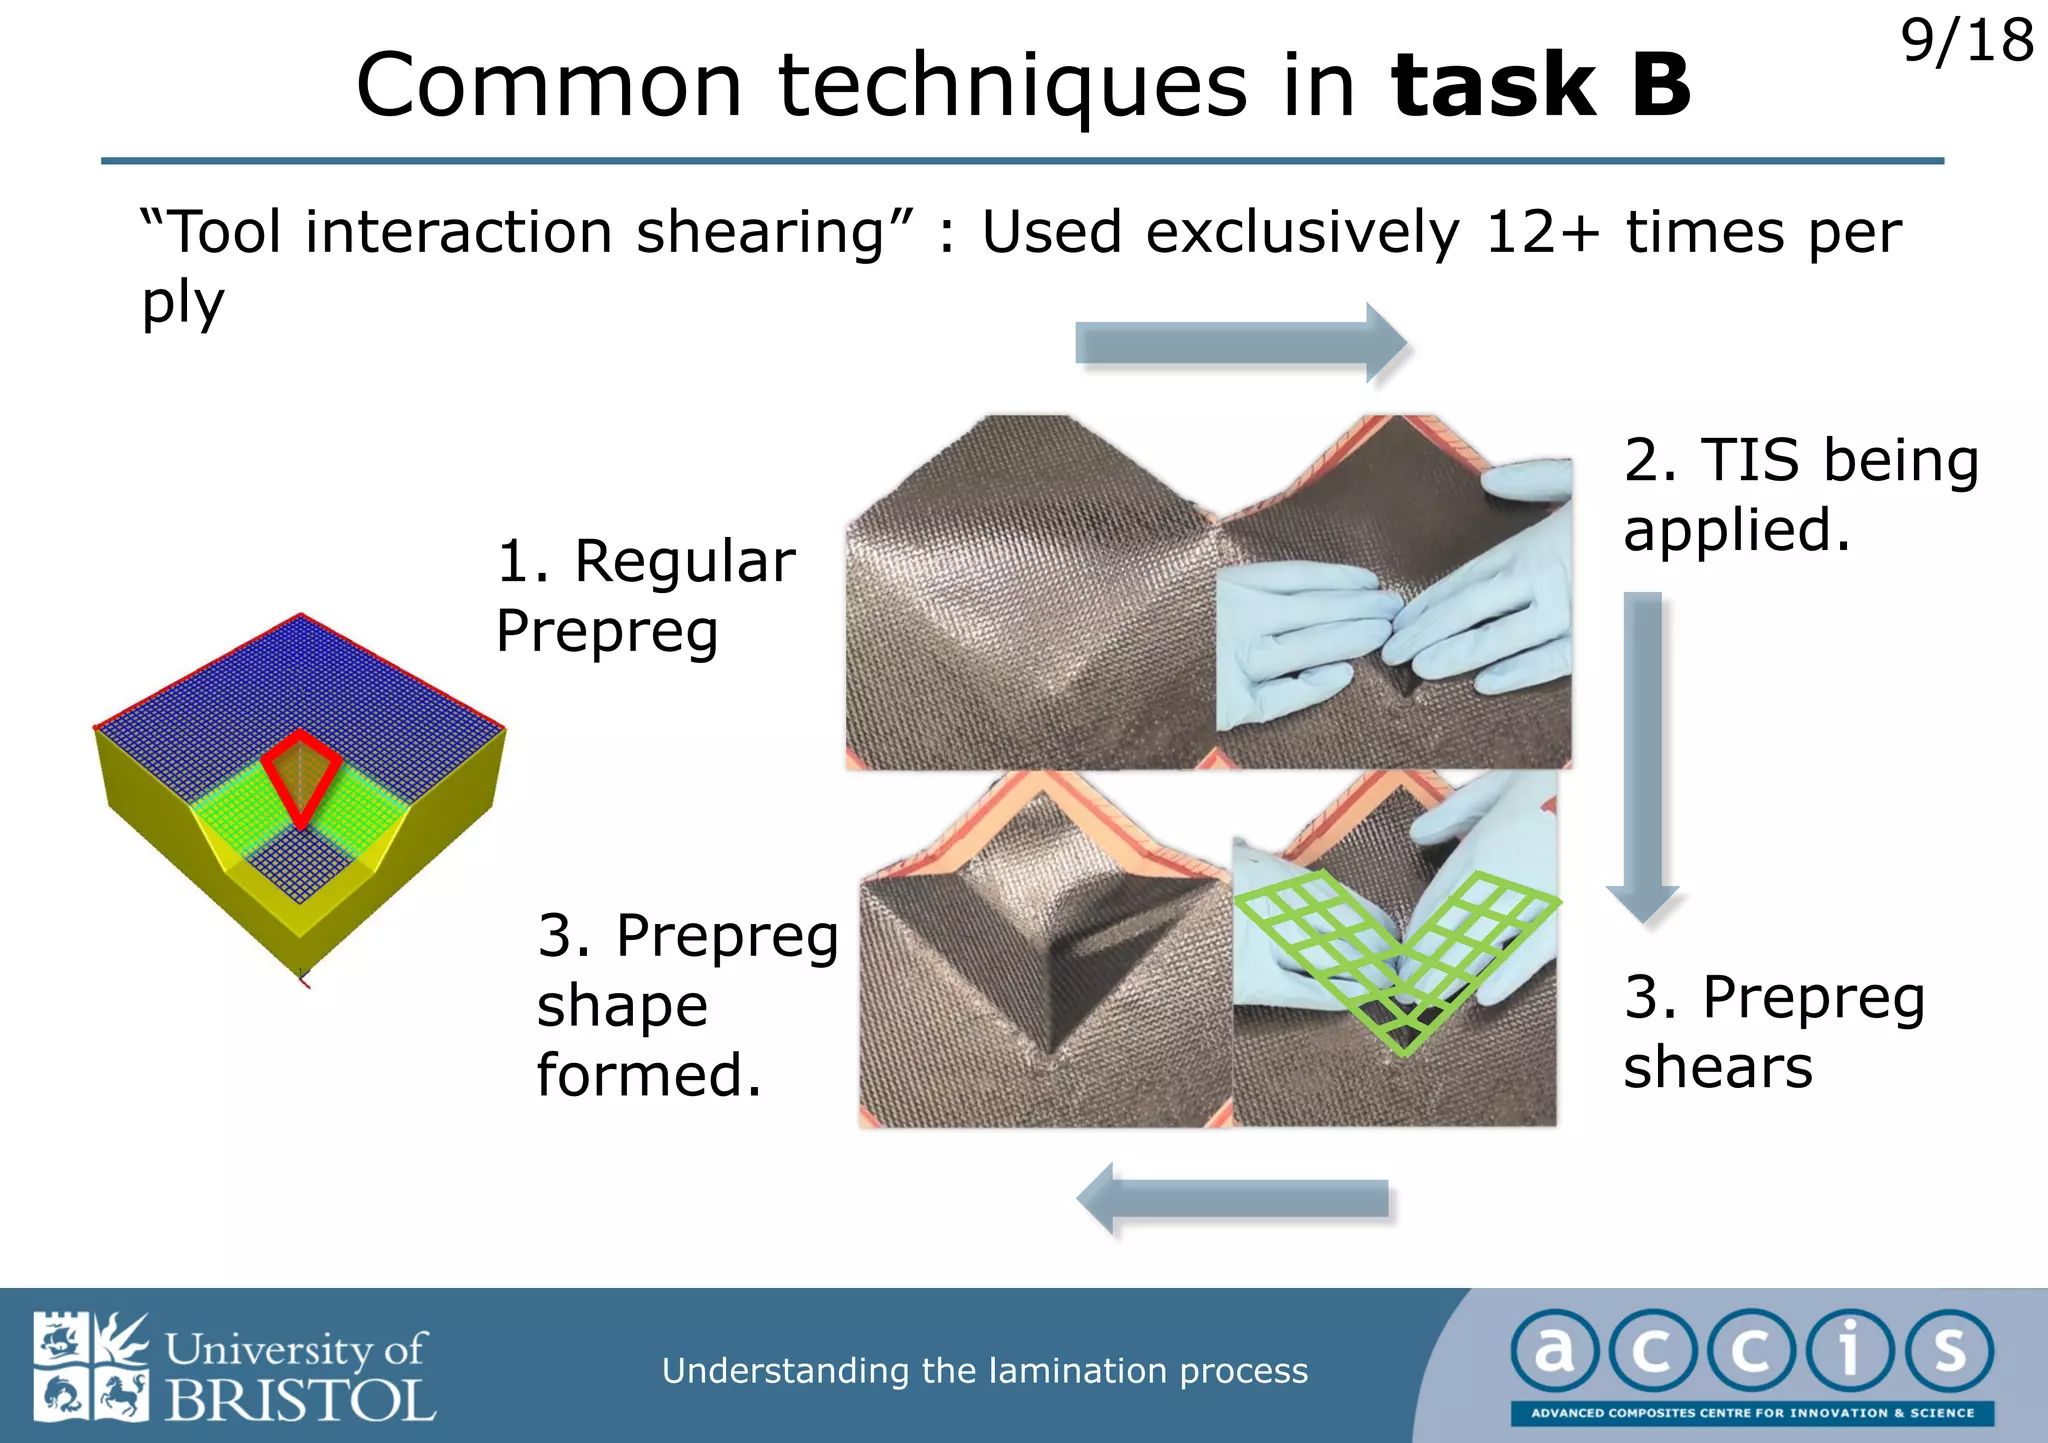
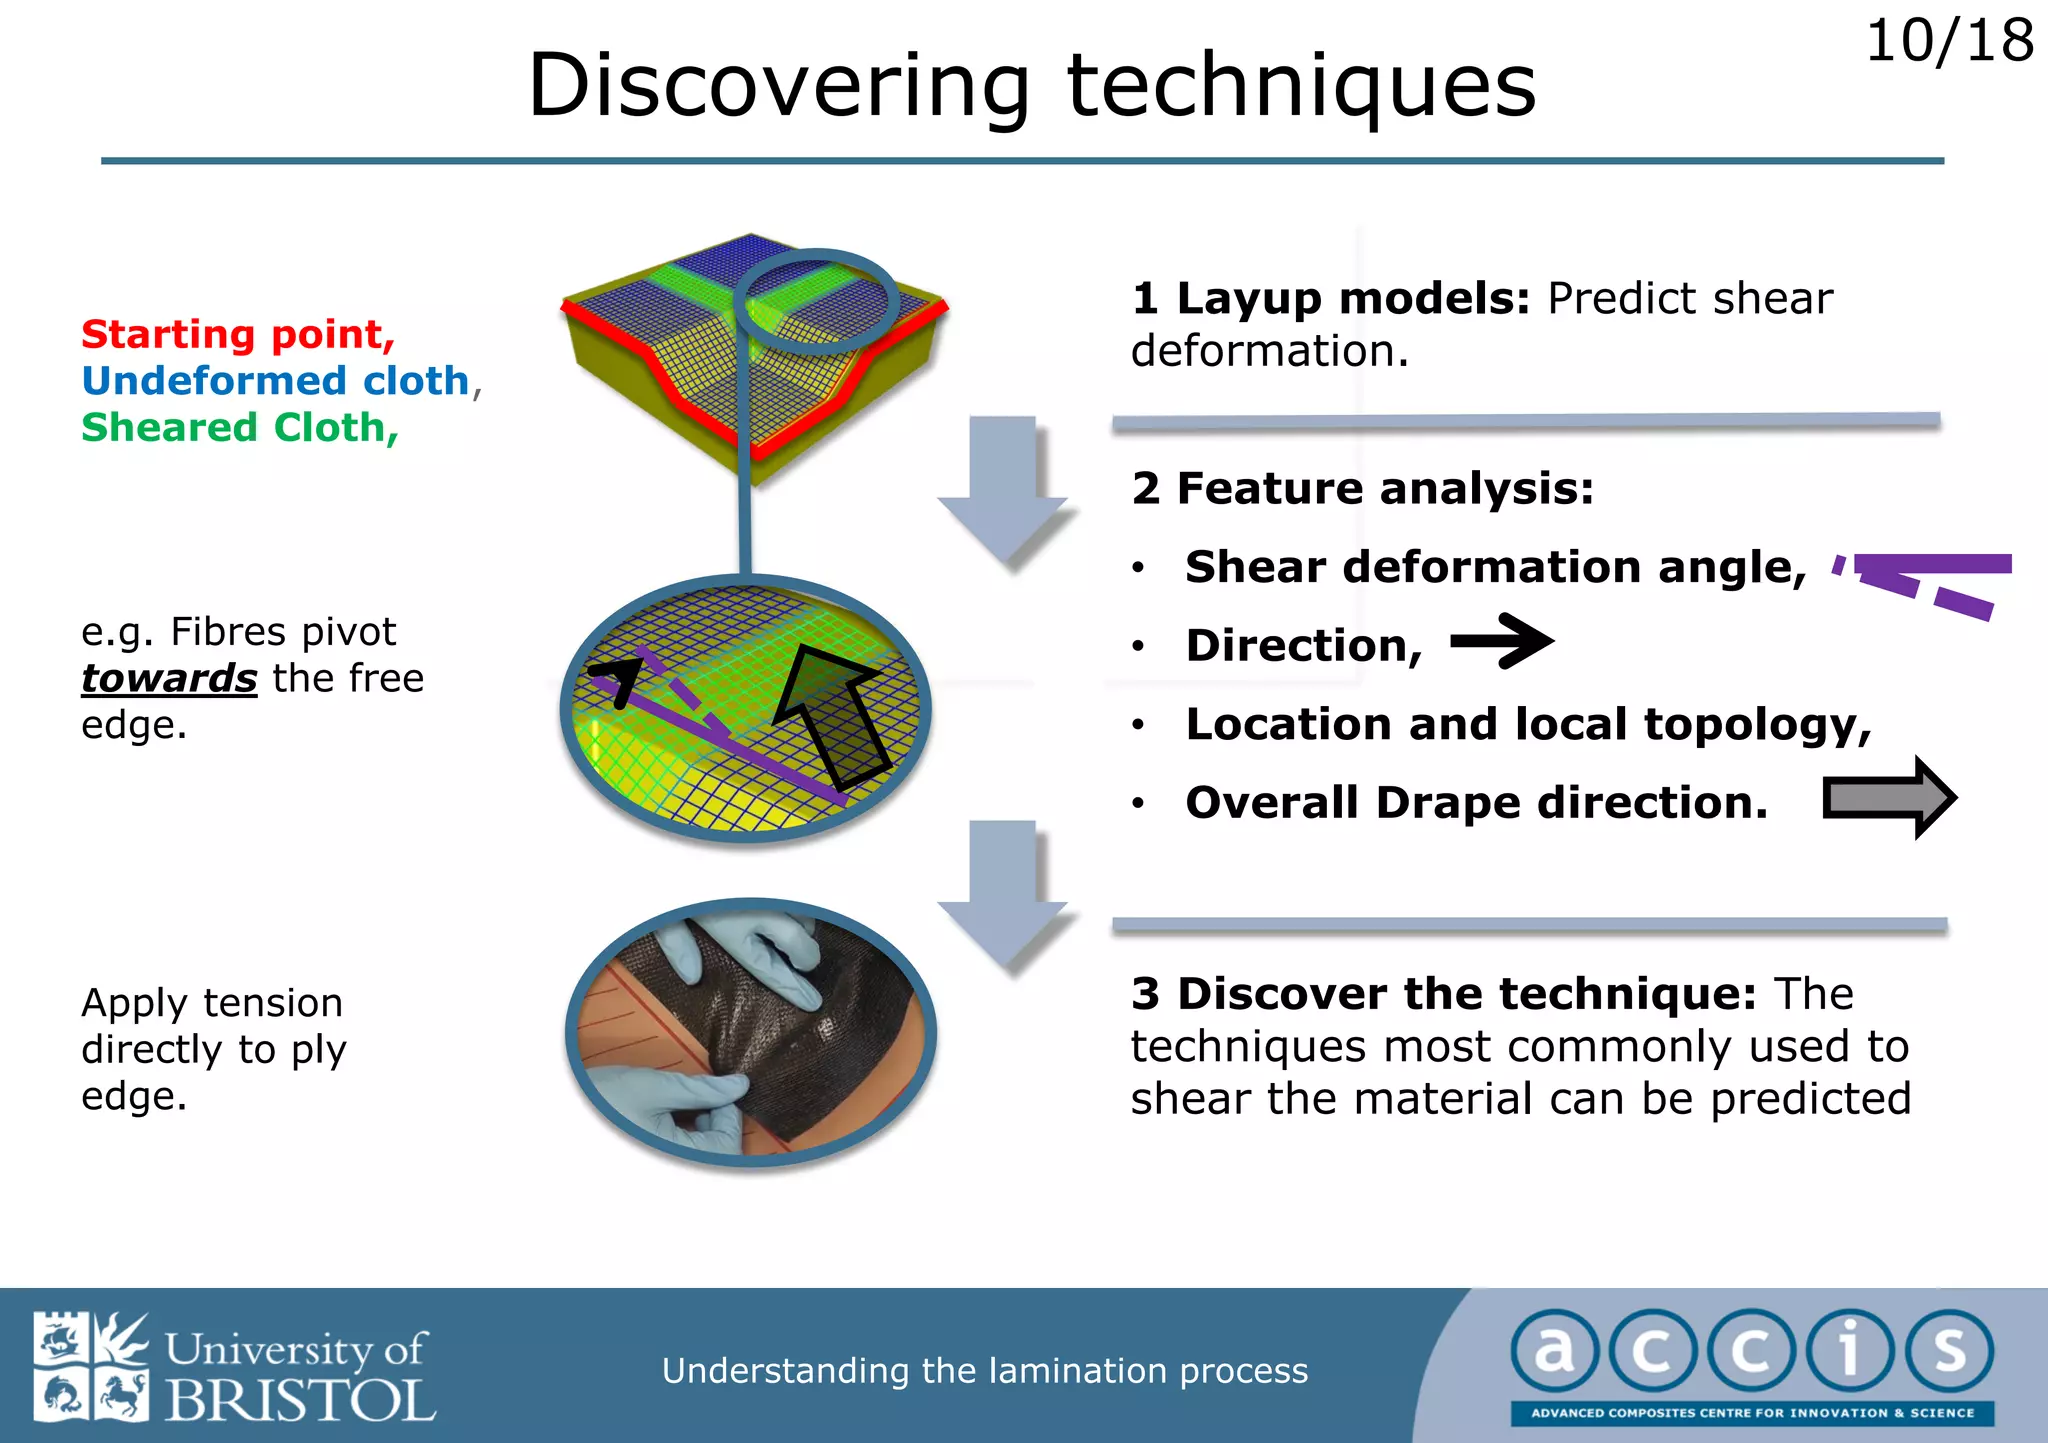
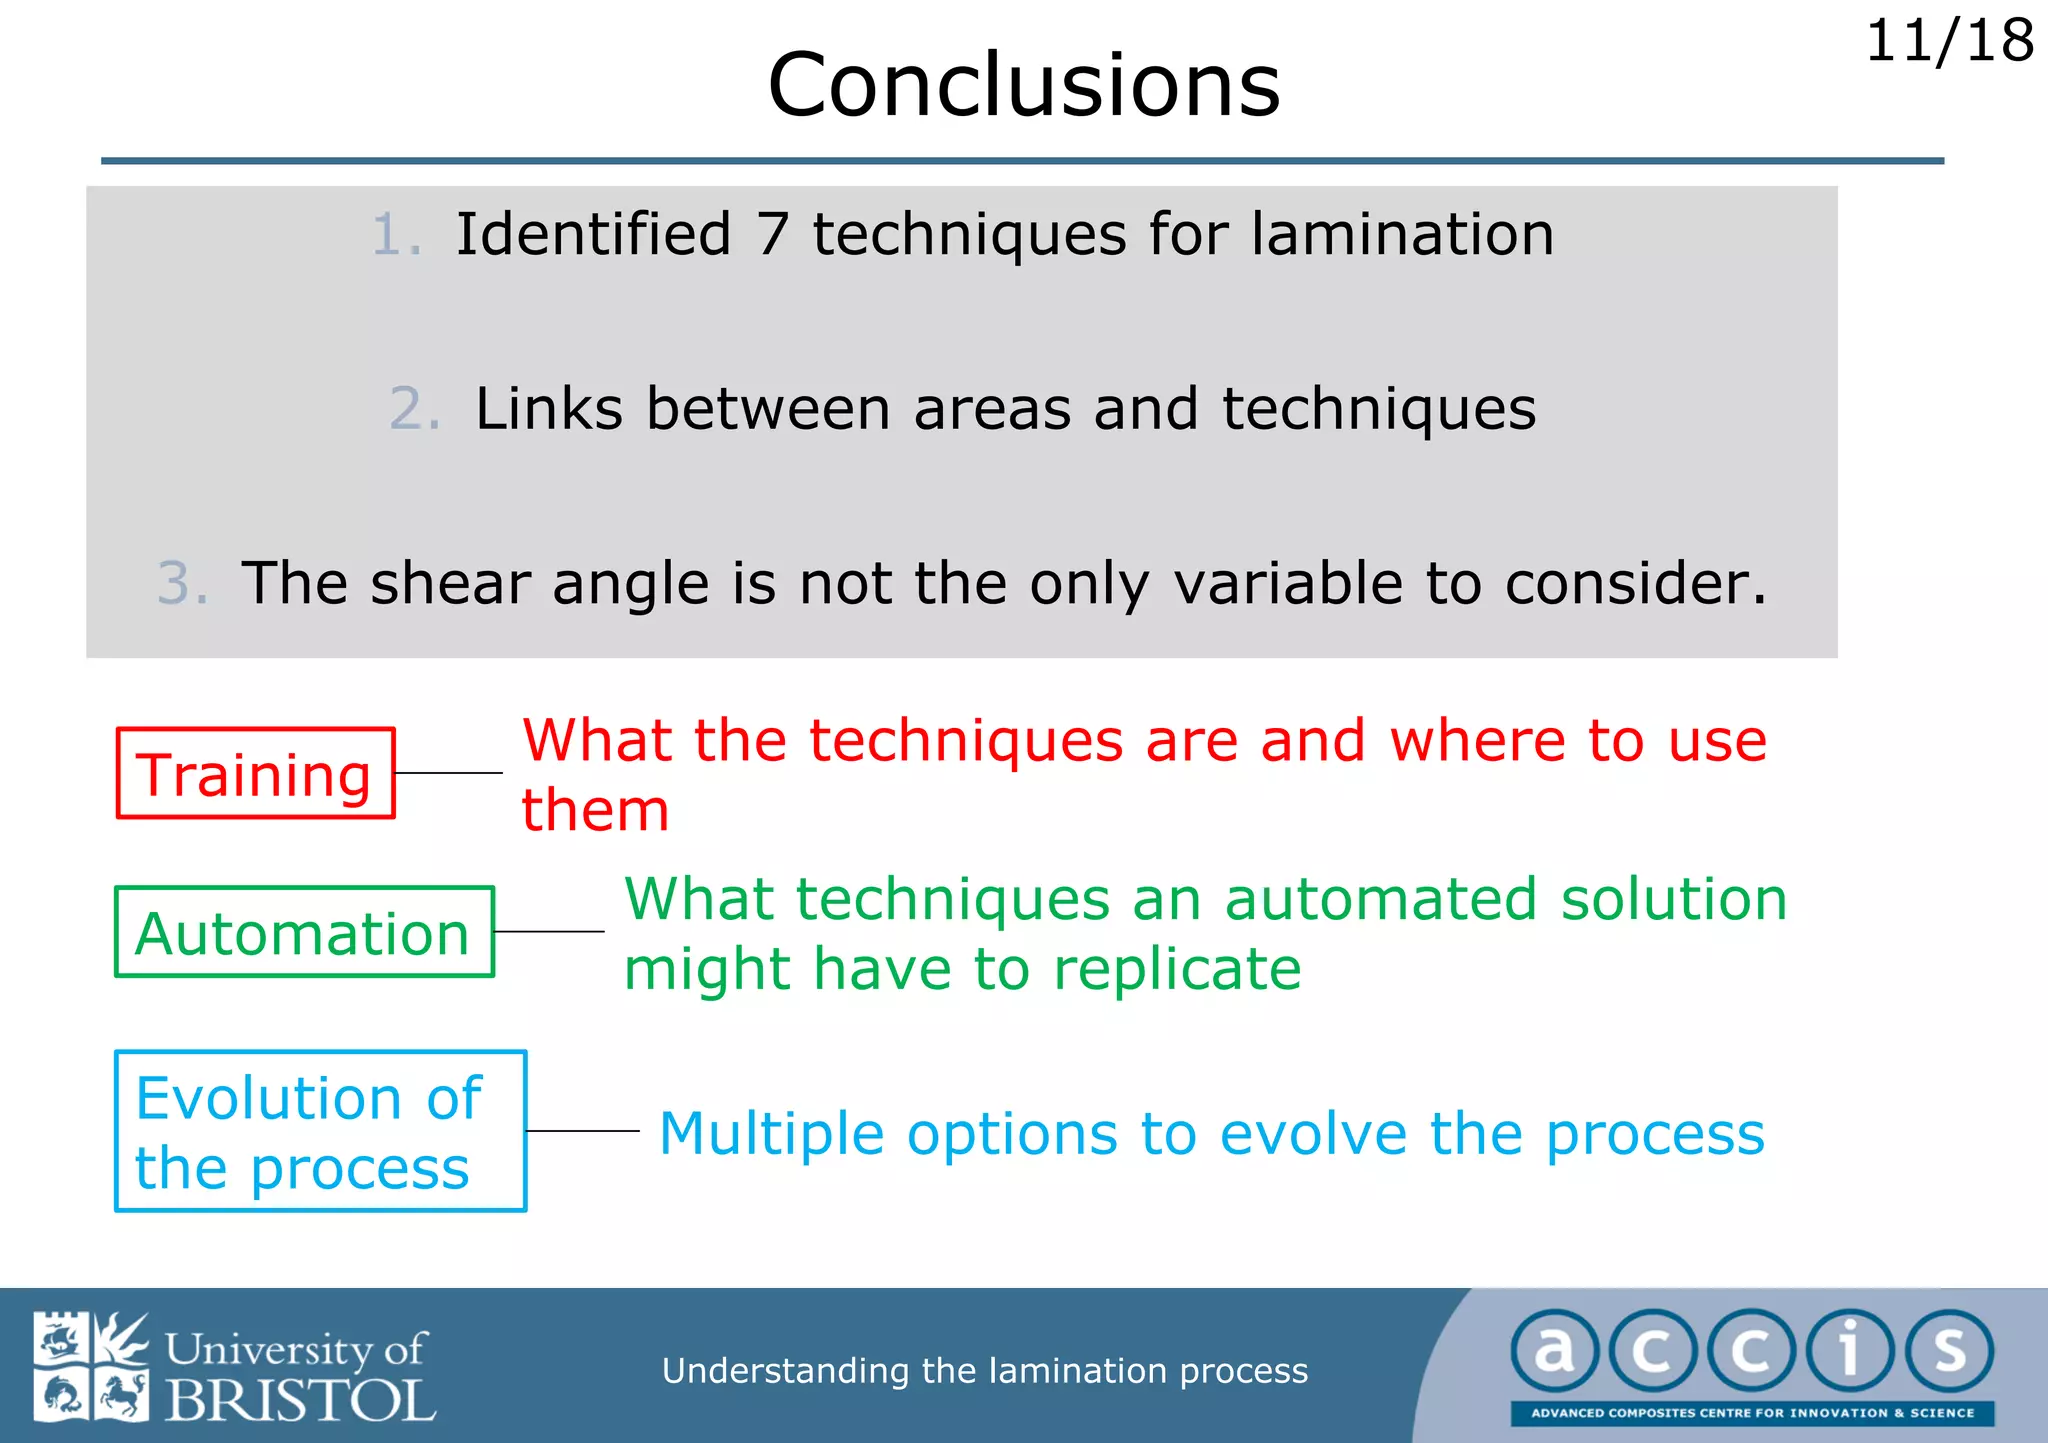
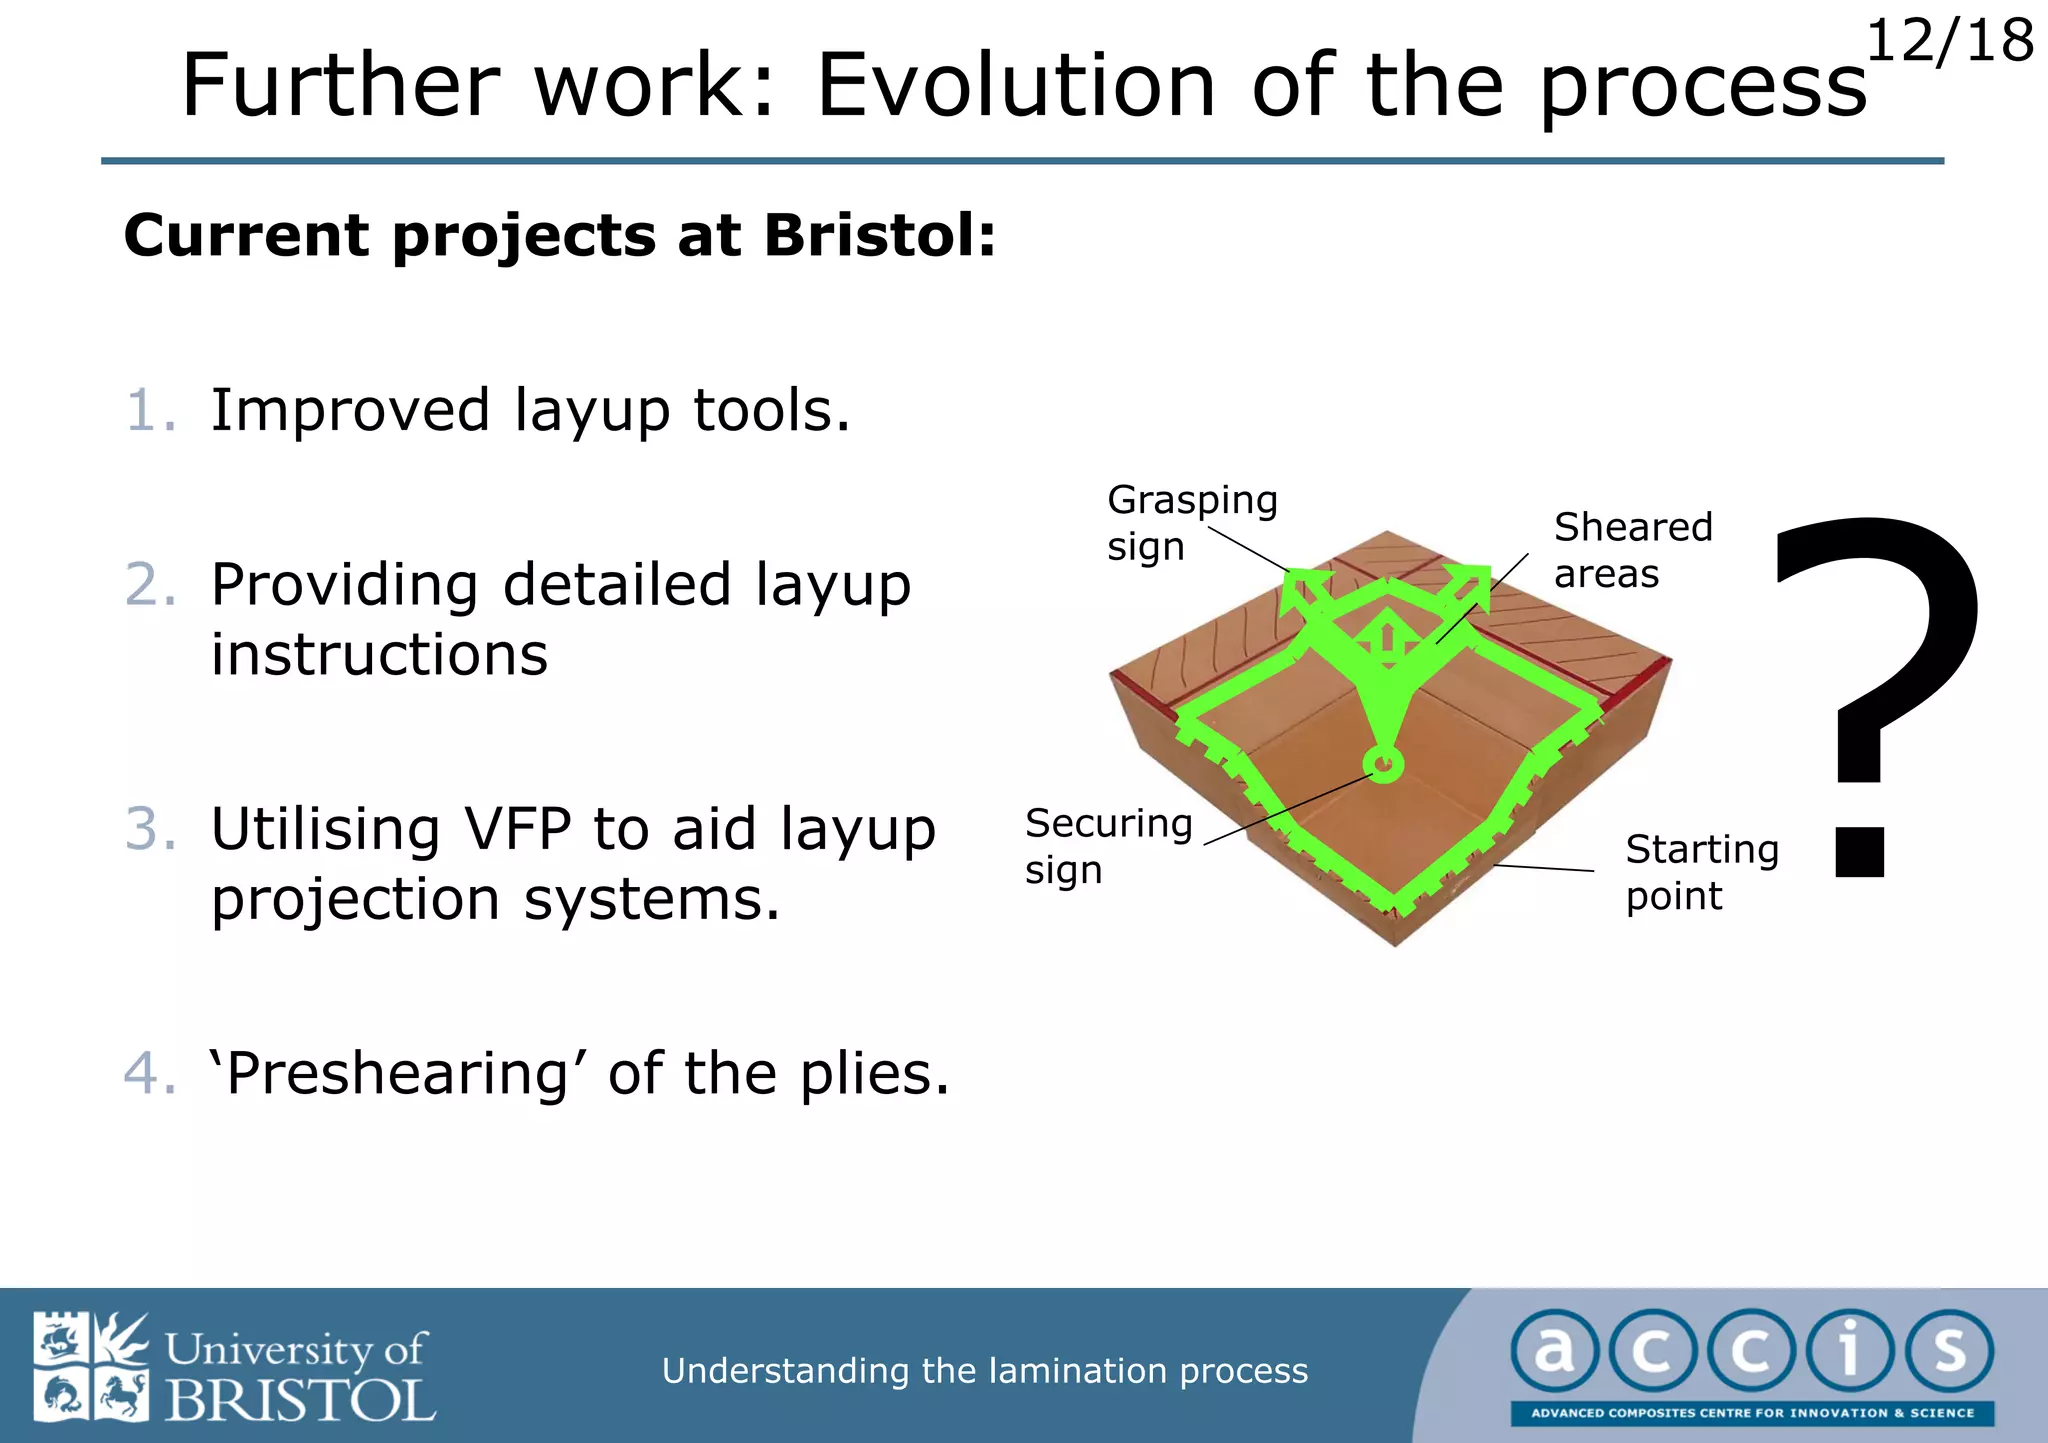
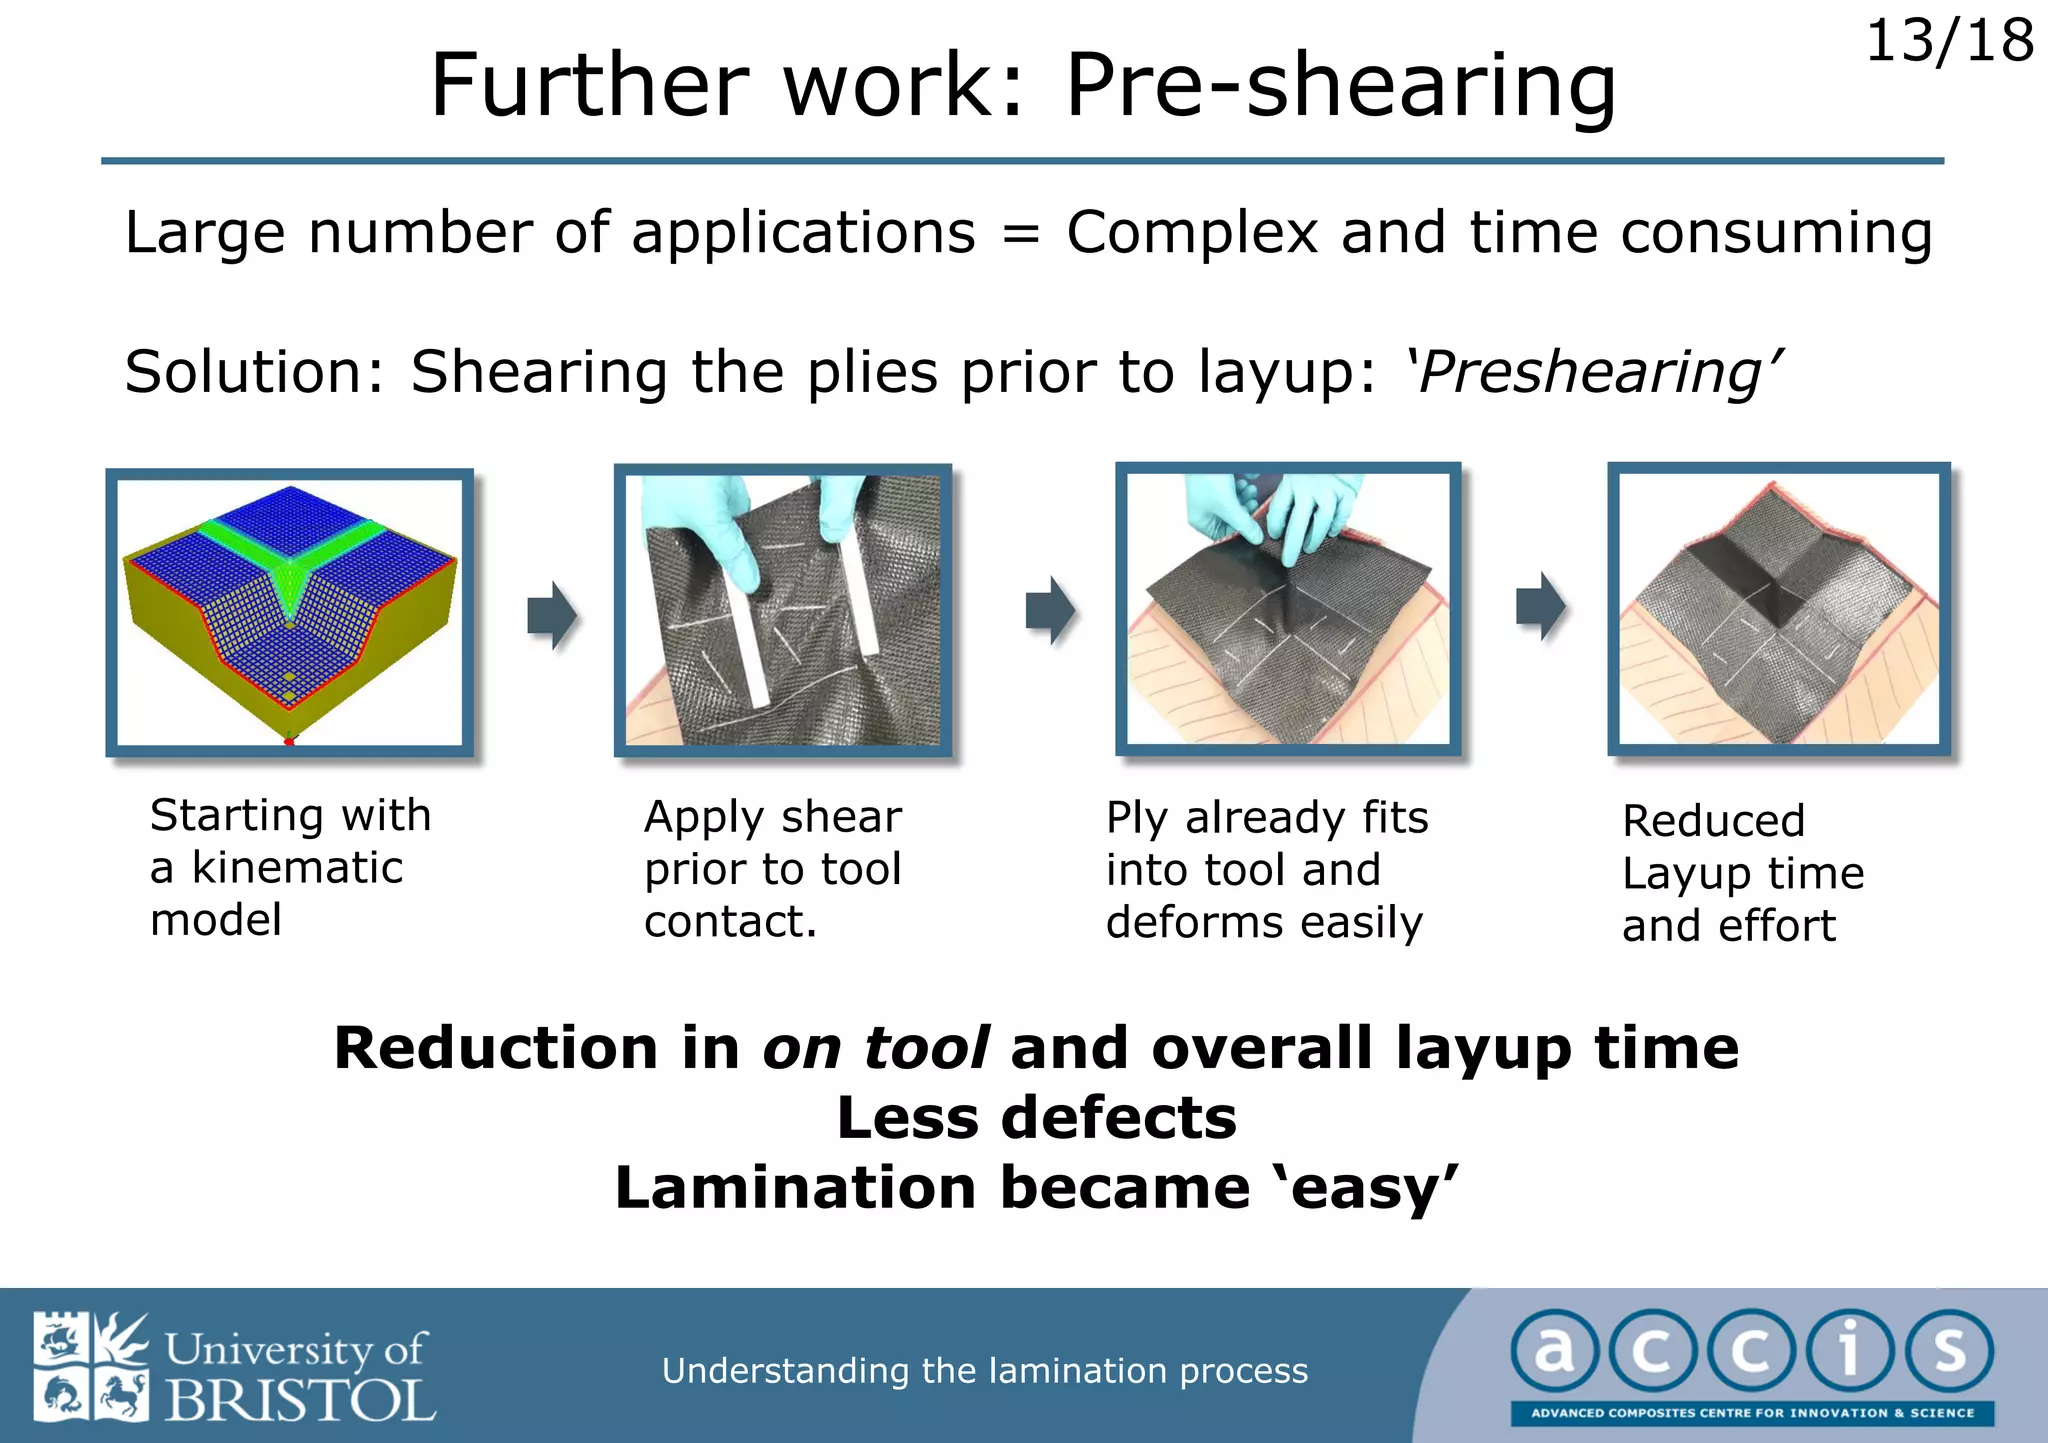
www.bris.ac.uk/composites
Michael Elkington
Supervisors: C Ward, K Potter.
University of Bristol
michael.elkington@bristol.ac.uk
Understanding the
Lamination Process
2/18
Understanding the lamination process
Hand layup of prepreg
• Complex parts
• Short lead times
• Low setup costs
• High labour costs
• Low production rates
• Variability
• Potential shortage of laminators
The process has changed little in decades:
Scope for optimisation.
3/18
Understanding the lamination process
• Flat sheet + Double Curved mould = In-plane shear deformation
• VFP (Virtual fabric placement) provides deformation predictions
The knowledge gap:
“How is the deformation achieved…?”
4/18
Understanding the lamination process
Analysis Methodology
1. Record
operators at work
Areas
2. Watch the
footage
3. Record the
frequency and
location of
specific
techniques
6 laminators
19 layup trials
3 Repeats each
5/18
Understanding the lamination process
7 key Techniques
Guiding with two hands (G2H)
One handed Guiding (1HG)
Manually Folding material (MF)
Tension Secured
shearing (TSS)
Smoothing with tension (S&T)
Tool interaction shear
forming (TIS)
Tension-Tension Shear forming (TTS).
6/18
Understanding the lamination process
Results: Common techniques
Certain techniques saw use across all tasks.
Example: One handed Guiding, (1HG): Used almost
exclusively to align edge of plies.
7/18
Understanding the lamination process
Two sample results
A - Starting at the front B - Starting at the back
20˚ shear
8/18
Understanding the lamination process
Common techniques in task A
1. Regular
Prepreg
2. Technique
applied
3. Prepreg
shears
“Tension secured shearing”: Used exclusively 4+ per ply.
4. Prepreg
shape
formed.
9/18
Understanding the lamination process
Common techniques in task B
1. Regular
Prepreg
2. TIS being
applied.
3. Prepreg
shears
3. Prepreg
shape
formed.
“Tool interaction shearing” : Used exclusively 12+ times per
ply
10/18
Understanding the lamination process
Discovering techniques
Apply tension
directly to ply
edge.
e.g. Fibres pivot
towards the free
edge.
1 Layup models: Predict shear
deformation.
3 Discover the technique: The
techniques most commonly used to
shear the material can be predicted
2 Feature analysis:
• Shear deformation angle,
• Direction,
• Location and local topology,
• Overall Drape direction.
Starting point,
Undeformed cloth,
Sheared Cloth,
11/18
Understanding the lamination process
Conclusions
1. Identified 7 techniques for lamination
2. Links between areas and techniques
3. The shear angle is not the only variable to consider.
Training
Automation
Evolution of
the process
What the techniques are and where to use
them
What techniques an automated solution
might have to replicate
Multiple options to evolve the process
12/18
Understanding the lamination process
Further work: Evolution of the process
Current projects at Bristol:
1. Improved layup tools.
2. Providing detailed layup
instructions
3. Utilising VFP to aid layup
projection systems.
4. ‘Preshearing’ of the plies.
Starting
point
Sheared
areas
Grasping
sign
Securing
sign ?
13/18
Understanding the lamination process
Further work: Pre-shearing
Starting with
a kinematic
model
Apply shear
prior to tool
contact.
Ply already fits
into tool and
deforms easily
Reduced
Layup time
and effort
Large number of applications = Complex and time consuming
Solution: Shearing the plies prior to layup: ‘Preshearing’
Reduction in on tool and overall layup time
Less defects
Lamination became ‘easy’
14/18
Understanding the lamination process
Thank you for listening.
Questions and ideas welcome:
michael.elkington@bristol.ac.uk
Doctoral Training Centre (DTC)

Understanding the lamination process

  • 1.
    www.bris.ac.uk/composites Michael Elkington Supervisors: CWard, K Potter. University of Bristol michael.elkington@bristol.ac.uk Understanding the Lamination Process
  • 2.
    2/18 Understanding the laminationprocess Hand layup of prepreg • Complex parts • Short lead times • Low setup costs • High labour costs • Low production rates • Variability • Potential shortage of laminators The process has changed little in decades: Scope for optimisation.
  • 3.
    3/18 Understanding the laminationprocess • Flat sheet + Double Curved mould = In-plane shear deformation • VFP (Virtual fabric placement) provides deformation predictions The knowledge gap: “How is the deformation achieved…?”
  • 4.
    4/18 Understanding the laminationprocess Analysis Methodology 1. Record operators at work Areas 2. Watch the footage 3. Record the frequency and location of specific techniques 6 laminators 19 layup trials 3 Repeats each
  • 5.
    5/18 Understanding the laminationprocess 7 key Techniques Guiding with two hands (G2H) One handed Guiding (1HG) Manually Folding material (MF) Tension Secured shearing (TSS) Smoothing with tension (S&T) Tool interaction shear forming (TIS) Tension-Tension Shear forming (TTS).
  • 6.
    6/18 Understanding the laminationprocess Results: Common techniques Certain techniques saw use across all tasks. Example: One handed Guiding, (1HG): Used almost exclusively to align edge of plies.
  • 7.
    7/18 Understanding the laminationprocess Two sample results A - Starting at the front B - Starting at the back 20˚ shear
  • 8.
    8/18 Understanding the laminationprocess Common techniques in task A 1. Regular Prepreg 2. Technique applied 3. Prepreg shears “Tension secured shearing”: Used exclusively 4+ per ply. 4. Prepreg shape formed.
  • 9.
    9/18 Understanding the laminationprocess Common techniques in task B 1. Regular Prepreg 2. TIS being applied. 3. Prepreg shears 3. Prepreg shape formed. “Tool interaction shearing” : Used exclusively 12+ times per ply
  • 10.
    10/18 Understanding the laminationprocess Discovering techniques Apply tension directly to ply edge. e.g. Fibres pivot towards the free edge. 1 Layup models: Predict shear deformation. 3 Discover the technique: The techniques most commonly used to shear the material can be predicted 2 Feature analysis: • Shear deformation angle, • Direction, • Location and local topology, • Overall Drape direction. Starting point, Undeformed cloth, Sheared Cloth,
  • 11.
    11/18 Understanding the laminationprocess Conclusions 1. Identified 7 techniques for lamination 2. Links between areas and techniques 3. The shear angle is not the only variable to consider. Training Automation Evolution of the process What the techniques are and where to use them What techniques an automated solution might have to replicate Multiple options to evolve the process
  • 12.
    12/18 Understanding the laminationprocess Further work: Evolution of the process Current projects at Bristol: 1. Improved layup tools. 2. Providing detailed layup instructions 3. Utilising VFP to aid layup projection systems. 4. ‘Preshearing’ of the plies. Starting point Sheared areas Grasping sign Securing sign ?
  • 13.
    13/18 Understanding the laminationprocess Further work: Pre-shearing Starting with a kinematic model Apply shear prior to tool contact. Ply already fits into tool and deforms easily Reduced Layup time and effort Large number of applications = Complex and time consuming Solution: Shearing the plies prior to layup: ‘Preshearing’ Reduction in on tool and overall layup time Less defects Lamination became ‘easy’
  • 14.
    14/18 Understanding the laminationprocess Thank you for listening. Questions and ideas welcome: michael.elkington@bristol.ac.uk Doctoral Training Centre (DTC)