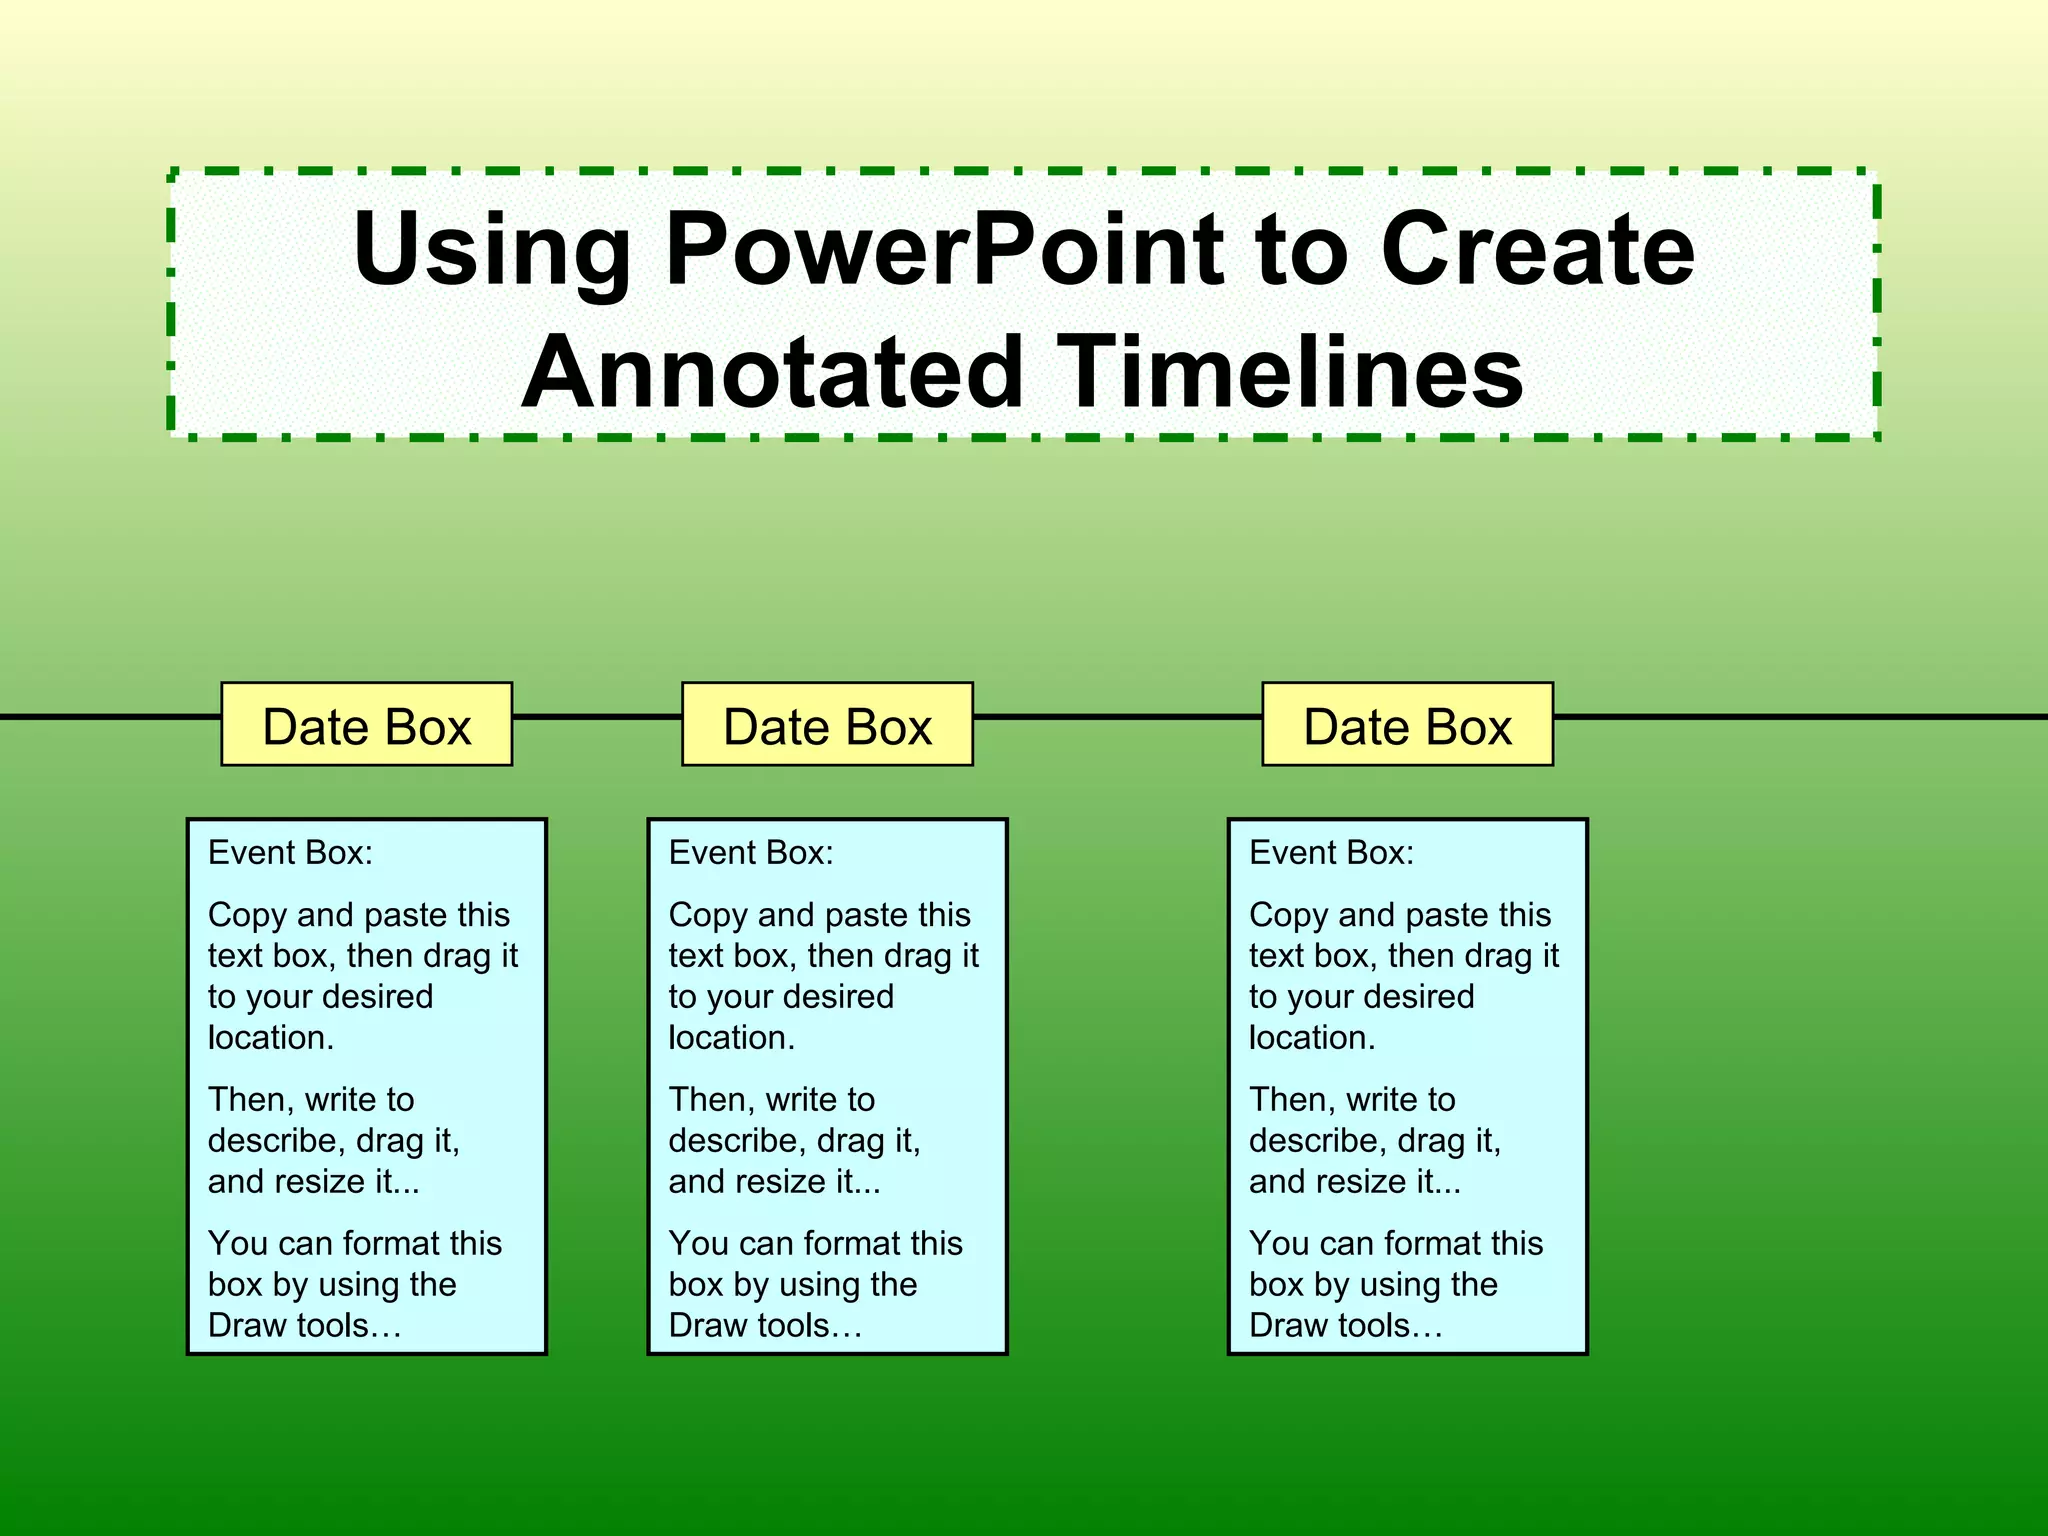
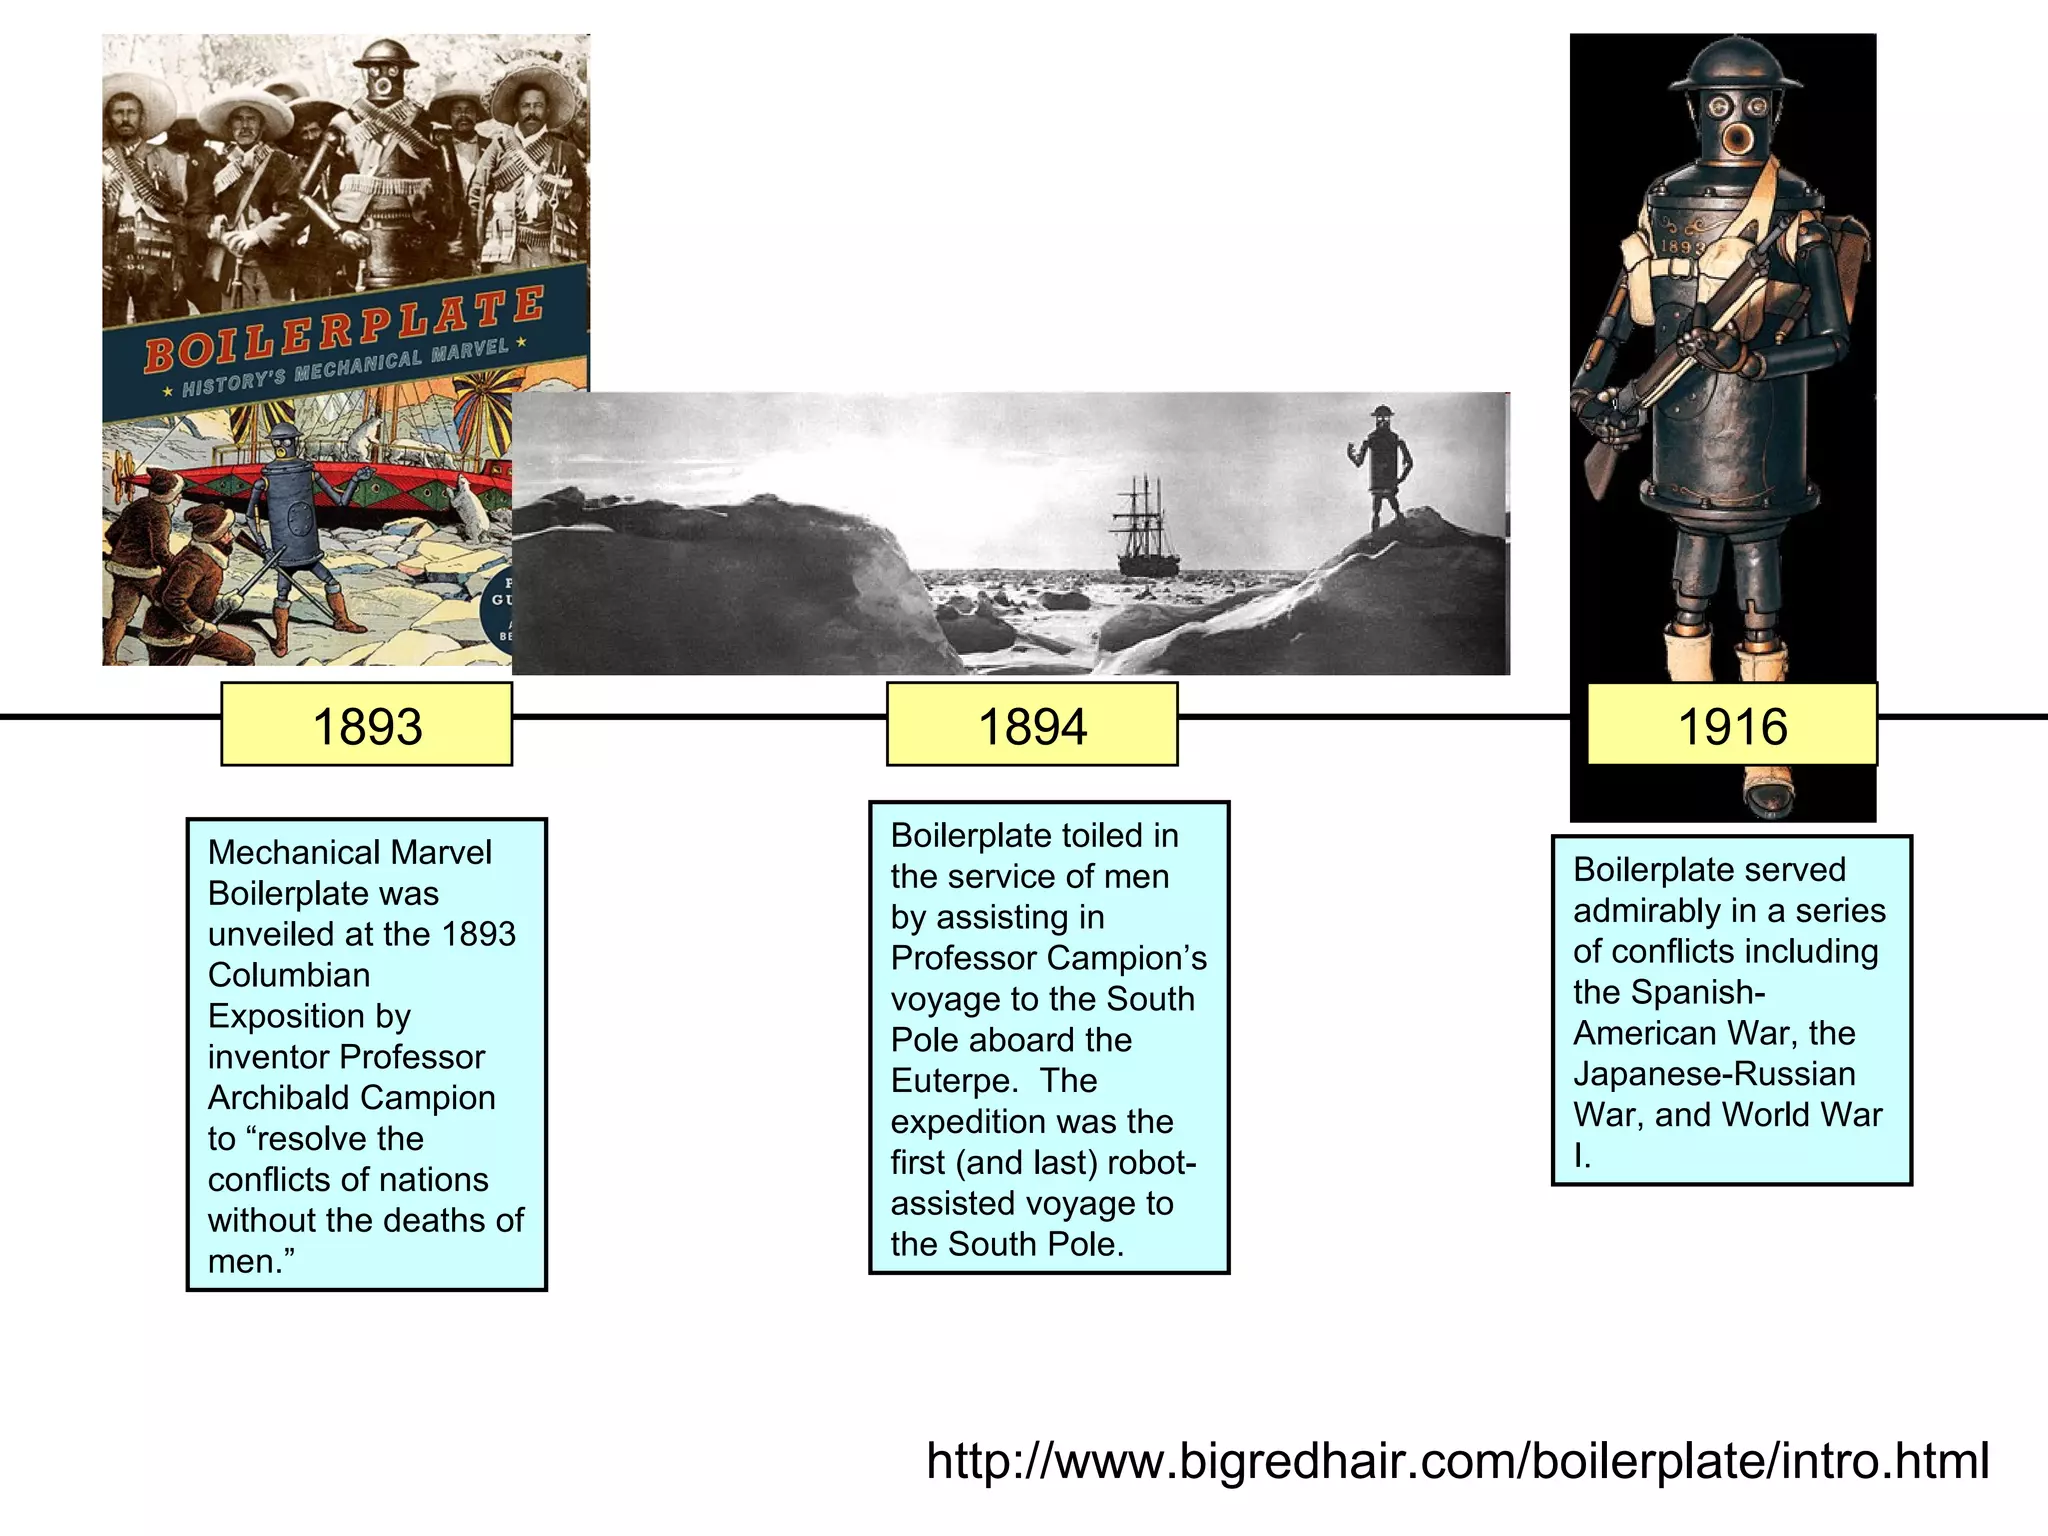
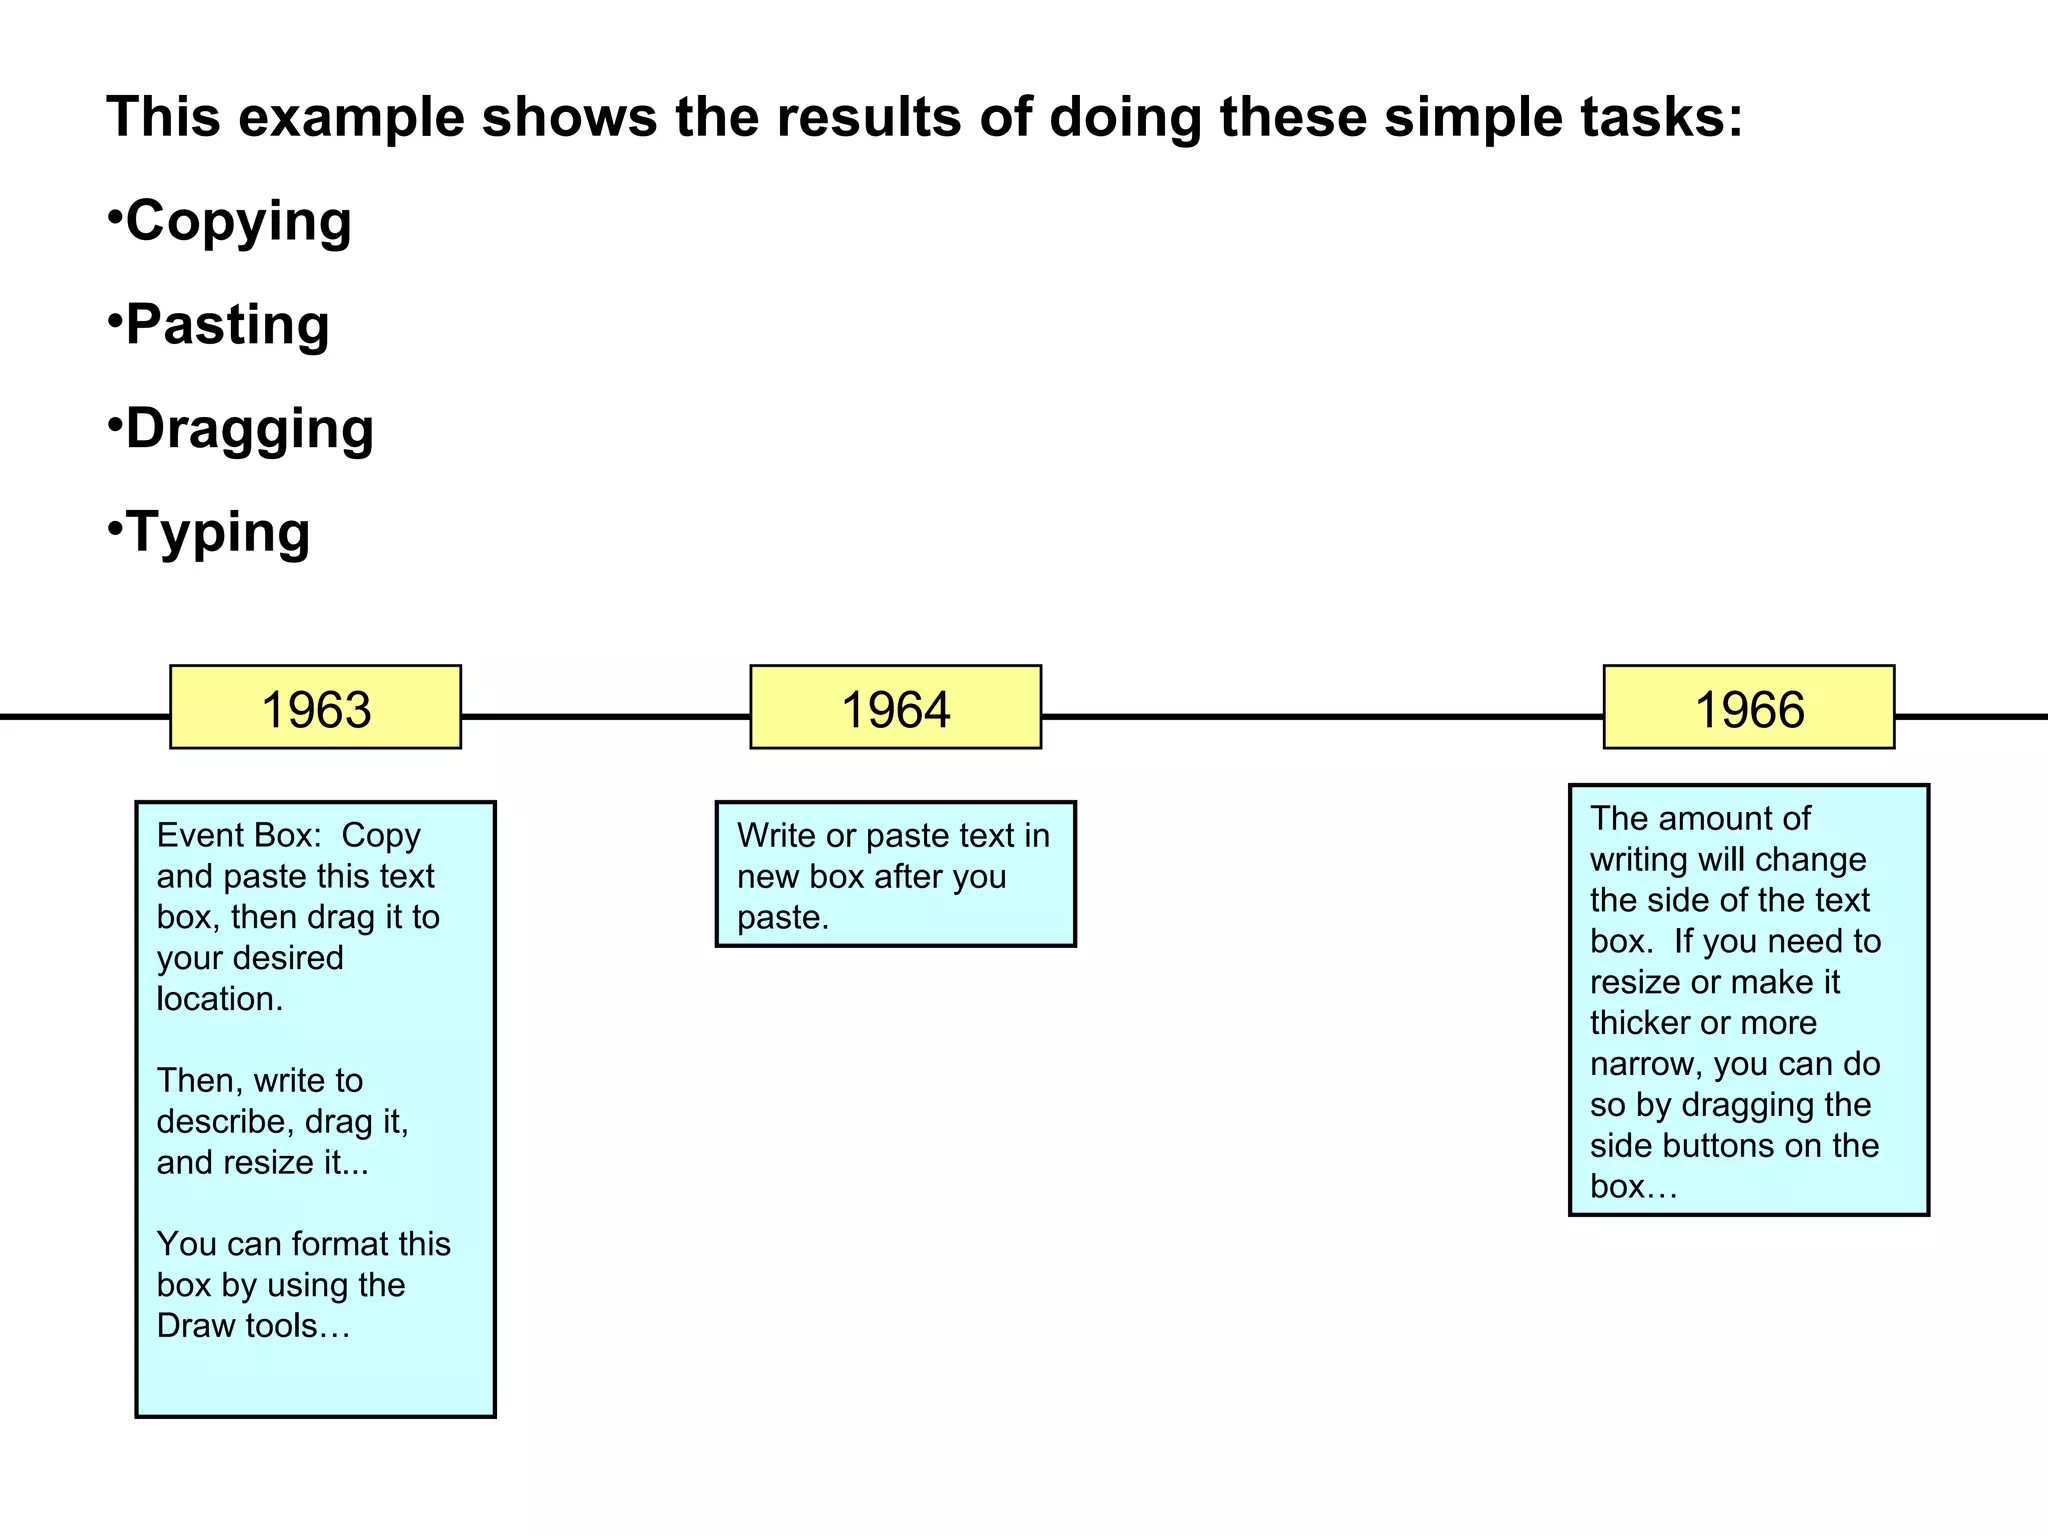
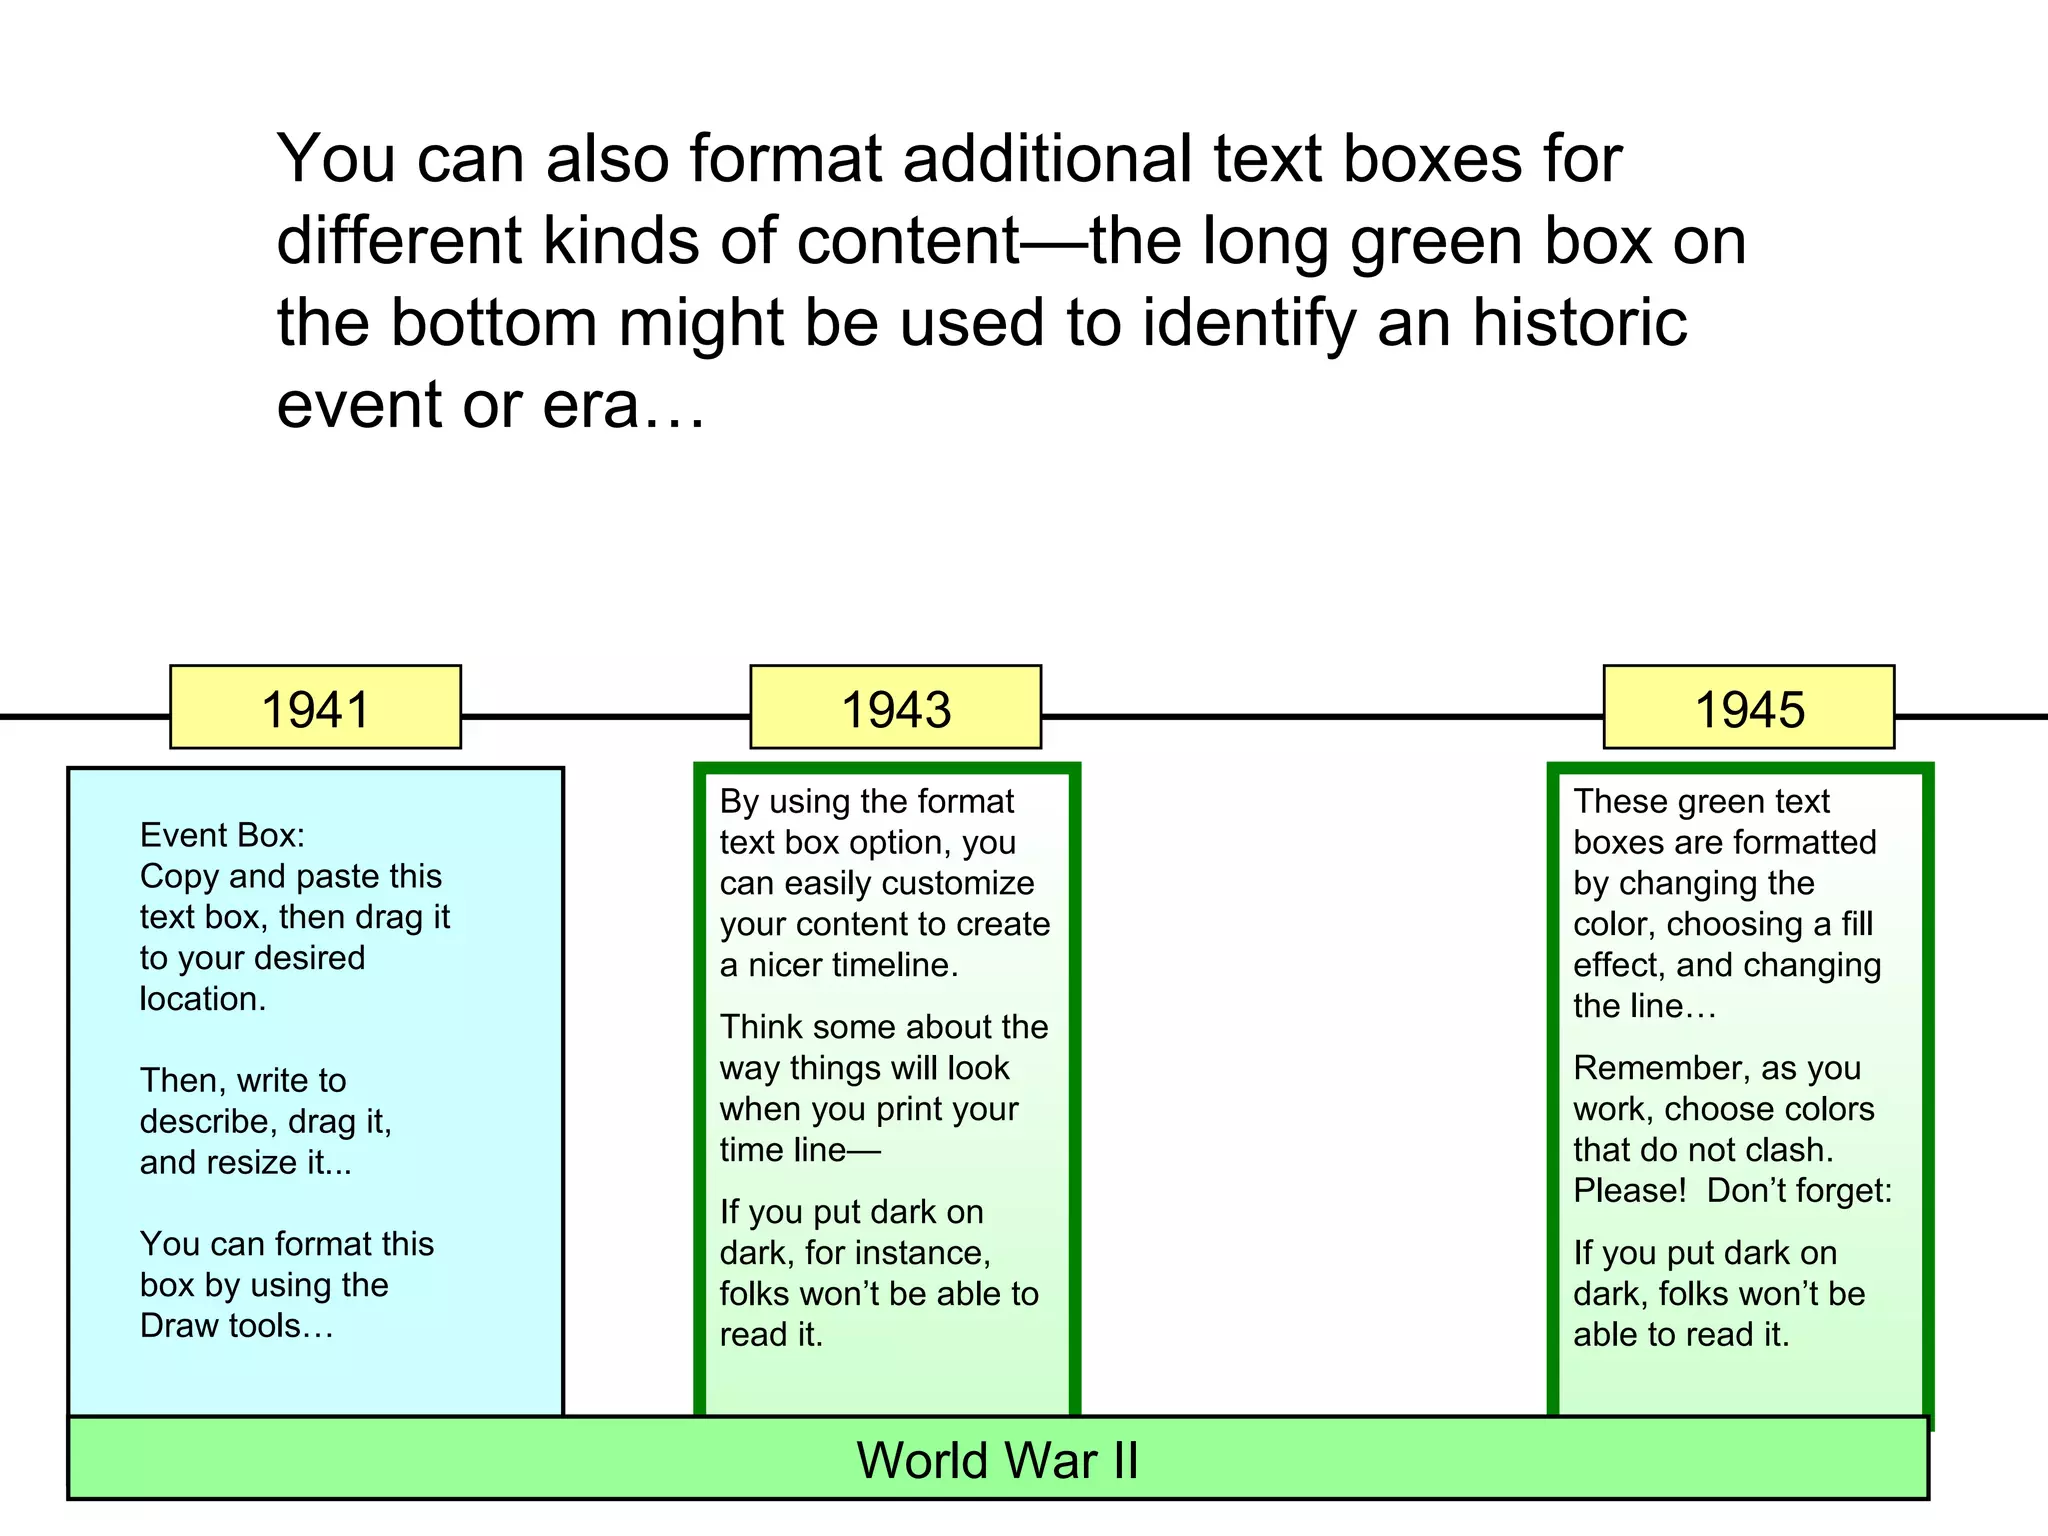
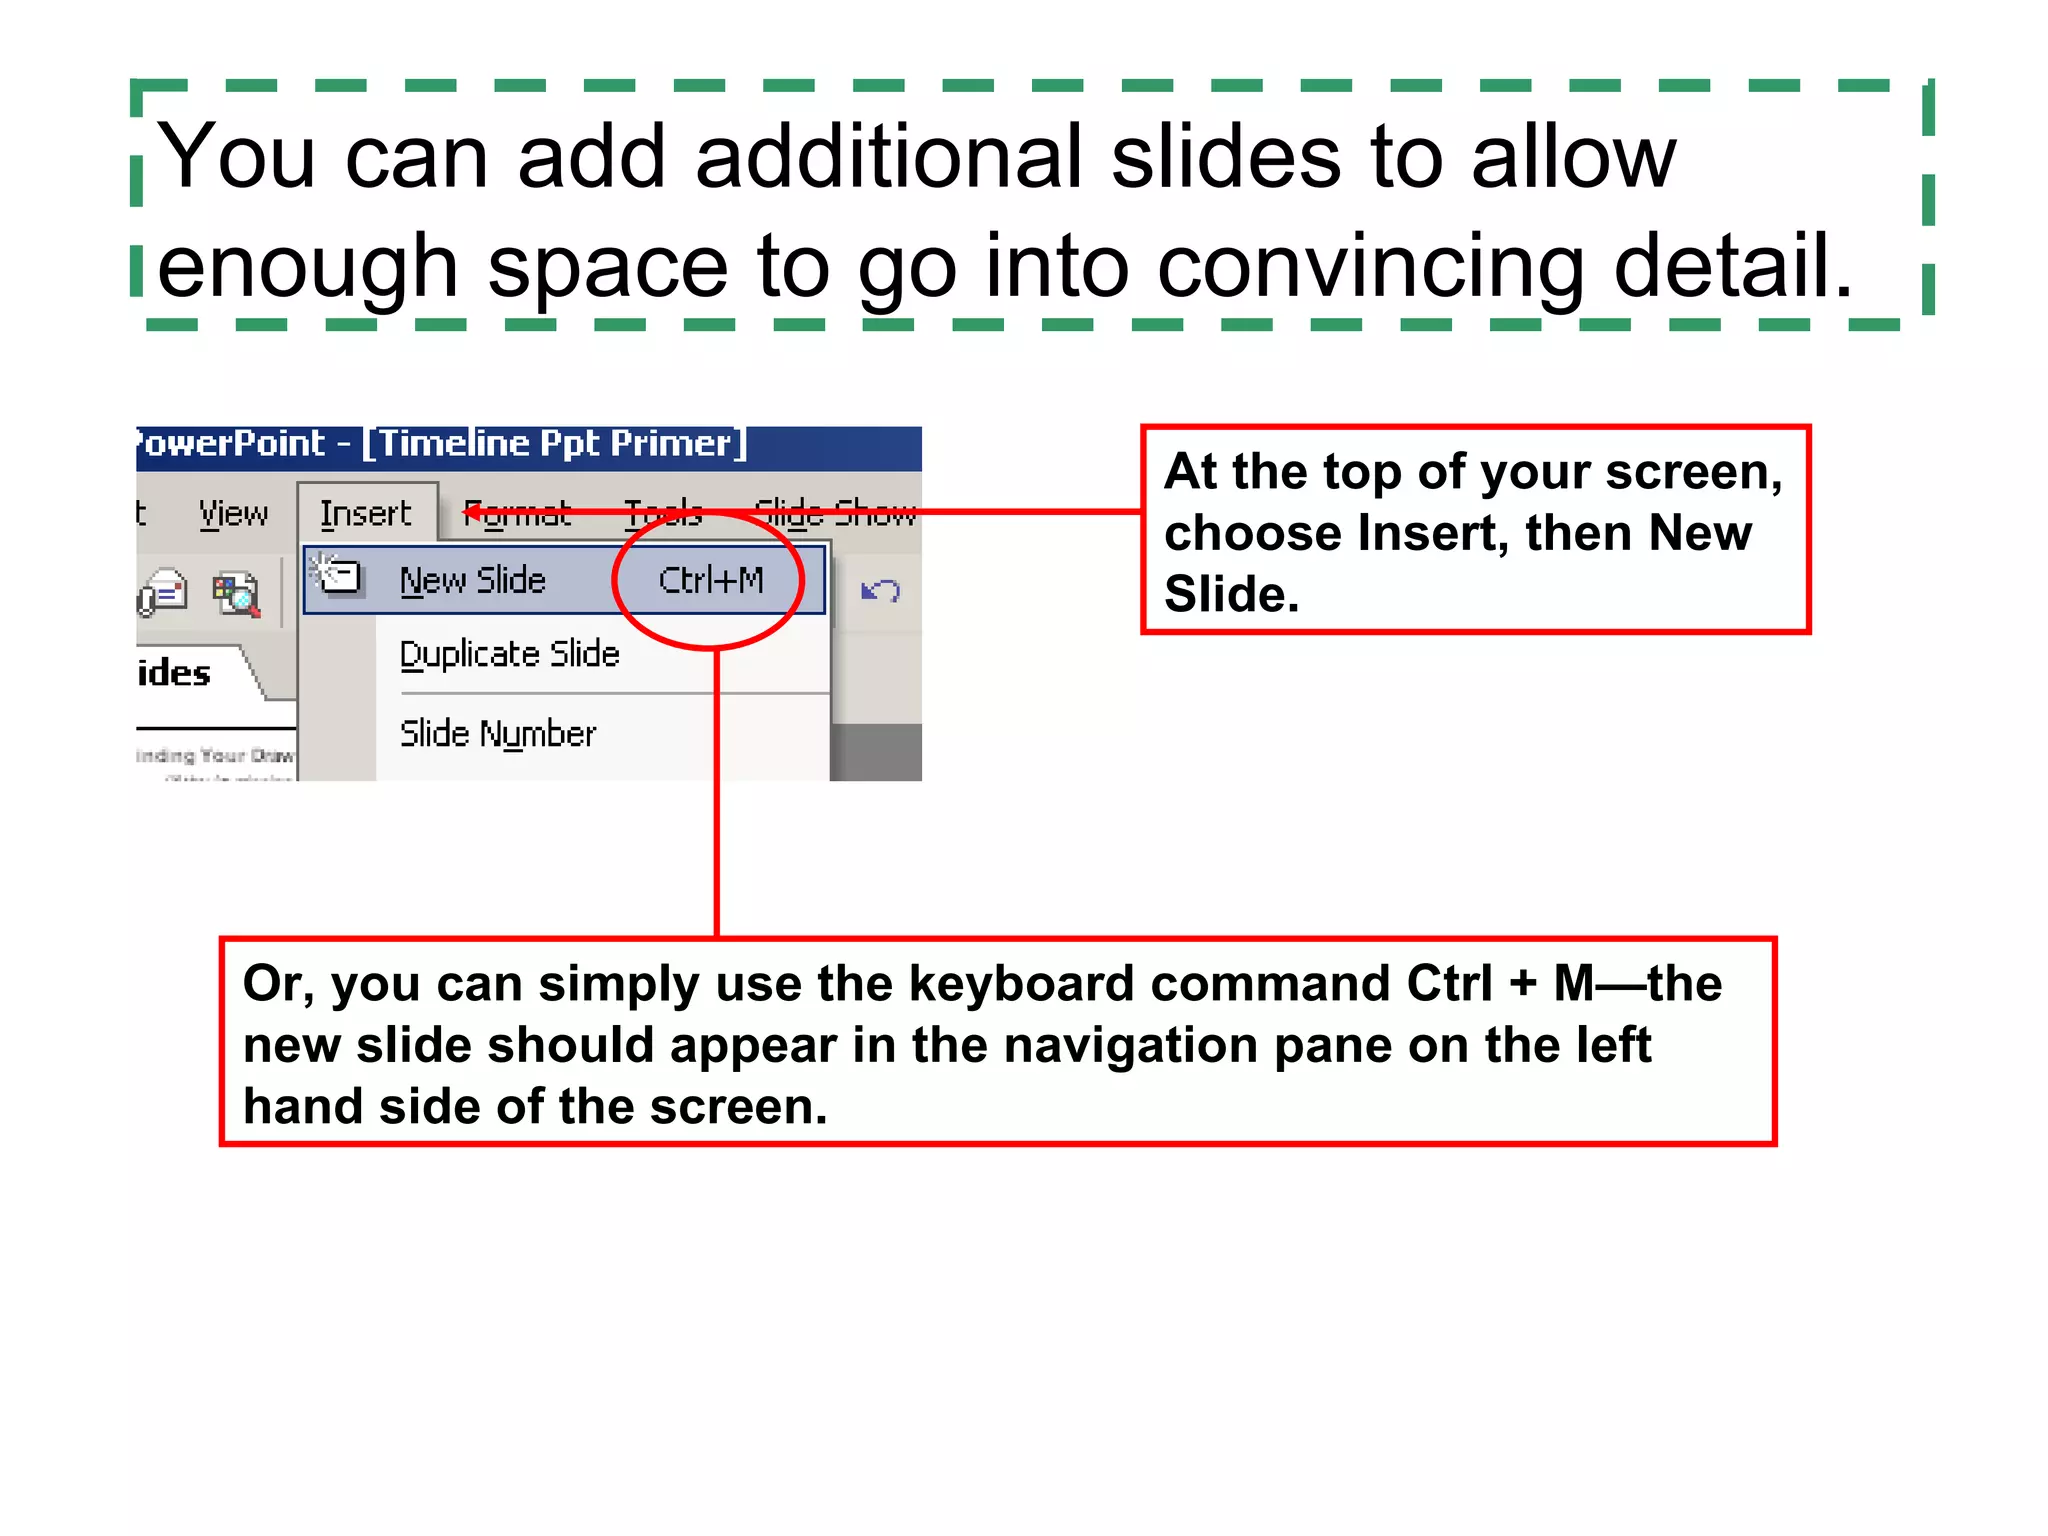
Call Girls in Najafgarh Delhi 💯Call Us 🔝8264348440🔝
Timeline ppt primer
1. Using PowerPoint to Create
Annotated Timelines
Date Box Date Box Date Box
Event Box: Event Box: Event Box:
Copy and paste this Copy and paste this Copy and paste this
text box, then drag it text box, then drag it text box, then drag it
to your desired to your desired to your desired
location. location. location.
Then, write to Then, write to Then, write to
describe, drag it, describe, drag it, describe, drag it,
and resize it... and resize it... and resize it...
You can format this You can format this You can format this
box by using the box by using the box by using the
Draw tools… Draw tools… Draw tools…
2. 1893 1894 1916
Boilerplate toiled in
Mechanical Marvel
the service of men Boilerplate served
Boilerplate was
by assisting in admirably in a series
unveiled at the 1893
Professor Campion’s of conflicts including
Columbian
voyage to the South the Spanish-
Exposition by
Pole aboard the American War, the
inventor Professor Japanese-Russian
Euterpe. The
Archibald Campion
expedition was the War, and World War
to “resolve the
first (and last) robot- I.
conflicts of nations
assisted voyage to
without the deaths of
the South Pole.
men.”
http://www.bigredhair.com/boilerplate/intro.html
3. Date Box Copy, paste, drag to line, and fill in with the
appropriate date
If you need more than a single page, you can copy
and paste THIS LINE into a new slide—Go to
InsertNew Slide—the new line will be in the same
spot if you do not move it
Event Box:
Copy and paste this
text box, then drag it
to your desired
location.
Then, write to
describe, drag it,
and resize it...
You can format this
box by using the
Draw tools…
4. This example shows the results of doing these simple tasks:
•Copying
•Pasting
•Dragging
•Typing
1963 1964 1966
Event Box: Copy The amount of
Write or paste text in
and paste this text writing will change
new box after you
box, then drag it to the side of the text
paste.
your desired box. If you need to
location. resize or make it
thicker or more
Then, write to narrow, you can do
describe, drag it, so by dragging the
and resize it... side buttons on the
box…
You can format this
box by using the
Draw tools…
5. Finding Your Draw Tools
(if they’re missing…)
Click on View
Click on Toolbars
Click on Drawing
The drawing toolbar
will appear in the lower
left hand corner…
6. Insert text box button. Then choose size and location. Add text.
Insert image button. You can click, drag, and resize images.
Fill button. You can change the fill color of text boxes—get more colors, too.
Line color button. Changes outline colors. This box is red.
Line thickness button. These fat lines are 2 ¼ point lines and the
skinny ones are 1 point.
7. You can also format additional text boxes for
different kinds of content—the long green box on
the bottom might be used to identify an historic
event or era…
1941 1943 1945
By using the format These green text
Event Box: text box option, you boxes are formatted
Copy and paste this can easily customize by changing the
text box, then drag it your content to create color, choosing a fill
to your desired a nicer timeline. effect, and changing
location. the line…
Think some about the
Then, write to way things will look Remember, as you
describe, drag it, when you print your work, choose colors
and resize it... time line— that do not clash.
Please! Don’t forget:
If you put dark on
You can format this dark, for instance, If you put dark on
box by using the folks won’t be able to dark, folks won’t be
Draw tools… read it. able to read it.
World War II
8. Once you have formatted a text box the
way you want it—colors, fonts, and so on,
copy and paste the pretty box so you don’t
have to reformat every single text box.
Just type over the font that needs to be
changed when you paste a text box.
9. This first computer
was made of wood This portable
and powered by computer only The latest
steam! weighed 475 pounds computers are made
and was moved by a of folded paper and
team of draft horses very expensive tape
An early model
nicknamed “El Pinto”
because it This short-lived
sometimes burst into model was both a
flames computer and a
fashionable hat
1885 1904 1922 1931 1999 2040
This old looking This Depression-era
computer is an early computer doubled
MacIntosh computer as a furnace
A late model, “green
technology”
This model was computer made of
called the Compy recycled dead X-box
386 consoles
10. To add images to your timeline, find suitable images online. Then,
right click, choose “Copy Image,” and you can paste the image
directly into your timeline slide.
Once the image is in, you need to
copy and paste the URL from the
image’s Web page into one of two
places:
Onto the slide where the image
appears OR
Onto a credits slide at the end of
your presentation
11. You can add additional slides to allow
enough space to go into convincing detail.
At the top of your screen,
choose Insert, then New
Slide.
Or, you can simply use the keyboard command Ctrl + M—the
new slide should appear in the navigation pane on the left
hand side of the screen.
12. To succeed most fully, work in this order:
Think and Plan—What goes in? What
goes where?
Hunt and Gather—Find & think up content
to write. Get images to view.
Format and Produce—Where does
everything go? Work towards the final
product: Good appearance and good
ideas!