Download as PDF, PPTX

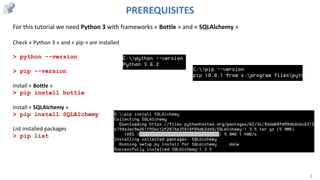


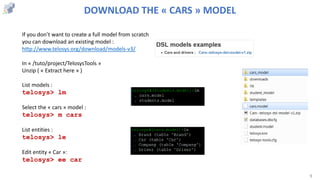
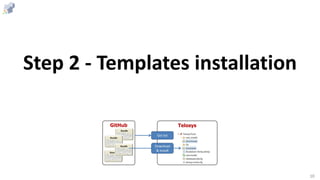
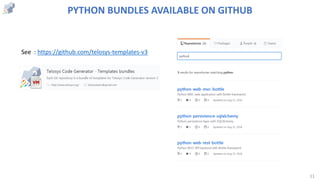


This document provides a comprehensive tutorial for setting up a Python MVC/SQL web application using Telosys, including installation instructions for Python packages like Bottle and SQLAlchemy, as well as the Telosys CLI. It outlines steps for creating and managing entity models, installing template bundles, generating code for web MVC and persistence layers, and initializing the SQLite database. Finally, it guides the user on running the web application and customizing entities or templates as needed.