Download to read offline
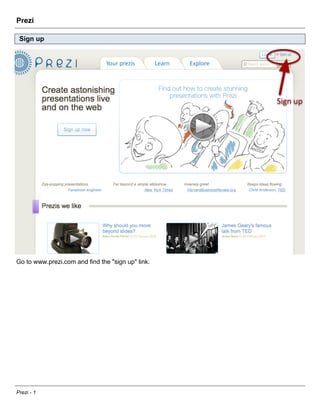


This document provides instructions for creating a Prezi presentation. It explains how to [1] sign up for a free Prezi license using a university email which allows storage and downloading of prezis. It then outlines [2] how to give a prezi a title and description and insert text, images, videos and group concepts into frames. Finally, it describes [3] how to choose a path order to display content and use the "show" option to present and verify the prezi.