Download to read offline

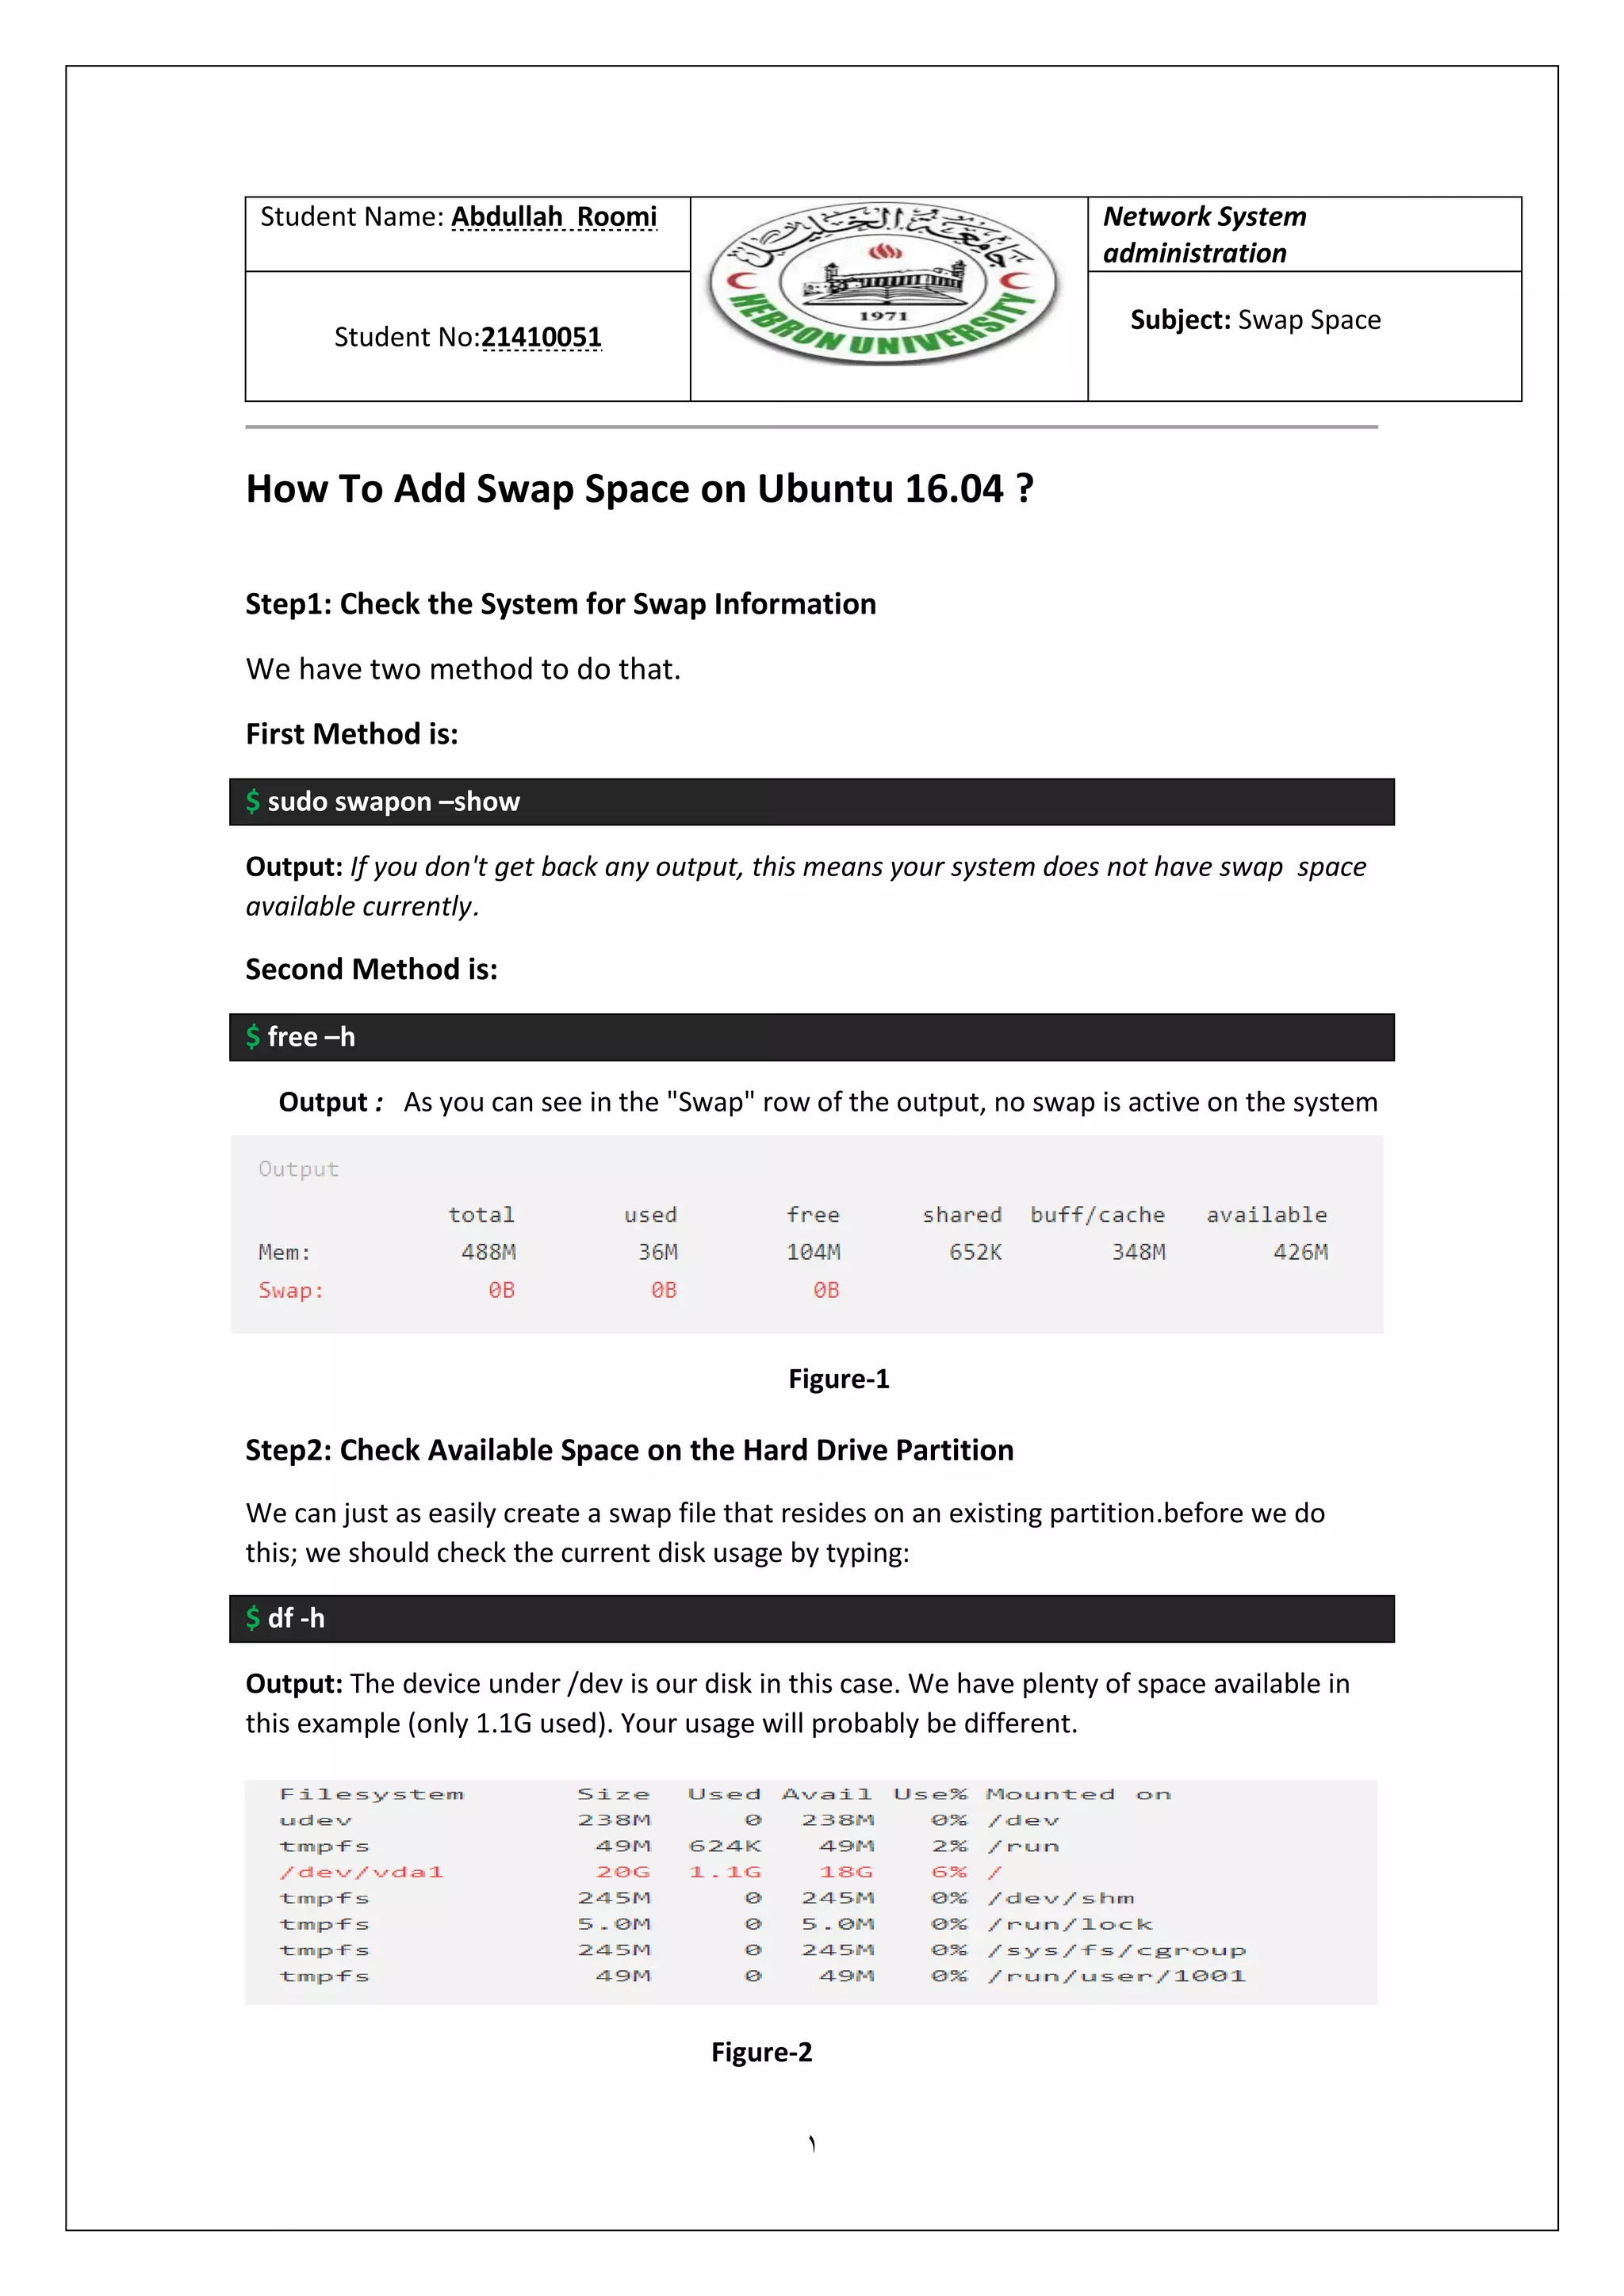
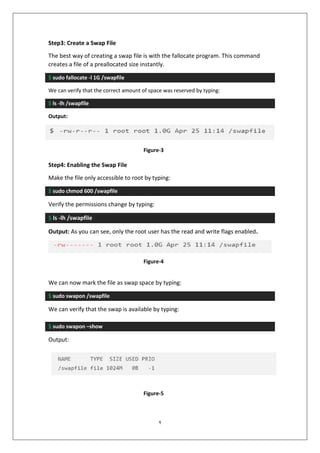
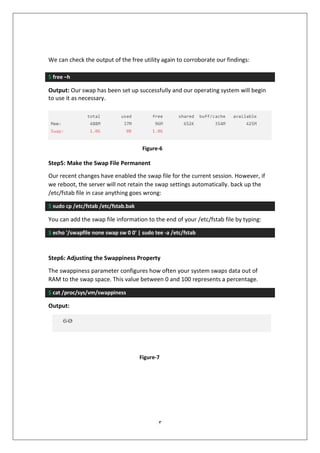
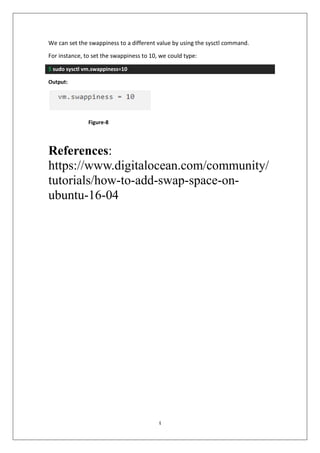

The document provides steps to add swap space on an Ubuntu 16.04 system. It describes checking the current swap configuration and available disk space. Then it explains how to create a 1GB swap file using fallocate, make it accessible only to root, and enable it for use. The steps also cover making the swap file configuration permanent in fstab and adjusting the swappiness parameter to control how often data is swapped out to disk.