Downloaded 45 times

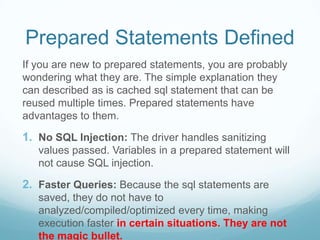
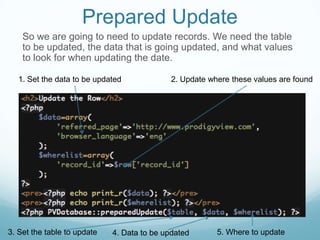
![Prepared Insert Explain
In our previous example, we are inserting a query and returning
the auto generated id. The method used for that looks and
operates like below:
$table_name: The table the query is going into
$returnField: The field that is going to be returned. Used for Postgresql.
$returnTable: The table that contains the field that the auto-generated will be
returned from. Used for MS SQL.
$data: Data to be inserted into the table using column => value format
$formats: Optional. By default is an empty row, but is associated with the
values passed. So if the value at $data[0] is a string, the $format[0] should be
‘s’ for string.](https://image.slidesharecdn.com/preparedstatementsphp-111207082653-phpapp02/85/SQL-Prepared-Statements-Tutorial-6-320.jpg)
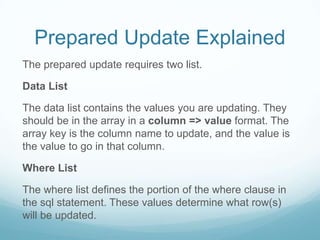
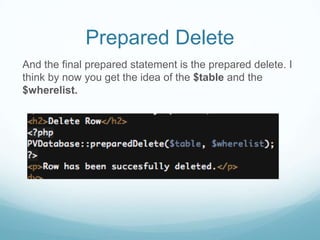
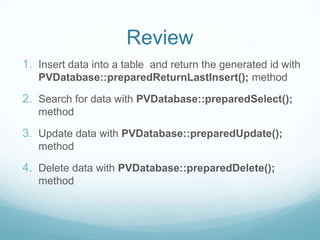

This document discusses prepared statements in databases. Prepared statements can insert, select, update, and delete data more securely and efficiently than plain SQL queries. The key advantages are prevention of SQL injection and faster execution. The document provides code examples for inserting, selecting, updating, and deleting data using prepared statements. It explains the use of placeholders and prepared statement methods.