This document provides steps to set up Selenium WebDriver with Java and Eclipse:
1. Install the latest JDK and Eclipse IDE.
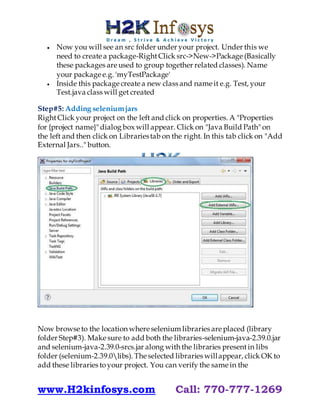
2. Download the Selenium WebDriver JAR files from the SeleniumHQ website.
3. In Eclipse, create a new project, package, and class. Add the Selenium JAR files to the project.
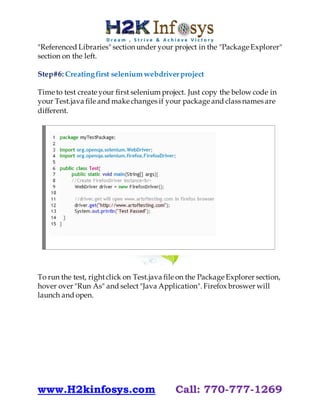
4. Copy sample code to test launching a Firefox browser into the class.