Contents
Custom tray
Border molding
Tray preparation after border molding
Final impression
Inspecting the impression
Disinfecting the impression
Remaking the impression
3.
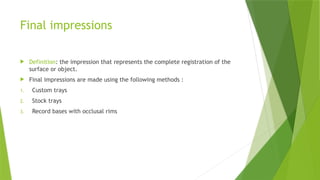
Final impressions
Definition:the impression that represents the complete registration of the
surface or object.
Final impressions are made using the following methods :
1. Custom trays
2. Stock trays
3. Record bases with occlusal rims
4.
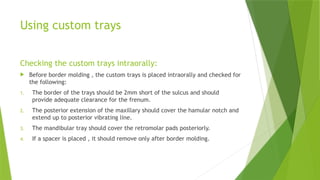
Using custom trays
Checkingthe custom trays intraorally:
Before border molding , the custom trays is placed intraorally and checked for
the following:
1. The border of the trays should be 2mm short of the sulcus and should
provide adequate clearance for the frenum.
2. The posterior extension of the maxillary should cover the hamular notch and
extend up to posterior vibrating line.
3. The mandibular tray should cover the retromolar pads posteriorly.
4. If a spacer is placed , it should remove only after border molding.
5.
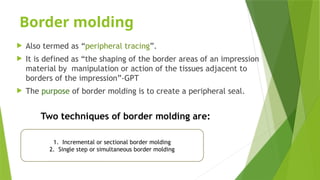
Border molding
Alsotermed as “peripheral tracing”.
It is defined as “the shaping of the border areas of an impression
material by manipulation or action of the tissues adjacent to
borders of the impression”-GPT
The purpose of border molding is to create a peripheral seal.
Two techniques of border molding are:
1. Incremental or sectional border molding
2. Single step or simultaneous border molding
6.
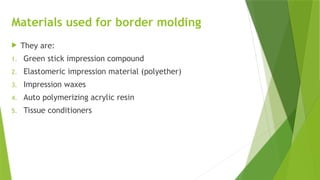
Materials used forborder molding
They are:
1. Green stick impression compound
2. Elastomeric impression material (polyether)
3. Impression waxes
4. Auto polymerizing acrylic resin
5. Tissue conditioners
7.
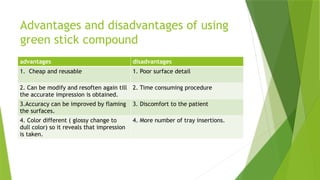
Advantages and disadvantagesof using
green stick compound
advantages disadvantages
1. Cheap and reusable 1. Poor surface detail
2. Can be modify and resoften again till
the accurate impression is obtained.
2. Time consuming procedure
3.Accuracy can be improved by flaming
the surfaces.
3. Discomfort to the patient
4. Color different ( glossy change to
dull color) so it reveals that impression
is taken.
4. More number of tray insertions.
8.
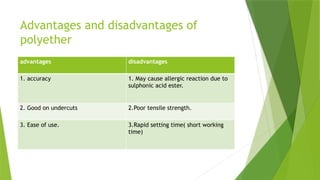
Advantages and disadvantagesof
polyether
advantages disadvantages
1. accuracy 1. May cause allergic reaction due to
sulphonic acid ester.
2. Good on undercuts 2.Poor tensile strength.
3. Ease of use. 3.Rapid setting time( short working
time)
9.
Single step orsimultaneous border
molding
In this method, the entire periphery of the tray is refined in a
single step.
The border molding material is kept around entire border
In a single step and molded all at once.
Putty or heavy body elastomeric impression materials are
Ideal for this method
Greenstick compound is not recommended as it impossible to
soften the material over the entire length of border.
Advantages of this method
Error in one section will not propagate the mistakes to other
segments
Number of insertion of the tray in the mouth is reduced to one.
10.
Ideal requisites forthe material used for
simultaneous border molding
1. It should have sufficient viscosity to remain in position
along the border of the tray.
2. It should not be sticky, it should be easy to manipulate
and load on deficient areas.
3. It should have setting time of 3-5minutes.
4. It shouldn’t displace the tissues.
5. It should be easily trimmed and shaped.
6. It should retain its flow properties when placed inside the
mouth.
11.
Advantages of usingelastomeric
impression materials
1. Procedure is simple no need to temper and chill.
2. Less armamentarium – no water bath and flames.
3. No fear of patient discomfort from heated stick compound.
Disadvantages of using elastomeric impression materials:
4. They will not adhere to tray and require tray adhesive.
5. Material is more expensive.
6. They need good support from tray , not indicated with grossly
underextended trays.
12.
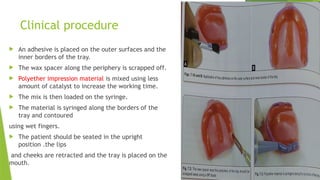
Clinical procedure
Anadhesive is placed on the outer surfaces and the
inner borders of the tray.
The wax spacer along the periphery is scrapped off.
Polyether impression material is mixed using less
amount of catalyst to increase the working time.
The mix is then loaded on the syringe.
The material is syringed along the borders of the
tray and contoured
using wet fingers.
The patient should be seated in the upright
position .the lips
and cheeks are retracted and the tray is placed on the
mouth.
13.
Following passivemovements are performed:
1. The lips are elevated and then extended outwards ,
downwards and inwards.
2. The cheek is elevated and then pulled outward , downward and
inward .
3. The buccal frenum is recorded by pulling the cheek backwards and
forwards.
4. The distobuccal region is recorded by pulling the cheek outward ,
downwards and inwards followed by opening the mouth wide and
moving the mandible to side to side.
14.
Incremental or sectionalborder molding
In this method sections of the periphery of the tray are
refined individually , according to the anatomical
landmark in that areas.
The material of the choice is green stick compound(low
fusing impression compound).
In this case , the spacer is generally removed just before
impression making.
15.
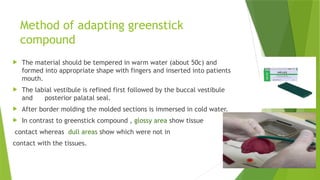
Method of adaptinggreenstick
compound
The material should be tempered in warm water (about 50c) and
formed into appropriate shape with fingers and inserted into patients
mouth.
The labial vestibule is refined first followed by the buccal vestibule
and posterior palatal seal.
After border molding the molded sections is immersed in cold water.
In contrast to greenstick compound , glossy area show tissue
contact whereas dull areas show which were not in
contact with the tissues.
16.
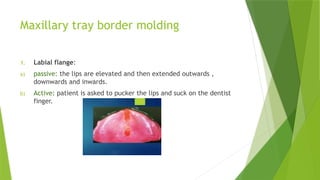
Maxillary tray bordermolding
1. Labial flange:
a) passive: the lips are elevated and then extended outwards ,
downwards and inwards.
b) Active: patient is asked to pucker the lips and suck on the dentist
finger.
17.
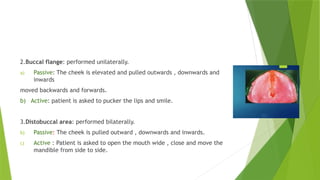
2.Buccal flange: performedunilaterally.
a) Passive: The cheek is elevated and pulled outwards , downwards and
inwards
moved backwards and forwards.
b) Active: patient is asked to pucker the lips and smile.
3.Distobuccal area: performed bilaterally.
b) Passive: The cheek is pulled outward , downwards and inwards.
c) Active : Patient is asked to open the mouth wide , close and move the
mandible from side to side.
18.
Recording the POSTERIORPALATAL SEAL;
The posterior palatal seal is defined as “The soft tissues along the
junction of hard and soft palate on which pressure within the
physiological limits of tissue can be applied by a denture to aid in
retenture of denture”.GPT
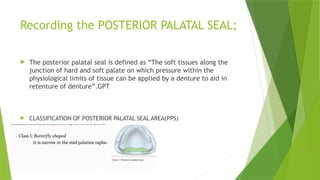
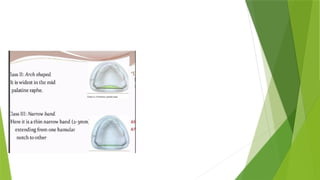
CLASSIFICATION OF POSTERIOR PALATAL SEAL AREA(PPS)
21.
Functions of posteriorpalatal seal
Aids in retention by maintaining constant contact with the
soft palate during functional movements like speech ,
mastication and deglutition.
Reduces the tendency for gag reflex as it prevents the
formation of the gap between the denture base and soft
palate during functional movements.
Prevents food accumulation between the posterior border
of the denture and soft palate.
22.
Methods used tomark post dam
Conventional method
Fluid wax technique
Arbitrary scraping of the master cast
Extended palatal technique
23.
Conventional approach
Thepatient is asked to sit in an upright position and asked to rinse his
mouth with some astringent mouth wash.
The posterior palatal area is wiped with gauze.
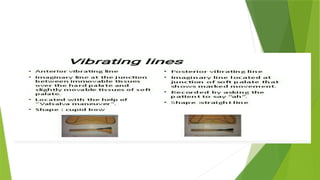
The “T” burnisher is used to locate the hamular notch by palpating
posteriorly to the maxillary tuberosity on the both sides. The full
extent of the hamular notch is marked with an indelible pencil.
The posterior vibrating line is marked using a indelible pencil by
asking the patient to say “ah” in a non-vigorous motion.
25.
Advantages of conventionalmethod disadvantages of conventional method
The patient has idea of the posterior extent of the
denture base.
Excessive scraping of the cast can
frequently lead to tissue compression.
Final adjustments during insertion are minimized. it is not a physiological technique ,
hence it is technique sensitive.
The patient can experience the retentive qualities
of the denture at earliest stage.
26.
Fluid wax technique
This technique is done immediately after making the wash impression and
before pouring the master cast .
Zinc oxide eugenol and impression plaster are suitable impression materials
for this technique as fluid wax adheres well to them.
The anterior and posterior vibrating lines are marked as described in
conventional technique .These lines are marked in the patients mouth
immediately after making the wash impression.
27.
Fluid wax technique
Done immediately after making the wash impression and before pouring the
master cast.
Zinc oxide eugenol and impression plaster are suitable impression materials
for this technique as fluid wax adheres well to them.
The anterior and posterior vibrating lines are marked . these lines are marked
in the patients mouth immediately after making wash impression.
The marking are transferred to the secondary or wash impression by reseating
the impression in the mouth.
The wash impression is painted with fluid wax.
28.
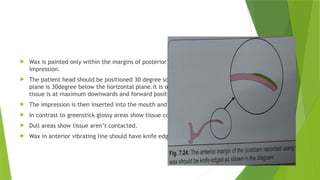
Wax ispainted only within the margins of posterior palatal seal marked on the
impression.
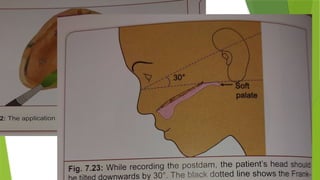
The patient head should be positioned 30 degree so that Frankfort horizontal
plane is 30degree below the horizontal plane.it is only position that the soft
tissue is at maximum downwards and forward position.
The impression is then inserted into the mouth and removed after 4-6 mins.
In contrast to greenstick glossy areas show tissue contact.
Dull areas show tissue aren’t contacted.
Wax in anterior vibrating line should have knife edge margins.
29.
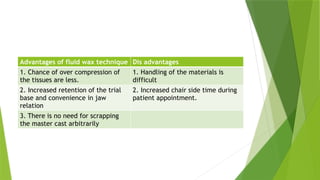
Advantages of fluidwax technique Dis advantages
1. Chance of over compression of
the tissues are less.
1. Handling of the materials is
difficult
2. Increased retention of the trial
base and convenience in jaw
relation
2. Increased chair side time during
patient appointment.
3. There is no need for scrapping
the master cast arbitrarily
30.
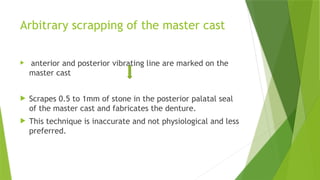
Arbitrary scrapping ofthe master cast
anterior and posterior vibrating line are marked on the
master cast
Scrapes 0.5 to 1mm of stone in the posterior palatal seal
of the master cast and fabricates the denture.
This technique is inaccurate and not physiological and less
preferred.
31.
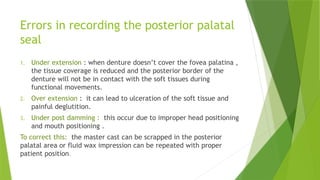
Errors in recordingthe posterior palatal
seal
1. Under extension : when denture doesn’t cover the fovea palatina ,
the tissue coverage is reduced and the posterior border of the
denture will not be in contact with the soft tissues during
functional movements.
2. Over extension : it can lead to ulceration of the soft tissue and
painful deglutition.
3. Under post damming : this occur due to improper head positioning
and mouth positioning .
To correct this: the master cast can be scrapped in the posterior
palatal area or fluid wax impression can be repeated with proper
patient position.
32.
4. Over postdamming : occurs due to excess scraping of the
master cast . Most commonly in the hamular notch region.
Mild over damming in the hamular notch region can lead to
tissue irritation of the mucosa and excessive over damming
produces downward displacement of the denture
posteriorly.
33.
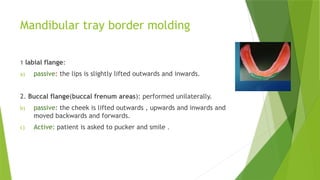
Mandibular tray bordermolding
1 labial flange:
a) passive: the lips is slightly lifted outwards and inwards.
2. Buccal flange(buccal frenum areas): performed unilaterally.
b) passive: the cheek is lifted outwards , upwards and inwards and
moved backwards and forwards.
c) Active: patient is asked to pucker and smile .
34.
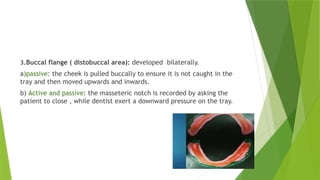
3.Buccal flange (distobuccal area): developed bilaterally.
a)passive: the cheek is pulled buccally to ensure it is not caught in the
tray and then moved upwards and inwards.
b) Active and passive: the masseteric notch is recorded by asking the
patient to close , while dentist exert a downward pressure on the tray.
35.
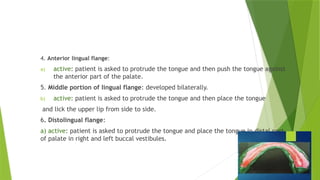
4. Anterior lingualflange:
a) active: patient is asked to protrude the tongue and then push the tongue against
the anterior part of the palate.
5. Middle portion of lingual flange: developed bilaterally.
b) active: patient is asked to protrude the tongue and then place the tongue
and lick the upper lip from side to side.
6. Distolingual flange:
a) active: patient is asked to protrude the tongue and place the tongue in distal part
of palate in right and left buccal vestibules.
36.
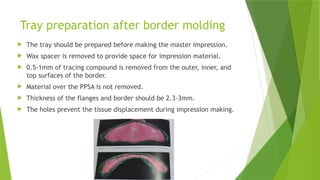
Tray preparation afterborder molding
The tray should be prepared before making the master impression.
Wax spacer is removed to provide space for impression material.
0.5-1mm of tracing compound is removed from the outer, inner, and
top surfaces of the border.
Material over the PPSA is not removed.
Thickness of the flanges and border should be 2.3-3mm.
The holes prevent the tissue displacement during impression making.
37.
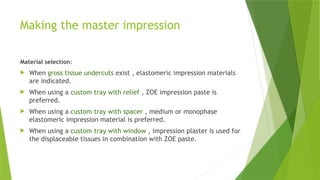
Making the masterimpression
Material selection:
When gross tissue undercuts exist , elastomeric impression materials
are indicated.
When using a custom tray with relief , ZOE impression paste is
preferred.
When using a custom tray with spacer , medium or monophase
elastomeric impression material is preferred.
When using a custom tray with window , impression plaster is used for
the displaceable tissues in combination with ZOE paste.
38.
Advantages and disadvantagesof
impression plaster
advantages disadvantages
1. Capable of recording soft tissues
in the uncompressed state.
Very dry sensation after having
impression recorded.
2. Minimal dimensional change on
setting
Not suitable for use in undercuts.1
39.
Advantages and disadvantagesof zinc
oxide eugenol paste
advantages disadvantages
1. It registers accurate surface
details.
1.It requires a special tray for
impression making
2. Dimensionally stable 2. It is sticky in nature and adheres
to tissues.
3, it can be checked in the mouth
repeatedly without deforming.
3. Eugenol can cause burning
sensation and tissue irritation.
4. Minor defects can be corrected
locally without discarding a good
impression.
4. It can’t be used for impression of
undercut areas as it is inelastic in
nature.
40.
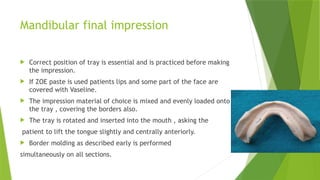
Mandibular final impression
Correct position of tray is essential and is practiced before making
the impression.
If ZOE paste is used patients lips and some part of the face are
covered with Vaseline.
The impression material of choice is mixed and evenly loaded onto
the tray , covering the borders also.
The tray is rotated and inserted into the mouth , asking the
patient to lift the tongue slightly and centrally anteriorly.
Border molding as described early is performed
simultaneously on all sections.
41.
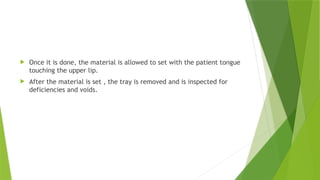
Once itis done, the material is allowed to set with the patient tongue
touching the upper lip.
After the material is set , the tray is removed and is inspected for
deficiencies and voids.
42.
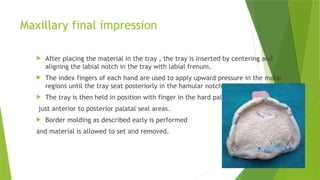
Maxillary final impression
After placing the material in the tray , the tray is inserted by centering and
aligning the labial notch in the tray with labial frenum.
The index fingers of each hand are used to apply upward pressure in the molar
regions until the tray seat posteriorly in the hamular notches.
The tray is then held in position with finger in the hard palate
just anterior to posterior palatal seal areas.
Border molding as described early is performed
and material is allowed to set and removed.
43.
Inspecting the impression
Inspected for air inclusions and voids.
The surface is inspected to make sure , that all the landmarks are
recorded accurately.
Small voids can be rectified by filling them with the wax.
44.
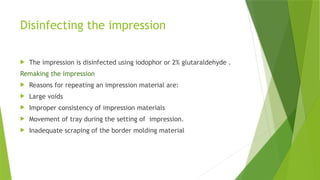
Disinfecting the impression
The impression is disinfected using iodophor or 2% glutaraldehyde .
Remaking the impression
Reasons for repeating an impression material are:
Large voids
Improper consistency of impression materials
Movement of tray during the setting of impression.
Inadequate scraping of the border molding material
45.
References
Textbook ofprosthodontics Deepak Nallaswamy Veeraiyan 2nd
edition.
Textbook of prosthodontics V Rangarajan 2nd
edition