Download to read offline


![Protecting your computer from viruses and security risks 49
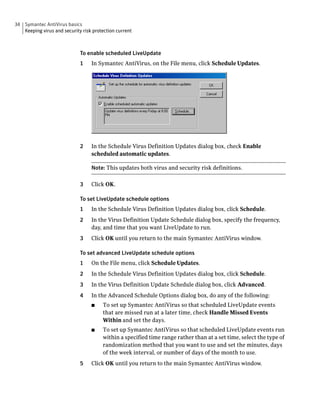
Using Tamper Protection
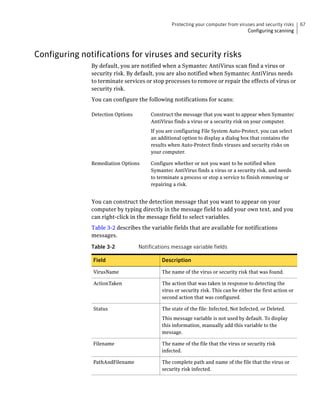
Table 3-1 Tamper Protection message field names and descriptions
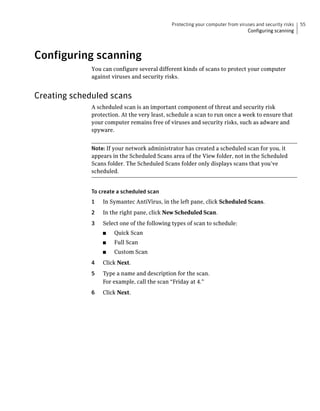
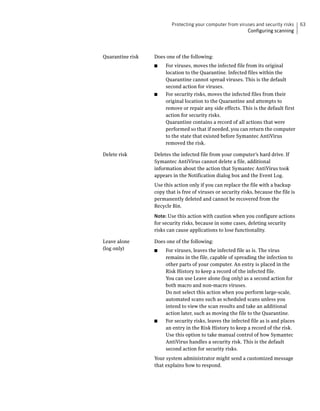
Field Description
Actor Process ID The ID number of the process that attacked a Symantec
application.
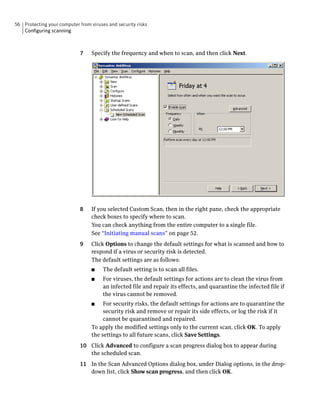
Actor Process Name The name of the process that attacked a Symantec
application.
Target Pathname The location of the target that the process attacked.
Target Process ID The process ID of the target that the process attacked.
Target Terminal Session ID The ID of the terminal session on which the event
occurred.
Use the following format to create messages:
Text that you type: [Field Name 1] [Field Name 2] (Optional and
additional text that you type [Field Name x])
The following example illustrates a message that tells you which process
attempted to take which action and when:
Date: [DateFound]
Process Located At: [PathAndFilename] (Named: [Actor Process Name])
Attacked: [Target Pathname] [Target Process ID]
To create Tamper Protection messages
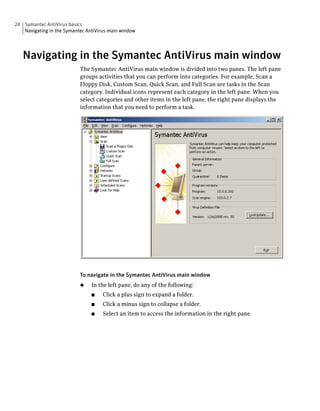
1 In Symantec AntiVirus, in the left pane, click Tamper Protection.
2 In the right pane, under Notifications, ensure that Display message on
affected computer is checked, and then click Message.
3 In the Message box, click to insert a cursor.](https://image.slidesharecdn.com/saceclientguide-121031041529-phpapp02/85/Sace-client-guide-49-320.jpg)


Symantec AntiVirus provides virus and security risk protection for computers. It can detect and remove viruses, worms, trojans, and other security risks. Symantec AntiVirus keeps protection current through automatic updates that are delivered via LiveUpdate. This helps ensure computers are protected from the latest viruses and security risks.


