This document provides an implementation guide for Symantec Endpoint Protection and Symantec Network Access Control. It contains information about installing, configuring, and managing these products. The guide includes sections on planning installation, installing the management server and client software, upgrading and migrating from previous versions, setting up sites and replication, managing protection on clients, and using policies to manage security settings.


![Planning the installation 87
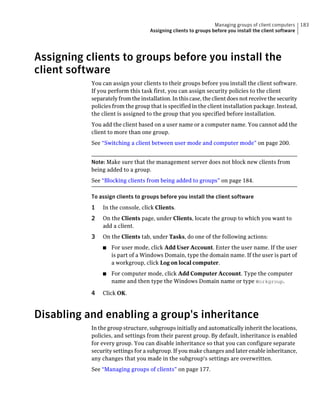
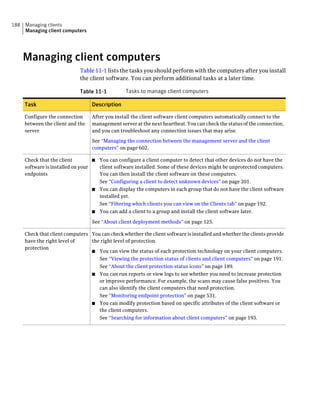
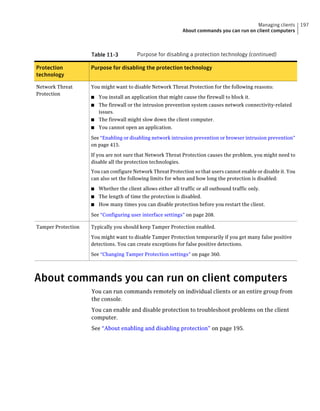
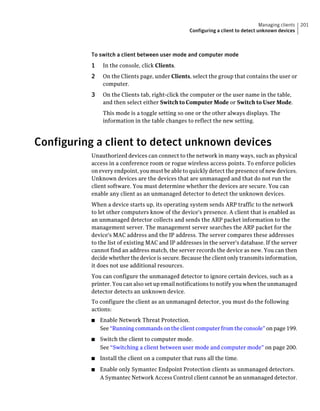
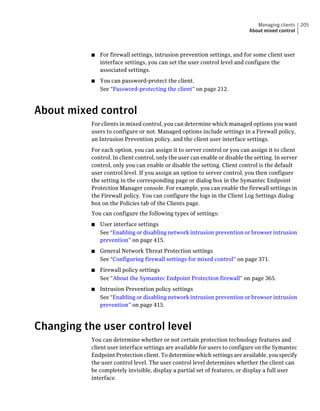
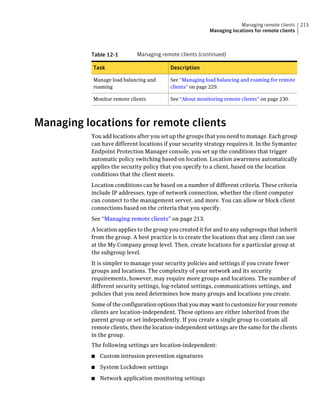
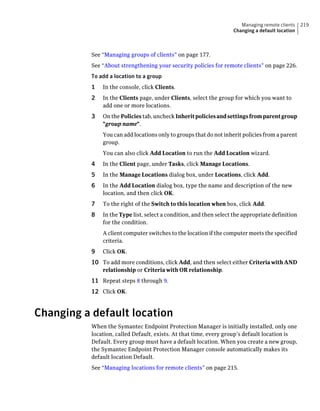
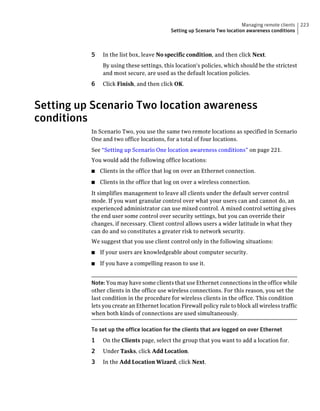
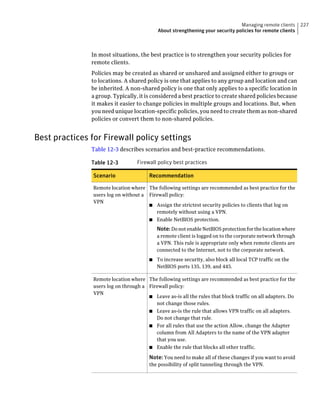
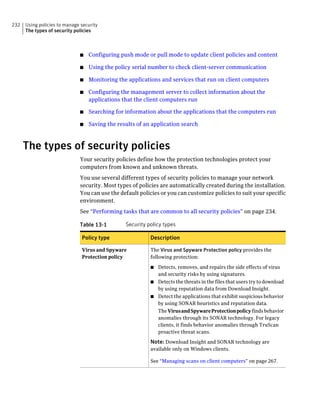
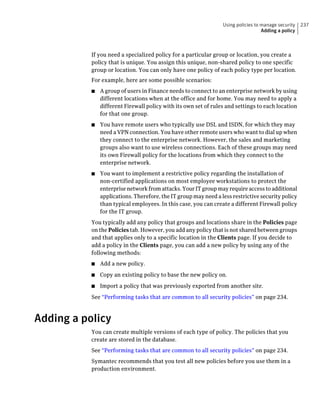
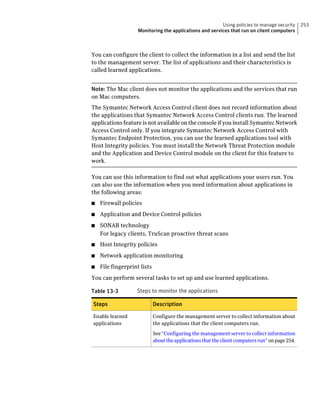
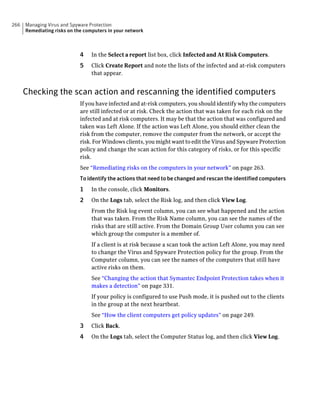
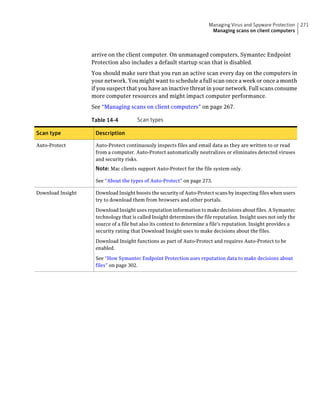
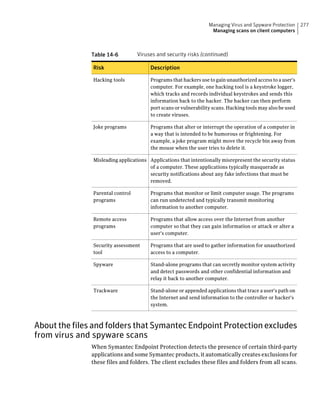
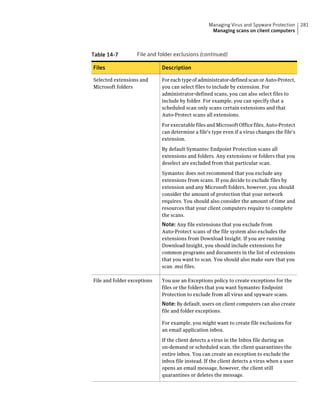
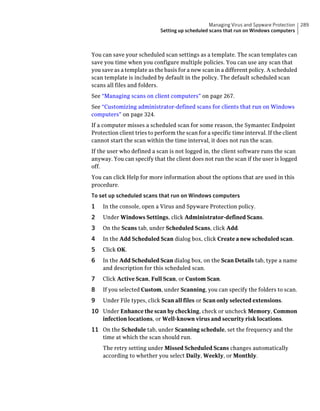
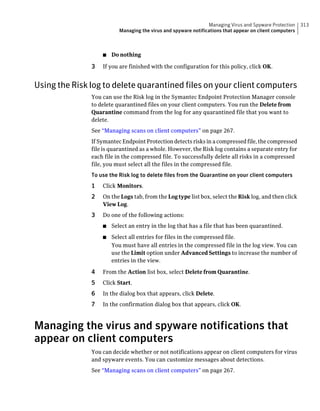
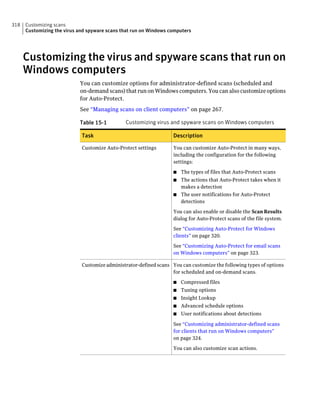
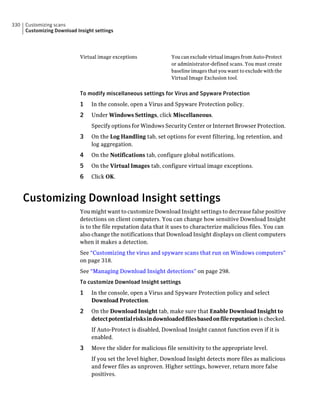
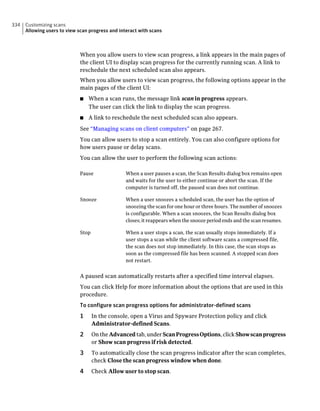
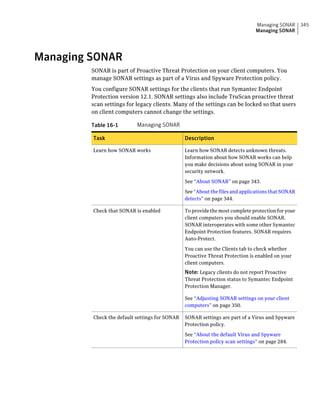
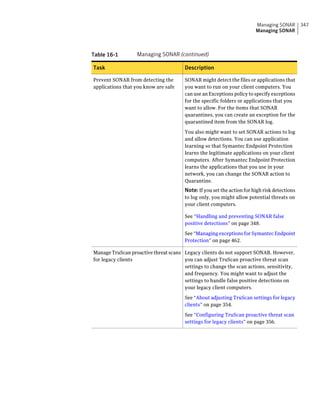
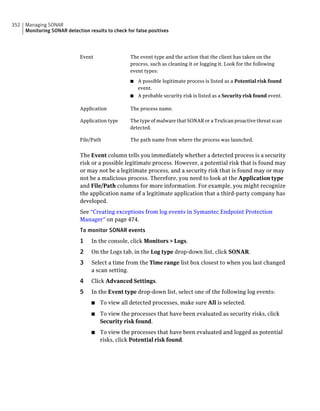
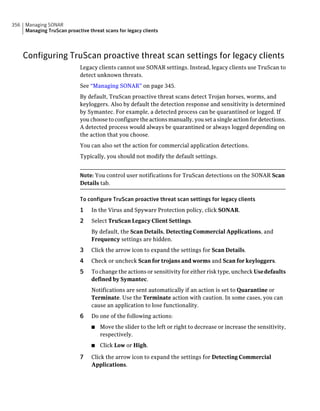
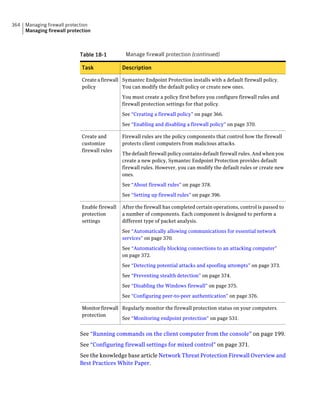
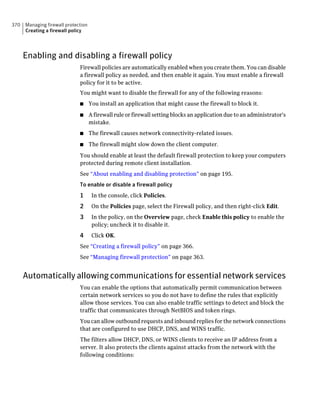
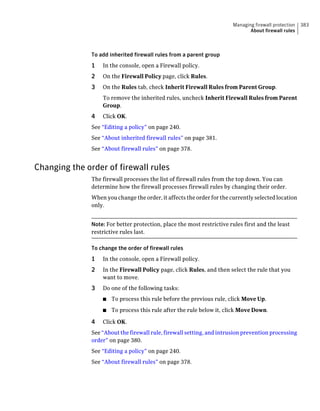
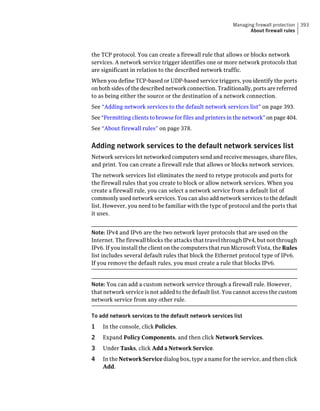
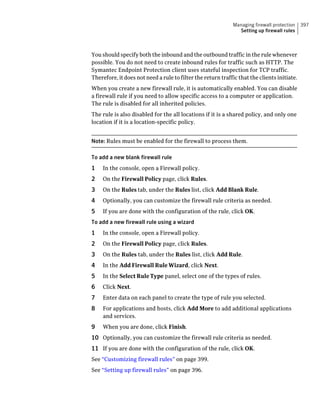
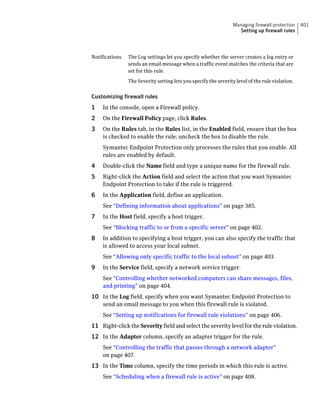
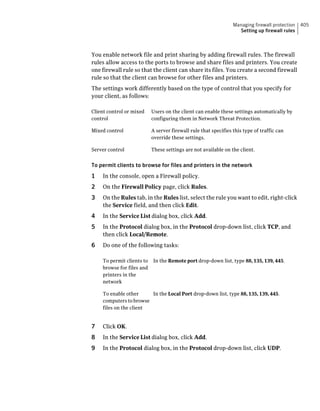
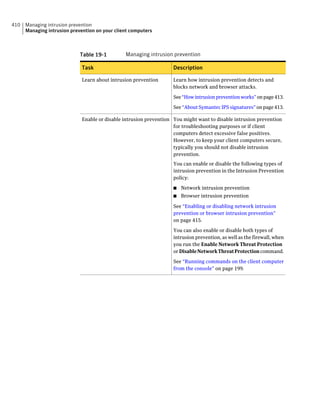
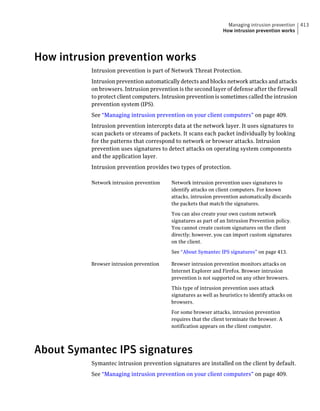
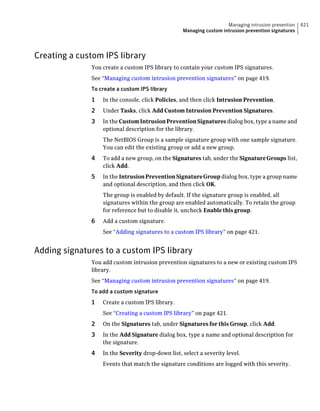
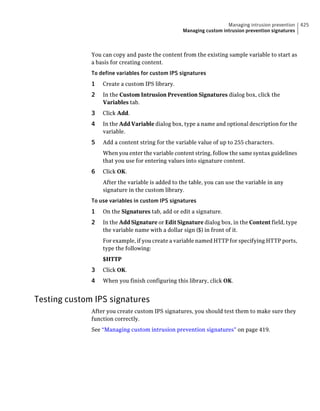
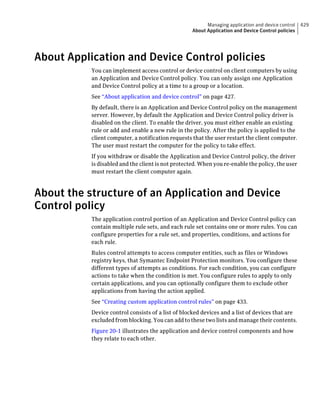
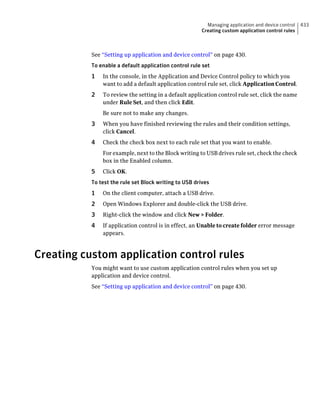
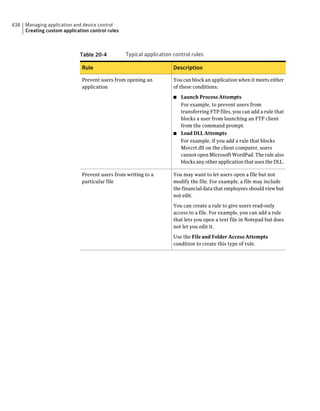
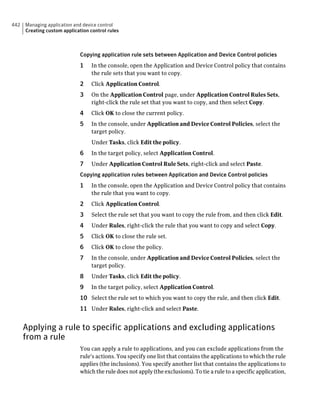
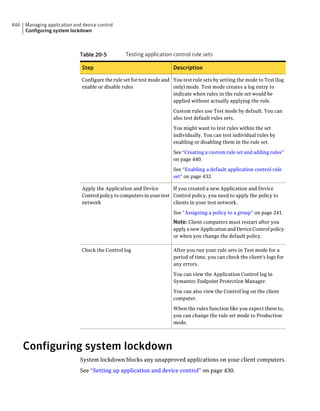
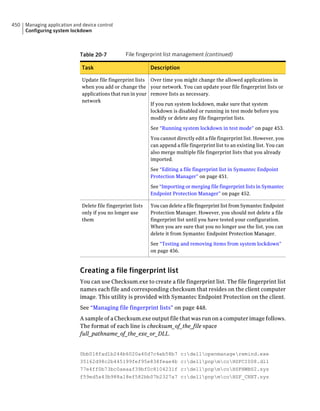
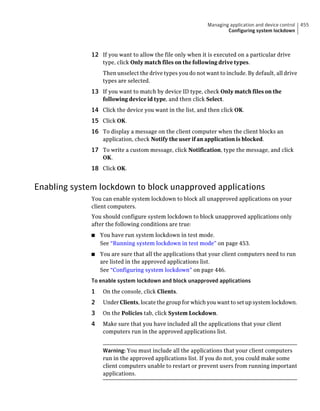
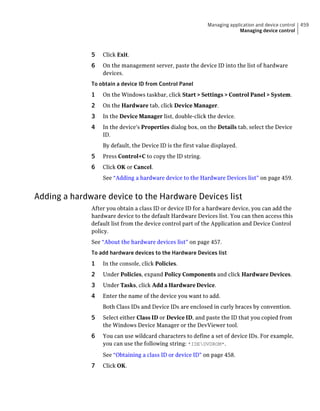
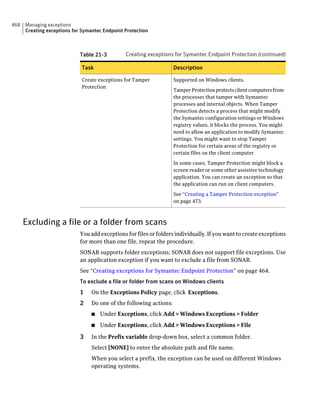
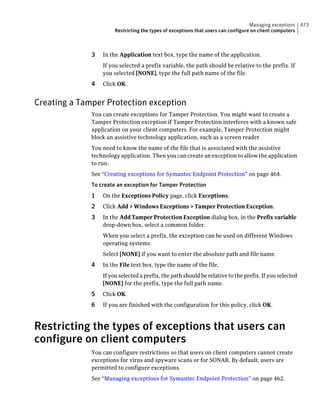
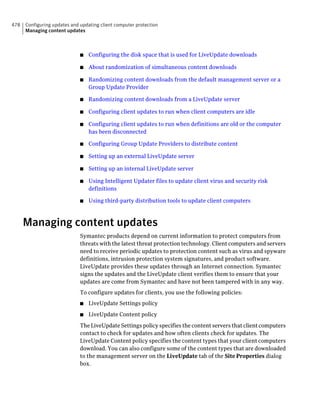
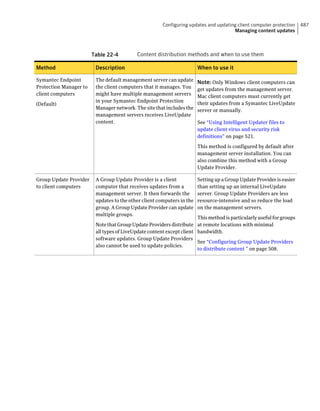
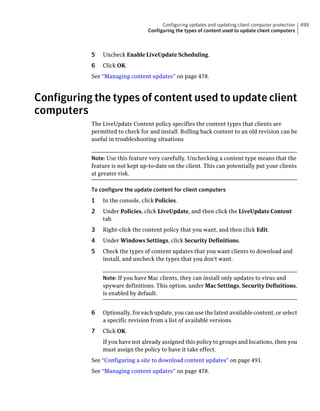
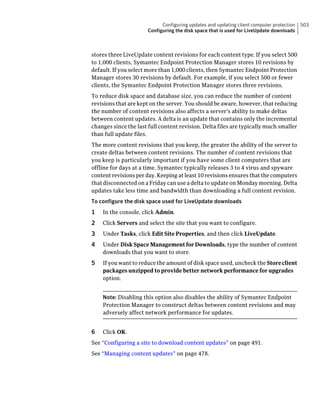
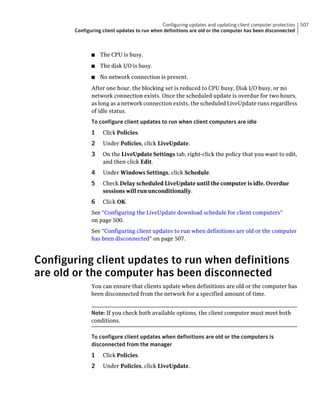
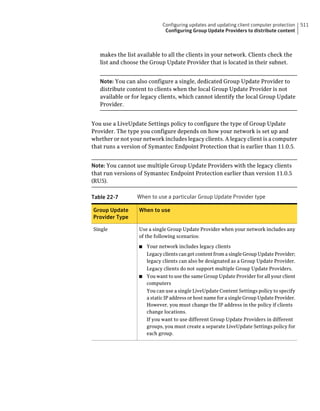
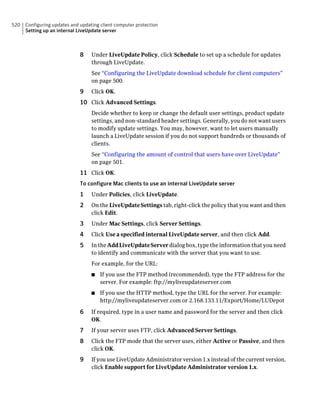
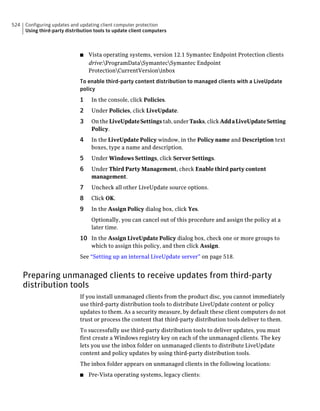
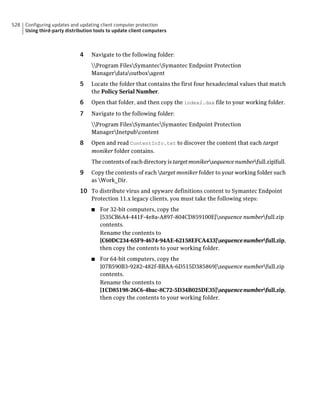
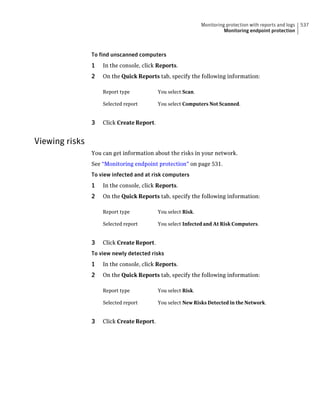
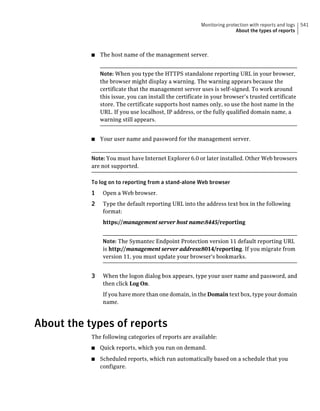
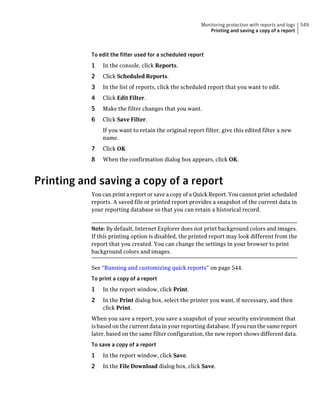
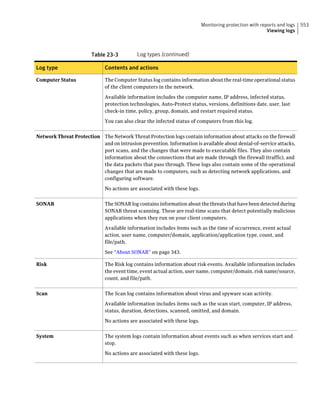
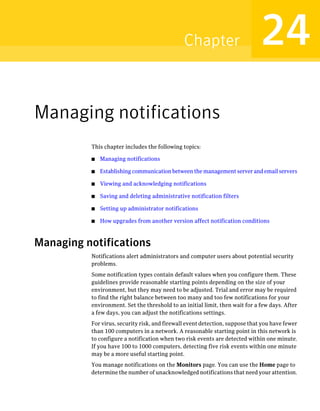
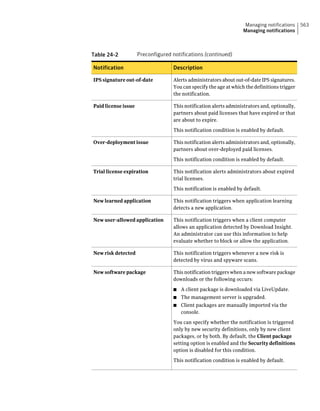
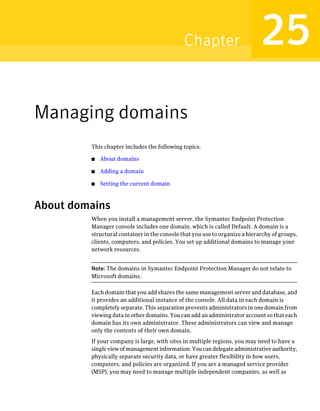
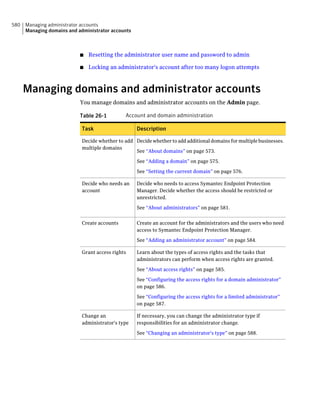
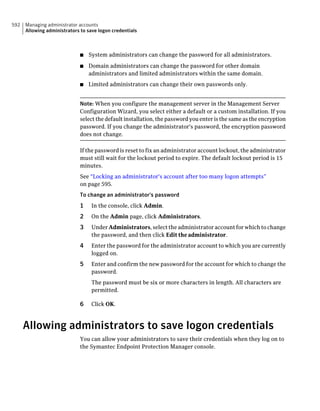
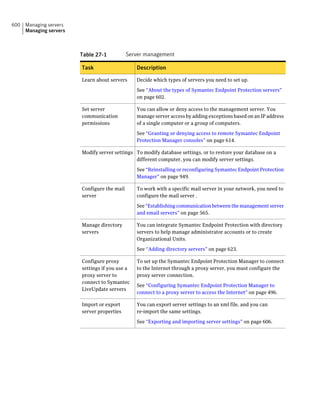
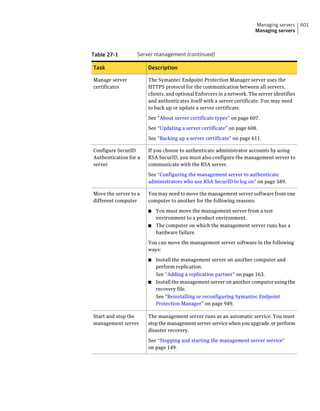
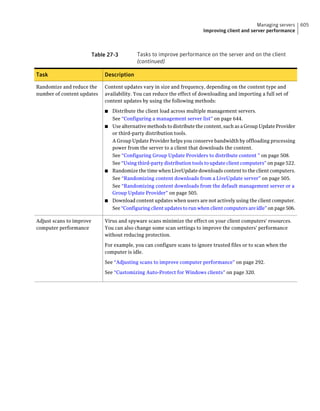
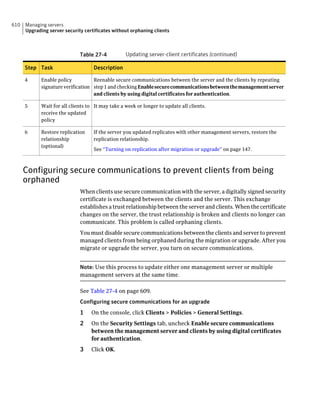
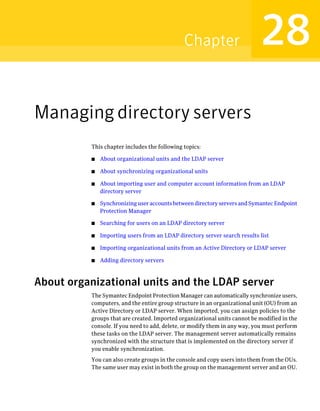
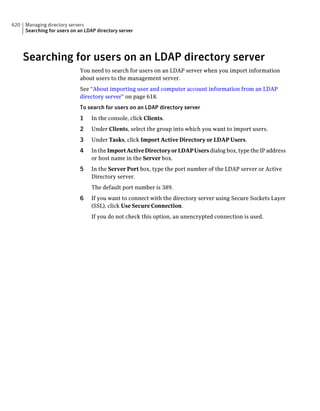
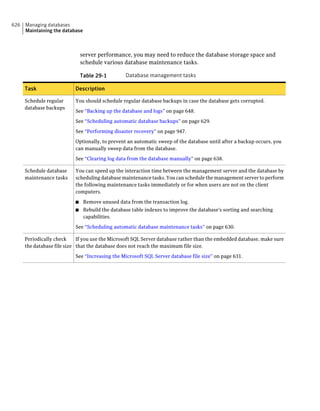
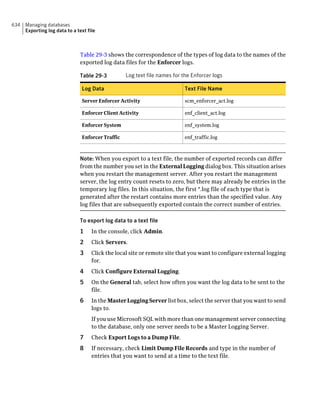
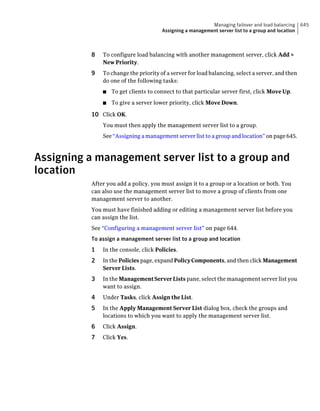
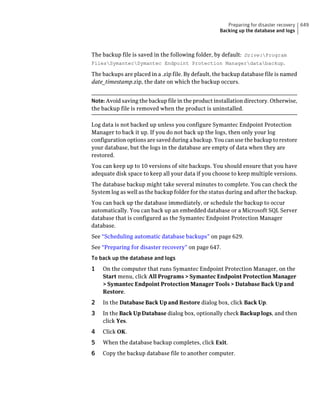
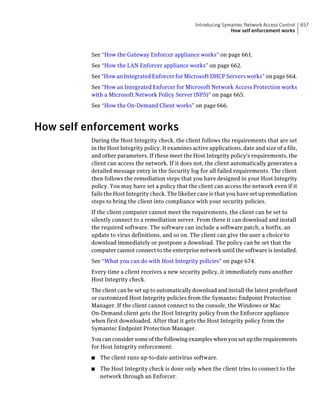
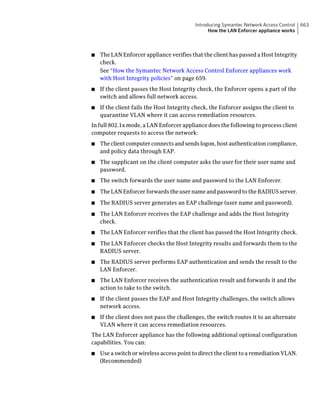
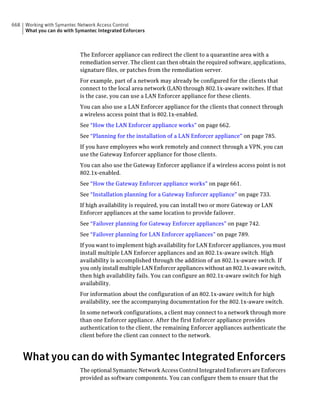
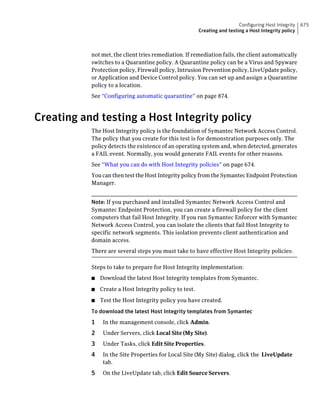
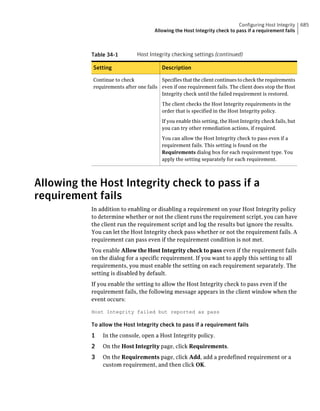
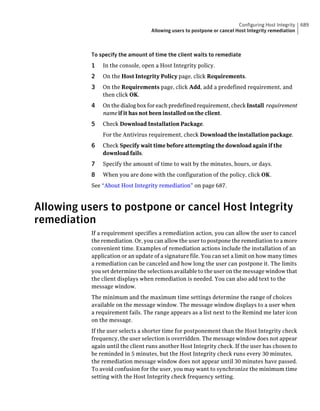
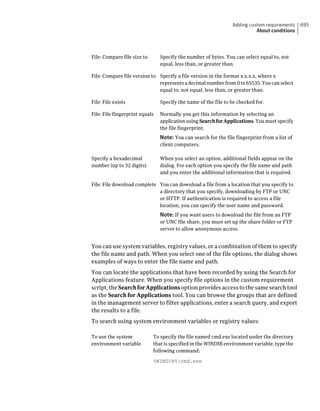
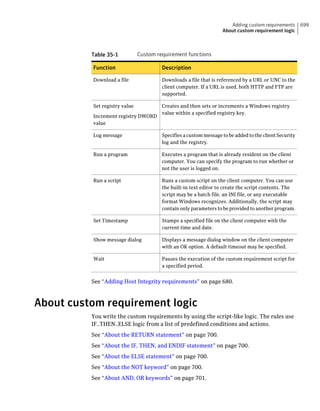
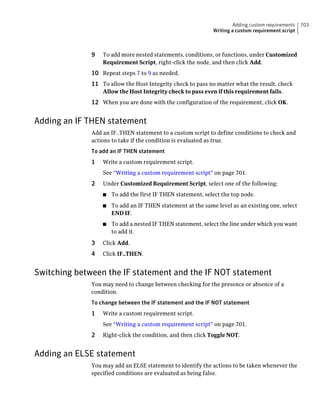
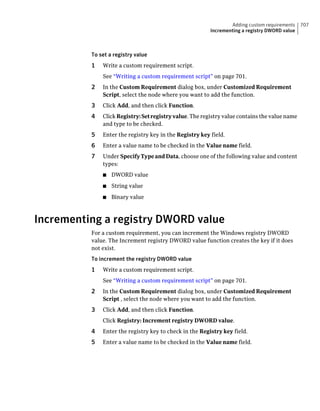
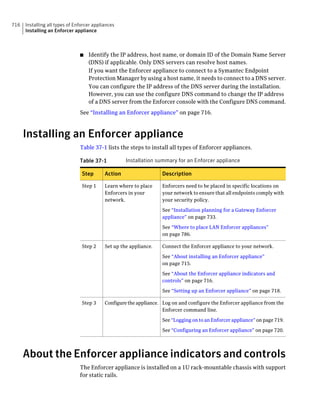
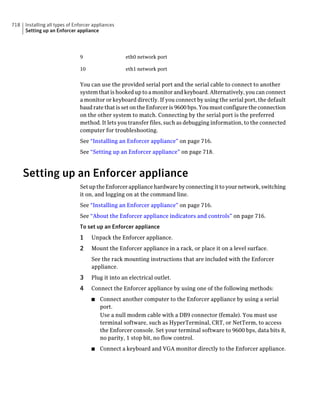
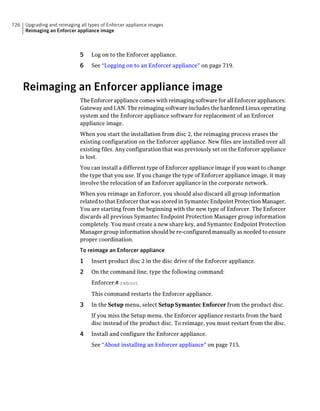
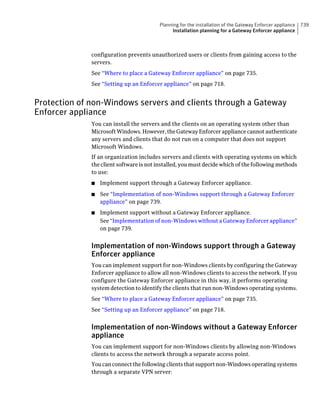
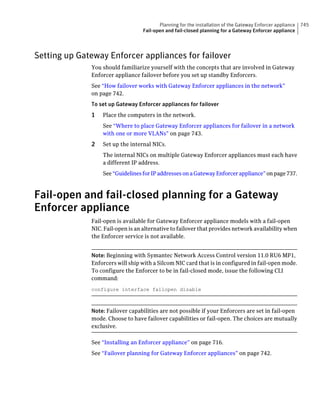
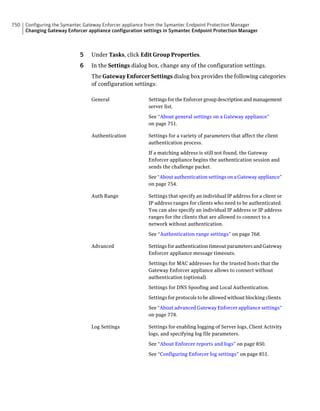
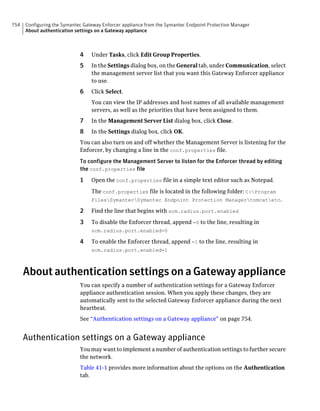
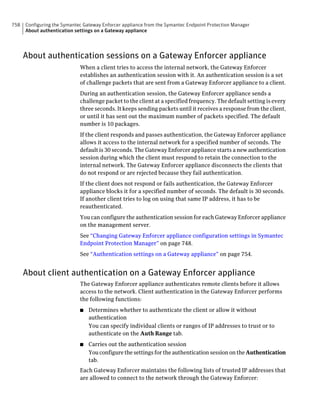
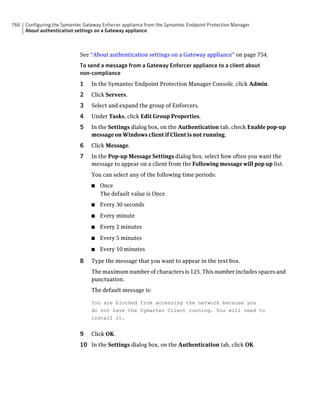
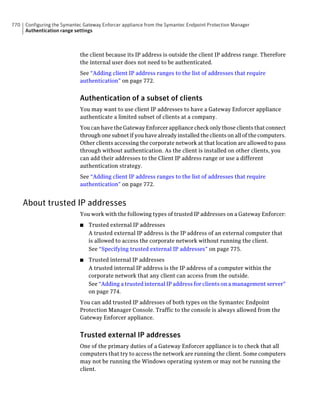
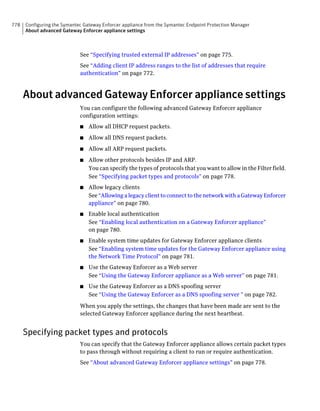
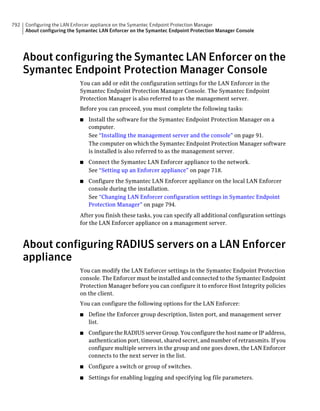
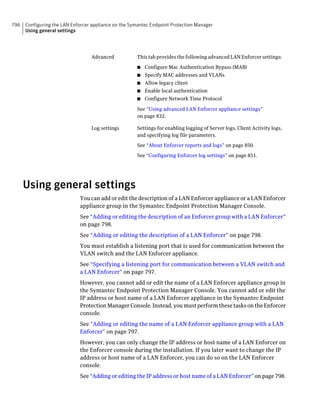
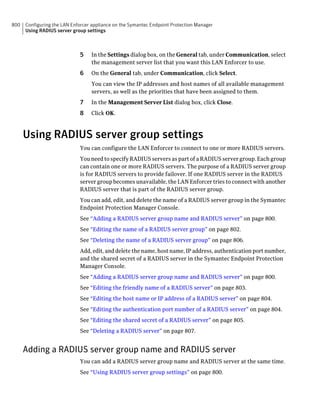
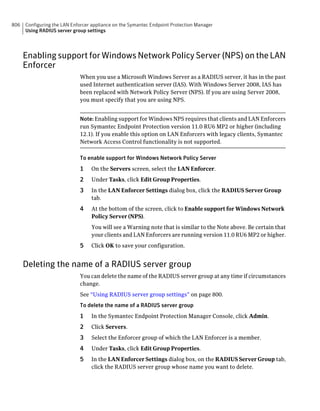
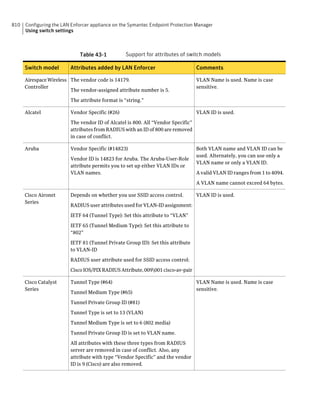
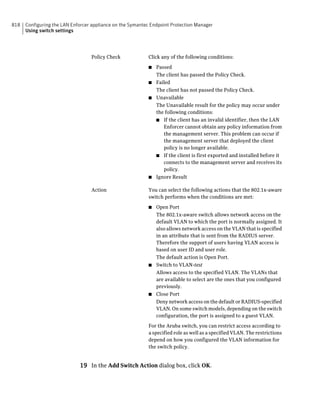
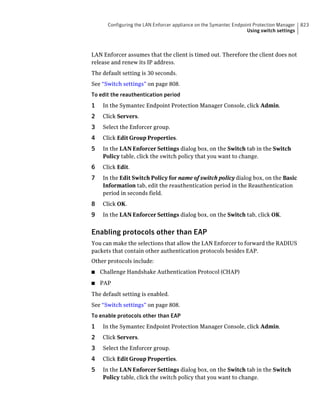
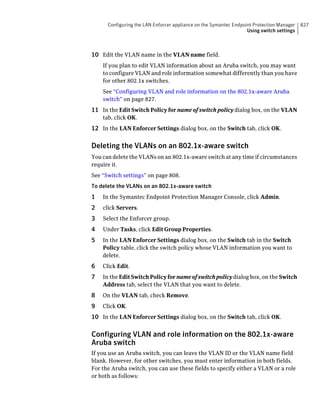
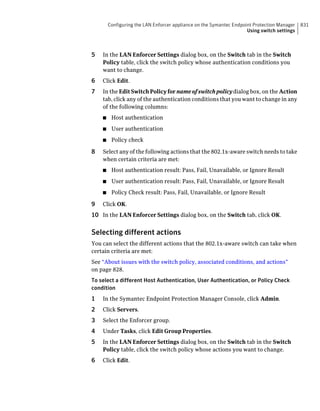
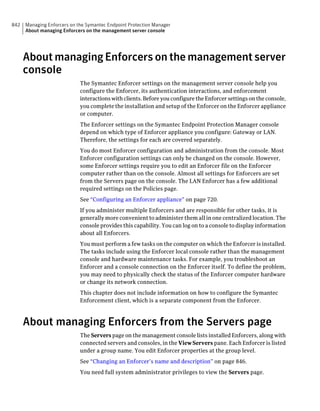
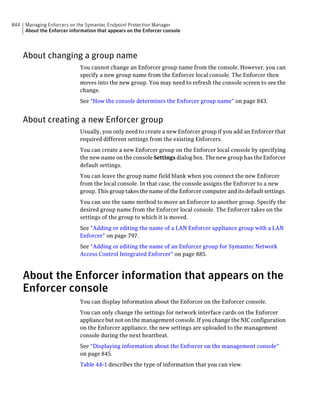
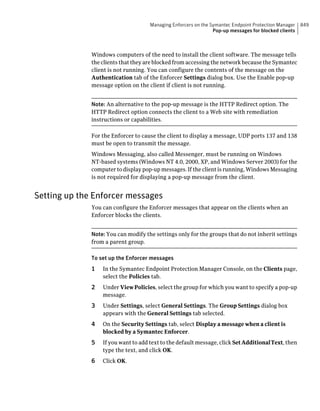
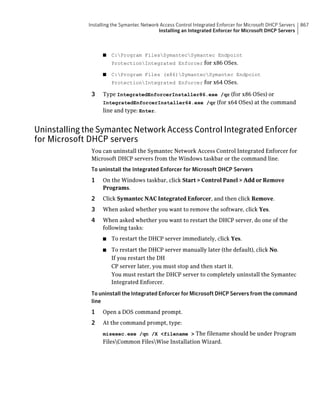
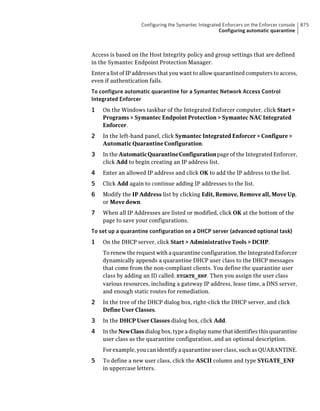
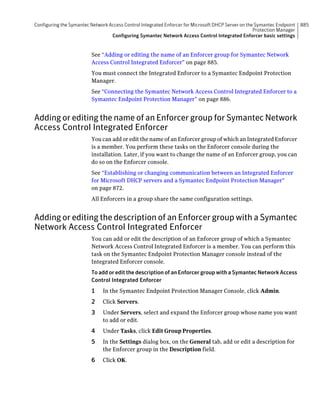
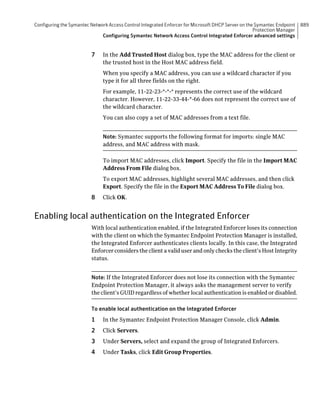
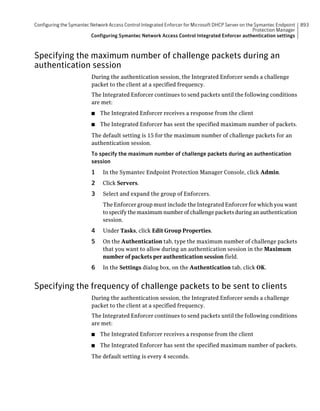
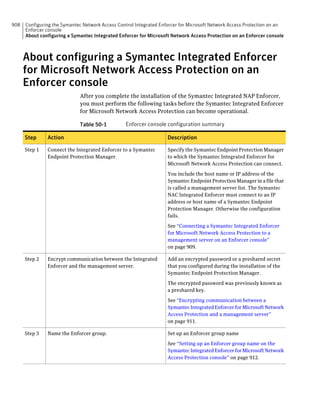
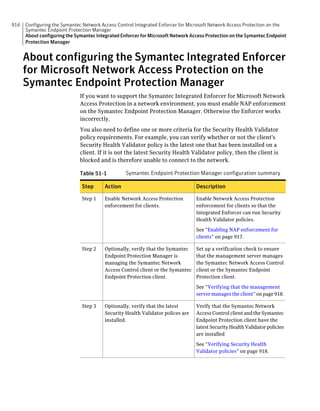
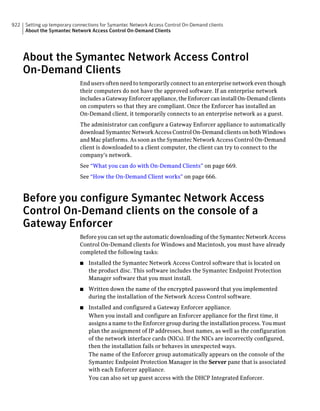
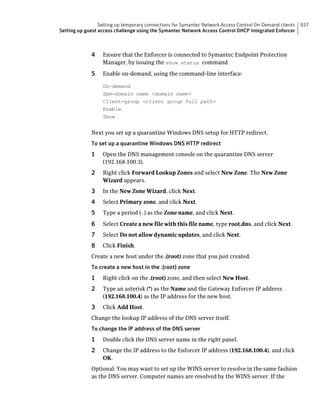
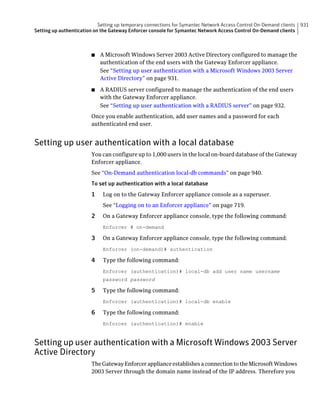
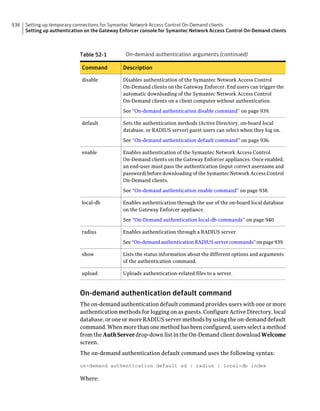
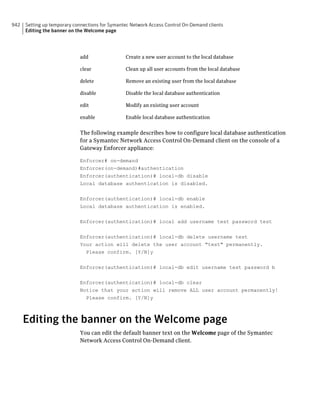
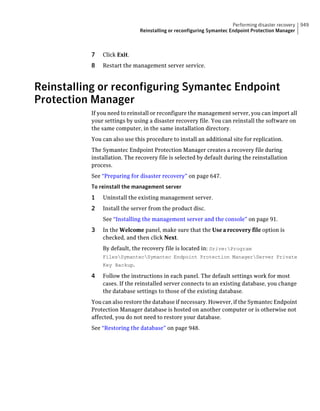
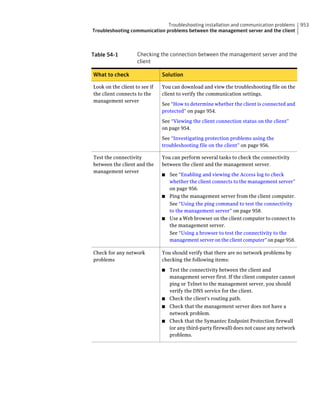
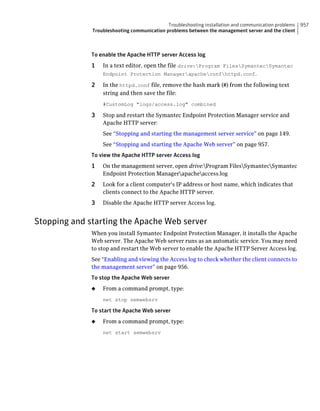
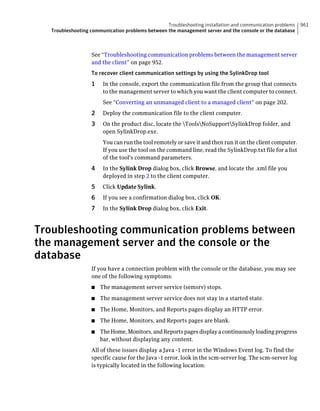
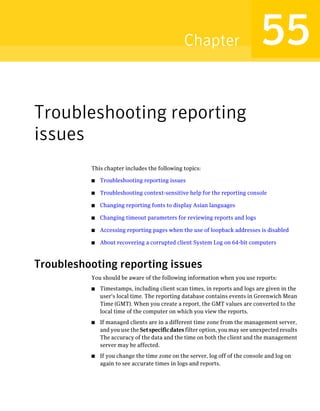
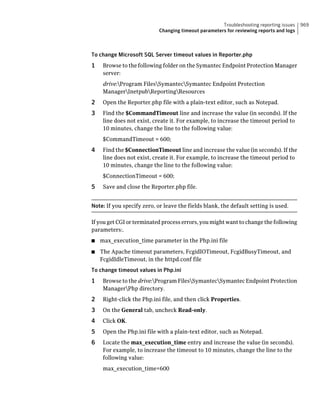
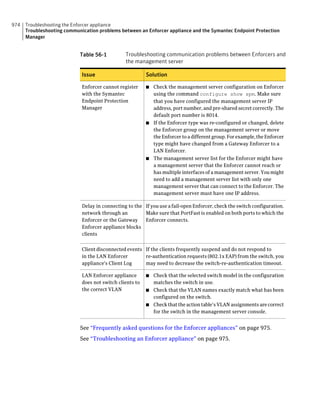
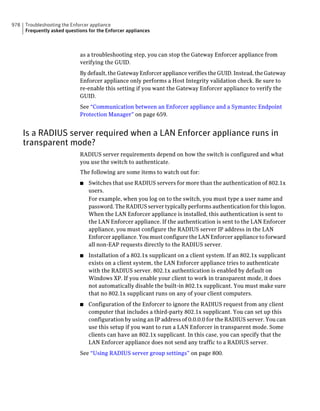
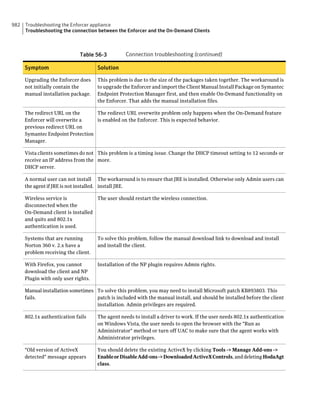
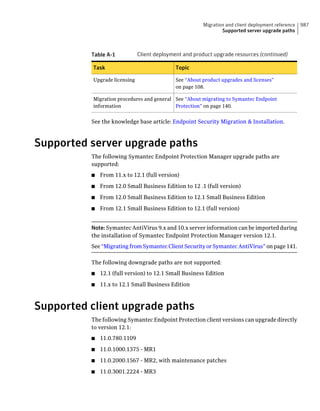
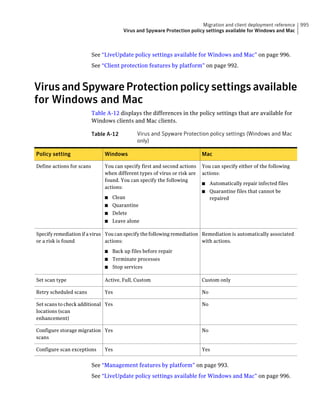
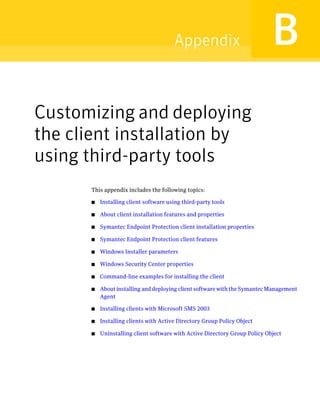
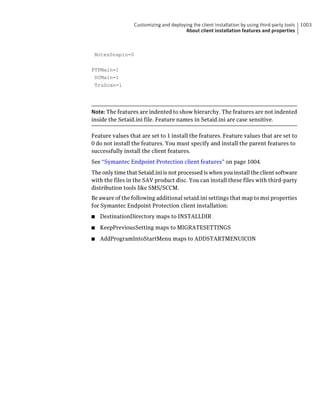
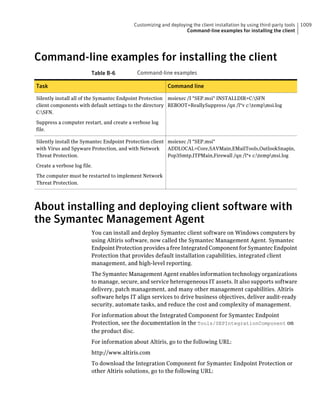
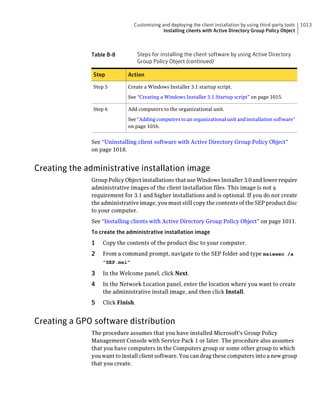
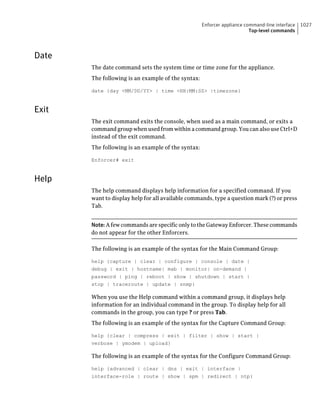
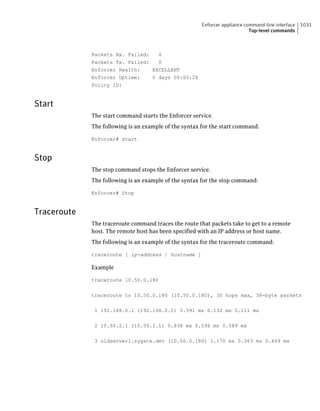
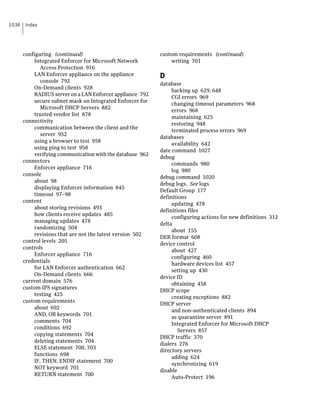
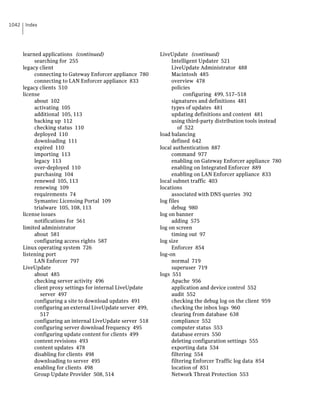
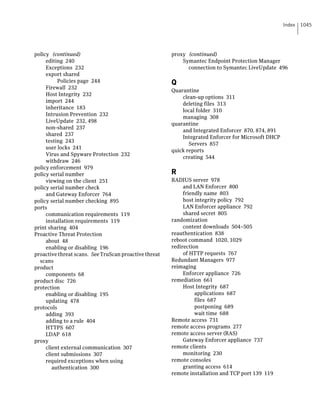
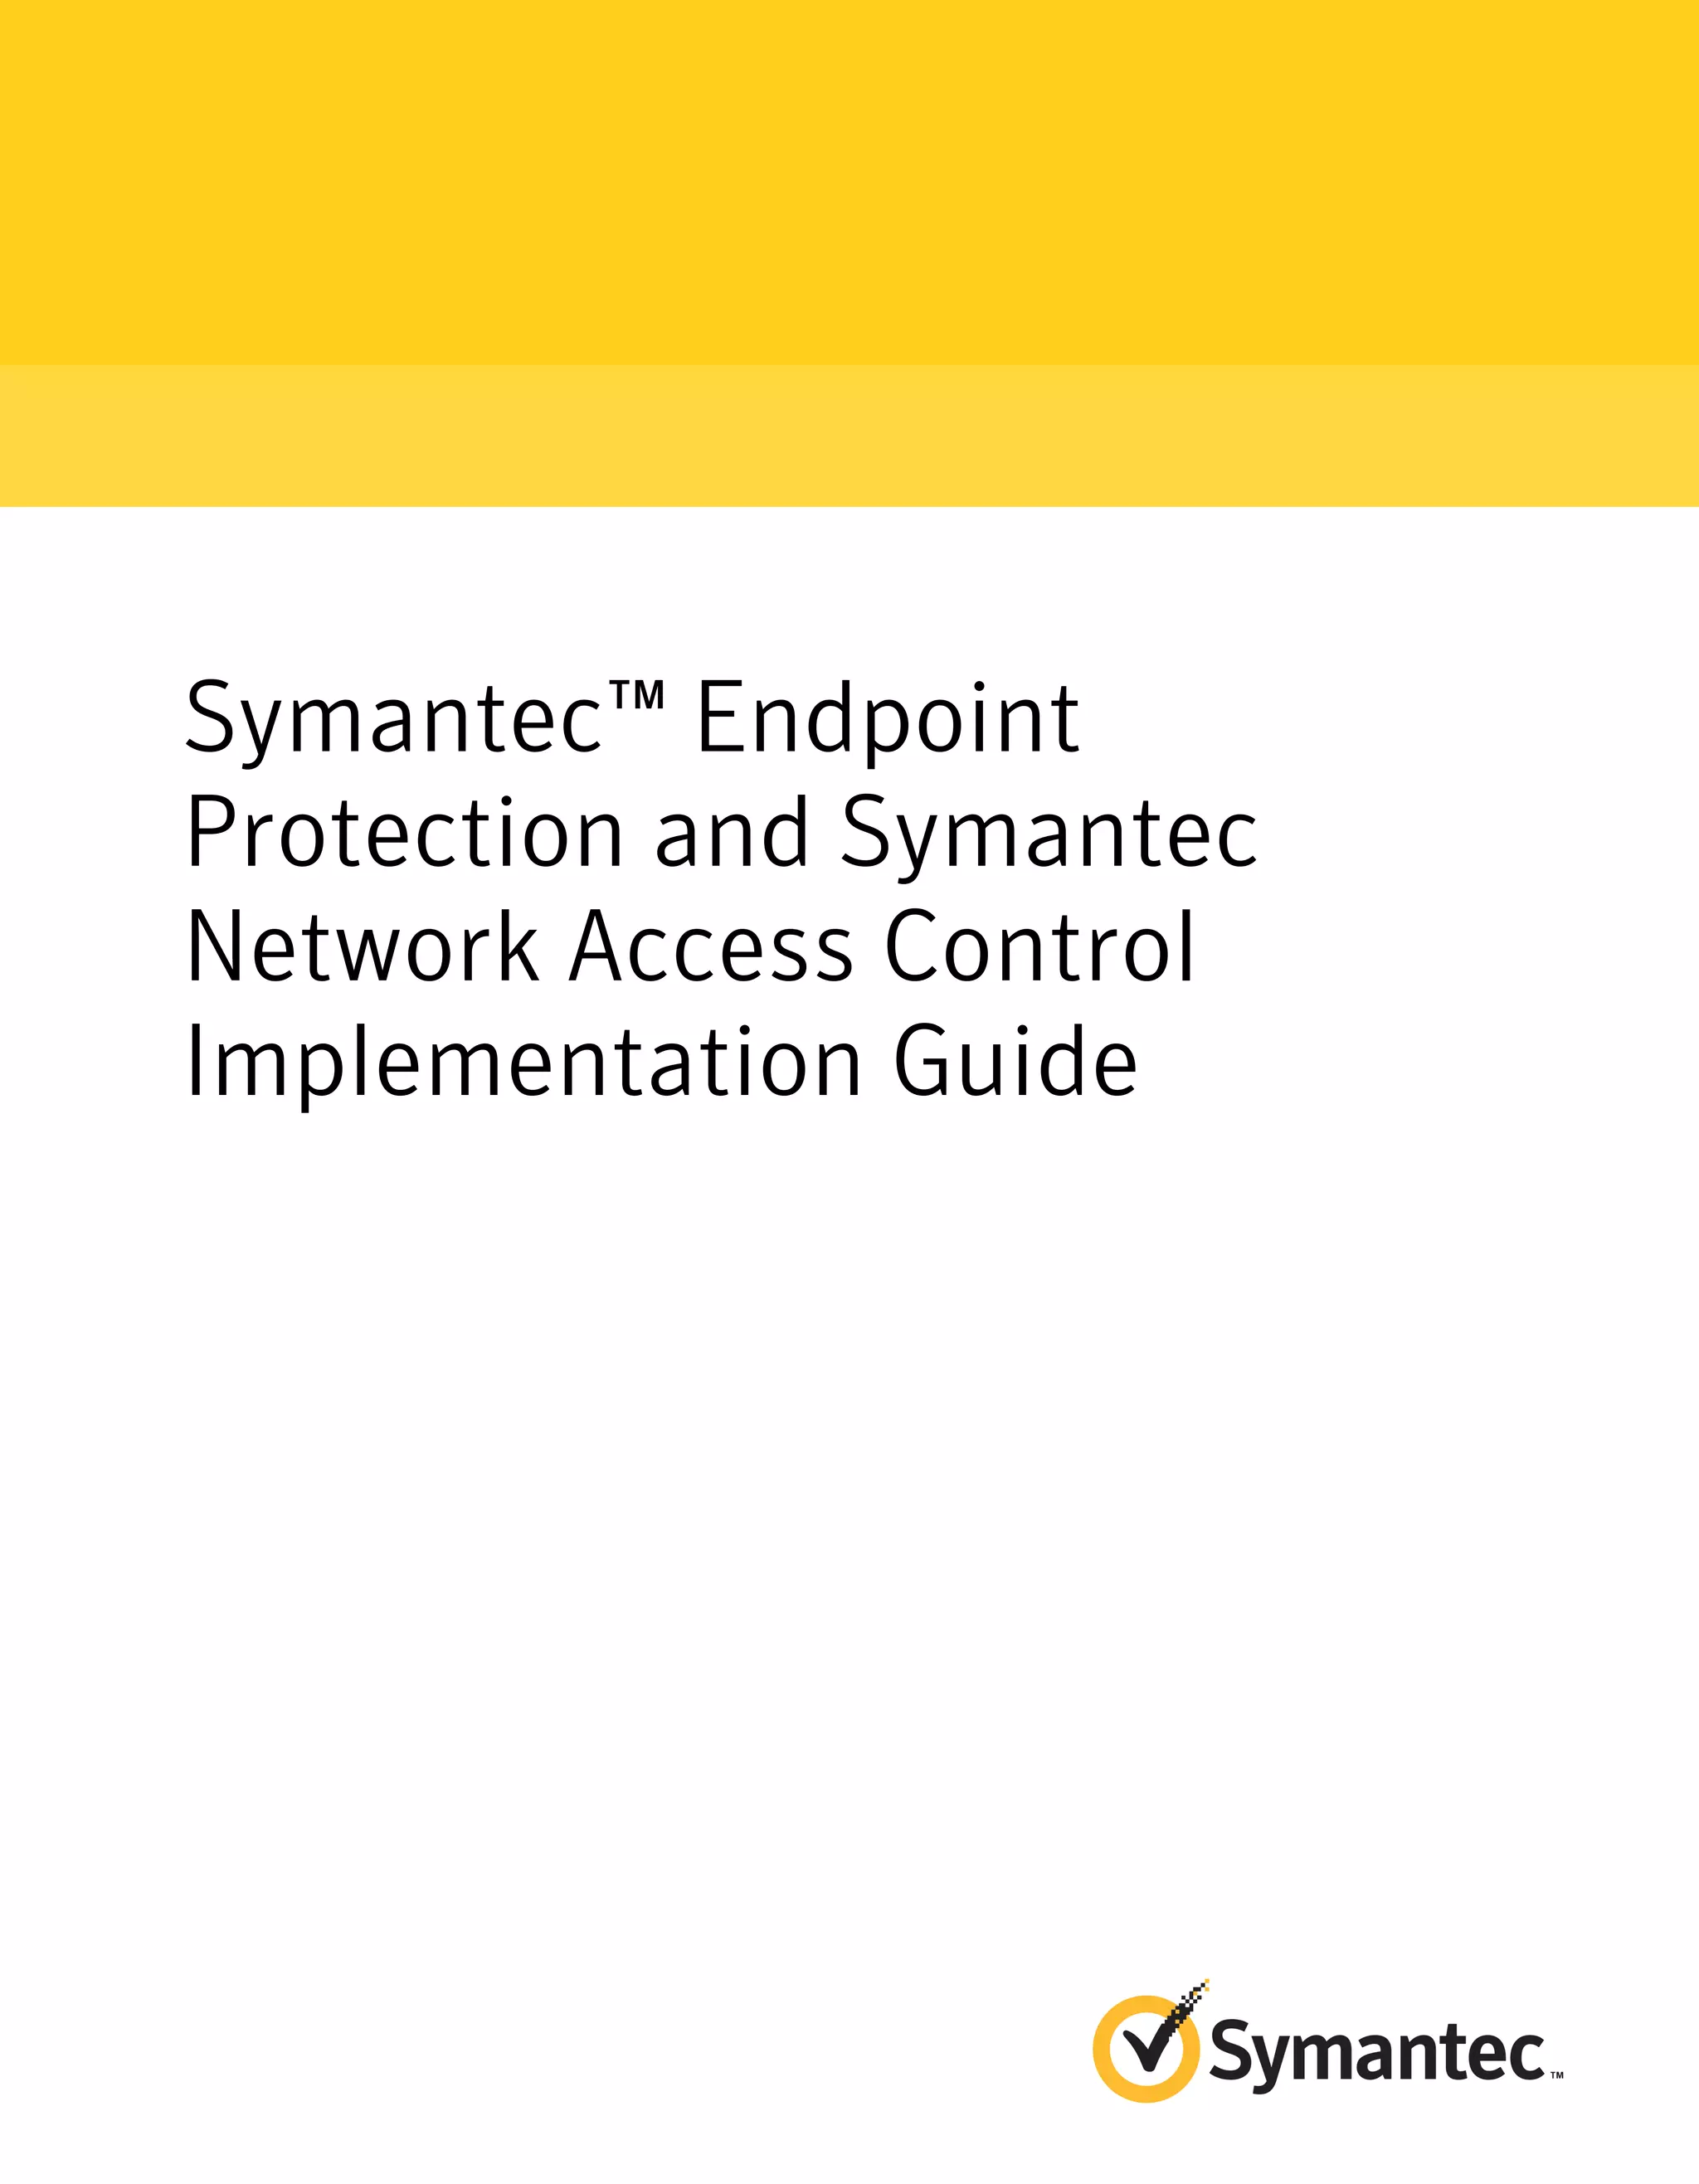
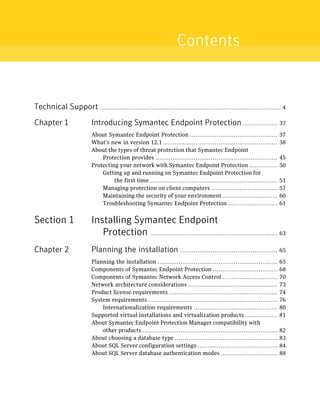
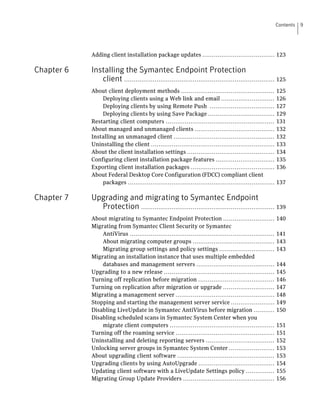
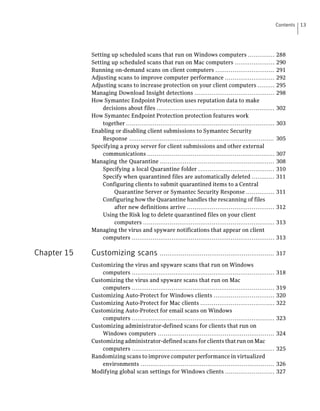
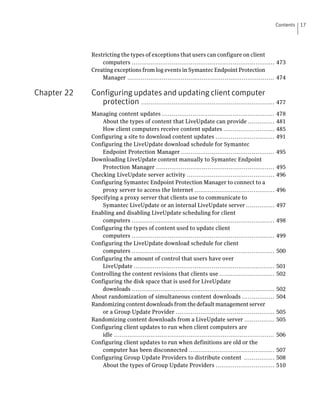
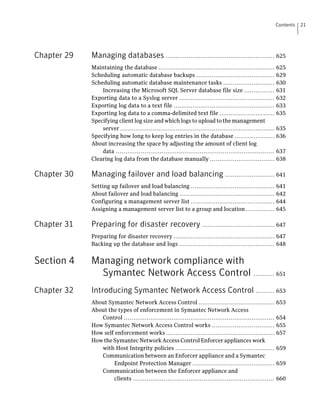
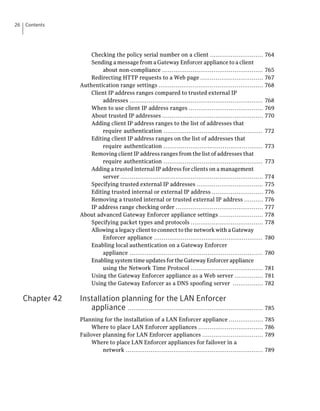
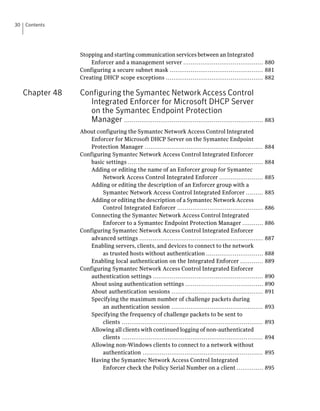
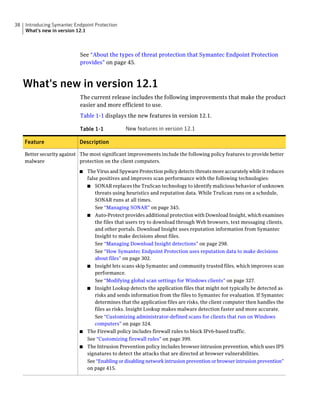
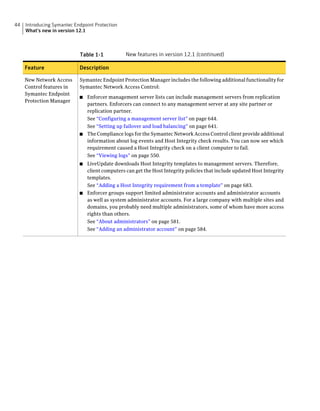
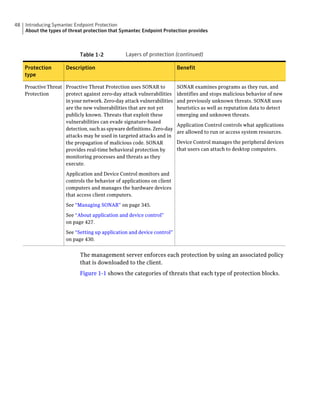
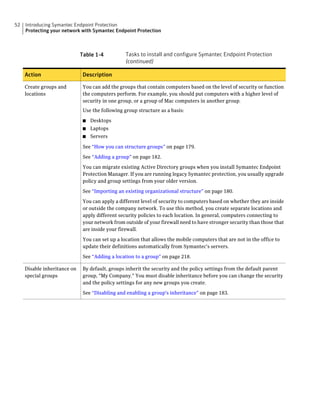
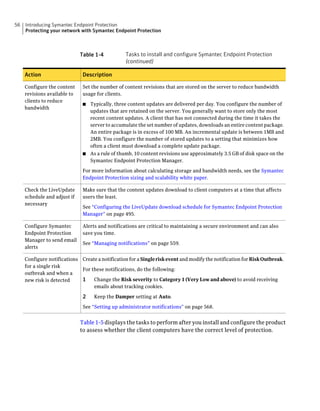
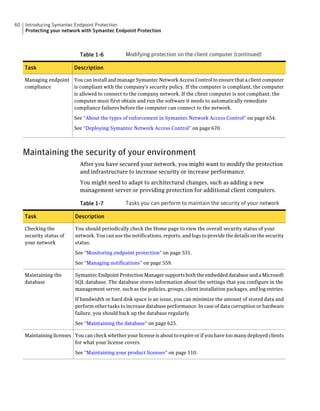
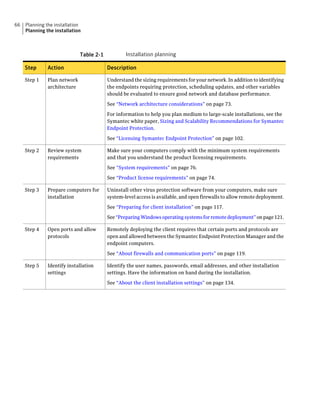
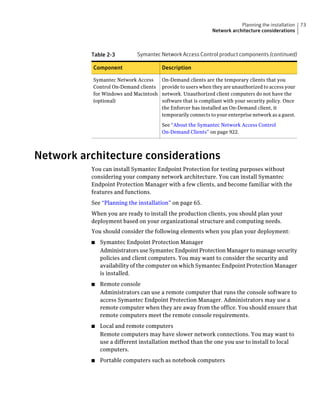
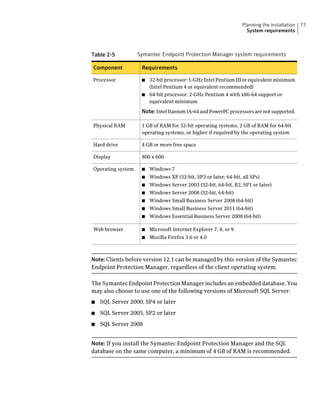
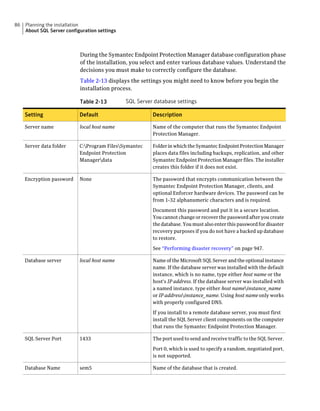
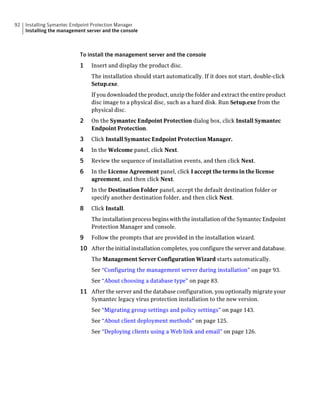
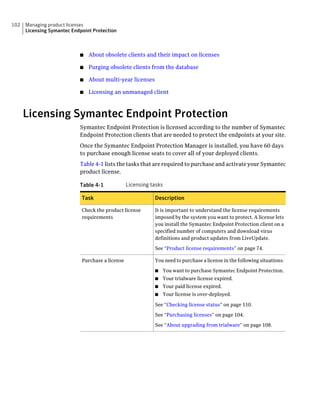
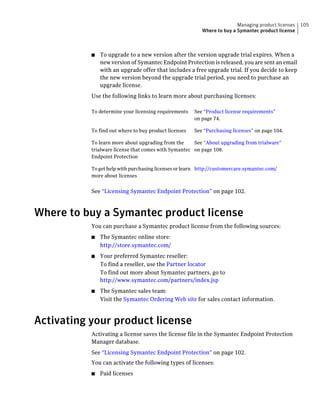
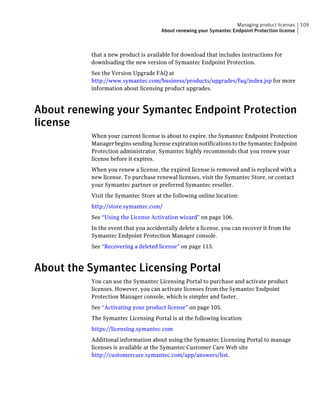
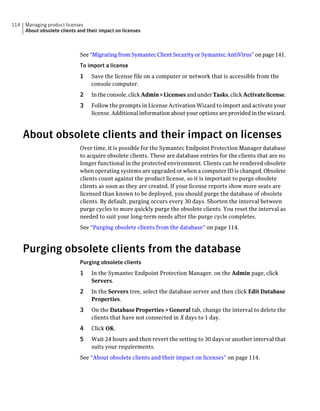
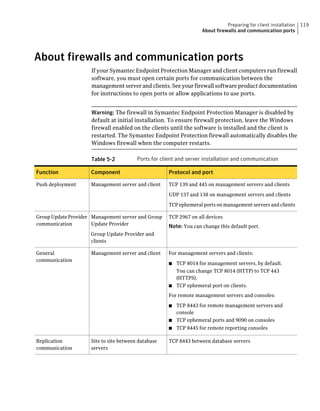
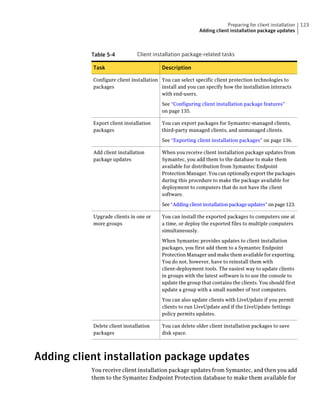
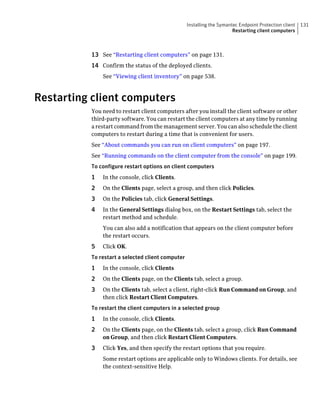
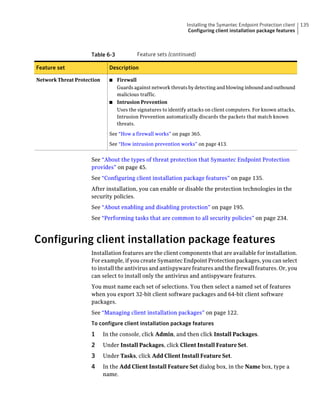
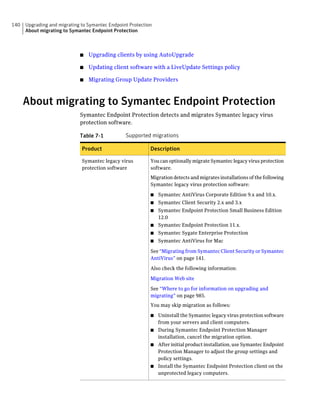
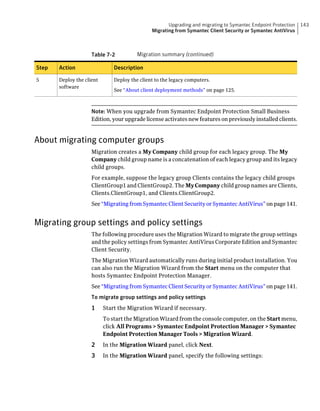
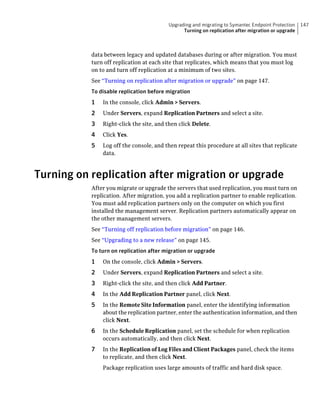
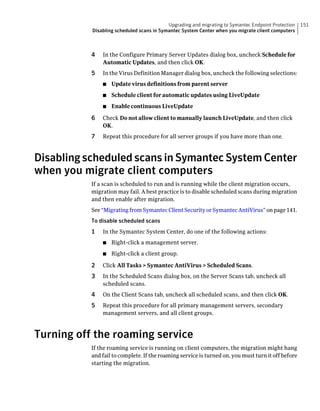
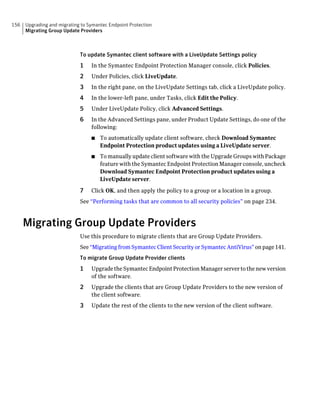
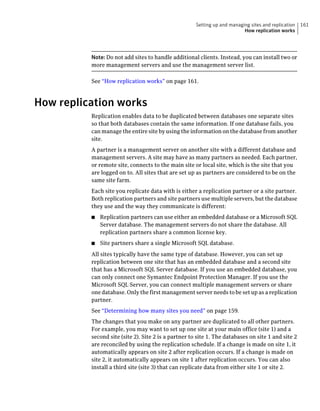
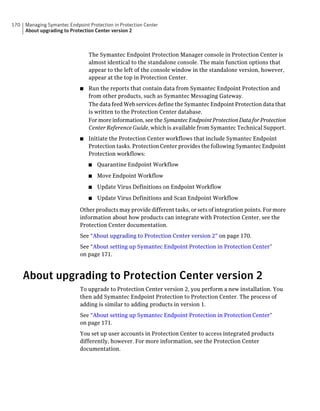
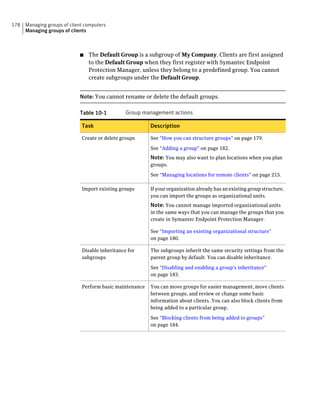
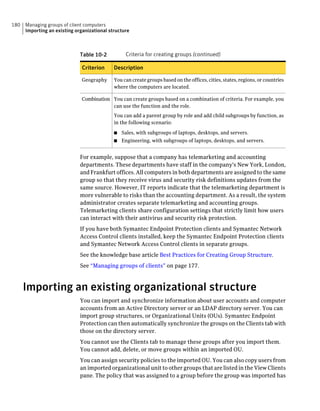
About SQL Server configuration settings
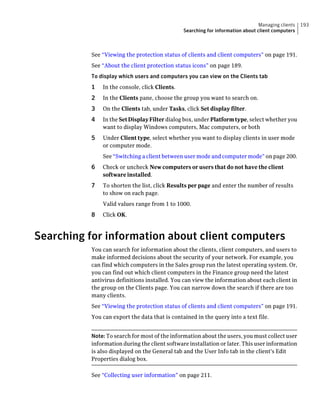
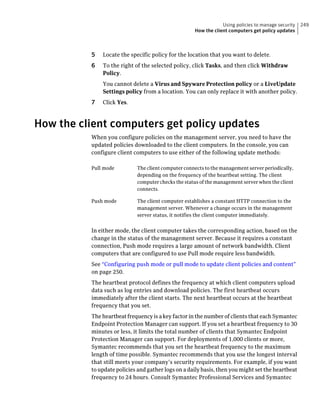
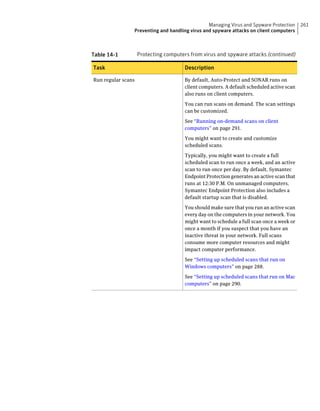
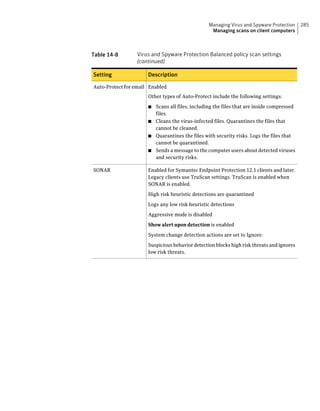
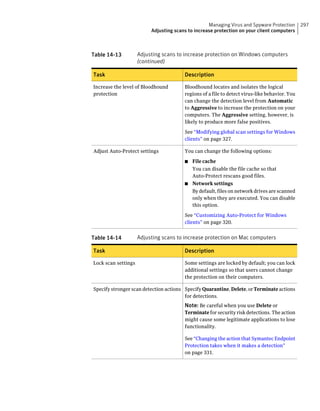
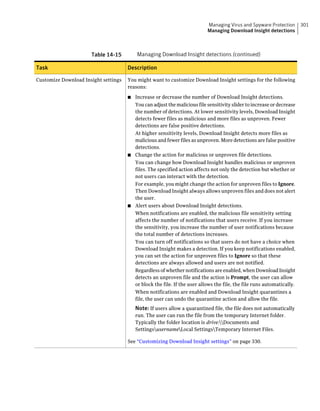
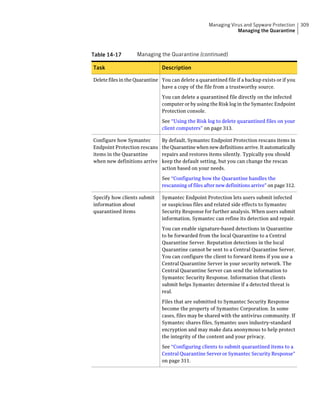
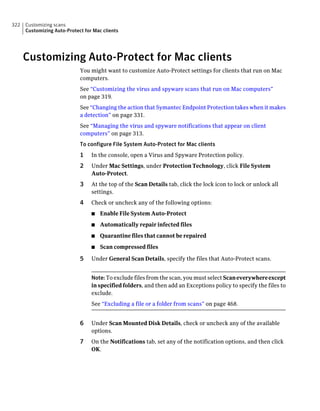
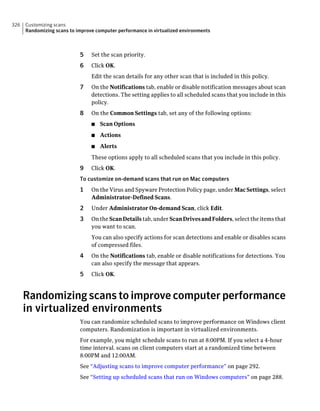
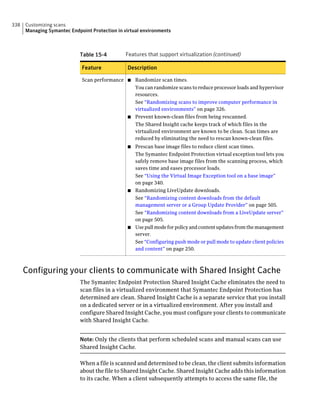
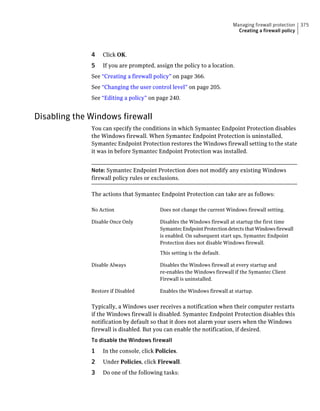
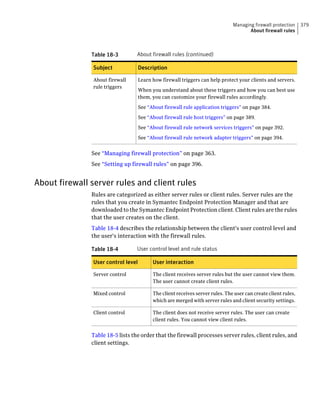
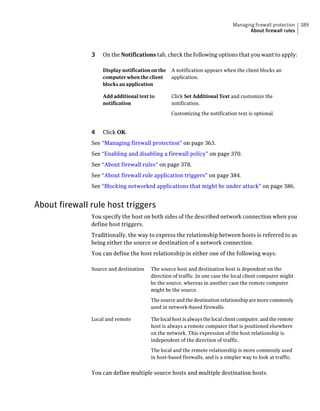
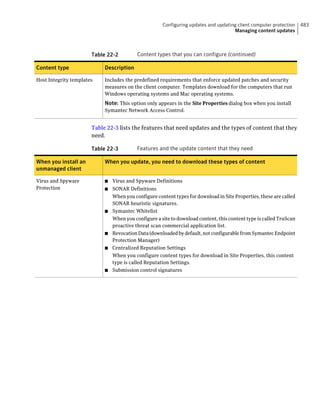
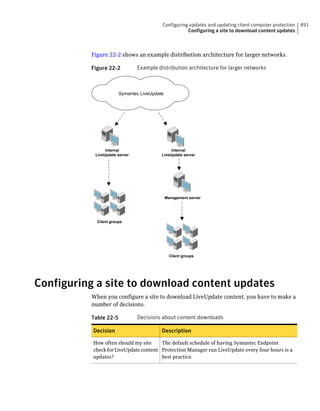
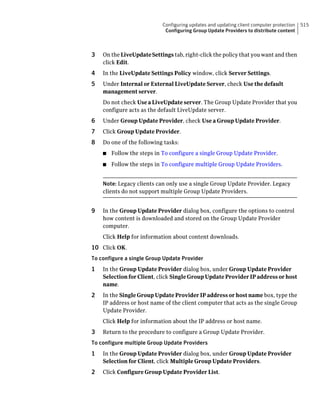
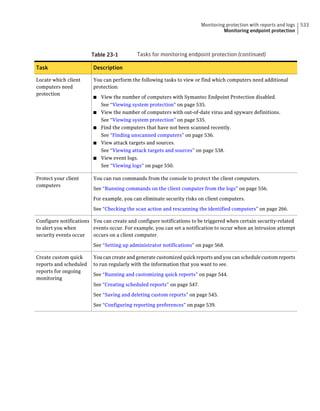
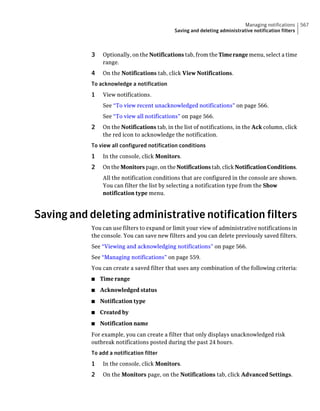
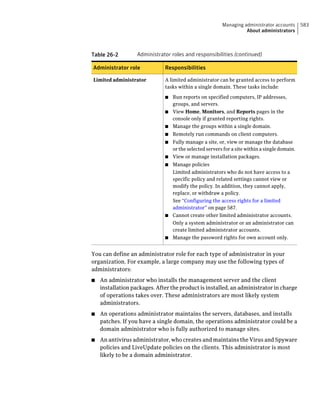
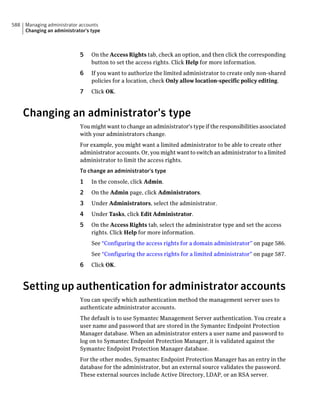
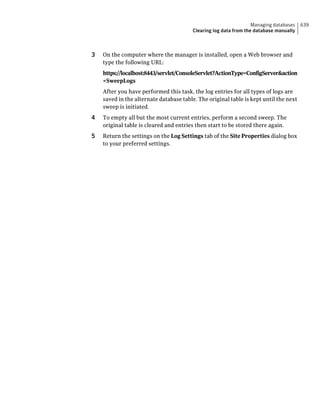
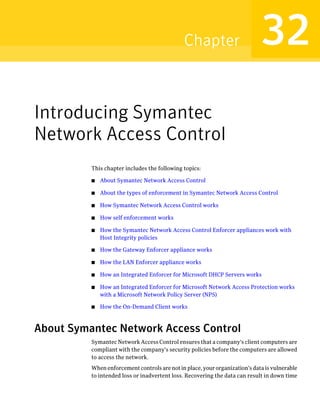
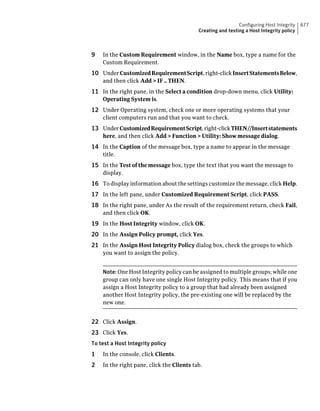
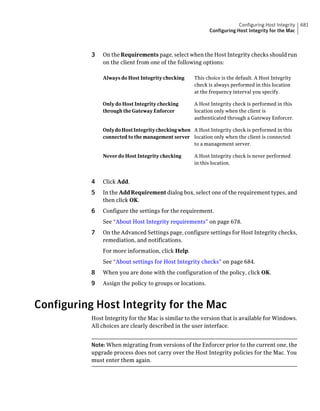
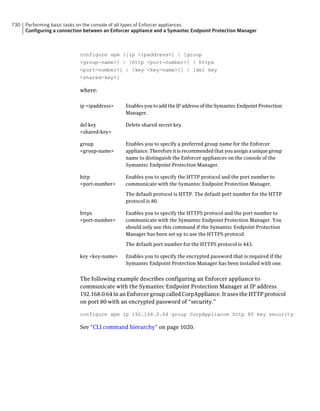
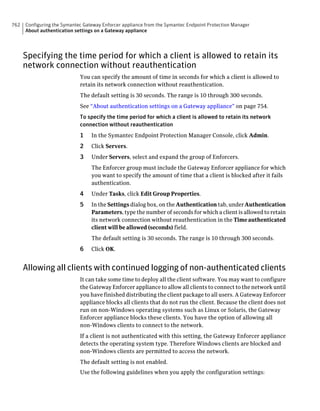
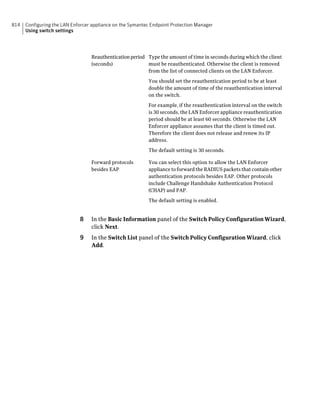
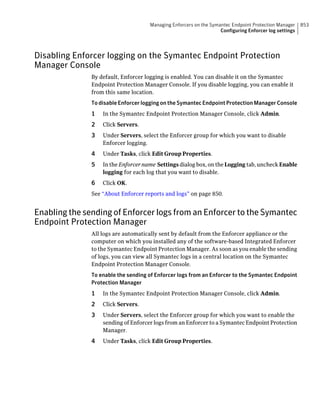
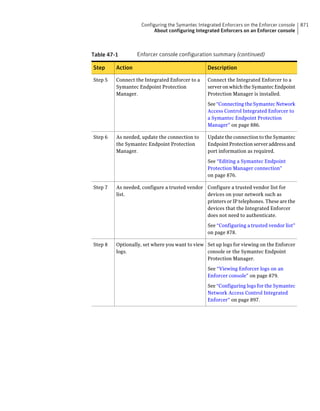
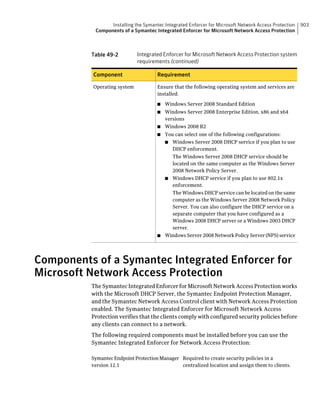
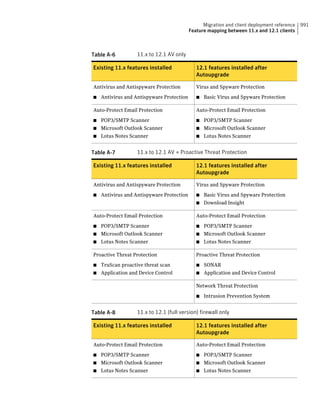
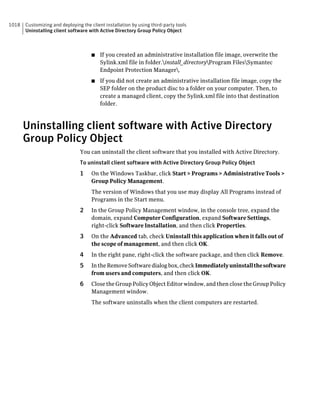
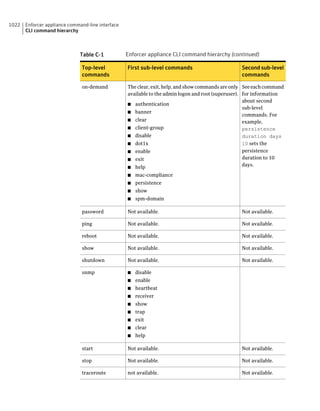
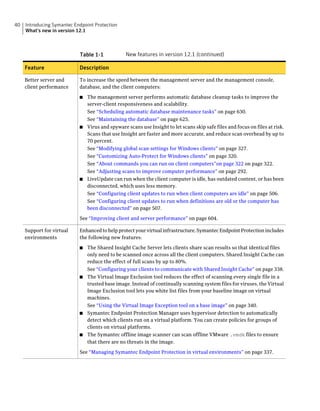
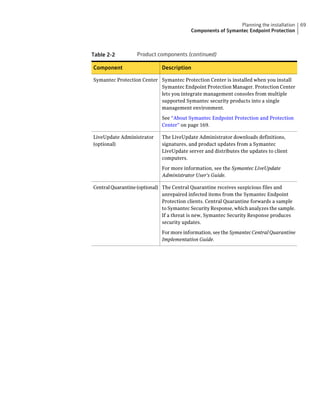
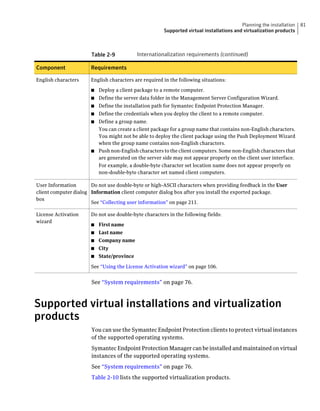
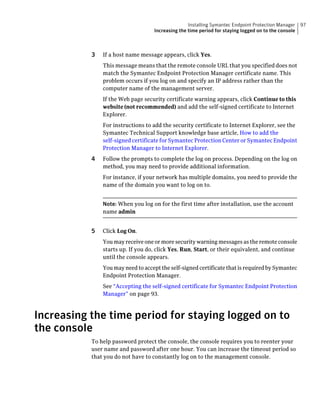
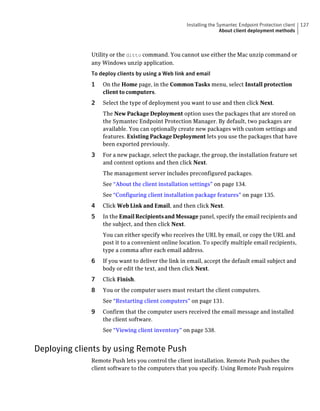
Table 2-13 SQL Server database settings (continued)
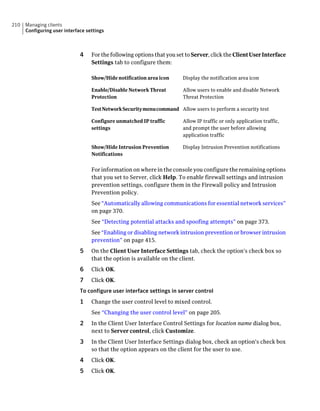
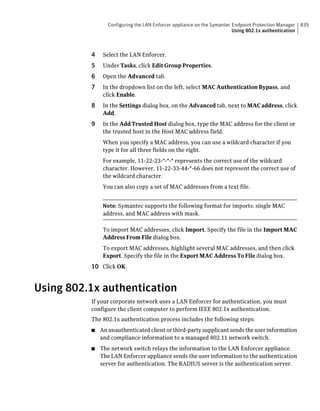
Setting Default Description
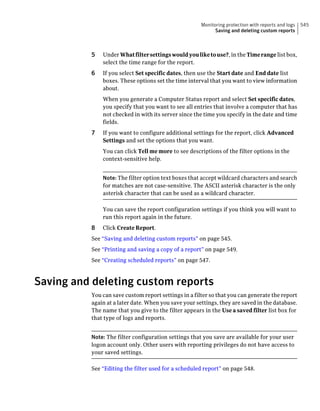
User sem5 Name of the database user account that is created. The
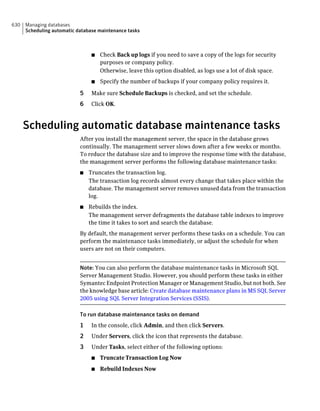
user account has a standard role with read and write access.
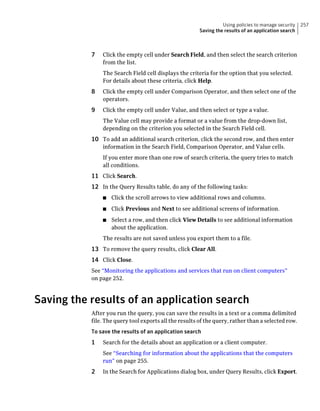
The name can be a combination of alphanumeric values
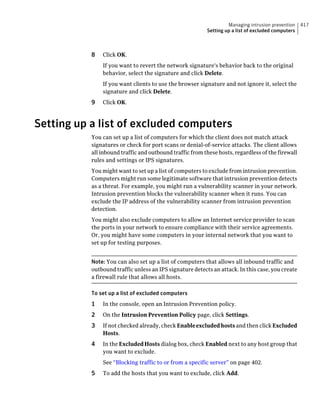
and the special characters ~#%_+=|:./. The special
characters `!@$^&*()-{}[]<;>,? are not allowed.
The following names are also not allowed: sysadmin, server
admin, setupadmin, securityadmin, processadmin,
dbcreator, diskadmin, bulkadmin.
Password None The password to associate with the database user account.
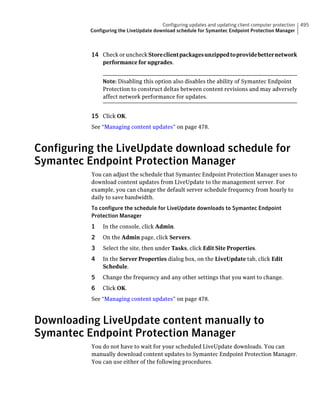
The name can be a combination of alphanumeric values
and the special characters ~#%_+=|:./. The special
characters !@*(){}[];,? are not allowed.
SQL client folder SQL Server 2000: C:Program Location of the local SQL Client Utility directory that
FilesMicrosoft SQL contains bcp.exe.
Server80ToolsBinn
SQL Server 2005: C:Program
FilesMicrosoft SQL
Server90ToolsBinn
SQL Server 2008: C:Program
FilesMicrosoft SQL
Server100ToolsBinn
DBA user None Name of the database server administrator account, which
is typically sa.
DBA password None Name of the password that is associated with the database
user account.](https://image.slidesharecdn.com/implementationguidesep12-1-120911172934-phpapp01/85/Implementation-guide-sep12-1-87-320.jpg)
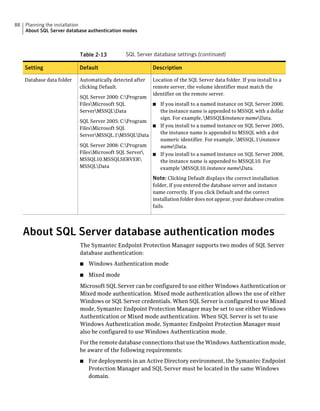


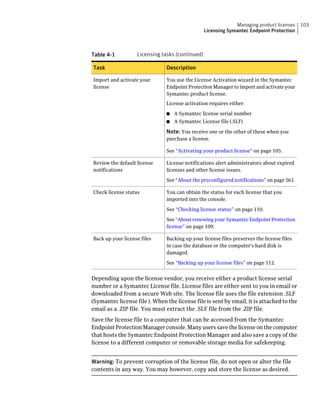
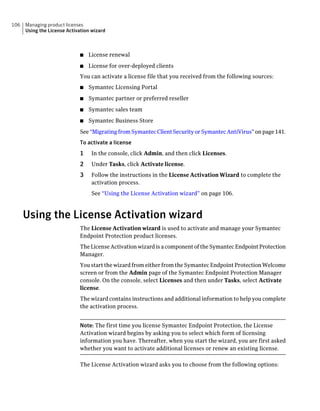
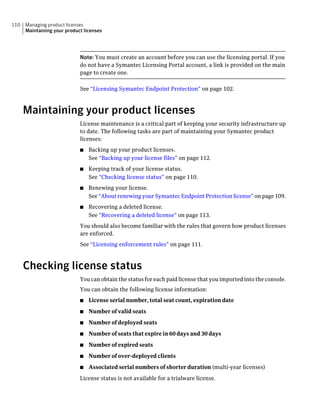

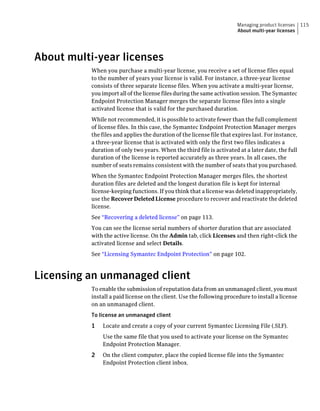

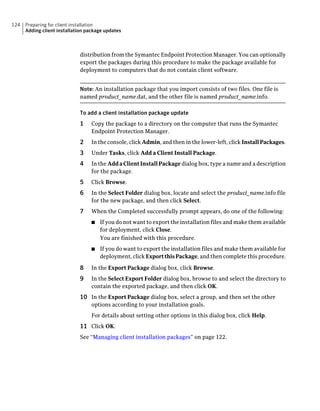
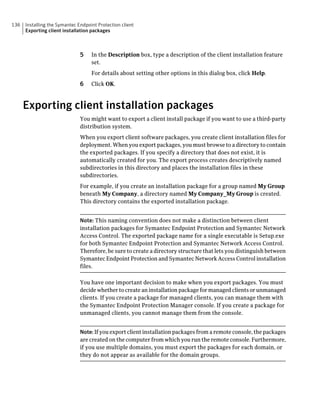
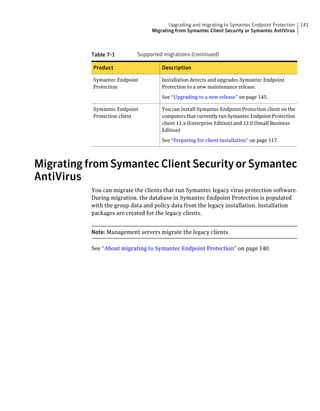
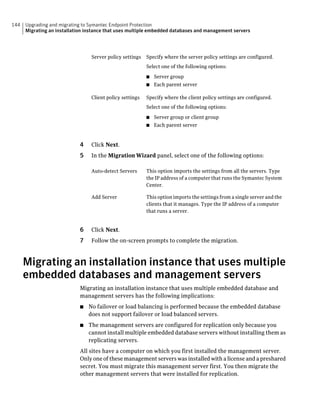

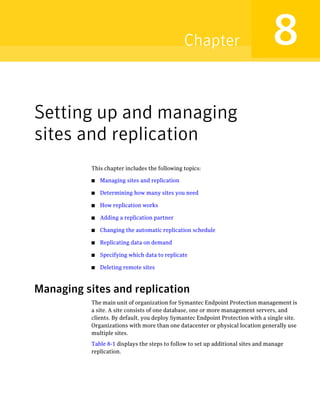


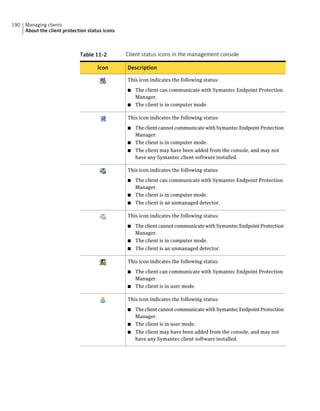
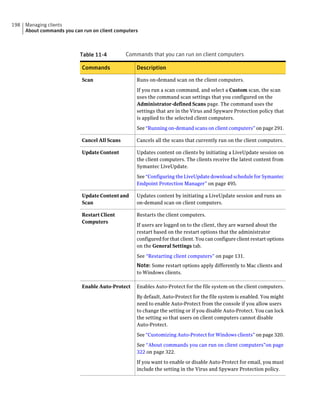
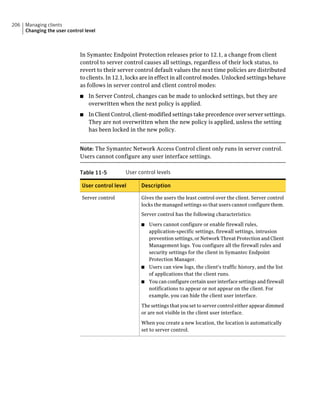
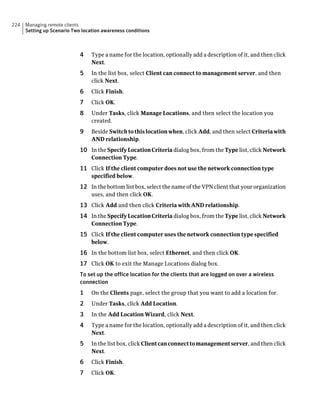
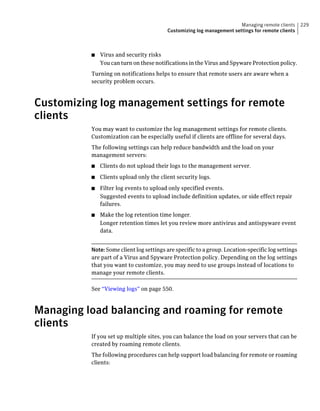
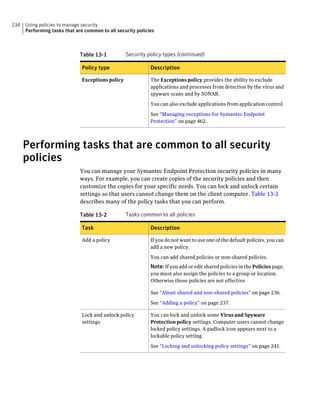
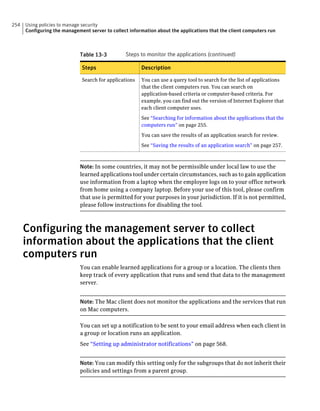
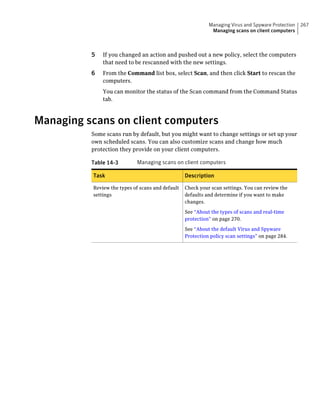
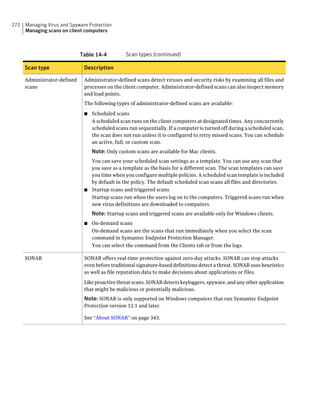
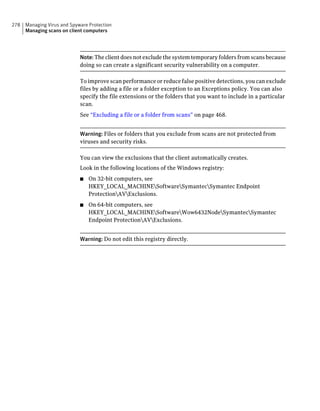
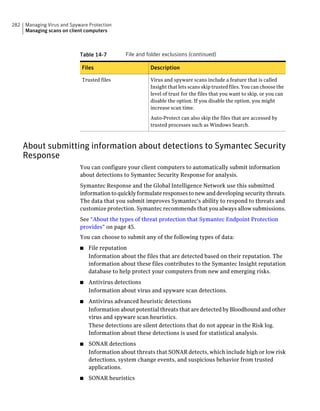
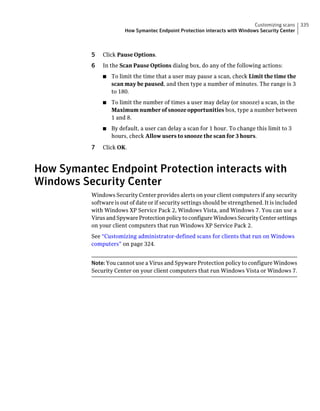
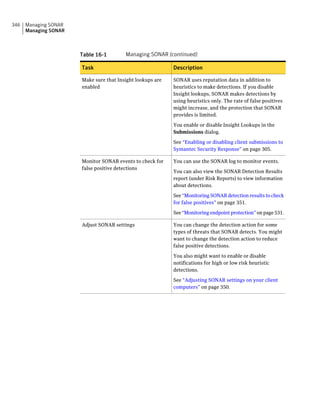
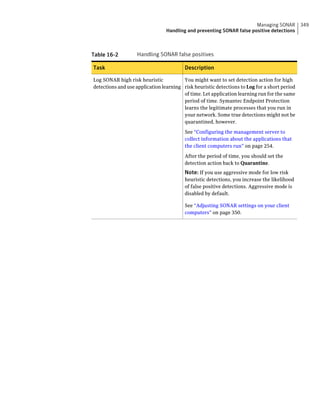
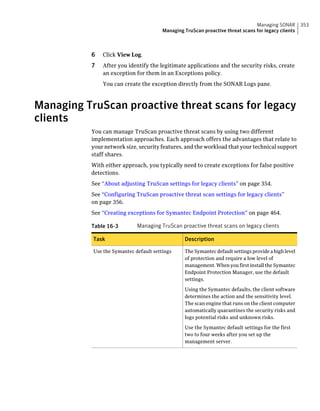
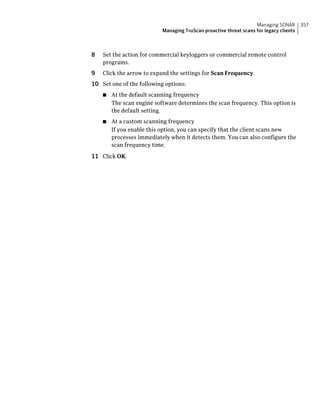
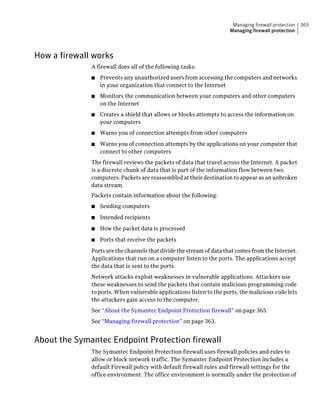
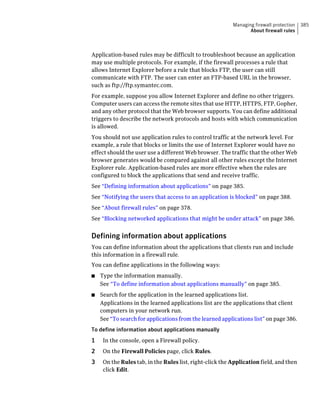
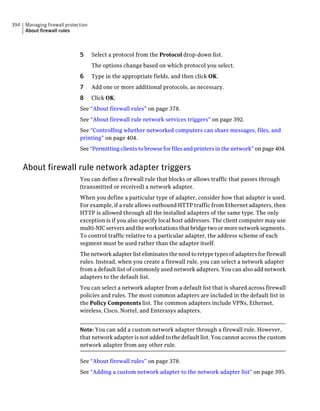
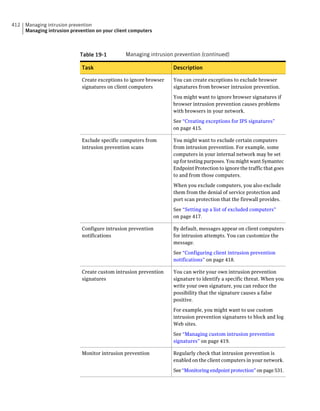
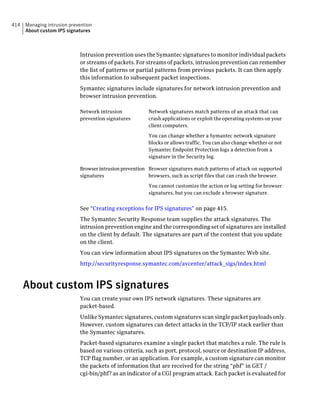
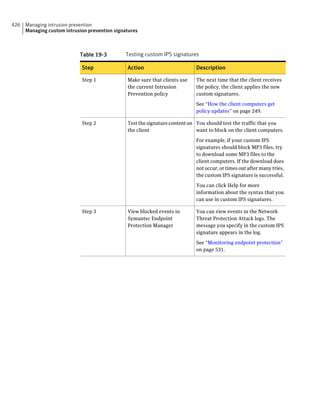
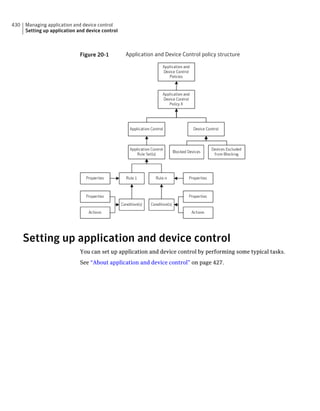
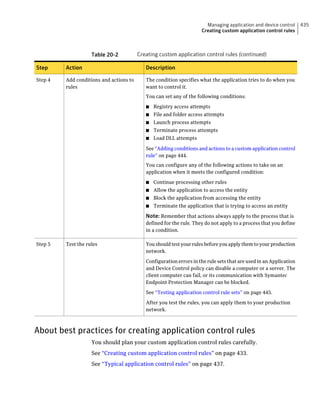
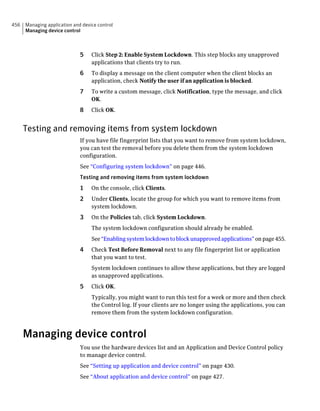
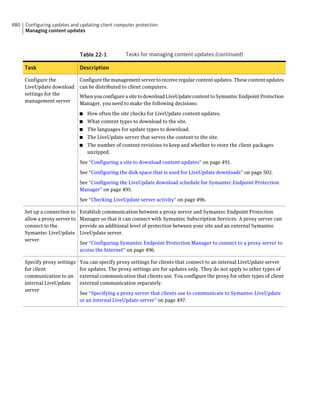
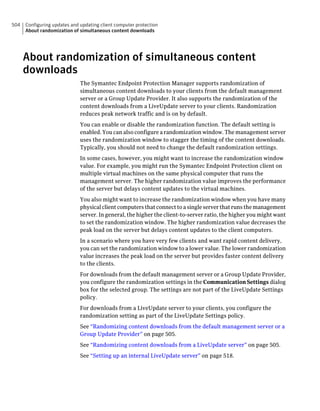
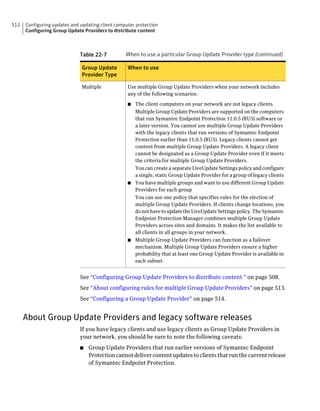
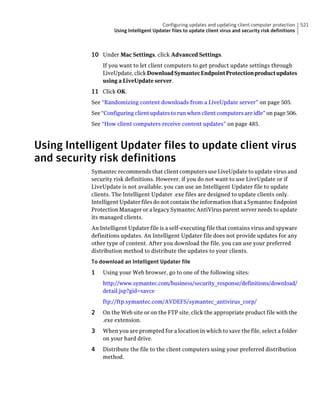
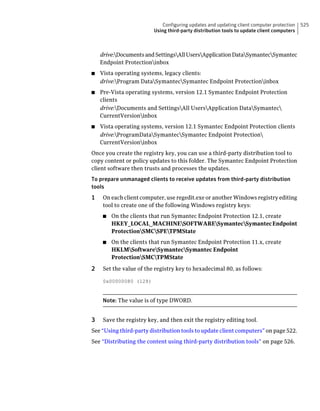
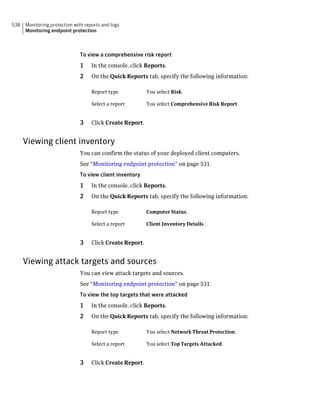
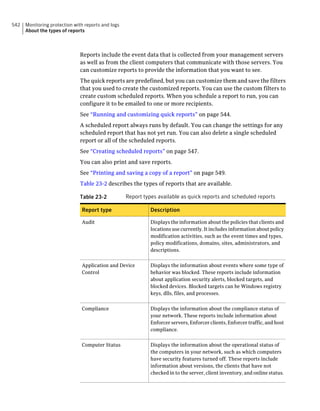
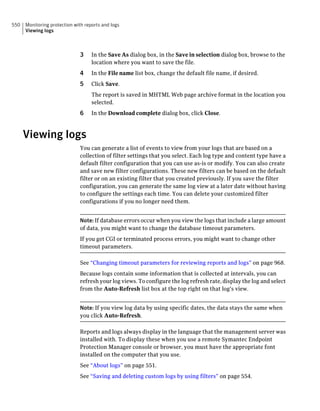
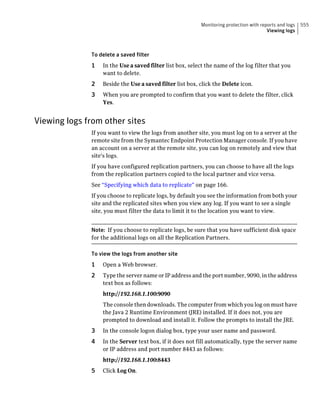
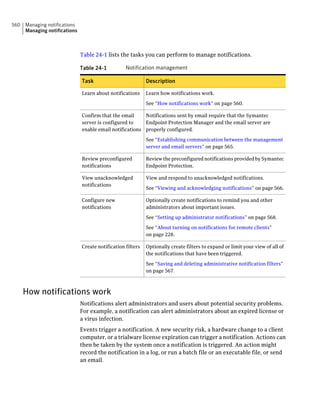
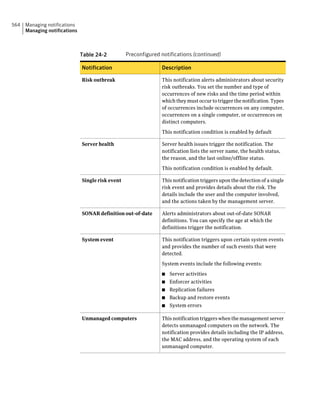
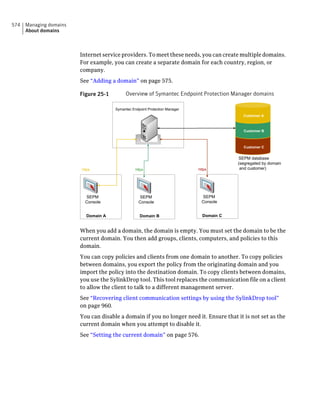
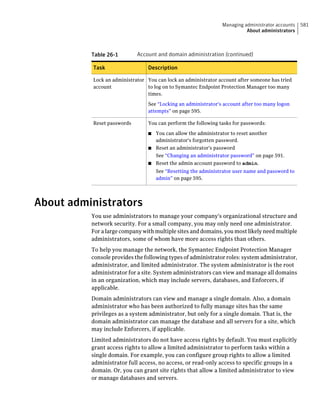
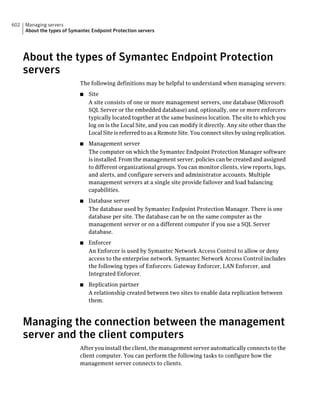
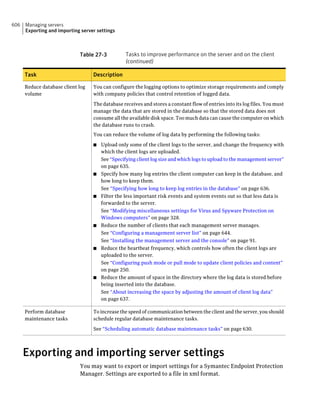
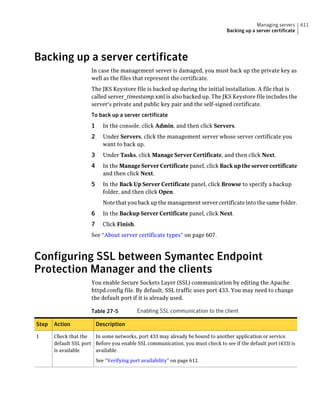
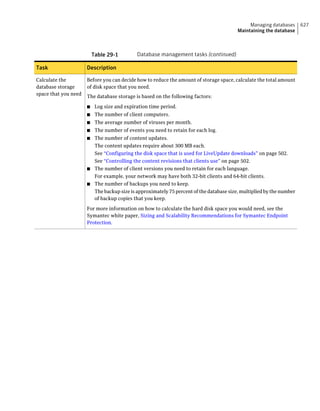
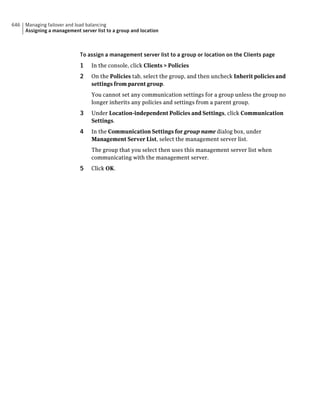
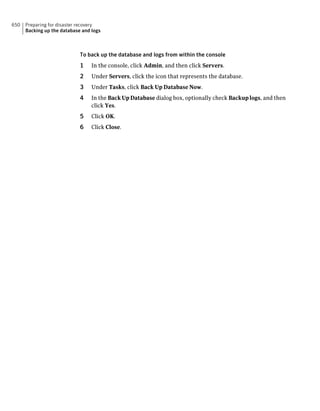
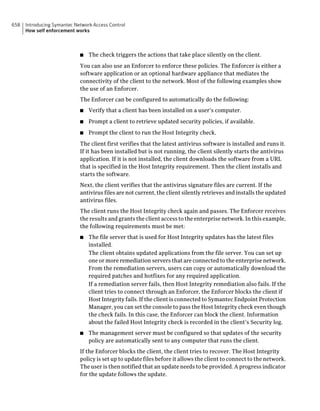
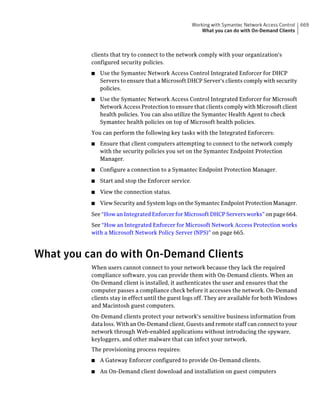
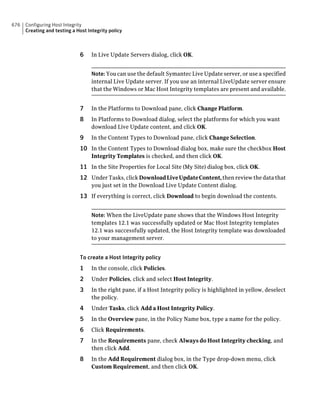
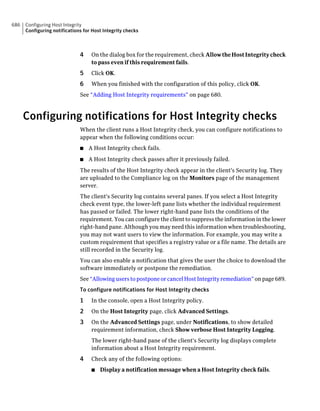
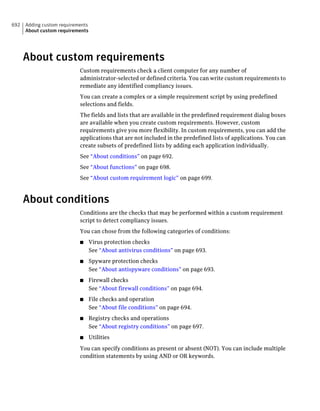
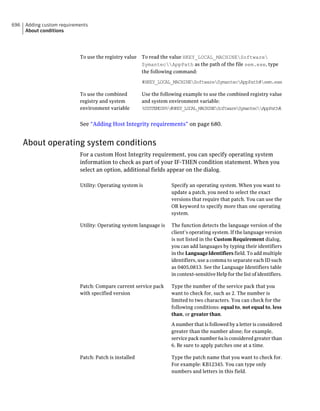
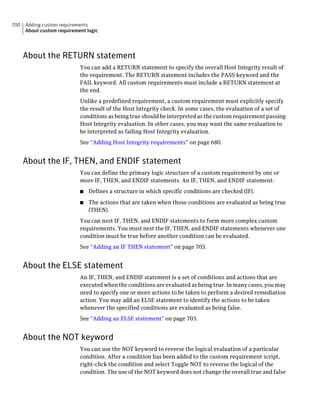
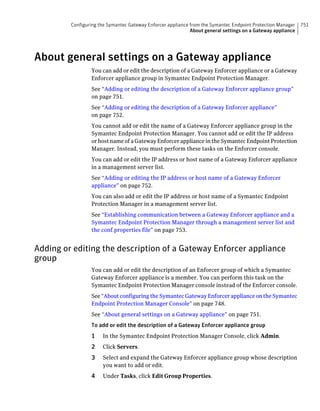
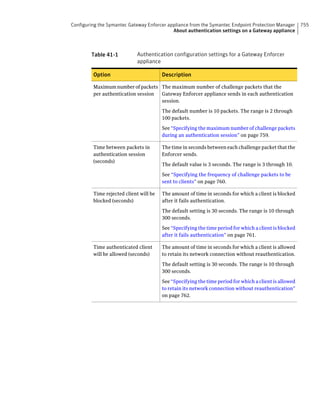
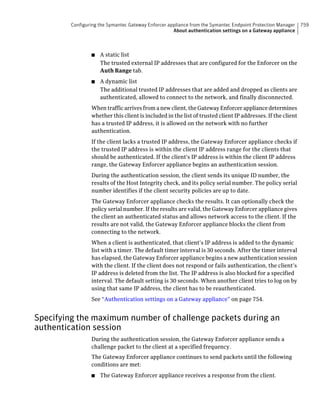
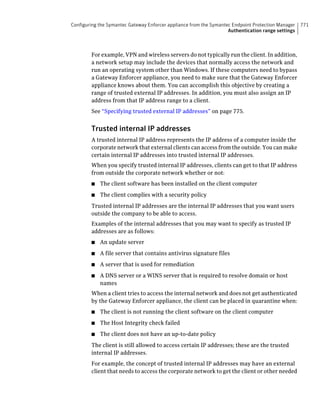
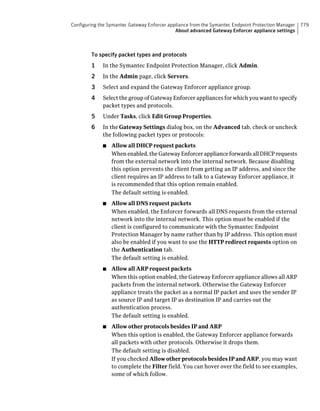
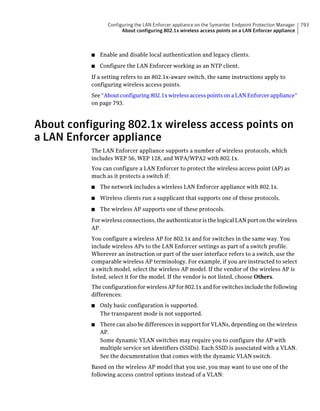
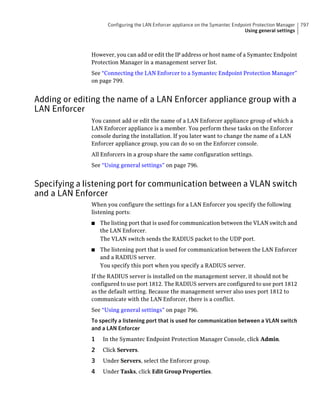
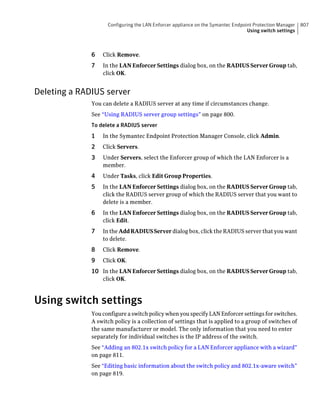
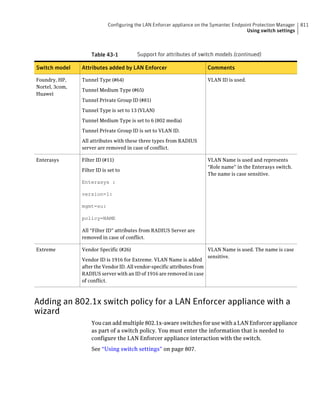
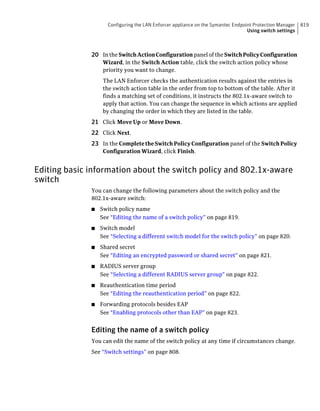
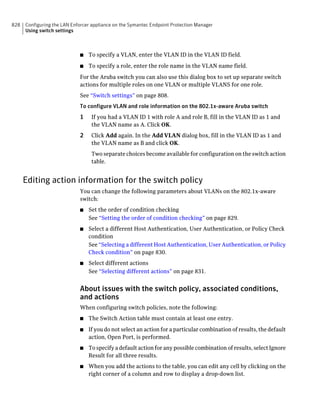
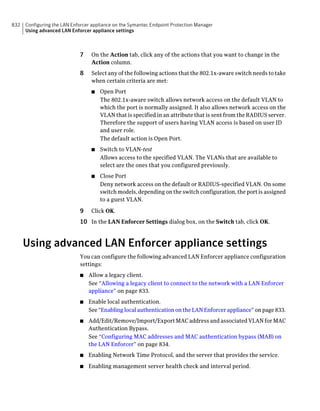
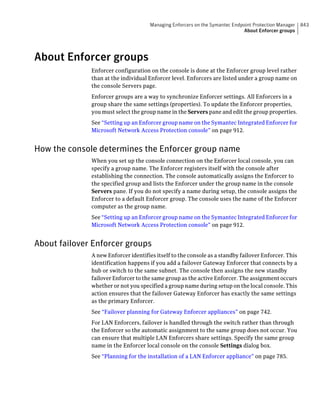
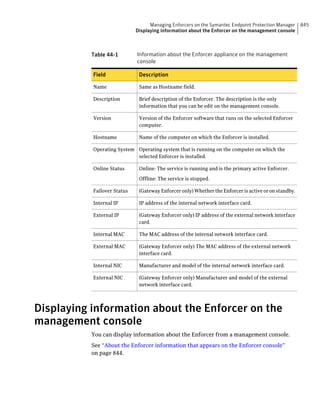
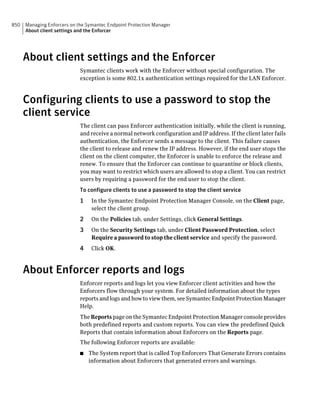
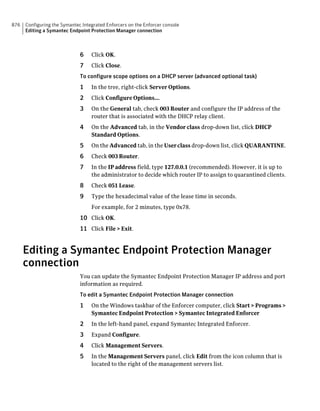
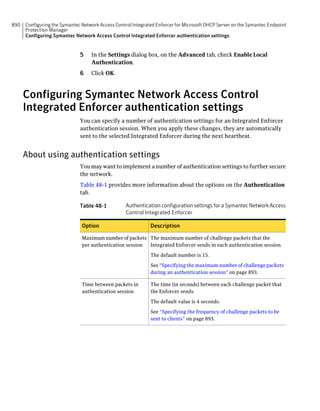
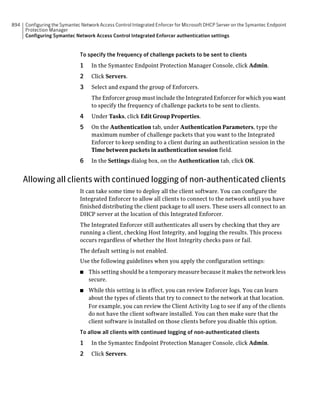
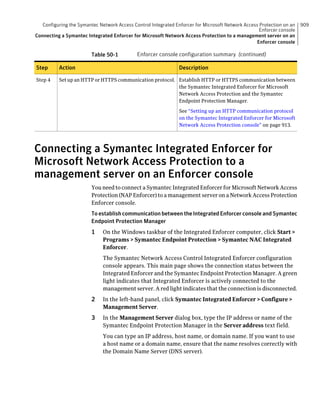
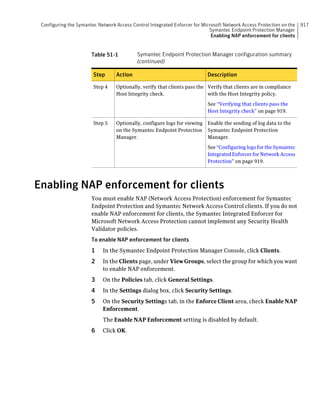
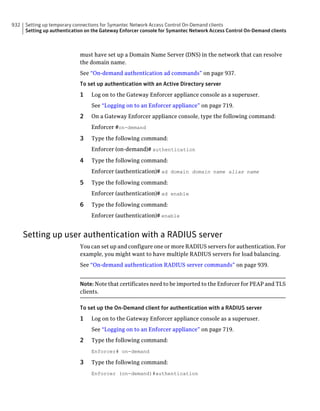
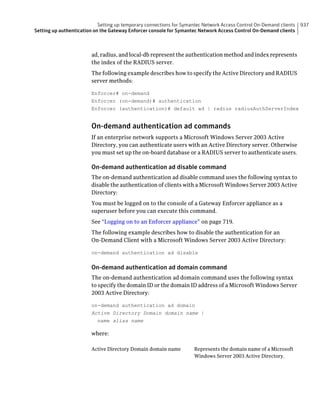
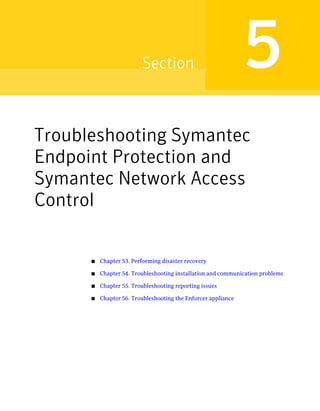
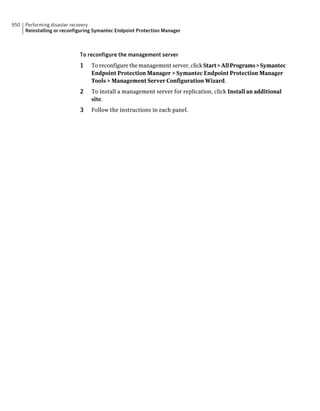
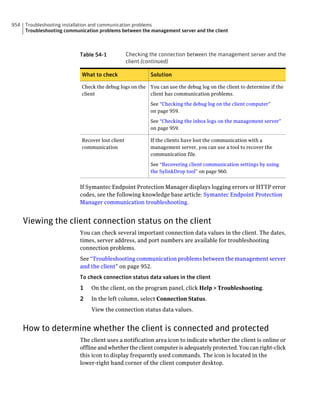
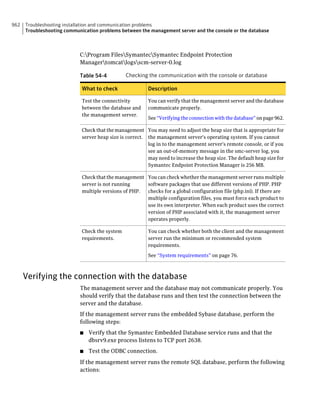
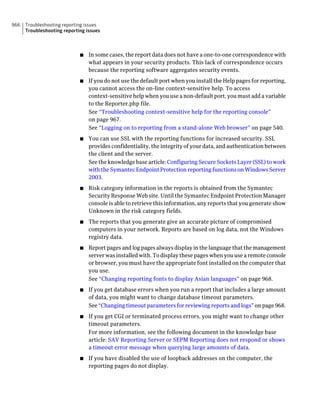
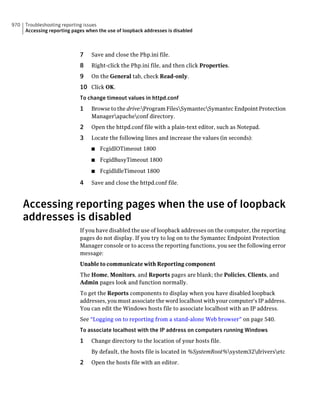
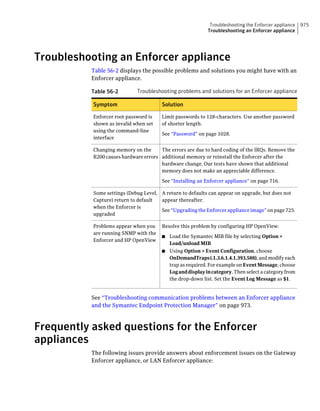
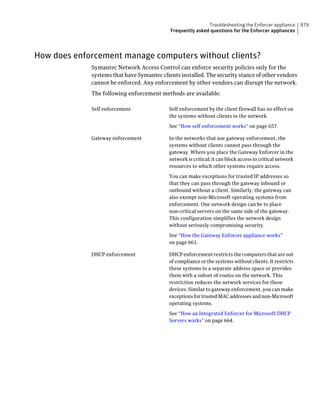
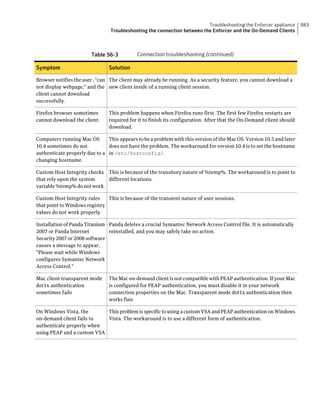
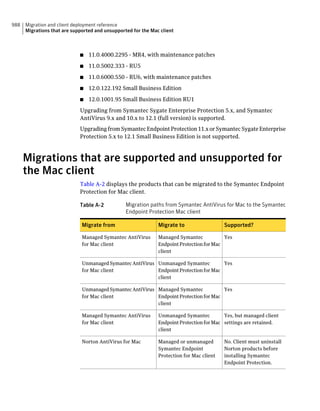
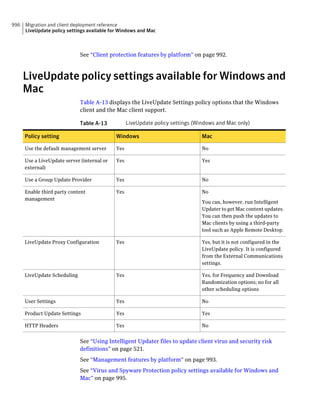
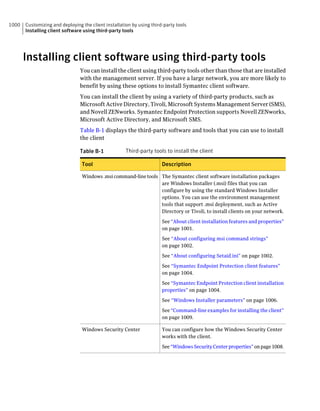
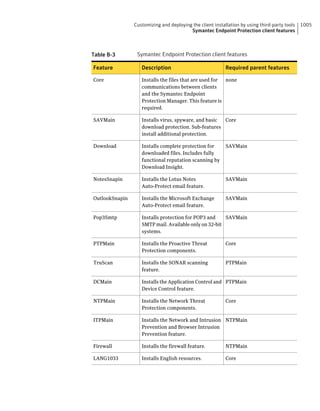
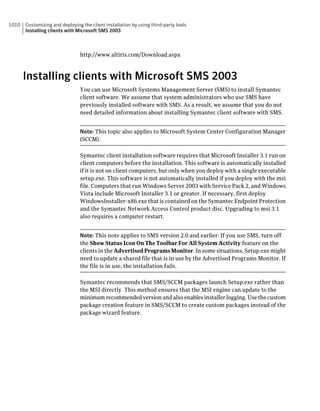
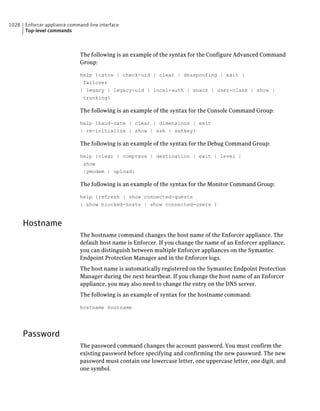
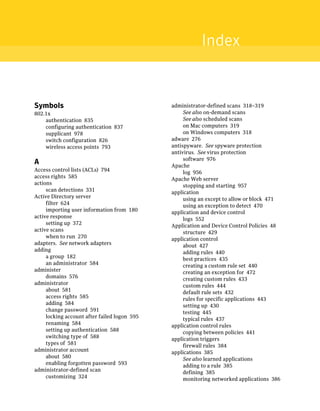
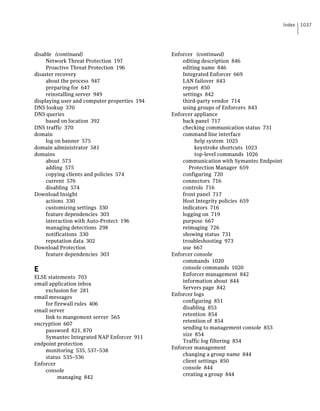
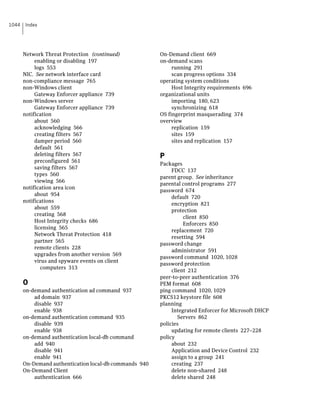
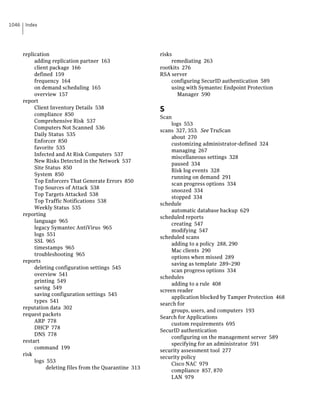
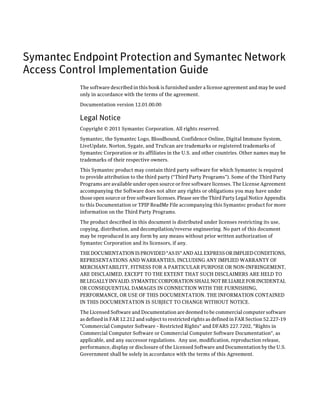
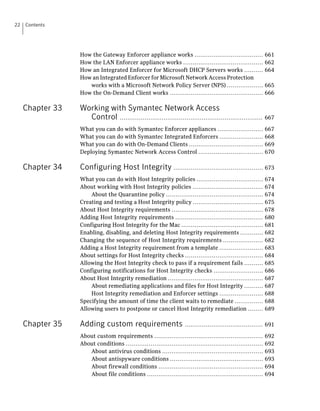
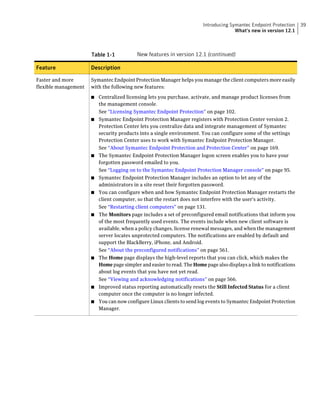
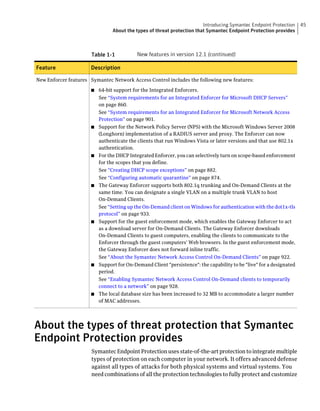
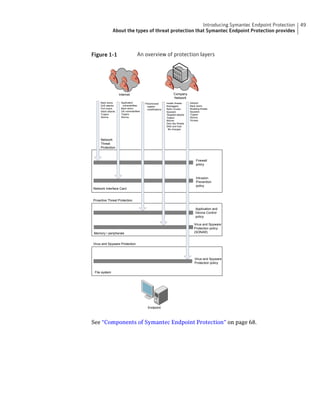
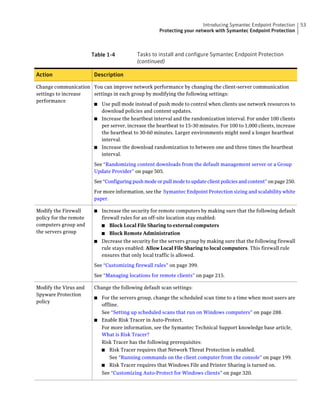
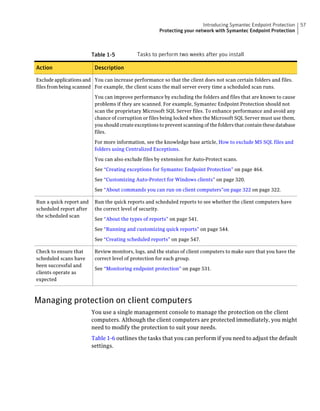
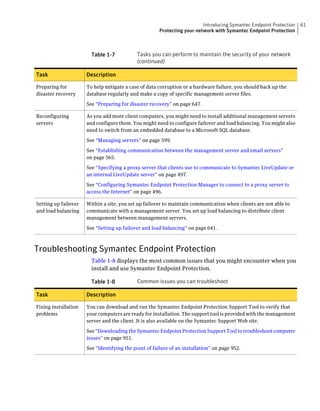
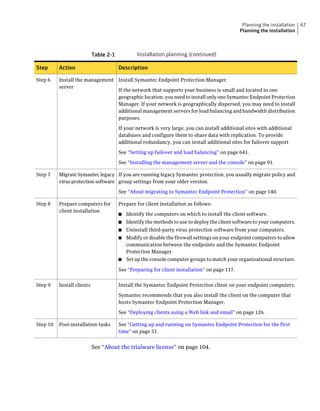
![182 Managing groups of client computers
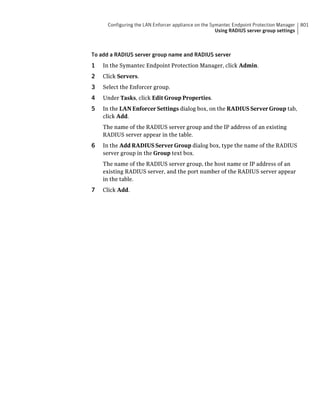
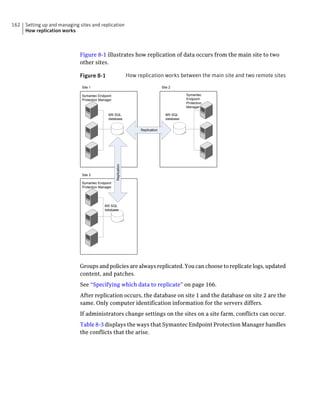
Adding a group
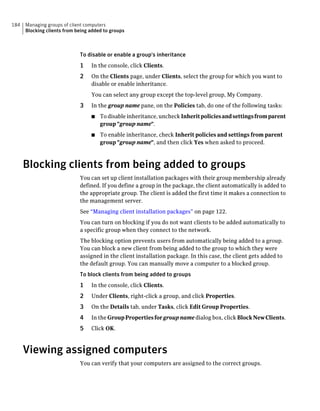
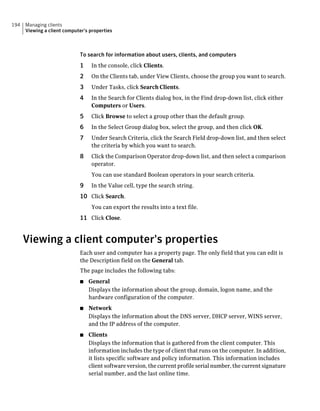
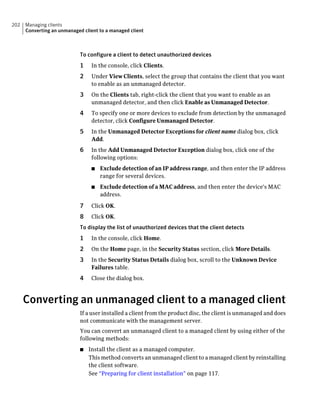
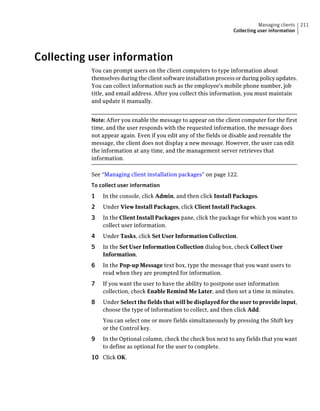
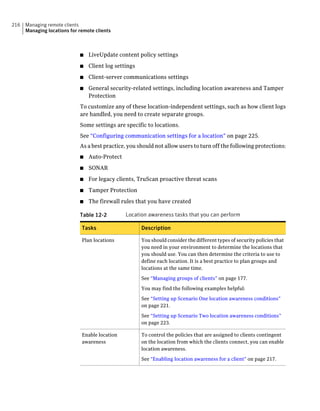
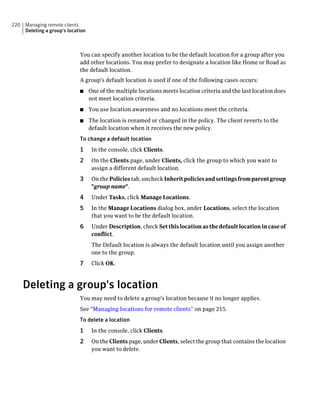
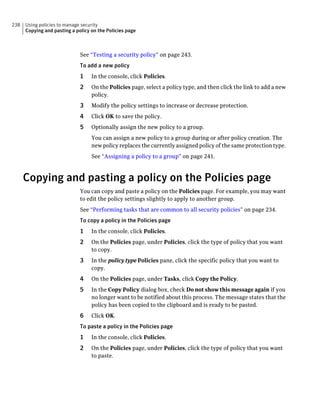
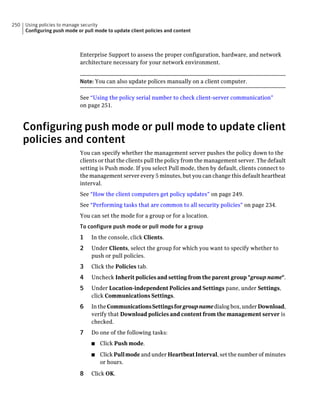
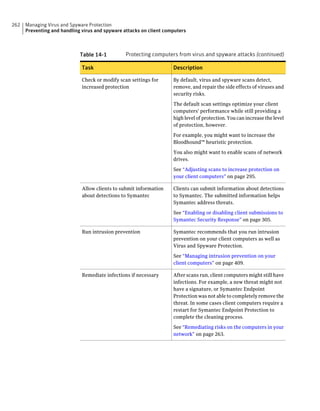
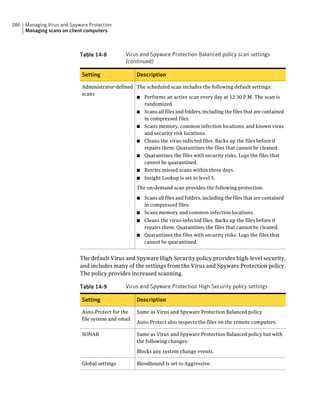
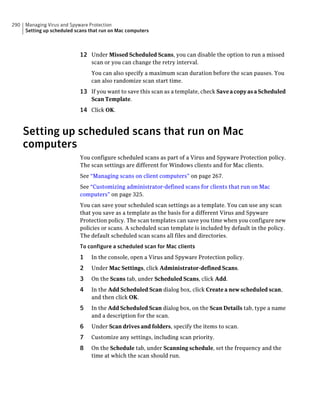
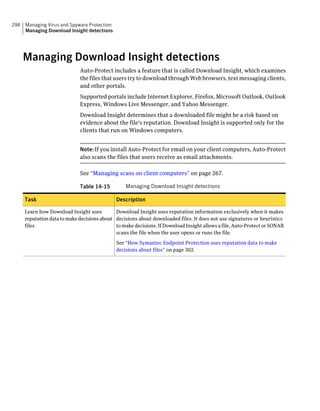
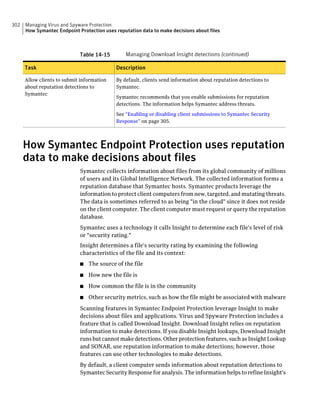
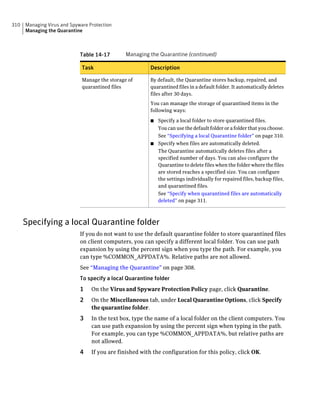
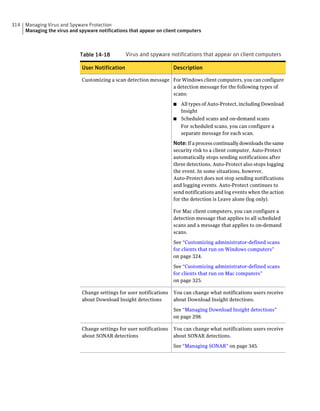
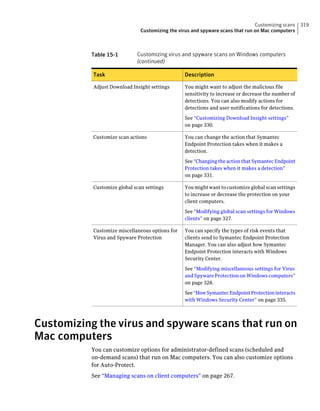
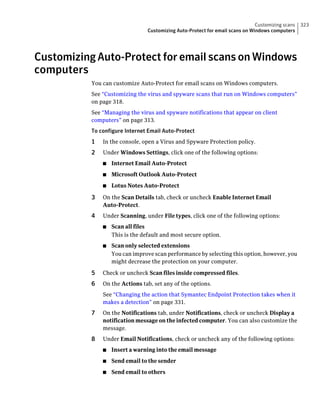
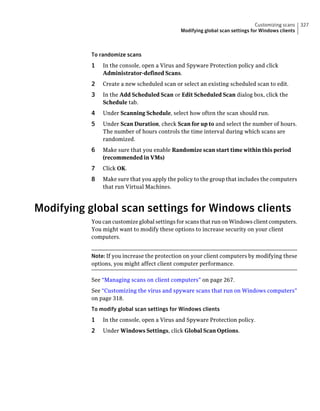
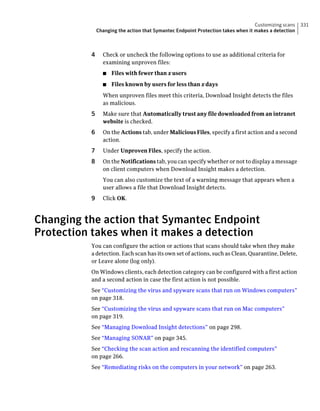
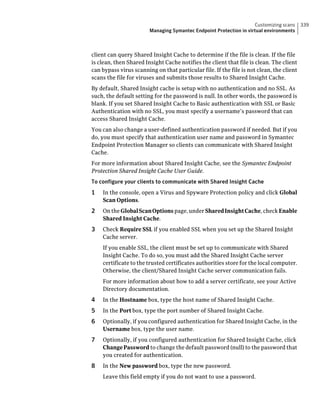
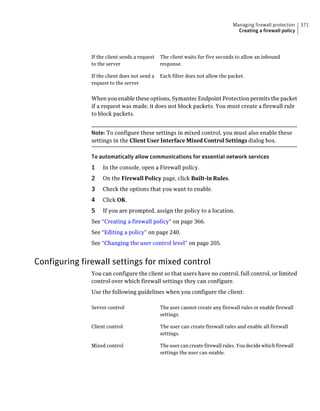
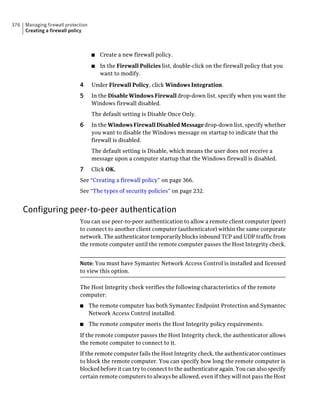
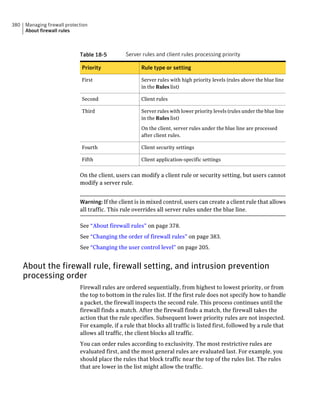
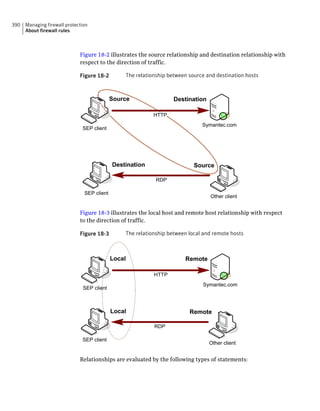
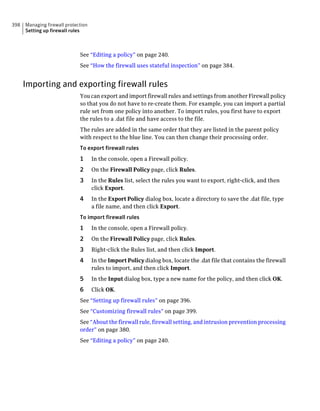
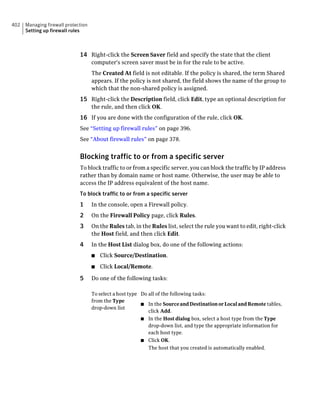
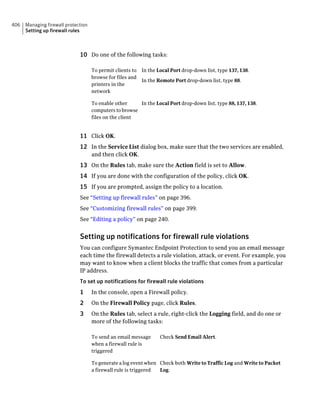
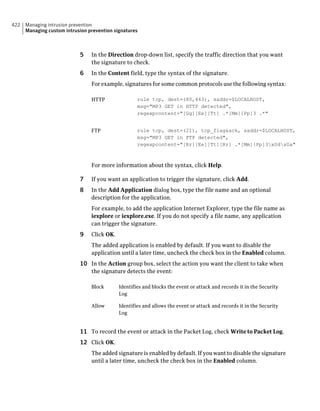
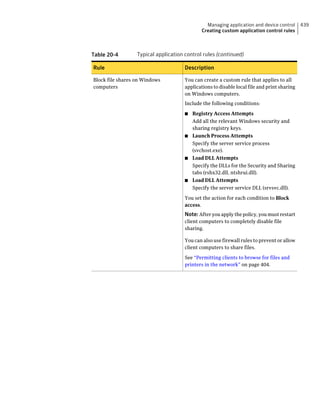
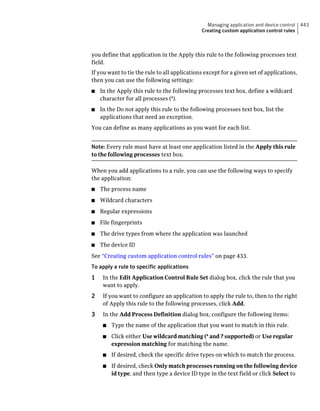
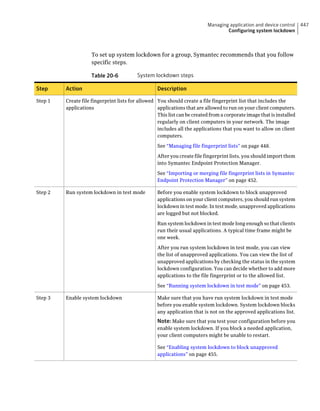
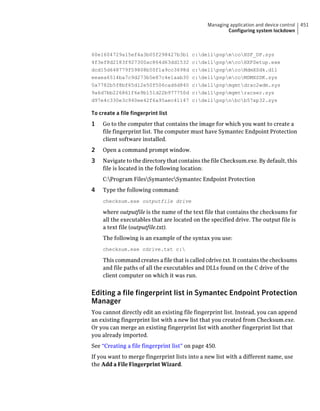
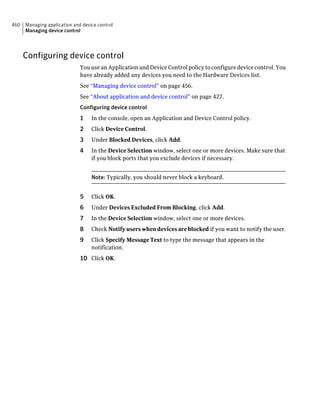
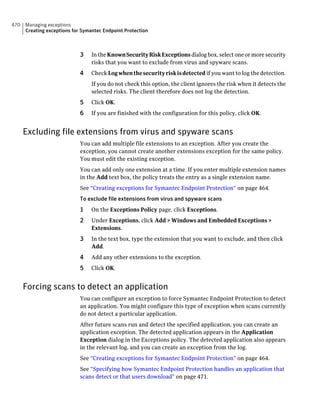
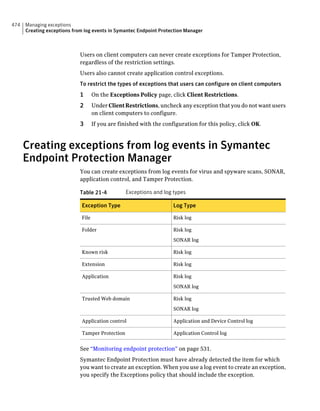
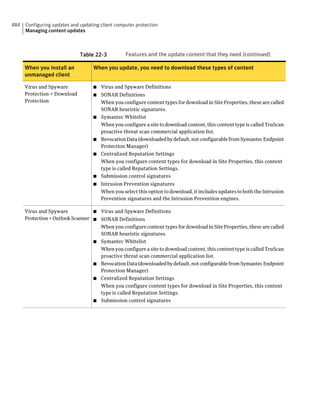
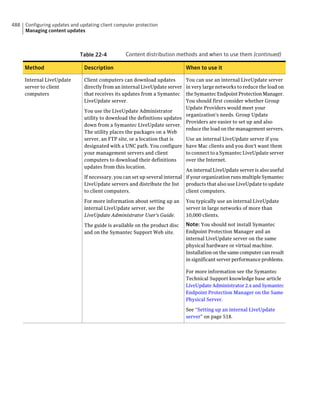
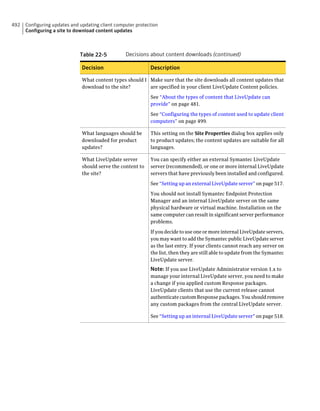
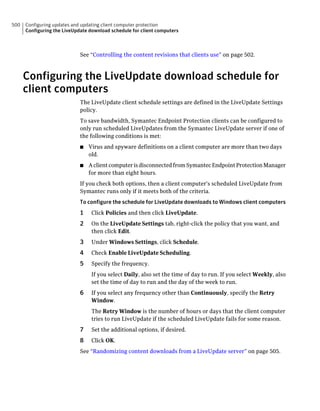
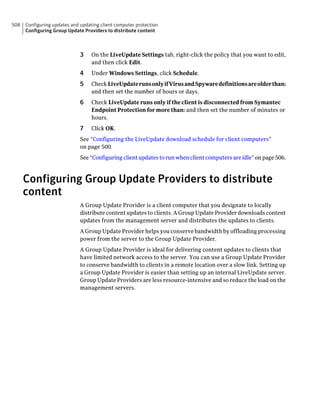
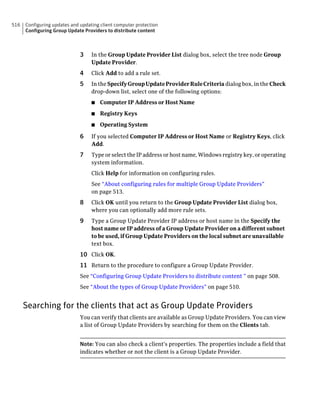
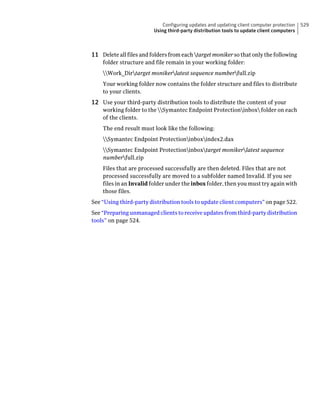
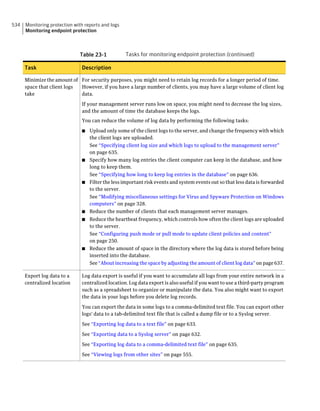
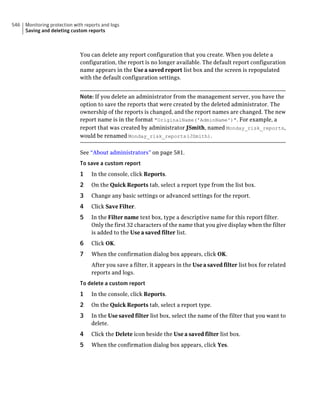
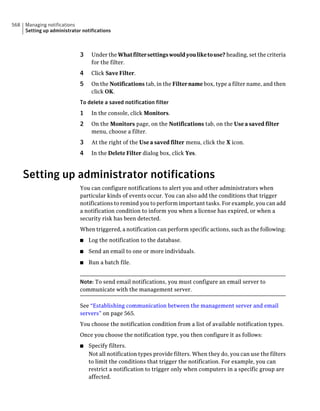
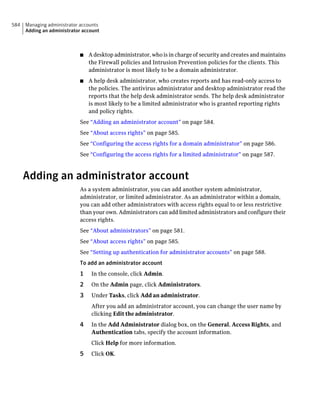
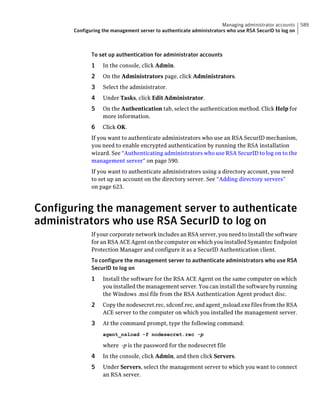
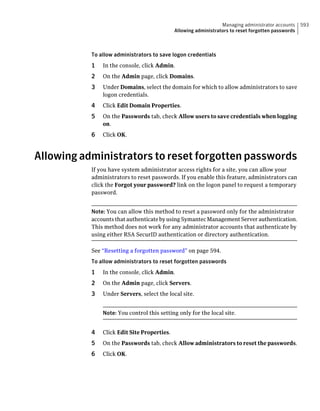
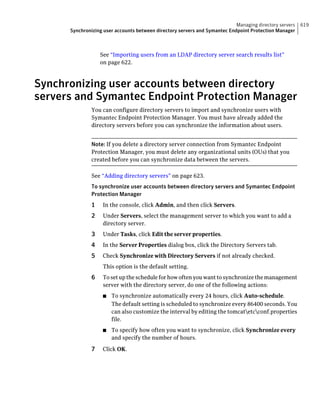
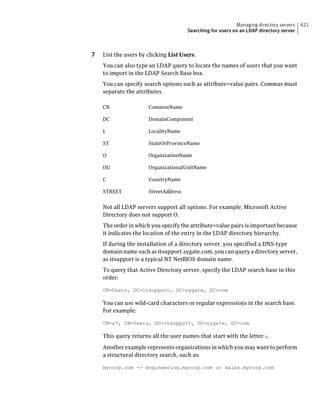
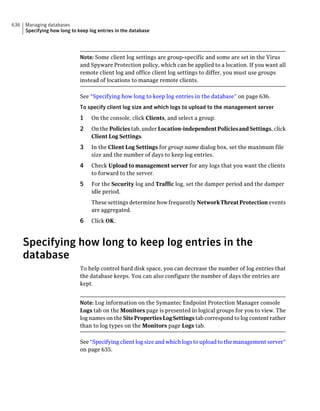
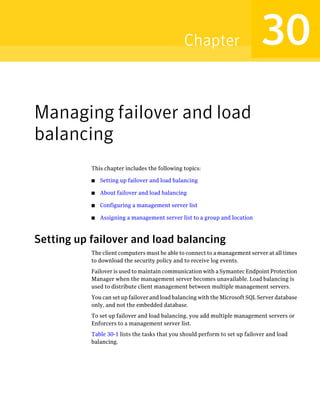
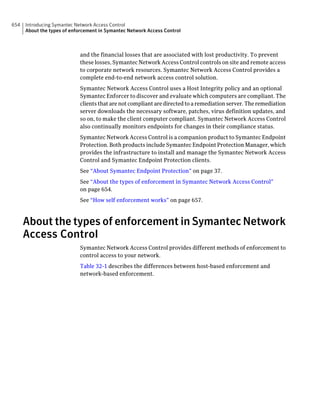
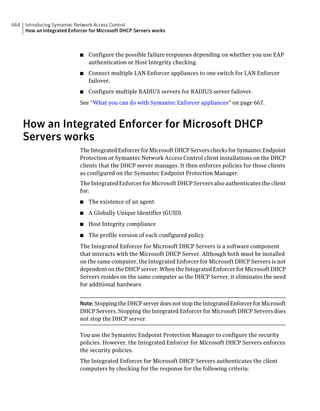
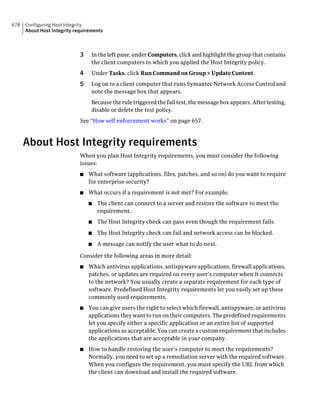
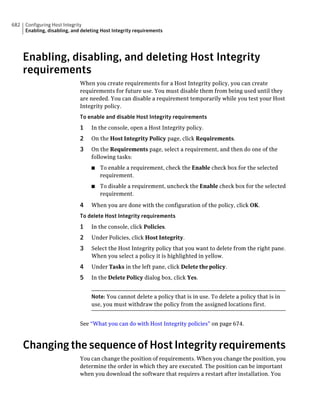
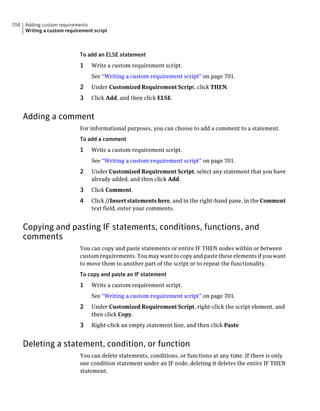
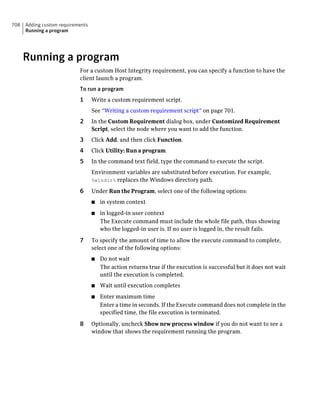
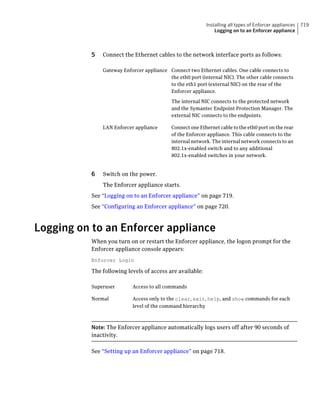
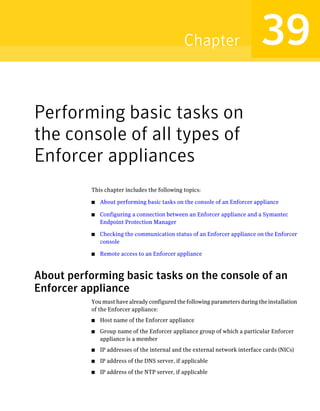
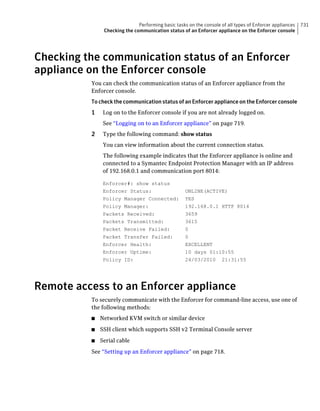
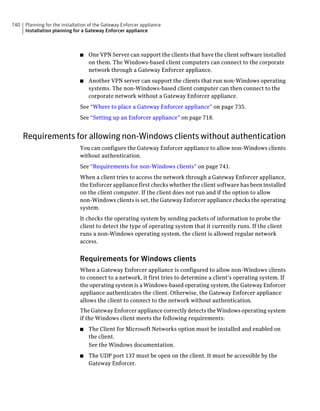
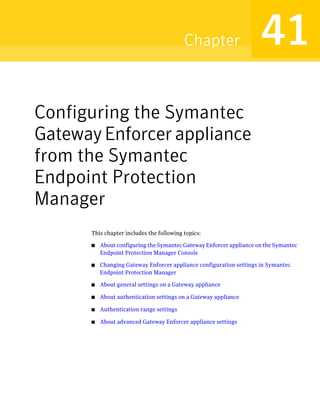
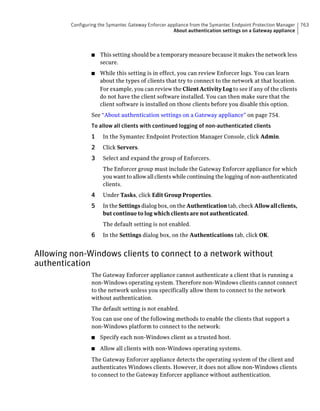
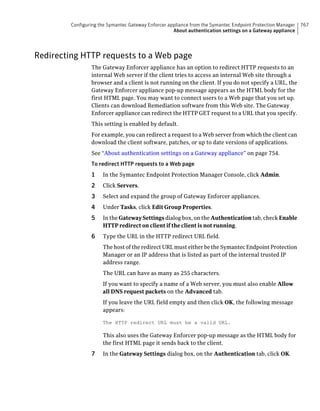
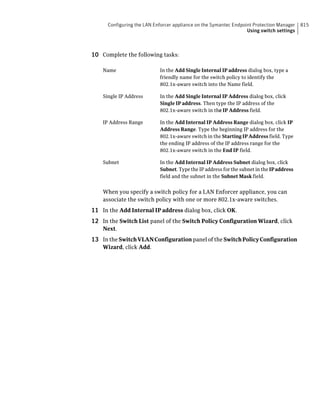
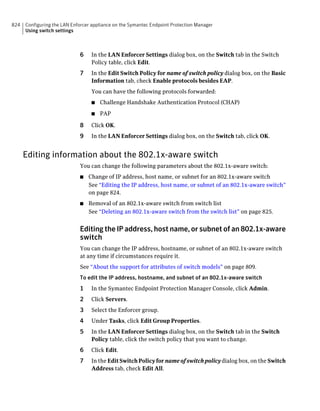
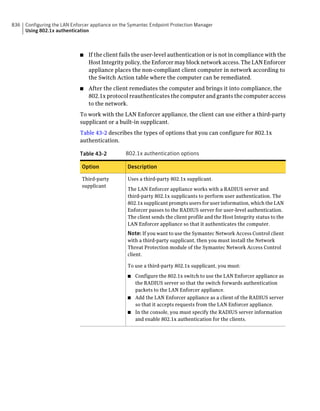
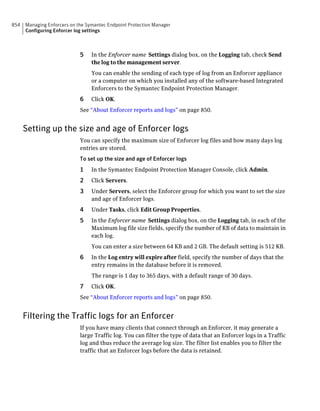
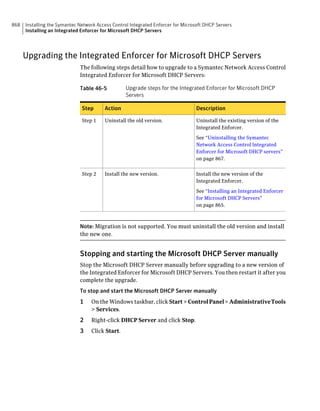
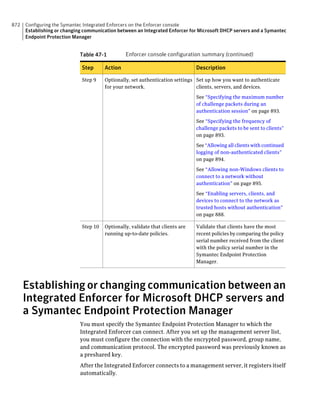
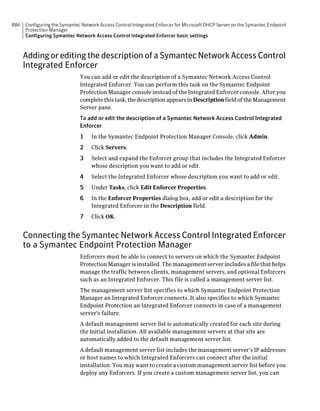
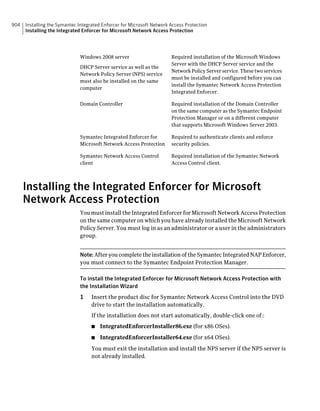
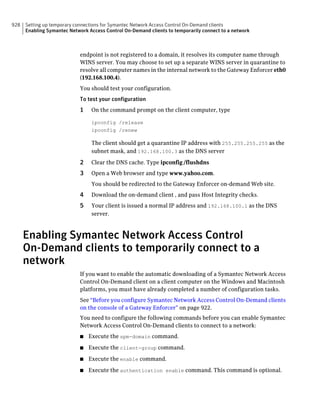
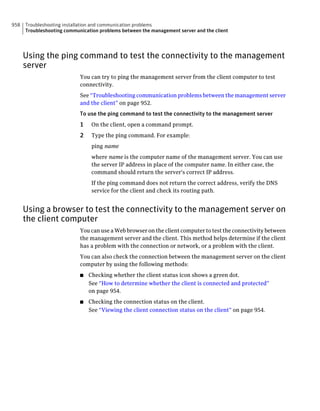
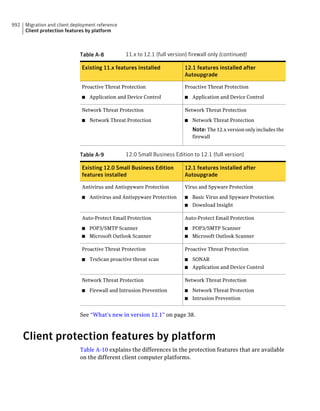
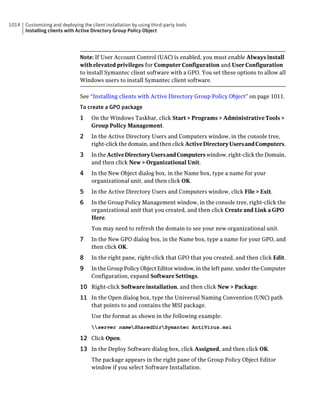
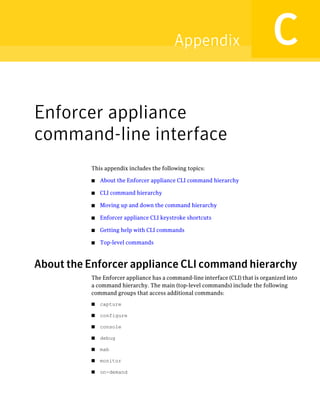
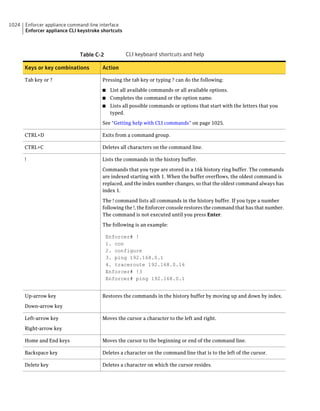
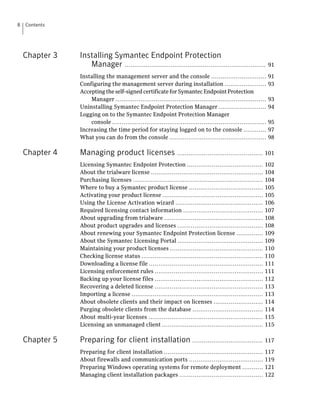
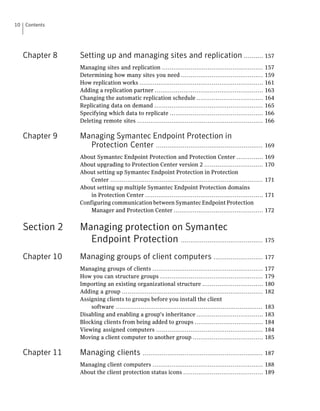
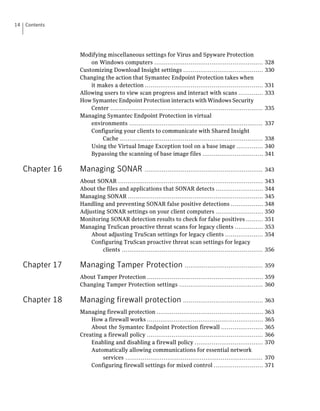
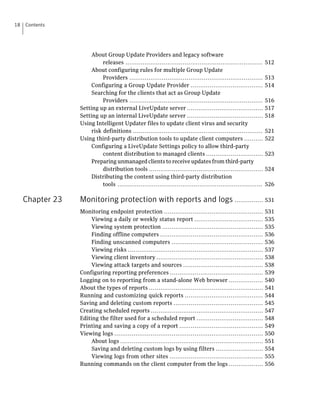
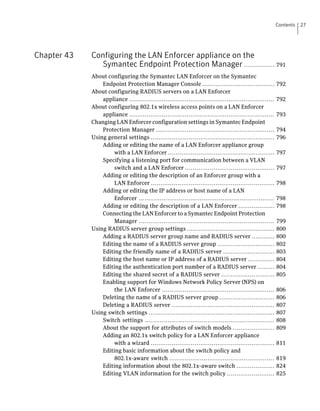
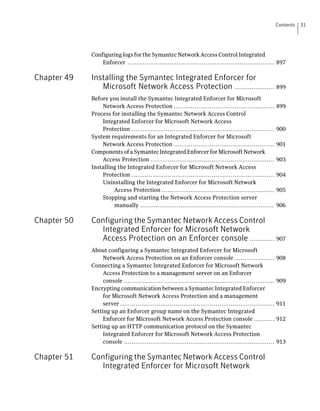
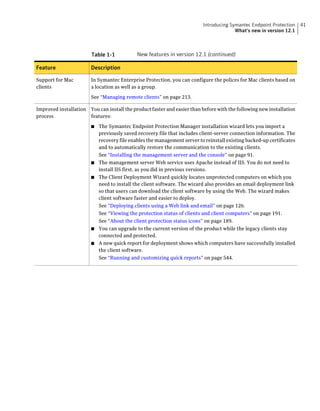
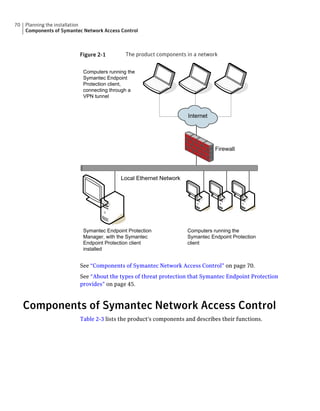
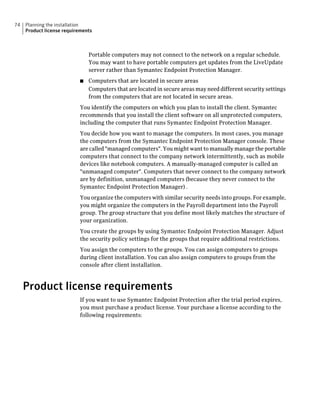
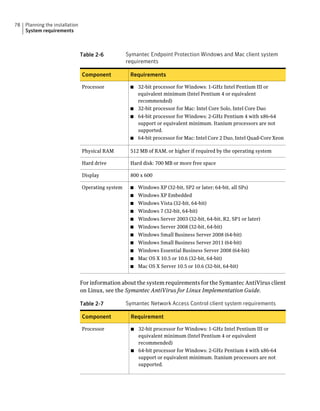
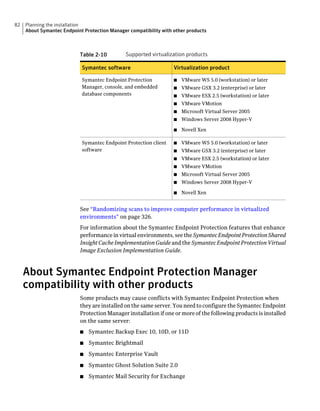
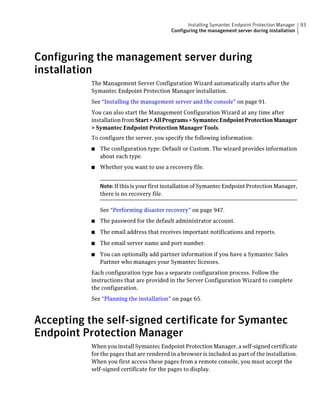
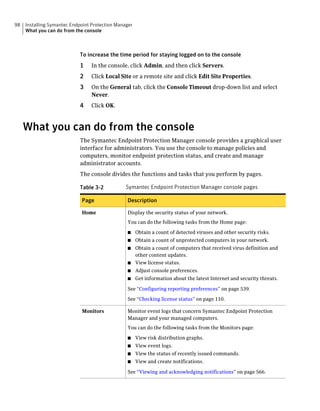
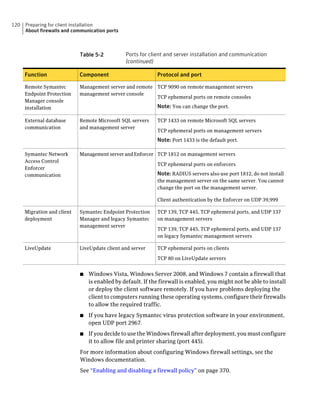
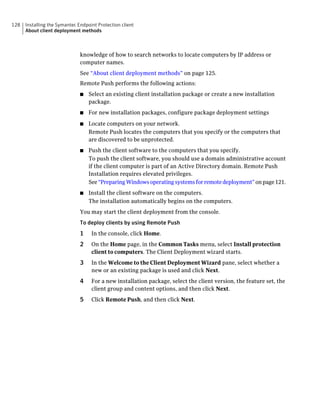
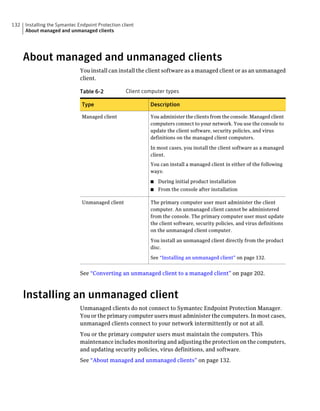
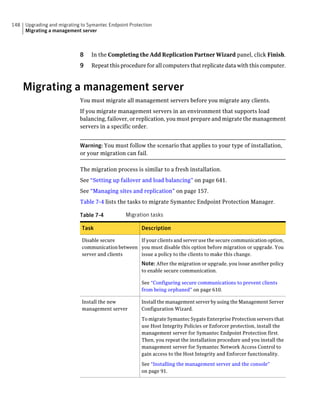
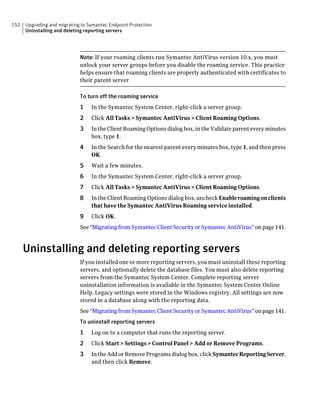
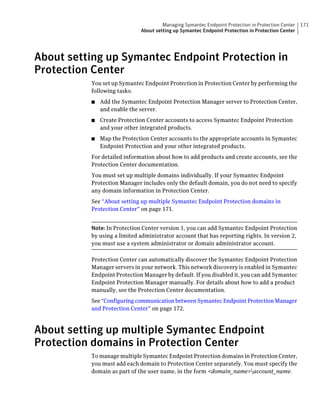
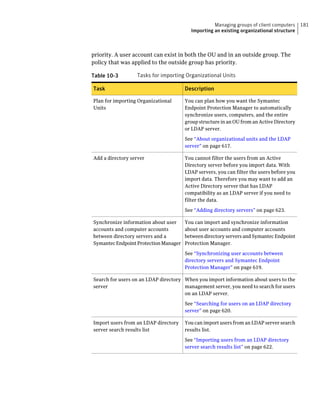
Table 10-3 Tasks for importing Organizational Units (continued)
Task Description
Import organizational units from an You can import OUs from an Active Directory
Active Directory server or an LDAP server or an LDAP directory server.
directory server
See “Importing organizational units from an
Active Directory or LDAP server” on page 623.
Import user account and computer You can import user account and computer
account information from an LDAP account information from an LDAP server.
server
See “About importing user and computer account
information from an LDAP directory server”
on page 618.
Synchronize Organizational Units You can synchronize OUs.
See “About synchronizing organizational units”
on page 618.
Adding a group
You can add groups after you define the group structure for your organization.
Group descriptions may be up to 1024 characters long. Group names may contain
any character except the following characters: [” / * ? < > | :] Group descriptions
are not restricted.
Note: You cannot add groups to the Default Group.
See “How you can structure groups” on page 179.
To add a group
1 In the console, click Clients.
2 Under Clients, select the group to which you want to add a new subgroup.
3 On the Clients tab, under Tasks, click Add Group.
4 In the Add Group for group name dialog box, type the group name and a
description.
5 Click OK.](https://image.slidesharecdn.com/implementationguidesep12-1-120911172934-phpapp01/85/Implementation-guide-sep12-1-182-320.jpg)