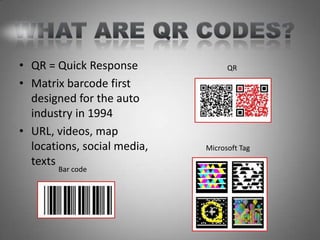
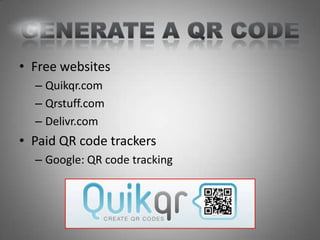
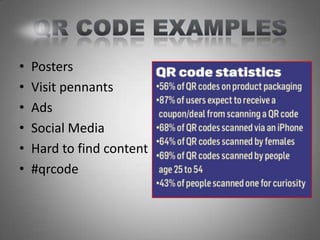
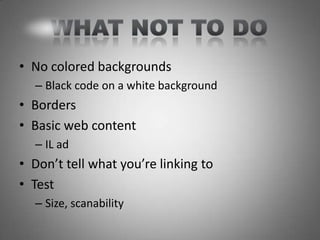
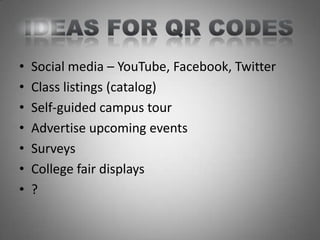
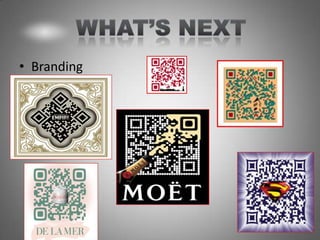
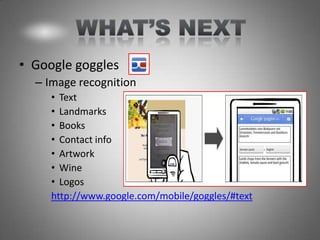
SlideShare a Scribd company logo
MELISSA PEREZ
MARKETING COORDINATOR
UW-STOUT
• QR = Quick Response              QR

• Matrix barcode first
  designed for the auto
  industry in 1994
• URL, videos, map
  locations, social media,   Microsoft Tag
  texts
       Bar code
• Free websites
  – Quikqr.com
  – Qrstuff.com
  – Delivr.com
• Paid QR code trackers
  – Google: QR code tracking
• Droid           There’s an app for that!
   – ScanLife
   – QuickMark
   – i-nigma
• Blackberry
   – ScannerPro
   – i-nigma
• iPhone
   – ScanLife
   – QuickMark
   – i-nigma
•   Posters
•   Visit pennants
•   Ads
•   Social Media
•   Hard to find content
•   #qrcode
• No colored backgrounds
  – Black code on a white background
• Borders
• Basic web content
  – IL ad
• Don’t tell what you’re linking to
• Test
  – Size, scanability
•   Social media – YouTube, Facebook, Twitter
•   Class listings (catalog)
•   Self-guided campus tour
•   Advertise upcoming events
•   Surveys
•   College fair displays
•   ?
• Branding
• Google goggles
  – http://news.yahoo.com/blogs/this-could-be-big-
    abc-news/qr-codes-things-185409346.html
• Google goggles
  – Image recognition
     • Text
     • Landmarks
     • Books
     • Contact info
     • Artwork
     • Wine
     • Logos
     http://www.google.com/mobile/goggles/#text
Pilot something!

Melissa Perez
UW-Stout
715-232-2276
perezm@uwstout.edu

More Related Content

Similar to Qr code presentation

Qr code power point
Qr code power pointQr code power point
Qr code power point
Mary Papageorge
 
QR Codes, what they are and why you should care
QR Codes, what they are and why you should careQR Codes, what they are and why you should care
QR Codes, what they are and why you should care
Emily Davis
 
Social Media & QR codes s-go 2012
Social Media & QR codes  s-go 2012Social Media & QR codes  s-go 2012
Social Media & QR codes s-go 2012
sgorney
 
QR Codes ASTE 2012
QR Codes ASTE 2012QR Codes ASTE 2012
QR Codes ASTE 2012
Tina Coulston
 
The role of social media and online communication in developing and growing...
The role of social media and online  communication in developing and  growing...The role of social media and online  communication in developing and  growing...
The role of social media and online communication in developing and growing...
CraftsCouncilofIreland
 
RE/MAX India 2013 Internet Marketing
RE/MAX India 2013 Internet MarketingRE/MAX India 2013 Internet Marketing
RE/MAX India 2013 Internet Marketing
RE/MAX India
 
QR Codes in the Garden
QR Codes in the GardenQR Codes in the Garden
QR Codes in the Garden
Mary Van Dyke
 
QR Codes
QR Codes QR Codes
QR Codes
Richard Smith
 
01 Social Media to Promote Your Global Destination
01 Social Media to Promote Your Global Destination01 Social Media to Promote Your Global Destination
01 Social Media to Promote Your Global Destination
meagburnt
 
QR presentation
QR presentationQR presentation
QR presentation
jbwood44
 
5 Ways To Use On Line Tools To Drive More Sales
5 Ways To Use On Line Tools To Drive More Sales5 Ways To Use On Line Tools To Drive More Sales
5 Ways To Use On Line Tools To Drive More Sales
Brad Tornberg
 
Tiu services slideshow 120710
Tiu services slideshow 120710Tiu services slideshow 120710
Tiu services slideshow 120710
William DeLeo
 
5 ways to use on line tools to drive more sales
5 ways to use on line tools to drive more sales5 ways to use on line tools to drive more sales
5 ways to use on line tools to drive more sales
Brad Tornberg
 
Digital Marketing Strategy Presentation.pdf
Digital Marketing Strategy Presentation.pdfDigital Marketing Strategy Presentation.pdf
Digital Marketing Strategy Presentation.pdf
Joe Orlando
 
QR Codes in Schools and Libraries
QR Codes in Schools and LibrariesQR Codes in Schools and Libraries
QR Codes in Schools and Libraries
elliotel
 
Waggly Investor deck
Waggly Investor deckWaggly Investor deck
Waggly Investor deck
waggly
 
Searching for a Job with Social Media
Searching for a Job with Social MediaSearching for a Job with Social Media
Searching for a Job with Social Media
Alex Putman
 
Creating Drowning Awareness through Social Media
Creating Drowning Awareness through Social MediaCreating Drowning Awareness through Social Media
Creating Drowning Awareness through Social Media
SuncoastMeetings
 
Basics of digital marketing
Basics of digital marketingBasics of digital marketing
Basics of digital marketing
FAIZIN NAVAS
 
QR Code Marketing Presentation
QR Code Marketing PresentationQR Code Marketing Presentation
QR Code Marketing Presentation
SunDance Marketing Solutions
 

Similar to Qr code presentation (20)

Qr code power point
Qr code power pointQr code power point
Qr code power point
 
QR Codes, what they are and why you should care
QR Codes, what they are and why you should careQR Codes, what they are and why you should care
QR Codes, what they are and why you should care
 
Social Media & QR codes s-go 2012
Social Media & QR codes  s-go 2012Social Media & QR codes  s-go 2012
Social Media & QR codes s-go 2012
 
QR Codes ASTE 2012
QR Codes ASTE 2012QR Codes ASTE 2012
QR Codes ASTE 2012
 
The role of social media and online communication in developing and growing...
The role of social media and online  communication in developing and  growing...The role of social media and online  communication in developing and  growing...
The role of social media and online communication in developing and growing...
 
RE/MAX India 2013 Internet Marketing
RE/MAX India 2013 Internet MarketingRE/MAX India 2013 Internet Marketing
RE/MAX India 2013 Internet Marketing
 
QR Codes in the Garden
QR Codes in the GardenQR Codes in the Garden
QR Codes in the Garden
 
QR Codes
QR Codes QR Codes
QR Codes
 
01 Social Media to Promote Your Global Destination
01 Social Media to Promote Your Global Destination01 Social Media to Promote Your Global Destination
01 Social Media to Promote Your Global Destination
 
QR presentation
QR presentationQR presentation
QR presentation
 
5 Ways To Use On Line Tools To Drive More Sales
5 Ways To Use On Line Tools To Drive More Sales5 Ways To Use On Line Tools To Drive More Sales
5 Ways To Use On Line Tools To Drive More Sales
 
Tiu services slideshow 120710
Tiu services slideshow 120710Tiu services slideshow 120710
Tiu services slideshow 120710
 
5 ways to use on line tools to drive more sales
5 ways to use on line tools to drive more sales5 ways to use on line tools to drive more sales
5 ways to use on line tools to drive more sales
 
Digital Marketing Strategy Presentation.pdf
Digital Marketing Strategy Presentation.pdfDigital Marketing Strategy Presentation.pdf
Digital Marketing Strategy Presentation.pdf
 
QR Codes in Schools and Libraries
QR Codes in Schools and LibrariesQR Codes in Schools and Libraries
QR Codes in Schools and Libraries
 
Waggly Investor deck
Waggly Investor deckWaggly Investor deck
Waggly Investor deck
 
Searching for a Job with Social Media
Searching for a Job with Social MediaSearching for a Job with Social Media
Searching for a Job with Social Media
 
Creating Drowning Awareness through Social Media
Creating Drowning Awareness through Social MediaCreating Drowning Awareness through Social Media
Creating Drowning Awareness through Social Media
 
Basics of digital marketing
Basics of digital marketingBasics of digital marketing
Basics of digital marketing
 
QR Code Marketing Presentation
QR Code Marketing PresentationQR Code Marketing Presentation
QR Code Marketing Presentation
 

Recently uploaded

Driving Business Innovation: Latest Generative AI Advancements & Success Story
Driving Business Innovation: Latest Generative AI Advancements & Success StoryDriving Business Innovation: Latest Generative AI Advancements & Success Story
Driving Business Innovation: Latest Generative AI Advancements & Success Story
Safe Software
 
National Security Agency - NSA mobile device best practices
National Security Agency - NSA mobile device best practicesNational Security Agency - NSA mobile device best practices
National Security Agency - NSA mobile device best practices
Quotidiano Piemontese
 
HCL Notes and Domino License Cost Reduction in the World of DLAU
HCL Notes and Domino License Cost Reduction in the World of DLAUHCL Notes and Domino License Cost Reduction in the World of DLAU
HCL Notes and Domino License Cost Reduction in the World of DLAU
panagenda
 
Cosa hanno in comune un mattoncino Lego e la backdoor XZ?
Cosa hanno in comune un mattoncino Lego e la backdoor XZ?Cosa hanno in comune un mattoncino Lego e la backdoor XZ?
Cosa hanno in comune un mattoncino Lego e la backdoor XZ?
Speck&Tech
 
GraphSummit Singapore | Enhancing Changi Airport Group's Passenger Experience...
GraphSummit Singapore | Enhancing Changi Airport Group's Passenger Experience...GraphSummit Singapore | Enhancing Changi Airport Group's Passenger Experience...
GraphSummit Singapore | Enhancing Changi Airport Group's Passenger Experience...
Neo4j
 
RESUME BUILDER APPLICATION Project for students
RESUME BUILDER APPLICATION Project for studentsRESUME BUILDER APPLICATION Project for students
RESUME BUILDER APPLICATION Project for students
KAMESHS29
 
UiPath Test Automation using UiPath Test Suite series, part 6
UiPath Test Automation using UiPath Test Suite series, part 6UiPath Test Automation using UiPath Test Suite series, part 6
UiPath Test Automation using UiPath Test Suite series, part 6
DianaGray10
 
Let's Integrate MuleSoft RPA, COMPOSER, APM with AWS IDP along with Slack
Let's Integrate MuleSoft RPA, COMPOSER, APM with AWS IDP along with SlackLet's Integrate MuleSoft RPA, COMPOSER, APM with AWS IDP along with Slack
Let's Integrate MuleSoft RPA, COMPOSER, APM with AWS IDP along with Slack
shyamraj55
 
20240607 QFM018 Elixir Reading List May 2024
20240607 QFM018 Elixir Reading List May 202420240607 QFM018 Elixir Reading List May 2024
20240607 QFM018 Elixir Reading List May 2024
Matthew Sinclair
 
20240609 QFM020 Irresponsible AI Reading List May 2024
20240609 QFM020 Irresponsible AI Reading List May 202420240609 QFM020 Irresponsible AI Reading List May 2024
20240609 QFM020 Irresponsible AI Reading List May 2024
Matthew Sinclair
 
Serial Arm Control in Real Time Presentation
Serial Arm Control in Real Time PresentationSerial Arm Control in Real Time Presentation
Serial Arm Control in Real Time Presentation
tolgahangng
 
GraphSummit Singapore | The Future of Agility: Supercharging Digital Transfor...
GraphSummit Singapore | The Future of Agility: Supercharging Digital Transfor...GraphSummit Singapore | The Future of Agility: Supercharging Digital Transfor...
GraphSummit Singapore | The Future of Agility: Supercharging Digital Transfor...
Neo4j
 
Unlock the Future of Search with MongoDB Atlas_ Vector Search Unleashed.pdf
Unlock the Future of Search with MongoDB Atlas_ Vector Search Unleashed.pdfUnlock the Future of Search with MongoDB Atlas_ Vector Search Unleashed.pdf
Unlock the Future of Search with MongoDB Atlas_ Vector Search Unleashed.pdf
Malak Abu Hammad
 
GraphSummit Singapore | Neo4j Product Vision & Roadmap - Q2 2024
GraphSummit Singapore | Neo4j Product Vision & Roadmap - Q2 2024GraphSummit Singapore | Neo4j Product Vision & Roadmap - Q2 2024
GraphSummit Singapore | Neo4j Product Vision & Roadmap - Q2 2024
Neo4j
 
Full-RAG: A modern architecture for hyper-personalization
Full-RAG: A modern architecture for hyper-personalizationFull-RAG: A modern architecture for hyper-personalization
Full-RAG: A modern architecture for hyper-personalization
Zilliz
 
“I’m still / I’m still / Chaining from the Block”
“I’m still / I’m still / Chaining from the Block”“I’m still / I’m still / Chaining from the Block”
“I’m still / I’m still / Chaining from the Block”
Claudio Di Ciccio
 
“Building and Scaling AI Applications with the Nx AI Manager,” a Presentation...
“Building and Scaling AI Applications with the Nx AI Manager,” a Presentation...“Building and Scaling AI Applications with the Nx AI Manager,” a Presentation...
“Building and Scaling AI Applications with the Nx AI Manager,” a Presentation...
Edge AI and Vision Alliance
 
How to Get CNIC Information System with Paksim Ga.pptx
How to Get CNIC Information System with Paksim Ga.pptxHow to Get CNIC Information System with Paksim Ga.pptx
How to Get CNIC Information System with Paksim Ga.pptx
danishmna97
 
みなさんこんにちはこれ何文字まで入るの?40文字以下不可とか本当に意味わからないけどこれ限界文字数書いてないからマジでやばい文字数いけるんじゃないの?えこ...
みなさんこんにちはこれ何文字まで入るの?40文字以下不可とか本当に意味わからないけどこれ限界文字数書いてないからマジでやばい文字数いけるんじゃないの?えこ...みなさんこんにちはこれ何文字まで入るの?40文字以下不可とか本当に意味わからないけどこれ限界文字数書いてないからマジでやばい文字数いけるんじゃないの?えこ...
みなさんこんにちはこれ何文字まで入るの?40文字以下不可とか本当に意味わからないけどこれ限界文字数書いてないからマジでやばい文字数いけるんじゃないの?えこ...
名前 です男
 
Video Streaming: Then, Now, and in the Future
Video Streaming: Then, Now, and in the FutureVideo Streaming: Then, Now, and in the Future
Video Streaming: Then, Now, and in the Future
Alpen-Adria-Universität
 

Recently uploaded (20)

Driving Business Innovation: Latest Generative AI Advancements & Success Story
Driving Business Innovation: Latest Generative AI Advancements & Success StoryDriving Business Innovation: Latest Generative AI Advancements & Success Story
Driving Business Innovation: Latest Generative AI Advancements & Success Story
 
National Security Agency - NSA mobile device best practices
National Security Agency - NSA mobile device best practicesNational Security Agency - NSA mobile device best practices
National Security Agency - NSA mobile device best practices
 
HCL Notes and Domino License Cost Reduction in the World of DLAU
HCL Notes and Domino License Cost Reduction in the World of DLAUHCL Notes and Domino License Cost Reduction in the World of DLAU
HCL Notes and Domino License Cost Reduction in the World of DLAU
 
Cosa hanno in comune un mattoncino Lego e la backdoor XZ?
Cosa hanno in comune un mattoncino Lego e la backdoor XZ?Cosa hanno in comune un mattoncino Lego e la backdoor XZ?
Cosa hanno in comune un mattoncino Lego e la backdoor XZ?
 
GraphSummit Singapore | Enhancing Changi Airport Group's Passenger Experience...
GraphSummit Singapore | Enhancing Changi Airport Group's Passenger Experience...GraphSummit Singapore | Enhancing Changi Airport Group's Passenger Experience...
GraphSummit Singapore | Enhancing Changi Airport Group's Passenger Experience...
 
RESUME BUILDER APPLICATION Project for students
RESUME BUILDER APPLICATION Project for studentsRESUME BUILDER APPLICATION Project for students
RESUME BUILDER APPLICATION Project for students
 
UiPath Test Automation using UiPath Test Suite series, part 6
UiPath Test Automation using UiPath Test Suite series, part 6UiPath Test Automation using UiPath Test Suite series, part 6
UiPath Test Automation using UiPath Test Suite series, part 6
 
Let's Integrate MuleSoft RPA, COMPOSER, APM with AWS IDP along with Slack
Let's Integrate MuleSoft RPA, COMPOSER, APM with AWS IDP along with SlackLet's Integrate MuleSoft RPA, COMPOSER, APM with AWS IDP along with Slack
Let's Integrate MuleSoft RPA, COMPOSER, APM with AWS IDP along with Slack
 
20240607 QFM018 Elixir Reading List May 2024
20240607 QFM018 Elixir Reading List May 202420240607 QFM018 Elixir Reading List May 2024
20240607 QFM018 Elixir Reading List May 2024
 
20240609 QFM020 Irresponsible AI Reading List May 2024
20240609 QFM020 Irresponsible AI Reading List May 202420240609 QFM020 Irresponsible AI Reading List May 2024
20240609 QFM020 Irresponsible AI Reading List May 2024
 
Serial Arm Control in Real Time Presentation
Serial Arm Control in Real Time PresentationSerial Arm Control in Real Time Presentation
Serial Arm Control in Real Time Presentation
 
GraphSummit Singapore | The Future of Agility: Supercharging Digital Transfor...
GraphSummit Singapore | The Future of Agility: Supercharging Digital Transfor...GraphSummit Singapore | The Future of Agility: Supercharging Digital Transfor...
GraphSummit Singapore | The Future of Agility: Supercharging Digital Transfor...
 
Unlock the Future of Search with MongoDB Atlas_ Vector Search Unleashed.pdf
Unlock the Future of Search with MongoDB Atlas_ Vector Search Unleashed.pdfUnlock the Future of Search with MongoDB Atlas_ Vector Search Unleashed.pdf
Unlock the Future of Search with MongoDB Atlas_ Vector Search Unleashed.pdf
 
GraphSummit Singapore | Neo4j Product Vision & Roadmap - Q2 2024
GraphSummit Singapore | Neo4j Product Vision & Roadmap - Q2 2024GraphSummit Singapore | Neo4j Product Vision & Roadmap - Q2 2024
GraphSummit Singapore | Neo4j Product Vision & Roadmap - Q2 2024
 
Full-RAG: A modern architecture for hyper-personalization
Full-RAG: A modern architecture for hyper-personalizationFull-RAG: A modern architecture for hyper-personalization
Full-RAG: A modern architecture for hyper-personalization
 
“I’m still / I’m still / Chaining from the Block”
“I’m still / I’m still / Chaining from the Block”“I’m still / I’m still / Chaining from the Block”
“I’m still / I’m still / Chaining from the Block”
 
“Building and Scaling AI Applications with the Nx AI Manager,” a Presentation...
“Building and Scaling AI Applications with the Nx AI Manager,” a Presentation...“Building and Scaling AI Applications with the Nx AI Manager,” a Presentation...
“Building and Scaling AI Applications with the Nx AI Manager,” a Presentation...
 
How to Get CNIC Information System with Paksim Ga.pptx
How to Get CNIC Information System with Paksim Ga.pptxHow to Get CNIC Information System with Paksim Ga.pptx
How to Get CNIC Information System with Paksim Ga.pptx
 
みなさんこんにちはこれ何文字まで入るの?40文字以下不可とか本当に意味わからないけどこれ限界文字数書いてないからマジでやばい文字数いけるんじゃないの?えこ...
みなさんこんにちはこれ何文字まで入るの?40文字以下不可とか本当に意味わからないけどこれ限界文字数書いてないからマジでやばい文字数いけるんじゃないの?えこ...みなさんこんにちはこれ何文字まで入るの?40文字以下不可とか本当に意味わからないけどこれ限界文字数書いてないからマジでやばい文字数いけるんじゃないの?えこ...
みなさんこんにちはこれ何文字まで入るの?40文字以下不可とか本当に意味わからないけどこれ限界文字数書いてないからマジでやばい文字数いけるんじゃないの?えこ...
 
Video Streaming: Then, Now, and in the Future
Video Streaming: Then, Now, and in the FutureVideo Streaming: Then, Now, and in the Future
Video Streaming: Then, Now, and in the Future
 

Qr code presentation

  • 2. • QR = Quick Response QR • Matrix barcode first designed for the auto industry in 1994 • URL, videos, map locations, social media, Microsoft Tag texts Bar code
  • 3. • Free websites – Quikqr.com – Qrstuff.com – Delivr.com • Paid QR code trackers – Google: QR code tracking
  • 4. • Droid There’s an app for that! – ScanLife – QuickMark – i-nigma • Blackberry – ScannerPro – i-nigma • iPhone – ScanLife – QuickMark – i-nigma
  • 5. Posters • Visit pennants • Ads • Social Media • Hard to find content • #qrcode
  • 6. • No colored backgrounds – Black code on a white background • Borders • Basic web content – IL ad • Don’t tell what you’re linking to • Test – Size, scanability
  • 7. Social media – YouTube, Facebook, Twitter • Class listings (catalog) • Self-guided campus tour • Advertise upcoming events • Surveys • College fair displays • ?
  • 9. • Google goggles – http://news.yahoo.com/blogs/this-could-be-big- abc-news/qr-codes-things-185409346.html
  • 10. • Google goggles – Image recognition • Text • Landmarks • Books • Contact info • Artwork • Wine • Logos http://www.google.com/mobile/goggles/#text

Editor's Notes

  1. Reflected text and animated spotlight(Intermediate)To reproduce the text effects on this slide, do the following:On the Home tab, in theSlides group, click Layout, and then click Blank.On the Insert tab, in the Text group, click Text Box, and then on the slide, drag to draw the text box. Enter text in the text box and select the text. On the Home tab, in the Font group, do the following:In the Font list, select Arial Black.In the Font Size box, enter 50.Click Bold. On the Home tab, in the Paragraph group, click Center to center the text in the text box.Select the text box. Under Drawing Tools, on the Format tab, in bottom right corner of the WordArt Styles, click the Format Text Effects dialog box launcher. In the Format Text Effects dialog box,click Text Fill in the left pane, select Gradient fill in the Text Fill pane, and then do the following: In the Type list, select Linear.Click the button next to Direction, and then click Linear Down (first row, second option from the left).Under Gradient stops, click Add gradient stop or Remove gradient stop until two stops appear in the slider.Also under Gradient stops, customize the gradient stops that you added as follows:Select the first stop in the slider, and then do the following:In the Position box, enter 0%.Click the button next to Color, and then under Theme Colors click Black, Text 1, Lighter 35% (third row, second option from the left).Select the last stop in the slider, and then do the following: In the Position box, enter 100%.Click the button next to Color, and then under Theme Colors click Black, Text 1 (first row, second option from the left).Also in the Format Text Effects dialog box,click 3-D Format in the left pane, and then do the following in the 3-D Format pane:Under Bevel, click the button next to Top, and then under Bevel click Circle (first row, first option from the left). Next to Top, in the Width box, enter 10 pt, and in the Height box, enter 2.5 pt.Under Depth, click the button next to Color, and then select Automatic. Under Contour, click the button next to Color, click More Colors, and then in the Colors dialog box, on the Custom tab, enter values for Red: 68,Green: 113,Blue: 166. In the Sizebox, enter 0.5 pt.Under Surface, click the button next to Material, and then under Standard clickMetal (fourth option from the left). Click the button next to Lighting, and then under Neutral click Contrasting (second row, second option from the left). In the Angle box, enter 75°.Under Drawing Tools, on the Format tab, in the WordArt Styles group, click Text Effects, point to Reflection, and then under Reflection Variations click Half Reflection, touching (first row, second option from the left).Drag the text box above the middle of the slide.On the Home tab, in the Drawing group, click Arrange, point to Align, and then do the following:Click Align to Slide.Click Align Center.To reproduce the shape effects on this slide, do the following:On the Insert tab, in the Illustrations group, click Shapes, and then under Basic Shapes click Oval (first row, second option from the left). On the slide, drag to draw an oval.Select the oval. Under Drawing Tools, on the Format tab, in the Size group, do the following:In the Height box, enter 1.1”. In the Width box, enter 2.31”.With the oval still selected, on the Home tab, in the bottom right corner of the Drawing group, click the Format Shape dialog box launcher. In the Format Shape dialog box, click Fill in the left pane, select Gradient fill in the Fill pane, and then do the following:In the Type list, select Radial.Click the button next to Direction, and then click From Center (third option from the left).Under Gradient stops, click Add gradient stop or Remove gradient stop until three stops appear in the slider.Also under Gradient stops, customize the gradient stops that you added as follows:Select the first stop in the slider, and then do the following:In the Position box, enter 0%.Click the button next to Color, and then under Theme Colorsclick White, Background 1 (first row, first option from the left).In the Transparency box, enter 21%.Select the next stop in the slider, and then do the following: In the Position box, enter 51%.Click the button next to Color, and then under Theme Colorsclick White, Background 1 (first row, first option from the left).In the Transparency box, enter 73%.Select the last stop in the slider, and then do the following: In the Position box, enter 100%.Click the button next to Color, and then under Theme Colorsclick Black, Text 1 (first row, first option from the left).In the Transparency box, enter 100%.Under the Drawing Tools, on the Format tab, in the Shapes Styles group, do the following:Click the arrow next to Shape Outline, and then click No Outline.Click Shape Effects, point to Soft Edges,and then click 25 Point.On the slide, drag the oval until it is centered on the first letter in the text box.To reproduce the animation effects on this slide, do the following:On the slide, select the oval. On the Animations tab, in the Advanced Animation group, click Add Animation, and then under Fade click Entrance.Also on the Animations tab, in the Timing group, do the following:In the Start list, select With Previous.In the Duration box, enter 1.00.Also on the Animations tab, in the Advanced Animation group, click Add Animation, and then under Exit, click Fade.Also on the Animations tab, in the Timing group, do the following:In the Start list, select With Previous.In the Delay box, enter 4.00.In the Duration box, enter 1.00.Also on the Animations tab, in the Advanced Animation group, click Add Animation, and then under Entrance click Fade.Also on the Animations tab, in the Timing group, do the following:In the Start list, select With Previous.In the Delay box, enter 5.00.In the Duration box, enter 1.00.Also on the Animations tab, in the Advanced Animation group, click Add Animation, and then under Exit click Fade.Also on the Animations tab, in the Timing group, do the following:In the Start list, select With Previous.In the Delay box, enter 7.00.In the Duration box, enter 1.00.Also on the Animations tab, in the Advanced Animation group, click Add Animation, and then click More Motion Paths. In the Add Motion Path dialog box, under Lines & Curves, click Right.Also on the Animations tab, in the Animation group, click the Effect Options dialog box launcher. In the Right dialog box, do the following:On the Effect tab, under Settings, select Auto-reverse.On the Timing tab, do the following:In theStart list, selectWith Previous.In the Delay box, enter 0.In the Duration list, select 2 seconds (Medium).In the Repeat list, select 2.On the slide, select the motion path. Point to the endpoint (red arrow) of the motion path until the cursor becomes a two-headed arrow, press and hold SHIFT, and then drag the endpoint to the center of the last letter in the text box. To reproduce the background effects on this slide, do the following:Right-click the slide background area, and then click Format Background. In the Format Background dialog box, click Fill in the left pane, select Gradient fill in the Fill pane, and then do the following:In the Type list, select Radial.Click the button next to Direction, and then click From Center (third option from the left).Under Gradient stops, click Add gradient stop or Remove gradient stop until two stops appear in the slider.Also under Gradient stops, customize the gradient stops that you added as follows:Select the first stop in the slider, and then do the following:In the Position box, enter 0%.Click the button next to Color, and then under Theme Colors click White, Background 1, Darker 5% (second row, first option from the left).Select the last stop in the slider, and then do the following: In the Position box, enter 100%.Click the button next to Color, and then under Theme Colors click Black, Text 1, Lighter 35% (third row, second option from the left).
  2. Reflected text and animated spotlight(Intermediate)To reproduce the text effects on this slide, do the following:On the Home tab, in theSlides group, click Layout, and then click Blank.On the Insert tab, in the Text group, click Text Box, and then on the slide, drag to draw the text box. Enter text in the text box and select the text. On the Home tab, in the Font group, do the following:In the Font list, select Arial Black.In the Font Size box, enter 50.Click Bold. On the Home tab, in the Paragraph group, click Center to center the text in the text box.Select the text box. Under Drawing Tools, on the Format tab, in bottom right corner of the WordArt Styles, click the Format Text Effects dialog box launcher. In the Format Text Effects dialog box,click Text Fill in the left pane, select Gradient fill in the Text Fill pane, and then do the following: In the Type list, select Linear.Click the button next to Direction, and then click Linear Down (first row, second option from the left).Under Gradient stops, click Add gradient stop or Remove gradient stop until two stops appear in the slider.Also under Gradient stops, customize the gradient stops that you added as follows:Select the first stop in the slider, and then do the following:In the Position box, enter 0%.Click the button next to Color, and then under Theme Colors click Black, Text 1, Lighter 35% (third row, second option from the left).Select the last stop in the slider, and then do the following: In the Position box, enter 100%.Click the button next to Color, and then under Theme Colors click Black, Text 1 (first row, second option from the left).Also in the Format Text Effects dialog box,click 3-D Format in the left pane, and then do the following in the 3-D Format pane:Under Bevel, click the button next to Top, and then under Bevel click Circle (first row, first option from the left). Next to Top, in the Width box, enter 10 pt, and in the Height box, enter 2.5 pt.Under Depth, click the button next to Color, and then select Automatic. Under Contour, click the button next to Color, click More Colors, and then in the Colors dialog box, on the Custom tab, enter values for Red: 68,Green: 113,Blue: 166. In the Sizebox, enter 0.5 pt.Under Surface, click the button next to Material, and then under Standard clickMetal (fourth option from the left). Click the button next to Lighting, and then under Neutral click Contrasting (second row, second option from the left). In the Angle box, enter 75°.Under Drawing Tools, on the Format tab, in the WordArt Styles group, click Text Effects, point to Reflection, and then under Reflection Variations click Half Reflection, touching (first row, second option from the left).Drag the text box above the middle of the slide.On the Home tab, in the Drawing group, click Arrange, point to Align, and then do the following:Click Align to Slide.Click Align Center.To reproduce the shape effects on this slide, do the following:On the Insert tab, in the Illustrations group, click Shapes, and then under Basic Shapes click Oval (first row, second option from the left). On the slide, drag to draw an oval.Select the oval. Under Drawing Tools, on the Format tab, in the Size group, do the following:In the Height box, enter 1.1”. In the Width box, enter 2.31”.With the oval still selected, on the Home tab, in the bottom right corner of the Drawing group, click the Format Shape dialog box launcher. In the Format Shape dialog box, click Fill in the left pane, select Gradient fill in the Fill pane, and then do the following:In the Type list, select Radial.Click the button next to Direction, and then click From Center (third option from the left).Under Gradient stops, click Add gradient stop or Remove gradient stop until three stops appear in the slider.Also under Gradient stops, customize the gradient stops that you added as follows:Select the first stop in the slider, and then do the following:In the Position box, enter 0%.Click the button next to Color, and then under Theme Colorsclick White, Background 1 (first row, first option from the left).In the Transparency box, enter 21%.Select the next stop in the slider, and then do the following: In the Position box, enter 51%.Click the button next to Color, and then under Theme Colorsclick White, Background 1 (first row, first option from the left).In the Transparency box, enter 73%.Select the last stop in the slider, and then do the following: In the Position box, enter 100%.Click the button next to Color, and then under Theme Colorsclick Black, Text 1 (first row, first option from the left).In the Transparency box, enter 100%.Under the Drawing Tools, on the Format tab, in the Shapes Styles group, do the following:Click the arrow next to Shape Outline, and then click No Outline.Click Shape Effects, point to Soft Edges,and then click 25 Point.On the slide, drag the oval until it is centered on the first letter in the text box.To reproduce the animation effects on this slide, do the following:On the slide, select the oval. On the Animations tab, in the Advanced Animation group, click Add Animation, and then under Fade click Entrance.Also on the Animations tab, in the Timing group, do the following:In the Start list, select With Previous.In the Duration box, enter 1.00.Also on the Animations tab, in the Advanced Animation group, click Add Animation, and then under Exit, click Fade.Also on the Animations tab, in the Timing group, do the following:In the Start list, select With Previous.In the Delay box, enter 4.00.In the Duration box, enter 1.00.Also on the Animations tab, in the Advanced Animation group, click Add Animation, and then under Entrance click Fade.Also on the Animations tab, in the Timing group, do the following:In the Start list, select With Previous.In the Delay box, enter 5.00.In the Duration box, enter 1.00.Also on the Animations tab, in the Advanced Animation group, click Add Animation, and then under Exit click Fade.Also on the Animations tab, in the Timing group, do the following:In the Start list, select With Previous.In the Delay box, enter 7.00.In the Duration box, enter 1.00.Also on the Animations tab, in the Advanced Animation group, click Add Animation, and then click More Motion Paths. In the Add Motion Path dialog box, under Lines & Curves, click Right.Also on the Animations tab, in the Animation group, click the Effect Options dialog box launcher. In the Right dialog box, do the following:On the Effect tab, under Settings, select Auto-reverse.On the Timing tab, do the following:In theStart list, selectWith Previous.In the Delay box, enter 0.In the Duration list, select 2 seconds (Medium).In the Repeat list, select 2.On the slide, select the motion path. Point to the endpoint (red arrow) of the motion path until the cursor becomes a two-headed arrow, press and hold SHIFT, and then drag the endpoint to the center of the last letter in the text box. To reproduce the background effects on this slide, do the following:Right-click the slide background area, and then click Format Background. In the Format Background dialog box, click Fill in the left pane, select Gradient fill in the Fill pane, and then do the following:In the Type list, select Radial.Click the button next to Direction, and then click From Center (third option from the left).Under Gradient stops, click Add gradient stop or Remove gradient stop until two stops appear in the slider.Also under Gradient stops, customize the gradient stops that you added as follows:Select the first stop in the slider, and then do the following:In the Position box, enter 0%.Click the button next to Color, and then under Theme Colors click White, Background 1, Darker 5% (second row, first option from the left).Select the last stop in the slider, and then do the following: In the Position box, enter 100%.Click the button next to Color, and then under Theme Colors click Black, Text 1, Lighter 35% (third row, second option from the left).
  3. Reflected text and animated spotlight(Intermediate)To reproduce the text effects on this slide, do the following:On the Home tab, in theSlides group, click Layout, and then click Blank.On the Insert tab, in the Text group, click Text Box, and then on the slide, drag to draw the text box. Enter text in the text box and select the text. On the Home tab, in the Font group, do the following:In the Font list, select Arial Black.In the Font Size box, enter 50.Click Bold. On the Home tab, in the Paragraph group, click Center to center the text in the text box.Select the text box. Under Drawing Tools, on the Format tab, in bottom right corner of the WordArt Styles, click the Format Text Effects dialog box launcher. In the Format Text Effects dialog box,click Text Fill in the left pane, select Gradient fill in the Text Fill pane, and then do the following: In the Type list, select Linear.Click the button next to Direction, and then click Linear Down (first row, second option from the left).Under Gradient stops, click Add gradient stop or Remove gradient stop until two stops appear in the slider.Also under Gradient stops, customize the gradient stops that you added as follows:Select the first stop in the slider, and then do the following:In the Position box, enter 0%.Click the button next to Color, and then under Theme Colors click Black, Text 1, Lighter 35% (third row, second option from the left).Select the last stop in the slider, and then do the following: In the Position box, enter 100%.Click the button next to Color, and then under Theme Colors click Black, Text 1 (first row, second option from the left).Also in the Format Text Effects dialog box,click 3-D Format in the left pane, and then do the following in the 3-D Format pane:Under Bevel, click the button next to Top, and then under Bevel click Circle (first row, first option from the left). Next to Top, in the Width box, enter 10 pt, and in the Height box, enter 2.5 pt.Under Depth, click the button next to Color, and then select Automatic. Under Contour, click the button next to Color, click More Colors, and then in the Colors dialog box, on the Custom tab, enter values for Red: 68,Green: 113,Blue: 166. In the Sizebox, enter 0.5 pt.Under Surface, click the button next to Material, and then under Standard clickMetal (fourth option from the left). Click the button next to Lighting, and then under Neutral click Contrasting (second row, second option from the left). In the Angle box, enter 75°.Under Drawing Tools, on the Format tab, in the WordArt Styles group, click Text Effects, point to Reflection, and then under Reflection Variations click Half Reflection, touching (first row, second option from the left).Drag the text box above the middle of the slide.On the Home tab, in the Drawing group, click Arrange, point to Align, and then do the following:Click Align to Slide.Click Align Center.To reproduce the shape effects on this slide, do the following:On the Insert tab, in the Illustrations group, click Shapes, and then under Basic Shapes click Oval (first row, second option from the left). On the slide, drag to draw an oval.Select the oval. Under Drawing Tools, on the Format tab, in the Size group, do the following:In the Height box, enter 1.1”. In the Width box, enter 2.31”.With the oval still selected, on the Home tab, in the bottom right corner of the Drawing group, click the Format Shape dialog box launcher. In the Format Shape dialog box, click Fill in the left pane, select Gradient fill in the Fill pane, and then do the following:In the Type list, select Radial.Click the button next to Direction, and then click From Center (third option from the left).Under Gradient stops, click Add gradient stop or Remove gradient stop until three stops appear in the slider.Also under Gradient stops, customize the gradient stops that you added as follows:Select the first stop in the slider, and then do the following:In the Position box, enter 0%.Click the button next to Color, and then under Theme Colorsclick White, Background 1 (first row, first option from the left).In the Transparency box, enter 21%.Select the next stop in the slider, and then do the following: In the Position box, enter 51%.Click the button next to Color, and then under Theme Colorsclick White, Background 1 (first row, first option from the left).In the Transparency box, enter 73%.Select the last stop in the slider, and then do the following: In the Position box, enter 100%.Click the button next to Color, and then under Theme Colorsclick Black, Text 1 (first row, first option from the left).In the Transparency box, enter 100%.Under the Drawing Tools, on the Format tab, in the Shapes Styles group, do the following:Click the arrow next to Shape Outline, and then click No Outline.Click Shape Effects, point to Soft Edges,and then click 25 Point.On the slide, drag the oval until it is centered on the first letter in the text box.To reproduce the animation effects on this slide, do the following:On the slide, select the oval. On the Animations tab, in the Advanced Animation group, click Add Animation, and then under Fade click Entrance.Also on the Animations tab, in the Timing group, do the following:In the Start list, select With Previous.In the Duration box, enter 1.00.Also on the Animations tab, in the Advanced Animation group, click Add Animation, and then under Exit, click Fade.Also on the Animations tab, in the Timing group, do the following:In the Start list, select With Previous.In the Delay box, enter 4.00.In the Duration box, enter 1.00.Also on the Animations tab, in the Advanced Animation group, click Add Animation, and then under Entrance click Fade.Also on the Animations tab, in the Timing group, do the following:In the Start list, select With Previous.In the Delay box, enter 5.00.In the Duration box, enter 1.00.Also on the Animations tab, in the Advanced Animation group, click Add Animation, and then under Exit click Fade.Also on the Animations tab, in the Timing group, do the following:In the Start list, select With Previous.In the Delay box, enter 7.00.In the Duration box, enter 1.00.Also on the Animations tab, in the Advanced Animation group, click Add Animation, and then click More Motion Paths. In the Add Motion Path dialog box, under Lines & Curves, click Right.Also on the Animations tab, in the Animation group, click the Effect Options dialog box launcher. In the Right dialog box, do the following:On the Effect tab, under Settings, select Auto-reverse.On the Timing tab, do the following:In theStart list, selectWith Previous.In the Delay box, enter 0.In the Duration list, select 2 seconds (Medium).In the Repeat list, select 2.On the slide, select the motion path. Point to the endpoint (red arrow) of the motion path until the cursor becomes a two-headed arrow, press and hold SHIFT, and then drag the endpoint to the center of the last letter in the text box. To reproduce the background effects on this slide, do the following:Right-click the slide background area, and then click Format Background. In the Format Background dialog box, click Fill in the left pane, select Gradient fill in the Fill pane, and then do the following:In the Type list, select Radial.Click the button next to Direction, and then click From Center (third option from the left).Under Gradient stops, click Add gradient stop or Remove gradient stop until two stops appear in the slider.Also under Gradient stops, customize the gradient stops that you added as follows:Select the first stop in the slider, and then do the following:In the Position box, enter 0%.Click the button next to Color, and then under Theme Colors click White, Background 1, Darker 5% (second row, first option from the left).Select the last stop in the slider, and then do the following: In the Position box, enter 100%.Click the button next to Color, and then under Theme Colors click Black, Text 1, Lighter 35% (third row, second option from the left).
  4. Reflected text and animated spotlight(Intermediate)To reproduce the text effects on this slide, do the following:On the Home tab, in theSlides group, click Layout, and then click Blank.On the Insert tab, in the Text group, click Text Box, and then on the slide, drag to draw the text box. Enter text in the text box and select the text. On the Home tab, in the Font group, do the following:In the Font list, select Arial Black.In the Font Size box, enter 50.Click Bold. On the Home tab, in the Paragraph group, click Center to center the text in the text box.Select the text box. Under Drawing Tools, on the Format tab, in bottom right corner of the WordArt Styles, click the Format Text Effects dialog box launcher. In the Format Text Effects dialog box,click Text Fill in the left pane, select Gradient fill in the Text Fill pane, and then do the following: In the Type list, select Linear.Click the button next to Direction, and then click Linear Down (first row, second option from the left).Under Gradient stops, click Add gradient stop or Remove gradient stop until two stops appear in the slider.Also under Gradient stops, customize the gradient stops that you added as follows:Select the first stop in the slider, and then do the following:In the Position box, enter 0%.Click the button next to Color, and then under Theme Colors click Black, Text 1, Lighter 35% (third row, second option from the left).Select the last stop in the slider, and then do the following: In the Position box, enter 100%.Click the button next to Color, and then under Theme Colors click Black, Text 1 (first row, second option from the left).Also in the Format Text Effects dialog box,click 3-D Format in the left pane, and then do the following in the 3-D Format pane:Under Bevel, click the button next to Top, and then under Bevel click Circle (first row, first option from the left). Next to Top, in the Width box, enter 10 pt, and in the Height box, enter 2.5 pt.Under Depth, click the button next to Color, and then select Automatic. Under Contour, click the button next to Color, click More Colors, and then in the Colors dialog box, on the Custom tab, enter values for Red: 68,Green: 113,Blue: 166. In the Sizebox, enter 0.5 pt.Under Surface, click the button next to Material, and then under Standard clickMetal (fourth option from the left). Click the button next to Lighting, and then under Neutral click Contrasting (second row, second option from the left). In the Angle box, enter 75°.Under Drawing Tools, on the Format tab, in the WordArt Styles group, click Text Effects, point to Reflection, and then under Reflection Variations click Half Reflection, touching (first row, second option from the left).Drag the text box above the middle of the slide.On the Home tab, in the Drawing group, click Arrange, point to Align, and then do the following:Click Align to Slide.Click Align Center.To reproduce the shape effects on this slide, do the following:On the Insert tab, in the Illustrations group, click Shapes, and then under Basic Shapes click Oval (first row, second option from the left). On the slide, drag to draw an oval.Select the oval. Under Drawing Tools, on the Format tab, in the Size group, do the following:In the Height box, enter 1.1”. In the Width box, enter 2.31”.With the oval still selected, on the Home tab, in the bottom right corner of the Drawing group, click the Format Shape dialog box launcher. In the Format Shape dialog box, click Fill in the left pane, select Gradient fill in the Fill pane, and then do the following:In the Type list, select Radial.Click the button next to Direction, and then click From Center (third option from the left).Under Gradient stops, click Add gradient stop or Remove gradient stop until three stops appear in the slider.Also under Gradient stops, customize the gradient stops that you added as follows:Select the first stop in the slider, and then do the following:In the Position box, enter 0%.Click the button next to Color, and then under Theme Colorsclick White, Background 1 (first row, first option from the left).In the Transparency box, enter 21%.Select the next stop in the slider, and then do the following: In the Position box, enter 51%.Click the button next to Color, and then under Theme Colorsclick White, Background 1 (first row, first option from the left).In the Transparency box, enter 73%.Select the last stop in the slider, and then do the following: In the Position box, enter 100%.Click the button next to Color, and then under Theme Colorsclick Black, Text 1 (first row, first option from the left).In the Transparency box, enter 100%.Under the Drawing Tools, on the Format tab, in the Shapes Styles group, do the following:Click the arrow next to Shape Outline, and then click No Outline.Click Shape Effects, point to Soft Edges,and then click 25 Point.On the slide, drag the oval until it is centered on the first letter in the text box.To reproduce the animation effects on this slide, do the following:On the slide, select the oval. On the Animations tab, in the Advanced Animation group, click Add Animation, and then under Fade click Entrance.Also on the Animations tab, in the Timing group, do the following:In the Start list, select With Previous.In the Duration box, enter 1.00.Also on the Animations tab, in the Advanced Animation group, click Add Animation, and then under Exit, click Fade.Also on the Animations tab, in the Timing group, do the following:In the Start list, select With Previous.In the Delay box, enter 4.00.In the Duration box, enter 1.00.Also on the Animations tab, in the Advanced Animation group, click Add Animation, and then under Entrance click Fade.Also on the Animations tab, in the Timing group, do the following:In the Start list, select With Previous.In the Delay box, enter 5.00.In the Duration box, enter 1.00.Also on the Animations tab, in the Advanced Animation group, click Add Animation, and then under Exit click Fade.Also on the Animations tab, in the Timing group, do the following:In the Start list, select With Previous.In the Delay box, enter 7.00.In the Duration box, enter 1.00.Also on the Animations tab, in the Advanced Animation group, click Add Animation, and then click More Motion Paths. In the Add Motion Path dialog box, under Lines & Curves, click Right.Also on the Animations tab, in the Animation group, click the Effect Options dialog box launcher. In the Right dialog box, do the following:On the Effect tab, under Settings, select Auto-reverse.On the Timing tab, do the following:In theStart list, selectWith Previous.In the Delay box, enter 0.In the Duration list, select 2 seconds (Medium).In the Repeat list, select 2.On the slide, select the motion path. Point to the endpoint (red arrow) of the motion path until the cursor becomes a two-headed arrow, press and hold SHIFT, and then drag the endpoint to the center of the last letter in the text box. To reproduce the background effects on this slide, do the following:Right-click the slide background area, and then click Format Background. In the Format Background dialog box, click Fill in the left pane, select Gradient fill in the Fill pane, and then do the following:In the Type list, select Radial.Click the button next to Direction, and then click From Center (third option from the left).Under Gradient stops, click Add gradient stop or Remove gradient stop until two stops appear in the slider.Also under Gradient stops, customize the gradient stops that you added as follows:Select the first stop in the slider, and then do the following:In the Position box, enter 0%.Click the button next to Color, and then under Theme Colors click White, Background 1, Darker 5% (second row, first option from the left).Select the last stop in the slider, and then do the following: In the Position box, enter 100%.Click the button next to Color, and then under Theme Colors click Black, Text 1, Lighter 35% (third row, second option from the left).
  5. Reflected text and animated spotlight(Intermediate)To reproduce the text effects on this slide, do the following:On the Home tab, in theSlides group, click Layout, and then click Blank.On the Insert tab, in the Text group, click Text Box, and then on the slide, drag to draw the text box. Enter text in the text box and select the text. On the Home tab, in the Font group, do the following:In the Font list, select Arial Black.In the Font Size box, enter 50.Click Bold. On the Home tab, in the Paragraph group, click Center to center the text in the text box.Select the text box. Under Drawing Tools, on the Format tab, in bottom right corner of the WordArt Styles, click the Format Text Effects dialog box launcher. In the Format Text Effects dialog box,click Text Fill in the left pane, select Gradient fill in the Text Fill pane, and then do the following: In the Type list, select Linear.Click the button next to Direction, and then click Linear Down (first row, second option from the left).Under Gradient stops, click Add gradient stop or Remove gradient stop until two stops appear in the slider.Also under Gradient stops, customize the gradient stops that you added as follows:Select the first stop in the slider, and then do the following:In the Position box, enter 0%.Click the button next to Color, and then under Theme Colors click Black, Text 1, Lighter 35% (third row, second option from the left).Select the last stop in the slider, and then do the following: In the Position box, enter 100%.Click the button next to Color, and then under Theme Colors click Black, Text 1 (first row, second option from the left).Also in the Format Text Effects dialog box,click 3-D Format in the left pane, and then do the following in the 3-D Format pane:Under Bevel, click the button next to Top, and then under Bevel click Circle (first row, first option from the left). Next to Top, in the Width box, enter 10 pt, and in the Height box, enter 2.5 pt.Under Depth, click the button next to Color, and then select Automatic. Under Contour, click the button next to Color, click More Colors, and then in the Colors dialog box, on the Custom tab, enter values for Red: 68,Green: 113,Blue: 166. In the Sizebox, enter 0.5 pt.Under Surface, click the button next to Material, and then under Standard clickMetal (fourth option from the left). Click the button next to Lighting, and then under Neutral click Contrasting (second row, second option from the left). In the Angle box, enter 75°.Under Drawing Tools, on the Format tab, in the WordArt Styles group, click Text Effects, point to Reflection, and then under Reflection Variations click Half Reflection, touching (first row, second option from the left).Drag the text box above the middle of the slide.On the Home tab, in the Drawing group, click Arrange, point to Align, and then do the following:Click Align to Slide.Click Align Center.To reproduce the shape effects on this slide, do the following:On the Insert tab, in the Illustrations group, click Shapes, and then under Basic Shapes click Oval (first row, second option from the left). On the slide, drag to draw an oval.Select the oval. Under Drawing Tools, on the Format tab, in the Size group, do the following:In the Height box, enter 1.1”. In the Width box, enter 2.31”.With the oval still selected, on the Home tab, in the bottom right corner of the Drawing group, click the Format Shape dialog box launcher. In the Format Shape dialog box, click Fill in the left pane, select Gradient fill in the Fill pane, and then do the following:In the Type list, select Radial.Click the button next to Direction, and then click From Center (third option from the left).Under Gradient stops, click Add gradient stop or Remove gradient stop until three stops appear in the slider.Also under Gradient stops, customize the gradient stops that you added as follows:Select the first stop in the slider, and then do the following:In the Position box, enter 0%.Click the button next to Color, and then under Theme Colorsclick White, Background 1 (first row, first option from the left).In the Transparency box, enter 21%.Select the next stop in the slider, and then do the following: In the Position box, enter 51%.Click the button next to Color, and then under Theme Colorsclick White, Background 1 (first row, first option from the left).In the Transparency box, enter 73%.Select the last stop in the slider, and then do the following: In the Position box, enter 100%.Click the button next to Color, and then under Theme Colorsclick Black, Text 1 (first row, first option from the left).In the Transparency box, enter 100%.Under the Drawing Tools, on the Format tab, in the Shapes Styles group, do the following:Click the arrow next to Shape Outline, and then click No Outline.Click Shape Effects, point to Soft Edges,and then click 25 Point.On the slide, drag the oval until it is centered on the first letter in the text box.To reproduce the animation effects on this slide, do the following:On the slide, select the oval. On the Animations tab, in the Advanced Animation group, click Add Animation, and then under Fade click Entrance.Also on the Animations tab, in the Timing group, do the following:In the Start list, select With Previous.In the Duration box, enter 1.00.Also on the Animations tab, in the Advanced Animation group, click Add Animation, and then under Exit, click Fade.Also on the Animations tab, in the Timing group, do the following:In the Start list, select With Previous.In the Delay box, enter 4.00.In the Duration box, enter 1.00.Also on the Animations tab, in the Advanced Animation group, click Add Animation, and then under Entrance click Fade.Also on the Animations tab, in the Timing group, do the following:In the Start list, select With Previous.In the Delay box, enter 5.00.In the Duration box, enter 1.00.Also on the Animations tab, in the Advanced Animation group, click Add Animation, and then under Exit click Fade.Also on the Animations tab, in the Timing group, do the following:In the Start list, select With Previous.In the Delay box, enter 7.00.In the Duration box, enter 1.00.Also on the Animations tab, in the Advanced Animation group, click Add Animation, and then click More Motion Paths. In the Add Motion Path dialog box, under Lines & Curves, click Right.Also on the Animations tab, in the Animation group, click the Effect Options dialog box launcher. In the Right dialog box, do the following:On the Effect tab, under Settings, select Auto-reverse.On the Timing tab, do the following:In theStart list, selectWith Previous.In the Delay box, enter 0.In the Duration list, select 2 seconds (Medium).In the Repeat list, select 2.On the slide, select the motion path. Point to the endpoint (red arrow) of the motion path until the cursor becomes a two-headed arrow, press and hold SHIFT, and then drag the endpoint to the center of the last letter in the text box. To reproduce the background effects on this slide, do the following:Right-click the slide background area, and then click Format Background. In the Format Background dialog box, click Fill in the left pane, select Gradient fill in the Fill pane, and then do the following:In the Type list, select Radial.Click the button next to Direction, and then click From Center (third option from the left).Under Gradient stops, click Add gradient stop or Remove gradient stop until two stops appear in the slider.Also under Gradient stops, customize the gradient stops that you added as follows:Select the first stop in the slider, and then do the following:In the Position box, enter 0%.Click the button next to Color, and then under Theme Colors click White, Background 1, Darker 5% (second row, first option from the left).Select the last stop in the slider, and then do the following: In the Position box, enter 100%.Click the button next to Color, and then under Theme Colors click Black, Text 1, Lighter 35% (third row, second option from the left).
  6. Reflected text and animated spotlight(Intermediate)To reproduce the text effects on this slide, do the following:On the Home tab, in theSlides group, click Layout, and then click Blank.On the Insert tab, in the Text group, click Text Box, and then on the slide, drag to draw the text box. Enter text in the text box and select the text. On the Home tab, in the Font group, do the following:In the Font list, select Arial Black.In the Font Size box, enter 50.Click Bold. On the Home tab, in the Paragraph group, click Center to center the text in the text box.Select the text box. Under Drawing Tools, on the Format tab, in bottom right corner of the WordArt Styles, click the Format Text Effects dialog box launcher. In the Format Text Effects dialog box,click Text Fill in the left pane, select Gradient fill in the Text Fill pane, and then do the following: In the Type list, select Linear.Click the button next to Direction, and then click Linear Down (first row, second option from the left).Under Gradient stops, click Add gradient stop or Remove gradient stop until two stops appear in the slider.Also under Gradient stops, customize the gradient stops that you added as follows:Select the first stop in the slider, and then do the following:In the Position box, enter 0%.Click the button next to Color, and then under Theme Colors click Black, Text 1, Lighter 35% (third row, second option from the left).Select the last stop in the slider, and then do the following: In the Position box, enter 100%.Click the button next to Color, and then under Theme Colors click Black, Text 1 (first row, second option from the left).Also in the Format Text Effects dialog box,click 3-D Format in the left pane, and then do the following in the 3-D Format pane:Under Bevel, click the button next to Top, and then under Bevel click Circle (first row, first option from the left). Next to Top, in the Width box, enter 10 pt, and in the Height box, enter 2.5 pt.Under Depth, click the button next to Color, and then select Automatic. Under Contour, click the button next to Color, click More Colors, and then in the Colors dialog box, on the Custom tab, enter values for Red: 68,Green: 113,Blue: 166. In the Sizebox, enter 0.5 pt.Under Surface, click the button next to Material, and then under Standard clickMetal (fourth option from the left). Click the button next to Lighting, and then under Neutral click Contrasting (second row, second option from the left). In the Angle box, enter 75°.Under Drawing Tools, on the Format tab, in the WordArt Styles group, click Text Effects, point to Reflection, and then under Reflection Variations click Half Reflection, touching (first row, second option from the left).Drag the text box above the middle of the slide.On the Home tab, in the Drawing group, click Arrange, point to Align, and then do the following:Click Align to Slide.Click Align Center.To reproduce the shape effects on this slide, do the following:On the Insert tab, in the Illustrations group, click Shapes, and then under Basic Shapes click Oval (first row, second option from the left). On the slide, drag to draw an oval.Select the oval. Under Drawing Tools, on the Format tab, in the Size group, do the following:In the Height box, enter 1.1”. In the Width box, enter 2.31”.With the oval still selected, on the Home tab, in the bottom right corner of the Drawing group, click the Format Shape dialog box launcher. In the Format Shape dialog box, click Fill in the left pane, select Gradient fill in the Fill pane, and then do the following:In the Type list, select Radial.Click the button next to Direction, and then click From Center (third option from the left).Under Gradient stops, click Add gradient stop or Remove gradient stop until three stops appear in the slider.Also under Gradient stops, customize the gradient stops that you added as follows:Select the first stop in the slider, and then do the following:In the Position box, enter 0%.Click the button next to Color, and then under Theme Colorsclick White, Background 1 (first row, first option from the left).In the Transparency box, enter 21%.Select the next stop in the slider, and then do the following: In the Position box, enter 51%.Click the button next to Color, and then under Theme Colorsclick White, Background 1 (first row, first option from the left).In the Transparency box, enter 73%.Select the last stop in the slider, and then do the following: In the Position box, enter 100%.Click the button next to Color, and then under Theme Colorsclick Black, Text 1 (first row, first option from the left).In the Transparency box, enter 100%.Under the Drawing Tools, on the Format tab, in the Shapes Styles group, do the following:Click the arrow next to Shape Outline, and then click No Outline.Click Shape Effects, point to Soft Edges,and then click 25 Point.On the slide, drag the oval until it is centered on the first letter in the text box.To reproduce the animation effects on this slide, do the following:On the slide, select the oval. On the Animations tab, in the Advanced Animation group, click Add Animation, and then under Fade click Entrance.Also on the Animations tab, in the Timing group, do the following:In the Start list, select With Previous.In the Duration box, enter 1.00.Also on the Animations tab, in the Advanced Animation group, click Add Animation, and then under Exit, click Fade.Also on the Animations tab, in the Timing group, do the following:In the Start list, select With Previous.In the Delay box, enter 4.00.In the Duration box, enter 1.00.Also on the Animations tab, in the Advanced Animation group, click Add Animation, and then under Entrance click Fade.Also on the Animations tab, in the Timing group, do the following:In the Start list, select With Previous.In the Delay box, enter 5.00.In the Duration box, enter 1.00.Also on the Animations tab, in the Advanced Animation group, click Add Animation, and then under Exit click Fade.Also on the Animations tab, in the Timing group, do the following:In the Start list, select With Previous.In the Delay box, enter 7.00.In the Duration box, enter 1.00.Also on the Animations tab, in the Advanced Animation group, click Add Animation, and then click More Motion Paths. In the Add Motion Path dialog box, under Lines & Curves, click Right.Also on the Animations tab, in the Animation group, click the Effect Options dialog box launcher. In the Right dialog box, do the following:On the Effect tab, under Settings, select Auto-reverse.On the Timing tab, do the following:In theStart list, selectWith Previous.In the Delay box, enter 0.In the Duration list, select 2 seconds (Medium).In the Repeat list, select 2.On the slide, select the motion path. Point to the endpoint (red arrow) of the motion path until the cursor becomes a two-headed arrow, press and hold SHIFT, and then drag the endpoint to the center of the last letter in the text box. To reproduce the background effects on this slide, do the following:Right-click the slide background area, and then click Format Background. In the Format Background dialog box, click Fill in the left pane, select Gradient fill in the Fill pane, and then do the following:In the Type list, select Radial.Click the button next to Direction, and then click From Center (third option from the left).Under Gradient stops, click Add gradient stop or Remove gradient stop until two stops appear in the slider.Also under Gradient stops, customize the gradient stops that you added as follows:Select the first stop in the slider, and then do the following:In the Position box, enter 0%.Click the button next to Color, and then under Theme Colors click White, Background 1, Darker 5% (second row, first option from the left).Select the last stop in the slider, and then do the following: In the Position box, enter 100%.Click the button next to Color, and then under Theme Colors click Black, Text 1, Lighter 35% (third row, second option from the left).
  7. Reflected text and animated spotlight(Intermediate)To reproduce the text effects on this slide, do the following:On the Home tab, in theSlides group, click Layout, and then click Blank.On the Insert tab, in the Text group, click Text Box, and then on the slide, drag to draw the text box. Enter text in the text box and select the text. On the Home tab, in the Font group, do the following:In the Font list, select Arial Black.In the Font Size box, enter 50.Click Bold. On the Home tab, in the Paragraph group, click Center to center the text in the text box.Select the text box. Under Drawing Tools, on the Format tab, in bottom right corner of the WordArt Styles, click the Format Text Effects dialog box launcher. In the Format Text Effects dialog box,click Text Fill in the left pane, select Gradient fill in the Text Fill pane, and then do the following: In the Type list, select Linear.Click the button next to Direction, and then click Linear Down (first row, second option from the left).Under Gradient stops, click Add gradient stop or Remove gradient stop until two stops appear in the slider.Also under Gradient stops, customize the gradient stops that you added as follows:Select the first stop in the slider, and then do the following:In the Position box, enter 0%.Click the button next to Color, and then under Theme Colors click Black, Text 1, Lighter 35% (third row, second option from the left).Select the last stop in the slider, and then do the following: In the Position box, enter 100%.Click the button next to Color, and then under Theme Colors click Black, Text 1 (first row, second option from the left).Also in the Format Text Effects dialog box,click 3-D Format in the left pane, and then do the following in the 3-D Format pane:Under Bevel, click the button next to Top, and then under Bevel click Circle (first row, first option from the left). Next to Top, in the Width box, enter 10 pt, and in the Height box, enter 2.5 pt.Under Depth, click the button next to Color, and then select Automatic. Under Contour, click the button next to Color, click More Colors, and then in the Colors dialog box, on the Custom tab, enter values for Red: 68,Green: 113,Blue: 166. In the Sizebox, enter 0.5 pt.Under Surface, click the button next to Material, and then under Standard clickMetal (fourth option from the left). Click the button next to Lighting, and then under Neutral click Contrasting (second row, second option from the left). In the Angle box, enter 75°.Under Drawing Tools, on the Format tab, in the WordArt Styles group, click Text Effects, point to Reflection, and then under Reflection Variations click Half Reflection, touching (first row, second option from the left).Drag the text box above the middle of the slide.On the Home tab, in the Drawing group, click Arrange, point to Align, and then do the following:Click Align to Slide.Click Align Center.To reproduce the shape effects on this slide, do the following:On the Insert tab, in the Illustrations group, click Shapes, and then under Basic Shapes click Oval (first row, second option from the left). On the slide, drag to draw an oval.Select the oval. Under Drawing Tools, on the Format tab, in the Size group, do the following:In the Height box, enter 1.1”. In the Width box, enter 2.31”.With the oval still selected, on the Home tab, in the bottom right corner of the Drawing group, click the Format Shape dialog box launcher. In the Format Shape dialog box, click Fill in the left pane, select Gradient fill in the Fill pane, and then do the following:In the Type list, select Radial.Click the button next to Direction, and then click From Center (third option from the left).Under Gradient stops, click Add gradient stop or Remove gradient stop until three stops appear in the slider.Also under Gradient stops, customize the gradient stops that you added as follows:Select the first stop in the slider, and then do the following:In the Position box, enter 0%.Click the button next to Color, and then under Theme Colorsclick White, Background 1 (first row, first option from the left).In the Transparency box, enter 21%.Select the next stop in the slider, and then do the following: In the Position box, enter 51%.Click the button next to Color, and then under Theme Colorsclick White, Background 1 (first row, first option from the left).In the Transparency box, enter 73%.Select the last stop in the slider, and then do the following: In the Position box, enter 100%.Click the button next to Color, and then under Theme Colorsclick Black, Text 1 (first row, first option from the left).In the Transparency box, enter 100%.Under the Drawing Tools, on the Format tab, in the Shapes Styles group, do the following:Click the arrow next to Shape Outline, and then click No Outline.Click Shape Effects, point to Soft Edges,and then click 25 Point.On the slide, drag the oval until it is centered on the first letter in the text box.To reproduce the animation effects on this slide, do the following:On the slide, select the oval. On the Animations tab, in the Advanced Animation group, click Add Animation, and then under Fade click Entrance.Also on the Animations tab, in the Timing group, do the following:In the Start list, select With Previous.In the Duration box, enter 1.00.Also on the Animations tab, in the Advanced Animation group, click Add Animation, and then under Exit, click Fade.Also on the Animations tab, in the Timing group, do the following:In the Start list, select With Previous.In the Delay box, enter 4.00.In the Duration box, enter 1.00.Also on the Animations tab, in the Advanced Animation group, click Add Animation, and then under Entrance click Fade.Also on the Animations tab, in the Timing group, do the following:In the Start list, select With Previous.In the Delay box, enter 5.00.In the Duration box, enter 1.00.Also on the Animations tab, in the Advanced Animation group, click Add Animation, and then under Exit click Fade.Also on the Animations tab, in the Timing group, do the following:In the Start list, select With Previous.In the Delay box, enter 7.00.In the Duration box, enter 1.00.Also on the Animations tab, in the Advanced Animation group, click Add Animation, and then click More Motion Paths. In the Add Motion Path dialog box, under Lines & Curves, click Right.Also on the Animations tab, in the Animation group, click the Effect Options dialog box launcher. In the Right dialog box, do the following:On the Effect tab, under Settings, select Auto-reverse.On the Timing tab, do the following:In theStart list, selectWith Previous.In the Delay box, enter 0.In the Duration list, select 2 seconds (Medium).In the Repeat list, select 2.On the slide, select the motion path. Point to the endpoint (red arrow) of the motion path until the cursor becomes a two-headed arrow, press and hold SHIFT, and then drag the endpoint to the center of the last letter in the text box. To reproduce the background effects on this slide, do the following:Right-click the slide background area, and then click Format Background. In the Format Background dialog box, click Fill in the left pane, select Gradient fill in the Fill pane, and then do the following:In the Type list, select Radial.Click the button next to Direction, and then click From Center (third option from the left).Under Gradient stops, click Add gradient stop or Remove gradient stop until two stops appear in the slider.Also under Gradient stops, customize the gradient stops that you added as follows:Select the first stop in the slider, and then do the following:In the Position box, enter 0%.Click the button next to Color, and then under Theme Colors click White, Background 1, Darker 5% (second row, first option from the left).Select the last stop in the slider, and then do the following: In the Position box, enter 100%.Click the button next to Color, and then under Theme Colors click Black, Text 1, Lighter 35% (third row, second option from the left).
  8. Reflected text and animated spotlight(Intermediate)To reproduce the text effects on this slide, do the following:On the Home tab, in theSlides group, click Layout, and then click Blank.On the Insert tab, in the Text group, click Text Box, and then on the slide, drag to draw the text box. Enter text in the text box and select the text. On the Home tab, in the Font group, do the following:In the Font list, select Arial Black.In the Font Size box, enter 50.Click Bold. On the Home tab, in the Paragraph group, click Center to center the text in the text box.Select the text box. Under Drawing Tools, on the Format tab, in bottom right corner of the WordArt Styles, click the Format Text Effects dialog box launcher. In the Format Text Effects dialog box,click Text Fill in the left pane, select Gradient fill in the Text Fill pane, and then do the following: In the Type list, select Linear.Click the button next to Direction, and then click Linear Down (first row, second option from the left).Under Gradient stops, click Add gradient stop or Remove gradient stop until two stops appear in the slider.Also under Gradient stops, customize the gradient stops that you added as follows:Select the first stop in the slider, and then do the following:In the Position box, enter 0%.Click the button next to Color, and then under Theme Colors click Black, Text 1, Lighter 35% (third row, second option from the left).Select the last stop in the slider, and then do the following: In the Position box, enter 100%.Click the button next to Color, and then under Theme Colors click Black, Text 1 (first row, second option from the left).Also in the Format Text Effects dialog box,click 3-D Format in the left pane, and then do the following in the 3-D Format pane:Under Bevel, click the button next to Top, and then under Bevel click Circle (first row, first option from the left). Next to Top, in the Width box, enter 10 pt, and in the Height box, enter 2.5 pt.Under Depth, click the button next to Color, and then select Automatic. Under Contour, click the button next to Color, click More Colors, and then in the Colors dialog box, on the Custom tab, enter values for Red: 68,Green: 113,Blue: 166. In the Sizebox, enter 0.5 pt.Under Surface, click the button next to Material, and then under Standard clickMetal (fourth option from the left). Click the button next to Lighting, and then under Neutral click Contrasting (second row, second option from the left). In the Angle box, enter 75°.Under Drawing Tools, on the Format tab, in the WordArt Styles group, click Text Effects, point to Reflection, and then under Reflection Variations click Half Reflection, touching (first row, second option from the left).Drag the text box above the middle of the slide.On the Home tab, in the Drawing group, click Arrange, point to Align, and then do the following:Click Align to Slide.Click Align Center.To reproduce the shape effects on this slide, do the following:On the Insert tab, in the Illustrations group, click Shapes, and then under Basic Shapes click Oval (first row, second option from the left). On the slide, drag to draw an oval.Select the oval. Under Drawing Tools, on the Format tab, in the Size group, do the following:In the Height box, enter 1.1”. In the Width box, enter 2.31”.With the oval still selected, on the Home tab, in the bottom right corner of the Drawing group, click the Format Shape dialog box launcher. In the Format Shape dialog box, click Fill in the left pane, select Gradient fill in the Fill pane, and then do the following:In the Type list, select Radial.Click the button next to Direction, and then click From Center (third option from the left).Under Gradient stops, click Add gradient stop or Remove gradient stop until three stops appear in the slider.Also under Gradient stops, customize the gradient stops that you added as follows:Select the first stop in the slider, and then do the following:In the Position box, enter 0%.Click the button next to Color, and then under Theme Colorsclick White, Background 1 (first row, first option from the left).In the Transparency box, enter 21%.Select the next stop in the slider, and then do the following: In the Position box, enter 51%.Click the button next to Color, and then under Theme Colorsclick White, Background 1 (first row, first option from the left).In the Transparency box, enter 73%.Select the last stop in the slider, and then do the following: In the Position box, enter 100%.Click the button next to Color, and then under Theme Colorsclick Black, Text 1 (first row, first option from the left).In the Transparency box, enter 100%.Under the Drawing Tools, on the Format tab, in the Shapes Styles group, do the following:Click the arrow next to Shape Outline, and then click No Outline.Click Shape Effects, point to Soft Edges,and then click 25 Point.On the slide, drag the oval until it is centered on the first letter in the text box.To reproduce the animation effects on this slide, do the following:On the slide, select the oval. On the Animations tab, in the Advanced Animation group, click Add Animation, and then under Fade click Entrance.Also on the Animations tab, in the Timing group, do the following:In the Start list, select With Previous.In the Duration box, enter 1.00.Also on the Animations tab, in the Advanced Animation group, click Add Animation, and then under Exit, click Fade.Also on the Animations tab, in the Timing group, do the following:In the Start list, select With Previous.In the Delay box, enter 4.00.In the Duration box, enter 1.00.Also on the Animations tab, in the Advanced Animation group, click Add Animation, and then under Entrance click Fade.Also on the Animations tab, in the Timing group, do the following:In the Start list, select With Previous.In the Delay box, enter 5.00.In the Duration box, enter 1.00.Also on the Animations tab, in the Advanced Animation group, click Add Animation, and then under Exit click Fade.Also on the Animations tab, in the Timing group, do the following:In the Start list, select With Previous.In the Delay box, enter 7.00.In the Duration box, enter 1.00.Also on the Animations tab, in the Advanced Animation group, click Add Animation, and then click More Motion Paths. In the Add Motion Path dialog box, under Lines & Curves, click Right.Also on the Animations tab, in the Animation group, click the Effect Options dialog box launcher. In the Right dialog box, do the following:On the Effect tab, under Settings, select Auto-reverse.On the Timing tab, do the following:In theStart list, selectWith Previous.In the Delay box, enter 0.In the Duration list, select 2 seconds (Medium).In the Repeat list, select 2.On the slide, select the motion path. Point to the endpoint (red arrow) of the motion path until the cursor becomes a two-headed arrow, press and hold SHIFT, and then drag the endpoint to the center of the last letter in the text box. To reproduce the background effects on this slide, do the following:Right-click the slide background area, and then click Format Background. In the Format Background dialog box, click Fill in the left pane, select Gradient fill in the Fill pane, and then do the following:In the Type list, select Radial.Click the button next to Direction, and then click From Center (third option from the left).Under Gradient stops, click Add gradient stop or Remove gradient stop until two stops appear in the slider.Also under Gradient stops, customize the gradient stops that you added as follows:Select the first stop in the slider, and then do the following:In the Position box, enter 0%.Click the button next to Color, and then under Theme Colors click White, Background 1, Darker 5% (second row, first option from the left).Select the last stop in the slider, and then do the following: In the Position box, enter 100%.Click the button next to Color, and then under Theme Colors click Black, Text 1, Lighter 35% (third row, second option from the left).
  9. Reflected text and animated spotlight(Intermediate)To reproduce the text effects on this slide, do the following:On the Home tab, in theSlides group, click Layout, and then click Blank.On the Insert tab, in the Text group, click Text Box, and then on the slide, drag to draw the text box. Enter text in the text box and select the text. On the Home tab, in the Font group, do the following:In the Font list, select Arial Black.In the Font Size box, enter 50.Click Bold. On the Home tab, in the Paragraph group, click Center to center the text in the text box.Select the text box. Under Drawing Tools, on the Format tab, in bottom right corner of the WordArt Styles, click the Format Text Effects dialog box launcher. In the Format Text Effects dialog box,click Text Fill in the left pane, select Gradient fill in the Text Fill pane, and then do the following: In the Type list, select Linear.Click the button next to Direction, and then click Linear Down (first row, second option from the left).Under Gradient stops, click Add gradient stop or Remove gradient stop until two stops appear in the slider.Also under Gradient stops, customize the gradient stops that you added as follows:Select the first stop in the slider, and then do the following:In the Position box, enter 0%.Click the button next to Color, and then under Theme Colors click Black, Text 1, Lighter 35% (third row, second option from the left).Select the last stop in the slider, and then do the following: In the Position box, enter 100%.Click the button next to Color, and then under Theme Colors click Black, Text 1 (first row, second option from the left).Also in the Format Text Effects dialog box,click 3-D Format in the left pane, and then do the following in the 3-D Format pane:Under Bevel, click the button next to Top, and then under Bevel click Circle (first row, first option from the left). Next to Top, in the Width box, enter 10 pt, and in the Height box, enter 2.5 pt.Under Depth, click the button next to Color, and then select Automatic. Under Contour, click the button next to Color, click More Colors, and then in the Colors dialog box, on the Custom tab, enter values for Red: 68,Green: 113,Blue: 166. In the Sizebox, enter 0.5 pt.Under Surface, click the button next to Material, and then under Standard clickMetal (fourth option from the left). Click the button next to Lighting, and then under Neutral click Contrasting (second row, second option from the left). In the Angle box, enter 75°.Under Drawing Tools, on the Format tab, in the WordArt Styles group, click Text Effects, point to Reflection, and then under Reflection Variations click Half Reflection, touching (first row, second option from the left).Drag the text box above the middle of the slide.On the Home tab, in the Drawing group, click Arrange, point to Align, and then do the following:Click Align to Slide.Click Align Center.To reproduce the shape effects on this slide, do the following:On the Insert tab, in the Illustrations group, click Shapes, and then under Basic Shapes click Oval (first row, second option from the left). On the slide, drag to draw an oval.Select the oval. Under Drawing Tools, on the Format tab, in the Size group, do the following:In the Height box, enter 1.1”. In the Width box, enter 2.31”.With the oval still selected, on the Home tab, in the bottom right corner of the Drawing group, click the Format Shape dialog box launcher. In the Format Shape dialog box, click Fill in the left pane, select Gradient fill in the Fill pane, and then do the following:In the Type list, select Radial.Click the button next to Direction, and then click From Center (third option from the left).Under Gradient stops, click Add gradient stop or Remove gradient stop until three stops appear in the slider.Also under Gradient stops, customize the gradient stops that you added as follows:Select the first stop in the slider, and then do the following:In the Position box, enter 0%.Click the button next to Color, and then under Theme Colorsclick White, Background 1 (first row, first option from the left).In the Transparency box, enter 21%.Select the next stop in the slider, and then do the following: In the Position box, enter 51%.Click the button next to Color, and then under Theme Colorsclick White, Background 1 (first row, first option from the left).In the Transparency box, enter 73%.Select the last stop in the slider, and then do the following: In the Position box, enter 100%.Click the button next to Color, and then under Theme Colorsclick Black, Text 1 (first row, first option from the left).In the Transparency box, enter 100%.Under the Drawing Tools, on the Format tab, in the Shapes Styles group, do the following:Click the arrow next to Shape Outline, and then click No Outline.Click Shape Effects, point to Soft Edges,and then click 25 Point.On the slide, drag the oval until it is centered on the first letter in the text box.To reproduce the animation effects on this slide, do the following:On the slide, select the oval. On the Animations tab, in the Advanced Animation group, click Add Animation, and then under Fade click Entrance.Also on the Animations tab, in the Timing group, do the following:In the Start list, select With Previous.In the Duration box, enter 1.00.Also on the Animations tab, in the Advanced Animation group, click Add Animation, and then under Exit, click Fade.Also on the Animations tab, in the Timing group, do the following:In the Start list, select With Previous.In the Delay box, enter 4.00.In the Duration box, enter 1.00.Also on the Animations tab, in the Advanced Animation group, click Add Animation, and then under Entrance click Fade.Also on the Animations tab, in the Timing group, do the following:In the Start list, select With Previous.In the Delay box, enter 5.00.In the Duration box, enter 1.00.Also on the Animations tab, in the Advanced Animation group, click Add Animation, and then under Exit click Fade.Also on the Animations tab, in the Timing group, do the following:In the Start list, select With Previous.In the Delay box, enter 7.00.In the Duration box, enter 1.00.Also on the Animations tab, in the Advanced Animation group, click Add Animation, and then click More Motion Paths. In the Add Motion Path dialog box, under Lines & Curves, click Right.Also on the Animations tab, in the Animation group, click the Effect Options dialog box launcher. In the Right dialog box, do the following:On the Effect tab, under Settings, select Auto-reverse.On the Timing tab, do the following:In theStart list, selectWith Previous.In the Delay box, enter 0.In the Duration list, select 2 seconds (Medium).In the Repeat list, select 2.On the slide, select the motion path. Point to the endpoint (red arrow) of the motion path until the cursor becomes a two-headed arrow, press and hold SHIFT, and then drag the endpoint to the center of the last letter in the text box. To reproduce the background effects on this slide, do the following:Right-click the slide background area, and then click Format Background. In the Format Background dialog box, click Fill in the left pane, select Gradient fill in the Fill pane, and then do the following:In the Type list, select Radial.Click the button next to Direction, and then click From Center (third option from the left).Under Gradient stops, click Add gradient stop or Remove gradient stop until two stops appear in the slider.Also under Gradient stops, customize the gradient stops that you added as follows:Select the first stop in the slider, and then do the following:In the Position box, enter 0%.Click the button next to Color, and then under Theme Colors click White, Background 1, Darker 5% (second row, first option from the left).Select the last stop in the slider, and then do the following: In the Position box, enter 100%.Click the button next to Color, and then under Theme Colors click Black, Text 1, Lighter 35% (third row, second option from the left).
  10. Reflected text and animated spotlight(Intermediate)To reproduce the text effects on this slide, do the following:On the Home tab, in theSlides group, click Layout, and then click Blank.On the Insert tab, in the Text group, click Text Box, and then on the slide, drag to draw the text box. Enter text in the text box and select the text. On the Home tab, in the Font group, do the following:In the Font list, select Arial Black.In the Font Size box, enter 50.Click Bold. On the Home tab, in the Paragraph group, click Center to center the text in the text box.Select the text box. Under Drawing Tools, on the Format tab, in bottom right corner of the WordArt Styles, click the Format Text Effects dialog box launcher. In the Format Text Effects dialog box,click Text Fill in the left pane, select Gradient fill in the Text Fill pane, and then do the following: In the Type list, select Linear.Click the button next to Direction, and then click Linear Down (first row, second option from the left).Under Gradient stops, click Add gradient stop or Remove gradient stop until two stops appear in the slider.Also under Gradient stops, customize the gradient stops that you added as follows:Select the first stop in the slider, and then do the following:In the Position box, enter 0%.Click the button next to Color, and then under Theme Colors click Black, Text 1, Lighter 35% (third row, second option from the left).Select the last stop in the slider, and then do the following: In the Position box, enter 100%.Click the button next to Color, and then under Theme Colors click Black, Text 1 (first row, second option from the left).Also in the Format Text Effects dialog box,click 3-D Format in the left pane, and then do the following in the 3-D Format pane:Under Bevel, click the button next to Top, and then under Bevel click Circle (first row, first option from the left). Next to Top, in the Width box, enter 10 pt, and in the Height box, enter 2.5 pt.Under Depth, click the button next to Color, and then select Automatic. Under Contour, click the button next to Color, click More Colors, and then in the Colors dialog box, on the Custom tab, enter values for Red: 68,Green: 113,Blue: 166. In the Sizebox, enter 0.5 pt.Under Surface, click the button next to Material, and then under Standard clickMetal (fourth option from the left). Click the button next to Lighting, and then under Neutral click Contrasting (second row, second option from the left). In the Angle box, enter 75°.Under Drawing Tools, on the Format tab, in the WordArt Styles group, click Text Effects, point to Reflection, and then under Reflection Variations click Half Reflection, touching (first row, second option from the left).Drag the text box above the middle of the slide.On the Home tab, in the Drawing group, click Arrange, point to Align, and then do the following:Click Align to Slide.Click Align Center.To reproduce the shape effects on this slide, do the following:On the Insert tab, in the Illustrations group, click Shapes, and then under Basic Shapes click Oval (first row, second option from the left). On the slide, drag to draw an oval.Select the oval. Under Drawing Tools, on the Format tab, in the Size group, do the following:In the Height box, enter 1.1”. In the Width box, enter 2.31”.With the oval still selected, on the Home tab, in the bottom right corner of the Drawing group, click the Format Shape dialog box launcher. In the Format Shape dialog box, click Fill in the left pane, select Gradient fill in the Fill pane, and then do the following:In the Type list, select Radial.Click the button next to Direction, and then click From Center (third option from the left).Under Gradient stops, click Add gradient stop or Remove gradient stop until three stops appear in the slider.Also under Gradient stops, customize the gradient stops that you added as follows:Select the first stop in the slider, and then do the following:In the Position box, enter 0%.Click the button next to Color, and then under Theme Colorsclick White, Background 1 (first row, first option from the left).In the Transparency box, enter 21%.Select the next stop in the slider, and then do the following: In the Position box, enter 51%.Click the button next to Color, and then under Theme Colorsclick White, Background 1 (first row, first option from the left).In the Transparency box, enter 73%.Select the last stop in the slider, and then do the following: In the Position box, enter 100%.Click the button next to Color, and then under Theme Colorsclick Black, Text 1 (first row, first option from the left).In the Transparency box, enter 100%.Under the Drawing Tools, on the Format tab, in the Shapes Styles group, do the following:Click the arrow next to Shape Outline, and then click No Outline.Click Shape Effects, point to Soft Edges,and then click 25 Point.On the slide, drag the oval until it is centered on the first letter in the text box.To reproduce the animation effects on this slide, do the following:On the slide, select the oval. On the Animations tab, in the Advanced Animation group, click Add Animation, and then under Fade click Entrance.Also on the Animations tab, in the Timing group, do the following:In the Start list, select With Previous.In the Duration box, enter 1.00.Also on the Animations tab, in the Advanced Animation group, click Add Animation, and then under Exit, click Fade.Also on the Animations tab, in the Timing group, do the following:In the Start list, select With Previous.In the Delay box, enter 4.00.In the Duration box, enter 1.00.Also on the Animations tab, in the Advanced Animation group, click Add Animation, and then under Entrance click Fade.Also on the Animations tab, in the Timing group, do the following:In the Start list, select With Previous.In the Delay box, enter 5.00.In the Duration box, enter 1.00.Also on the Animations tab, in the Advanced Animation group, click Add Animation, and then under Exit click Fade.Also on the Animations tab, in the Timing group, do the following:In the Start list, select With Previous.In the Delay box, enter 7.00.In the Duration box, enter 1.00.Also on the Animations tab, in the Advanced Animation group, click Add Animation, and then click More Motion Paths. In the Add Motion Path dialog box, under Lines & Curves, click Right.Also on the Animations tab, in the Animation group, click the Effect Options dialog box launcher. In the Right dialog box, do the following:On the Effect tab, under Settings, select Auto-reverse.On the Timing tab, do the following:In theStart list, selectWith Previous.In the Delay box, enter 0.In the Duration list, select 2 seconds (Medium).In the Repeat list, select 2.On the slide, select the motion path. Point to the endpoint (red arrow) of the motion path until the cursor becomes a two-headed arrow, press and hold SHIFT, and then drag the endpoint to the center of the last letter in the text box. To reproduce the background effects on this slide, do the following:Right-click the slide background area, and then click Format Background. In the Format Background dialog box, click Fill in the left pane, select Gradient fill in the Fill pane, and then do the following:In the Type list, select Radial.Click the button next to Direction, and then click From Center (third option from the left).Under Gradient stops, click Add gradient stop or Remove gradient stop until two stops appear in the slider.Also under Gradient stops, customize the gradient stops that you added as follows:Select the first stop in the slider, and then do the following:In the Position box, enter 0%.Click the button next to Color, and then under Theme Colors click White, Background 1, Darker 5% (second row, first option from the left).Select the last stop in the slider, and then do the following: In the Position box, enter 100%.Click the button next to Color, and then under Theme Colors click Black, Text 1, Lighter 35% (third row, second option from the left).
  11. Reflected text and animated spotlight(Intermediate)To reproduce the text effects on this slide, do the following:On the Home tab, in theSlides group, click Layout, and then click Blank.On the Insert tab, in the Text group, click Text Box, and then on the slide, drag to draw the text box. Enter text in the text box and select the text. On the Home tab, in the Font group, do the following:In the Font list, select Arial Black.In the Font Size box, enter 50.Click Bold. On the Home tab, in the Paragraph group, click Center to center the text in the text box.Select the text box. Under Drawing Tools, on the Format tab, in bottom right corner of the WordArt Styles, click the Format Text Effects dialog box launcher. In the Format Text Effects dialog box,click Text Fill in the left pane, select Gradient fill in the Text Fill pane, and then do the following: In the Type list, select Linear.Click the button next to Direction, and then click Linear Down (first row, second option from the left).Under Gradient stops, click Add gradient stop or Remove gradient stop until two stops appear in the slider.Also under Gradient stops, customize the gradient stops that you added as follows:Select the first stop in the slider, and then do the following:In the Position box, enter 0%.Click the button next to Color, and then under Theme Colors click Black, Text 1, Lighter 35% (third row, second option from the left).Select the last stop in the slider, and then do the following: In the Position box, enter 100%.Click the button next to Color, and then under Theme Colors click Black, Text 1 (first row, second option from the left).Also in the Format Text Effects dialog box,click 3-D Format in the left pane, and then do the following in the 3-D Format pane:Under Bevel, click the button next to Top, and then under Bevel click Circle (first row, first option from the left). Next to Top, in the Width box, enter 10 pt, and in the Height box, enter 2.5 pt.Under Depth, click the button next to Color, and then select Automatic. Under Contour, click the button next to Color, click More Colors, and then in the Colors dialog box, on the Custom tab, enter values for Red: 68,Green: 113,Blue: 166. In the Sizebox, enter 0.5 pt.Under Surface, click the button next to Material, and then under Standard clickMetal (fourth option from the left). Click the button next to Lighting, and then under Neutral click Contrasting (second row, second option from the left). In the Angle box, enter 75°.Under Drawing Tools, on the Format tab, in the WordArt Styles group, click Text Effects, point to Reflection, and then under Reflection Variations click Half Reflection, touching (first row, second option from the left).Drag the text box above the middle of the slide.On the Home tab, in the Drawing group, click Arrange, point to Align, and then do the following:Click Align to Slide.Click Align Center.To reproduce the shape effects on this slide, do the following:On the Insert tab, in the Illustrations group, click Shapes, and then under Basic Shapes click Oval (first row, second option from the left). On the slide, drag to draw an oval.Select the oval. Under Drawing Tools, on the Format tab, in the Size group, do the following:In the Height box, enter 1.1”. In the Width box, enter 2.31”.With the oval still selected, on the Home tab, in the bottom right corner of the Drawing group, click the Format Shape dialog box launcher. In the Format Shape dialog box, click Fill in the left pane, select Gradient fill in the Fill pane, and then do the following:In the Type list, select Radial.Click the button next to Direction, and then click From Center (third option from the left).Under Gradient stops, click Add gradient stop or Remove gradient stop until three stops appear in the slider.Also under Gradient stops, customize the gradient stops that you added as follows:Select the first stop in the slider, and then do the following:In the Position box, enter 0%.Click the button next to Color, and then under Theme Colorsclick White, Background 1 (first row, first option from the left).In the Transparency box, enter 21%.Select the next stop in the slider, and then do the following: In the Position box, enter 51%.Click the button next to Color, and then under Theme Colorsclick White, Background 1 (first row, first option from the left).In the Transparency box, enter 73%.Select the last stop in the slider, and then do the following: In the Position box, enter 100%.Click the button next to Color, and then under Theme Colorsclick Black, Text 1 (first row, first option from the left).In the Transparency box, enter 100%.Under the Drawing Tools, on the Format tab, in the Shapes Styles group, do the following:Click the arrow next to Shape Outline, and then click No Outline.Click Shape Effects, point to Soft Edges,and then click 25 Point.On the slide, drag the oval until it is centered on the first letter in the text box.To reproduce the animation effects on this slide, do the following:On the slide, select the oval. On the Animations tab, in the Advanced Animation group, click Add Animation, and then under Fade click Entrance.Also on the Animations tab, in the Timing group, do the following:In the Start list, select With Previous.In the Duration box, enter 1.00.Also on the Animations tab, in the Advanced Animation group, click Add Animation, and then under Exit, click Fade.Also on the Animations tab, in the Timing group, do the following:In the Start list, select With Previous.In the Delay box, enter 4.00.In the Duration box, enter 1.00.Also on the Animations tab, in the Advanced Animation group, click Add Animation, and then under Entrance click Fade.Also on the Animations tab, in the Timing group, do the following:In the Start list, select With Previous.In the Delay box, enter 5.00.In the Duration box, enter 1.00.Also on the Animations tab, in the Advanced Animation group, click Add Animation, and then under Exit click Fade.Also on the Animations tab, in the Timing group, do the following:In the Start list, select With Previous.In the Delay box, enter 7.00.In the Duration box, enter 1.00.Also on the Animations tab, in the Advanced Animation group, click Add Animation, and then click More Motion Paths. In the Add Motion Path dialog box, under Lines & Curves, click Right.Also on the Animations tab, in the Animation group, click the Effect Options dialog box launcher. In the Right dialog box, do the following:On the Effect tab, under Settings, select Auto-reverse.On the Timing tab, do the following:In theStart list, selectWith Previous.In the Delay box, enter 0.In the Duration list, select 2 seconds (Medium).In the Repeat list, select 2.On the slide, select the motion path. Point to the endpoint (red arrow) of the motion path until the cursor becomes a two-headed arrow, press and hold SHIFT, and then drag the endpoint to the center of the last letter in the text box. To reproduce the background effects on this slide, do the following:Right-click the slide background area, and then click Format Background. In the Format Background dialog box, click Fill in the left pane, select Gradient fill in the Fill pane, and then do the following:In the Type list, select Radial.Click the button next to Direction, and then click From Center (third option from the left).Under Gradient stops, click Add gradient stop or Remove gradient stop until two stops appear in the slider.Also under Gradient stops, customize the gradient stops that you added as follows:Select the first stop in the slider, and then do the following:In the Position box, enter 0%.Click the button next to Color, and then under Theme Colors click White, Background 1, Darker 5% (second row, first option from the left).Select the last stop in the slider, and then do the following: In the Position box, enter 100%.Click the button next to Color, and then under Theme Colors click Black, Text 1, Lighter 35% (third row, second option from the left).