Download to read offline


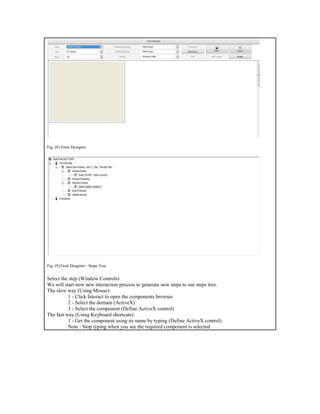


This document provides steps for implementing an ActiveX control using PWCT 1.9 Art Documentation. It describes adding components to a steps tree to define the user interface, including defining windows, menus, status bars, and procedures. Screenshots illustrate selecting components using the component browser and setting properties on the interaction page to generate the steps.


