Download to read offline
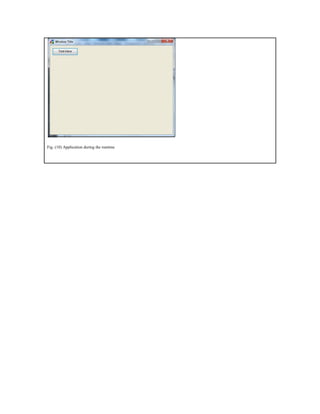

This document provides steps for adding controls to a window using an interaction design tool. It describes selecting components from the component browser to define a new window with a button control and set their properties. Screenshots illustrate the component browser, property pages, and final steps tree with the defined window and button. The summary concludes by noting the document describes the application's runtime behavior with the added controls.