Download to read offline
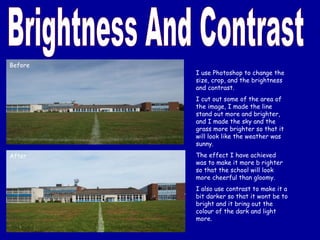
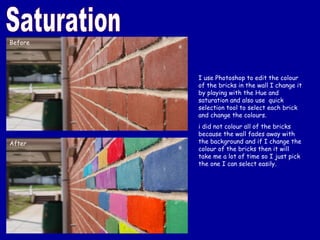


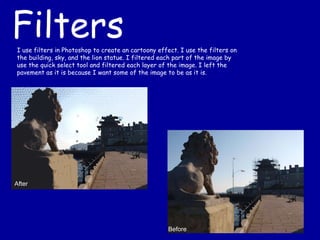

The document discusses various photo editing techniques used in Photoshop. It describes adjusting brightness and contrast to make an image of a school look sunnier. It also describes using saturation tools to change brick colors in a wall, burning tools to make text stand out from the background, dodging tools to brighten parts of an image and create a sunny atmosphere, and filters to add a cartoon effect to certain elements like buildings and the sky.


