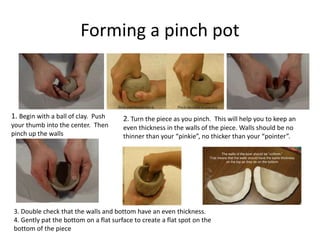
1) Pinch pots are formed by pinching clay between the thumb and fingers to create walls of even thickness.
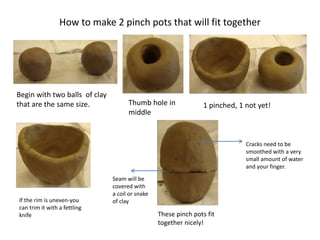
2) To make two pinch pots fit together, begin with equally sized balls of clay and pinch one pot, leaving the other unformed. Trim uneven rims and smooth any cracks.
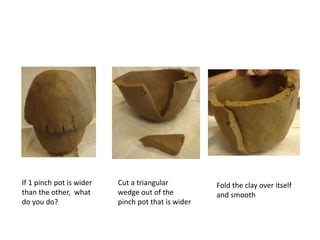
3) If one pinch pot is wider than the other, cut a triangular wedge from the wider pot and fold the clay over itself to narrow the opening.