PHOTOGRAPHY TIPS               SPOTLIGHT ON               IMPROVING YOUR               IMAGE EDITING
 AND TECHNIQUES               PHOTOGRAPHER               DIGITAL WORKFLOW             TIPS & TUTORIALS


PhotographyBB
                                                                                         ISSUE #7 - August 2008


           online
YO U R G U I D E T O T H E W O R L D O F D I G I TA L P H O T O G R A P H Y


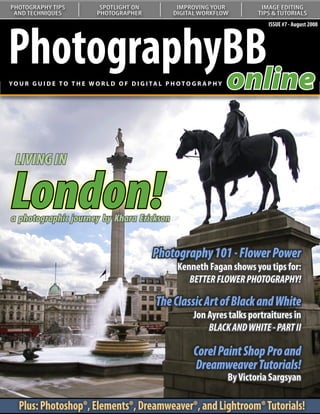
  LIVING IN

London!
   Understanding Curves:
  Our series on curves continues
  with a look at color correction
a photographic journey by Khara Erickson


                                                  Photography 101 - Flower Power
                                                           Kenneth Fagan shows you tips for:
                                                              BETTER FLOWER PHOTOGRAPHY!

                                                   The Classic Art of Black and White
                                                                Jon Ayres talks portraitures in
                                                                    BLACK AND WHITE - PART II

                                                                Corel Paint Shop Pro and
                                                                Dreamweaver Tutorials!
                                                                              By Victoria Sargsyan

   Plus: Photoshop®, Elements®, Dreamweaver®, and Lightroom® Tutorials!
PhotographyBB Online Magazine


                                             From The Editor’s Desk
                                        Dave Seeram is the Editor in Chief for PhotographyBB Online Magazine. As
                                        the administrator of the PhotographyBB Website and Forums, Dave is also
                                        an experienced author of several Photoshop® Actions and Tutorials which
                                        can be found on http://www.PhotographyBB.com


                                                  PhotographyBB Online Magazine Seventh Edition - Lucky 7

                                L
                                     ucky 7! That’s how we see it here at PhotographyBB. Thanks to you, our readers, we are
                                     proud to be on our 7th issue this year. It’s been another busy month here, especially
                                     in the PhotographyBB Forums where we’ve seen tremendous growth in new member
                                registrations, and traffic has been higher than ever. I would like to think it’s due to the new
                                improvements and challenges we’ve implemented on the forums.

                                    For those of you who have not yet had an opportunity to check these out, these would
                                be the Photography Assignments Challenge - where every 2 weeks we “assign” a theme to be
                                photographed. The top 3 photos from each assignment will be published in this magazine for
                                everyone to enjoy. The other challenge, implemented by our friend and moderator Kenneth
                                Fagan, is the weekly Macro Challenge. Drop by the forums and say hi, participate in the
                                challenges, learn from the tutorials and discussions, and by all means... have a great time.

                                     Looking into this month’s issue, we’ve got some of the new and the familiar. Beginning with
                                our continuing series on darkrooms, Ken Fagan shows us how to build your own darkroom!
                                Additionally, Ken will show you just what to look for when purchasing a new camera battery, if
                                you need a new camera battery, and how to care for your camera batteries. He’s also teaching
                                us techniques and tips on how to shoot flowers, in our Photography 101 guide.

                                     I am very happy to say that I’d like to officially welcome John Ogden as new member of the
                                team. John was kind enough to begin a series on Lightroom processing last month, and he’s
                                back to continue his series with a look at creative uses for Lightroom. He’s also giving us a brief
                                introduction to Lightroom 2, which he will cover in more depth in next month’s issue. Welcome
                                John, it’s a real pleasure to have you on the team here.

                                     Our other Jon (Jon Ayres) is also continuing his series on black and white photography, this
                                time from the perspective of portraitures. Fred McWilson is now on part 3 of his fantastic 4 part
                                series on HDR photography, and Victoria Sargsyan brings us something new this month with
                                a tutorial on Corel Painter. Additionally, in our Photography Around the World series, Khara
                                Erickson takes us to London for a unique look at one of the world’s most spectacular cities. Last
                                but not least, Gareth Glynn Ash joins us as our “Member in the Spotlight.” I had a lot of fun with
                                this interview; you are all going to get a kick out of this one!

                                     I’d like to close by thanking everyone who takes the time to write in and comment on the
                                magazine. Our team of volunteers all work extremely hard to produce a quality publication
                                (at the best price - free). I am always on the lookout for new articles and ideas, so if you - our
                                readers, feel that you have what it takes to contribute a quality article - please email me at
                                magazine@photographybb.com and I will be most happy to listen to your ideas. Thanks for
                                making this not only a success, but a worthwhile success. On with the show!

                                    Dave Seeram
                                    Editor and Publisher
                                                                                                                                      Page 2
PhotographyBB Online Magazine


            PhotographyBB
                       online
            YO U R G U I D E T O T H E W O R L D O F D I G I TA L P H O T O G R A P H Y


         Contributing Authors                                                  CREDITS
                                                                                   EDITORIAL:
         DAVE SEERAM is the creator and administrator of the                       Dave Seeram, Editor in Chief
         PhotographyBB Online Website, and the PhotographyBB
                                                                                   Kenneth Fagan, Creative Concepts & Content
         Forums. Dave is also the Editor and Publisher of the
         PhotographyBB Online Magazine. Dave is a digital photography              Victoria Sargsyan, Creative Concepts and Design
         enthusiast, and loves shooting landscapes and architecture in             Priscilla Ko, Creative Concepts and Design
         his spare time. Additionally, he has several years of formal train-
         ing in both Adobe Photoshop® and Quark Xpress®.                           WEB TEAM:
                                                                                   Dave Seeram, Web Design & Publishing, Admin
         KENNETH FAGAN         is a photographer extraordinaire based in           Kenneth Fagan, Site Moderator, Challenges Admin
         Meath, in the Republic of Ireland. Ken graduated with a profes-           Victoria Sargsyan, Site Moderator
         sional Diploma in Photography from the Focal Point School for
         Visual Arts in Vancouver. His specialities are product and food
                                                                                   PUBLISHING:
         photography, but he is also skilled in fashion, sports and land-
         scapes. Ken works with many camera formats including, 35mm                Dave Seeram, Publisher & Author
         pro digital and film SLRS, medium format, and 4x5 large format.            Jon Ayres, Contributing Writer
                                                                                   Kenneth Fagan, Contributing Writer, Proofreading
                                                                                   Victoria Sargsyan, Contributing Writer
         JON AYRES      is a digital photographer from the United States,
                                                                                   Fred McWilson, Contributing Writer
         now living in Moscow since August 2003. He enjoys photogra-
         phy, writing, history, and taking beautiful scenes of Moscow on           Jason Anderson, Contributing Writer
         his walking photo-tours. Jon has been involved in writing, digi-
         tal art and photography for over thirty years and is a published          ON THE COVER:
         author having several articles and photos published.                      Dave Seeram, Cover Layout and Design
                                                                                   Priscilla Ko, Cover Design & Consultation
         VICTORIA SARGSYAN           is a professional graphic designer            Cover Image, Courtesy of Khara Erickson
         with over 15 years experience. Her favorite software tool is
         Adobe Photoshop, and additionally, she is experienced in Il-
         lustrator, CorelDraw, Freehand, Lightroom, Adobe ImageReady,
         Flash,HTML, Dreamweaver, Motion Artist, Anime Studio, Poser.
                                                                                   HOW TO CONTACT PHOTOGRAPHYBB ONLINE:
         FRED MCWILSON is a photographer and Photoshop-wizard
         from southeast Missouri. We’re pleased to have Fred with us           If you would like to contact PhotographyBB Online,
         as a Photoshop tutorial and HDR column author. Some of his            please email: magazine@photographybb.com or write:
         hobbies other than Photoshop and photography are caving
         and paintball.
                                                                                   PhotographyBB
                                                                                   #331 - 6540 Hastings St.
         JOHN OGDEN       is an award winning London based digital                 Burnaby, B.C. V5B 4Z5
         artist and photographer. John lectures on Photoshop CS3
                                                                                   CANADA
         and Lightroom to adult learners in Further Education, is an
         Adobe Certified Instructor, and member of NAPP.
                                                                                    ARTICLE SUBMISSION:
                                                                               To submit an article, or to request an article submission,
         GUEST CONTRIBUTORS THIS MONTH:                                        please email magazine@photographybb.com with your
         Khara Erickson joins us in “Photography Around the World”    ,        name, email address, and a brief description of your
         for a unique look at the spectacular city of London, England.         article and ideas. We look forward to hearing from you.
                                                                                                                                            Page 3
PhotographyBB Online Magazine


                                              Before There Was Digital...
                                          Before the days of digital photography and still today, the art of developing
                                          film has been regarded as a skill in a class of its own. In this continuing 3-
                                          part series, we’ll take a look at the world of darkroom processing in an effort
                                          to both challenge and inspire those photographers who are willing to try
                                          something new and have fun in the process!


         DARKROOM DELIGHTS PART II: BUILDING YOUR OWN DARKROOM LABORATORY - By Kenneth Fagan
         Last month, I gave you a step-by-step introduction into dark rooming by showing you how to successfully
         develop your own black and white film. If you have suddenly been bitten by the darkroom bug, you may be
         tempted to go a little further and start printing your own black and white photos. To be able to do this you will
         require a few extra tools to be added to your list from the last day. In this issue I will guide you around building
         your own simple and compact darkroom no bigger than 24 square feet. That is a tiny six foot by four foot floor
         area - A space which many of you may be able to give up for a darkroom, whether it be in the form of your attic,
         a garden shed or even a small corner of a room in your house. I managed to build one in my bedroom, and today
         I am going to show you how you can too!


                                                                      B
                                                                             uilding a darkroom can be as simple or as
                                                                             complicated as you wish, a simple dark blanket
                                                                             over your bathroom window can do the trick
                                                                      for many. However, what if you wanted something a
                                                                      little more personal at relatively low cost? If you are an
                                                                      avid DIY’er, this project could be one for you. The basic
                                                                      needs of a darkroom consist of the following: Four walls
                                                                      that let in absolutely no light, a door which doesn’t
                                                                      allow any light to enter the lab, a worktop, and most
                                                                      importantly some ventilation. They are the things that
                                                                      are vital to let your darkroom work for you at the most
                                                                      basic level. For this project I will guide you through it in
                                                                      two phases, 1: Construction and 2: Installations.


                                                                      Phase 1: Construction
                                                                          The construction of this darkroom is a simple
                                                                      wood frame construction, sheeted on the exterior
                                                                      with sheetrock (or plasterboard). If you are using an
                                                                      existing wall for one or more sides you will not have
                                                                      to do as much work and you will need fewer materials.
                                                                      For the lab I built, I used two existing walls so it cut
                                                                      down on both labour and cost quite a bit. First I began
                                                                      by constructing the frames from 4”x1.5” lumber, butt
                                                                      joining them together using 4” wire nails for strength.
                                                                      You can plan the height of the ceiling in your lab
                                                                      according to your own height or to the height of the
                                                                      existing walls around it.

                                                                          In some cases you will need to build a ceiling (if
                                                                                                                                     Page 4
PhotographyBB Online Magazine

         you are not using one that is already there, a frame                   The door is a very important part of the darkroom,
         complete with an entry for a door, and the other sides.           the reason being is that it is the most likely part to cause
                                                                           light leaks. The best way to construct a door by simple
             Each frame structure is started by building a square          means is to measure the square in the frame where the
         from four pieces of 4”x1.5” then inserting battens into           door is going to be placed, Construct a frame to fit into
         the frame about every 16” or so. See the basic layout             that but allow a very small bit for the door to easily
         plan for the frames to give you an idea of what way               open and close. Cover the interior of the door with a
         they have to be constructed. The actual dimensions                sheet of plywood cut for it to over-hang the frame by
         are at your own discretion depending on how big or                about 2” (this helps stop light leaks from entering, as
         small you want your darkroom laboratory.                          light travels in straight lines). Leave the plywood on the
                                                                           hinge side flush with the frame. The door once hung
                                                                           will open inwards; I used two rather ugly tee hinges
                                                                           to hang the door because if I used flush hinges there
                                                                           would be every possibility of a greater chance of light
                                                                           leaks occurring. To further prevent light leaks, with the
                                                                           door closed fully, secure a frame of wood the same
                                                                           dimensions as the doorframe, this will stop light from
                                                                           entering where the small gap is between the door and
                                                                           the doorframe. Once that is finished place a bolt on
                                                                           the inside of the door or any other mechanism to keep
                                                                           a door closed to allow you to work in your darkroom
                                                                           with the door safely shut.


                                                Example of wall frames.


                                  Example of wall frame with door entry.

             Once you have all the frames complete, it is time to               Once the darkroom is fully covered with the
         assemble them together. This must be completed at the             sheetrock, and the door is hung correctly, seal up all
         location where the lab is being placed. The frames are            the gaps where light is getting in with brown silicone
         simply butted and nailed together and secured to an               sealant (the reason I suggest brown it that white
         existing wall if there is one. I used some 2” ‘L’ brackets        silicone does not fully seal the light out where brown
         to fasten it to the wall. Once you have the frames all            does the job very well).
         assembled and stitched together you can proceed to
         the sheeting. I used some 4’x2’x1/2”plasterboard or                   There you have the main construction of the
         sheetrock, to cover it up on the exterior of the frames.          darkroom, now its time for you to move inside it and
         Do not forget though to leave the area in the frame for           install the worktop and various other bits and pieces.
         the door open.                                                    So now we move onto phase 2.
                                                                                                                                          Page 5
PhotographyBB Online Magazine


         Phase 2:                                                           The black outlines in the image shown are the
                                                                       position in which each piece of wood is placed to
         The interior, worktops, and installations.                    construct the worktops frame. The worktop should
                                                                       be securely fitted, as it will have to bear the weight
              The next step is to install the worktop. If you decide
                                                                       of water and other liquids and equipment. For the
         to build a darkroom as small as I have (6’x4’) I suggest
                                                                       surface of the worktop it is desirable to have a water
         for the best layout, to maximize the amount of work
                                                                       resistant material such as rubber covering the surface.
         space you have, is to have the worktop in an ‘L’ Shape
                                                                       On the other hand if you are only going to use your
         as shown in the image of the plan bleow.
                                                                       darkroom once or twice a week, if you can salvage
                                                                       some laminated tongue and groove ¼” MDF flooring
                                                                       boards it will do the job fine once you fully dry any
                                                                       spills on the surface that may occur. I used some spare
                                                                       floorboards for my worktop surface and it has served
                                                                       me well through the years.


             Position the worktop at a comfortable working
         height, putting into consideration that you may be
         standing over it for an hour or more at a time so it is
         important that you do not have it too high or too low. To
         build the work top, simply secure one piece of lumber
         across the length of the back wall of the darkroom,
         the same wood you used for the frames will be fine
         (4”x1.5”) and construct the frame of the worktop as in
         the plan shown below:


                                                                           Spare floorboarding makes for a great water resistant countertop.

                                                                            Once you have the worktop installed you will be
                                                                       able to put the finishing touches to the walls of your
                                                                       darkroom. It is a common myth that darkrooms must be
                                                                       painted black, in fact this is most certainly not the case,
                                                                       the inside of your darkroom must be painted white for
                                                                       reflecting the infra red light (black absorbs light) and
                                                                       it also allows you to see what you are doing when you
                                                                       are working under the dimness of the IR bulb.

                                                                            The last thing you need to do is have some power
                                                                       to light up an infrared and a standard light and the
                                                                       enlarger. I installed some wall sockets and switches but
                                                                       I recommend that you either simply use an electrical
                                                                       extension lead to get power from the mains from
                                                                       another socket (I actually used this method as I am
                                                                       not an electrician and I did not want to be zapped). Do
                                                                                                                                              Page 6
PhotographyBB Online Magazine

         not attempt to play around with electricity to power                              At this point you should have a complete darkroom
         your darkroom, unless you are qualified to do so, if                         set up, I don’t have running water in mine (I rather fill
         not get someone who is to hardwire your darkroom                             bottles…less messy and space saving and I don’t use
         responsibly. You can control the temperature of                              it enough to be worth it, besides that electricity and
         your darkroom with a small fan heater and a room                             water never get on very well together anyway).
         thermostat, and to remove any smells you can install an
         extractor fan, which I recommend to be all installed by                          This article is not intended to be a step by step
         a professional. See the image below of how I positioned                      guide on how to build your own darkroom, rather a
         the fan ducting to allow air out but not light in, and the                   glimpst into how I built my own personal darkroom.
         same applied for the ceiling ‘air in’ ventilation.                           Please look at all the plans that are with this article as
                                                                                      well as the photos, they will give you some ideas as to
                                                                                      how you can build your darkroom. Tune back in next
                                                                                      month and I will show you how to accessorize your
                                                                                      darkroom with enlargers, trays etc and being the final
                                                                                      part of the three part darkroom series I will go through
                                                                                      how you can begin printing your own black and white
                                                                                      photos.


               Ceiling air-in ventilation to allow for fresh air into the darkroom.


                Fan ducting for air-out removal of fumes and chemical smells.                                   A peek inside my self-made darkroom!


         Safety Precautions:

         Working with electrical tools should be done with proper knowledge and care. Do not rush at anything and always
         wear protective gear such as goggles and dust masks where necessary and keep your work area tidy. It is advised
         that you seek a professional to make and electrical and/or pluming installations in your darkroom. All sockets and
         switches must be build according to codes within your municipality, and additionally must be waterproof and/or
         placed higher than the area where there will be liquids. When working with paint and sealers etc… always ensure
         that you have good ventilation.

         Neither I, the author of this article, nor the Publisher/Editor of this magazine hold any responsibility or liability for
         damage, injury, injury causing death, shock and all other consequences which occur due to malpractice, carelessness
         or lack of experience or otherwise. Accidents do not just happen they are caused. This is a project designed for
         amatuer builders with some prior building experience. Please undertake the construction at your own risk!
                                                                                                                                                       Page 7


     This article and photographs contained are Copyright © and courtesy of Kenneth Fagan. Please contact the author directly with any questions.
PhotographyBB Online Magazine


                          Black & White
                            The Classic Photography Art Part II - By Jon D. Ayres


                           The Art of Black and White Portraitures

                           L
                                 et me begin by stating that this article,     camera. Or W. Eugene Smith, who also
                                 like most of my articles, is aimed towards    became one of photography’s legendary
                                 the amateur and hobby photographer.           photographers. He was, undeniably, one of
                           Professional portrait photographers have            the greatest photojournalists of the 20th
                           to pay close attention to several things that       century whose work included the “Country
                           often can be overlooked by hobbyist. Things         Doctor” “Nurse Midwife” and “Man of Mercy,
                           like studio setup, lighting, backgrounds are        which portrayed a back-woods midwife and
                           important for the pro portrait photographer,        Dr. Albert Schweitzer.” These photographers
                           but not to the degree that it is, or should be,     became famous for their hard work, sacrifices,
                           for the hobby photographer. This article is         experimentation and never giving up. If they
                           mainly for the hobby photographer taking            can do it, why can not we?
                           portraits of family members, friends, or even
                           strangers under different situations that I think       Just why are black and white portraitures
                           should be taken into consideration in order to      so good? Well, to be honest, not all portraitures
                           get some great black and white portraits. I         and photos, whether they are color or black and
                           tend not to like mentioning camera settings         white, are good just like not all photographers
                           because each situation requires something           are good. It is the photographer who has taken
                           different, plus the best photos come from           the time to learn not only about photography,
                           trying something new. Camera settings you           but also how to use their camera to its fullest
                           should learn on your own by taking a class or       that takes great photos and portraitures.
                           reading a good photography reference book.          But why are black and white portraitures so
                           I tend to not be a big believer in set rules or     interesting? For many reasons - Each person
                           settings; I’m always willing to try something       has their preferences and reasons for liking
                           new. Now that I have my disclaimer out of the       or not liking something. I grew up in the 60’s
                           way…On with the show!                               and 70’s, and as a child almost everything I
                                                                               watched on TV was in black and white, even
                                Portraiture art has been done throughout       the cartoons. I remember the photos my
                           mankind’s history. Since we lived in caves,         father took with a black and white Poloroid
                           throughout the Ancient Greek and Roman              camera. Celebrities were people admired and
                           civilizations on through when Rembrandt,            respected, and the black and white photos of
                           Leonardo Da Vinci and James Whistler painted        celebrities had style and class. So I guess you
                           their famous portraits. Continuing on up to         can say I like black and white photos because
                           the present when Alfred Eisenstaedt became          they bring back good memories, dreams of my
                           famous for the photography he did for LIFE          youth. Generally, the same things that apply
                           Magazine when he started photographing              to color portraits also apply to black and white
                           for the magazine in 1935. His work included         photos with maybe a little alteration every
                           86 covers and over 2500 assignments for             now and then.
                           LIFE including photographing royalty to
                           movie stars, from scholars to diplomats and
                           everybody in-between including John F.              What Makes a Good Black and White?
                           Kennedy, Albert Einstein, Marilyn Monroe,
                           and Winston Churchill to name a few of                 Black and white photography is as much
                           the celebrities captured by Eisenstaedt’s           about contrast, tone (shades of gray,) texture,
                                                                                                                                   Page 8
PhotographyBB Online Magazine

                                                                                 photos in black & white that were all only about light
                                                                                 and shadows and how they fell across the object in the
                                                                                 image. You have to work a little bit harder when you
                                                                                 are looking to make a black and white photo, because
                                                                                 there is no color to distract your eye, there is so much
                                                                                 more to take into consideration. Now that we know
                                                                                 what makes a good black and white photo, let’s take a
                                                                                 look at what I consider important considerations which
                                                                                 help make a gallery quality fine art portrait.


                                                                                 Just what makes a good portrait?
                                                                                      I noticed once on a forum where somebody asked,
         If this photo of kids skating had been in color, your eyes would have   “Just what makes a good portrait photo?” Somebody
         tended to wonder around the photo. With it being black and white, the   answered, “That question was a very subjective
         viewer’s eyes focuses right in on the skaters.                          question, you have to take a lot into consideration,”
                                                                                 and I agree fully with that answer. Good photography
                                                                                 of any type takes thought and planning. Will the
         detail and composition as color is to color photos.                     photo be color or black and white, what do you want
         Oftentimes, many photos just do not make good black                     your photo to say, what do you want your viewers to
         and white photographs because color is what makes                       see, what settings will be best for the given situation,
         the photograph special and why the photo was taken.                     are some of the things you have to give consideration
         For example, sunsets are not often portrayed well as                    to if your going to take a good portrait photograph.
         black and white, nor does a field of wildflowers look as                But just like the old saying, “Beauty is in the eye of the
         nice in black and white because color is part of what                   beholder,” holds very true in photography.
         makes the photo special. But sometimes there is just so
         much more to an image than only color. Black and white                       I do not believe in rules, per say. Sometimes rules
         can make the viewer study the image longer, because                     are important (like the rule if thirds usually works well
         usually there is just so much more detail to examine                    for black and white portraitures), but believe it or not,
         in a black and white photo. A black & white photo of a                  often times all it takes is nothing but luck, the wiliness
         single flower brings out details that would be missed                   to experiment and try new settings, and the patience to
         if the image was in color and causes the viewer to take                 make good portraits - not rules. Some of the greatest
         time to look at the pollen on the stamen, the veins in                  photographs ever taken have come from people who
         the petals, and how the light hits the flower. Street                   bent the rules for their own purposes and intentions,
         photography and especially street portraitures works                    so don’t be scared of experimentation.
         especially well in black & white, because your attention
         is always drawn to what is actually happening in the                       Good portraitures show the sprit of the subject
         scene and how the people are interacting with their                     photographed to the viewer. A good portrait will
         surroundings and with each other, which should be
         why the photo was taken in the first place. Strong
         texture works well in black and white; the grains of
         sand on a sidewalk, the grain found in the wood of
         an old wooden bench, or the texture of tree bark, fog,
         rocks and close-up shots of leaves, plants, flowers
         and fabric, to name just a few of the different things
         with strong textures. Reflections found in puddles
         or other still bodies of water or windows also work
         well. Black and white portraits are especially effective
         in conveying emotions, age, wisdom or knowledge,
         because when you take the color out of the picture,
         these things become more noticeable and you actually
         end up putting more color in the photo when you take
         well thought out black and white photos. Light; the
         intensity or lack of it, the direction it’s coming from
         and the quality of it, become much more noticeable                      You haven’t been to a McDonalds until you go to a McDonalds with a
         in a black and white image. I have seen some very fine                  view like this! See how well back and white works with this photo.
                                                                                                                                                      Page 9
PhotographyBB Online Magazine

         contain at least one element which shows the subject’s
         personality, attitude, special mannerisms or any of
         the other features or personal traits that form the
         individual’s personality. In quality portraits in which
         the subject is facing directly to the camera, the eyes of
         your subject will be what the viewer will focus on first;
         everything else in the frame can be out of focus, but if
         the eyes are well-lit and focused then the viewer will
         have an area to focus their attention on. An old saying
         once stated that the eyes are a window into the soul,
         and this is same for face-on portraitures; the eyes of
         your subject are the widow that opens the photograph
         completely to the viewer.

              It is rare that I shoot posed shots, preferring to
         shoot candied shots better, but when I do shot posed                      Artists are one of my favorite subjects to photograph; these two
         shots, I remember the expressions and poses I see and                     art students at Kolomenskoye park were two of my first artists I
         sometimes ask my model to use these expressions and                       photographed when I came here to Russia.
         poses. The successful portrait photographer must
         study people they do not know in order to capture                              A big part of portrait photography, especially street
         their true feelings. This involves watching for signals in                portraiture photography is having an understanding of
         a subject’s mannerism, reactions, expressions and body                    human nature, how people react to certain situations,
         language. Then the photographer should be able to                         events and stimuli. Pay close attention to the location
         decide how best to capture the subjects feelings and                      your at. You’re in a café - people generally look up
         character with the camera. Being a people watcher                         when a waitress comes up. Everybody loves children
         will help you to learn how to sense what people will do,                  and babies - they smile when one passes by. A siren
         this will help you to get some great street portraitures.                 goes off - everybody looks toward it. Pay attention to
         Photographer Elsa Dorfman has a belief that I agree                       the situation and be ready to get the photographs you
         with whole heartedly, be interested in your subject.                      are looking for.
         Elsa cares about people. She is genuinely curious
         about people and she has never met a person that                                Personally, I’m not a very bid fan of portraitures
         she could not connect with in just a few minutes. If                      shot in a studio, they just seem too unnatural and
         you are so busy photographing that you can not care                       unreal to me. Professional models are like actors and
         about the people your photographing and then do                           actresses, they know how to fake a look or emotion,
         not even bother trying to take their photos! Many                         but most of us never get to shot professional models.
         photographers forget that their own personalities                         It is always important to make your subjects feel at ease
         are expressed in the photos they take, more than the                      when shooting portraits. Sometimes a shot has to be
         photographer realizes.                                                    posed, but if it is a posed shot, then being in a real and
                                                                                   natural environment will help make for gallery quality
                                                                                   portraitures in my humble opinion. The more artistic
                                                                                   views that the photographer has, the more natural the
                                                                                   shot and more relaxed the subject will be.

                                                                                        Backgrounds are important in portraiture
                                                                                   photography; it should give your subject personality.
                                                                                   For example, some photographers believe that the
                                                                                   background of your portraiture should be blurry;
                                                                                   Sometimes yes, but the background can also be part
                                                                                   of the scene. If you have your photo taken standing
                                                                                   in front of St. Basil’s Cathedral, you want people to see
                                                                                   where you have been, and it is the same with portraiture
                                                                                   photography. The background can be as much a part
                                                                                   of the photo as it can be a distraction. The scene can
                                                                                   make or break a photo.

         Care for a ride in my new wheels? Sometimes color can be a distraction.      There are two types of black and white portraitures:
         I think black and white suits this shot better than the color version.    Posed shots where the subject is fully aware that their
                                                                                                                                                      Page 10
PhotographyBB Online Magazine

                                                                      for a person to want to know why you’re taking their
                                                                      photo. Be honest with them! If a person objects, then
                                                                      show them you’re deleting their photo. Photographer’s
                                                                      rights do not take preference over another person’s
                                                                      rights, and if they do not want to be photographed,
                                                                      then that’s their right.

                                                                          As we already know, candid’s seek to be
                                                                      something like a fly-on-the-wall that catch people
                                                                      going about their day to day activities seemingly
                                                                      unaware of the photographer. Another of my favorite
                                                                      types of photography is candid portraits WITH the
                                                                      subject’s permission, when the photographer is
                                                                      actively engaged with the subject and the subject is
                                                                      conscious of the photographer and photos are being
                                                                      taken. In consensual candid’s, the relationship can
                                                                      be either obvious with the subject looks directly into
                                                                      the camera or subtle with the relationship is implied
                                                                      because the image feels more intimate. We sense that
                                                                      the photographer was physically close to the subject
                                                                      and that the person was aware that they were being
                                                                      photographed.
         Black and white works very well for street portraitures.
                                                                           When shooting portraits always be on the lookout
                                                                      for those special moments when a person’s character
         photo is being taken, and candied shots where the            comes shining though. I remember once a friend asked
         subject has no idea that they are being photographed.        me to take some portrait shots of her so she could
         Each type of portraitures have their place, I have done      send to her boyfriend in the army. She stopped by my
         both, but generally prefer candied shots because they        apartment where I had two cameras setup in my living
         are more natural and show the subject’s true feelings        room. One camera was set to take shots from her waist
         and emotions. My favorite type of photographs are            up and the second camera set to take shots from mid
         when I take photos of people going about their day           chest to a little over her head, unbeknownst to her, I
         to day business such as vendors in a market, a crowd         had two remotes attached to the cameras and the
         on the street, a policeman/woman on street patrol or         sound shut off on the cameras. While she was putting
         people sitting in a bus or subway. You want them to          on her makeup, brushing her hair, and chatting about
         appear that they are unaware of your camera. You want        things and joking, I was taking photos of her. Then I
         the viewers of your photo to feel that they are viewing      said, OK, we’re through! She was kind of surprised, so
         an unguarded view of the subject photographed.               I showed her the photos I took and she was amazed.
                                                                      Why? Because every shot I had taken were completely
              There are several ways to take natural candid           natural and not posed. She said that those photos
         photographs. Find your chosen spot and wait for              were some of the best she had ever had taken of her.
         everything to come together in the way you are               When you are photographing street scenes or street
         looking for. One of the best lenses for candied              portraitures, be on the lookout for special expressions
         street portraits is telephoto lens; it will help you to      on people’s faces like the impatient expression on a
         take completely natural scenes of people, their true         pedestrian’s face as he waits for the light to change.
         thoughts and feelings. People on the street and in           Always be on the lookout for that special moment.
         public can be photographed freely and in any manner          Every person has a story, and every picture should tell
         the photographer chooses, it makes no difference             that story. Remember when shooting strangers like
         whether you’re using a 50mm lens and being up close          when your doing street portraitures, you either get the
         and personal or a 400mm telephoto lens and standing          shot or you do not, there are rarely second chances.
         far away. If they are in public and on the street, you can
         photograph them in any way or manner you choose to.              With regards to posed portraiture photograph. in
         There is, however, a right way and wrong way of doing        my opinion, doing them on location is better than in
         things. Most of the time people really will not even         a studio. Being on location helps to put your subject
         notice you, and if they do, they usually will not mind       at ease and relaxed. Most portraits are about people
         you taking their photo. But you have to use common           with the modern exception of pet portraits or wildlife
         sense and always try to avoid trouble. It’s only natural     portraits, but portraits of people are still the main area
                                                                                                                                   Page 11
PhotographyBB Online Magazine

                                                                                                         café, bar, street or even a widow sill
                                                                                                         can offer a setting that not only puts
                                                                                                         your subject at ease, but many times
                                                                                                         provides a scene that just can not be
                                                                                                         done in any studio. The locations
                                                                                                         in which you make portraitures
                                                                                                         are important because they add
                                                                                                         to the viewer’s understanding of
                                                                                                         your subject. The room where your
                                                                                                         subject lives or works, their home
                                                                                                         or apartment, the street they live
                                                                                                         on, the places where they relax of
                                                                                                         play (adults do play), these locations
                                                                                                         gives information about the subject
                                                                                                         and if your portrait is true, it will tell
                                                                                                         the viewer something about the
                                                                                                         subject’s life.

                                                                                                                    Sometimes portraitures with
                                                                                                                detail are better than portraits with
                                                                                                                no detail. As I mentioned before,
                                                                                                                sometimes the background is an
                                                                                                                important part of the portrait.
         Another of my favorite subjects, street artists. See how clean this photo is. By clean I mean no Composition of your shot and
         distractions, your eyes go directly to where I want them to, the artist and her sketch.
                                                                                                                including the background may
         of portraitures. Portraits shot on location are about                                                  be important in your photograph.
         people and their lives. Portraitures can be about                                  Often time’s portraits are shot from the waist up,
         what kind of work your subject does and where they                                 showing nothing but the person’s chest, arms that are
         work. Often times I take street portraits of policemen,                            cut off, neck and head, a big mistake. Many business
         firemen, street cleaners, businessmen/women in their                               executives have portraits done in this manner for some
         surroundings. Location shooting portraits should                                   reason, but instead of showing class and power, they
         convey an idea about a person by combining portraiture                             look like some goofy student because the portrait
         with a feeling of the location. The location should be                             looks just like a yearbook photo. Good executive
         connected to your subject’s life in some manner, their                             photos would show the executive sitting at their desk,
         home, a favorite park, their office, a popular site in                             answering the phone, reading a report, or writing
         their neighborhood or city, a location that puts them                              something – including their background elements.
         in a good and natural mood. Always take advantage                                  Good photographs always tell a story and this is just as
         of shooting locations, let the location be your studio.                            important if not more important for portraits. Gallery
         Often being on location, a local tourist site, riverfront,                         quality portraitures always tell a story about the
                                                                                            subject, just look at famous painting by famous artists
                                                                                            hanging in art museums. Every single one tells a story
                                                                                            and so should your photos. You will often find that
                                                                                            shots taken with the subject not looking directly at
                                                                                            the camera are better than the subject staring directly
                                                                                            into the lens. A sideward’s glance by the subject or
                                                                                            the photographer shooting from a slight angel many
                                                                                            times adds a dimension of class or in shooting a
                                                                                            female, a touch of romance. Again, do not be afraid
                                                                                            to experiment and try new things, that should be the
                                                                                            number one rule of photography, at least it is for me.


                                                                                    Post Processing
                                                                                        I guess it really depends on whether you shoot
         Police K9 unit relaxing, black and white tends to emphasize the relaxing   in black and white or choose to convert to black
         police and dogs during their break.                                        and white in post processing. There are many good
                                                                                                                                                        Page 12
PhotographyBB Online Magazine


         Street scenes tend to come out pretty good in black and white, here is a three horse wagon that used to be popular in Russia. Your eyes are directed
         right between the two horses to the driver.


         programs for post processing your photos and                                 a glamour type black and white. Masculine photos
         converting them to black and white. I use Photoshop                          I tend to keep sharp and in focus, something of a
         and Lightroom for my post processing and black and                           strong feeling. Post processing is an important part of
         white conversions because of the almost unlimited                            photography and always has been important from the
         options these programs give me, especially Photoshop.                        start of photography in the early 1800’s when the first
         With Photoshop I currently use several black and white                       photos were worked on in a chemical darkroom. I’ve
         conversion plugins that give me excellent results.                           seen some posts on various forums where the poster
         I currently use Black and White Styler, Alien Skin                           says, “I get it right in the camera the first time, so post
         Exposure2, Digital Film Tools 55m and Digital Film                           processing is not needed.” Well, maybe they’re satisfied
         Lab, Nik Color Efex Pro, Power Retouch Pro, Red Paw                          with a half done job. A good photo is more than just
         Media-BW Pro, Silver Oxide, Tiffen-DFX, and OnOne                            picture perfect settings and technique, its mood and
         PhotoTools and of course Photoshop itself converts                           feelings also. Sometimes, moods and feelings can only
         to black and white. Lightroom is not as extensive a                          be brought out with post processing. Post processing
         selection, but it does have a pretty good conversion                         has nothing to do with correcting bad mistakes with
         abilities. Of course Photoshop and Lightroom are not                         exposure, contrast, saturation etc… Rather enhancing
         the only games in town, there’s Aperture if you use a                        or amplifying the mood and feelings the photo gives
         Mac, Gimp, Picasa, Corel Painter Photo and numerous                          off. Yes, photo mistakes can be corrected with post
         of other post processing programs. I generally try                           processing, but even if you take picture perfect photos,
         and tailor my post processing to the photo; photos                           post processing is important because it can set or make
         of women I like to keep a soft dreamy focus, maybe                           a mood that can not be achieved with the camera.
                                                                                                                                                                Page 13
PhotographyBB Online Magazine

                                                                                       Once you find the web page with photos taken with
                                                                                       your camera model, then you can do a search for black
                                                                                       and white photos and you most likely will find plenty,
                                                                                       look them all over. Then when you see a scene you
                                                                                       want to shoot in black and white, you can view it in
                                                                                       your imagination in black and white pretty easy. Next
                                                                                       you have to decide whether or not the photo you will
                                                                                       take will be better in color or black and white. Some
                                                                                       photos are better in color and others in black and
                                                                                       white. I always shoot in color and then convert to black
                                                                                       and white in post processing and this works the best
                                                                                       for me. Of course you have to use the right camera
                                                                                       settings for the given situation you’re shooting under.

                                                                                            I’ve only mentioned a few things that I consider
                                                                                       important when shooting portraitures for you to take
                                                                                       into consideration. It would take a book to mention
                                                                                       everything about shooting portraitures; in fact many
                                                                                       books have been written on the subject of portrait
                                                                                       photography. Never be afraid to experiment with
                                                                                       settings, composition and post processing. There are
                                                                                       no set rules for fine art. Give black and white digital
                                                                                       photography a try, either by shooting in black and
                                                                                       white or converting in post processing, I think you may
                                                                                       be in for a big pleasant surprise if you just try.


                                                                                          A Word From the Author:
                                                                                          My name is Jon D. Ayres and I’m originally from
         This photo has an interesting story: I tried to post process it in somewhat      Albany, GA in the US. I first came to Moscow,
         of a spooky way. At Red Square, there are impersonators dressed as               Russia in August 2003 and fell in love with the
         Lenin, Marx, Tsar Nicholas II who charge you to take their photo or              city and I have been here ever since. In Moscow,
         pose with them. One afternoon I was at the Kremlin taking photos and
                                                                                          I have taught English, business, history, literature
         stopped in Alexander’s Garden to take a break and have a cool brew.
         Well you know what beer does to you, so off to the restroom I go. At              among other things.
         Red Square there are two public restrooms, in the Kremlin towers at
         each end. There is the crypt with Lenin between the two towers. Well, I          I have been involved in writing, digital art and
         was standing in one of the men’s restrooms, when in walked Comrade               photography for over thirty years and I am a
         Lenin. Needless to say, I was somewhat surprised since the effects of
                                                                                          published author of several articles and photos.
         Russian beer can be somewhat strong (Russian beer comes in different
         strengths unlike US beer). I guess you could say I was in the right place        You can find examples of my digital art and
         at the right time, for more than one reason. The combination of the              photography at the following sites:
         post processing, along with the photo being black and white, gives this
         image a classic look.                                                            http://www.redbubble.com/people/bossman

                                                                                          http://www.featurepics.com/Authors/
         Final thoughts                                                                   Images6269.aspx

              Black and white portraits truly are classical art.                          http://www.eyeoftheart.com/JonAyres
         What makes black and white photos and portraitures
         special are the strong emotions and feelings they                                http://s28.photobucket.com/albums/c226/
         give off. Black and white photographs are nostalgic,                             wummis/
         timeless and emotionally strong. In order to create
         digital fine art black and white photos, you first must                          http://www.fotothing.com/JohnnyReb/
         learn to see in black and white. A good way to do this
         is look at flickr.com first for the camera model you use.
                                                                                                                                                      Page 14


       This article and all photographs contained are Copyright © and courtesy of Jon Ayres. Please contact the author directly with any questions.
PhotographyBB Online Magazine


                                                Photography 101
                                            Each issue of PhotographyBB Online Magazine will bring you helpful tips and
                                            tutorials on how to get the most of your digital camera and equipment. We’ll
                                            cover camera techniques, principals of photography, digital photography
                                            issues, and how to get the most from the dreaded manual-mode!


                                FLOWER POWER: FLOWER PHOTOGRAPHY ESSENTIALS - By Kenneth Fagan
         It’s the summer time and the landscapes and gardens are full of colour. Yes, all the summer flowers are in bloom
         so it is now time to take out your camera and get shooting. It can be so easy to get carried away and shoot
         without thinking; this is a big mistake, particularly when photographing flowers. As with all photographic
         situations, there are three main factors to consider when photographing flowers: Lighting, Depth of Field (DOF)
         and Point of Focus. With these three factors carefully put into consideration each time you shoot, you will already
         have improved your flower photography.


         A
                s with all areas of photography, composition is       image. At the other end of the scale you could use a
                the key to a successful image; Try not to have too    wide aperture such as f5.6. Increasing your aperture
                much or too little of what you are photographing.     will cause the DOF of an image to become shallow,
         You do not want an overkill of detail, which complicates     and there will be much less background detail which
         an image and makes it difficult to look at, while on the     may otherwise prove to be a bit of a distraction. For
         other hand, an image with too little detail will look flat   an example of this have a look at the image of the red
         and lifeless. You can control the amount of detail in an     Dahlia (as shown on the following page).
         image by availing of your SLR’s f-stops to control the
         depth of field. If you use a small aperture such as f22,          The first image was taken with an f-stop of f22.
         you will have sharp (or relatively sharp) background         Compare that with the second image, which was taken
         detail, meaning an increased amount of detail, which         at f5.6, and we can see how the first image has relatively
         is not complimentary to main subject in the final            sharper detail than the second image. Notice how your
                                                                                                                                   Page 15
PhotographyBB Online Magazine

         eye was drawn to the flower much faster with the shallow DOF (f5.6).


                    Shot at f22. Notice how the background still retains detail.   Shot at f5.6. Background is blurred out, drawing the eye to the flower.

             Depending on the effect you desire, you may want to play around with the apertures to experiment with the
         DOF. In macro photography, the more shallow the DOF (such as f2.8), the better the results are, particularly for very
         close up shots. If you wish to do some very close up work you will need a dedicated macro lens which are specially
         designed for macro work. These lenses are quite expensive so you unless you plan to shoot macros on quite a
         regular basis they may not be worth the money, otherwise, you can get a standard lens that is macro capable. To tell
         whether your lens is macro capable there will be a small flower shaped symbol on the lens, allowing you to shoot
         relatively close to the subject. All of the images shown in this article were taken with a macro capable lens and
         standard lenses.

             It is especially important to remember when shooting with very large apertures that you must take care when
         focusing. Photographing flowers is not just a matter of setting your aperture and click… you’re done - there is a lot
         more to it than that. The appearance of a flower in an image is all about the area that is sharp and the area that is
         out of focus; commonly the closer you are to a subject the wider the aperture will need to be. As mentioned earlier,
         an image with a shallow depth of field will have much less of an area in focus than if you used a smaller aperture.
         To get the flower to look its best in an image, focus on the centre of the flower where the parts of the Pistil and the
         Stamen are nearest the lens, which means that the outer extremities of the central part of the flower (where the
         pollen collects) will be in focus. Once you have those areas in focus you can then play around with the apertures and
         experiment with the DOF that looks best.


                                                                                                                                                            Page 16
PhotographyBB Online Magazine

            It is also important to be aware of where you focus when shooting a variety of flowers, such as the next three
         images, which were taken at the same angle at f4.5 but with the focus set at three different areas in the scene.


              With the first image the focus is on the flowers at the rear of the frame. This is an obvious example of picking a
         bad area to focus on as the flowers are beginning to die back. Besides that, aesthetically it is a rather undesirable area
         of an image to be focused on and you lose interest in the image as soon as you look at it. The second image shows
         the focus on the middle ground. It does look better than the first image, but the out of focus area to the foreground
         is a huge distraction. Finally, the third image has the focus nicely set to the foreground of the image, displaying some
         nice healthy flowers with a beautiful dappling of colour in the background.

              The next series of three images were part of a street stall selling beautiful bunches of flowers of all kinds. For
         this, I actually just used a point and shoot camera, and looked for patterns and areas where there was good colour
         co-ordination and a nice mix of flowers. By simply shooting an entire area or a few select flowers, you can come up
         with some cool images.


                                                                                                                                      Page 17
PhotographyBB Online Magazine

             Just take a little time with the composition and remember that sometimes a little bit of post processing cropping
         can work wonders for an image as you can see from the next images where the original image had some plastic
         wrapping sticking out - With a quick crop, the appearance of the image improved considerably.


             At this stage, you have learned that the focal point and the DOF are very important when composing flower
         images. There’s also something more challenging, such as a high contrast image (a dark background with a bright
         foreground or vice versa) like the image of the white flower shown here.

              To show the best possible example of this I chose a flower with dark green leaves and white petals. The sky was
         perfect for the shot, it was overcast so it acted as a giant natural soft box, removing any shadows from the white petals.
         It so happened that the petals were two f-stops lower than the green leaves for correct exposure, hence the flower
         was correctly exposed but the stem and leaves were under exposed by two stops causing the background to be a
         lot darker than if they were exposed correctly. Once you are ready for some post processing you can further darken
         the shadows (the under exposed
         area) and brighten the highlights
         (the correctly exposed area.).
         The most successful and reliable
         way of doing this is with curves
         (in Photoshop or your favourite
         image editing software).

              Not all flower photography
         has to be macro. As you have
         seen earlier, some nicely
         presented flowers at a market
         can make wonderful subjects.
         Always be on the lookout
         when visiting public gardens
         for flower displays in pots and
         hanging baskets, you might be
         surprised with what you come
         up with a little consideration for
         its surroundings. Look for things
         that could give a nice framing
         effect such as the window box
         display or a large colourful
         flowerpot against a wooden
                                                                                                                                      Page 18
PhotographyBB Online Magazine

         fence. Have a look at the following examples of how the background and surroundings play an important role.


         Post Processing: Photoshop Flower Fun
         Finally, if you are the type that likes to take a photograph then have a little bit of fun with it in Photoshop well here is
         a simple idea where you can easily change the colours of the flower with just a few simple steps. Flip to the following
         page to have a look at a very brief and easy tutorial which will have you turning red roses blue in no time!
                                                                                                                                        Page 19
PhotographyBB Online Magazine


                                                                              Step 1:
                                                                              Open up an image of a flower which has a nice clean
                                                                              appearance with as little blemishes as possible. The
                                                                              goal here, is to change the colour of the flower easily,
                                                                              without affecting the colour in the rest of the image.


                                                                              Step 2:
                                                                              Select HUE / SATURATION from the adjustments menu
                                                                              (or CTRL+U) and select (in this instance) REDS in the
                                                                              drop down edit menu. If your image contained (for
                                                                              example) a yellow flower, then you would choose
                                                                              YELLOWS to edit instead.


                                                                              Step 3:
                                                                              With the Hue Slider move it left or right and select the
                                                                              colour you wish to use. You can leave the other sliders
                                                                              alone if desired, or experiment with them for different
                                                                              effects on your flowers.

                                                                              As well as that, you can also run the history brush over
                                                                              the background area to get back the colours of the
                                                                              original image, but ensure that you don’t history brush
                                                                              the area where you made the colour adjustment.


         So now that you have read my guide to flower photography, why don’t you go out and try it for yourself. It is butterfly
         season soon so there is no better time to capture the wonder and beauty of nature.
                                                                                                                                                    Page 20


     This article and photographs contained are Copyright © and courtesy of Kenneth Fagan. Please contact the author directly with any questions.
PhotographyBB Online Magazine


                                                 Photography Around the World
                                             Each month, the PhotographyBB Online Magazine takes you around the
                                             PhotographyBB Online Magazine is pleased to launch our first issue with a
                                             globe for a stunning photographic exploration of fascinating cities in
                                             fabulous andfascinatingphoto-tour of one of the most different lands and
                                             cultures which enrich our beautiful us on streetwalking tour the world,
                                             the world - Moscow. Jon Ayres takesplanet.aJoin us as we travel of the city,
                                             and some interesting historical facts and glory of far away places.
                                             withbecome inspired by the photographic of course, amazing photos!


                                                                               LIVING IN LONDON - By Khara Erikson


         A
                h, London… So much to see and do, and not               was made that street names are posted on the sides
                enough time to see and do it all. I can still           of buildings at intersections and not overhead or on
                remember the first time I visited. For so long          a post on the corner like it is back in western Canada,
         always a city in the story books of such classics as Charles   exploring got a wee bit easier. Piccadilly Circus with
         Dickens, A Christmas Carol, where the Queen lives and          its bright lights, double decker buses, and black cabs
         a country of many castles. This was my interpretation of       racing about awed me while trying not to get hit by
         London, not the hustle and bustle it is today. I walked        the traffic. So many little differences, so many things to
         for ages exploring central London from dawn till dusk,         explore, so many things to love and hate whether you
         my feet aching and too proud to ask for directions after       like shopping, sightseeing or entertainment, your stay
         getting lost on several occasions. Once the discovery          in London will be over before you know it.
                                                                                                                                     Page 21
PhotographyBB Online Magazine

                                                                                      After a year of living here, I’m still finding I look
                                                                                 the wrong way as I cross the street, even with the very
                                                                                 helpful look right or look left painted in bright colours
                                                                                 on the crosswalk. Oddly enough I don’t find it as old
                                                                                 as other European cities that I’ve been to. I believe this
                                                                                 is mostly due to the Great Fire of London that swept
                                                                                 through in 1666. The fire destroyed the medieval
                                                                                 city inside the old Roman wall along with St. Paul’s
                                                                                 Catherdral, and the slums. It seems like there’s a lot of
                                                                                 up and coming architecture here. It is strange though to
                                                                                 be walking along and you’re looking at a building that
                                                                                 was built in the 19th century, right next to a modern
                                                                                 limestone and glass feat. Of course though, one of my
                                                                                 favourite skyscrapers is the Gherkin - An egg shaped
                                                                                 skyscraper that stands out amongst the other building
                           A view of the busy and colourful Piccadilly Circus.   blocks. I also think that the City Hall is a gherkin that
                                                                                 has been squashed by a giant’s thumb and it now leans
                                                                                 a bit to the side about to fall over.
             Where does one start? With so many tourist
         attractions in to see in London, a walking tour on the
         River Thames where there is much to see on both sides
         on the river is a good place to begin. Most of the sites
         and attractions are situated in Zone One on the Tube
         map, as the London Underground is another good way
         of making your way through the city.


                                                                                                                           A view of City Hall.


                                                                                     Still nice looking though, and I’m sure it has a
                                                                                 lovely view for the city workers, looking over the River
                                                                                 Thames and the financial district, not to mention
                                                                                 the Tower of London. A fortress situated in central
                                                                                 London, built by William the Conqueror in 1078, it is
                                                                                 now an exhibition and tourist attraction which houses
                                                                                 the Crown Jewels of the UK. Just off of the Tower of
                                                                                 London is the stunning Tower Bridge. London seems
                                                                                 to love building distinct and quite individual bridges
                                                                                 over the Thames, not to mention the foot tunnel that
                                                                                 runs under the Thames from Greenwich to the Isle of
                                                                                 Dogs. The bridge was completed in 1894 which took
                                                                                 8 years to build. It’s an impressive design combination
                                                                                 of a bascule and suspension bridge and it seems to
                                                                                 be an iconic symbol of London. There’s an exhibition
                                                                                 that gives the history of the bridge, but even more of
                                                                                 a highlight is the fantastic views it offers from its 42
                                                                                 meter walkways above the River Thames.

                                                                                     Another option of panoramic views is the London
                                                                                 Eye, a renowned ferris wheel which offer spectacular
                                                                                 views over London on any sunny day. It is Europe’s
                                                                                                                                                  Page 22
PhotographyBB Online Magazine


                                                                                                 London’s spectacular Tower Bridge.


         tallest ferris wheel standing at 135 meters, where one           Another of London’s famous landmarks is
         full rotation takes 30 minutes to complete. I would         Westminster Abbey. Its official status is a Royal
         think it’s the UK’s most popular paid tourist attraction,   Peculiar (meaning a church responsible directly to the
         it originally only had planning permission for 5 years      sovereign, and not to a diocesan bishop), made so by
         but due to the success is now another one of London’s       Elizabeth I. Since 1066, all English and British monarchs
         permanent landmarks.                                        have been crowned in the Abbey, except for a few and
                                                                     subsequently most Kings and Queens of England have
              For a cheaper view of the city, then look no further   been buried there. It has become an honor to have
         than The Monument. Built to commemorate the Great           been buried or memorialized here such as Charles
         Fire of London, it was completed in 1677 and built on
         the alleged spot in Pudding Lane where the Great Fire
         is believed to have begun. Standing at 61 meters, a
         climb of 311 steps brings you to the flaming urn top
         free standing column. Offering breathtaking views of
         the city, the column was designed by Sir Christopher
         Wren and Robert Hooke. Another of Sir Christopher’s
         Wren’s more famous designs is St. Paul’s Cathedral. It
         is supposedly London’s fifth St. Paul’s Cathedral, the
         fourth also being gutted by the Great Fire of London.
         The cathedral was completed in 1708 and has survived
         WWII despite being targeted during the war. It is
         the final resting place for John Donne and Florence
         Nightingale, not to mention numerous other famous
         people.
                                                                                                                                      Page 23
PhotographyBB Online Magazine

                                                                       There’s the Serpentine Gallery situated in Hyde Park
                                                                       and the National Portrait Gallery, free except for special
                                                                       exhibits.

                                                                            Trafalgar Square sits out front of the National
                                                                       Portrait Gallery and today serves as a centre for
                                                                       rallies, protests, and demonstrations, mostly held on
                                                                       weekends. It has also served as a place of celebration
                                                                       for sporting events and New Years Eve. There are also
                                                                       lots of parks and open spaces to spend the days idling
                                                                       about. The likes of Kensington Gardens, Hyde Park,
                                                                       Green Park, and St. James’s Park form a continuous
                                                                       open green space. Regents Park houses the London
                                                                       Zoo, Queen Mary’s Garden, as well as an open sports
                                                                       pavilion. Hyde Park is the largest in central London, and
                                                                       adjacent to Hyde Park is Kensington Gardens, which
                                                                       at the western edge is Kensington Palace. Opposite
                                                                       Hyde Park is Green Park where Buckingham Palace is
                                                                       situated.Across from Green Park is St. James Park, the
                                                                       oldest of the Royal Parks of London.


                                                 Westminster Abbey.
         Darwin, Sir Isaac Newton, Geoffrey Chaucer, Charles
         Dickens, and many more.
                                                                                                                     St. James Park.
             One of the things I love about London is the
         myriad of museums, parks and squares there are for                An easy way to pass the time by is to wander about
         the public. The Tate Modern and Tate Britain are free         London’s numerous markets. My absolute favourite
         admission, except for the major exhibits. As well as the      is Camden Lock Market. A vibrant atmosphere and a
         Photographer’s Gallery, just off of Leicester Square.         wide selection of goods being sold, it’s a great place to
                                                                       find unique clothing, art, jewelry, and crafts as it serves
                                                                       alternative sub cultures away from the mainstream
                                                                       shops such as H&M and Topshop.


                                          Trafalgar Square Panorama.                                           Camden Lock Market.
                                                                                                                                       Page 24
PhotographyBB Online Magazine


              Just minutes from Camden Lock Market is Camden          who regularly film there. Covent Garden is worth a look
         Town, with more vibrant shops to browse through as           around. It sells mostly novelty items but there’s Apple
         well as pubs to rest your bones and wet your lips. There     market that sells unusual and imaginative antiques,
         are several other markets worth a browse. Portobello         handicrafts, jewelry, and clothing. There are many
         Market on the weekend is another great place to              street entertainers about who have to audition for
         look for antiques and beautiful jewelry, second hand         their time slots. On the far end of the piazza is the Royal
         clothing, handmade designer clothing as well as              Opera House as well as London’s Transport Museum.
         funky boutiques near by for the more exclusive buys.
         Spitalfields is another market worth escaping to.                 The end of any good day is a show at any of the
         Located and steeped in history, this is the area where       West End’s many theatres. There are several places in
         Jack the Ripper acted out his murderous deeds. It is         Leicester Square that sell tickets half priced on the day
         now home to a lively art scene, an international food        of showing, including a ticket office that’s in Leicester
         village and lots of wondrous boutiques to browse             Square Tube Station. All of London’s film premieres
         through. Closeby is the colourful Brick Lane, world          happen here in Leicester Square and I find it really
         famous for it’s graffiti featuring such artists as Bansky,   funny to be walking around and seeing all the tourists
         D*Face and Ben Eine. There’s a real jumble of stalls         and street performers and then a queue of people
         selling various goods from leather, clothing, second         lining up to see the stars sometimes as much as 8 or
         hand furniture to bric-a-brac. Sometimes referred to as      9 hours later. If you still have any energy at the end of
         Banglatown, there’s lots of cheap and cheerful Indian        the day, head to Soho for the many clubs, pubs, bars,
         and Bangladeshi restaurants to be found.                     restaurants, and late night coffee shops. Or cash left
                                                                      over to burn then head to Berwick Street for the many
             Columbia Road Market is a street flower market           record shops, or to Carnaby Street, a thriving shopping
         that is popular with photographers and TV companies          area.


                                                                                                                                    Page 25
PhotographyBB Online Magazine


                                                                                     It feels a bit surreal sometimes to realize that I’ve
                                                                                living in such a cultural glamorous city, where fashion
                                                                                is cutting edge, artists and musicians make it big and
                                                                                I’m still wandering about in my faded jeans and t-shirt.
                                                                                London is a huge city with so many well kept secrets
                                                                                just waiting to be discovered and chanced upon;
                                                                                Pubs down tiny side lanes, boutiques and bookshops
                                                                                in trendy Marylebone or Hoxton, an abundance of
                                                                                museums and galleries throughout this sprawling
                                                                                metropolis. I no longer see the outdated cliché of tea
                                                                                drinking crumpet eaters, but a thriving hustle and
                                                                                bustle of mixing lifestyles and traditions emerging
                                                                                into what we call London today.


                                                                                                                                                      Page 26


       This article and all images contained are Copyright © are courtesy of Khara Erickson. Please contact the author directly with any questions.
PhotographyBB Online Magazine


                                              Choosing the Right Accessories
                                          With all of the photography gear on the market today, it’s difficult to
                                          determine which accessories are right for you, and what to look for once you
                                          decide on an accessory. In this ongoing segment, we’ll examine the things
                                          you should look for when choosing photography accessories, and help you
                                          to make an informed decision based on your photographic needs.

          POWER CELLS: DISPOSABLES, RECHARGEABLES AND COMPATIBLES - BATTERY TALK - By Kenneth Fagan
         These days, unlike fifty years ago, the modern camera is a mere paperweight without batteries. Depending
         on the make, model, and size, batteries vary greatly. There are dozens of different batteries out there, each
         one having a specific purpose. In this issue, I am going to take you through the use of disposable batteries
         against the more expensive rechargeable batteries as well as the camera specific branded against non-branded
         or generic batteries.
                                                                    Lithium Ion). SLR’s are high drain electronic devices so
                                                                    they require batteries, which have a high capacity and
                                                                    last longer than a standard alkaline battery, because
                                                                    the maximum voltage of a standard AA alkaline battery
                                                                    is 1.5 volts. In particular, the CR123 disposable battery
                                                                    or a rechargeable Li-ion or NiCd batteries especially
                                                                    in SLR’s has replaced the alkaline battery for higher
                                                                    voltage and amps. For example, a single CR2 battery
                                                                    can have a capacity of up to 3V so the benefits are
                                                                    obvious.

                                                                       Alkaline batteries’ common uses are for the point
                                                                    and shoot camera market where there is less power


         R
               echargeable batteries use different alloys for
               power than the standard disposable battery;
               The most common alloys used in rechargeable
         batteries are Nickel Metal Hydride (NiMH), Nickel
         Cadmium (NiCd) and Lithium Ion (Li-ion). These
         alloys, once drained of energy through use, can have
         their chemical reactions restored to original capacity
         by applying electrical energy to the battery with a
         battery specific charger (a charger that is designed
         to charge the type of rechargeable battery you have).
         Non-rechargeable or disposable batteries use different
         alloys to produce electrical energy, which cannot be
         reversed once depleted. The most common disposable
         camera batteries are Alkaline and Lithium batteries (not                         Alkaline and Lithium Disposable Batteries.
                                                                                                                                       Page 27
PhotographyBB Online Magazine

         drain, although some cameras can be very draining                        shorter than the disposables. Of course, this is just my
         with batteries. Generally, the poorer cousins in the                     experience and it may not necessarily be the case for
         alkaline battery world are of no use to your camera, they                all situations, battery brands, or flash units. Although
         tend to be poor and drain easily. It is recommended to                   for economical sense, since flash units are high drain in
         use high quality batteries to get the most hours at a                    general, rechargeable batteries are definitely the way
         time with your camera. Brand names such as Duracell                      to go. In some circles it is suggested that you do not use
         or Energizer have fantastic alkaline batteries on the                    rechargeable AA batteries in your flash unit. If you find
         market, and as technology improves, their batteries                      that disposable AA batteries are better for occasions
         seem to get better and better.                                           where fast recycle times are of high importance, then
                                                                                  I recommend you go with what you think is best. The
                                                                                  higher the mAh in your rechargeable batteries, the
                                                                                  stronger the output and the longer lasting they will
         Different, or the Same?                                                  be.
              In some cases, rechargeable batteries seem to give
         out less power than their disposable counterparts do,
         because the amps may vary from battery to battery.
         The standard amps rating for a disposable alkaline
         battery is 1500mAh (milliamp hours) where as the
         rechargeable equivalent can vary from 1200mAh
         to 2500mAh or maybe more. In reality from my own
         experience, disposable batteries are more consistent
         than rechargeable. I find this when I use a mounted
         flash (which takes AA batteries) on my DSLR; the flash
         recycle time was much improved with disposables.
         I noticed a huge difference in flash recycle time
         between my batch of 1200 mAh and 2500mAh
         rechargables, which is quite understandable because
         of the output differences between the two. The drain
         time of the rechargeable AA batteries was consistently

                                                                                  Selecting a New Battery
                                                                                       For the more expensive rechargeable batteries,
                                                                                  such as the NiMH and Li-Ion, they can vary greatly
                                                                                  in price; the reason being that the manufacturer of
                                                                                  your DSLR may also manufacture the battery to go
                                                                                  with it. These batteries tend to be of high quality and
                                                                                  because the SLR manufacturer brands them, the price
                                                                                  automatically goes up. It is no surprise to have to fork out
                                                                                  about $100 to buy a new battery for your SLR. If you are
                                                                                  like me, and not willing to pay a high price for a battery
                                                                                  there is an alternative. Compatible or generic batteries
                                                                                  are manufactured by independent manufactures that
                                                                                  make specific batteries for many DSLR’s for around half
                                                                                  the price as the ‘branded’ battery. That said, there are
                                                                                  some compatible batteries, which are of extremely
                                                                                  poor quality, but in a good camera store, they will only
                                                                                  stock good quality batteries. So, comparing a $100
                                                                                  battery to a good quality $50 compatible battery, the
                                                                                  compatible battery might be a better investment. I am
                                                                                  the owner of a Canon EOS 5D and a Powershot G9, and
                                                                                  for both of these I have the original Canon battery along
                                                                                  with two or three compatibles, and to this day, I have
                                                                                  not noticed a single difference between the branded
         Rechargable AA batteries look the same as their alkaline counterparts,   and unbranded batteries. It is important to note that
         however, there’s a sacrifice in performance for cost savings.             I purchased these compatible batteries from reliable
                                                                                                                                                 Page 28
PhotographyBB Online Magazine

         retailers so I do not recommend you to go onto the                   life of a NiMH battery anywhere between 2-4 years if
         internet and purchase a batch of five for twenty dollars             charged correctly.
         or something. That would be a very bad idea as they
         could cause irreversible damage to your equipment.
                                                                              Li-Ion Batteries
         Battery Care                                                              Lastly, the newer of the battery technologies are the
                                                                              Li-Ion batteries, which is most likely the type of battery
               Care needs to be taken when handling batteries,                you have, provided your digital camera was purchased
         never touch the metal terminals with your fingers                    within the past couple of years. Li-Ion batteries are
         as oily residue will transfer and eventually cause                   extremely robust, and can be charged anytime without
         corrosion in your camera and on the battery. Never use               affecting their overall life cycle. Unlike NiCd and NiMH
         a charger that is not suitable for your battery type as              batteries, Li-Ions do not need to be conditioned (as
         this can cause a fire or an explosion. When you change               commonly thought), but rather they have a finite
         the battery in your camera always, make sure that the                number of charges before they begin to degrade. In
         camera is switched off, even though the battery may                  most cases, you will find that with Li-Ion batteries you
         seem completely dead, there may be still some power                  can get approximately 200 full charge cycles out of the
         in it. Removing it could cause damage to your camera.                battery. That does not mean you can only charge the
                                                                              battery 200 times, it means 200 full charge cycles. For
                                                                              example, if you were to use 30% of your battery during
         Charging Your Battery                                                a photoshoot, came home and recharged it, then
                                                                              the next day you used 70% and again recharged the
              In charging your batteries it is important to note just         battery – this would count as one full charge cycle, not
         which type of rechargeable battery you have. Different               two. That’s the huge benefit of Li-Ion batteries, along
         types of rechargable batteries are manufactured with                 with the fact that they do not drain as quickly as NiCd
         different chemical compounds and components, and                     and NiMH batteries when not in use.
         thus requre special and unique care when it comes to
         charging your battery and maintaining its optimum                         There is a new type of battery on the market, which
         life and performance.                                                is not yet widely used in the digital camera market,
                                                                              called Lithium Polymer. Since these are currently an
                                                                              uncommon battery type for the photographer, we will
         NiCd Batteries                                                       explore this battery in further detail at a later date,
                                                                              when it’s sure to become the next latest and greatest
              You may have heard of something called a                        “standard” battery technology in your digital camera.
         “memory effect” when it comes to charging your
         battery. The older NiCd batteries do experience this, in                 I hope you have enjoyed this article and found it
         that if you were to charge it while it was still half full, it       to be helpful in both the selection, and the care of new
         will eventually “think” (or more properly – react) that              and your existing batteries. They may not be the love
         half-full means empty, and you will only effectively get             of our life, but the certainly are the life of our love.
         half a charge everytime you charge it. That is one of
         the reasons why battery technology was replaced by
         the NiMH batteries which do not experience this effect
         as severely.


         NiMH Batteries
             Although still nickel based, NiMH batteries are a
         step up from their NiCd predecessor. You can charge
         your NiMH batteries at any point in their drain cycle,
         and these batteries can also be “conditioned” to act as
         new over time. Conditioning a NiMH battery basically
         requires that you fully charge and fully drain your
         battery for a cycle of 3 times. This effectively refreshes
         the chemical cycle in the battery, and can give you a
         long life for your battery. Typically, you can extend the
                                                                                                                                                    Page 29


     This article and photographs contained are Copyright © and courtesy of Kenneth Fagan. Please contact the author directly with any questions.
PhotographyBB Online Magazine


                                               High Dynamic Range (HDR)
                                           HDR (High Dynamic Range) photography is a relatively new photography
                                           technique made possible by the advent of digital camera technology, and
                                           new breakthroughs in image manipulation software. This monthly series
                                           will take you through the basics of HDR photography, and how you can
                                           create your own stunning HDR images.


                        HDR PHOTOGRAPHY PART III - SOFTWARE AND HDR BASICS - By Fred McWilson
         Welcome back fellow photographers to the third installment on our HDR series. In this month’s issue we are
         going to look at some of the fundamental software aspects with regards to HDR and tone mapping. Hopefully
         by now, any photographers interested in HDR / tone mapping, have a better understanding of what you need,
         and how you can utilize this technique and that it is not all that difficult to achieve good results.


         T
               he main emphasis for this month’s article is to       start with this. Now if you don’t have any bracketed
               do a general walkthrough so you can better            shots yet, you can go to this address:
               understand what to expect when you use
         whichever HDR software you choose to work with. Of          http://www.photographybb.com/images/shared/
         course, I am not able to give a step by step guide for      HDR_Sample_Images.zip
         each and every software package since I have only
         used a few of the many that are available. I would          and download the full size images of three sample
         trust that whatever HDR package you go with that you        images provided to use for your practice.
         follow their instructions for the best results. There are
         however a few things that I can share that might get
         you going a little faster.

             As I mentioned in last month’s article when
         capturing the images, you should have bracketed shots
         with differing ev’s (Exposure Values). Normally I shoot
         three shots at +-2ev, so I end up with a -2ev, 0ev and
         +2ev sequence, of course you can have more but let’s
                                                                                                                            Page 30
PhotographyBB Online Magazine

             Normally most HDR software will require you to
         load the bracketed shots into its program. Photoshop,
         Photomatix, Essential HDR or any of the other major
         HDR programs all work this way. Now there is a
         decision, usually, that you must make when you are
         going to load your images (or my sample images). In
         some of the programs you must choose whether to
         use the “Auto Align” feature first while in others you
         can choose this later once the images have been
         loaded. The “Auto Align” is simply a feature to aid in
         the registration of the images to each other. This is
         most useful for any handheld bracketed shots where
         the images are not framed exactly between each
         shot. You should choose this action if you are using

                                                                  handheld shots or if the images are
                                                                  not perfectly aligned to begin with.
                                                                  If you are using my sample images
                                                                  they were done using a tripod so
                                                                  the auto alignment is not needed
                                                                  but can be used without any issues.
                                                                  The main reason to not use the
                                                                  auto alignment if your images are
                                                                  already perfectly aligned is simply
                                                                  computer processing time. If you
                                                                  choose to always use the auto
                                                                  alignment, your computer has to
                                                                  do more with the images and will
                                                                  increase the amount of processing
                                                                  time required, so only use as
                                                                  needed.

                                                                       Once the images have been
                                                                  loaded, and whether or not the
                                                                  auto alignment feature is to be
                                                                  used, comes the generation of
                                                                  the HDR image. Most programs
                                                                  once initiated will do one of the
                                                                  following: Some of the programs
                                                                  will generate an HDR image that
                                                                  then requires the additional step of
                                                                  “tone mapping” such as Photomatix.
                                                                                  ,
                                                                  Other programs will go directly to a
                                                                  preview tone mapped version of the
                                                                  image such as Essential HDR. Let me
                                                                  stop here and explain a little about
                                                                  why for instance in Photomatix it
                                                                  creates the HDR image first that
                                                                  looks horrible on your monitor. If
                                                                  you recall in my previous article that
                                                                  most current display monitors are
                                                                  unable to render the visual dynamic
                                                                  range that can be generated, the
                                                                  greater dynamic range that can be
                                                                  achieved with this technique when
                                                                  displayed will look awful…that is
                                                                  until you tone map it. So until you
                                                                                                           Page 31
PhotographyBB Online Magazine

         choose to tone map the HDR image the monitor will be
         unable to properly render it.

              The tone mapping of the HDR image basically
         takes the dynamic range and compresses it such that
         your monitor can then render it making it viewable. The
         trick here is that just because you can create a higher
         dynamic ranged image does not negate the fact that
         our current display methods are still unable to do so,
         which is why we must tone map the image to bring the
         image to within the dynamic range of our monitors or
         print media.

              Now that you have the image in a preview tone
         map state, most of the programs will allow further
         adjustments to then allow you to go from the more
         natural looking to the surreal end of the visual
         spectrum. Most of the options are self explanatory
         if you are familiar with other editing programs such
         as Elements or Photoshop and / or through simple
         exploration of how they affect your image. One bit of
         advice is to watch out for “Halos” which are an attribute
                                          ,
         associated with the tone mapping routines. The halos
         can be seen around objects with differing contrasts
         such as a sky and trees. Typically halos are considered
         to be an unwanted artifact for the more realistic HDR
         imagery, while in some of the more surreal style they
         can be a desired effect. See this example showing the
         halo effect surrounding the trees:
                                                                               Here’s an example of a tone mapped “for realism” HDR image. By not
                                                                               tone mapping to the extreme, the results are quite natural and the
                                                                               image has no halos.

                                                                                    When you are satisfied with the adjustment
                                                                               settings, the program will produce the final tone
                                                                               mapped image. I normally, once I have the final tone
                                                                               mapped image, bring that into Photoshop and tweak
                                                                               a few more things such as the “Levels” and perhaps
                                                                               run “Noise Reduction” to bring my image to the state I
                                                                               like, but we will get into that more next month where I
                                                                               will go deeper in the post processing that I do. I would
                                                                               encourage you to go download a trial version of an
                                                                               HDR program and play around with it.

                                                                               Here are some free trial versions that I’d recommend:
                                                                               http://www.essentialhdr.com/Download.aspx
                                                                               http://www.hdrsoft.com/download.html

                                                                               A Note From the Editor:
                                                                               If any of our readers are interested in purchasing the
                                                                               full version of Photomatix Pro, or the Photomatix Tone
                                                                               Mapping Plugin for Photoshop®, there is a 15% off
                                                                               coupon code available for our readers at:
                                                                               http://www.photographybb.com/hdr

                                                                               A special thanks to Fred McWilson for this continuing
                                                                               series, we look forward to next month’s article!
                                                                                                                                                     Page 32


      This article and photographs contained are Copyright © and courtesy of Fred McWilson. Please contact the author directly with any questions.
PhotographyBB Online Magazine


                                             Photoshop Tutorial
                                         Photoshop tutorials will help you to get the most out of using Photoshop,
                                         while also helping you to discover the many tools and uses for our favourite
                                         image processing software. In this series, you’ll learn tips, tricks, and
                                         techniques to wow your family, friends, and maybe even yourself!


                                                                             ART AIN’T HISTORY! - By Dave Seeram
         Continuing our summer theme (from our Photography 101 column) of “Flower Power” this month, I thought
         it would be suitable to show you a very handy artistic technique for turning photos into beautiful paintings.
         Sure, there are countless filters in Photoshop which can do this for you, but where’s the satisfaction in that? This
         month, we’ll be taking a look at the Art History Brush, and how you can use it to create your own digital works
         of art, even if you are not a painter... Grab your brushes, and let’s go!


                                         For this tutorial, we’re going to be painting. Don’t worry if you feel that you don’t
                                         have a “painter’s talent” because in no time, you’ll be brushing your way to great art,
                                         all from your Photography. When I show the keyboard shortcuts, always remember
                                         that PC’s use the “Control” key where Macs use the “Command” key. I’m going to
                                         make use of the keyboard shortcuts where possible in this tutorial, as they will
                                         come in very handy in speeding up your workflow in the future.

                                         Step 1: Open a starting image (as shown here on the left). This beautiful flower
                                         shot has been provided to us by Ken Fagan.


                                         Step 2: We’re actually going to prepare the details part of our image first, before we
                                         start painting. To do this, prepare your layers as follows:


                                                      a) Duplicate your Background layer (Command/Control-J).

                                                      b) Duplicate it again (Command/Control-J), and desaturate it by
                                                      pressing:
                                                      Shift - Command/Control-U.

                                                      c) Duplicate this desaturated layer (Command/Control-J), and invert
                                                      the layer by pressing Command/Control-I (for Invert).

                                                      d) Lastly, change the blending mode of this layer to “Color Dodge” in
                                                      the layer’s palette.

                                                      Here’s how your layer’s palette should look at this point (See image to
                                                      the left). It may not look like much just yet, but we’ve only just begun!
                                                      The next step we are about to take will give your image somewhat of
                                                      a pencil sketch look, which you can even use on it’s own as a popular
                                                      effect by itself.
                                                                                                                                   Page 33
PhotographyBB Online Magazine

                                                                           Step 3: With your top layer as the active layer in
                                                                           your layers palette, go to the menu: Filter > Blur >
                                                                           Gaussian Blur... and choose a radius setting that
                                                                           gives your image a nice soft pencil sketch type look.
                                                                           You want to use a low radius to show only nice soft
                                                                           edge details, not too many shadow areas. Here I used
                                                                           a radius of 3.5 pixels, and it will vary depending on
                                                                           your image.


                                                                           Step 4: Turn off the visibility of your Background
                                                                           Layer by clicking on the little eyeball icon next to
                                                                           that layer. Now press Control/Command - Shift - E to
                                                                           merge only the visible layers. This should leave you
                                                                           with your “pencil sketch” layer on top of your hidden
                                                                           Background Layer.


                                                                           Step 5: Change the blending mode of your top
                                                                           “pencil sketch” layer to “Multiply” and apply another
                                                                                                                ,
                                                                           Gaussian Blur with a lower radius setting (Menu: Filter
                                                                           > Blur > Gaussian Blur...). I used 2.0 for my radius here,
                                                                           but it may be different for your image. The goal is
                                                                           to soften the pencil sketch look even further. Lastly,
                                                                           reduce the opacity of this layer to 75%.


                                                    Step 6: Turn your Background Layer visibility back on, and duplicate the
                                                    layer (Command/Control-J). Your layers palette should now look like this.
                                                    (See image on the left).


                                                    Step 7: Select the History Brush Tool
                                                    (from your toolbar) or by using the
                                                    keyboard shortcut: Shift-Y. Before we
                                                    do anything else, open your History
                                                    Palette (Window>History) and click on
                                                    the little box-area next to your last step
                                                    which should read “Layer via copy”    .


         Step 8: Along the top of your screen, you’ll see some History Brush Options. You can leave most of these as-is, or
         experiment with the settings layer, but for now, just make sure your mode is set to “Normal” and the brush style is set
         to “Tight Short” as I have done for this tutorial. Click on the icon at the right-end of the History Brush options toolbar
         on the top of your screen, which will toggle open/closed the brush options dialog box.


         Step 9: Here, we can go down the list of options for an almost infinite number
         of settings and combinations of settings. It’s best to experiment, as you will
         find different ways to create your own unique styles. For this tutorial, I will
         show you the settings which I used.

         For Brush Tip Shape: I used the “Oil Heavy Flow Dry Edges” brush from the
         built-in brushes. You can find all of the built-in brushes by clicking on the
         little fly-out menu (located just under the “x” which would close the brushes
         palette), and at the bottom of the flyout menu you’ll see the various brushes.
                                                                                                                                        Page 34
PhotographyBB Online Magazine

                                                                              Shape Dynamics: I left everything here as the default,
                                                                              except I changed the Angle Jitter to 50%

                                                                              Color Dynamics: I left everything at 0% except for
                                                                              Saturation which I raised to 15%. These settings
                                                                              determine how much variance you would like to have
                                                                              in things like color, saturation, etc...

                                                                              Other Dynamics: I raised both opacity sliders to 100%
                                                                              for a softer brush look. For a hard brush look, lower
                                                                              these opacities to your taste.

                                                                              Step 10: We are finally able to paint! I find the best
                                                                              way of doing this is to start with large areas of similar
                                                                              colour, and work your brush around (holding down the
                                                                              mouse button), in small wavy strokes. You can change
                                                                              the brush size if it is too large/small by pressing the [
                                                                              or ] (square bracket) keys. Paint over your entire image
                                                                              until you are happy with the look. You can try different
                                                                              brushes, opacities, or any of the brush settings in the
                                                                              previous steps. Lastly, you can adjust the opacity of
                                                                              your top layer to bring back some slight detail into
                                                                              your image. Here’s the finished result! You are now a
                                                                              digital painter; see, I told you it would be easy! Have
                                                                              fun Photoshopping!


               Here’s a look at the before and
               after versions. The possibilities
               with this technique are truly
               endless. I hope you have enjoyed
               this tutorial, and I would love to
               see your painted results in the
               PhotographyBB Forums. We have
               a very active Digital Art Gallery,
               and now that you are all artists, I’d
               love to see your creations. Drop
               by the forums and show us your
               stuff!
                                                                                                                                                   Page 35


      This article and all images contained are Copyright © and courtesy of Dave Seeram and Kenneth Fagan. Contact the author for any questions.
PhotographyBB Online Magazine


                                              Newsflash! - Lightroom 2
                                          This month we have a news flash announcement for our readers. Adobe has
                                          just released the new and improved Photoshop Lightroom™ 2. We’ll give you
                                          a brief look at what’s new for Lightroom 2, and next month we’ll continue
                                          with an in depth look at some of the new features and how they work.


                                                                     LIGHTROOM 2 RELEASED! - By John Ogden
         With still another month left to go on the Beta release version, Adobe has just launched the full shipping version
         of the highly anticipated Lightroom version 2!


                                                                     A look at the SOAP interface:


         L
              ook closely at the splash screen for Adobe
              Photoshop Lightroom 2.0 and you will see
              the name “Phil Clevenger” Phil designed
                                             .
         the Lightroom user interface (UI) and is driven by
         simplification, streamlined workflow and localised
         functionality. The latter is embodied in revolutionary
         the new non-destructive retouch brush function.

         Back in the 90’s Phil Clevenger worked on Kai’s Photo
         Soap ™ by MetaTools, a ground breaking photo app
         way ahead of its time. SOAP also featured the workflow
         driven interface and even a retouch brush! Inspiration,
         perhaps, for Lightroom 2? (Note the original colour
         scheme too!)
                                                                       SOAP’s “room” based workflow. Inspiration for Lightroom 2 perhaps?
                                                                                                                                           Page 36
PhotographyBB Online Magazine


         Streamlined Workflow Based Application:                               Secondary Display:
             The Lightroom team have been working hard to                          Under the window menu you can now activate a
         produce an application that is streets ahead of the first             secondary display for either a secondary window or
         version. Behind the scenes significant developments                   another monitor as shown.
         in the algorithms hide the complexity, but out in
         front the UI puts the emphasis on the tools that need
         to be at hand. Here’s a quick look at some of the
         developments.


         New Retouching Tools Grouping:
              Crop, Spot healing/cloning, Red Eye, Graduated
         Filter and the Adjustment Brush are now grouped
         together in the right develop panel, freeing up more
         screen space for your images.


              A whole host of new controls are revealed and
         stacked in the develop panel, when the new Adjustment
         Brush is activated:


                                                                               To summarise, important enhancements that can be
                                                                               found in Lightroom 2.0 include;

                                                                                         •   Clearer import dialogue
                                                                                         •   Enhanced Photoshop integration
                                                                                         •   Improved organisational tools
                                                                                         •   Twin monitor support
                                                                                         •   Localised corrections
                                                                                         •   Flexible print packages
                                                                                         •   Improved Sharpness
                                                                                         •   And much more…


                                                                               Coming Next Issue...
                                                                               Join us next month as we dive in a little deeper and
                                                                               explore some of the new and wonderful features of
                                                                               Adobe Photoshop Lightroom™ 2.
                                                                                                                                                   Page 37


        This article and all images contained are Copyright © and courtesy of John Ogden. Please contact the author directly with any questions.
PhotographyBB Online Magazine


                                                Adobe Photoshop® Lightroom™
                                            Adobe Photoshop® Lightroom™ is Adobe’s most powerful solution for
                                            working with camera RAW images, giving the digital photographer all the
                                            necessary tools to master their digital darkroom developing techniques. This
                                            series will explore various uses of Lightroom, and the types of processing
                                            and effects that can be achieved through working with RAW files.


             GETTING CREATIVE WITH ADOBE PHOTOSHOP® LIGHTROOM™ - PART II - By John Ogden
         Last issue we looked at how Adobe Photoshop Lightroom can be used to creative effect using such techniques
         as filtered black and white images, selective colour and cross processing. In this article I will show you how to
         achieve a pencil sketch effect, custom edges and even a textured “canvas” background.


         They said it could not be done!                               2 or 3 (all of these legacy effects are still there in the
                                                                       current filter menu of CS3, under Artistic and Sketch).
         Some Lightroom user forums out there claim that the           But with a little work around, Lightroom version 1 can
         more advanced manipulation effects shown above                also produce some pleasantly surprising results.
         need Photoshop; Well, stand by your beds!
                                                                       In this article I’ll show you how to turn a colour
         It’s true of course that the mighty Photoshop has come        photograph into a line drawing or sketch effect, along
         laden with artistic filters that place a variety of special   with a textured background, and how to introduce a
         painterly effects at your fingertips. These, originally       popular “graphic edges” effect using Lightroom’s print
         third party, filters were bought by Adobe back in version     module.
                                                                                                                                    Page 38
PhotographyBB Online Magazine


         Line Drawing:
         This technique involves the following four distinct stages:

             1. Start with a good quality colour image             3. Export a copy and re-import,
             2. Develop in Lightroom,                              4. Further develop the copy.

             By following this route, the develop settings can be applied twice, one on top of another, thereby multiplying
         the results. The image becomes “over-processed” which helps to achieve the line effect.


                           Step 1                               Step 2                               Step 4


                                                                                                                              Page 39
PhotographyBB Online Magazine


         Step 1:                                                    This is the key to this technique and allows the develop
                                                                    settings to be reapplied on top of the current settings.
                                                                    Right click (command click) on the image in either the
         Start with a good colour image (I have found that this
                                                                    loupe or filmstrip to bring up the context sensitive
         technique works best with relatively high contrast
                                                                    menu (see below) and choose edit in Photoshop or any
         pictures like the studio portrait of my lovely wife,
                                                                    other installed editor.
         Ingrid).
                                                                     I know we said we wouldn’t use Photoshop, and we
                                                                    are not! When you invoke this command, Lightroom
         Step 2:                                                    produces a copy of the image and stores it neatly
                                                                    referenced in its database along with the original. In
                                                                    the dialogue box that appears when you choose “Edit
                                                                    in Photoshop” chose the first option: “Edit a copy with
                                                                                 ,
                                                                    Lightroom Adjustments”


         Convert to grayscale using the Grayscale text button
         at the top of the basic panel. Then over process in the
         Develop module by pumping up Recovery 100%, Fill
         light 50% and Clarity 100% as shown in the image on
         the previous page.

         In this case (shown in Step 2 on the previous page), you
         can see that I have also used the white balance sliders,
         moving Temperature towards orange and Tint towards
         magenta to lighten the image (this works differently
         which each image depending on the original colours,
         you will need to experiment to see how these sliders
         work with lightening or darkening tones).


         Step 3:

                                                                    This will give you a new image file with the develop
                                                                    settings “baked in” so you can over process further. The
                                                                    new file appears next to your original in the film strip.


                                                                    Step 4:
                                                                    Now develop this new file in Lightroom with maximum
                                                                    Fill Light and Clarity, and bring up the Blacks until the
                                                                    line drawing effect talks shape. A white vignette will
                                                                    enhance the effect further. Towards the bottom of
                                                                    the Basic panel under “Lens Corrections” set the Lens
                                                                    Vignetting as shown to end up with a mainly white
                                                                    canvas.
                                                                                                                                Page 40
PhotographyBB Online Magazine

         This same technique works on other types of images too, this classic wide angle hot rod shot is one of my
         favourites.


          Texture Effects and Edges:
         To introduce the texture effect we are going to “misuse” the identity plate function in the print module. Here is our
         hot rod with a blue marble effect all done in Lightroom!


                                                                                                                                 Page 41
PhotographyBB Online Magazine


          So how did you do that?
         The texture and edge effects require a little bit of setting up, as additional files are required, and will be used to
         montage and blend with the original.

                                                 Custom Effects File Examples:


                      Custom Edge                               Linen                             Blue Marble
              Either download, capture, or create suitable texture/edge files. The three files used here are shown above (the
         Custom Edge was created in Photoshop and saved out as a TIF to preserve transparency). You probably guessed that
         the blue marble is the texture used on the hot rod. The portraits below show how the original colour and the new
         line drawing version look with the Linen texture added.


                                                                                                                                  Page 42
PhotographyBB Online Magazine


          Identity Plate Abuse!
             The identity plate feature is found in the print module under “Overlays” It is typically used to brand the finished
                                                                                    .
         print with the photographers’ graphic logo or custom text, as in my rainbow panorama below:


             Clicking on the tiny down-pointing triangle in the bottom right hand corner of the Identity Plate preview
         (highlighted by the red circle in the illustration above) opens a list of possible ID plate templates available. Choose
         the edit option as shown, and the Identity Plate editor opens:


                                                                                                                                   Page 43
PhotographyBB Online Magazine

              You can now toggle between the styled text and
         graphical versions. It is the graphical identity plate, of
                                                                               Photoshop Rules, OK?
         course, that allows our texture and edge graphics to be
         introduced. Simply click on the “Locate File…” button
         in the Identity Plate Editor and navigate to the required                 Of course its easier to produce these creative
         custom effect file.                                                   effects and more in Photoshop, but do you need access
                                                                               to Pantone inks, Video, 3D, Channels, Layer Comps, etc
                                                                               etc… when all we may want to achieve are some photo
         Custom Edge Effect:                                                   based graphic experiments. With a little imagination


              For this picture of a rose, growing wild in my back
                                                                               and inspiration, the simplest of tools can often create
         garden, I have added the edge effect in the same way
                                                                               stunning effects (and at a third of the price!). Lets not
         via the graphical identity plate editor. Note the custom
                                                                               forget that Lightroom 2 is set to take creative imaging
         edge file is now displayed in the Overlay panel preview
                                                                               to a new level with selective editing.
         to the right.
                                                                                   For me, as a Photoshop tutor and user of over ten
            Careful adjustment of the opacity and scale sliders
                                                                               years, this article represents an exercise in problem
         completes the effect, here the opacity is right up to
                                                                               solving, and problem solving is always good for creative
         100%. For the textures opacity will be much lower and
                                                                               thinking! Until next time, happy Lightrooming…
         needs experimentation for each image.


         Bio:
         John Ogden is an award winning London based digital artist and photographer. John lectures on Photoshop CS3 and
         Lightroom to adult learners in Further Education. John is Pentax shooter, Adobe Certified Instructor and member of
         the National Association of Photoshop Professionals. Contact: john.ogden@bracknell.ac.uk
                                                                                                                                                   Page 44


        This article and all images contained are Copyright © and courtesy of John Ogden. Please contact the author directly with any questions.
PhotographyBB Online Magazine


                                               Adobe Dreamweaver® Basics
                                           In today’s age of digital photography, the modern photographer is finding
                                           that not only do they need to be a good photographer, but they need to
                                           know things like image post-processing techniques, and even basic HTML to
                                           create their digital galleries on the web. In this column, we’ll look at some
                                           basic steps in Dreamweaver for building your photo websites.


                                                 GENERATING YOUR PORTFOLIO PAGES - By Victoria Sargsyan
         Welcome back! As we continue our “Photographer’s” series on Dreamweaver®, this month we’ll be taking a look
         at how to create and easily generate the pages which will be displaying your portfolio of photos. Navigate back
         to your Dreamweaver website folder, and let’s get started with this month’s Dreamweaver tutorial!

         Step 1: For this tutorial, we actually need to begin by hopping over to our good friend Photoshop before we can
         continue. Once in Photoshop, go to the menu: File > Automate > Web Photo Gallery...


         Here you can choose any options that you like. I will go with “Simple-Vertical Thumbnails” for this example. For
         your Source Images Folder, use the folder which contains the images that you will be using in this web gallery
         category. For the Destination, use your Dreamweaver site’s images folder, and create a subfolder for this image
         category inside. You will want to repeat this entire step for each category of photography you would like to have
         in your gallery. For example, if you have portrait photography, you would do this step for portraits using the source
         folder where your portraits are stored on your computer, and the destination folder would be the Dreamweaver
         images folder, with a subfolder called “portraits” (ie. images/portraits). Under Options you can enter your site’s name,
         photographer’s name, contact info, and date. Once you click OK, Photoshop will create the web gallery for you,
         which you will see the gallery in the form of an internet HTML page. Copy each gallery’s files into a subfolder in your
         site’s main images folder, for example: images/landscapes (copy all of the files and folders that Photoshop created
         for your landscapes gallery).
                                                                                                                                    Page 45
PhotographyBB Online Magazine

         Here’s what the gallery page lookes like, created all automatically by Photoshop:


         Step 2: (Optional) If you would like to create a nice and stylish rollover image to be used as a button on your
         website, here’s how it’s done. This would be especially useful in creating rollover buttons / thumbnails as navigation
         buttons for your different photo galleries (ie, portraits, landscapes, nature, etc...).

         Create a sub-folder in your Dreamweaver images folder, and name it something such as “nav_buttons” Create two
                                                                                                              .
         images (one for the navigation button image, and one for the image when the mouse is rolled over that image. A
         good example would be to use a small thumbnail of a landscape shot in colour as your first image, then the same
         shot desaturated to black and white for the second (rollover) image. Once you have created these, copy them into
         your Dreamweaver images/nav_buttons folder (or where ever you would like to store them on your site).

         Step 3: With your site’s main page open in Dreamweaver, click inside the AP Div table where your image thumbnails
         will be placed, and go to the menu: Insert > Insert Image Object > Rollover image...

         Step 4: In the dialog box: “Original Image” is the first image that will appear, and “Rollover Image” is the image that
         you will see when you will rollover your first image with mouse. “Alternative text” is the is text that will appear when
         the mouse is hovering over the image. For “When clicked, Go to URL” select the index page in your images subfolder
                                                                                ,
         where you uploaded your Web Photo Gallery (this is not the index page of your site, it is the index page of your Web
         Photo Gallery catgory such as “landscapes”). For example, if you are making a rollover button for your landscapes
         photography gallery, your destination URL should be: images/landscapes/index.htm


         You will want to do this for each gallery category you have in your portforlio. Save your page, and you are done!
         Next month we’ll have a look at how to create another style of portfolio, and some additional options for your site.
                                                                                                                                                        Page 46


      This article and all images contained are Copyright © are courtesy of Victoria Sargsyan. Please contact the author directly with any questions.
PhotographyBB Online Magazine


                                               Corel Paint Shop Pro Tutorial
                                           From time to time we’ll be looking at other post processing software tools,
                                           besides our usual favourites from Adobe. This month, we’ll have a look at a
                                           basic tutorial in Corel Paint Shop Pro.


               CREATING EASY PICTURE FRAMES WITH COREL PAINT SHOP PRO - By Victoria Sargsyan
         Over the past few months, we’ve been looking at how to create picture frames for your digital images, for
         displaying them in your web gallery. We’ve learned how to make image frames in Photoshop CS3, Photoshop
         Elements, and even Photoshop Lightroom... We’re going to take one more look at creating easy web gallery
         image frames for those of us who use another great piece of software, Corel Paint Shop Pro.


         Creating photo frames with Corel Paint Shop Pro is quite easy, and fun I might add. A nice border or artistic frame
         around your image really has the ability to make your images stand out, especially in your web gallery. Let’s have a
         look at how we can create these fast and easy frames.

         Step 1: Open up Corel Paint Shop Pro, and create a new file: File > New... Set the image dimensions to a size that suits
         your web gallery or to your taste.


                                                                                                                                    Page 47
PhotographyBB Online Magazine

         Step 2: Open the image or photo that you will be working with.


         Step 3: Copy your image (Menu: Edit > Copy...) and then minimize the image.

         Step 4: Going back to your new blank file, paste the image by going to the menu: Edit > Paste as a new layer

         Step 5: Using the Pick Tool (k) you can now resize your photo to fit nicely within your document’s dimensions.


                                                                                                                          Page 48
PhotographyBB Online Magazine

         Step 6: Go to the menu: Image > Picture Frame... and from here you can select any frame you desire. I am going to
         use an artistic looking border frame for this example. Click OK.


         Step 7: Always remember to save when finished!


                                                                                                There you have it! It’s a quick and easy
                                                                                                way to create frames and borders in Corel,
                                                                                                which is often overlooked.

                                                                                                Adding a frame or border can make your
                                                                                                image stand out in your gallery, and it
                                                                                                makes for a unique look when creating
                                                                                                gifts like cards or calendars.

                                                                                                Try using frames or borders for the images
                                                                                                or even thumbnails in your gallery page,
                                                                                                which you are creating in Dreamweaver,
                                                                                                the possibilities are endless.


                                                                                                Have fun with your frames!
                                                                                                                                                       Page 49


      This article and all image contained are Copyright © are courtesy of Victoria Sargsyan. Please contact the author directly with any questions.
PhotographyBB Online Magazine


                                                  Member in the Spotlight
                                             “Spotlights” are not only a great way to get to know each other, but they
                                             can also be a creative inspiration to all of us. Each month, we feature a
                                             “Spotlight” on one of our site’s forum members and tell you a little bit about
                                             who they are, how they got started, what their photographic interests are,
                                             and display some of their work.


         THIS MONTH’S FEATURE ON MEMBER: Gareth Glynn Ash
         PhotographyBB is pleased to have Gareth Glynn Ash joining us this month as our Spotlight Member. Gareth has
         been with us as a forum member and avid contributor to the site since June 2008. Gareth is always happy to lend
         his advice on the forums, and likes to share fun and interesting photography related links with our members.
         Throughout this interview we’ll be showcasing some of Gareth’s photography, so let’s get on with it and get to
         know our friend Gareth!


         Gareth, welcome to the PhotographyBB Online                     musician (I want to be Chris Squire when I grow up) …
         Magazine! How about we start with a quick                       pretty ho-hum stuff, actually. Oh, and I make photos!
         introduction for our members - Tell us about                    All of this means I rarely sleep and our coffee tab would
         yourself!                                                       blow your socks off.

         Thanks so much for inviting me, Dave. Well, let’s see:          What photographic equipment and software do you
         I’m 48 years old and was born in Chicago, IL, but               like to use? Do you have a favourite piece of gear
         currently reside in the beautiful and tropical village          that you’ll always bring with you on a shoot?
         of Kenosha, WI. I’m married to a lovely and talented
         lady (a musician) and share quarters with her two sons          As for the nuts and bolts, I’m currently using Canon
         who we affectionately refer to as Chaos and Skippy              gear: Canon 20D DSLR (for now … until my wife let’s me
         (they’re just entering the dreaded teen years). I have          buy the 1Ds MkIII); Canon EF 70-200mm f/2.8L IS USM;
         four (count ‘em … four!) great kids of my own (three            Canon EF 28-135mm f/3.5-5.6 IS USM; Canon EF 50mm
         boys and a girl, all grown now … but they never really          f/2.5 Compact Macro; Canon EF 50mm f/1.8 II; Canon
         grow up, do they?). I’m an AutoCAD Drafter by trade             EF-S 18-55mm f/3.5-5.6 USM; a cheap Quantaray 70-
         (my “day job” until the photography thing pans out). I          300mm f/4-5.6 LD Tele-Macro (which I actually love for
         do some freelance graphic arts and desktop publishing           Macro work); Canon 430EX Speedlight; some extension
         on the side (to pay for all this gear). I’m a very frustrated   tubes, extenders and converters; miscellaneous sundry
                                                                                                                                     Page 50
PhotographyBB Online Magazine


         accessories and filters … always adding on. You know          just can’t tell you what it is in musical terms or play it
         how that is. Next on the list is a really nice wide angle     myself. I can hear a wrong note. I feel the vibe, though,
         lens for landscape work.                                      you know? In high school I had a photography class
                                                                       and I was really getting into it. The teacher told me I
         As for post production I use Photoshop CS3; Adobe             had “An eye for the photograph.” I was really enjoying
         Camera RAW; PhotoMatix; some Alien Skin and OnOne             it … until he brought us into the darkroom. All the
         stuff once in a while … all on a Mac. I’m currently           chemicals made me sick, so I just kind of drifted away
         teaching myself Lightroom, but I’m not sold on it yet.        from it. For years I had no kind of artistic outlet to turn
         Early on it seems like it has some nice stuff, but it looks   to. So, what got me interested in digital photography
         like it creates too many files and it seems to be just one    and how long have I been doing it? It all kind of ties in
         more (or many more) steps in the workflow. We’ll see,         with the next questions, so …
         though … I could just be a doof!
                                                                       In looking through your blog and web gallery, I
         No matter what, I never leave home without the 50mm           can see that you have quite a diverse portfolio.
         f/2.5 Macro. It makes for a wonderful walking around          What’s your favourite photographic discipline? (ie,
         prime lens, for both Macro and general purpose                Portraits, landscapes, concert...) Also, was there any
         photography.                                                  particular inspiration or event which got you started
                                                                       with this style?
         What is your artistic background (ie. self
         taught, school...)? How long have you been into               I’ll answer the second part of your question first and
         photography, and can you recall what it was that              then, I promise, tie everything together.
         first got you interested in digital photography?
                                                                       Yes, there was one particular event that got me back
         As I mentioned, I’m a frustrated musician. I’ve had           into making photos. About six years ago, after we
         various lessons at least five times in my life. I finally     moved to Wisconsin my wife joined a Celtic Rock
         realized I have absolutely no talent. But it’s strange …      band up here called The Sandcarvers (http://www.
         I can “hear” what’s right and what’s wrong in music, I        thesandcarversmusic.com). One of the members
                                                                                                                                     Page 51
PhotographyBB Online Magazine

                                                                       want they say, “Oh, just work your magic,” but then
                                                                       come back and say, “That isn’t really what I was thinking
                                                                       of.” I can — and have — done portrait and wedding
                                                                       photography, and while I think I do a passable enough
                                                                       job — technically — in these fields, I don’t have the
                                                                       patience for it, more with myself than anything else
                                                                       and besides, it’s not really my calling.

                                                                       So, to answer your question, I would definitely say
                                                                       concert and music photography is my favorite. It kind
                                                                       of gives the frustrated musician side of me an artistic
                                                                       outlet that — in all humility — I’m actually really good
                                                                       at. It allows me to translate what I can’t do musically
                                                                       into a visual medium.

                                                                       “But,” you say, “you said that you don’t play well with
                                                                       others. How does that work?” Well, yes, I am working
                                                                       with other people when I’m doing concert work, but
                                                                       all I have to do is stay out of their way and out of the
                                                                       way of the audience (not an easy task at times). After
                                                                       that, it’s just a matter of listening to the music while
                                                                       shooting and anticipating things. The band is free to
                                                                       pursue their artistic expression while, at the same time,
                                                                       I’m free to pursue mine. It’s almost as if the bands and
                                                                       I feed off of each other’s artistic energies sometimes.
                                                                       I love capturing those “Rock ‘n’ Roll moments.” I love
                                                                       capturing the artists and all of the emotions they’re
                                                                       pouring out to the audience. If I can make the bands
                                                                       look good … then I look good as well. So it’s a nice give
                                                                       and take kind of thing on all of our parts.

                                                                       Over the years The Sandcarvers have been gracious
                                                                       enough to allow me to hone my craft and eventually
         mentioned in passing that it’d be great if they had some      become their “official” photographer, So, I owe them
         photos of their first gig with my wife and asked if I could   a huge debt of gratitude. Over the years, people
         take them. The flame that I snuffed out
         back in my teens was suddenly sparked
         again. I said “Sure, I’ll do it.” At the time,
         I didn’t even own a camera! I borrowed
         a cheapo point and shoot from work to
         do the gig. After looking at the shots I
         thought, “These are really rough, but I
         think I might be on to something here.”
         They continued to allow me to shoot
         their shows, I eventually got my Canon
         DSLR … and the beast was unleashed.
         So, yeah, so far it’s been all self taught,
         although I’m primed to take some college
         photography courses … just to make it
         official, and all.

         As for my favorite discipline? Well, I’ll be
         the first to admit that I don’t really play
         well with others. I don’t feel comfortable
         at all “directing” people. I become very
         annoyed with people who ask me to take
         photos of them and when I ask what they
                                                                                                                                   Page 52
PhotographyBB Online Magazine


         like JJ McAuliffe (McAuliffe’s Pub - http://www.              Do you have any photographic achievement (or
         mcauliffespub.com); John Bowles (PaddyRock Radio              image) which you are most proud of? What are your
         - http://www.paddyrock.com) and bands such                    plans for the future of your photography?
         as Strange Land (http://www.strange-land.net),
         Kopecky (http://www.kopecky.8m.com), The Young                Yes! But I can’t show it to you right now. It will be
         Dubliners (http://www.youngdubliners.com)… so                 appearing on the new Strange Land album I mentioned,
         many others as well, they’ve all been instrumental (no        so for the moment it’s all very hush-hush! There’s also a
         pun intended) in my development as a photographer,            shot of my wife that I took this past weekend (8-2-2008
         so I must thank them all. I couldn’t have gotten this         - still waiting to be processed) at the Iowa IrishFest
         far without their help and encouragement. In fact, I’m        (http://www.iowairishfest.com) that I absolutely love.
         currently wrapping up the artwork with the boys from          Can I show these to you at a later date?
         Strange Land for their upcoming album titled Catharsis,
         so I’m really excited about that. The music is simply
         killer, so I hope the photos are half as good! This will be
         the second album I’ve collaborated on, the first being
         Dealin’ Craic (http://cdbaby.com/cd/sandcarvers2)
         by The Sandcarvers.

         I’ve realy been quite lucky and very grateful for
         everything that has come my way … despite a bump
         or two in the road along the way.

         To wrap up this long-winded answer (I do that a lot
         … just ask my wife!), I like to think I’m pretty good
         at Landscape, Macro, Street & Architecture, Still Life,
         Nature and Abstract work as well. Whether anyone else
         thinks that, well …
                                                                                                                                   Page 53
PhotographyBB Online Magazine


         My plans for the future? Well, just getting better,           the quickest way to give up on photography entirely.
         learning more and being more creative goes without            Ask for help, advice and criticism. Don’t be afraid to
         saying, I suppose … and the whole school thing. But           make mistakes and when someone tells you, “This
         truly, I’d like to work on that patience thing I was          sucks,” listen to them, because it probably does! Don’t
         talking about. I’d like to get to the point where the         believe every grand and glorious comment posted to
         mother of the bride can yell at me, “Where’s a shot of        your photos on your site or bulletin boards. If you look
         Aunt Mable?!?!” without me saying to myself, “I’m never       at it again, you’ll find something you can do better
         doing this again!” This might be more for life in general     next time. Don’t get too full of yourself. If you got it
         than simply just photography, but hey …                       right this time, chances are there was at least a small
                                                                       element of luck involved, if not a large element of luck.
         Then again, if Rolling Stone would just pick up the           When you’ve done all that… Shoot some more!
         phone …
                                                                       Thanks, Dave. This has been a blast!
         Do you have any advice to share with the members
         who are either just getting started with digital
         photography, or for those looking to take their
         photography to “the next level”?

         Yes… Shoot! Shoot… shoot… shoot… and then shoot
         some more! Take your camera with you at all times and
         try — as much as possible — to work with a prime lens
         while you’re out and about. It’ll force you to frame and
         compose without relying on the zoom. Figure out what
         genre you enjoy shooting, develop your own style, your
         own voice, your own vision. Try every day to hone that
         style, to listen to that voice and to see that vision, even
         if you’re making no money (or never will) from it. Don’t
         try to force yourself into a niche you don’t enjoy. It’s
                                                                                                                                   Page 54
PhotographyBB Online Magazine


         What’s Happening:
         The PhotographyBB
                    Forums
                   PHOTOGRAPHYBB: PHOTO CHALLENGES COULD PUT YOU IN NEXT MONTH’S ISSUE!

         Photography Assignments for YOU...
         We’ve just launched two exciting new challenges this past month in the forums. The first of which, is the Photography
         Assignments Challenge. Every two weeks, we “assign” you with a new photographic theme. It’s then your task to bring
         your cameras out, and challenge yourself to break free from your normal photographic style and comfort zones, by
         shooting for the assigned theme. This challenge has become quite popular among the members, and it’s a great way
         to learn new techniques, gain knowledge and inspiration, and to really push yourself photographically.

         The top 3 photos which best represent each assigned theme will be published in this magazine! At the end of the
         year, all of the top 3 winners’ photos will be re-evaluated, and one grand prize winner will receive a prize! See the
         forums challenge section for further details.

         Seeing with a Macro-Eye
         No, that’s not superhero-speak! That’s what our new Macro Challenge room is all about. Our resident moderator,
         Kenneth Fagan, is running the macro challenges where each week he’ll be posting a macro photography image, and
         you must try to guess what is being shown in the photo. This one’s purely for fun, but you’ll be surprised when you see
         just how difficult it is to see with your “macro-eye.”

         Members are also free to submit their own macro photography images to be used in the challenges. See the Macro
         Challenge room for further details.

         These are just some of the new features of the forums, however, you’ll still find loads of hot photography tips & tricks,
         tutorials, great discussions and debates, and most of all... the friendliest photography folks on the web!
         Happy Photographing, and we’ll see you on the forums.


             Visit the PhotographyBB Forums and participate today!
           http://www.photographybb.com/forum/
                                                                                                                                    Page 55
PhotographyBB Online Magazine


          Photography Assignments
         Challenge Winners!
         PHOTOGRAPHYBB PHOTO ASSIGNMENTS CHALLENGE #1: MOTION
         The assignment for this first challenge was for members to go out with their cameras in hand, and capture our given
         theme of “Motion” in a still image. Thanks to all of the members who participated, the race was extremely close
         between so many of the submissions, and EVERYONE hit the mark with their submissions. Everyone is welcome to
         participate, so visit our forums and join in the photo-fun. The top 3 chosen photos for Assignment #1 are:


                                                                “Zero Gravity” Photo submitted by member Alan Plummer (Cardmnal)


                                Photo submitted by member Dot Radley            “Female Ruby at Black & Blue Salvia” by Greg McComsey (GregM)
                                                                                                                                                Page 56
PhotographyBB Online Magazine


         Step into the Spotlight!
         Would you like to be featured in the PhotographyBB             Have a Great
                                                                         Idea for a
         Online Spotlight on Member section? If so, please let
         us know at: magazine@photographybb.com


                                                                        Photography
         We’ll feature your photos, a small biography and write-
         up about you, as well as links to your web gallery or
         photography related business. We all love photography
         and image editing, so let’s get to know each other!
                                                                          Article?
         Next Month’s Issue:
         Next month we’ll be wrapping up our HDR series with          We are looking for
         some more advanced processing techniques. We will
         also be having an in depth look at some of the new
                                                                     talented individuals
         features in Adobe Photoshop Lightroom 2.                     who would like to
         Next Month in “Photography Around the World”
                                                                   expand their portfolios
         we’ll be off to another new and wonderful place to           by volunteering to
         photographically explore. Stay tuned for coming issues
         as we travel the globe!
                                                                    contribute articles to
                                                                   this e-magazine! If you
         This month we had a great series of tutorials, and next
         month we will be continuing the trend. Since many of
                                                                     are interested, we’d
         our readers are starting to shoot with DSLR cameras,      love to hear from you.
         we are going to take a look at Lightroom 2, and RAW
         image processing. Of course we’ll still serve up a nice
         plate of Photoshop, Elements, Dreamweaver, and            Topics of Interest are:
         another Corel Painter tutorial to wet the appetite!
                                                                   -   Photography Techniques
         Discounts for Readers:                                    -
                                                                   -
                                                                       Photography on Location
                                                                       Photoshop Tutorials
         The Photomatix Pro 15% off coupon was HUGE last           -   Hardware / Software Reviews
         month, so we’ve managed to extend it to our readers       -   Camera Equipment
         for yet another month. If you are considering HDR         -   Member Spotlight
         photography, you can save 15% off the leading HDR         -   Plus we’re open to new ideas!
         software, Photomatix Pro by visiting us at:

         http://www.photographybb.com/hdr/                         To become either a regular
                                                                   contributing author, or even
         and use the coupon code: photographybb.com                just for a one-time article,
         for a special discount. Also, check out the Shop          please email us at:
         PhotographyBB site for links to some great deals on
         cameras and accessories. Best deals on the web!
                                                                   magazine@photographybb.com
         Thank you for reading the PhotographyBB Online
         Magazine. We hope you enjoyed it, and we’d love to
         see you again next month. If you have any questions or    Introduce yourself, share your
         comments for us regarding this magazine, please feel      idea, and maybe we’ll see you
         free to email us at:                                      in next month’s issue!
         magazine@photographybb.com
                                                                                                       Page 57

Photography bb 7

  • 1.
    PHOTOGRAPHY TIPS SPOTLIGHT ON IMPROVING YOUR IMAGE EDITING AND TECHNIQUES PHOTOGRAPHER DIGITAL WORKFLOW TIPS & TUTORIALS PhotographyBB ISSUE #7 - August 2008 online YO U R G U I D E T O T H E W O R L D O F D I G I TA L P H O T O G R A P H Y LIVING IN London! Understanding Curves: Our series on curves continues with a look at color correction a photographic journey by Khara Erickson Photography 101 - Flower Power Kenneth Fagan shows you tips for: BETTER FLOWER PHOTOGRAPHY! The Classic Art of Black and White Jon Ayres talks portraitures in BLACK AND WHITE - PART II Corel Paint Shop Pro and Dreamweaver Tutorials! By Victoria Sargsyan Plus: Photoshop®, Elements®, Dreamweaver®, and Lightroom® Tutorials!
  • 2.
    PhotographyBB Online Magazine From The Editor’s Desk Dave Seeram is the Editor in Chief for PhotographyBB Online Magazine. As the administrator of the PhotographyBB Website and Forums, Dave is also an experienced author of several Photoshop® Actions and Tutorials which can be found on http://www.PhotographyBB.com PhotographyBB Online Magazine Seventh Edition - Lucky 7 L ucky 7! That’s how we see it here at PhotographyBB. Thanks to you, our readers, we are proud to be on our 7th issue this year. It’s been another busy month here, especially in the PhotographyBB Forums where we’ve seen tremendous growth in new member registrations, and traffic has been higher than ever. I would like to think it’s due to the new improvements and challenges we’ve implemented on the forums. For those of you who have not yet had an opportunity to check these out, these would be the Photography Assignments Challenge - where every 2 weeks we “assign” a theme to be photographed. The top 3 photos from each assignment will be published in this magazine for everyone to enjoy. The other challenge, implemented by our friend and moderator Kenneth Fagan, is the weekly Macro Challenge. Drop by the forums and say hi, participate in the challenges, learn from the tutorials and discussions, and by all means... have a great time. Looking into this month’s issue, we’ve got some of the new and the familiar. Beginning with our continuing series on darkrooms, Ken Fagan shows us how to build your own darkroom! Additionally, Ken will show you just what to look for when purchasing a new camera battery, if you need a new camera battery, and how to care for your camera batteries. He’s also teaching us techniques and tips on how to shoot flowers, in our Photography 101 guide. I am very happy to say that I’d like to officially welcome John Ogden as new member of the team. John was kind enough to begin a series on Lightroom processing last month, and he’s back to continue his series with a look at creative uses for Lightroom. He’s also giving us a brief introduction to Lightroom 2, which he will cover in more depth in next month’s issue. Welcome John, it’s a real pleasure to have you on the team here. Our other Jon (Jon Ayres) is also continuing his series on black and white photography, this time from the perspective of portraitures. Fred McWilson is now on part 3 of his fantastic 4 part series on HDR photography, and Victoria Sargsyan brings us something new this month with a tutorial on Corel Painter. Additionally, in our Photography Around the World series, Khara Erickson takes us to London for a unique look at one of the world’s most spectacular cities. Last but not least, Gareth Glynn Ash joins us as our “Member in the Spotlight.” I had a lot of fun with this interview; you are all going to get a kick out of this one! I’d like to close by thanking everyone who takes the time to write in and comment on the magazine. Our team of volunteers all work extremely hard to produce a quality publication (at the best price - free). I am always on the lookout for new articles and ideas, so if you - our readers, feel that you have what it takes to contribute a quality article - please email me at magazine@photographybb.com and I will be most happy to listen to your ideas. Thanks for making this not only a success, but a worthwhile success. On with the show! Dave Seeram Editor and Publisher Page 2
  • 3.
    PhotographyBB Online Magazine PhotographyBB online YO U R G U I D E T O T H E W O R L D O F D I G I TA L P H O T O G R A P H Y Contributing Authors CREDITS EDITORIAL: DAVE SEERAM is the creator and administrator of the Dave Seeram, Editor in Chief PhotographyBB Online Website, and the PhotographyBB Kenneth Fagan, Creative Concepts & Content Forums. Dave is also the Editor and Publisher of the PhotographyBB Online Magazine. Dave is a digital photography Victoria Sargsyan, Creative Concepts and Design enthusiast, and loves shooting landscapes and architecture in Priscilla Ko, Creative Concepts and Design his spare time. Additionally, he has several years of formal train- ing in both Adobe Photoshop® and Quark Xpress®. WEB TEAM: Dave Seeram, Web Design & Publishing, Admin KENNETH FAGAN is a photographer extraordinaire based in Kenneth Fagan, Site Moderator, Challenges Admin Meath, in the Republic of Ireland. Ken graduated with a profes- Victoria Sargsyan, Site Moderator sional Diploma in Photography from the Focal Point School for Visual Arts in Vancouver. His specialities are product and food PUBLISHING: photography, but he is also skilled in fashion, sports and land- scapes. Ken works with many camera formats including, 35mm Dave Seeram, Publisher & Author pro digital and film SLRS, medium format, and 4x5 large format. Jon Ayres, Contributing Writer Kenneth Fagan, Contributing Writer, Proofreading Victoria Sargsyan, Contributing Writer JON AYRES is a digital photographer from the United States, Fred McWilson, Contributing Writer now living in Moscow since August 2003. He enjoys photogra- phy, writing, history, and taking beautiful scenes of Moscow on Jason Anderson, Contributing Writer his walking photo-tours. Jon has been involved in writing, digi- tal art and photography for over thirty years and is a published ON THE COVER: author having several articles and photos published. Dave Seeram, Cover Layout and Design Priscilla Ko, Cover Design & Consultation VICTORIA SARGSYAN is a professional graphic designer Cover Image, Courtesy of Khara Erickson with over 15 years experience. Her favorite software tool is Adobe Photoshop, and additionally, she is experienced in Il- lustrator, CorelDraw, Freehand, Lightroom, Adobe ImageReady, Flash,HTML, Dreamweaver, Motion Artist, Anime Studio, Poser. HOW TO CONTACT PHOTOGRAPHYBB ONLINE: FRED MCWILSON is a photographer and Photoshop-wizard from southeast Missouri. We’re pleased to have Fred with us If you would like to contact PhotographyBB Online, as a Photoshop tutorial and HDR column author. Some of his please email: magazine@photographybb.com or write: hobbies other than Photoshop and photography are caving and paintball. PhotographyBB #331 - 6540 Hastings St. JOHN OGDEN is an award winning London based digital Burnaby, B.C. V5B 4Z5 artist and photographer. John lectures on Photoshop CS3 CANADA and Lightroom to adult learners in Further Education, is an Adobe Certified Instructor, and member of NAPP. ARTICLE SUBMISSION: To submit an article, or to request an article submission, GUEST CONTRIBUTORS THIS MONTH: please email magazine@photographybb.com with your Khara Erickson joins us in “Photography Around the World” , name, email address, and a brief description of your for a unique look at the spectacular city of London, England. article and ideas. We look forward to hearing from you. Page 3
  • 4.
    PhotographyBB Online Magazine Before There Was Digital... Before the days of digital photography and still today, the art of developing film has been regarded as a skill in a class of its own. In this continuing 3- part series, we’ll take a look at the world of darkroom processing in an effort to both challenge and inspire those photographers who are willing to try something new and have fun in the process! DARKROOM DELIGHTS PART II: BUILDING YOUR OWN DARKROOM LABORATORY - By Kenneth Fagan Last month, I gave you a step-by-step introduction into dark rooming by showing you how to successfully develop your own black and white film. If you have suddenly been bitten by the darkroom bug, you may be tempted to go a little further and start printing your own black and white photos. To be able to do this you will require a few extra tools to be added to your list from the last day. In this issue I will guide you around building your own simple and compact darkroom no bigger than 24 square feet. That is a tiny six foot by four foot floor area - A space which many of you may be able to give up for a darkroom, whether it be in the form of your attic, a garden shed or even a small corner of a room in your house. I managed to build one in my bedroom, and today I am going to show you how you can too! B uilding a darkroom can be as simple or as complicated as you wish, a simple dark blanket over your bathroom window can do the trick for many. However, what if you wanted something a little more personal at relatively low cost? If you are an avid DIY’er, this project could be one for you. The basic needs of a darkroom consist of the following: Four walls that let in absolutely no light, a door which doesn’t allow any light to enter the lab, a worktop, and most importantly some ventilation. They are the things that are vital to let your darkroom work for you at the most basic level. For this project I will guide you through it in two phases, 1: Construction and 2: Installations. Phase 1: Construction The construction of this darkroom is a simple wood frame construction, sheeted on the exterior with sheetrock (or plasterboard). If you are using an existing wall for one or more sides you will not have to do as much work and you will need fewer materials. For the lab I built, I used two existing walls so it cut down on both labour and cost quite a bit. First I began by constructing the frames from 4”x1.5” lumber, butt joining them together using 4” wire nails for strength. You can plan the height of the ceiling in your lab according to your own height or to the height of the existing walls around it. In some cases you will need to build a ceiling (if Page 4
  • 5.
    PhotographyBB Online Magazine you are not using one that is already there, a frame The door is a very important part of the darkroom, complete with an entry for a door, and the other sides. the reason being is that it is the most likely part to cause light leaks. The best way to construct a door by simple Each frame structure is started by building a square means is to measure the square in the frame where the from four pieces of 4”x1.5” then inserting battens into door is going to be placed, Construct a frame to fit into the frame about every 16” or so. See the basic layout that but allow a very small bit for the door to easily plan for the frames to give you an idea of what way open and close. Cover the interior of the door with a they have to be constructed. The actual dimensions sheet of plywood cut for it to over-hang the frame by are at your own discretion depending on how big or about 2” (this helps stop light leaks from entering, as small you want your darkroom laboratory. light travels in straight lines). Leave the plywood on the hinge side flush with the frame. The door once hung will open inwards; I used two rather ugly tee hinges to hang the door because if I used flush hinges there would be every possibility of a greater chance of light leaks occurring. To further prevent light leaks, with the door closed fully, secure a frame of wood the same dimensions as the doorframe, this will stop light from entering where the small gap is between the door and the doorframe. Once that is finished place a bolt on the inside of the door or any other mechanism to keep a door closed to allow you to work in your darkroom with the door safely shut. Example of wall frames. Example of wall frame with door entry. Once you have all the frames complete, it is time to Once the darkroom is fully covered with the assemble them together. This must be completed at the sheetrock, and the door is hung correctly, seal up all location where the lab is being placed. The frames are the gaps where light is getting in with brown silicone simply butted and nailed together and secured to an sealant (the reason I suggest brown it that white existing wall if there is one. I used some 2” ‘L’ brackets silicone does not fully seal the light out where brown to fasten it to the wall. Once you have the frames all does the job very well). assembled and stitched together you can proceed to the sheeting. I used some 4’x2’x1/2”plasterboard or There you have the main construction of the sheetrock, to cover it up on the exterior of the frames. darkroom, now its time for you to move inside it and Do not forget though to leave the area in the frame for install the worktop and various other bits and pieces. the door open. So now we move onto phase 2. Page 5
  • 6.
    PhotographyBB Online Magazine Phase 2: The black outlines in the image shown are the position in which each piece of wood is placed to The interior, worktops, and installations. construct the worktops frame. The worktop should be securely fitted, as it will have to bear the weight The next step is to install the worktop. If you decide of water and other liquids and equipment. For the to build a darkroom as small as I have (6’x4’) I suggest surface of the worktop it is desirable to have a water for the best layout, to maximize the amount of work resistant material such as rubber covering the surface. space you have, is to have the worktop in an ‘L’ Shape On the other hand if you are only going to use your as shown in the image of the plan bleow. darkroom once or twice a week, if you can salvage some laminated tongue and groove ¼” MDF flooring boards it will do the job fine once you fully dry any spills on the surface that may occur. I used some spare floorboards for my worktop surface and it has served me well through the years. Position the worktop at a comfortable working height, putting into consideration that you may be standing over it for an hour or more at a time so it is important that you do not have it too high or too low. To build the work top, simply secure one piece of lumber across the length of the back wall of the darkroom, the same wood you used for the frames will be fine (4”x1.5”) and construct the frame of the worktop as in the plan shown below: Spare floorboarding makes for a great water resistant countertop. Once you have the worktop installed you will be able to put the finishing touches to the walls of your darkroom. It is a common myth that darkrooms must be painted black, in fact this is most certainly not the case, the inside of your darkroom must be painted white for reflecting the infra red light (black absorbs light) and it also allows you to see what you are doing when you are working under the dimness of the IR bulb. The last thing you need to do is have some power to light up an infrared and a standard light and the enlarger. I installed some wall sockets and switches but I recommend that you either simply use an electrical extension lead to get power from the mains from another socket (I actually used this method as I am not an electrician and I did not want to be zapped). Do Page 6
  • 7.
    PhotographyBB Online Magazine not attempt to play around with electricity to power At this point you should have a complete darkroom your darkroom, unless you are qualified to do so, if set up, I don’t have running water in mine (I rather fill not get someone who is to hardwire your darkroom bottles…less messy and space saving and I don’t use responsibly. You can control the temperature of it enough to be worth it, besides that electricity and your darkroom with a small fan heater and a room water never get on very well together anyway). thermostat, and to remove any smells you can install an extractor fan, which I recommend to be all installed by This article is not intended to be a step by step a professional. See the image below of how I positioned guide on how to build your own darkroom, rather a the fan ducting to allow air out but not light in, and the glimpst into how I built my own personal darkroom. same applied for the ceiling ‘air in’ ventilation. Please look at all the plans that are with this article as well as the photos, they will give you some ideas as to how you can build your darkroom. Tune back in next month and I will show you how to accessorize your darkroom with enlargers, trays etc and being the final part of the three part darkroom series I will go through how you can begin printing your own black and white photos. Ceiling air-in ventilation to allow for fresh air into the darkroom. Fan ducting for air-out removal of fumes and chemical smells. A peek inside my self-made darkroom! Safety Precautions: Working with electrical tools should be done with proper knowledge and care. Do not rush at anything and always wear protective gear such as goggles and dust masks where necessary and keep your work area tidy. It is advised that you seek a professional to make and electrical and/or pluming installations in your darkroom. All sockets and switches must be build according to codes within your municipality, and additionally must be waterproof and/or placed higher than the area where there will be liquids. When working with paint and sealers etc… always ensure that you have good ventilation. Neither I, the author of this article, nor the Publisher/Editor of this magazine hold any responsibility or liability for damage, injury, injury causing death, shock and all other consequences which occur due to malpractice, carelessness or lack of experience or otherwise. Accidents do not just happen they are caused. This is a project designed for amatuer builders with some prior building experience. Please undertake the construction at your own risk! Page 7 This article and photographs contained are Copyright © and courtesy of Kenneth Fagan. Please contact the author directly with any questions.
  • 8.
    PhotographyBB Online Magazine Black & White The Classic Photography Art Part II - By Jon D. Ayres The Art of Black and White Portraitures L et me begin by stating that this article, camera. Or W. Eugene Smith, who also like most of my articles, is aimed towards became one of photography’s legendary the amateur and hobby photographer. photographers. He was, undeniably, one of Professional portrait photographers have the greatest photojournalists of the 20th to pay close attention to several things that century whose work included the “Country often can be overlooked by hobbyist. Things Doctor” “Nurse Midwife” and “Man of Mercy, like studio setup, lighting, backgrounds are which portrayed a back-woods midwife and important for the pro portrait photographer, Dr. Albert Schweitzer.” These photographers but not to the degree that it is, or should be, became famous for their hard work, sacrifices, for the hobby photographer. This article is experimentation and never giving up. If they mainly for the hobby photographer taking can do it, why can not we? portraits of family members, friends, or even strangers under different situations that I think Just why are black and white portraitures should be taken into consideration in order to so good? Well, to be honest, not all portraitures get some great black and white portraits. I and photos, whether they are color or black and tend not to like mentioning camera settings white, are good just like not all photographers because each situation requires something are good. It is the photographer who has taken different, plus the best photos come from the time to learn not only about photography, trying something new. Camera settings you but also how to use their camera to its fullest should learn on your own by taking a class or that takes great photos and portraitures. reading a good photography reference book. But why are black and white portraitures so I tend to not be a big believer in set rules or interesting? For many reasons - Each person settings; I’m always willing to try something has their preferences and reasons for liking new. Now that I have my disclaimer out of the or not liking something. I grew up in the 60’s way…On with the show! and 70’s, and as a child almost everything I watched on TV was in black and white, even Portraiture art has been done throughout the cartoons. I remember the photos my mankind’s history. Since we lived in caves, father took with a black and white Poloroid throughout the Ancient Greek and Roman camera. Celebrities were people admired and civilizations on through when Rembrandt, respected, and the black and white photos of Leonardo Da Vinci and James Whistler painted celebrities had style and class. So I guess you their famous portraits. Continuing on up to can say I like black and white photos because the present when Alfred Eisenstaedt became they bring back good memories, dreams of my famous for the photography he did for LIFE youth. Generally, the same things that apply Magazine when he started photographing to color portraits also apply to black and white for the magazine in 1935. His work included photos with maybe a little alteration every 86 covers and over 2500 assignments for now and then. LIFE including photographing royalty to movie stars, from scholars to diplomats and everybody in-between including John F. What Makes a Good Black and White? Kennedy, Albert Einstein, Marilyn Monroe, and Winston Churchill to name a few of Black and white photography is as much the celebrities captured by Eisenstaedt’s about contrast, tone (shades of gray,) texture, Page 8
  • 9.
    PhotographyBB Online Magazine photos in black & white that were all only about light and shadows and how they fell across the object in the image. You have to work a little bit harder when you are looking to make a black and white photo, because there is no color to distract your eye, there is so much more to take into consideration. Now that we know what makes a good black and white photo, let’s take a look at what I consider important considerations which help make a gallery quality fine art portrait. Just what makes a good portrait? I noticed once on a forum where somebody asked, If this photo of kids skating had been in color, your eyes would have “Just what makes a good portrait photo?” Somebody tended to wonder around the photo. With it being black and white, the answered, “That question was a very subjective viewer’s eyes focuses right in on the skaters. question, you have to take a lot into consideration,” and I agree fully with that answer. Good photography of any type takes thought and planning. Will the detail and composition as color is to color photos. photo be color or black and white, what do you want Oftentimes, many photos just do not make good black your photo to say, what do you want your viewers to and white photographs because color is what makes see, what settings will be best for the given situation, the photograph special and why the photo was taken. are some of the things you have to give consideration For example, sunsets are not often portrayed well as to if your going to take a good portrait photograph. black and white, nor does a field of wildflowers look as But just like the old saying, “Beauty is in the eye of the nice in black and white because color is part of what beholder,” holds very true in photography. makes the photo special. But sometimes there is just so much more to an image than only color. Black and white I do not believe in rules, per say. Sometimes rules can make the viewer study the image longer, because are important (like the rule if thirds usually works well usually there is just so much more detail to examine for black and white portraitures), but believe it or not, in a black and white photo. A black & white photo of a often times all it takes is nothing but luck, the wiliness single flower brings out details that would be missed to experiment and try new settings, and the patience to if the image was in color and causes the viewer to take make good portraits - not rules. Some of the greatest time to look at the pollen on the stamen, the veins in photographs ever taken have come from people who the petals, and how the light hits the flower. Street bent the rules for their own purposes and intentions, photography and especially street portraitures works so don’t be scared of experimentation. especially well in black & white, because your attention is always drawn to what is actually happening in the Good portraitures show the sprit of the subject scene and how the people are interacting with their photographed to the viewer. A good portrait will surroundings and with each other, which should be why the photo was taken in the first place. Strong texture works well in black and white; the grains of sand on a sidewalk, the grain found in the wood of an old wooden bench, or the texture of tree bark, fog, rocks and close-up shots of leaves, plants, flowers and fabric, to name just a few of the different things with strong textures. Reflections found in puddles or other still bodies of water or windows also work well. Black and white portraits are especially effective in conveying emotions, age, wisdom or knowledge, because when you take the color out of the picture, these things become more noticeable and you actually end up putting more color in the photo when you take well thought out black and white photos. Light; the intensity or lack of it, the direction it’s coming from and the quality of it, become much more noticeable You haven’t been to a McDonalds until you go to a McDonalds with a in a black and white image. I have seen some very fine view like this! See how well back and white works with this photo. Page 9
  • 10.
    PhotographyBB Online Magazine contain at least one element which shows the subject’s personality, attitude, special mannerisms or any of the other features or personal traits that form the individual’s personality. In quality portraits in which the subject is facing directly to the camera, the eyes of your subject will be what the viewer will focus on first; everything else in the frame can be out of focus, but if the eyes are well-lit and focused then the viewer will have an area to focus their attention on. An old saying once stated that the eyes are a window into the soul, and this is same for face-on portraitures; the eyes of your subject are the widow that opens the photograph completely to the viewer. It is rare that I shoot posed shots, preferring to shoot candied shots better, but when I do shot posed Artists are one of my favorite subjects to photograph; these two shots, I remember the expressions and poses I see and art students at Kolomenskoye park were two of my first artists I sometimes ask my model to use these expressions and photographed when I came here to Russia. poses. The successful portrait photographer must study people they do not know in order to capture A big part of portrait photography, especially street their true feelings. This involves watching for signals in portraiture photography is having an understanding of a subject’s mannerism, reactions, expressions and body human nature, how people react to certain situations, language. Then the photographer should be able to events and stimuli. Pay close attention to the location decide how best to capture the subjects feelings and your at. You’re in a café - people generally look up character with the camera. Being a people watcher when a waitress comes up. Everybody loves children will help you to learn how to sense what people will do, and babies - they smile when one passes by. A siren this will help you to get some great street portraitures. goes off - everybody looks toward it. Pay attention to Photographer Elsa Dorfman has a belief that I agree the situation and be ready to get the photographs you with whole heartedly, be interested in your subject. are looking for. Elsa cares about people. She is genuinely curious about people and she has never met a person that Personally, I’m not a very bid fan of portraitures she could not connect with in just a few minutes. If shot in a studio, they just seem too unnatural and you are so busy photographing that you can not care unreal to me. Professional models are like actors and about the people your photographing and then do actresses, they know how to fake a look or emotion, not even bother trying to take their photos! Many but most of us never get to shot professional models. photographers forget that their own personalities It is always important to make your subjects feel at ease are expressed in the photos they take, more than the when shooting portraits. Sometimes a shot has to be photographer realizes. posed, but if it is a posed shot, then being in a real and natural environment will help make for gallery quality portraitures in my humble opinion. The more artistic views that the photographer has, the more natural the shot and more relaxed the subject will be. Backgrounds are important in portraiture photography; it should give your subject personality. For example, some photographers believe that the background of your portraiture should be blurry; Sometimes yes, but the background can also be part of the scene. If you have your photo taken standing in front of St. Basil’s Cathedral, you want people to see where you have been, and it is the same with portraiture photography. The background can be as much a part of the photo as it can be a distraction. The scene can make or break a photo. Care for a ride in my new wheels? Sometimes color can be a distraction. There are two types of black and white portraitures: I think black and white suits this shot better than the color version. Posed shots where the subject is fully aware that their Page 10
  • 11.
    PhotographyBB Online Magazine for a person to want to know why you’re taking their photo. Be honest with them! If a person objects, then show them you’re deleting their photo. Photographer’s rights do not take preference over another person’s rights, and if they do not want to be photographed, then that’s their right. As we already know, candid’s seek to be something like a fly-on-the-wall that catch people going about their day to day activities seemingly unaware of the photographer. Another of my favorite types of photography is candid portraits WITH the subject’s permission, when the photographer is actively engaged with the subject and the subject is conscious of the photographer and photos are being taken. In consensual candid’s, the relationship can be either obvious with the subject looks directly into the camera or subtle with the relationship is implied because the image feels more intimate. We sense that the photographer was physically close to the subject and that the person was aware that they were being photographed. Black and white works very well for street portraitures. When shooting portraits always be on the lookout for those special moments when a person’s character photo is being taken, and candied shots where the comes shining though. I remember once a friend asked subject has no idea that they are being photographed. me to take some portrait shots of her so she could Each type of portraitures have their place, I have done send to her boyfriend in the army. She stopped by my both, but generally prefer candied shots because they apartment where I had two cameras setup in my living are more natural and show the subject’s true feelings room. One camera was set to take shots from her waist and emotions. My favorite type of photographs are up and the second camera set to take shots from mid when I take photos of people going about their day chest to a little over her head, unbeknownst to her, I to day business such as vendors in a market, a crowd had two remotes attached to the cameras and the on the street, a policeman/woman on street patrol or sound shut off on the cameras. While she was putting people sitting in a bus or subway. You want them to on her makeup, brushing her hair, and chatting about appear that they are unaware of your camera. You want things and joking, I was taking photos of her. Then I the viewers of your photo to feel that they are viewing said, OK, we’re through! She was kind of surprised, so an unguarded view of the subject photographed. I showed her the photos I took and she was amazed. Why? Because every shot I had taken were completely There are several ways to take natural candid natural and not posed. She said that those photos photographs. Find your chosen spot and wait for were some of the best she had ever had taken of her. everything to come together in the way you are When you are photographing street scenes or street looking for. One of the best lenses for candied portraitures, be on the lookout for special expressions street portraits is telephoto lens; it will help you to on people’s faces like the impatient expression on a take completely natural scenes of people, their true pedestrian’s face as he waits for the light to change. thoughts and feelings. People on the street and in Always be on the lookout for that special moment. public can be photographed freely and in any manner Every person has a story, and every picture should tell the photographer chooses, it makes no difference that story. Remember when shooting strangers like whether you’re using a 50mm lens and being up close when your doing street portraitures, you either get the and personal or a 400mm telephoto lens and standing shot or you do not, there are rarely second chances. far away. If they are in public and on the street, you can photograph them in any way or manner you choose to. With regards to posed portraiture photograph. in There is, however, a right way and wrong way of doing my opinion, doing them on location is better than in things. Most of the time people really will not even a studio. Being on location helps to put your subject notice you, and if they do, they usually will not mind at ease and relaxed. Most portraits are about people you taking their photo. But you have to use common with the modern exception of pet portraits or wildlife sense and always try to avoid trouble. It’s only natural portraits, but portraits of people are still the main area Page 11
  • 12.
    PhotographyBB Online Magazine café, bar, street or even a widow sill can offer a setting that not only puts your subject at ease, but many times provides a scene that just can not be done in any studio. The locations in which you make portraitures are important because they add to the viewer’s understanding of your subject. The room where your subject lives or works, their home or apartment, the street they live on, the places where they relax of play (adults do play), these locations gives information about the subject and if your portrait is true, it will tell the viewer something about the subject’s life. Sometimes portraitures with detail are better than portraits with no detail. As I mentioned before, sometimes the background is an important part of the portrait. Another of my favorite subjects, street artists. See how clean this photo is. By clean I mean no Composition of your shot and distractions, your eyes go directly to where I want them to, the artist and her sketch. including the background may of portraitures. Portraits shot on location are about be important in your photograph. people and their lives. Portraitures can be about Often time’s portraits are shot from the waist up, what kind of work your subject does and where they showing nothing but the person’s chest, arms that are work. Often times I take street portraits of policemen, cut off, neck and head, a big mistake. Many business firemen, street cleaners, businessmen/women in their executives have portraits done in this manner for some surroundings. Location shooting portraits should reason, but instead of showing class and power, they convey an idea about a person by combining portraiture look like some goofy student because the portrait with a feeling of the location. The location should be looks just like a yearbook photo. Good executive connected to your subject’s life in some manner, their photos would show the executive sitting at their desk, home, a favorite park, their office, a popular site in answering the phone, reading a report, or writing their neighborhood or city, a location that puts them something – including their background elements. in a good and natural mood. Always take advantage Good photographs always tell a story and this is just as of shooting locations, let the location be your studio. important if not more important for portraits. Gallery Often being on location, a local tourist site, riverfront, quality portraitures always tell a story about the subject, just look at famous painting by famous artists hanging in art museums. Every single one tells a story and so should your photos. You will often find that shots taken with the subject not looking directly at the camera are better than the subject staring directly into the lens. A sideward’s glance by the subject or the photographer shooting from a slight angel many times adds a dimension of class or in shooting a female, a touch of romance. Again, do not be afraid to experiment and try new things, that should be the number one rule of photography, at least it is for me. Post Processing I guess it really depends on whether you shoot Police K9 unit relaxing, black and white tends to emphasize the relaxing in black and white or choose to convert to black police and dogs during their break. and white in post processing. There are many good Page 12
  • 13.
    PhotographyBB Online Magazine Street scenes tend to come out pretty good in black and white, here is a three horse wagon that used to be popular in Russia. Your eyes are directed right between the two horses to the driver. programs for post processing your photos and a glamour type black and white. Masculine photos converting them to black and white. I use Photoshop I tend to keep sharp and in focus, something of a and Lightroom for my post processing and black and strong feeling. Post processing is an important part of white conversions because of the almost unlimited photography and always has been important from the options these programs give me, especially Photoshop. start of photography in the early 1800’s when the first With Photoshop I currently use several black and white photos were worked on in a chemical darkroom. I’ve conversion plugins that give me excellent results. seen some posts on various forums where the poster I currently use Black and White Styler, Alien Skin says, “I get it right in the camera the first time, so post Exposure2, Digital Film Tools 55m and Digital Film processing is not needed.” Well, maybe they’re satisfied Lab, Nik Color Efex Pro, Power Retouch Pro, Red Paw with a half done job. A good photo is more than just Media-BW Pro, Silver Oxide, Tiffen-DFX, and OnOne picture perfect settings and technique, its mood and PhotoTools and of course Photoshop itself converts feelings also. Sometimes, moods and feelings can only to black and white. Lightroom is not as extensive a be brought out with post processing. Post processing selection, but it does have a pretty good conversion has nothing to do with correcting bad mistakes with abilities. Of course Photoshop and Lightroom are not exposure, contrast, saturation etc… Rather enhancing the only games in town, there’s Aperture if you use a or amplifying the mood and feelings the photo gives Mac, Gimp, Picasa, Corel Painter Photo and numerous off. Yes, photo mistakes can be corrected with post of other post processing programs. I generally try processing, but even if you take picture perfect photos, and tailor my post processing to the photo; photos post processing is important because it can set or make of women I like to keep a soft dreamy focus, maybe a mood that can not be achieved with the camera. Page 13
  • 14.
    PhotographyBB Online Magazine Once you find the web page with photos taken with your camera model, then you can do a search for black and white photos and you most likely will find plenty, look them all over. Then when you see a scene you want to shoot in black and white, you can view it in your imagination in black and white pretty easy. Next you have to decide whether or not the photo you will take will be better in color or black and white. Some photos are better in color and others in black and white. I always shoot in color and then convert to black and white in post processing and this works the best for me. Of course you have to use the right camera settings for the given situation you’re shooting under. I’ve only mentioned a few things that I consider important when shooting portraitures for you to take into consideration. It would take a book to mention everything about shooting portraitures; in fact many books have been written on the subject of portrait photography. Never be afraid to experiment with settings, composition and post processing. There are no set rules for fine art. Give black and white digital photography a try, either by shooting in black and white or converting in post processing, I think you may be in for a big pleasant surprise if you just try. A Word From the Author: My name is Jon D. Ayres and I’m originally from This photo has an interesting story: I tried to post process it in somewhat Albany, GA in the US. I first came to Moscow, of a spooky way. At Red Square, there are impersonators dressed as Russia in August 2003 and fell in love with the Lenin, Marx, Tsar Nicholas II who charge you to take their photo or city and I have been here ever since. In Moscow, pose with them. One afternoon I was at the Kremlin taking photos and I have taught English, business, history, literature stopped in Alexander’s Garden to take a break and have a cool brew. Well you know what beer does to you, so off to the restroom I go. At among other things. Red Square there are two public restrooms, in the Kremlin towers at each end. There is the crypt with Lenin between the two towers. Well, I I have been involved in writing, digital art and was standing in one of the men’s restrooms, when in walked Comrade photography for over thirty years and I am a Lenin. Needless to say, I was somewhat surprised since the effects of published author of several articles and photos. Russian beer can be somewhat strong (Russian beer comes in different strengths unlike US beer). I guess you could say I was in the right place You can find examples of my digital art and at the right time, for more than one reason. The combination of the photography at the following sites: post processing, along with the photo being black and white, gives this image a classic look. http://www.redbubble.com/people/bossman http://www.featurepics.com/Authors/ Final thoughts Images6269.aspx Black and white portraits truly are classical art. http://www.eyeoftheart.com/JonAyres What makes black and white photos and portraitures special are the strong emotions and feelings they http://s28.photobucket.com/albums/c226/ give off. Black and white photographs are nostalgic, wummis/ timeless and emotionally strong. In order to create digital fine art black and white photos, you first must http://www.fotothing.com/JohnnyReb/ learn to see in black and white. A good way to do this is look at flickr.com first for the camera model you use. Page 14 This article and all photographs contained are Copyright © and courtesy of Jon Ayres. Please contact the author directly with any questions.
  • 15.
    PhotographyBB Online Magazine Photography 101 Each issue of PhotographyBB Online Magazine will bring you helpful tips and tutorials on how to get the most of your digital camera and equipment. We’ll cover camera techniques, principals of photography, digital photography issues, and how to get the most from the dreaded manual-mode! FLOWER POWER: FLOWER PHOTOGRAPHY ESSENTIALS - By Kenneth Fagan It’s the summer time and the landscapes and gardens are full of colour. Yes, all the summer flowers are in bloom so it is now time to take out your camera and get shooting. It can be so easy to get carried away and shoot without thinking; this is a big mistake, particularly when photographing flowers. As with all photographic situations, there are three main factors to consider when photographing flowers: Lighting, Depth of Field (DOF) and Point of Focus. With these three factors carefully put into consideration each time you shoot, you will already have improved your flower photography. A s with all areas of photography, composition is image. At the other end of the scale you could use a the key to a successful image; Try not to have too wide aperture such as f5.6. Increasing your aperture much or too little of what you are photographing. will cause the DOF of an image to become shallow, You do not want an overkill of detail, which complicates and there will be much less background detail which an image and makes it difficult to look at, while on the may otherwise prove to be a bit of a distraction. For other hand, an image with too little detail will look flat an example of this have a look at the image of the red and lifeless. You can control the amount of detail in an Dahlia (as shown on the following page). image by availing of your SLR’s f-stops to control the depth of field. If you use a small aperture such as f22, The first image was taken with an f-stop of f22. you will have sharp (or relatively sharp) background Compare that with the second image, which was taken detail, meaning an increased amount of detail, which at f5.6, and we can see how the first image has relatively is not complimentary to main subject in the final sharper detail than the second image. Notice how your Page 15
  • 16.
    PhotographyBB Online Magazine eye was drawn to the flower much faster with the shallow DOF (f5.6). Shot at f22. Notice how the background still retains detail. Shot at f5.6. Background is blurred out, drawing the eye to the flower. Depending on the effect you desire, you may want to play around with the apertures to experiment with the DOF. In macro photography, the more shallow the DOF (such as f2.8), the better the results are, particularly for very close up shots. If you wish to do some very close up work you will need a dedicated macro lens which are specially designed for macro work. These lenses are quite expensive so you unless you plan to shoot macros on quite a regular basis they may not be worth the money, otherwise, you can get a standard lens that is macro capable. To tell whether your lens is macro capable there will be a small flower shaped symbol on the lens, allowing you to shoot relatively close to the subject. All of the images shown in this article were taken with a macro capable lens and standard lenses. It is especially important to remember when shooting with very large apertures that you must take care when focusing. Photographing flowers is not just a matter of setting your aperture and click… you’re done - there is a lot more to it than that. The appearance of a flower in an image is all about the area that is sharp and the area that is out of focus; commonly the closer you are to a subject the wider the aperture will need to be. As mentioned earlier, an image with a shallow depth of field will have much less of an area in focus than if you used a smaller aperture. To get the flower to look its best in an image, focus on the centre of the flower where the parts of the Pistil and the Stamen are nearest the lens, which means that the outer extremities of the central part of the flower (where the pollen collects) will be in focus. Once you have those areas in focus you can then play around with the apertures and experiment with the DOF that looks best. Page 16
  • 17.
    PhotographyBB Online Magazine It is also important to be aware of where you focus when shooting a variety of flowers, such as the next three images, which were taken at the same angle at f4.5 but with the focus set at three different areas in the scene. With the first image the focus is on the flowers at the rear of the frame. This is an obvious example of picking a bad area to focus on as the flowers are beginning to die back. Besides that, aesthetically it is a rather undesirable area of an image to be focused on and you lose interest in the image as soon as you look at it. The second image shows the focus on the middle ground. It does look better than the first image, but the out of focus area to the foreground is a huge distraction. Finally, the third image has the focus nicely set to the foreground of the image, displaying some nice healthy flowers with a beautiful dappling of colour in the background. The next series of three images were part of a street stall selling beautiful bunches of flowers of all kinds. For this, I actually just used a point and shoot camera, and looked for patterns and areas where there was good colour co-ordination and a nice mix of flowers. By simply shooting an entire area or a few select flowers, you can come up with some cool images. Page 17
  • 18.
    PhotographyBB Online Magazine Just take a little time with the composition and remember that sometimes a little bit of post processing cropping can work wonders for an image as you can see from the next images where the original image had some plastic wrapping sticking out - With a quick crop, the appearance of the image improved considerably. At this stage, you have learned that the focal point and the DOF are very important when composing flower images. There’s also something more challenging, such as a high contrast image (a dark background with a bright foreground or vice versa) like the image of the white flower shown here. To show the best possible example of this I chose a flower with dark green leaves and white petals. The sky was perfect for the shot, it was overcast so it acted as a giant natural soft box, removing any shadows from the white petals. It so happened that the petals were two f-stops lower than the green leaves for correct exposure, hence the flower was correctly exposed but the stem and leaves were under exposed by two stops causing the background to be a lot darker than if they were exposed correctly. Once you are ready for some post processing you can further darken the shadows (the under exposed area) and brighten the highlights (the correctly exposed area.). The most successful and reliable way of doing this is with curves (in Photoshop or your favourite image editing software). Not all flower photography has to be macro. As you have seen earlier, some nicely presented flowers at a market can make wonderful subjects. Always be on the lookout when visiting public gardens for flower displays in pots and hanging baskets, you might be surprised with what you come up with a little consideration for its surroundings. Look for things that could give a nice framing effect such as the window box display or a large colourful flowerpot against a wooden Page 18
  • 19.
    PhotographyBB Online Magazine fence. Have a look at the following examples of how the background and surroundings play an important role. Post Processing: Photoshop Flower Fun Finally, if you are the type that likes to take a photograph then have a little bit of fun with it in Photoshop well here is a simple idea where you can easily change the colours of the flower with just a few simple steps. Flip to the following page to have a look at a very brief and easy tutorial which will have you turning red roses blue in no time! Page 19
  • 20.
    PhotographyBB Online Magazine Step 1: Open up an image of a flower which has a nice clean appearance with as little blemishes as possible. The goal here, is to change the colour of the flower easily, without affecting the colour in the rest of the image. Step 2: Select HUE / SATURATION from the adjustments menu (or CTRL+U) and select (in this instance) REDS in the drop down edit menu. If your image contained (for example) a yellow flower, then you would choose YELLOWS to edit instead. Step 3: With the Hue Slider move it left or right and select the colour you wish to use. You can leave the other sliders alone if desired, or experiment with them for different effects on your flowers. As well as that, you can also run the history brush over the background area to get back the colours of the original image, but ensure that you don’t history brush the area where you made the colour adjustment. So now that you have read my guide to flower photography, why don’t you go out and try it for yourself. It is butterfly season soon so there is no better time to capture the wonder and beauty of nature. Page 20 This article and photographs contained are Copyright © and courtesy of Kenneth Fagan. Please contact the author directly with any questions.
  • 21.
    PhotographyBB Online Magazine Photography Around the World Each month, the PhotographyBB Online Magazine takes you around the PhotographyBB Online Magazine is pleased to launch our first issue with a globe for a stunning photographic exploration of fascinating cities in fabulous andfascinatingphoto-tour of one of the most different lands and cultures which enrich our beautiful us on streetwalking tour the world, the world - Moscow. Jon Ayres takesplanet.aJoin us as we travel of the city, and some interesting historical facts and glory of far away places. withbecome inspired by the photographic of course, amazing photos! LIVING IN LONDON - By Khara Erikson A h, London… So much to see and do, and not was made that street names are posted on the sides enough time to see and do it all. I can still of buildings at intersections and not overhead or on remember the first time I visited. For so long a post on the corner like it is back in western Canada, always a city in the story books of such classics as Charles exploring got a wee bit easier. Piccadilly Circus with Dickens, A Christmas Carol, where the Queen lives and its bright lights, double decker buses, and black cabs a country of many castles. This was my interpretation of racing about awed me while trying not to get hit by London, not the hustle and bustle it is today. I walked the traffic. So many little differences, so many things to for ages exploring central London from dawn till dusk, explore, so many things to love and hate whether you my feet aching and too proud to ask for directions after like shopping, sightseeing or entertainment, your stay getting lost on several occasions. Once the discovery in London will be over before you know it. Page 21
  • 22.
    PhotographyBB Online Magazine After a year of living here, I’m still finding I look the wrong way as I cross the street, even with the very helpful look right or look left painted in bright colours on the crosswalk. Oddly enough I don’t find it as old as other European cities that I’ve been to. I believe this is mostly due to the Great Fire of London that swept through in 1666. The fire destroyed the medieval city inside the old Roman wall along with St. Paul’s Catherdral, and the slums. It seems like there’s a lot of up and coming architecture here. It is strange though to be walking along and you’re looking at a building that was built in the 19th century, right next to a modern limestone and glass feat. Of course though, one of my favourite skyscrapers is the Gherkin - An egg shaped skyscraper that stands out amongst the other building A view of the busy and colourful Piccadilly Circus. blocks. I also think that the City Hall is a gherkin that has been squashed by a giant’s thumb and it now leans a bit to the side about to fall over. Where does one start? With so many tourist attractions in to see in London, a walking tour on the River Thames where there is much to see on both sides on the river is a good place to begin. Most of the sites and attractions are situated in Zone One on the Tube map, as the London Underground is another good way of making your way through the city. A view of City Hall. Still nice looking though, and I’m sure it has a lovely view for the city workers, looking over the River Thames and the financial district, not to mention the Tower of London. A fortress situated in central London, built by William the Conqueror in 1078, it is now an exhibition and tourist attraction which houses the Crown Jewels of the UK. Just off of the Tower of London is the stunning Tower Bridge. London seems to love building distinct and quite individual bridges over the Thames, not to mention the foot tunnel that runs under the Thames from Greenwich to the Isle of Dogs. The bridge was completed in 1894 which took 8 years to build. It’s an impressive design combination of a bascule and suspension bridge and it seems to be an iconic symbol of London. There’s an exhibition that gives the history of the bridge, but even more of a highlight is the fantastic views it offers from its 42 meter walkways above the River Thames. Another option of panoramic views is the London Eye, a renowned ferris wheel which offer spectacular views over London on any sunny day. It is Europe’s Page 22
  • 23.
    PhotographyBB Online Magazine London’s spectacular Tower Bridge. tallest ferris wheel standing at 135 meters, where one Another of London’s famous landmarks is full rotation takes 30 minutes to complete. I would Westminster Abbey. Its official status is a Royal think it’s the UK’s most popular paid tourist attraction, Peculiar (meaning a church responsible directly to the it originally only had planning permission for 5 years sovereign, and not to a diocesan bishop), made so by but due to the success is now another one of London’s Elizabeth I. Since 1066, all English and British monarchs permanent landmarks. have been crowned in the Abbey, except for a few and subsequently most Kings and Queens of England have For a cheaper view of the city, then look no further been buried there. It has become an honor to have than The Monument. Built to commemorate the Great been buried or memorialized here such as Charles Fire of London, it was completed in 1677 and built on the alleged spot in Pudding Lane where the Great Fire is believed to have begun. Standing at 61 meters, a climb of 311 steps brings you to the flaming urn top free standing column. Offering breathtaking views of the city, the column was designed by Sir Christopher Wren and Robert Hooke. Another of Sir Christopher’s Wren’s more famous designs is St. Paul’s Cathedral. It is supposedly London’s fifth St. Paul’s Cathedral, the fourth also being gutted by the Great Fire of London. The cathedral was completed in 1708 and has survived WWII despite being targeted during the war. It is the final resting place for John Donne and Florence Nightingale, not to mention numerous other famous people. Page 23
  • 24.
    PhotographyBB Online Magazine There’s the Serpentine Gallery situated in Hyde Park and the National Portrait Gallery, free except for special exhibits. Trafalgar Square sits out front of the National Portrait Gallery and today serves as a centre for rallies, protests, and demonstrations, mostly held on weekends. It has also served as a place of celebration for sporting events and New Years Eve. There are also lots of parks and open spaces to spend the days idling about. The likes of Kensington Gardens, Hyde Park, Green Park, and St. James’s Park form a continuous open green space. Regents Park houses the London Zoo, Queen Mary’s Garden, as well as an open sports pavilion. Hyde Park is the largest in central London, and adjacent to Hyde Park is Kensington Gardens, which at the western edge is Kensington Palace. Opposite Hyde Park is Green Park where Buckingham Palace is situated.Across from Green Park is St. James Park, the oldest of the Royal Parks of London. Westminster Abbey. Darwin, Sir Isaac Newton, Geoffrey Chaucer, Charles Dickens, and many more. St. James Park. One of the things I love about London is the myriad of museums, parks and squares there are for An easy way to pass the time by is to wander about the public. The Tate Modern and Tate Britain are free London’s numerous markets. My absolute favourite admission, except for the major exhibits. As well as the is Camden Lock Market. A vibrant atmosphere and a Photographer’s Gallery, just off of Leicester Square. wide selection of goods being sold, it’s a great place to find unique clothing, art, jewelry, and crafts as it serves alternative sub cultures away from the mainstream shops such as H&M and Topshop. Trafalgar Square Panorama. Camden Lock Market. Page 24
  • 25.
    PhotographyBB Online Magazine Just minutes from Camden Lock Market is Camden who regularly film there. Covent Garden is worth a look Town, with more vibrant shops to browse through as around. It sells mostly novelty items but there’s Apple well as pubs to rest your bones and wet your lips. There market that sells unusual and imaginative antiques, are several other markets worth a browse. Portobello handicrafts, jewelry, and clothing. There are many Market on the weekend is another great place to street entertainers about who have to audition for look for antiques and beautiful jewelry, second hand their time slots. On the far end of the piazza is the Royal clothing, handmade designer clothing as well as Opera House as well as London’s Transport Museum. funky boutiques near by for the more exclusive buys. Spitalfields is another market worth escaping to. The end of any good day is a show at any of the Located and steeped in history, this is the area where West End’s many theatres. There are several places in Jack the Ripper acted out his murderous deeds. It is Leicester Square that sell tickets half priced on the day now home to a lively art scene, an international food of showing, including a ticket office that’s in Leicester village and lots of wondrous boutiques to browse Square Tube Station. All of London’s film premieres through. Closeby is the colourful Brick Lane, world happen here in Leicester Square and I find it really famous for it’s graffiti featuring such artists as Bansky, funny to be walking around and seeing all the tourists D*Face and Ben Eine. There’s a real jumble of stalls and street performers and then a queue of people selling various goods from leather, clothing, second lining up to see the stars sometimes as much as 8 or hand furniture to bric-a-brac. Sometimes referred to as 9 hours later. If you still have any energy at the end of Banglatown, there’s lots of cheap and cheerful Indian the day, head to Soho for the many clubs, pubs, bars, and Bangladeshi restaurants to be found. restaurants, and late night coffee shops. Or cash left over to burn then head to Berwick Street for the many Columbia Road Market is a street flower market record shops, or to Carnaby Street, a thriving shopping that is popular with photographers and TV companies area. Page 25
  • 26.
    PhotographyBB Online Magazine It feels a bit surreal sometimes to realize that I’ve living in such a cultural glamorous city, where fashion is cutting edge, artists and musicians make it big and I’m still wandering about in my faded jeans and t-shirt. London is a huge city with so many well kept secrets just waiting to be discovered and chanced upon; Pubs down tiny side lanes, boutiques and bookshops in trendy Marylebone or Hoxton, an abundance of museums and galleries throughout this sprawling metropolis. I no longer see the outdated cliché of tea drinking crumpet eaters, but a thriving hustle and bustle of mixing lifestyles and traditions emerging into what we call London today. Page 26 This article and all images contained are Copyright © are courtesy of Khara Erickson. Please contact the author directly with any questions.
  • 27.
    PhotographyBB Online Magazine Choosing the Right Accessories With all of the photography gear on the market today, it’s difficult to determine which accessories are right for you, and what to look for once you decide on an accessory. In this ongoing segment, we’ll examine the things you should look for when choosing photography accessories, and help you to make an informed decision based on your photographic needs. POWER CELLS: DISPOSABLES, RECHARGEABLES AND COMPATIBLES - BATTERY TALK - By Kenneth Fagan These days, unlike fifty years ago, the modern camera is a mere paperweight without batteries. Depending on the make, model, and size, batteries vary greatly. There are dozens of different batteries out there, each one having a specific purpose. In this issue, I am going to take you through the use of disposable batteries against the more expensive rechargeable batteries as well as the camera specific branded against non-branded or generic batteries. Lithium Ion). SLR’s are high drain electronic devices so they require batteries, which have a high capacity and last longer than a standard alkaline battery, because the maximum voltage of a standard AA alkaline battery is 1.5 volts. In particular, the CR123 disposable battery or a rechargeable Li-ion or NiCd batteries especially in SLR’s has replaced the alkaline battery for higher voltage and amps. For example, a single CR2 battery can have a capacity of up to 3V so the benefits are obvious. Alkaline batteries’ common uses are for the point and shoot camera market where there is less power R echargeable batteries use different alloys for power than the standard disposable battery; The most common alloys used in rechargeable batteries are Nickel Metal Hydride (NiMH), Nickel Cadmium (NiCd) and Lithium Ion (Li-ion). These alloys, once drained of energy through use, can have their chemical reactions restored to original capacity by applying electrical energy to the battery with a battery specific charger (a charger that is designed to charge the type of rechargeable battery you have). Non-rechargeable or disposable batteries use different alloys to produce electrical energy, which cannot be reversed once depleted. The most common disposable camera batteries are Alkaline and Lithium batteries (not Alkaline and Lithium Disposable Batteries. Page 27
  • 28.
    PhotographyBB Online Magazine drain, although some cameras can be very draining shorter than the disposables. Of course, this is just my with batteries. Generally, the poorer cousins in the experience and it may not necessarily be the case for alkaline battery world are of no use to your camera, they all situations, battery brands, or flash units. Although tend to be poor and drain easily. It is recommended to for economical sense, since flash units are high drain in use high quality batteries to get the most hours at a general, rechargeable batteries are definitely the way time with your camera. Brand names such as Duracell to go. In some circles it is suggested that you do not use or Energizer have fantastic alkaline batteries on the rechargeable AA batteries in your flash unit. If you find market, and as technology improves, their batteries that disposable AA batteries are better for occasions seem to get better and better. where fast recycle times are of high importance, then I recommend you go with what you think is best. The higher the mAh in your rechargeable batteries, the stronger the output and the longer lasting they will Different, or the Same? be. In some cases, rechargeable batteries seem to give out less power than their disposable counterparts do, because the amps may vary from battery to battery. The standard amps rating for a disposable alkaline battery is 1500mAh (milliamp hours) where as the rechargeable equivalent can vary from 1200mAh to 2500mAh or maybe more. In reality from my own experience, disposable batteries are more consistent than rechargeable. I find this when I use a mounted flash (which takes AA batteries) on my DSLR; the flash recycle time was much improved with disposables. I noticed a huge difference in flash recycle time between my batch of 1200 mAh and 2500mAh rechargables, which is quite understandable because of the output differences between the two. The drain time of the rechargeable AA batteries was consistently Selecting a New Battery For the more expensive rechargeable batteries, such as the NiMH and Li-Ion, they can vary greatly in price; the reason being that the manufacturer of your DSLR may also manufacture the battery to go with it. These batteries tend to be of high quality and because the SLR manufacturer brands them, the price automatically goes up. It is no surprise to have to fork out about $100 to buy a new battery for your SLR. If you are like me, and not willing to pay a high price for a battery there is an alternative. Compatible or generic batteries are manufactured by independent manufactures that make specific batteries for many DSLR’s for around half the price as the ‘branded’ battery. That said, there are some compatible batteries, which are of extremely poor quality, but in a good camera store, they will only stock good quality batteries. So, comparing a $100 battery to a good quality $50 compatible battery, the compatible battery might be a better investment. I am the owner of a Canon EOS 5D and a Powershot G9, and for both of these I have the original Canon battery along with two or three compatibles, and to this day, I have not noticed a single difference between the branded Rechargable AA batteries look the same as their alkaline counterparts, and unbranded batteries. It is important to note that however, there’s a sacrifice in performance for cost savings. I purchased these compatible batteries from reliable Page 28
  • 29.
    PhotographyBB Online Magazine retailers so I do not recommend you to go onto the life of a NiMH battery anywhere between 2-4 years if internet and purchase a batch of five for twenty dollars charged correctly. or something. That would be a very bad idea as they could cause irreversible damage to your equipment. Li-Ion Batteries Battery Care Lastly, the newer of the battery technologies are the Li-Ion batteries, which is most likely the type of battery Care needs to be taken when handling batteries, you have, provided your digital camera was purchased never touch the metal terminals with your fingers within the past couple of years. Li-Ion batteries are as oily residue will transfer and eventually cause extremely robust, and can be charged anytime without corrosion in your camera and on the battery. Never use affecting their overall life cycle. Unlike NiCd and NiMH a charger that is not suitable for your battery type as batteries, Li-Ions do not need to be conditioned (as this can cause a fire or an explosion. When you change commonly thought), but rather they have a finite the battery in your camera always, make sure that the number of charges before they begin to degrade. In camera is switched off, even though the battery may most cases, you will find that with Li-Ion batteries you seem completely dead, there may be still some power can get approximately 200 full charge cycles out of the in it. Removing it could cause damage to your camera. battery. That does not mean you can only charge the battery 200 times, it means 200 full charge cycles. For example, if you were to use 30% of your battery during Charging Your Battery a photoshoot, came home and recharged it, then the next day you used 70% and again recharged the In charging your batteries it is important to note just battery – this would count as one full charge cycle, not which type of rechargeable battery you have. Different two. That’s the huge benefit of Li-Ion batteries, along types of rechargable batteries are manufactured with with the fact that they do not drain as quickly as NiCd different chemical compounds and components, and and NiMH batteries when not in use. thus requre special and unique care when it comes to charging your battery and maintaining its optimum There is a new type of battery on the market, which life and performance. is not yet widely used in the digital camera market, called Lithium Polymer. Since these are currently an uncommon battery type for the photographer, we will NiCd Batteries explore this battery in further detail at a later date, when it’s sure to become the next latest and greatest You may have heard of something called a “standard” battery technology in your digital camera. “memory effect” when it comes to charging your battery. The older NiCd batteries do experience this, in I hope you have enjoyed this article and found it that if you were to charge it while it was still half full, it to be helpful in both the selection, and the care of new will eventually “think” (or more properly – react) that and your existing batteries. They may not be the love half-full means empty, and you will only effectively get of our life, but the certainly are the life of our love. half a charge everytime you charge it. That is one of the reasons why battery technology was replaced by the NiMH batteries which do not experience this effect as severely. NiMH Batteries Although still nickel based, NiMH batteries are a step up from their NiCd predecessor. You can charge your NiMH batteries at any point in their drain cycle, and these batteries can also be “conditioned” to act as new over time. Conditioning a NiMH battery basically requires that you fully charge and fully drain your battery for a cycle of 3 times. This effectively refreshes the chemical cycle in the battery, and can give you a long life for your battery. Typically, you can extend the Page 29 This article and photographs contained are Copyright © and courtesy of Kenneth Fagan. Please contact the author directly with any questions.
  • 30.
    PhotographyBB Online Magazine High Dynamic Range (HDR) HDR (High Dynamic Range) photography is a relatively new photography technique made possible by the advent of digital camera technology, and new breakthroughs in image manipulation software. This monthly series will take you through the basics of HDR photography, and how you can create your own stunning HDR images. HDR PHOTOGRAPHY PART III - SOFTWARE AND HDR BASICS - By Fred McWilson Welcome back fellow photographers to the third installment on our HDR series. In this month’s issue we are going to look at some of the fundamental software aspects with regards to HDR and tone mapping. Hopefully by now, any photographers interested in HDR / tone mapping, have a better understanding of what you need, and how you can utilize this technique and that it is not all that difficult to achieve good results. T he main emphasis for this month’s article is to start with this. Now if you don’t have any bracketed do a general walkthrough so you can better shots yet, you can go to this address: understand what to expect when you use whichever HDR software you choose to work with. Of http://www.photographybb.com/images/shared/ course, I am not able to give a step by step guide for HDR_Sample_Images.zip each and every software package since I have only used a few of the many that are available. I would and download the full size images of three sample trust that whatever HDR package you go with that you images provided to use for your practice. follow their instructions for the best results. There are however a few things that I can share that might get you going a little faster. As I mentioned in last month’s article when capturing the images, you should have bracketed shots with differing ev’s (Exposure Values). Normally I shoot three shots at +-2ev, so I end up with a -2ev, 0ev and +2ev sequence, of course you can have more but let’s Page 30
  • 31.
    PhotographyBB Online Magazine Normally most HDR software will require you to load the bracketed shots into its program. Photoshop, Photomatix, Essential HDR or any of the other major HDR programs all work this way. Now there is a decision, usually, that you must make when you are going to load your images (or my sample images). In some of the programs you must choose whether to use the “Auto Align” feature first while in others you can choose this later once the images have been loaded. The “Auto Align” is simply a feature to aid in the registration of the images to each other. This is most useful for any handheld bracketed shots where the images are not framed exactly between each shot. You should choose this action if you are using handheld shots or if the images are not perfectly aligned to begin with. If you are using my sample images they were done using a tripod so the auto alignment is not needed but can be used without any issues. The main reason to not use the auto alignment if your images are already perfectly aligned is simply computer processing time. If you choose to always use the auto alignment, your computer has to do more with the images and will increase the amount of processing time required, so only use as needed. Once the images have been loaded, and whether or not the auto alignment feature is to be used, comes the generation of the HDR image. Most programs once initiated will do one of the following: Some of the programs will generate an HDR image that then requires the additional step of “tone mapping” such as Photomatix. , Other programs will go directly to a preview tone mapped version of the image such as Essential HDR. Let me stop here and explain a little about why for instance in Photomatix it creates the HDR image first that looks horrible on your monitor. If you recall in my previous article that most current display monitors are unable to render the visual dynamic range that can be generated, the greater dynamic range that can be achieved with this technique when displayed will look awful…that is until you tone map it. So until you Page 31
  • 32.
    PhotographyBB Online Magazine choose to tone map the HDR image the monitor will be unable to properly render it. The tone mapping of the HDR image basically takes the dynamic range and compresses it such that your monitor can then render it making it viewable. The trick here is that just because you can create a higher dynamic ranged image does not negate the fact that our current display methods are still unable to do so, which is why we must tone map the image to bring the image to within the dynamic range of our monitors or print media. Now that you have the image in a preview tone map state, most of the programs will allow further adjustments to then allow you to go from the more natural looking to the surreal end of the visual spectrum. Most of the options are self explanatory if you are familiar with other editing programs such as Elements or Photoshop and / or through simple exploration of how they affect your image. One bit of advice is to watch out for “Halos” which are an attribute , associated with the tone mapping routines. The halos can be seen around objects with differing contrasts such as a sky and trees. Typically halos are considered to be an unwanted artifact for the more realistic HDR imagery, while in some of the more surreal style they can be a desired effect. See this example showing the halo effect surrounding the trees: Here’s an example of a tone mapped “for realism” HDR image. By not tone mapping to the extreme, the results are quite natural and the image has no halos. When you are satisfied with the adjustment settings, the program will produce the final tone mapped image. I normally, once I have the final tone mapped image, bring that into Photoshop and tweak a few more things such as the “Levels” and perhaps run “Noise Reduction” to bring my image to the state I like, but we will get into that more next month where I will go deeper in the post processing that I do. I would encourage you to go download a trial version of an HDR program and play around with it. Here are some free trial versions that I’d recommend: http://www.essentialhdr.com/Download.aspx http://www.hdrsoft.com/download.html A Note From the Editor: If any of our readers are interested in purchasing the full version of Photomatix Pro, or the Photomatix Tone Mapping Plugin for Photoshop®, there is a 15% off coupon code available for our readers at: http://www.photographybb.com/hdr A special thanks to Fred McWilson for this continuing series, we look forward to next month’s article! Page 32 This article and photographs contained are Copyright © and courtesy of Fred McWilson. Please contact the author directly with any questions.
  • 33.
    PhotographyBB Online Magazine Photoshop Tutorial Photoshop tutorials will help you to get the most out of using Photoshop, while also helping you to discover the many tools and uses for our favourite image processing software. In this series, you’ll learn tips, tricks, and techniques to wow your family, friends, and maybe even yourself! ART AIN’T HISTORY! - By Dave Seeram Continuing our summer theme (from our Photography 101 column) of “Flower Power” this month, I thought it would be suitable to show you a very handy artistic technique for turning photos into beautiful paintings. Sure, there are countless filters in Photoshop which can do this for you, but where’s the satisfaction in that? This month, we’ll be taking a look at the Art History Brush, and how you can use it to create your own digital works of art, even if you are not a painter... Grab your brushes, and let’s go! For this tutorial, we’re going to be painting. Don’t worry if you feel that you don’t have a “painter’s talent” because in no time, you’ll be brushing your way to great art, all from your Photography. When I show the keyboard shortcuts, always remember that PC’s use the “Control” key where Macs use the “Command” key. I’m going to make use of the keyboard shortcuts where possible in this tutorial, as they will come in very handy in speeding up your workflow in the future. Step 1: Open a starting image (as shown here on the left). This beautiful flower shot has been provided to us by Ken Fagan. Step 2: We’re actually going to prepare the details part of our image first, before we start painting. To do this, prepare your layers as follows: a) Duplicate your Background layer (Command/Control-J). b) Duplicate it again (Command/Control-J), and desaturate it by pressing: Shift - Command/Control-U. c) Duplicate this desaturated layer (Command/Control-J), and invert the layer by pressing Command/Control-I (for Invert). d) Lastly, change the blending mode of this layer to “Color Dodge” in the layer’s palette. Here’s how your layer’s palette should look at this point (See image to the left). It may not look like much just yet, but we’ve only just begun! The next step we are about to take will give your image somewhat of a pencil sketch look, which you can even use on it’s own as a popular effect by itself. Page 33
  • 34.
    PhotographyBB Online Magazine Step 3: With your top layer as the active layer in your layers palette, go to the menu: Filter > Blur > Gaussian Blur... and choose a radius setting that gives your image a nice soft pencil sketch type look. You want to use a low radius to show only nice soft edge details, not too many shadow areas. Here I used a radius of 3.5 pixels, and it will vary depending on your image. Step 4: Turn off the visibility of your Background Layer by clicking on the little eyeball icon next to that layer. Now press Control/Command - Shift - E to merge only the visible layers. This should leave you with your “pencil sketch” layer on top of your hidden Background Layer. Step 5: Change the blending mode of your top “pencil sketch” layer to “Multiply” and apply another , Gaussian Blur with a lower radius setting (Menu: Filter > Blur > Gaussian Blur...). I used 2.0 for my radius here, but it may be different for your image. The goal is to soften the pencil sketch look even further. Lastly, reduce the opacity of this layer to 75%. Step 6: Turn your Background Layer visibility back on, and duplicate the layer (Command/Control-J). Your layers palette should now look like this. (See image on the left). Step 7: Select the History Brush Tool (from your toolbar) or by using the keyboard shortcut: Shift-Y. Before we do anything else, open your History Palette (Window>History) and click on the little box-area next to your last step which should read “Layer via copy” . Step 8: Along the top of your screen, you’ll see some History Brush Options. You can leave most of these as-is, or experiment with the settings layer, but for now, just make sure your mode is set to “Normal” and the brush style is set to “Tight Short” as I have done for this tutorial. Click on the icon at the right-end of the History Brush options toolbar on the top of your screen, which will toggle open/closed the brush options dialog box. Step 9: Here, we can go down the list of options for an almost infinite number of settings and combinations of settings. It’s best to experiment, as you will find different ways to create your own unique styles. For this tutorial, I will show you the settings which I used. For Brush Tip Shape: I used the “Oil Heavy Flow Dry Edges” brush from the built-in brushes. You can find all of the built-in brushes by clicking on the little fly-out menu (located just under the “x” which would close the brushes palette), and at the bottom of the flyout menu you’ll see the various brushes. Page 34
  • 35.
    PhotographyBB Online Magazine Shape Dynamics: I left everything here as the default, except I changed the Angle Jitter to 50% Color Dynamics: I left everything at 0% except for Saturation which I raised to 15%. These settings determine how much variance you would like to have in things like color, saturation, etc... Other Dynamics: I raised both opacity sliders to 100% for a softer brush look. For a hard brush look, lower these opacities to your taste. Step 10: We are finally able to paint! I find the best way of doing this is to start with large areas of similar colour, and work your brush around (holding down the mouse button), in small wavy strokes. You can change the brush size if it is too large/small by pressing the [ or ] (square bracket) keys. Paint over your entire image until you are happy with the look. You can try different brushes, opacities, or any of the brush settings in the previous steps. Lastly, you can adjust the opacity of your top layer to bring back some slight detail into your image. Here’s the finished result! You are now a digital painter; see, I told you it would be easy! Have fun Photoshopping! Here’s a look at the before and after versions. The possibilities with this technique are truly endless. I hope you have enjoyed this tutorial, and I would love to see your painted results in the PhotographyBB Forums. We have a very active Digital Art Gallery, and now that you are all artists, I’d love to see your creations. Drop by the forums and show us your stuff! Page 35 This article and all images contained are Copyright © and courtesy of Dave Seeram and Kenneth Fagan. Contact the author for any questions.
  • 36.
    PhotographyBB Online Magazine Newsflash! - Lightroom 2 This month we have a news flash announcement for our readers. Adobe has just released the new and improved Photoshop Lightroom™ 2. We’ll give you a brief look at what’s new for Lightroom 2, and next month we’ll continue with an in depth look at some of the new features and how they work. LIGHTROOM 2 RELEASED! - By John Ogden With still another month left to go on the Beta release version, Adobe has just launched the full shipping version of the highly anticipated Lightroom version 2! A look at the SOAP interface: L ook closely at the splash screen for Adobe Photoshop Lightroom 2.0 and you will see the name “Phil Clevenger” Phil designed . the Lightroom user interface (UI) and is driven by simplification, streamlined workflow and localised functionality. The latter is embodied in revolutionary the new non-destructive retouch brush function. Back in the 90’s Phil Clevenger worked on Kai’s Photo Soap ™ by MetaTools, a ground breaking photo app way ahead of its time. SOAP also featured the workflow driven interface and even a retouch brush! Inspiration, perhaps, for Lightroom 2? (Note the original colour scheme too!) SOAP’s “room” based workflow. Inspiration for Lightroom 2 perhaps? Page 36
  • 37.
    PhotographyBB Online Magazine Streamlined Workflow Based Application: Secondary Display: The Lightroom team have been working hard to Under the window menu you can now activate a produce an application that is streets ahead of the first secondary display for either a secondary window or version. Behind the scenes significant developments another monitor as shown. in the algorithms hide the complexity, but out in front the UI puts the emphasis on the tools that need to be at hand. Here’s a quick look at some of the developments. New Retouching Tools Grouping: Crop, Spot healing/cloning, Red Eye, Graduated Filter and the Adjustment Brush are now grouped together in the right develop panel, freeing up more screen space for your images. A whole host of new controls are revealed and stacked in the develop panel, when the new Adjustment Brush is activated: To summarise, important enhancements that can be found in Lightroom 2.0 include; • Clearer import dialogue • Enhanced Photoshop integration • Improved organisational tools • Twin monitor support • Localised corrections • Flexible print packages • Improved Sharpness • And much more… Coming Next Issue... Join us next month as we dive in a little deeper and explore some of the new and wonderful features of Adobe Photoshop Lightroom™ 2. Page 37 This article and all images contained are Copyright © and courtesy of John Ogden. Please contact the author directly with any questions.
  • 38.
    PhotographyBB Online Magazine Adobe Photoshop® Lightroom™ Adobe Photoshop® Lightroom™ is Adobe’s most powerful solution for working with camera RAW images, giving the digital photographer all the necessary tools to master their digital darkroom developing techniques. This series will explore various uses of Lightroom, and the types of processing and effects that can be achieved through working with RAW files. GETTING CREATIVE WITH ADOBE PHOTOSHOP® LIGHTROOM™ - PART II - By John Ogden Last issue we looked at how Adobe Photoshop Lightroom can be used to creative effect using such techniques as filtered black and white images, selective colour and cross processing. In this article I will show you how to achieve a pencil sketch effect, custom edges and even a textured “canvas” background. They said it could not be done! 2 or 3 (all of these legacy effects are still there in the current filter menu of CS3, under Artistic and Sketch). Some Lightroom user forums out there claim that the But with a little work around, Lightroom version 1 can more advanced manipulation effects shown above also produce some pleasantly surprising results. need Photoshop; Well, stand by your beds! In this article I’ll show you how to turn a colour It’s true of course that the mighty Photoshop has come photograph into a line drawing or sketch effect, along laden with artistic filters that place a variety of special with a textured background, and how to introduce a painterly effects at your fingertips. These, originally popular “graphic edges” effect using Lightroom’s print third party, filters were bought by Adobe back in version module. Page 38
  • 39.
    PhotographyBB Online Magazine Line Drawing: This technique involves the following four distinct stages: 1. Start with a good quality colour image 3. Export a copy and re-import, 2. Develop in Lightroom, 4. Further develop the copy. By following this route, the develop settings can be applied twice, one on top of another, thereby multiplying the results. The image becomes “over-processed” which helps to achieve the line effect. Step 1 Step 2 Step 4 Page 39
  • 40.
    PhotographyBB Online Magazine Step 1: This is the key to this technique and allows the develop settings to be reapplied on top of the current settings. Right click (command click) on the image in either the Start with a good colour image (I have found that this loupe or filmstrip to bring up the context sensitive technique works best with relatively high contrast menu (see below) and choose edit in Photoshop or any pictures like the studio portrait of my lovely wife, other installed editor. Ingrid). I know we said we wouldn’t use Photoshop, and we are not! When you invoke this command, Lightroom Step 2: produces a copy of the image and stores it neatly referenced in its database along with the original. In the dialogue box that appears when you choose “Edit in Photoshop” chose the first option: “Edit a copy with , Lightroom Adjustments” Convert to grayscale using the Grayscale text button at the top of the basic panel. Then over process in the Develop module by pumping up Recovery 100%, Fill light 50% and Clarity 100% as shown in the image on the previous page. In this case (shown in Step 2 on the previous page), you can see that I have also used the white balance sliders, moving Temperature towards orange and Tint towards magenta to lighten the image (this works differently which each image depending on the original colours, you will need to experiment to see how these sliders work with lightening or darkening tones). Step 3: This will give you a new image file with the develop settings “baked in” so you can over process further. The new file appears next to your original in the film strip. Step 4: Now develop this new file in Lightroom with maximum Fill Light and Clarity, and bring up the Blacks until the line drawing effect talks shape. A white vignette will enhance the effect further. Towards the bottom of the Basic panel under “Lens Corrections” set the Lens Vignetting as shown to end up with a mainly white canvas. Page 40
  • 41.
    PhotographyBB Online Magazine This same technique works on other types of images too, this classic wide angle hot rod shot is one of my favourites. Texture Effects and Edges: To introduce the texture effect we are going to “misuse” the identity plate function in the print module. Here is our hot rod with a blue marble effect all done in Lightroom! Page 41
  • 42.
    PhotographyBB Online Magazine So how did you do that? The texture and edge effects require a little bit of setting up, as additional files are required, and will be used to montage and blend with the original. Custom Effects File Examples: Custom Edge Linen Blue Marble Either download, capture, or create suitable texture/edge files. The three files used here are shown above (the Custom Edge was created in Photoshop and saved out as a TIF to preserve transparency). You probably guessed that the blue marble is the texture used on the hot rod. The portraits below show how the original colour and the new line drawing version look with the Linen texture added. Page 42
  • 43.
    PhotographyBB Online Magazine Identity Plate Abuse! The identity plate feature is found in the print module under “Overlays” It is typically used to brand the finished . print with the photographers’ graphic logo or custom text, as in my rainbow panorama below: Clicking on the tiny down-pointing triangle in the bottom right hand corner of the Identity Plate preview (highlighted by the red circle in the illustration above) opens a list of possible ID plate templates available. Choose the edit option as shown, and the Identity Plate editor opens: Page 43
  • 44.
    PhotographyBB Online Magazine You can now toggle between the styled text and graphical versions. It is the graphical identity plate, of Photoshop Rules, OK? course, that allows our texture and edge graphics to be introduced. Simply click on the “Locate File…” button in the Identity Plate Editor and navigate to the required Of course its easier to produce these creative custom effect file. effects and more in Photoshop, but do you need access to Pantone inks, Video, 3D, Channels, Layer Comps, etc etc… when all we may want to achieve are some photo Custom Edge Effect: based graphic experiments. With a little imagination For this picture of a rose, growing wild in my back and inspiration, the simplest of tools can often create garden, I have added the edge effect in the same way stunning effects (and at a third of the price!). Lets not via the graphical identity plate editor. Note the custom forget that Lightroom 2 is set to take creative imaging edge file is now displayed in the Overlay panel preview to a new level with selective editing. to the right. For me, as a Photoshop tutor and user of over ten Careful adjustment of the opacity and scale sliders years, this article represents an exercise in problem completes the effect, here the opacity is right up to solving, and problem solving is always good for creative 100%. For the textures opacity will be much lower and thinking! Until next time, happy Lightrooming… needs experimentation for each image. Bio: John Ogden is an award winning London based digital artist and photographer. John lectures on Photoshop CS3 and Lightroom to adult learners in Further Education. John is Pentax shooter, Adobe Certified Instructor and member of the National Association of Photoshop Professionals. Contact: john.ogden@bracknell.ac.uk Page 44 This article and all images contained are Copyright © and courtesy of John Ogden. Please contact the author directly with any questions.
  • 45.
    PhotographyBB Online Magazine Adobe Dreamweaver® Basics In today’s age of digital photography, the modern photographer is finding that not only do they need to be a good photographer, but they need to know things like image post-processing techniques, and even basic HTML to create their digital galleries on the web. In this column, we’ll look at some basic steps in Dreamweaver for building your photo websites. GENERATING YOUR PORTFOLIO PAGES - By Victoria Sargsyan Welcome back! As we continue our “Photographer’s” series on Dreamweaver®, this month we’ll be taking a look at how to create and easily generate the pages which will be displaying your portfolio of photos. Navigate back to your Dreamweaver website folder, and let’s get started with this month’s Dreamweaver tutorial! Step 1: For this tutorial, we actually need to begin by hopping over to our good friend Photoshop before we can continue. Once in Photoshop, go to the menu: File > Automate > Web Photo Gallery... Here you can choose any options that you like. I will go with “Simple-Vertical Thumbnails” for this example. For your Source Images Folder, use the folder which contains the images that you will be using in this web gallery category. For the Destination, use your Dreamweaver site’s images folder, and create a subfolder for this image category inside. You will want to repeat this entire step for each category of photography you would like to have in your gallery. For example, if you have portrait photography, you would do this step for portraits using the source folder where your portraits are stored on your computer, and the destination folder would be the Dreamweaver images folder, with a subfolder called “portraits” (ie. images/portraits). Under Options you can enter your site’s name, photographer’s name, contact info, and date. Once you click OK, Photoshop will create the web gallery for you, which you will see the gallery in the form of an internet HTML page. Copy each gallery’s files into a subfolder in your site’s main images folder, for example: images/landscapes (copy all of the files and folders that Photoshop created for your landscapes gallery). Page 45
  • 46.
    PhotographyBB Online Magazine Here’s what the gallery page lookes like, created all automatically by Photoshop: Step 2: (Optional) If you would like to create a nice and stylish rollover image to be used as a button on your website, here’s how it’s done. This would be especially useful in creating rollover buttons / thumbnails as navigation buttons for your different photo galleries (ie, portraits, landscapes, nature, etc...). Create a sub-folder in your Dreamweaver images folder, and name it something such as “nav_buttons” Create two . images (one for the navigation button image, and one for the image when the mouse is rolled over that image. A good example would be to use a small thumbnail of a landscape shot in colour as your first image, then the same shot desaturated to black and white for the second (rollover) image. Once you have created these, copy them into your Dreamweaver images/nav_buttons folder (or where ever you would like to store them on your site). Step 3: With your site’s main page open in Dreamweaver, click inside the AP Div table where your image thumbnails will be placed, and go to the menu: Insert > Insert Image Object > Rollover image... Step 4: In the dialog box: “Original Image” is the first image that will appear, and “Rollover Image” is the image that you will see when you will rollover your first image with mouse. “Alternative text” is the is text that will appear when the mouse is hovering over the image. For “When clicked, Go to URL” select the index page in your images subfolder , where you uploaded your Web Photo Gallery (this is not the index page of your site, it is the index page of your Web Photo Gallery catgory such as “landscapes”). For example, if you are making a rollover button for your landscapes photography gallery, your destination URL should be: images/landscapes/index.htm You will want to do this for each gallery category you have in your portforlio. Save your page, and you are done! Next month we’ll have a look at how to create another style of portfolio, and some additional options for your site. Page 46 This article and all images contained are Copyright © are courtesy of Victoria Sargsyan. Please contact the author directly with any questions.
  • 47.
    PhotographyBB Online Magazine Corel Paint Shop Pro Tutorial From time to time we’ll be looking at other post processing software tools, besides our usual favourites from Adobe. This month, we’ll have a look at a basic tutorial in Corel Paint Shop Pro. CREATING EASY PICTURE FRAMES WITH COREL PAINT SHOP PRO - By Victoria Sargsyan Over the past few months, we’ve been looking at how to create picture frames for your digital images, for displaying them in your web gallery. We’ve learned how to make image frames in Photoshop CS3, Photoshop Elements, and even Photoshop Lightroom... We’re going to take one more look at creating easy web gallery image frames for those of us who use another great piece of software, Corel Paint Shop Pro. Creating photo frames with Corel Paint Shop Pro is quite easy, and fun I might add. A nice border or artistic frame around your image really has the ability to make your images stand out, especially in your web gallery. Let’s have a look at how we can create these fast and easy frames. Step 1: Open up Corel Paint Shop Pro, and create a new file: File > New... Set the image dimensions to a size that suits your web gallery or to your taste. Page 47
  • 48.
    PhotographyBB Online Magazine Step 2: Open the image or photo that you will be working with. Step 3: Copy your image (Menu: Edit > Copy...) and then minimize the image. Step 4: Going back to your new blank file, paste the image by going to the menu: Edit > Paste as a new layer Step 5: Using the Pick Tool (k) you can now resize your photo to fit nicely within your document’s dimensions. Page 48
  • 49.
    PhotographyBB Online Magazine Step 6: Go to the menu: Image > Picture Frame... and from here you can select any frame you desire. I am going to use an artistic looking border frame for this example. Click OK. Step 7: Always remember to save when finished! There you have it! It’s a quick and easy way to create frames and borders in Corel, which is often overlooked. Adding a frame or border can make your image stand out in your gallery, and it makes for a unique look when creating gifts like cards or calendars. Try using frames or borders for the images or even thumbnails in your gallery page, which you are creating in Dreamweaver, the possibilities are endless. Have fun with your frames! Page 49 This article and all image contained are Copyright © are courtesy of Victoria Sargsyan. Please contact the author directly with any questions.
  • 50.
    PhotographyBB Online Magazine Member in the Spotlight “Spotlights” are not only a great way to get to know each other, but they can also be a creative inspiration to all of us. Each month, we feature a “Spotlight” on one of our site’s forum members and tell you a little bit about who they are, how they got started, what their photographic interests are, and display some of their work. THIS MONTH’S FEATURE ON MEMBER: Gareth Glynn Ash PhotographyBB is pleased to have Gareth Glynn Ash joining us this month as our Spotlight Member. Gareth has been with us as a forum member and avid contributor to the site since June 2008. Gareth is always happy to lend his advice on the forums, and likes to share fun and interesting photography related links with our members. Throughout this interview we’ll be showcasing some of Gareth’s photography, so let’s get on with it and get to know our friend Gareth! Gareth, welcome to the PhotographyBB Online musician (I want to be Chris Squire when I grow up) … Magazine! How about we start with a quick pretty ho-hum stuff, actually. Oh, and I make photos! introduction for our members - Tell us about All of this means I rarely sleep and our coffee tab would yourself! blow your socks off. Thanks so much for inviting me, Dave. Well, let’s see: What photographic equipment and software do you I’m 48 years old and was born in Chicago, IL, but like to use? Do you have a favourite piece of gear currently reside in the beautiful and tropical village that you’ll always bring with you on a shoot? of Kenosha, WI. I’m married to a lovely and talented lady (a musician) and share quarters with her two sons As for the nuts and bolts, I’m currently using Canon who we affectionately refer to as Chaos and Skippy gear: Canon 20D DSLR (for now … until my wife let’s me (they’re just entering the dreaded teen years). I have buy the 1Ds MkIII); Canon EF 70-200mm f/2.8L IS USM; four (count ‘em … four!) great kids of my own (three Canon EF 28-135mm f/3.5-5.6 IS USM; Canon EF 50mm boys and a girl, all grown now … but they never really f/2.5 Compact Macro; Canon EF 50mm f/1.8 II; Canon grow up, do they?). I’m an AutoCAD Drafter by trade EF-S 18-55mm f/3.5-5.6 USM; a cheap Quantaray 70- (my “day job” until the photography thing pans out). I 300mm f/4-5.6 LD Tele-Macro (which I actually love for do some freelance graphic arts and desktop publishing Macro work); Canon 430EX Speedlight; some extension on the side (to pay for all this gear). I’m a very frustrated tubes, extenders and converters; miscellaneous sundry Page 50
  • 51.
    PhotographyBB Online Magazine accessories and filters … always adding on. You know just can’t tell you what it is in musical terms or play it how that is. Next on the list is a really nice wide angle myself. I can hear a wrong note. I feel the vibe, though, lens for landscape work. you know? In high school I had a photography class and I was really getting into it. The teacher told me I As for post production I use Photoshop CS3; Adobe had “An eye for the photograph.” I was really enjoying Camera RAW; PhotoMatix; some Alien Skin and OnOne it … until he brought us into the darkroom. All the stuff once in a while … all on a Mac. I’m currently chemicals made me sick, so I just kind of drifted away teaching myself Lightroom, but I’m not sold on it yet. from it. For years I had no kind of artistic outlet to turn Early on it seems like it has some nice stuff, but it looks to. So, what got me interested in digital photography like it creates too many files and it seems to be just one and how long have I been doing it? It all kind of ties in more (or many more) steps in the workflow. We’ll see, with the next questions, so … though … I could just be a doof! In looking through your blog and web gallery, I No matter what, I never leave home without the 50mm can see that you have quite a diverse portfolio. f/2.5 Macro. It makes for a wonderful walking around What’s your favourite photographic discipline? (ie, prime lens, for both Macro and general purpose Portraits, landscapes, concert...) Also, was there any photography. particular inspiration or event which got you started with this style? What is your artistic background (ie. self taught, school...)? How long have you been into I’ll answer the second part of your question first and photography, and can you recall what it was that then, I promise, tie everything together. first got you interested in digital photography? Yes, there was one particular event that got me back As I mentioned, I’m a frustrated musician. I’ve had into making photos. About six years ago, after we various lessons at least five times in my life. I finally moved to Wisconsin my wife joined a Celtic Rock realized I have absolutely no talent. But it’s strange … band up here called The Sandcarvers (http://www. I can “hear” what’s right and what’s wrong in music, I thesandcarversmusic.com). One of the members Page 51
  • 52.
    PhotographyBB Online Magazine want they say, “Oh, just work your magic,” but then come back and say, “That isn’t really what I was thinking of.” I can — and have — done portrait and wedding photography, and while I think I do a passable enough job — technically — in these fields, I don’t have the patience for it, more with myself than anything else and besides, it’s not really my calling. So, to answer your question, I would definitely say concert and music photography is my favorite. It kind of gives the frustrated musician side of me an artistic outlet that — in all humility — I’m actually really good at. It allows me to translate what I can’t do musically into a visual medium. “But,” you say, “you said that you don’t play well with others. How does that work?” Well, yes, I am working with other people when I’m doing concert work, but all I have to do is stay out of their way and out of the way of the audience (not an easy task at times). After that, it’s just a matter of listening to the music while shooting and anticipating things. The band is free to pursue their artistic expression while, at the same time, I’m free to pursue mine. It’s almost as if the bands and I feed off of each other’s artistic energies sometimes. I love capturing those “Rock ‘n’ Roll moments.” I love capturing the artists and all of the emotions they’re pouring out to the audience. If I can make the bands look good … then I look good as well. So it’s a nice give and take kind of thing on all of our parts. Over the years The Sandcarvers have been gracious enough to allow me to hone my craft and eventually mentioned in passing that it’d be great if they had some become their “official” photographer, So, I owe them photos of their first gig with my wife and asked if I could a huge debt of gratitude. Over the years, people take them. The flame that I snuffed out back in my teens was suddenly sparked again. I said “Sure, I’ll do it.” At the time, I didn’t even own a camera! I borrowed a cheapo point and shoot from work to do the gig. After looking at the shots I thought, “These are really rough, but I think I might be on to something here.” They continued to allow me to shoot their shows, I eventually got my Canon DSLR … and the beast was unleashed. So, yeah, so far it’s been all self taught, although I’m primed to take some college photography courses … just to make it official, and all. As for my favorite discipline? Well, I’ll be the first to admit that I don’t really play well with others. I don’t feel comfortable at all “directing” people. I become very annoyed with people who ask me to take photos of them and when I ask what they Page 52
  • 53.
    PhotographyBB Online Magazine like JJ McAuliffe (McAuliffe’s Pub - http://www. Do you have any photographic achievement (or mcauliffespub.com); John Bowles (PaddyRock Radio image) which you are most proud of? What are your - http://www.paddyrock.com) and bands such plans for the future of your photography? as Strange Land (http://www.strange-land.net), Kopecky (http://www.kopecky.8m.com), The Young Yes! But I can’t show it to you right now. It will be Dubliners (http://www.youngdubliners.com)… so appearing on the new Strange Land album I mentioned, many others as well, they’ve all been instrumental (no so for the moment it’s all very hush-hush! There’s also a pun intended) in my development as a photographer, shot of my wife that I took this past weekend (8-2-2008 so I must thank them all. I couldn’t have gotten this - still waiting to be processed) at the Iowa IrishFest far without their help and encouragement. In fact, I’m (http://www.iowairishfest.com) that I absolutely love. currently wrapping up the artwork with the boys from Can I show these to you at a later date? Strange Land for their upcoming album titled Catharsis, so I’m really excited about that. The music is simply killer, so I hope the photos are half as good! This will be the second album I’ve collaborated on, the first being Dealin’ Craic (http://cdbaby.com/cd/sandcarvers2) by The Sandcarvers. I’ve realy been quite lucky and very grateful for everything that has come my way … despite a bump or two in the road along the way. To wrap up this long-winded answer (I do that a lot … just ask my wife!), I like to think I’m pretty good at Landscape, Macro, Street & Architecture, Still Life, Nature and Abstract work as well. Whether anyone else thinks that, well … Page 53
  • 54.
    PhotographyBB Online Magazine My plans for the future? Well, just getting better, the quickest way to give up on photography entirely. learning more and being more creative goes without Ask for help, advice and criticism. Don’t be afraid to saying, I suppose … and the whole school thing. But make mistakes and when someone tells you, “This truly, I’d like to work on that patience thing I was sucks,” listen to them, because it probably does! Don’t talking about. I’d like to get to the point where the believe every grand and glorious comment posted to mother of the bride can yell at me, “Where’s a shot of your photos on your site or bulletin boards. If you look Aunt Mable?!?!” without me saying to myself, “I’m never at it again, you’ll find something you can do better doing this again!” This might be more for life in general next time. Don’t get too full of yourself. If you got it than simply just photography, but hey … right this time, chances are there was at least a small element of luck involved, if not a large element of luck. Then again, if Rolling Stone would just pick up the When you’ve done all that… Shoot some more! phone … Thanks, Dave. This has been a blast! Do you have any advice to share with the members who are either just getting started with digital photography, or for those looking to take their photography to “the next level”? Yes… Shoot! Shoot… shoot… shoot… and then shoot some more! Take your camera with you at all times and try — as much as possible — to work with a prime lens while you’re out and about. It’ll force you to frame and compose without relying on the zoom. Figure out what genre you enjoy shooting, develop your own style, your own voice, your own vision. Try every day to hone that style, to listen to that voice and to see that vision, even if you’re making no money (or never will) from it. Don’t try to force yourself into a niche you don’t enjoy. It’s Page 54
  • 55.
    PhotographyBB Online Magazine What’s Happening: The PhotographyBB Forums PHOTOGRAPHYBB: PHOTO CHALLENGES COULD PUT YOU IN NEXT MONTH’S ISSUE! Photography Assignments for YOU... We’ve just launched two exciting new challenges this past month in the forums. The first of which, is the Photography Assignments Challenge. Every two weeks, we “assign” you with a new photographic theme. It’s then your task to bring your cameras out, and challenge yourself to break free from your normal photographic style and comfort zones, by shooting for the assigned theme. This challenge has become quite popular among the members, and it’s a great way to learn new techniques, gain knowledge and inspiration, and to really push yourself photographically. The top 3 photos which best represent each assigned theme will be published in this magazine! At the end of the year, all of the top 3 winners’ photos will be re-evaluated, and one grand prize winner will receive a prize! See the forums challenge section for further details. Seeing with a Macro-Eye No, that’s not superhero-speak! That’s what our new Macro Challenge room is all about. Our resident moderator, Kenneth Fagan, is running the macro challenges where each week he’ll be posting a macro photography image, and you must try to guess what is being shown in the photo. This one’s purely for fun, but you’ll be surprised when you see just how difficult it is to see with your “macro-eye.” Members are also free to submit their own macro photography images to be used in the challenges. See the Macro Challenge room for further details. These are just some of the new features of the forums, however, you’ll still find loads of hot photography tips & tricks, tutorials, great discussions and debates, and most of all... the friendliest photography folks on the web! Happy Photographing, and we’ll see you on the forums. Visit the PhotographyBB Forums and participate today! http://www.photographybb.com/forum/ Page 55
  • 56.
    PhotographyBB Online Magazine Photography Assignments Challenge Winners! PHOTOGRAPHYBB PHOTO ASSIGNMENTS CHALLENGE #1: MOTION The assignment for this first challenge was for members to go out with their cameras in hand, and capture our given theme of “Motion” in a still image. Thanks to all of the members who participated, the race was extremely close between so many of the submissions, and EVERYONE hit the mark with their submissions. Everyone is welcome to participate, so visit our forums and join in the photo-fun. The top 3 chosen photos for Assignment #1 are: “Zero Gravity” Photo submitted by member Alan Plummer (Cardmnal) Photo submitted by member Dot Radley “Female Ruby at Black & Blue Salvia” by Greg McComsey (GregM) Page 56
  • 57.
    PhotographyBB Online Magazine Step into the Spotlight! Would you like to be featured in the PhotographyBB Have a Great Idea for a Online Spotlight on Member section? If so, please let us know at: magazine@photographybb.com Photography We’ll feature your photos, a small biography and write- up about you, as well as links to your web gallery or photography related business. We all love photography and image editing, so let’s get to know each other! Article? Next Month’s Issue: Next month we’ll be wrapping up our HDR series with We are looking for some more advanced processing techniques. We will also be having an in depth look at some of the new talented individuals features in Adobe Photoshop Lightroom 2. who would like to Next Month in “Photography Around the World” expand their portfolios we’ll be off to another new and wonderful place to by volunteering to photographically explore. Stay tuned for coming issues as we travel the globe! contribute articles to this e-magazine! If you This month we had a great series of tutorials, and next month we will be continuing the trend. Since many of are interested, we’d our readers are starting to shoot with DSLR cameras, love to hear from you. we are going to take a look at Lightroom 2, and RAW image processing. Of course we’ll still serve up a nice plate of Photoshop, Elements, Dreamweaver, and Topics of Interest are: another Corel Painter tutorial to wet the appetite! - Photography Techniques Discounts for Readers: - - Photography on Location Photoshop Tutorials The Photomatix Pro 15% off coupon was HUGE last - Hardware / Software Reviews month, so we’ve managed to extend it to our readers - Camera Equipment for yet another month. If you are considering HDR - Member Spotlight photography, you can save 15% off the leading HDR - Plus we’re open to new ideas! software, Photomatix Pro by visiting us at: http://www.photographybb.com/hdr/ To become either a regular contributing author, or even and use the coupon code: photographybb.com just for a one-time article, for a special discount. Also, check out the Shop please email us at: PhotographyBB site for links to some great deals on cameras and accessories. Best deals on the web! magazine@photographybb.com Thank you for reading the PhotographyBB Online Magazine. We hope you enjoyed it, and we’d love to see you again next month. If you have any questions or Introduce yourself, share your comments for us regarding this magazine, please feel idea, and maybe we’ll see you free to email us at: in next month’s issue! magazine@photographybb.com Page 57