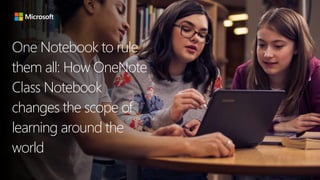
30. How do you use
OneNote with students?
Which features of
OneNote Class
Notebook are you
excited to try out with
your students?
31. Get training, build connections, and more in the
Microsoft Educator Community
Aka.ms/educatorcommunity
Use this promo code to redeem your points for
attending today's session!
BKRXP9018
Get help, find tutorials
support.office.com/education
Tweet out your learning
@SpecificHandle #MicrosoftEDU
Visit the Microsoft booth and the Hands-on Lab
Booth #1102 | Room #185A
Have slide 1 displaying as participants enter the session and get settled.
Welcome audience to the session.
Introduce yourself, including your applicable education credentials.
Say: Teachers are in a constant cycle of instructional planning, assessing, reflecting, and adjusting based on whole-class and individual student needs.
Say: We plan out units and lessons around standards and a school calendar, but we also build in flexibility as we anticipate the need to reteach a topic for better student understanding. Imagine a situation where you can, at a moment's notice, distribute additional resources and support materials to your students.
Say: OneNote Class Notebook provides that and so much more.
(Buying this image)
Say: In the past when I noticed students struggling with a particular assignment, I would run to the copier to make sets of additional activities or lessons for my students. The copier was often busy, and I hated to waste paper prepping lessons for those "just in case" moments.
Say: But now, in my Teacher-Only section of OneNote Class Notebook, I have alternate assignments and resources organized and ready to use whenever needed. With just a few clicks, I select a page, select a section, and distribute the resources to my students. Done! My students don't even have to wait for me to pass out any papers.
Plus, students don't feel singled out by getting "extra" work that their classmates don't also have assigned to them. They know that their assignments are designed specifically for their learning needs and are delivered to their student private notebooks without their peers knowing they have something different.
This kind of instructional efficiency has changed the way I organize my instructional materials and plan my lessons.
Say: I like to describe the structure of OneNote like a digital three-ring binder with sections (dividers) and pages. With OneNote Class Notebook you get that same basic arrangement as well as additional structure to help organize instructional content, collect student work, and encourage collaboration.
Scroll through the images on https://products.office.com/en-US/onenote
Do: Poll the participants about their familiarity with OneNote. This will help you determine how much detail you will be able to share about OneNote.
Say: How many of you currently use OneNote Class Notebook with your students?
Do: Wait for raise of hands.
Say: OneNote is a powerful tool that has allowed many teachers to go completely paperless in their classrooms. There is so much that OneNote can offer, and in this session we will explore ways OneNote Class Notebook can change the scope of learning in classrooms.
Live demo...keep it quick
Say: You create Class Notebooks through Office 365 or through Microsoft Teams. We'll hear more about Teams later. For now, let me briefly show the quick process to create a Class Notebook in Office 365.
Do: Log into Office 365 and click through (quickly) the Class Notebook set-up tool just so participants see all the steps. If not doing live demo, click through the slide deck to briefly show the steps.
This is not designed for "stop and ask questions" but just a quick view of the steps.
Say: In the Office 365 portal, I select Class Notebook then Create a class notebook.
Do: Advance to the next step.
Say: The process is complete in just 7 easy steps. First, I name the notebook.
Do: Advance to the next step.
Say: Next, I see the structure of the notebook with 3 distinct areas: Collaboration Space, Content Library, and Student Notebooks.
Do: Advance to the next step.
Say: I can add another teacher if needed.
Do: Advance to the next step.
Say: Next, I'm prompted to add students. I often skip this step now and add students later. I like to build the structure of the Class Notebook before I invite them to it.
Do: Advance to the next step.
Say: Even if I don't add students now, in the next step I can still determine how to personalize the default sections of my students' notebooks. I can use the suggested sections or add others.
Do: Advance to the next step.
Say: The next step previews the teacher and student spaces before I finish and create the notebook.
Do: *Don't finish creating the notebook. Instead, you'll use the notebook you opened previously (see "Before you teach" notes).
Say: And, that's it! Once the Class Notebook is created, I can start working in it with any version of OneNote including OneNote Online and OneNote for Windows 10. Today, I'll choose OneNote for Windows 10.
Do: Go back to OneNote for Windows 10 and navigate to the Content Library in the sample Class Notebook.
Say: OneNote allows teachers to store information in various multimedia formats so that students have one-stop shopping for curricular content that the teacher can predetermine. When building a new Class Notebook, I often start in the Content Library. It is a convenient place to store resources for students that students cannot edit. It is a read-only section.
Do: Display the "Life Cycle of a Tree Frog" page in the Content Library.
Say: Often, I use the Content Library for resources I want to students to access for a lesson or unit. For example, I might have pages with reading material, task lists, and tables of web resources. I hear from many teachers that instead of spending oodles of time at the copy machine, they just build student activities in the Content Library.
Say: Sometimes I need to organize my instructional content before I'm ready for students to see it. The Teacher-Only section is perfect for that. It's a place where I can draft my work and then move or copy pages to the Content Library when I'm ready for students to view the content. To enable to the Teacher-Only section, go back to Office 365 and select Manage Class Notebooks.
When in the Manage Notebook panel, you can specific which students can view which sections.
This is especially useful when you have groups of students working on different projects and you don’t need the entire class to have access to all the group sections.
When in the Manage Notebook panel, you can specific which students can view which sections.
This is especially useful when you have groups of students working on different projects and you don’t need the entire class to have access to all the group sections.
Do: Log into Office 365. Show the Microsoft Teams icon.
If tight on time, just show the slide deck images for this next part.
Say: If your school or district is using Microsoft Teams, you can use the Class Notebook within your Class Team. When students are enrolled in the Team, they are automatically added to the Class Notebook. And if your school or district is using School Data Sync, students might be automatically enrolled in Teams based on their class enrollment. These are all useful and time-saving features.
Say: One of my favorite features connecting OneNote and Microsoft Teams is the option to create an assignment using an existing page from the Class Notebook.
Say: As with all assignments, I enter basic information such as title, instruction, and due date. Then, I select resources for the students. When I select a page from our Class Notebook, I'm prompted to select a student section to which the page will be distributed. When I publish the assignment, students receive the directions and a specific link directly to the page they need to complete in OneNote. I appreciate how the connection between Microsoft Teams and OneNote makes things easier for my students and me.
Say: Let's get some shout-outs before we wrap-up.
Ask: How do you use OneNote with students? Which features of OneNote Class Notebook are you excited to try out with your students?
Do: Take as many responses as possible with the remaining time.
Say: Thank you for attending. I hope you enjoy the rest of the conference!
Do: Display final slides