Downloaded 15 times

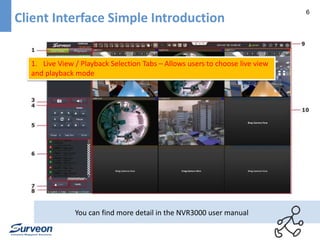
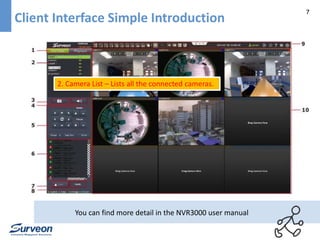
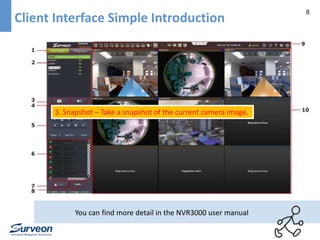


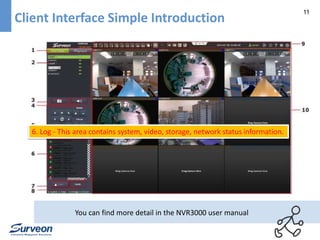
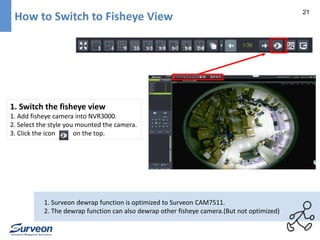
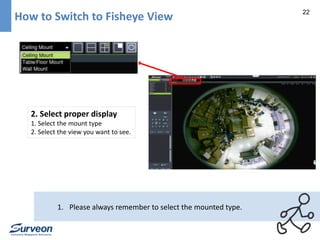
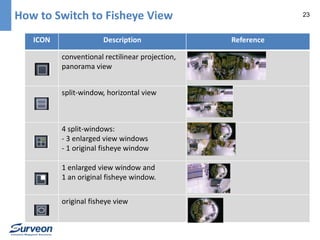


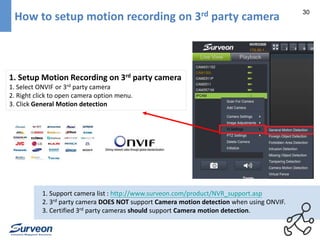
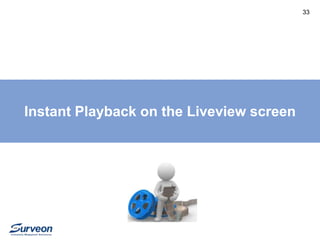
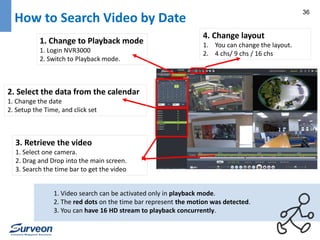
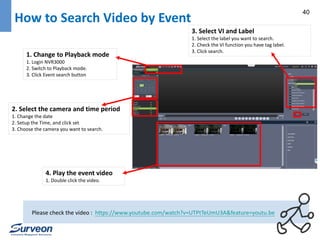
![34 How to use Instant Playback?
1. Change to Live View mode
1. Login NVR3000
2. Switch to Live-view mode.
2. Play the video
1. Right-click the video panel that playback is required on
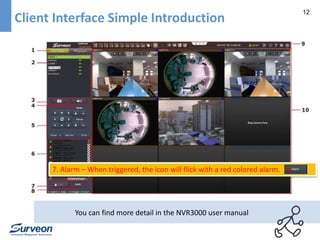
2. select Instant Play > [Time Length] to activate the function
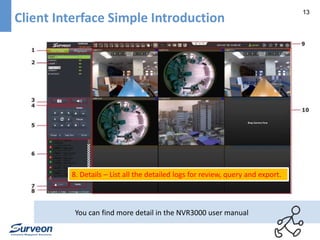
3. Instantly play video
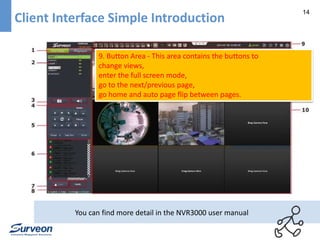
1. A popup will open with the desired playback.
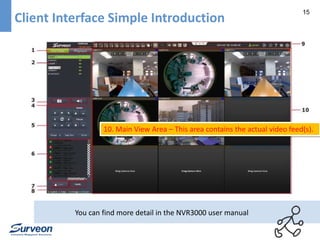
1. We allow one instant playback window at a time.
2. Demo Video : https://www.youtube.com/watch?v=wvWOZKXVJNw](https://image.slidesharecdn.com/nvr3000quickstartguide-141126032500-conversion-gate02/85/NVR3000-Quick-Start-Guide-34-320.jpg)

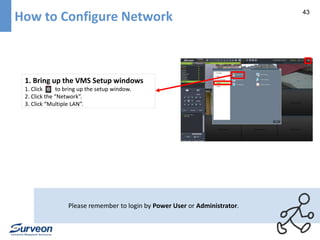


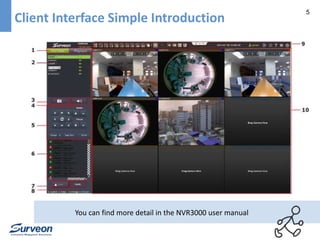
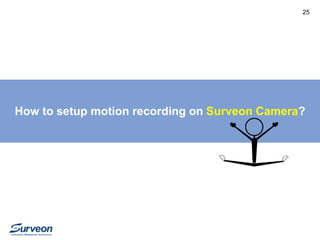
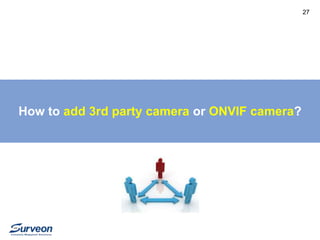
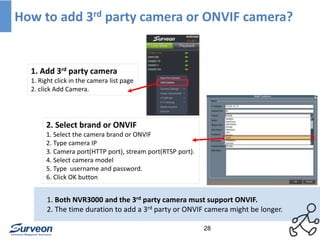
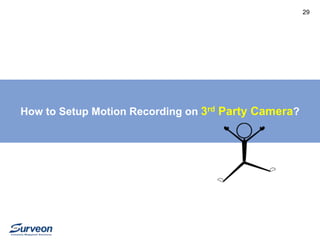
This document provides instructions for using the NVR3000 video management system. It describes the client interface, including live view/playback selection tabs, camera list, snapshot button, volume control, PTZ controls, logs, alarms, details, and main view area. It also explains how to check events and storage status, utilize PAP view, switch to fisheye view, set up motion recording, add third-party cameras, play video back by date or event, configure network and user accounts, and use dual monitors.


