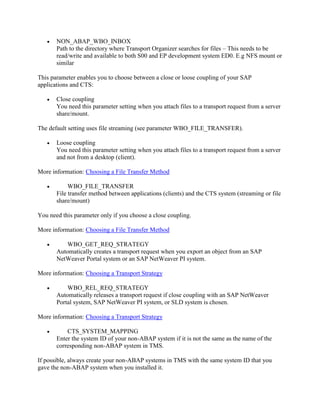
The document provides steps to configure CTS+ on Solution Manager (S00) for Portal (EP*) transports. It involves:
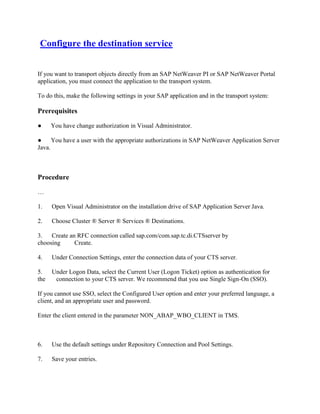
1. Configuring the CTS Deploy web service on S00.
2. Defining and configuring the non-ABAP portal system (ED0) in TMS, including settings for transport organizer.
3. Configuring Transport Organizer Web UI, including changing source system settings, activating the CTS_BROWSER service, and starting the Transport Organizer UI.