This document provides installation instructions for the Motorola AP-5181 access point. It describes how to assemble the mounting kit, install the access point on a pole using various mounting accessories, and attach the heavy weather kit. The instructions emphasize proper grounding and give detailed steps for clamping the access point to poles of different diameters. Safety is stressed and all hardware included in the kits is listed.
Motorola solutions ap 5181 access point deployment guide (part no. 72 e-15222...Advantec Distribution
This document provides installation instructions for the Motorola AP-5181 access point. It discusses:
1) Attaching the mounting bracket, tilt bracket, and pole clamps to securely mount the access point to a pole.
2) Installing optional heavy weather accessories like antenna extensions and a shield to protect the access point in outdoor environments.
3) Important steps like properly grounding the access point and avoiding sharp bends in antenna cables.
The instructions provide detailed pictures and numbered steps to guide installation and deployment of the AP-5181 access point for outdoor use. Proper installation is emphasized for safety and performance.
1. The document provides installation instructions for mounting and setting up the AP-5181 outdoor wireless access point. It describes the parts included and various mounting options, including pole mounting using brackets or wall mounting.
2. The instructions guide the installer through the steps for either pole or wall mounting, including positioning and securing the mounting brackets, then attaching the access point.
3. Additional safety and regulatory information is provided, along with technical specifications for the access point and its antenna options. Contact information is also included if the installer requires assistance.
This document provides assembly instructions for mounting multiple monitor displays on an adjustable arm system. It includes the following:
1. Instructions are given for assembling the base pole mount, extension arms, and dual monitor hubs to attach displays at the desired heights and locations.
2. Directions are provided for mounting the pole to surfaces using either a clamp or grommet system, as well as mounting to a wall or slat wall.
3. Steps are outlined for adjusting the tension on movable arm joints and height adjustable segments to properly counterbalance attached monitors.
F 22 for edf-40 plans and assembly guide v1[1]guest2c232c
This document provides instructions for building a model of an F-22 Raptor fighter jet with thrust vectoring capabilities. The model has a 15" wingspan and uses a micro EDF fan, brushless motor, and lithium polymer battery. Detailed steps are provided for assembling the foam and composite airframe parts, installing the electronics and control surfaces, and finishing the model with markings. The instructions emphasize precision in setting up the thrust line and ducting the exhaust to enable high-performance flight characteristics.
1. The document provides assembly instructions for the Xtend 7818J Series monitor arm. It includes a parts list and diagrams showing how to assemble, mount, adjust, and use the arm and its components.
2. The instructions describe how to mount the base assembly to a work surface using either a clamp or grommet mounting system, attach the arm assembly to the base, and mount a monitor to the arm using a VESA plate.
3. Additional sections cover adjusting the arm tension, joint torque, and tilt, as well as using the cable managers to route cables.
1) The document provides an owner's manual for the Sealy Posturematic Adjustable Base - Classic Model.
2) It describes important safety instructions, parts included, installation instructions, use of the remote control, programming instructions, and troubleshooting tips.
3) The manual emphasizes that only authorized repairs should be made to avoid voiding the warranty and warns of important weight and usage restrictions.
This document provides release notes for Cambium Networks PTP 600 Series System Release 600-10-04. Key updates include:
1) Support for new 5.8 GHz frequency bands in Greece and Portugal/Iceland/Serbia
2) Increased channel bandwidth and spacing options in existing frequency bands
3) Enhancements to password security settings and views
4) Ability to complete the installation wizard without entering install arm state.
It also outlines known problems and limitations, and provides support contact information.
Motorola solutions ap 5181 access point deployment guide (part no. 72 e-15222...Advantec Distribution
The document provides installation instructions for the Motorola Solutions AP-5181 access point. It describes assembling and installing the mounting accessories, mounting the access point to a pole using different kits, installing a heavy weather kit for outdoor deployments, installing a power tap unit, and connecting cables while maintaining an IP56 seal. The instructions are intended to properly install and deploy the outdoor access point and its components.
1) The document provides instructions for mounting an AP-5181 access point to a pole or wall.
2) It describes the parts included in the mounting kit, including plates, brackets, and clamps to securely attach the access point.
3) Step-by-step instructions are given for attaching the access point to either a pole using a V-shaped clamp, or to a wall using screws.
Instruction Manual US OPTICS SR Rifle Scope | Optics TradeOptics-Trade
The document provides instructions for using a rifle scope produced by U.S. Optics. It includes sections on focusing the reticle, mounting the scope, zeroing the scope, replacing batteries in an illuminated reticle, and cleaning the scope. The manufacturer provides the manual to guide users on properly installing, sighting in, and maintaining the optic.
The Bowthorpe Cable Spiker is used to prove that a disconnected cable is dead before work begins. It comprises a hand pump connected by a hose to a hydraulic ram with a diamond-shaped chisel that is placed around the cable. An independent earth cable is also included. The operator places the spiker around the cable, connects the earth cable, and uses the pump to drive the chisel into the cable to test if it is dead. Proper safety equipment and procedures must be followed when using the high voltage equipment.
This installation manual provides instructions for installing a dual monitor support arm system that can hold between 10-40 pounds total. It warns that the installer must verify the attachment surface can safely support the equipment weight and improper installation may cause damage or injury. The instructions cover mounting the arm to the work surface using either a grommet plate or clamp assembly. Additional steps include mounting the monitors, adjusting counterbalances, managing cables, setting a rotation limiter, and adjusting tilt tension.
This document provides installation instructions for single and dual monitor support arms. It describes how to mount the arm to a work surface using either a grommet hole or clamp, how to attach monitors to the arm, how to balance the arm counterweight, and how to route cables. Warnings are given to read all instructions before installation and to verify the surface can support the equipment weight.
Replacing antenna integrated radio units air32Roberto Rojas
This document provides instructions for replacing an Antenna Integrated Radio (AIR) 32 unit and fan unit. It describes unpacking replacement parts, handling the AIR unit safely, preparing the unit for removal by disconnecting cables and power, removing the unit from a pole or wall installation, and installing the replacement unit. Safety warnings and prerequisite documents, tools, and conditions are also outlined. The procedures aim to minimize potential traffic disturbances during the replacement work.
Instruction Manual | Nightforce CFS 6-36x50 F1 | Optics TradeOptics-Trade
The document is an owner's manual for a Nightforce Configurable Field Spotting Scope (CFS) 6-36x50mm F1. It contains 3 sentences:
The manual provides instructions for use, maintenance, and warranty information for the Nightforce CFS 6-36x50mm spotting scope, including focusing the image, adjusting magnification and diopter settings, mounting on a tripod, and installing optional accessory cages and rails. Key features of the spotting scope such as the rapid focus ring, magnification ring, and integrated dovetail base are described along with what is included in the product box and proper lens cap usage. Safety warnings and export restrictions are also noted at the beginning.
Instruction Manual, Getting Started Guide Minelab GPZ 7000 Metal Detector En...Serious Detecting
This document provides instructions for assembling and using the Minelab GPZ 7000 metal detector. It includes warnings and cautions, compliance information, and assembly steps for attaching the various detector components like the control box, battery, coil, and optional guide arm. It also provides a quick start guide for beginners to start detecting quickly in 6 steps and instructions for charging the lithium-ion battery pack.
This document provides installation instructions for a GAU-100x Gauge System in a 2002 or newer Subaru Impreza. The instructions outline removing interior panels to access wiring areas, installing senders like an oil pressure adapter, running wiring through the firewall and to the engine bay, and reassembling interior panels. Key steps include preparing the engine bay by removing items like the intercooler for easier access, tapping into wiring near the stereo to power gauges, and mounting the gauge pod and cover in the dashboard.
Volvo sd77 f single drum roller service repair manualfjjsekksekmm
This document provides instructions for removing a hydraulic motor from a machine. It describes draining the oil from the rear axle, disconnecting electrical and hydraulic connections from the motor, and removing mounting bolts. Safety precautions are noted, including using lifting devices rated for the motor's weight. Reinstallation involves reversing these steps, with adjustments if needed, and testing operation after refilling fluids.
Volvo sd77 f single drum roller service repair manualjfjkskefksmem
This document provides instructions for removing a hydraulic motor from a machine. It describes draining the oil from the rear axle, disconnecting electrical and hydraulic connections from the motor, and removing mounting bolts. Safety precautions are noted, including using lifting devices with adequate capacity and handling fluids safely. Reinstallation involves reversing these steps, including reconnecting lines and bolts, refilling oil, and testing operation.
This document provides installation and maintenance instructions for a multi-mounting kit used with reflective beam smoke detectors. The kit allows detectors and reflectors to be mounted to walls or ceilings and includes brackets, screws, and adjustment components. Instructions are provided to mount the transmitter/receiver unit or the reflector individually using the various brackets included in the kit. Proper alignment and secure mounting of both components is emphasized for correct operation of the beam smoke detection system.
Kinetrol Series 180 - 189 Actuator Spring Removal Replacement InstructionsKinetrol USA
The document provides instructions for removing and replacing the spring pack in 180/189 spring return actuators. It warns that the wound springs store a large amount of energy that can be dangerous if suddenly released. The removal process involves securely supporting the actuator, using a keeper plate to remove spring tension, lifting the spring pack out of the actuator, and protecting the springs during storage. Reassembly involves replacing parts like the base plate gasket if needed, lowering the spring pack back onto the actuator square end and baseplate register, and using air pressure to allow bolts to be fitted and retain the spring pack.
This document provides instructions for setting up and using the Wagner Smart SideKick Multi-Room Powered Roller for painting. It includes important safety information about fire and explosion hazards from solvent fumes, as well as hazardous vapors from paints and other materials. The document reviews the parts of the roller, including the pump assembly, roller arm, and extension. It provides step-by-step instructions for setting up the roller with a paint container and extending the roller arm. It also gives tips for practice and usage, such as using drop cloths and placing the roller flat during breaks to prevent dripping.
The document provides step-by-step instructions for setting up an OE-254 antenna system and connecting radios for retransmission. It involves assembling the antenna mast and guy wires, attaching antenna elements, and connecting radios to transmit and receive signals through the antenna. The radios are then configured for either traditional or same-net retransmission depending on the frequency plan and network setup.
This 3-sentence summary provides the high-level steps for installing a sit-stand workstation:
The document provides installation instructions over 8 pages for a sit-stand workstation, including installing the base on a desk through either clamp or grommet mounting, attaching the arm and mounting the work surface and keyboard tray, then installing the monitor and managing cables. The instructions describe counterbalancing the arm, leveling and tension adjustments, and include warnings about proper installation and disclaimers about liability.
This document provides installation instructions for heatshrink outdoor armour earthen to suit single core XLPE/AWA/PVC cables ranging from 7.2 to 33kV. The instructions are as follows: (1) position the large outer shrink tube and armour support ring over the cable end, (2) prepare the cable to the required length and expose the armours, (3) bend back the armour wires and fit the support ring, (4) secure the earth braid to the armours, (5) bend the armours back over the support ring, (6) secure the armours and braid with clamps, (7) apply mastic tape and further tape, (8) cover any
This document provides assembly instructions for the Ecilop Easy quadcopter. It includes a parts list and technical specifications. The assembly involves 22 steps to install components like the camera gimbal, landing gear, motors, electronics and battery. Balancing the drone and configuring the gyroscopes are important final steps to ensure stable flight and video.
This 3 sentence summary provides the high level information from the installation manual:
The installation manual provides instructions for installing a sit-stand workstation, including attaching the base to the desk, installing the arm and monitor, adjusting the counterbalance and monitor settings, and managing cables. Safety warnings are included and adjustments are suggested to properly support the workstation. Installation requires common hand tools and follows a multi-step process of assembling and securing the various components.
Cambium Networks is an industry leader in point-to-multipoint and point-to-point wireless broadband solutions. They have shipped over 4 million nodes totaling over $1 billion to networks in more than 150 countries. Their ePMP product line provides affordable and scalable wireless access networks through features like GPS synchronization, high scalability and consistent performance, interference mitigation technology, and effective quality of service capabilities.
Motorola solutions ap 5181 access point deployment guide (part no. 72 e-15222...Advantec Distribution
The document provides installation instructions for the Motorola Solutions AP-5181 access point. It describes assembling and installing the mounting accessories, mounting the access point to a pole using different kits, installing a heavy weather kit for outdoor deployments, installing a power tap unit, and connecting cables while maintaining an IP56 seal. The instructions are intended to properly install and deploy the outdoor access point and its components.
1) The document provides instructions for mounting an AP-5181 access point to a pole or wall.
2) It describes the parts included in the mounting kit, including plates, brackets, and clamps to securely attach the access point.
3) Step-by-step instructions are given for attaching the access point to either a pole using a V-shaped clamp, or to a wall using screws.
Instruction Manual US OPTICS SR Rifle Scope | Optics TradeOptics-Trade
The document provides instructions for using a rifle scope produced by U.S. Optics. It includes sections on focusing the reticle, mounting the scope, zeroing the scope, replacing batteries in an illuminated reticle, and cleaning the scope. The manufacturer provides the manual to guide users on properly installing, sighting in, and maintaining the optic.
The Bowthorpe Cable Spiker is used to prove that a disconnected cable is dead before work begins. It comprises a hand pump connected by a hose to a hydraulic ram with a diamond-shaped chisel that is placed around the cable. An independent earth cable is also included. The operator places the spiker around the cable, connects the earth cable, and uses the pump to drive the chisel into the cable to test if it is dead. Proper safety equipment and procedures must be followed when using the high voltage equipment.
This installation manual provides instructions for installing a dual monitor support arm system that can hold between 10-40 pounds total. It warns that the installer must verify the attachment surface can safely support the equipment weight and improper installation may cause damage or injury. The instructions cover mounting the arm to the work surface using either a grommet plate or clamp assembly. Additional steps include mounting the monitors, adjusting counterbalances, managing cables, setting a rotation limiter, and adjusting tilt tension.
This document provides installation instructions for single and dual monitor support arms. It describes how to mount the arm to a work surface using either a grommet hole or clamp, how to attach monitors to the arm, how to balance the arm counterweight, and how to route cables. Warnings are given to read all instructions before installation and to verify the surface can support the equipment weight.
Replacing antenna integrated radio units air32Roberto Rojas
This document provides instructions for replacing an Antenna Integrated Radio (AIR) 32 unit and fan unit. It describes unpacking replacement parts, handling the AIR unit safely, preparing the unit for removal by disconnecting cables and power, removing the unit from a pole or wall installation, and installing the replacement unit. Safety warnings and prerequisite documents, tools, and conditions are also outlined. The procedures aim to minimize potential traffic disturbances during the replacement work.
Instruction Manual | Nightforce CFS 6-36x50 F1 | Optics TradeOptics-Trade
The document is an owner's manual for a Nightforce Configurable Field Spotting Scope (CFS) 6-36x50mm F1. It contains 3 sentences:
The manual provides instructions for use, maintenance, and warranty information for the Nightforce CFS 6-36x50mm spotting scope, including focusing the image, adjusting magnification and diopter settings, mounting on a tripod, and installing optional accessory cages and rails. Key features of the spotting scope such as the rapid focus ring, magnification ring, and integrated dovetail base are described along with what is included in the product box and proper lens cap usage. Safety warnings and export restrictions are also noted at the beginning.
Instruction Manual, Getting Started Guide Minelab GPZ 7000 Metal Detector En...Serious Detecting
This document provides instructions for assembling and using the Minelab GPZ 7000 metal detector. It includes warnings and cautions, compliance information, and assembly steps for attaching the various detector components like the control box, battery, coil, and optional guide arm. It also provides a quick start guide for beginners to start detecting quickly in 6 steps and instructions for charging the lithium-ion battery pack.
This document provides installation instructions for a GAU-100x Gauge System in a 2002 or newer Subaru Impreza. The instructions outline removing interior panels to access wiring areas, installing senders like an oil pressure adapter, running wiring through the firewall and to the engine bay, and reassembling interior panels. Key steps include preparing the engine bay by removing items like the intercooler for easier access, tapping into wiring near the stereo to power gauges, and mounting the gauge pod and cover in the dashboard.
Volvo sd77 f single drum roller service repair manualfjjsekksekmm
This document provides instructions for removing a hydraulic motor from a machine. It describes draining the oil from the rear axle, disconnecting electrical and hydraulic connections from the motor, and removing mounting bolts. Safety precautions are noted, including using lifting devices rated for the motor's weight. Reinstallation involves reversing these steps, with adjustments if needed, and testing operation after refilling fluids.
Volvo sd77 f single drum roller service repair manualjfjkskefksmem
This document provides instructions for removing a hydraulic motor from a machine. It describes draining the oil from the rear axle, disconnecting electrical and hydraulic connections from the motor, and removing mounting bolts. Safety precautions are noted, including using lifting devices with adequate capacity and handling fluids safely. Reinstallation involves reversing these steps, including reconnecting lines and bolts, refilling oil, and testing operation.
This document provides installation and maintenance instructions for a multi-mounting kit used with reflective beam smoke detectors. The kit allows detectors and reflectors to be mounted to walls or ceilings and includes brackets, screws, and adjustment components. Instructions are provided to mount the transmitter/receiver unit or the reflector individually using the various brackets included in the kit. Proper alignment and secure mounting of both components is emphasized for correct operation of the beam smoke detection system.
Kinetrol Series 180 - 189 Actuator Spring Removal Replacement InstructionsKinetrol USA
The document provides instructions for removing and replacing the spring pack in 180/189 spring return actuators. It warns that the wound springs store a large amount of energy that can be dangerous if suddenly released. The removal process involves securely supporting the actuator, using a keeper plate to remove spring tension, lifting the spring pack out of the actuator, and protecting the springs during storage. Reassembly involves replacing parts like the base plate gasket if needed, lowering the spring pack back onto the actuator square end and baseplate register, and using air pressure to allow bolts to be fitted and retain the spring pack.
This document provides instructions for setting up and using the Wagner Smart SideKick Multi-Room Powered Roller for painting. It includes important safety information about fire and explosion hazards from solvent fumes, as well as hazardous vapors from paints and other materials. The document reviews the parts of the roller, including the pump assembly, roller arm, and extension. It provides step-by-step instructions for setting up the roller with a paint container and extending the roller arm. It also gives tips for practice and usage, such as using drop cloths and placing the roller flat during breaks to prevent dripping.
The document provides step-by-step instructions for setting up an OE-254 antenna system and connecting radios for retransmission. It involves assembling the antenna mast and guy wires, attaching antenna elements, and connecting radios to transmit and receive signals through the antenna. The radios are then configured for either traditional or same-net retransmission depending on the frequency plan and network setup.
This 3-sentence summary provides the high-level steps for installing a sit-stand workstation:
The document provides installation instructions over 8 pages for a sit-stand workstation, including installing the base on a desk through either clamp or grommet mounting, attaching the arm and mounting the work surface and keyboard tray, then installing the monitor and managing cables. The instructions describe counterbalancing the arm, leveling and tension adjustments, and include warnings about proper installation and disclaimers about liability.
This document provides installation instructions for heatshrink outdoor armour earthen to suit single core XLPE/AWA/PVC cables ranging from 7.2 to 33kV. The instructions are as follows: (1) position the large outer shrink tube and armour support ring over the cable end, (2) prepare the cable to the required length and expose the armours, (3) bend back the armour wires and fit the support ring, (4) secure the earth braid to the armours, (5) bend the armours back over the support ring, (6) secure the armours and braid with clamps, (7) apply mastic tape and further tape, (8) cover any
This document provides assembly instructions for the Ecilop Easy quadcopter. It includes a parts list and technical specifications. The assembly involves 22 steps to install components like the camera gimbal, landing gear, motors, electronics and battery. Balancing the drone and configuring the gyroscopes are important final steps to ensure stable flight and video.
This 3 sentence summary provides the high level information from the installation manual:
The installation manual provides instructions for installing a sit-stand workstation, including attaching the base to the desk, installing the arm and monitor, adjusting the counterbalance and monitor settings, and managing cables. Safety warnings are included and adjustments are suggested to properly support the workstation. Installation requires common hand tools and follows a multi-step process of assembling and securing the various components.
Similar to Motorola solutions ap 5181 access point deployment guide (part no. 72 e-152229-01 rev. b) (20)
Cambium Networks is an industry leader in point-to-multipoint and point-to-point wireless broadband solutions. They have shipped over 4 million nodes totaling over $1 billion to networks in more than 150 countries. Their ePMP product line provides affordable and scalable wireless access networks through features like GPS synchronization, high scalability and consistent performance, interference mitigation technology, and effective quality of service capabilities.
The VX 9000 virtualized software-based wireless LAN controller combines the power of virtualization with Motorola Solutions' WiNG Controller. It provides centralized management of wireless networks through a single interface with high scalability, flexibility and advanced wireless services. Key features include integrated network security, the advanced WiNG 5 operating system, plug-and-play deployment, simplified licensing and infinite scalability through virtualization. It supports all major hypervisors and public/private clouds for maximum deployment flexibility at low cost.
The NX 7500 integrated services platform provides comprehensive management of up to 2,048 network elements through a single interface. It allows all network infrastructure to intelligently route traffic for maximum speed and throughput without congestion. The NX 7500 offers advanced wireless LAN performance for mid-sized and campus environments with features such as plug-and-play installation, hierarchical management, smart routing, BYOD support, and integrated security services. It provides flexibility and investment protection through modular upgrades.
The document discusses the challenges retailers face in supporting increased wireless applications and next-generation Wi-Fi in stores. It introduces the Motorola AP 8200 Series as a solution that provides high-performance wireless connectivity for customers and staff. The AP 8200 Series allows easy access, security, support for 802.11ac Wi-Fi, bandwidth for applications, and performance for many users. It provides flexibility, a cost-effective upgrade to 802.11ac, and features for security, environmental monitoring, location services, and more.
The document describes the innovative features of the Motorola AP 8222 wireless access point. It has a sleek design suitable for retail, office, and other customer-facing spaces. It provides dual-band 802.11ac and 802.11n wireless connectivity at speeds up to 1.3Gbps. Key features include advanced beamforming, gap-free security, and support for bandwidth-heavy applications like video calling. The access point is centrally managed through Motorola's WiNG 5 networking operating system.
The AP 8163 is a ruggedized outdoor mesh access point designed to withstand extreme weather conditions. It has three radios - two for client access across 2.4GHz and 5GHz bands, and a third radio that can be used for wireless intrusion prevention scanning or dynamic frequency selection to avoid radar interference. The advanced WiNG 5 operating system allows the access points to self-optimize the network for best performance. Key features include powerful antennas for extended range, mesh networking for redundancy, and security features like firewalls and wireless intrusion prevention.
The document describes the features and capabilities of the Motorola AP 8122 3x3 MIMO 802.11n access point. It delivers high throughput to support enterprise applications including voice and HD video using 802.11n technology with standard 802.3af PoE. It has advanced features like load balancing, pre-emptive roaming, and dual band radios to increase network reliability, resilience, and security. The access point also supports advanced wireless capabilities such as voice over wireless, location services, and guest access controls.
The document describes the innovative features of the AP 7532 wireless access point. It provides the highest wireless speeds available with 3x3 MIMO and 256 QAM modulation on both 2.4GHz and 5GHz radios. It has a dual radio 802.11ac/802.11n design that provides a upgrade path to 1.3Gbps 802.11ac speeds while maintaining support for existing devices. It offers various advanced features like load balancing, security, sensor support and quality of service for voice. The access point is designed to deliver maximum performance at a low cost.
The AP 7502 is a dual-band 802.11ac wireless access point designed for installation in small spaces like hotel rooms. It has a compact wall-mount design, supports the latest WiFi standards, and includes features to ensure reliable connectivity even in challenging environments. Setup and management are simplified through zero-touch provisioning and both standalone and controller-based operation modes.
The document describes the innovative features of the AP 7522 wireless access point. It provides dual-band 802.11ac and 802.11n radios for high performance WiFi. It offers internal or external antenna options and can function as both an access point and wireless sensor. The access point provides security, load balancing, and other features to support mission critical applications on the wireless network.
Digital Marketing Trends in 2024 | Guide for Staying AheadWask
https://www.wask.co/ebooks/digital-marketing-trends-in-2024
Feeling lost in the digital marketing whirlwind of 2024? Technology is changing, consumer habits are evolving, and staying ahead of the curve feels like a never-ending pursuit. This e-book is your compass. Dive into actionable insights to handle the complexities of modern marketing. From hyper-personalization to the power of user-generated content, learn how to build long-term relationships with your audience and unlock the secrets to success in the ever-shifting digital landscape.
Trusted Execution Environment for Decentralized Process MiningLucaBarbaro3
Presentation of the paper "Trusted Execution Environment for Decentralized Process Mining" given during the CAiSE 2024 Conference in Cyprus on June 7, 2024.
Digital Banking in the Cloud: How Citizens Bank Unlocked Their MainframePrecisely
Inconsistent user experience and siloed data, high costs, and changing customer expectations – Citizens Bank was experiencing these challenges while it was attempting to deliver a superior digital banking experience for its clients. Its core banking applications run on the mainframe and Citizens was using legacy utilities to get the critical mainframe data to feed customer-facing channels, like call centers, web, and mobile. Ultimately, this led to higher operating costs (MIPS), delayed response times, and longer time to market.
Ever-changing customer expectations demand more modern digital experiences, and the bank needed to find a solution that could provide real-time data to its customer channels with low latency and operating costs. Join this session to learn how Citizens is leveraging Precisely to replicate mainframe data to its customer channels and deliver on their “modern digital bank” experiences.
Taking AI to the Next Level in Manufacturing.pdfssuserfac0301
Read Taking AI to the Next Level in Manufacturing to gain insights on AI adoption in the manufacturing industry, such as:
1. How quickly AI is being implemented in manufacturing.
2. Which barriers stand in the way of AI adoption.
3. How data quality and governance form the backbone of AI.
4. Organizational processes and structures that may inhibit effective AI adoption.
6. Ideas and approaches to help build your organization's AI strategy.
Your One-Stop Shop for Python Success: Top 10 US Python Development Providersakankshawande
Simplify your search for a reliable Python development partner! This list presents the top 10 trusted US providers offering comprehensive Python development services, ensuring your project's success from conception to completion.
Have you ever been confused by the myriad of choices offered by AWS for hosting a website or an API?
Lambda, Elastic Beanstalk, Lightsail, Amplify, S3 (and more!) can each host websites + APIs. But which one should we choose?
Which one is cheapest? Which one is fastest? Which one will scale to meet our needs?
Join me in this session as we dive into each AWS hosting service to determine which one is best for your scenario and explain why!
Ivanti’s Patch Tuesday breakdown goes beyond patching your applications and brings you the intelligence and guidance needed to prioritize where to focus your attention first. Catch early analysis on our Ivanti blog, then join industry expert Chris Goettl for the Patch Tuesday Webinar Event. There we’ll do a deep dive into each of the bulletins and give guidance on the risks associated with the newly-identified vulnerabilities.
For the full video of this presentation, please visit: https://www.edge-ai-vision.com/2024/06/temporal-event-neural-networks-a-more-efficient-alternative-to-the-transformer-a-presentation-from-brainchip/
Chris Jones, Director of Product Management at BrainChip , presents the “Temporal Event Neural Networks: A More Efficient Alternative to the Transformer” tutorial at the May 2024 Embedded Vision Summit.
The expansion of AI services necessitates enhanced computational capabilities on edge devices. Temporal Event Neural Networks (TENNs), developed by BrainChip, represent a novel and highly efficient state-space network. TENNs demonstrate exceptional proficiency in handling multi-dimensional streaming data, facilitating advancements in object detection, action recognition, speech enhancement and language model/sequence generation. Through the utilization of polynomial-based continuous convolutions, TENNs streamline models, expedite training processes and significantly diminish memory requirements, achieving notable reductions of up to 50x in parameters and 5,000x in energy consumption compared to prevailing methodologies like transformers.
Integration with BrainChip’s Akida neuromorphic hardware IP further enhances TENNs’ capabilities, enabling the realization of highly capable, portable and passively cooled edge devices. This presentation delves into the technical innovations underlying TENNs, presents real-world benchmarks, and elucidates how this cutting-edge approach is positioned to revolutionize edge AI across diverse applications.
Building Production Ready Search Pipelines with Spark and MilvusZilliz
Spark is the widely used ETL tool for processing, indexing and ingesting data to serving stack for search. Milvus is the production-ready open-source vector database. In this talk we will show how to use Spark to process unstructured data to extract vector representations, and push the vectors to Milvus vector database for search serving.
Driving Business Innovation: Latest Generative AI Advancements & Success StorySafe Software
Are you ready to revolutionize how you handle data? Join us for a webinar where we’ll bring you up to speed with the latest advancements in Generative AI technology and discover how leveraging FME with tools from giants like Google Gemini, Amazon, and Microsoft OpenAI can supercharge your workflow efficiency.
During the hour, we’ll take you through:
Guest Speaker Segment with Hannah Barrington: Dive into the world of dynamic real estate marketing with Hannah, the Marketing Manager at Workspace Group. Hear firsthand how their team generates engaging descriptions for thousands of office units by integrating diverse data sources—from PDF floorplans to web pages—using FME transformers, like OpenAIVisionConnector and AnthropicVisionConnector. This use case will show you how GenAI can streamline content creation for marketing across the board.
Ollama Use Case: Learn how Scenario Specialist Dmitri Bagh has utilized Ollama within FME to input data, create custom models, and enhance security protocols. This segment will include demos to illustrate the full capabilities of FME in AI-driven processes.
Custom AI Models: Discover how to leverage FME to build personalized AI models using your data. Whether it’s populating a model with local data for added security or integrating public AI tools, find out how FME facilitates a versatile and secure approach to AI.
We’ll wrap up with a live Q&A session where you can engage with our experts on your specific use cases, and learn more about optimizing your data workflows with AI.
This webinar is ideal for professionals seeking to harness the power of AI within their data management systems while ensuring high levels of customization and security. Whether you're a novice or an expert, gain actionable insights and strategies to elevate your data processes. Join us to see how FME and AI can revolutionize how you work with data!
Dandelion Hashtable: beyond billion requests per second on a commodity serverAntonios Katsarakis
This slide deck presents DLHT, a concurrent in-memory hashtable. Despite efforts to optimize hashtables, that go as far as sacrificing core functionality, state-of-the-art designs still incur multiple memory accesses per request and block request processing in three cases. First, most hashtables block while waiting for data to be retrieved from memory. Second, open-addressing designs, which represent the current state-of-the-art, either cannot free index slots on deletes or must block all requests to do so. Third, index resizes block every request until all objects are copied to the new index. Defying folklore wisdom, DLHT forgoes open-addressing and adopts a fully-featured and memory-aware closed-addressing design based on bounded cache-line-chaining. This design offers lock-free index operations and deletes that free slots instantly, (2) completes most requests with a single memory access, (3) utilizes software prefetching to hide memory latencies, and (4) employs a novel non-blocking and parallel resizing. In a commodity server and a memory-resident workload, DLHT surpasses 1.6B requests per second and provides 3.5x (12x) the throughput of the state-of-the-art closed-addressing (open-addressing) resizable hashtable on Gets (Deletes).
leewayhertz.com-AI in predictive maintenance Use cases technologies benefits ...alexjohnson7307
Predictive maintenance is a proactive approach that anticipates equipment failures before they happen. At the forefront of this innovative strategy is Artificial Intelligence (AI), which brings unprecedented precision and efficiency. AI in predictive maintenance is transforming industries by reducing downtime, minimizing costs, and enhancing productivity.
Introduction of Cybersecurity with OSS at Code Europe 2024Hiroshi SHIBATA
I develop the Ruby programming language, RubyGems, and Bundler, which are package managers for Ruby. Today, I will introduce how to enhance the security of your application using open-source software (OSS) examples from Ruby and RubyGems.
The first topic is CVE (Common Vulnerabilities and Exposures). I have published CVEs many times. But what exactly is a CVE? I'll provide a basic understanding of CVEs and explain how to detect and handle vulnerabilities in OSS.
Next, let's discuss package managers. Package managers play a critical role in the OSS ecosystem. I'll explain how to manage library dependencies in your application.
I'll share insights into how the Ruby and RubyGems core team works to keep our ecosystem safe. By the end of this talk, you'll have a better understanding of how to safeguard your code.
3. Deployment Guide 3
Introduction
This guide provides detailed hardware setup and deployment instructions for the AP-5181 model access point.
The AP-5181 model access point is primarily designed for outdoor deployments, thus it has a unique set of
installation instructions.
Please review all the material within this document before installing the AP-5181 model access point. The
purpose of this guide is to assist you in understanding the correct use and placement of the components within
the AP-5181 accessory kits. Proper installation is critical to the safety of the installation, installer and others in
the area of the AP-5181’s deployment.
Mounting Kit and Assembly
It is recommended the assembly of the AP-5181’s accessories be started, and fully staged (as described in this
chapter) before the AP-5181 is moved into its final area of deployment.
Installing the AP-5181’s Mounting Accessories
To install the AP-5181’s mounting accessories:
1. Install the mounting bracket to the AP-5181’s rear housing using 4 short length binder head screws from
the kit. Tighten securely.
NOTE Take note of the earth ground boss under the bracket. This point must be properly
grounded to earth to utilize this products safety features. This is a good time to add the
required grounding lug or cable (not included with the AP-5181 or mounting kit).
4. 4 AP5181 Access Point
2. Install the AP-5181 tilt bracket onto the AP-5181’s bracket installed in step 1.
Use one long binder head screw and hex nut from the kit. This will define the pivot about which the
AP-5181 can be tilted. Do not over tighten the nut.
3. Install 4 short binder head screws in the 4 slots, 2 each on left and right sides of the tilt bracket.
These can be tightened during this phase of the assembly. Once deployed in the field, the 4 screws should
be loosened slightly to allow the AP-5181 to be tilted to level, then re-tightened.
5. Deployment Guide 5
4. If sliding to a small pole diameter, up to 2 ½ inches in diameter, place the pole clamps into the slots of the
bracket assembled in step 3.
The pole clamps can be installed into inner or outer slots to adjust for pole diameters of various sizes.
5. Install 2 long binder head screws through the two holes of one clamp into the other clamp. Direction is
not important.
6. 6 AP5181 Access Point
On each long screw, install one split washer and one wing nut. Leave them somewhat loose, as the nut,
washer and screw will be loosened and re-installed in the field when mounting the AP-5181 to a Pole.
NOTE The unit is ready to be moved into its deployment area and mounted onto a pole (where
the AP-5181 cannot be slid over the pole end).
Installing the AP-5181 on a Pole
To install an AP-5181 on a pole:
1. Select the proper slot positions for the pole clamp to properly fit onto the pole. Position and hold the tilt
bracket. Align each of the 2 pole clamps in position on the pole. Install 2 long binder head screws through
the two holes of one clamp and into the other clamp. Direction is not important.
Install one split washer and one wing nut onto each long screw. Lightly tighten the wing nut, washer and
screw.
Point the tilt bracket in the direction the AP-5181 is to be mounted, and tighten the wing nut, washer and
screw
7. Deployment Guide 7
2. Install the mounting bracket onto the tilt bracket installed in step 1. Use one long binder head screw and
hex nut from the kit. This will provide the pivot about which the AP-5181 can be tilted. Do not over tighten
the nut.
3. Install 4 short binder head screws in the 4 slots (two each on left and right sides of the tilt bracket). Set
the angle of the AP-5181 up or down as required for the installation. The 4 short binder head screws and
the long screw hex nut can all be tightened to lock the unit into position.
8. 8 AP5181 Access Point
The image displayed above has the heavy weather accessory kit installed. Whether the unit is installed
with the heavy weather kit, or without it, it will be important to connect the
AP-5181 to an appropriate earth ground using the earth-ground boss on the back of the unit.
NOTE It is necessary to use the band clamp adapter when installing an AP-5181 on a larger
diameter pole (up to 18 inches).
4. Thread the 2 band clamps through the adapter.
Using both band clamps, position the adjuster screw about 6 inches from the face of the adapter. The
adjuster screw can be installed to either left or right sides.
5. Mount the adapter to the tilt bracket using 2 short binder head screws. It does not matter which side is
up or down, left or right. Tighten the screws securely.
9. Deployment Guide 9
6. Position and hold the tilt bracket and each of the band clamps onto the mounting pole. Thread the band
clamp through its own adjuster screw. Ensure the band clamp is installed into it’s own adjust screw.
Thread the free end of the band clamp through the adjuster. Pass through the screw, and pull the free end
of the clamp until it is snug. Repeat this process for the second clamp.
Point the tilt bracket in the direction the AP-5181 is to be mounted. Tighten the band clamps. Cut-off or
wrap around (as displayed above) the free end of the tightened band clamp.
7. Install the AP-5181’s mounting bracket onto the tilt bracket. Use one long binder head screw and hex nut
from the kit. This will provide the pivot about which the AP-5181 can be tilted. Do not over tighten the nut.
10. 10 AP5181 Access Point
The image displayed has the heavy weather accessory kit installed. Whether the unit uses the heavy
weather kit or not, remember to connect the AP-5181 to an appropriate earth ground using the
earth-ground boss on the back of the unit.
8. Install 4 short binder head screws in the 4 slots (2 each on left and right sides of the tilt bracket). Set the
angle of the AP-5181 up or down as required for the installation. The 4 short binder head screws, and the
long screw hex nut can be tightened to lock the AP-5181into position.
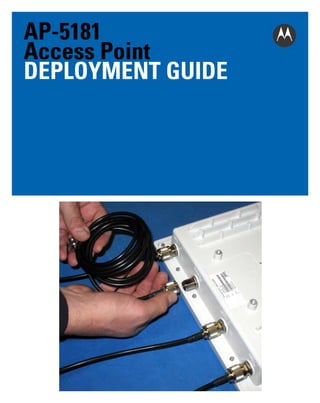
11. Deployment Guide 11
Heavy Weather Kit Assembly
To install the AP-5181 heavy weather kit:
NOTE Motorola Solutions recommends the assembly of the AP-5181 heavy weather kit be
started, and fully staged, before the unit is moved into the field for deployment.
1. Install 4 antenna extension cables (provided in the kit) to the AP-5181. Hand tighten.
2. Route the antenna extension cables through the cable guides on the rear of the access point. The cables
cross from left to right to maximize the bend radius. Avoid any sharp bending of the cables to extend their
useful life.
12. 12 AP5181 Access Point
NOTE Note the earth ground boss on the AP-5181. This point must be properly grounded to
earth to utilize this products safety features. This is a good time to add the required
grounding lug or cable (not included).
3. Install the heavy weather shield. Align the 4 screw holes with the 4 mating screw bosses on the AP-5181.
13. Deployment Guide 13
4. Install the mounting bracket to the AP-5181’s rear housing using 4 short length binder head screws from
kit.
5. The heavy weather shield is clamped between the bracket and the housing. Tighten securely.
6. Turn the unit over. On the face of the unit, remove and discard the 4 screws located in the cover of the
AP-5181.
14. 14 AP5181 Access Point
7. Install 4 hex stand-off screws into the screw holes created with the removal of the screws in step 5.
Tighten securely.
8. Install the heavy weather shield.
15. Deployment Guide 15
9. Align the 4 screw holes with the 4 mating screw bosses on the AP-5181 cover.
10. Install the AP-5181 mounting bracket to AP-5181 cover using 4 short length binder head screws from the
kit. The front and rear shields are intentionally staggered to ensure adequate ventilation.
16. 16 AP5181 Access Point
11. The heavy weather protected AP-5181 is now ready for installation.
Power Tap Installation
The installation of the AP-5181 Power Tap (Part No. AP-PSBIAS-5181-01R) requires the services of licensed and
trained electricians. The end user is solely responsible to ensure the unit is installed and maintained by properly
certified personnel. Additionally, the end user is responsible the unit is installed and maintained in full compliance
of local codes and standards.
WARNING! DO NOT open an installed or operating Power Tap unit. Always make sure the unit is
not energized before opening an installed or operating unit.
Before attempting to install a Power Tap, refer to the following guidelines:
• DO NOT open an installed or operating unit. Ensure the unit is not energized before opening an installed or
functioning unit.
• A Power Tap installation requires the services of licensed and trained electrician.
• Proper unit earth grounding is required to ensure safe and proper operation. Earth grounding must comply with
all specific or regional electrical codes and regulations.
• Opening the Power Tap exposes high voltage wiring, and creates a shock hazard. Care must be taken to avoid
introduction to the unit interior of any foreign object and/or fluids that would facilitate a shock hazard.
17. Deployment Guide 17
• The instructions provided herein are intended to provide useful installation guidance, and offer insight into best
practices. Adherence to this guide, and the instructions herein do not ensure compliance with specific or
regional electrical codes and regulations.
• In all cases, specific or regional electrical codes and regulations shall govern the installation of this product.
• Installation and maintenance of this product in compliance with specific or regional electrical codes and
regulations is the sole responsibility of the end user.
To install an AP-5181 Power Tap:
1. Remove and retain the 10 screws used to secure the Power Tap cover.
2. Remove the weather sealing cover to expose the unit’s interior. Do not remove or tamper with the sealing
gasket remaining on the back housing.
3. Remove and retain the 2 terminal screws releasing the 2 solder-less ring terminals.
18. 18 AP5181 Access Point
4. Remove and retain the nut with a captive locking washer. This nut releases a solder-less ring terminal.
5. Loosen the gland nut on the power entry fitting.
6. Expose 6 inches of wire from the jacket. Only use wire suited for your specific installation requirements
and application. Use 3 conductor wire of a gage suitable for the required wire run.
7. Feed the wire through the power fitting. Do not tighten the fitting at this time.
19. Deployment Guide 19
8. Using the solder-less ring terminals, strip and terminate the individual wires.
9. Expose only sufficient copper (using a solder-less terminal crimping tool) to ensure a good electrical
connection. No exposed copper strands should be visible outside the terminal insulator.
10. Install the power cable ring terminals using the 2 screws and nut removed in steps 3 and 4.
• Black wire to terminal L (line)
• White wire to terminal N (neutral)
• Green wire to terminal G (ground)
20. 20 AP5181 Access Point
11. Firmly tighten screws and nut.
12. Adjust the cable jacket by sliding into and out of the gland until about 1 inch remains visible inside the
housing.
13. Tighten the gland nut by hand to firmly hold the cable jacket. Examine all wires to ensure there is no
crimping pulling of wires or terminations.
21. Deployment Guide 21
14. Ensure no loose hardware is inside the housing. Check the wiring to be sure it is clear of the cover.
Carefully replace the cover. Only the correct cover orientation (as displayed below) allows all screws to
be properly installed.
15. Tighten all 10 screws securely. Torque all screws to 15-20 in-lbf. Hand tighten only. Do not use power
tools.
16. The Power Tap can now be installed.
NOTE Please locate the earth ground boss under the bracket of the Power Tap. This point
must be properly grounded to earth to utilize this product’s safety features.
17. Add the required grounding lug or cable (not included with this product) the earth ground boss.
22. 22 AP5181 Access Point
18. Seal un-used connectors to ensure the product’s IP56 rating.
19. Locate a port cover within the AP-PSBIAS-5181-01R product package. Install the cover on the unused LAN
or WAN port and hand tighten (do not use tools).
23. Deployment Guide 23
NOTE Locate the earth ground boss on the back of the Power Tap. This point must be properly
grounded to earth to utilize this product’s safety features. If you have not already done
so, this is a good time to add the required grounding lug or cable.
20. The Power-Tap can be installed using the standard AP-5181 mounting kit. The Power Tap can be installed
using the integrated mounting holes. The 2 holes are provided at the top and bottom of the unit.
21. Proper mounting of the unit places the 10 screw-heads against the mounting surface, thus making
un-authorized installations difficult.
22. When mounting the Power Tap on materials such as concrete or plaster, the use of wall anchors will
provide an excellent holding grip. Use the Power Tap’s 2 mounting holes as a template and punch or drill
holes to accept the 2 wall anchors.
24. 24 AP5181 Access Point
Cable Connectors and Unused Connector Protection
The following are the various components found in the connector kit supplied with the AP-5181. If a different
connector is used (or the connector is replaced), the replacement must be IP56 certified to retain product sealing.
The cable is customer provided and must be of the length required for your specific AP-5181 deployment. The
cable must be rated for outdoor use and have 8 conductors. Shielding is not required for the cable used.
To install the AP-5181 cabling:
25. Deployment Guide 25
1. Install the silicone rubber gland into the gland housing.
2. Loosely assemble the gland nut onto the gland housing. Do not tighten until the connector is fully
assembled and installed into the desired AP-5181 connection port. This creates the gland assembly.
3. Install the ring seal onto the end of the flange barrel. A small amount of grease on the surfaces will hold
the ring in place for the remainder of the assembly.
26. 26 AP5181 Access Point
As an option (not displayed above), the ring seal can be inserted into the receiving threaded hole of the
gland housing. The receiving threaded hole is in the hexagonal section of the gland housing stamped
LTW (see the illustration under step 2). Ensure the ring seal is seated at the bottom of the threaded hole.
4. Assemble the gland assembly, finger nut, flange barrel and modular connector onto the cable. You are now
ready to install the connector face gasket.
NOTE The modular connector is intended to be wired specifically. It is extremely important to
wire the connector per industry standards for Ethernet, non cross- over configuration).
The applicable standard is TIA/EIA 568-A.
5. Remove the adhesive liner on the gasket. Slide the gasket over the connector and along the cable, with
the adhesive facing the flange surface of the flange barrel.
27. Deployment Guide 27
6. Press the gasket into place on the plastic face with light finger pressure. Make sure the cutout of the
gasket aligns with the shape of the connector pocket of the flange barrel.
7. Slide the flange barrel so the modular connector is fully seated into the connector pocket.
8. Depress the modular connector latch spring against the body of the connector to fit the connector into the
pocket.
9. Insert the connector into the LAN or WAN port of the AP-5181. The connector will only plug into the port
if the connector is properly orientated. Using only finger pressure, no tools.
28. 28 AP5181 Access Point
10. Tighten the finger nut snugly onto the port. Next, tighten the gland assembly onto the flange barrel. Finally,
tighten the gland nut onto the gland assembly. When completed, the assembly will be weather resistant
to IP56, and offer reasonable strain relief to the cable.
NOTE Un-used connectors need to be sealed to ensure the product’s IP56 rating.
11. Locate 2 port covers, and 3 antenna connection covers within the AP-5181-13040-WWR product package.
12. Install these covers on any un-used ports and hand tighten (use no tools).
29. Deployment Guide 29
13. Note the earth ground boss on the back of the unit. This point must be properly grounded to earth to utilize
the AP-5181’s safety features. Add the required grounding lug or cable (not included with the AP-5181) at
this time.
Class 1/Division 2 Product Wiring Guidelines
This content is expressly intended for use by licensed and certified professional installers and personnel.
Motorola Solutions is not responsible for misuse of this information, nor damages, nor injuries either directly or
indirectly resulting from, or related to, the use of the information presented within.
Use of this information is at the sole discretion of the professional installer, and in all cases shall be considered
with priorities provided to location specific wiring codes, safety codes, and best practices established by the
industry.
Selection and use of installation materials not provided with the product, such as electromechanical tubing,
junction/wiring boxes, wiring materials, splices/ punch-down/interface connectors, and other hardware; shall be
defined and applied at the discretion of, and at the responsibility of, the professional installer, and shall be
suitable for the installation environment and product use demands.
30. 30 AP5181 Access Point
Please review this information in this section before installing an AP-5181. These instructions will assist you in
understanding the correct use and placement of all the various parts contained within the Accessory Kits. Proper
installation is critical to the safety of the installation, installer and others in the area of the products use.
Prior to any product wiring, Motorola Solutions strongly recommends the product components be mounted in the
desired locations, and required interconnecting wiring components, such as electromechanical tubing,
junction/wiring boxes, wiring materials, splices/ punch-down/interface connectors, and other hardware be
provided and installed. Pig-tail cable ends as provided on the AP-5181-1304C-WR product should be routed to an
acceptable junction box with sufficient space for reasonable splicing or termination.
The AP-5181-1304C-WR has two cables extending from sealed wiring glands. A black plastic console port cover
protects the console port during product configuration.
• Do not loosen or remove the wiring glands, these are factory sealed to ensure a gas tight interface to the
product.
• The glands are designed to be threaded directly into infrastructure protective cable armor, splicing and wiring
boxes, selected by the professional installer and suitable for the installation environment.
• Do not remove the plastic console port cover on an installed product. Use of the console port is restricted to
protected and non-hazardous environments only.
• The yellow colored cable is the data cable containing 4 pairs, 8 wires.
• No Power Is Provided or Accepted Over the Data wires of this product.
• The grey colored cable is the power cable containing 1 pair, 2 wires.
Expose and strip as required for splicing to the infrastructure wiring the AP power wires of the grey power cable.
31. Deployment Guide 31
• The product is intended to be connected and is certified with the AP-PSBIAS-5181-C-R product. Use of any
other power supply voids all certifications and warranties.
• The blue wire is connected to the positive terminal of the AP-PSBIAS-5181-C-R 48VDC power supply.
• The brown wire is connected to the negative terminal of the AP-PSBIAS-5181-C-R 48VDC power supply.
• The professional installer is required to select the appropriate interconnecting length and gauge of cable,
protective cable armor, splicing materials, junction/wiring boxes, suitable for the installation environment.
The AP-PSBIAS-5181-C-R is the only power supply certified for use with the AP-5181-1304C-WR. The use of any
other supply is not approved and may expose the installation to significant damage risk, personal injury or death.
Remove and retain the 10 screws for the power supply cover to expose the internal components.
The 48VDC terminal used to connect to and power the AP-5181-1304C-WR is as follows.
32. 32 AP5181 Access Point
Two brass wiring glands are included with the AP-PSBIAS-5181-C-R.
Instructions display below for a single gland installation, but both glands are installed in the same manner. The
installer shall disassemble the glands and retain any loose components within the gland.
The top portion of the gland is installed into the AP-PSBIAS-5181-C-R threaded boss and tightened to 8-10ft-lbs.
Note that the long threaded end of the gland is threaded into the plastic boss.
The bottom of the gland is then loosely re-assembled to the top of the gland. Note the installation orientation of
the compression sleeve (beveled edge orients into bottom side of gland, the flat end is placed against washer)
and compression washer.
33. Deployment Guide 33
Strip to length and install the interconnecting cable through the body of the gland.
Tighten the gland bottom against the gland top and torque to 10-15ft.-lb. It’s required the top of the gland be
restrained against turning by an appropriate tool while applying torque to the bottom of the gland. Failure to do so
will result in the cracking of the AP-PSBIAS-5181-C-R plastic boss.
With both glands tightened against the cable, terminate the 48VDC and AC supply cable to the terminal screws as
required for both the installation and code.
The glands are designed to be threaded directly into the infrastructure’s protective cable armor, splicing and
wiring boxes. Ensure they’re selected by the professional installer and suitable for the installation environment.
Class 1/Division 2 Data Wiring Guide
Please review this information in this section before installing an AP-5181. These instructions will assist you in
understanding the correct use and placement of all the various parts contained within the Accessory Kits. Proper
installation is critical to the safety of the installation, installer and others in the area of the products use.
Prior to any product wiring, Motorola Solutions strongly recommends the product components be mounted in the
desired locations, and required interconnecting wiring components, such as electromechanical tubing,
junction/wiring boxes, wiring materials, splices/ punch-down/interface connectors, and other hardware be
provided and installed. Pig-tail cable ends as provided on the AP-5181-1304C-WR product should be routed to an
acceptable junction box with sufficient space for reasonable splicing or termination.
34. 34 AP5181 Access Point
The AP-5181-1304C-WR has two cables extending from sealed wiring glands. A black plastic console port cover
protects the console port during product configuration.
• Do not loosen or remove the wiring glands, these are factory sealed to ensure a gas tight interface to the
product.
• The glands are designed to be threaded directly into infrastructure protective cable armor, splicing and wiring
boxes, selected by the professional installer and suitable for the installation environment.
• Do not remove the plastic console port cover on an installed product. Use of the console port is restricted to
protected and non-hazardous environments only.
• The yellow colored cable is the data cable containing 4 pairs, 8 wires.
• No Power Is Provided or Accepted Over the Data wires of this product.
• The grey colored cable is the power cable containing 1 pair, 2 wires.
Expose and strip as required for splicing to the infrastructure wiring the AP power wires of the yellow power
cable.
35. Deployment Guide 35
Strip away a length of the yellow cable jacket and cable braid to expose 4 internally shielded cable pairs. The wire
pairs are intended to be used with a site suitable punch-down block, and spliced to the infrastructure data cables.
Wiring color codes and pairing are compatible with Ethernet Standard T568A, as noted in the following:
• Green = Transmit -
• White paired with Green = Transmit +
• Orange = Receive -
• White paired with Orange = Receive +
• Brown and Blue pairs are not used
A professional installer is required to select the appropriate interconnecting length and cable gauge, protective
cable armor, splicing materials and junction/wiring boxes suitable for the installation environment.
Suitable Ethernet punch down connections are available commercially to the installer.
The following (on the next several pages) is provided as a reference example for commercially available materials.
The following describes a method of splicing the product data cable into a modular connector suitable for direct
connection to a RJ45 modular plug terminated Ethernet cable. The professional installer is expected to identify
the appropriate punch down connection for the installation environment and junction box constraints. The
professional installer is expected to meet all relevant electrical and safety codes.