MedPlus Beauty Virtual Cosmetic Studio Tutorial
•
0 likes•533 views

The virtual studio allows users to try on makeup virtually and purchase selected products with one click. Users can access the studio by clicking its icon on the website or the "Try It Now" button on product pages. The studio guides users through a step-by-step process to upload a photo, select makeup types and shades, adjust coverage, and save or share looks. Users can also purchase products they tried on through the studio.

Recommended
More Related Content
What's hot
What's hot (19)
Similar to MedPlus Beauty Virtual Cosmetic Studio Tutorial
Similar to MedPlus Beauty Virtual Cosmetic Studio Tutorial (20)
Recently uploaded
Recently uploaded (20)
MedPlus Beauty Virtual Cosmetic Studio Tutorial
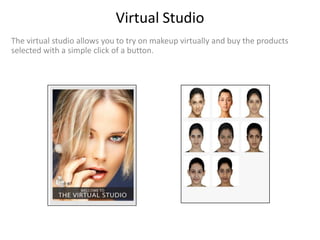
- 1. Virtual Studio The virtual studio allows you to try on makeup virtually and buy the products selected with a simple click of a button.
- 2. How do you access it? You can access the virtual studio either by clicking on the virtual studio icon on any page of the website or by clicking on the Try It Now or Try It In Our Virtual Studio button of the product you would like to try. Go through the next slides for a step by step instruction of how to apply makeup and try on products in the virtual studio.
- 3. Step 1 To begin, upload your photo by clicking on the Browse button. Choose a frontal photo of your face without makeup and hair tied back. Use our model photo on the right as a guide for selecting the right kind of photograph. Or choose one of the models displayed if she resembles you in shape, size, and colour as closely as possible.
- 4. Step 2 If you chose your own photo, adjust the wiring to select the correct area of the face for applying makeup. To do this: 1. Select an area of face – Face, Eyes or Lips. 2. Click on ‘Adjust Outline’. 3. Adjust the displayed wireframe to the desired makeup area. 4. Click ‘Done’ when finished. 5. Repeat the steps for other areas of the face. 2 3 4
- 5. Step 3 To start applying makeup: 1. Select an area of the face - Face, Eyes or Lips. 2. Select the type of product you would like to try. 3. Choose the brand (3a) and a line of product (3b) of the brand. 4. From the palette displayed, select a shade. 3b 4 2 3a 1
- 6. Step 4 1. The current shade selected is displayed on the left side (A). To change the shade, just click on the colour in the palette (B). 2. You can use the ‘Undo’ ‘Clear’ or ‘Clear All’ buttons to modify the shades you applied (C). 3. Use the ‘Style’(D) to adjust the region and ‘Intensity’ (E) for intensity of makeup. C Change color/shade by clicking. B A D E
- 7. Step 5 1. The ‘Before/After’ view lets you see the difference in the photo before and after applying makeup. You can drag the pane left or right to adjust the view. 2. To make the pane disappear, click on ‘Before/After’ again.
- 8. Step 6 To purchase the products you tried: 1. Select the products you would like to purchase by reviewing the choices listed under ‘What I am wearing’ (A) and ‘What I’ve tried’ (B) tabs. 2. Click on ‘Add Selected Products to Bag’ (C). 3. Since this action clears the current session, save the image if you would like to revisit it later or discard and continue with your shopping. A B C
- 9. Step 7 1. Once you have created your desired look, you can save it for later viewing , print it or share it with your friends and family via email, facebook or twitter. 2. You have to be a registered member of Medplusbeauty.com to be able to save or share your looks. If you are not already signed in, you will be prompted to sign in or register in the pop up box (A) that will open upon clicking ‘Save’ or ‘Share’. A
- 10. Step 8 To save the look you have created: 1. Click on ‘Save your look’ (A). You’ll see three options: Save, JPG & Print (B) 2. ‘Save’ allows you to save the look under ‘My Looks’ (C) with a unique title. You will be able to access this from any computer with an internet connection. 3. ‘JPG’ will allow you to save the look on your local computer. 4. ‘Print’ will allow you to make a print of the look you created. C A B
- 11. Step 9 To share the look with your friends or family: 1. Click on the ‘Share your look’ button. 2. Select the media you would like to use to share. 3. You may be required to log in to your specific media account to complete the transaction. Share look Select your media platform
- 12. Step 10 1. Click on ‘My Looks’ to view and edit the looks created by you earlier (A). 2. ‘1-click looks’ (B) are looks created by our editorial team for use at various occasions. With one click you can apply the featured products on the photo you uploaded. 3. ‘Change Photo’ (C) allows you the change the photo anytime during the makeup process. You will have a choice to save or discard the current look before changing the photo. 4. ‘Magnify button’ (D) allows you to expand or diminish the size of the image. B A A C D