Measuring instructions for curved shapes
•Download as PPSX, PDF•
3 likes•5,522 views

The document provides step-by-step instructions for measuring and documenting a curved wall shape, including: 1) Sketching the curved shape and measuring reference sides; 2) Marking points along the curve at intervals and measuring distances from two reference points ("A" and "B") to each point; 3) Using the distance measurements in AutoCAD to draw arcs from the reference points and mark their intersections, representing the curved shape.

Recommended
Recommended
More Related Content
What's hot
What's hot (20)
Similar to Measuring instructions for curved shapes
Similar to Measuring instructions for curved shapes (20)
Recently uploaded
Recently uploaded (7)
Measuring instructions for curved shapes
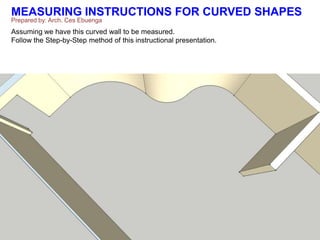
- 1. MEASURING INSTRUCTIONS FOR CURVED SHAPES Prepared by: Arch. Ces Ebuenga Assuming we have this curved wall to be measured. Follow the Step-by-Step method of this instructional presentation.
- 2. MEASURING INSTRUCTIONS FOR CURVED SHAPES Prepared by: Arch. Ces Ebuenga STEP 1. Begin with the Plan in freehand sketch indicating the shape of this area to be measured.
- 3. MEASURING INSTRUCTIONS FOR CURVED SHAPES Prepared by: Arch. Ces Ebuenga STEP 1. Begin with the Plan in freehand sketch indicating the shape of this area to be measured. STEP 2. After taking the measurement of these sides, we can use these to establish our references once we draw this plan in AutoCAD to locate both ends of this curve.
- 4. MEASURING INSTRUCTIONS FOR CURVED SHAPES Prepared by: Arch. Ces Ebuenga STEP 1. Begin with the Plan in freehand sketch indicating the shape of this area to be measured. STEP 2. After taking the measurement of these sides, we can use these to establish our references once we draw this plan in AutoCAD to locate both ends of this curve.
- 5. MEASURING INSTRUCTIONS FOR CURVED SHAPES Prepared by: Arch. Ces Ebuenga STEP 3. Establish two points, “A-B” with “A” on the left as shown. Line “A-B” must be at least 1.50M away from the wall and 2/3 the length of the curved wall. BA To mark “A-B” points on floor – use chalk marks, on ground – use stakes in the dirt. NOTE: The line “A-B” must never cross the curved line and should be approximately 1.50M away from the curved wall at the closest point.
- 6. MEASURING INSTRUCTIONS FOR CURVED SHAPES Prepared by: Arch. Ces Ebuenga STEP 4. Using a chalk, you mark and number points along the edge of the curved wall at approximately 0.90M intervals. BA In some cases, number all corner points, ladders, and any entities within the curved wall that needs to be reflected on the plan. NOTE: For small or tight radius areas and raised wall areas, use 0.30 – 0.60M intervals. 1 2 3 4 5 6 7 8 9 10 11 12 13 14
- 7. MEASURING INSTRUCTIONS FOR CURVED SHAPES Prepared by: Arch. Ces Ebuenga STEP 5. Using the table format shown below, measurements are now taken from point “A” to point #1, then point #2, and all the way along the curved wall. BA NOTE: You will going to use this tabulation in AutoCAD to create intersecting points from two arcs projecting from points “A” and “B”. 1 2 3 4 5 6 7 8 9 10 11 12 13 14 STEP 6. Then measure from point “B” to same point #1 and then #2, as you did for point “A”. No. A B 1 2 3 4 5 6 7 8 9 10 11 12 13 14 2733 2912 3003 THENCONTINUE… 5615 5291 4813 THENCONTINUE…
- 8. MEASURING INSTRUCTIONS FOR CURVED SHAPES Prepared by: Arch. Ces Ebuenga STEP 7. Now that you are in AutoCAD program, use the distance of Point #1 from Column A to draw an arc or circle from point “A” as your center point. BA 1 STEP 8. Then use the distance of Point #1 from Column B to draw an arc or circle from point “B” as your center point. No. A B 1 2 3 4 5 6 7 8 9 10 11 12 13 14 2733 2912 3003 THENCONTINUE… 5615 5291 4813 THENCONTINUE… STEP 9. Then put any marking on the intersection of these two arcs. STEP 10. Continue the method by repeating the STEP 7-9 to complete the process.
- 9. MEASURING INSTRUCTIONS FOR CURVED SHAPES Prepared by: Arch. Ces Ebuenga FINAL STEP: By using Polyline-Arc command, connect these markings to create the line of the curved wall. Then erase the markings after completing this command. IMPORTANT NOTE: For some cases, especially if the shape is complicated I suggest to get additional measurements to double-check the other distances that can clarify the exact dimensions of your site. AND WHAT IS YOUR FAT ASS DOING RIGHT NOW? GET BACK TO WORK, GO OUT FOR SITE VISIT AND MAKE SOME MONEY!