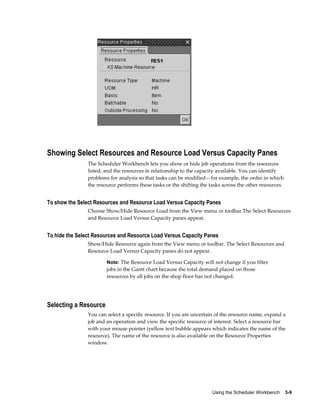
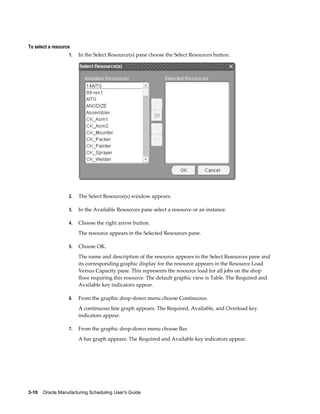
Download to read offline


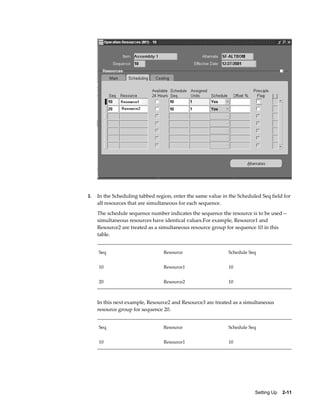


This document is the user guide for Oracle Manufacturing Scheduling Release 12. It contains information on setting up manufacturing scheduling, using the scheduler workbench, creating and importing jobs, reviewing exception messages, rescheduling discrete jobs, and shop floor modeling. The guide includes chapters on setup, the scheduler workbench, jobs, exceptions, rescheduling, and shop floor modeling. It provides instructions and reference information to help users schedule manufacturing jobs and resources effectively.