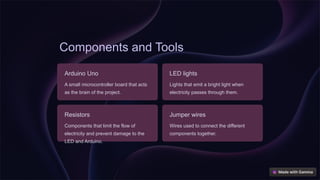
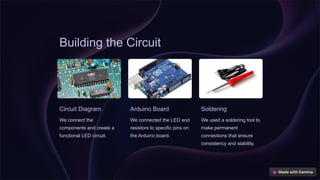
LED Arduino Uno
Hands-on Science
Project
An engaging and interactive project that introduces the world of
electronics and programming using LED technology and an Arduino Uno
microcontroller.
Introduction
Blinking an LED is an introductory Arduino project in which we
control an LED using Arduino. LED blinking refers to the process
of continuously turning an LED (Light Emitting Diode) and off in a
repetitive pattern. It is a simple and common demonstration in
electronics and microcontroller-based projects.
Components and Tools
Arduino Uno
A small microcontroller board that acts
as the brain of the project.
LED lights
Lights that emit a bright light when
electricity passes through them.
Resistors
Components that limit the flow of
electricity and prevent damage to the
LED and Arduino.
Jumper wires
Wires used to connect the different
components together.
Building the Circuit
Circuit Diagram
We connect the
components and create a
functional LED circuit.
Arduino Board
We connected the LED and
resistors to specific pins on
the Arduino board.
Soldering
We used a soldering tool to
make permanent
connections that ensure
consistency and stability.
Programming the Arduino
1 Programming
The programming was done in a
separate and easily installable
environment called Mblock.
2
Arduino Language
The C/C++ programming
language was used to program
the Arduino. 3 LED Control
We wrote code that controlled
the brightness and color of the
LED lights.
Testing and Troubleshooting
Multimeter Testing
We used a multimeter to check that the
circuit is working and all components
are properly connected.
Simulation Testing
We used a software simulation to test
and verify our code before running it on
the physical circuit.
Q&A
1 Questions and Answers
Q&A session to let us address any remaining doubts and questions you may have.

LED-Arduino-Uno-Hands-on-Science-Project.pptx

  • 1.
    LED Arduino Uno Hands-onScience Project An engaging and interactive project that introduces the world of electronics and programming using LED technology and an Arduino Uno microcontroller.
  • 2.
    Introduction Blinking an LEDis an introductory Arduino project in which we control an LED using Arduino. LED blinking refers to the process of continuously turning an LED (Light Emitting Diode) and off in a repetitive pattern. It is a simple and common demonstration in electronics and microcontroller-based projects.
  • 3.
    Components and Tools ArduinoUno A small microcontroller board that acts as the brain of the project. LED lights Lights that emit a bright light when electricity passes through them. Resistors Components that limit the flow of electricity and prevent damage to the LED and Arduino. Jumper wires Wires used to connect the different components together.
  • 4.
    Building the Circuit CircuitDiagram We connect the components and create a functional LED circuit. Arduino Board We connected the LED and resistors to specific pins on the Arduino board. Soldering We used a soldering tool to make permanent connections that ensure consistency and stability.
  • 5.
    Programming the Arduino 1Programming The programming was done in a separate and easily installable environment called Mblock. 2 Arduino Language The C/C++ programming language was used to program the Arduino. 3 LED Control We wrote code that controlled the brightness and color of the LED lights.
  • 6.
    Testing and Troubleshooting MultimeterTesting We used a multimeter to check that the circuit is working and all components are properly connected. Simulation Testing We used a software simulation to test and verify our code before running it on the physical circuit.
  • 7.
    Q&A 1 Questions andAnswers Q&A session to let us address any remaining doubts and questions you may have.