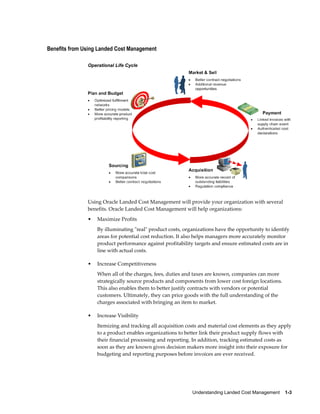
Oracle Landed Cost Management enables users to estimate and track the actual landed costs of purchased items, including transportation, handling, and other trade costs. It allows users to calculate estimated costs before or after receipt of items. Charges can be estimated and actual costs imported once invoices are received. Estimated and actual costs can be viewed side by side for comparison. Maintaining accurate landed costs provides insights into item profitability and budgeting.


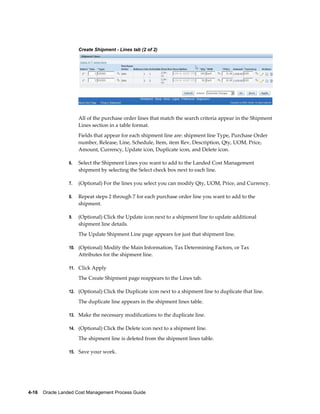


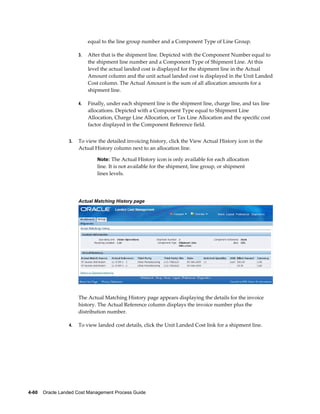


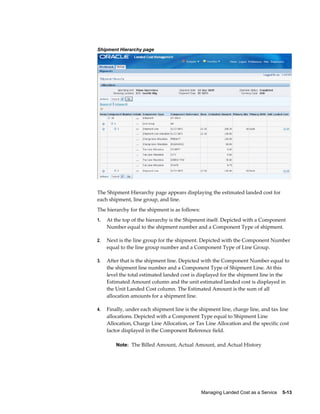


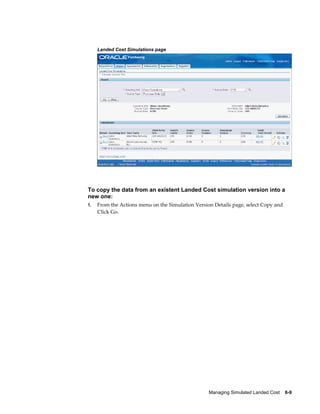
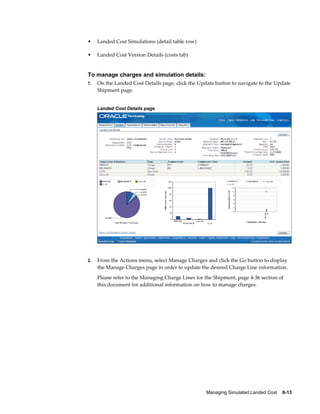
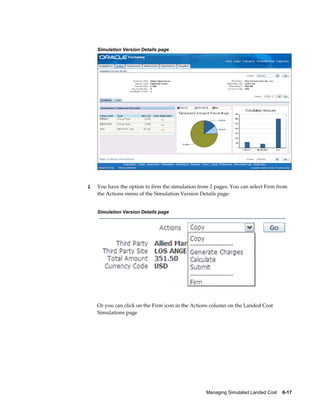
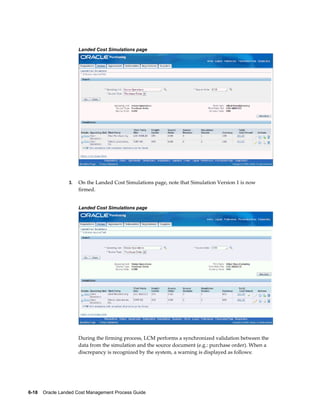
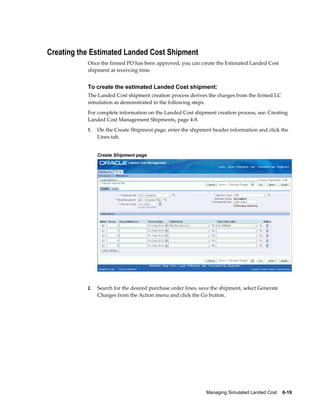
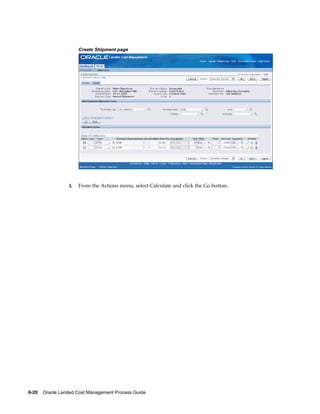
![A
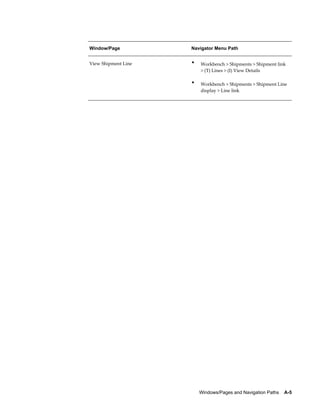
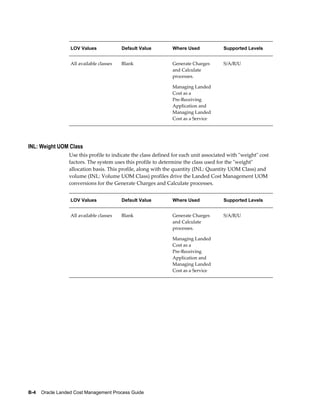
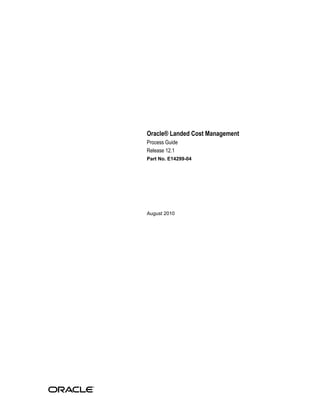
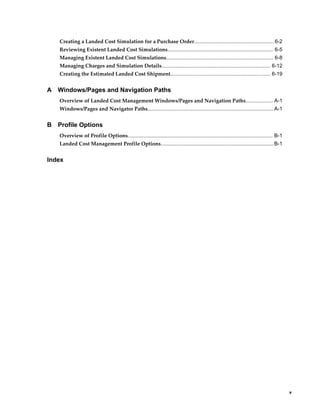
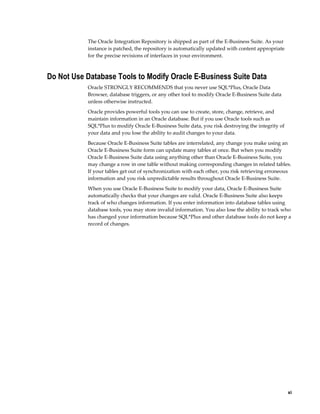
Windows/Pages and Navigation Paths
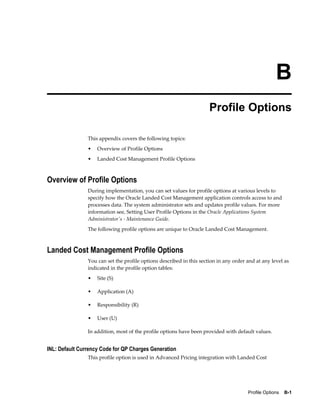
Overview of Landed Cost Management Windows/Pages and Navigation
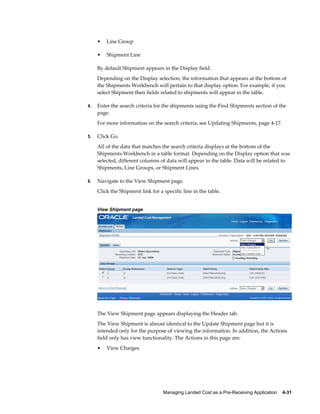
Paths
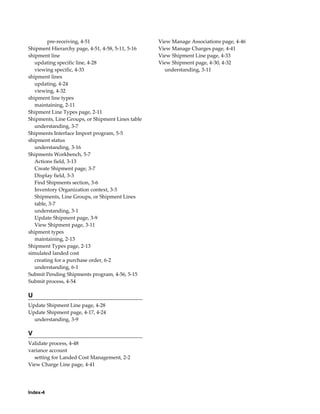
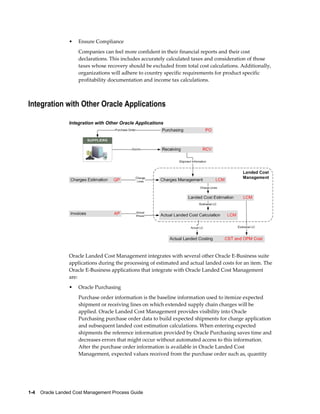
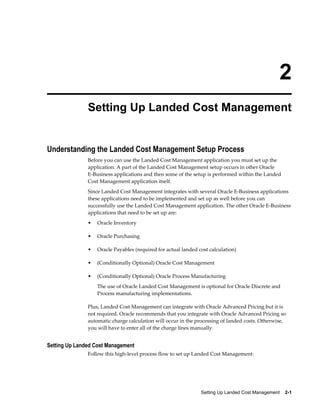
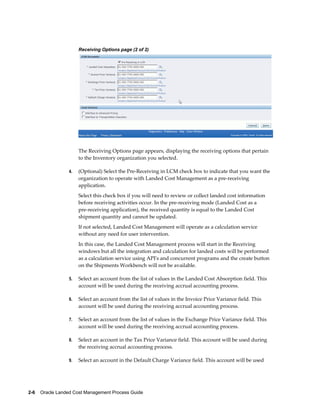
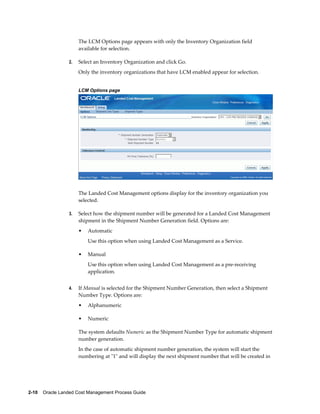
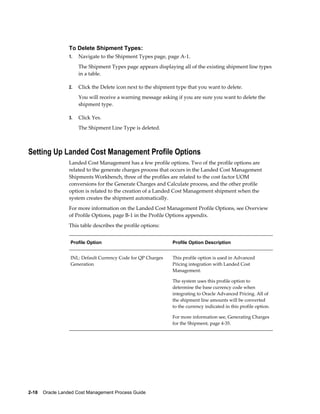
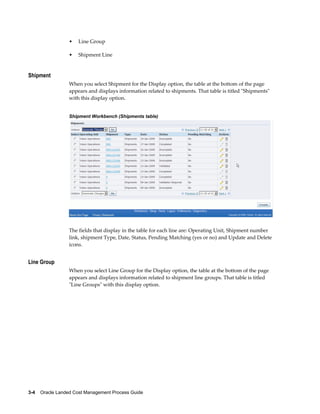
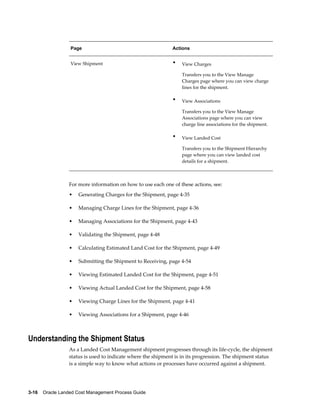
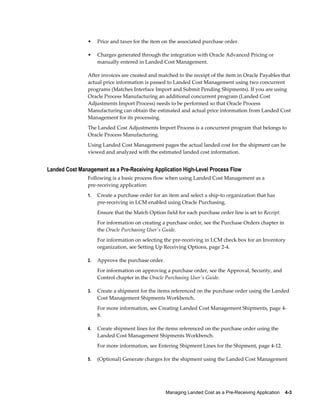
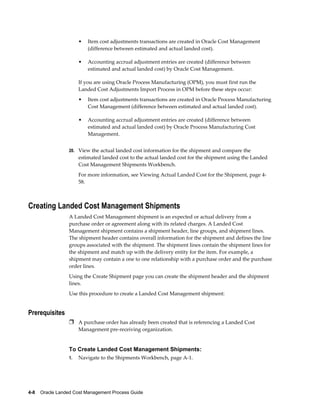
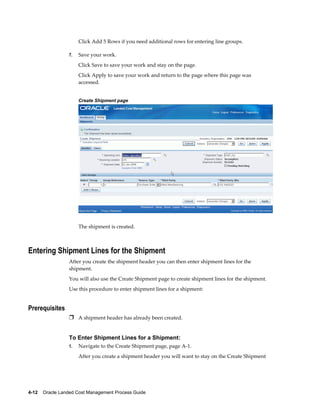
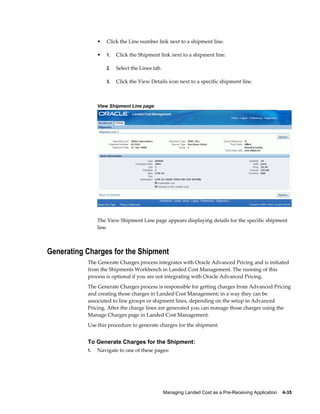
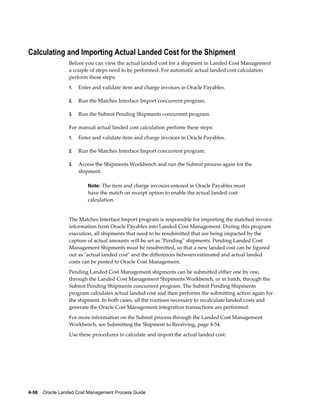
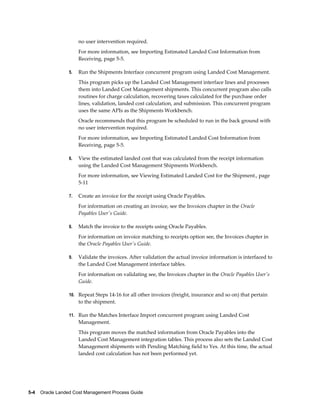
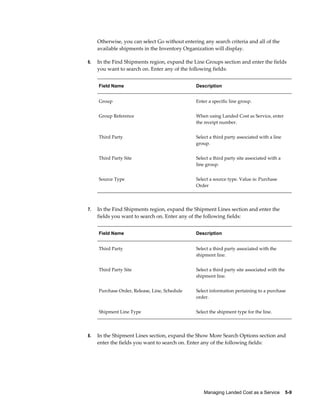
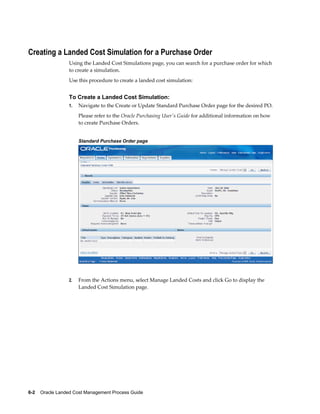
The following table displays the default navigation path for each Oracle Landed Cost
Management window or page.
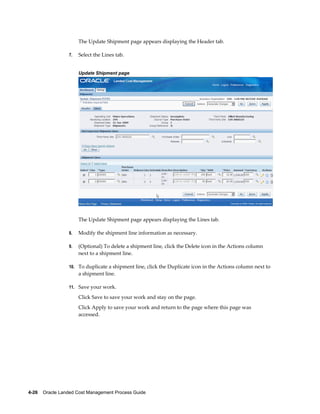
• Text in brackets ([]) indicates a button.
• (I) indicates a icon.
• (T) indicates to select a tab.
• (M) indicates to select the menu option from the window.
To assist with clarification, the responsibility may be listed ahead of the navigation path
in the Navigator Menu Path column of the table. For example, System Administrator:
System Profile Values. In this example, System Administrator is the responsibility.
Windows/Pages and Navigator Paths
Oracle Landed Cost Management Windows/Pages and Navigation Paths
Window/Page Navigator Menu Path
Actual Matching History Shipment Hierarchy > (I) View Actual History
Approve Document Purchasing: Purchase Orders > Purchase
Orders > [Approve]
Windows/Pages and Navigation Paths A-1](https://image.slidesharecdn.com/landedcost-120622010930-phpapp01/85/Landed-cost-171-320.jpg)
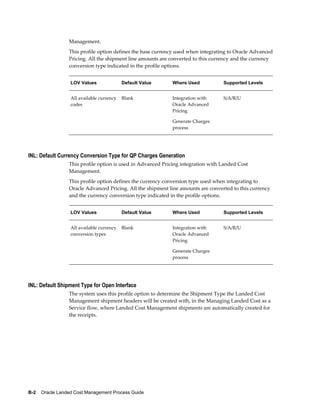
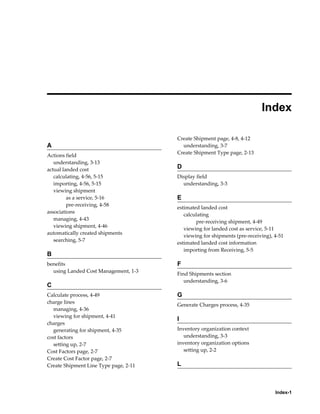
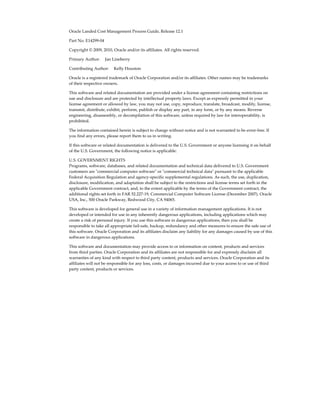
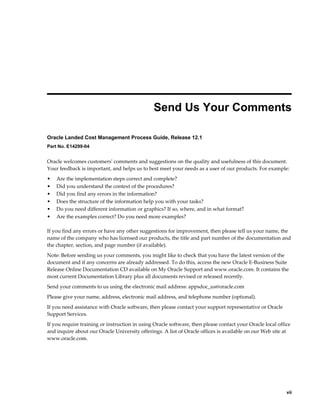
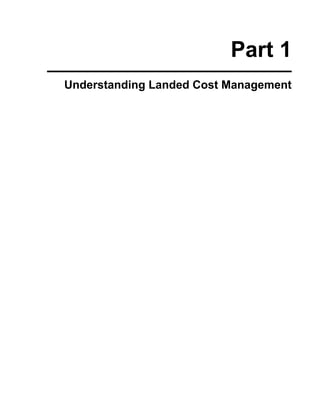
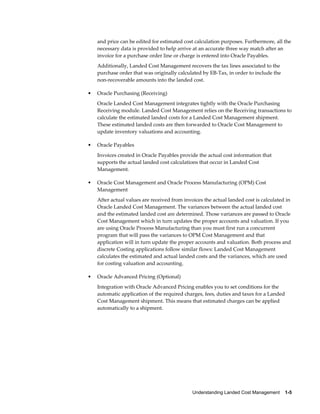
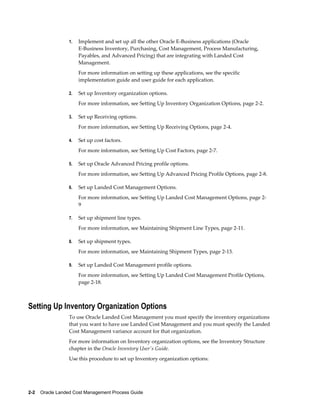
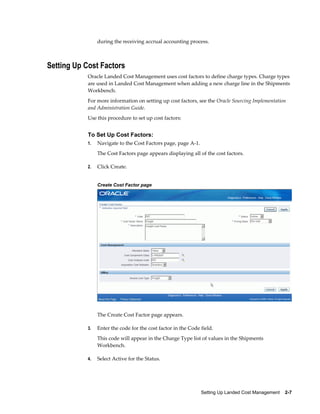
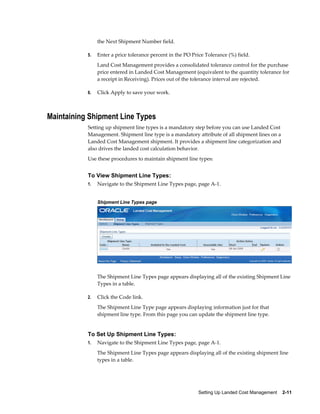
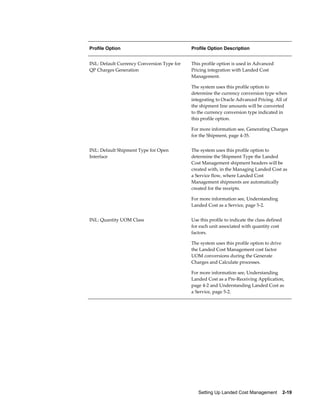
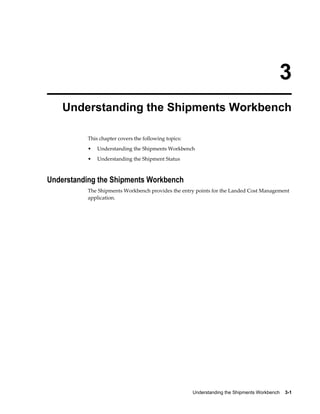
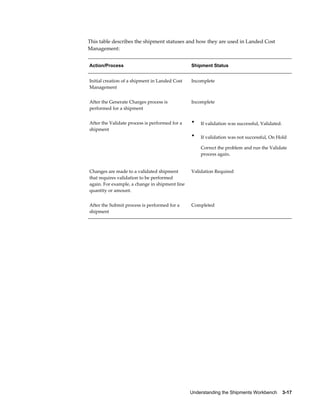
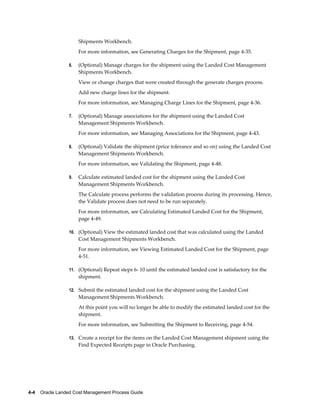
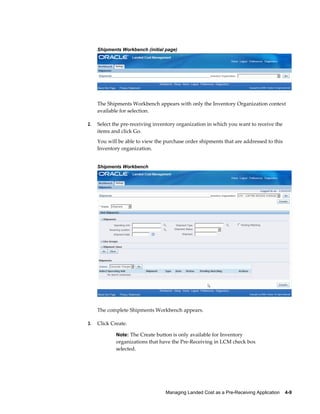
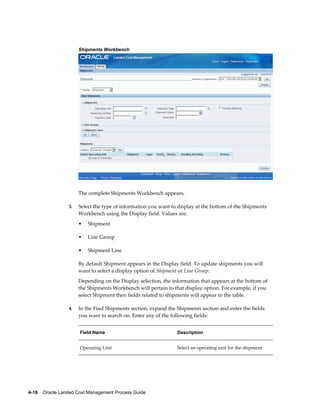
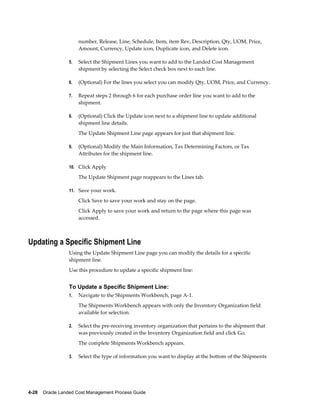
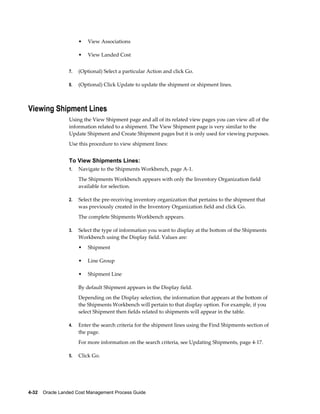
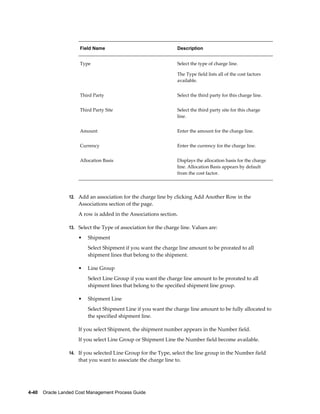
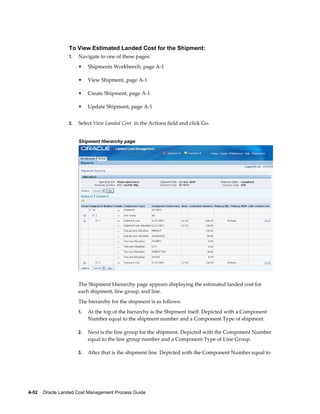
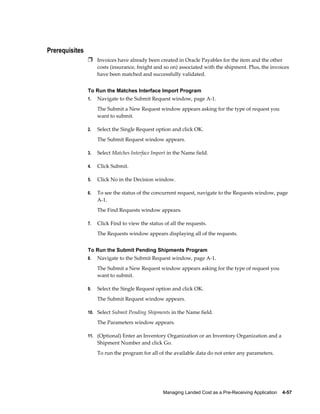
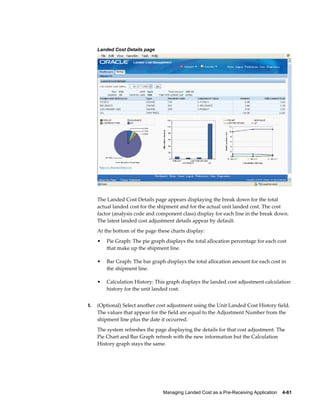
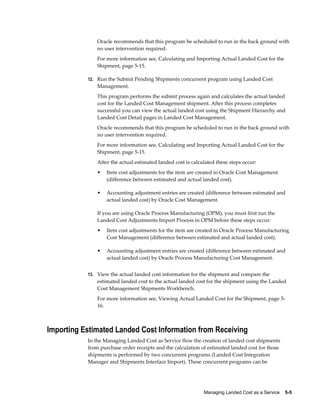
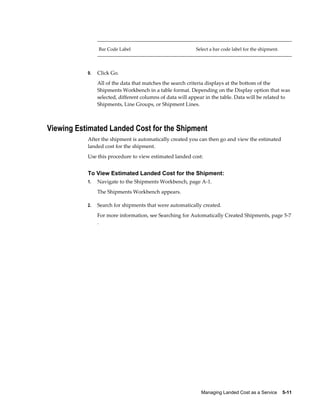
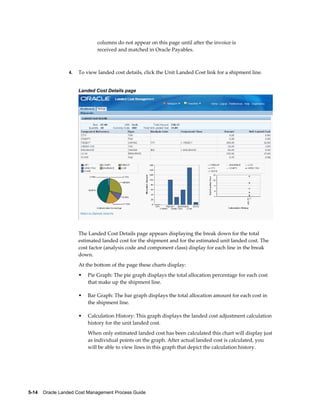
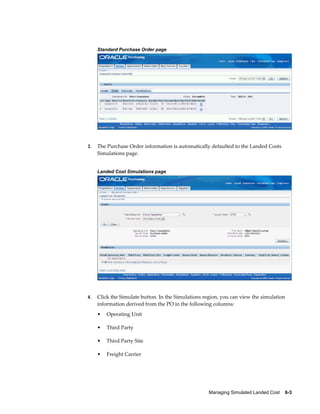
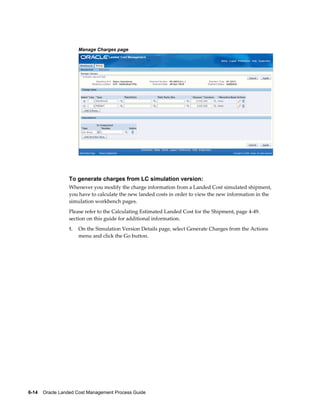
![Window/Page Navigator Menu Path
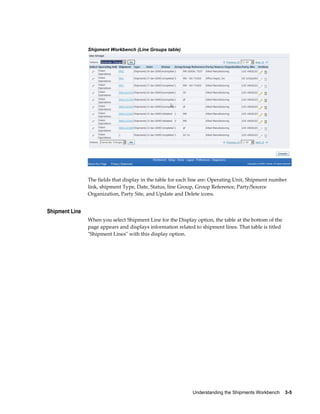
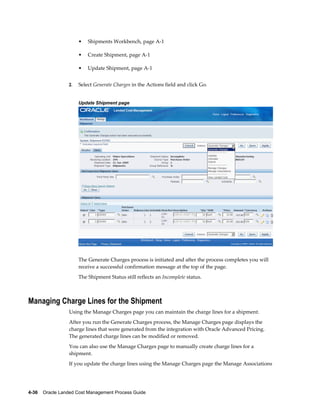
Cost Factors Oracle Purchasing: Setup > Purchasing > Cost
Factors
Create Cost Factor Oracle Purchasing: Setup > Purchasing > Cost
Factors > [Create]
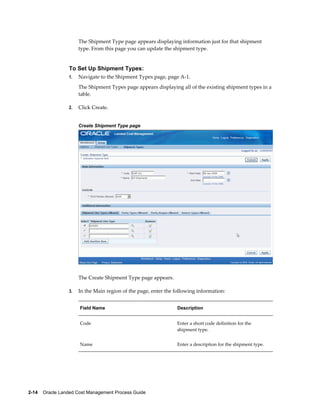
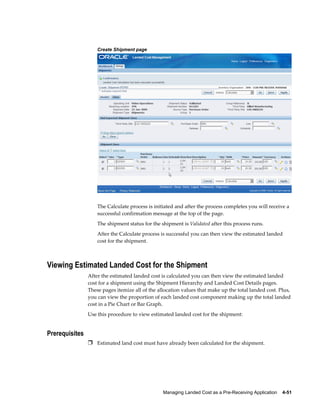
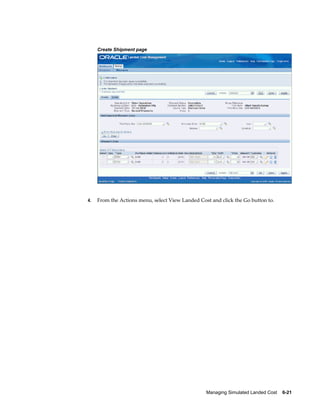
Create Shipment Workbench > Shipments > [Create]
Create Shipment Line Types Setup > Shipment Line Types > [Create]
Create Shipment Type Setup > Shipment Types > [Create]
Invoice Workbench Payables: Invoices > Entry > Invoices
Landed Cost Details Shipment Hierarchy > Unit Landed Cost link
LCM Options Setup > Options
Manage Associations • Update Shipment > Manage Associations
action
• Create Shipment > Manage Associations
action
Manage Charges • Update Shipment > Manage Charges
action
• Create Shipment > Manage Charges
action
Organization Parameters - Inventory Inventory: Setup > Organizations > Parameters
Parameters > (T) Inventory Parameters
Organization Parameters - Other Accounts Inventory: Setup > Organizations > Parameters
> (T) Other Accounts
Personal Profile Values • System Administrator: Profile > Personal
Other > Profile
A-2 Oracle Landed Cost Management Process Guide](https://image.slidesharecdn.com/landedcost-120622010930-phpapp01/85/Landed-cost-172-320.jpg)
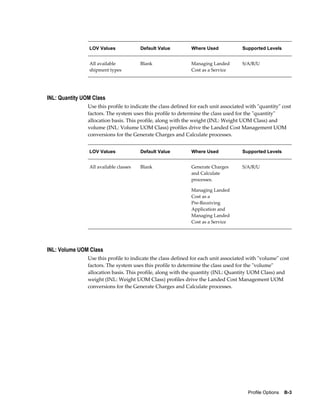
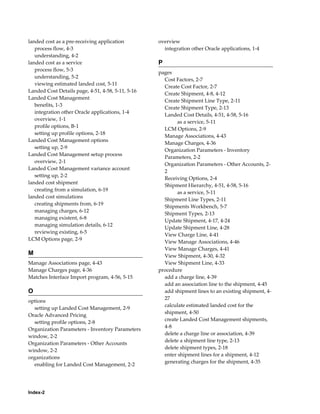
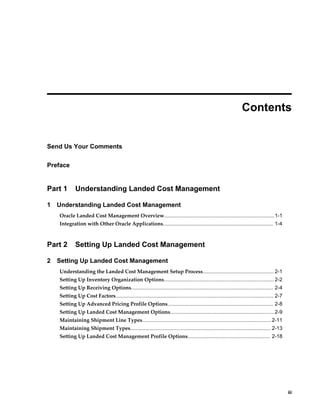
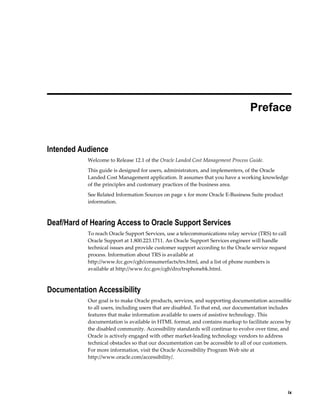
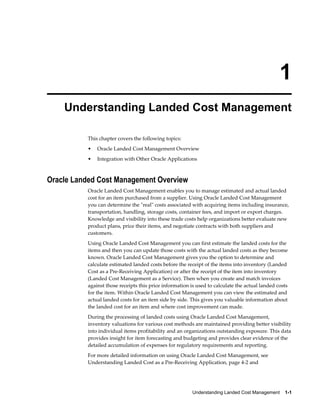
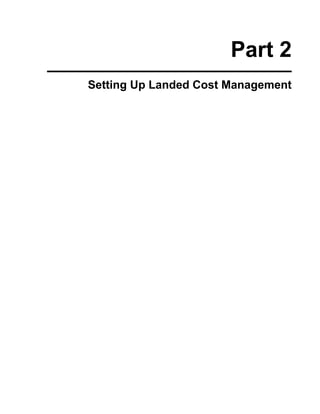
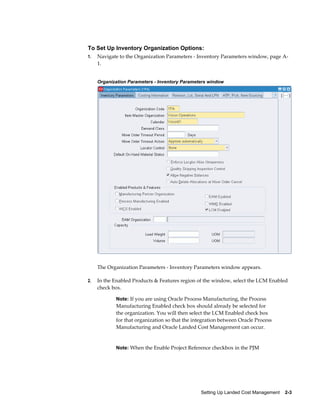
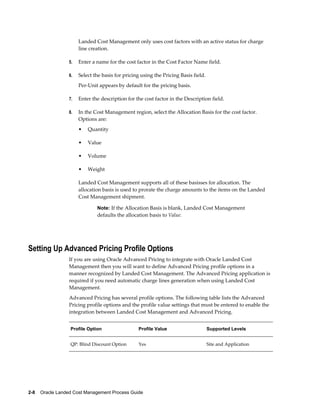
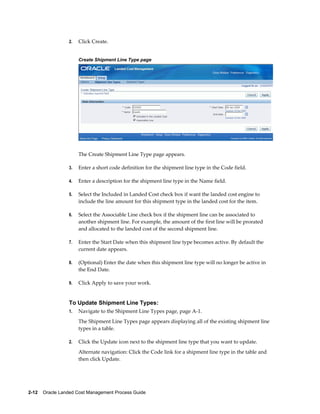
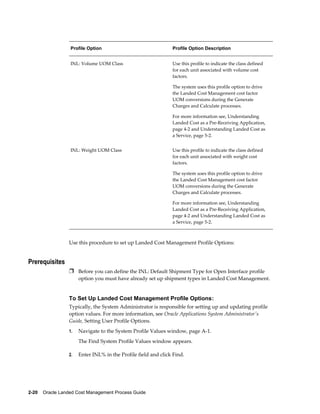
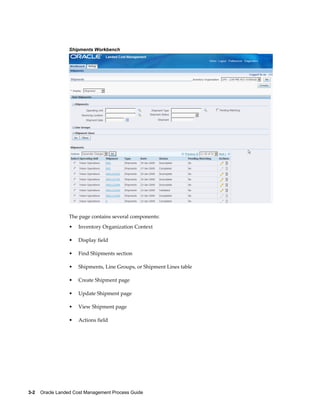
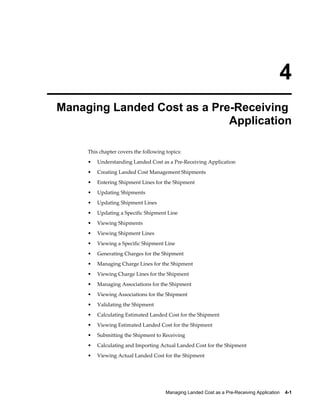
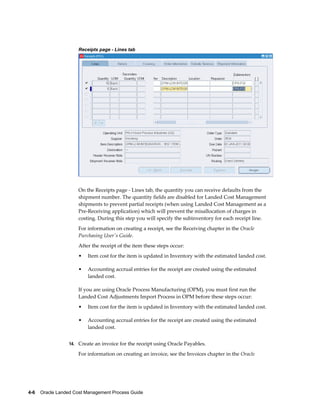
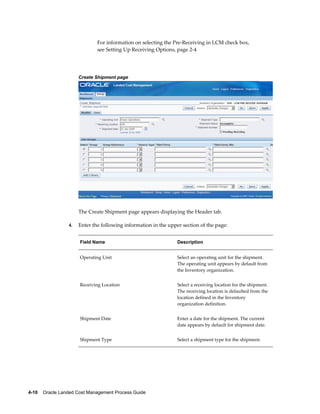
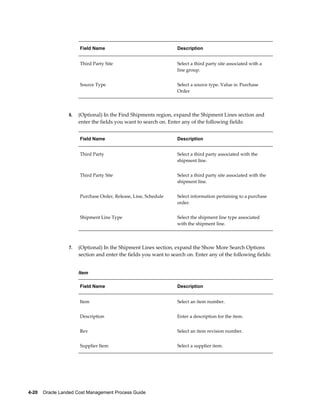
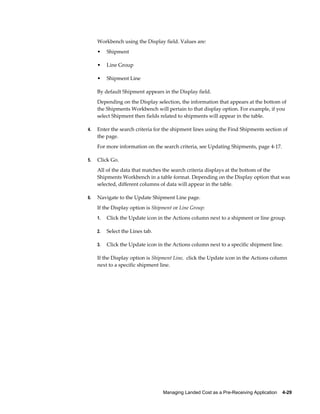
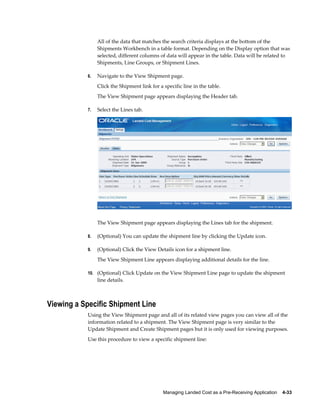
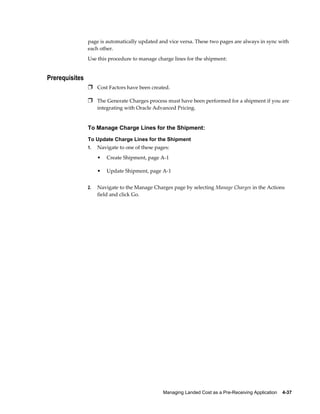
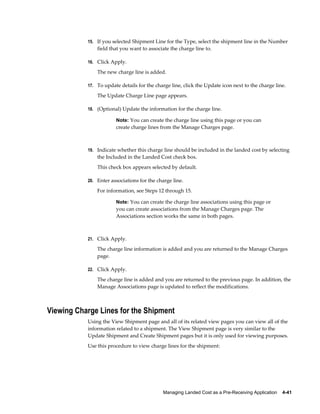
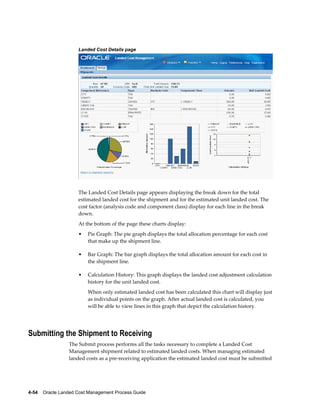
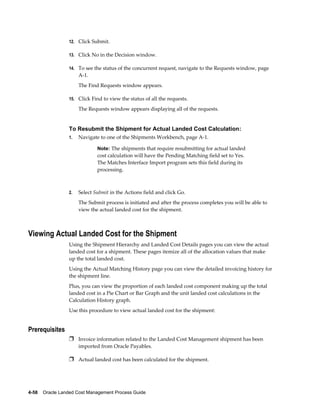
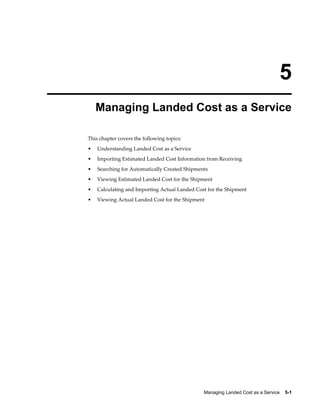
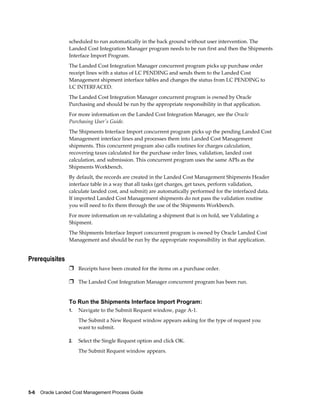
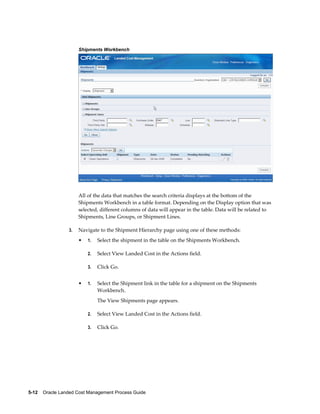
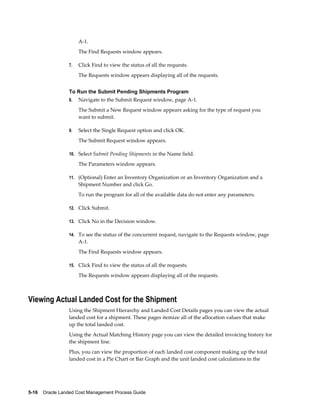
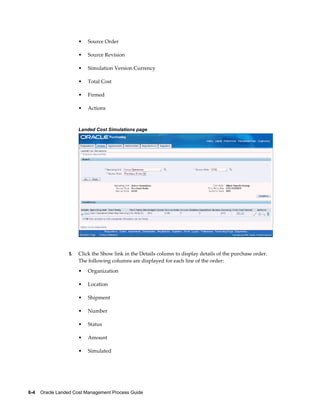
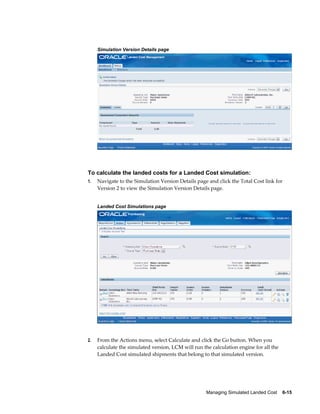
![Window/Page Navigator Menu Path
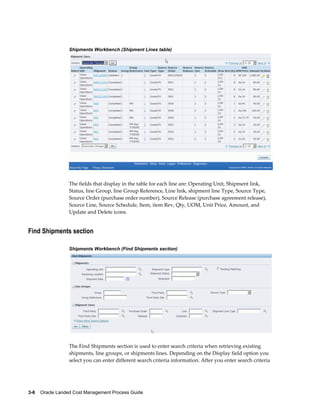
Purchase Orders Purchasing: Purchase Orders > Purchase
Orders
Receiving Options Inventory: Setup > Organizations > Receiving
Parameters
Receipts Inventory: Transactions > Receiving > Receipts
Requests • (M) View > Requests
• Other > Concurrent
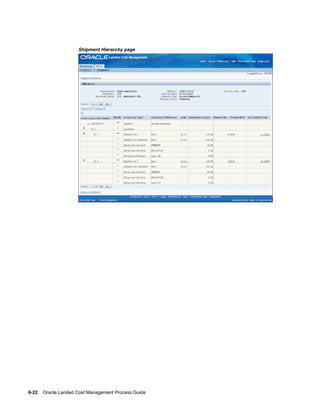
Shipment Hierarchy • Update Shipment > View Landed Cost
action
• Create Shipment > View Landed Cost
action
• Workbench > Shipments > View Landed
Cost action
• View Shipments > View Landed Cost
action
Shipment Line Types Setup > Shipment Line Types
Shipment Types Setup > Shipment Types
Shipments Purchasing: Purchase Orders > Purchase
Orders > [Shipments]
Shipments Workbench Workbench > Shipments
Submit Requests Other > Requests
System Profile Values System Administrator: Profile > System
Update Charge Line Manage Charges > (I) Update
Windows/Pages and Navigation Paths A-3](https://image.slidesharecdn.com/landedcost-120622010930-phpapp01/85/Landed-cost-173-320.jpg)
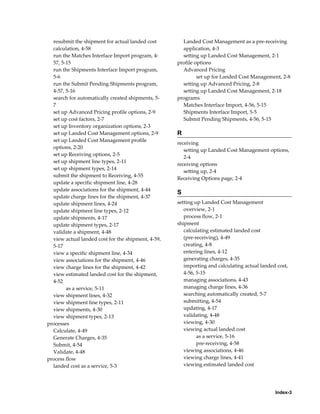
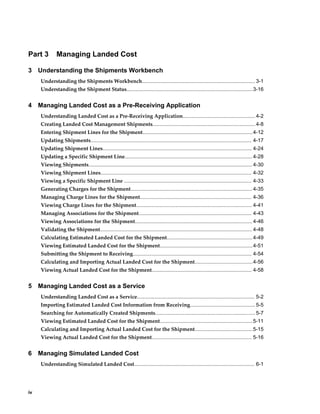
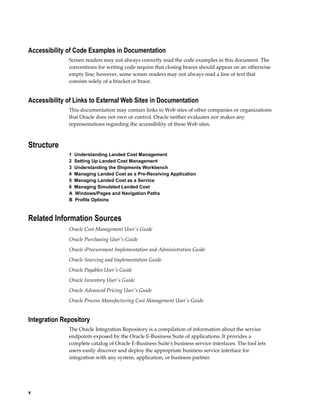
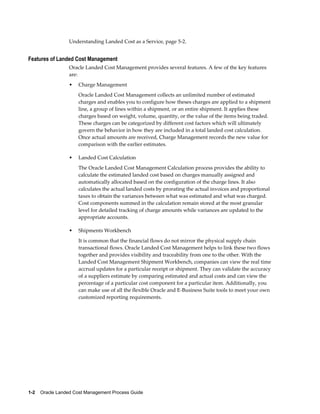
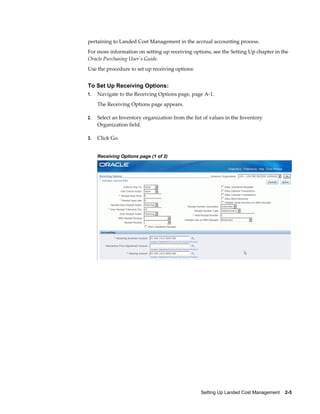
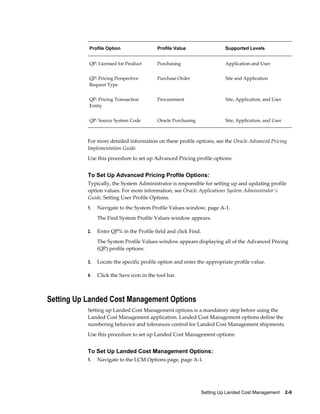
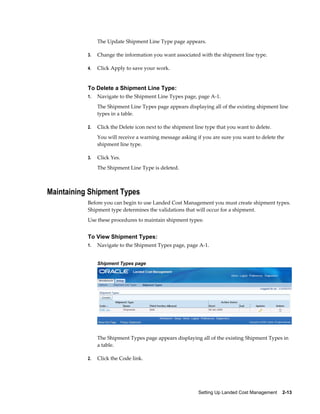
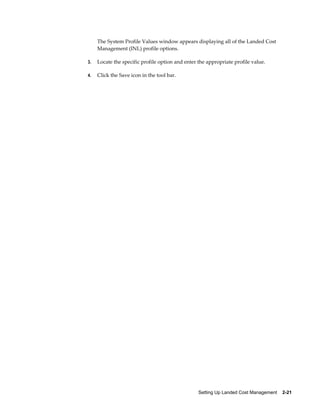
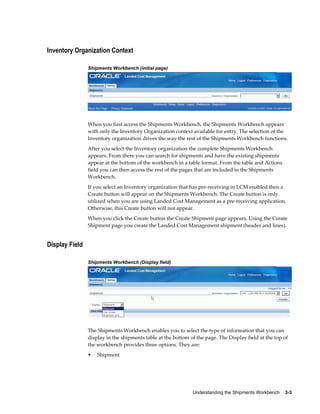
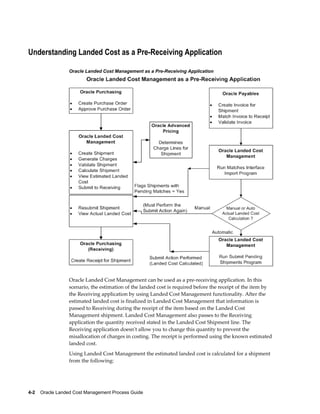
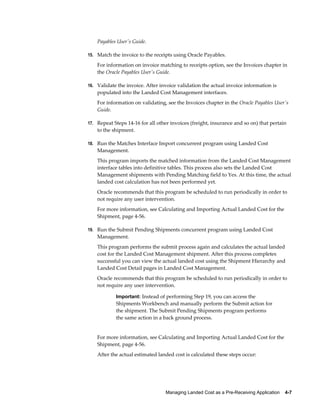
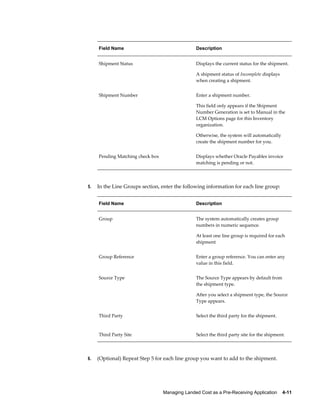
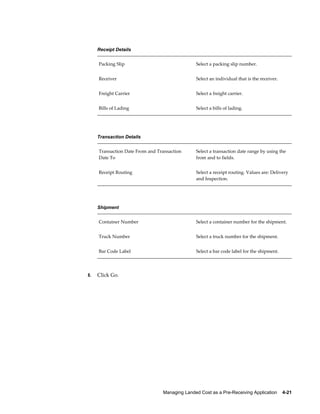
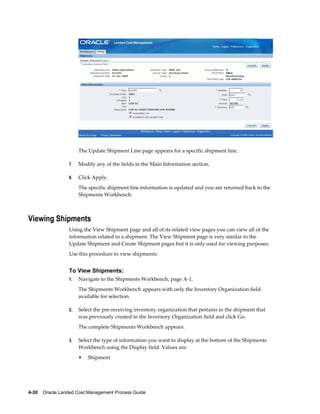
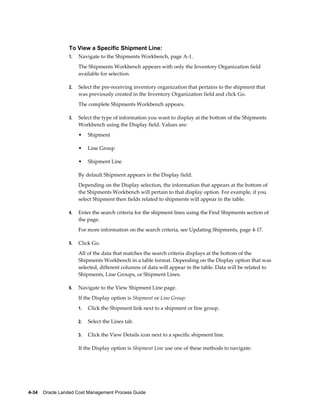
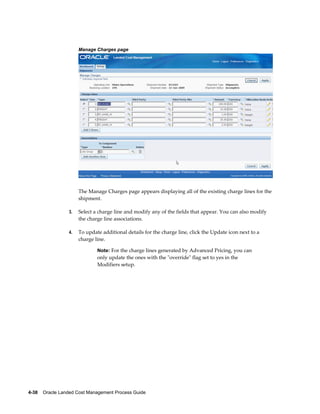
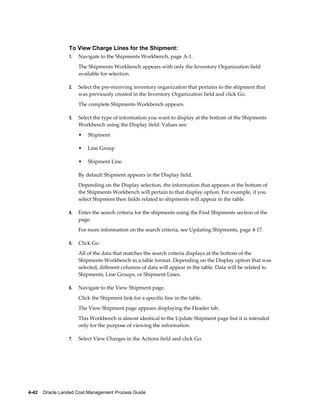
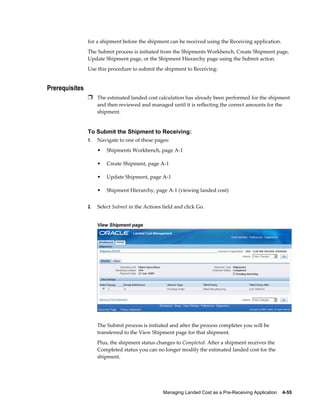
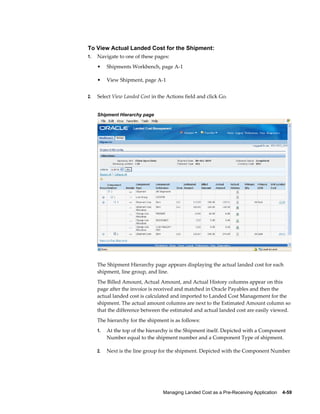
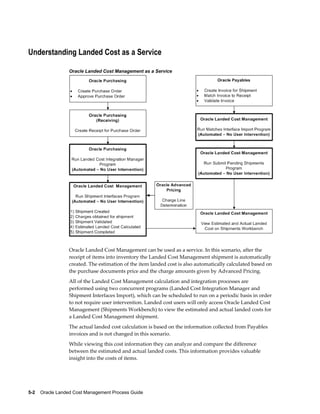
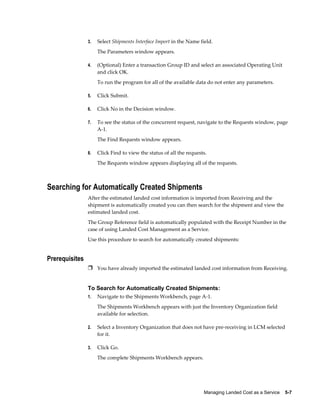
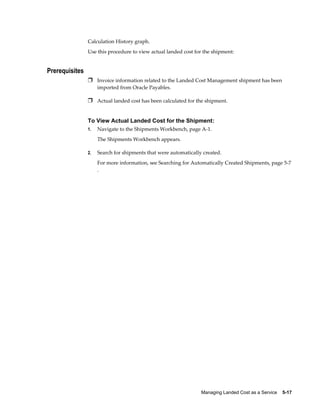
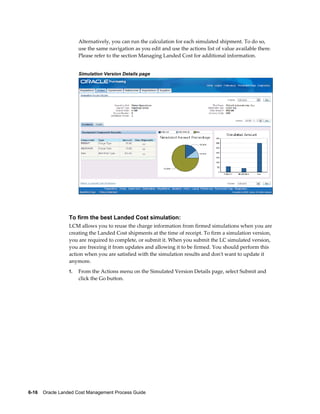
![Window/Page Navigator Menu Path
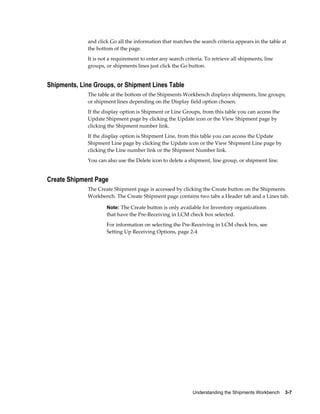
Update Shipment • Workbench > Shipments > Shipment or
Line Group display > (I) Update
• View Shipment > [Update]
Update Shipment Line • Create Shipment > (T) Lines > (I) Update
• Update Shipment > (T) Lines > (I) Update
• View Shipment > (T) Lines > (I) View
Details > [Update]
• Workbench > Shipments > Shipment Line
display > (I) Update
• Workbench > Shipments > Shipment Line
display > Line link > [Update]
Update Shipment Line Type • Setup > Shipment Line Types > (I) Update
• Setup > Shipment Line Types > Click
Code link > [Update]
Update Shipment Type • Setup > Shipment Types > (I) Update
• Setup > Shipment Types > Click Code link
> [Update]
View Charge Line View Manage Charges > (I) View Details
View Manage Associations View Shipment > View Associations action
View Manage Charges View Shipment > View Charges action
View Shipment Workbench > Shipments > Shipment link
A-4 Oracle Landed Cost Management Process Guide](https://image.slidesharecdn.com/landedcost-120622010930-phpapp01/85/Landed-cost-174-320.jpg)