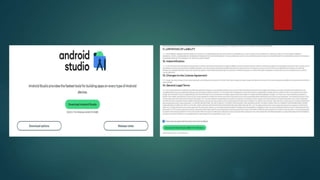
Bachelor of Information Technology
Fundamentals of Mobile Computing
BIT4C143
Lab Report
Phase02: When the download is complete, open the file from your downloads folder and execute
it. The following dialog box will appear.
Next should be selected. The following screen will request to choose a component, select
Android virtual Device then click next after that it will request an installation directory. Select a
route and then press the next button.
Phase03: This would begin the setup, and when it is finished, will seem as in the photo beneath.
Select Install and when it is finished, will seem as in the photo beneath.
Phase04: When selected "Finish," this will prompt whether the user wants to import their prior
preferences (if Android Studio was installed before). It's indeed preferable to select the 'Don't
import Settings' option.
Press Next to get something like the below picture:
Select the button “OK”
Phase05: Then on the computer, the Android Studio will launch.
Simultaneously, this would look for SDK components that are obtainable. This would take the
user to the Welcoming dialog box once it has located the SDK elements.
Next should be selected. Pick Standard furthermore click Next.
Phase06:The SDK elements must now be downloaded. Allow the components to finish
downloading. Then click Next and now the configuration of Android Studio has already been
completed. To start it, click the Finish button.
Phase07: To build a new app project click “Start a new Android Studio project”.

Lab Report presentation.pptx

  • 1.
    Bachelor of InformationTechnology Fundamentals of Mobile Computing BIT4C143 Lab Report
  • 4.
    Phase02: When thedownload is complete, open the file from your downloads folder and execute it. The following dialog box will appear. Next should be selected. The following screen will request to choose a component, select Android virtual Device then click next after that it will request an installation directory. Select a route and then press the next button.
  • 6.
    Phase03: This wouldbegin the setup, and when it is finished, will seem as in the photo beneath. Select Install and when it is finished, will seem as in the photo beneath.
  • 7.
    Phase04: When selected"Finish," this will prompt whether the user wants to import their prior preferences (if Android Studio was installed before). It's indeed preferable to select the 'Don't import Settings' option. Press Next to get something like the below picture:
  • 8.
    Select the button“OK” Phase05: Then on the computer, the Android Studio will launch. Simultaneously, this would look for SDK components that are obtainable. This would take the user to the Welcoming dialog box once it has located the SDK elements.
  • 9.
    Next should beselected. Pick Standard furthermore click Next.
  • 10.
    Phase06:The SDK elementsmust now be downloaded. Allow the components to finish downloading. Then click Next and now the configuration of Android Studio has already been completed. To start it, click the Finish button.
  • 11.
    Phase07: To builda new app project click “Start a new Android Studio project”.