SlideShare a Scribd company logo
STEERING
TABLE OF CONTENTS
page page
STEERING
DESCRIPTION . . . . . . . . . . . . . . . . . . . . . . . . . . 1
OPERATION . . . . . . . . . . . . . . . . . . . . . . . . . . . . 1
DIAGNOSIS AND TESTING
DIAGNOSIS AND TESTING - POWER
STEERING SYSTEM . . . . . . . . . . . . . . . . . . . . 1
DIAGNOSIS AND TESTING - POWER
STEERING FLOW AND PRESSURE . . . . . . . . 3
COLUMN . . . . . . . . . . . . . . . . . . . . . . . . . . . . . . . 5
GEAR . . . . . . . . . . . . . . . . . . . . . . . . . . . . . . . . . 13
LINKAGE . . . . . . . . . . . . . . . . . . . . . . . . . . . . . . 16
PUMP . . . . . . . . . . . . . . . . . . . . . . . . . . . . . . . . . 17
STEERING
DESCRIPTION
Power steering systems consist of:
• Steering column & Intermediate Shaft
• Rack and pinion steering gear
• Belt driven hydraulic steering pump
• Pump pressure, supply and return hoses
• Oil Cooler
OPERATION
The steering column intermediate shaft attaches
the steering column to the gear pinion. The rotation
of the pinion moves the gear rack from side-to-side.
This lateral action of the rack pushes and pulls the
tie rods to change the direction of the front wheels.
Power assist is provided by an engine mounted
hydraulic pump. The pump supplies hydraulic fluid
to the steering gear. All vehicles are equipped with
an oil cooler.
DIAGNOSIS AND TESTING
DIAGNOSIS AND TESTING - POWER STEERING SYSTEM
STEERING NOISE
There is some noise in all power steering systems. One of the most common is a hissing sound evident at a
standstill/parking, or when the steering is at the end of it’s travel. Hiss is a high frequency noise similar to that
of a water tap being closed slowly. The noise is present in all valves that have a high velocity fluid passing through
an orifice. There is no relationship between this noise and steering performance.
CONDITION POSSIBLE CAUSES CORRECTION
OBJECTIONAL HISS OR
WHISTLE
1. Steering intermediate shaft to dash panel
seal.
1. Check and repair seal at dash
panel.
2. Noisy valve in power steering gear. 2. Replace steering gear.
1. Gear mounting bolts loose. 1. Tighten bolts to specification.
2. Loose or damaged suspension
components.
2. Inspect and repair suspension.
3. Internal gear noise. 3. Replace steering gear.
4. Loose or damaged intermediate shaft or
column.
4. Inspect and repair or replace.
MOAN Pressure hose in contact with other
components.
Reposition hose.
CHIRP OR SQUEAL 1. Loose belt. 1. Adjust or replace.
KJ STEERING 19 - 1
CONDITION POSSIBLE CAUSES CORRECTION
WHINE OR GROWL 1. Low fluid level. 1. Fill to proper level.
2. Pressure hose in contact with other
components.
2. Reposition hose.
3. Internal pump noise. 3. Replace pump.
SUCKING AIR SOUND 1. Loose return line clamp. 1. Replace clamp.
2. O-ring missing or damaged on hose
fitting.
2. Replace o-ring.
3. Low fluid level. 3. Fill to proper level.
4. Air leak between pump and reservoir. 4. Repair as necessary.
5. Reservoir cap not installed correctly. 5. Install reservoir cap correctly.
SCRUBBING OR
KNOCKING
1. Wrong tire size. 1. Verify tire size.
2. Wrong gear. 2. Verify gear.
3. Tire Pressure 3. Adjust Tire Pressure
BINDING AND STICKING
CONDITION POSSIBLE CAUSE CORRECTION
DIFFICULT TO TURN WHEEL
STICKS OR BINDS
1. Low fluid level. 1. Fill to proper level.
2. Tire pressure. 2. Adjust tire pressure.
3. Steering components (ball
joints/tie rod ends).
3 Inspect and repair as necessary.
4. Loose belt. 4. Adjust or replace.
5. Low pump pressure. 5. Pressure test and replace if
necessary.
6. Column Intermediate shaft
binding.
6. Replace Intermediate Shaft.
7. Steering gear worn. 7. Replace gear.
INSUFFICIENT ASST. OR POOR RETURN TO CENTER
CONDITION POSSIBLE CAUSE CORRECTION
HARD TURNING OR MOMENTARY
INCREASE IN TURNING EFFORT
1. Tire pressure. 1. Adjust tire pressure.
2. Low fluid level. 2. Fill to proper level.
3. Loose belt. 3. Adjust or replace.
4. Low pump pressure. 4. Pressure test and repair as
necessary.
5. Internal gear leak. 5. Replace gear.
STEERING WHEEL DOES NOT
WANT TO RETURN TO CENTER
POSITION
1. Tire pressure. 1. Adjust tire pressure.
2. Wheel alignment. 2. Align front end.
3. Lack of lubrication. 3. Inspect and lubricate suspension
compnents.
4. High friction in steering gear. 4. Replace gear.
19 - 2 STEERING KJ
STEERING (Continued)
LOOSE STEERING AND VEHICLE LEAD
CONDITION POSSIBLE CAUSE CORRECTION
EXCESSIVE PLAY IN STEERING
WHEEL
1. Worn or loose suspension or
steering components.
1. Inspect and repair as necessary.
2. Worn or loose wheel bearings. 2. Inspect and replace bearings.
3. Steering gear mounting. 3. Tighten / replace gear mounting
bolts/ isolators to specification.
4. Gear out of adjustment. 4. Replace gear.
5. Worn or loose steering
intermediate shaft.
5. Inspect and replace as
necessary.
VEHICLE PULLS, DRIFTS OR
LEADS TO ONE SIDE.
1. Tire Pressure. 1. Adjust tire pressure.
2. Radial tire lead. 2. Rotate tires.
3. Brakes dragging. 3. Repair as necessary.
4. Wheel alignment. 4. Align front end.
DIAGNOSIS AND TESTING - POWER STEERING
FLOW AND PRESSURE
The following procedure is used to test the opera-
tion of the power steering system on the vehicle. This
test will provide the gallons per minute (GPM) or
flow rate of the power steering pump along with the
maximum relief pressure. Perform test any time a
power steering system problem is present. This test
will determine if the power steering pump or power
steering gear is not functioning properly. The follow-
ing pressure and flow test is performed using Power
Steering Analyzer Tool kit 6815 and (Fig. 1) Adapter
Kit 6893.
FLOW AND PRESSURE TEST
(1) Check the power steering belt to ensure it is in
good condition and adjusted properly.
(2) Connect pressure gauge hose from the Power
Steering Analyzer to Tube 6844.
(3) Connect Adapter 6826 to Power Steering Ana-
lyzer test valve end.
(4) Disconnect the high pressure hose from the
power steering pump.
(5) Connect the tube to the pump hose fitting.
(6) Connect the power steering hose from the
steering gear to the adapter.
(7) Open the test valve completely.
(8) Start engine and let idle long enough to circu-
late power steering fluid through flow/pressure test
gauge and to get air out of the fluid. Then shut off
engine.
(9) Check fluid level, add fluid as necessary. Start
engine again and let idle.
(10) Check for air bubbles, Evacuate if necessary
(11) Gauge should read below 862 kPa (125 psi), if
above, inspect the hoses for restrictions and repair as
necessary. The initial pressure reading should be in
the range of 345-552 kPa (50-80 psi).
(12) Increase the engine speed to 1500 RPM and
read the flow meter. If the flow rate (GPM) is below
specification, (refer to pump specification chart for
GPM) the pump should be replaced.
CAUTION: The following test procedure involves
testing maximum pump pressure output and flow
control valve operation. Do not leave valve closed
for more than three seconds as the pump could be
damaged.
Fig. 1 Analyzer With Tube and Adapter
1 - TUBE
2 - ADAPTER FITTINGS
3 - ANALYZER
4 - GAUGE HOSE
KJ STEERING 19 - 3
STEERING (Continued)
(13) Close valve fully three times and record high-
est pressure indicated each time. All three read-
ings must be above specifications and within
345 kPa (50 psi) of each other.
• Pressures above specifications but not within
345 kPa (50 psi) of each other, replace pump.
• Pressures within 345 kPa (50 psi) of each other
but below specifications, replace pump.
(14) Open the test valve and turn the steering
wheel to the extreme left and right positions three
times against the stops. Record the highest pressure
reading at each position. Compare readings to the
pump specifications chart. If pressures readings are
not within 50 psi of each other, the gear is leaking
internally and must be replaced.
CAUTION: Do not force the pump to operate against
the stops for more than 2 to 3 seconds at a time
because, pump damage will result.
PUMP SPECIFICATION
ENGINE
RELIEF PRESSURE ±
50
FLOW RATE
(GPM) AT 1500
RPM
3.7L,
2.4L &
2.5L
10342 kPa (1450 psi) 2.4 - 2.8
19 - 4 STEERING KJ
STEERING (Continued)
COLUMN
TABLE OF CONTENTS
page page
COLUMN
DESCRIPTION . . . . . . . . . . . . . . . . . . . . . . . . . . 5
OPERATION - SERVICE PRECAUTIONS . . . . . . 5
REMOVAL . . . . . . . . . . . . . . . . . . . . . . . . . . . . . 5
INSTALLATION . . . . . . . . . . . . . . . . . . . . . . . . . . 7
SPECIFICATIONS
TORQUE CHART . . . . . . . . . . . . . . . . . . . . . . 8
SPECIAL TOOLS
STEERING COLUMN . . . . . . . . . . . . . . . . . . . . 8
IGNITION SWITCH
DESCRIPTION . . . . . . . . . . . . . . . . . . . . . . . . . . 8
DIAGNOSIS AND TESTING - IGNITION
SWITCH . . . . . . . . . . . . . . . . . . . . . . . . . . . . . 8
REMOVAL
IGNITION SWITCH REMOVAL . . . . . . . . . . . . . 9
INSTALLATION
IGNITION SWITCH INSTALLATION . . . . . . . . . 9
KEY-IN IGNITION SWITCH
DESCRIPTION . . . . . . . . . . . . . . . . . . . . . . . . . 10
DIAGNOSIS AND TESTING - KEY-IN IGNITION
SWITCH . . . . . . . . . . . . . . . . . . . . . . . . . . . . 10
LOCK CYLINDER
REMOVAL . . . . . . . . . . . . . . . . . . . . . . . . . . . . . 10
INSTALLATION . . . . . . . . . . . . . . . . . . . . . . . . . 11
INTERMEDIATE SHAFT
REMOVAL . . . . . . . . . . . . . . . . . . . . . . . . . . . . . 11
INSTALLATION . . . . . . . . . . . . . . . . . . . . . . . . . 11
STEERING WHEEL
REMOVAL . . . . . . . . . . . . . . . . . . . . . . . . . . . . . 12
INSTALLATION . . . . . . . . . . . . . . . . . . . . . . . . . 12
COLUMN
DESCRIPTION
The standard non-tilt and tilt steering column has
been designed to be serviced as an assembly. The col-
umn is connected to the steering gear with a one
piece shaft. The upper half has a support bearing
mounted to a bracket. The bracket mounts to the
frame rail with two nuts. The shaft is serviceable.
The key cylinder, switches, clock spring, trim shrouds
and steering wheel are serviced separately.
OPERATION - SERVICE PRECAUTIONS
Safety goggles should be worn at all times when
working on steering columns.
To service the steering wheel, switches or airbag,
refer to Electrical - Restraints and follow all WARN-
INGS and CAUTIONS.
WARNING: THE AIRBAG SYSTEM IS A SENSITIVE,
COMPLEX ELECTRO-MECHANICAL UNIT. BEFORE
ATTEMPTING TO DIAGNOSE, REMOVE OR INSTALL
THE AIRBAG SYSTEM COMPONENTS YOU MUST
FIRST DISCONNECT AND ISOLATE THE BATTERY
NEGATIVE (GROUND) CABLE. THEN WAIT TWO
MINUTES FOR THE SYSTEM CAPACITOR TO DIS-
CHARGE. FAILURE TO DO SO COULD RESULT IN
ACCIDENTAL DEPLOYMENT OF THE AIRBAG AND
POSSIBLE PERSONAL INJURY. THE FASTENERS,
SCREWS, AND BOLTS, ORIGINALLY USED FOR
THE AIRBAG COMPONENTS, HAVE SPECIAL COAT-
INGS AND ARE SPECIFICALLY DESIGNED FOR THE
AIRBAG SYSTEM. THEY MUST NEVER BE
REPLACED WITH ANY SUBSTITUTES. ANYTIME A
NEW FASTENER IS NEEDED, REPLACE WITH THE
CORRECT FASTENERS PROVIDED IN THE SERVICE
PACKAGE OR FASTENERS LISTED IN THE PARTS
BOOKS.
REMOVAL
(1) Position front wheels straight ahead.
(2) Remove and isolate the negative ground cable
from the battery.
(3) Remove the airbag, (Refer to 8 - ELECTRICAL/
RESTRAINTS/DRIVER AIRBAG - REMOVAL).
NOTE: If equipped with cruise control, disconnect
clock spring harness from the cruise switch har-
ness on the steering wheel.
KJ COLUMN 19 - 5
(4) Remove the steering wheel with an appropriate
puller (Fig. 1) (Refer to 19 - STEERING/COLUMN/
STEERING WHEEL - REMOVAL).
(5) Remove knee blocker cover and knee blocker,
(Refer to 23 - BODY/INSTRUMENT PANEL/KNEE
BLOCKER - REMOVAL). (Fig. 2)
(6) Remove screws from the lower column shroud
(Fig. 3) and remove both the upper and lower
shrouds.
(7) Turn ignition key to the on position.
(8) If vehicle is equipped with automatic transmis-
sion, disconnect shifter interlock cable from the col-
umn.
(9) Remove the steering coupler bolt and column
mounting nuts and bolts (Fig. 4) then lower column
off the mounting studs.
(10) Disconnect and remove the wiring harness
from the column (Fig. 5).
(11) Slide the shifter interlock cable from the tie
straps.
(12) Remove column.
(13) Transfer the necessary parts if needed.
(14) Remove clock spring (Fig. 6), switches, (SKIM
if equipped) (Refer to 8 - ELECTRICAL/RE-
STRAINTS/CLOCKSPRING - REMOVAL).
Fig. 1 Steering Wheel Puller
1 - PULLER C-3894-A
2 - STEERING WHEEL
Fig. 2 KNEE BLOCKER
Fig. 3 SHROUD REMOVAL/INSTALL
1 - Upper Shroud
2 - Lower Shroud
Fig. 4 STEERING COLUMN MOUNTING
1 - Steering Column
2 - Mounting Holes
19 - 6 COLUMN KJ
COLUMN (Continued)
INSTALLATION
(1) Align and install column into the steering cou-
pler.
(2) Install column harness and connect harness to
switches.
(3) Reroute the shifter interlock cable through the
tie straps.
(4) Install the column onto the mounting studs.
(5) Install the two mounting nuts and the two
mounting bolts all finger tight.
CAUTION: Lower nuts must be installed and tight-
ened first then the upper nuts in order to prevent
damage to the capsules.
(6) Tighten the lower mounting nuts to 17 N·m
(150 in. lbs.).
(7) Tighten the upper mounting nuts to 17 N·m
(150 in. lbs.).
(8) Install the steering column coupler bolt and
tighten to 49 N·m (36 ft. lbs.).
(9) Reconnect the shifter interlock cable.
(10) Center the clock spring (if necessary) and
install it on the column, (Refer to 8 - ELECTRICAL/
RESTRAINTS/CLOCKSPRING - INSTALLATION).
(11) Snap together the column shrouds and install
the mounting screws.
(12) Install the knee blocker and the knee blocker
cover, (Refer to 23 - BODY/INSTRUMENT PANEL/
KNEE BLOCKER - INSTALLATION).
(13)
NOTE: Do not reuse the old steering wheel bolt (a
new bolt must be used)
NOTE: Be certain that the steering wheel mounting
bolt is tightened to the proper torque specification
to ensure proper clockspring operation.Install the
steering wheel and tighten bolt to 54 N·m (40 ft.
lbs.) (Refer to 19 - STEERING/COLUMN/STEERING
WHEEL - INSTALLATION).
NOTE: If equipped with cruise control, connect
clock spring harness to cruise switch harness on
the steering wheel.
(14) Install the airbag, (Refer to 8 - ELECTRICAL/
RESTRAINTS/DRIVER AIRBAG - INSTALLATION).
(15) Install the negative battery terminal.
Fig. 5 WIRING HARNESS COLUMN
1 - Column Wiring Harness
2 - Multi-function Switch
3 - Ignition Switch
4 - Steering Column
Fig. 6 CLOCK SPRING
1 - Tilt Lever
2 - Ignition Switch
3 - Clockspring
4 - Steering Column
5 - SKIM
KJ COLUMN 19 - 7
COLUMN (Continued)
SPECIFICATIONS
TORQUE CHART
TORQUE SPECIFICATIONS
DESCRIPTION N·m Ft. Lbs. In. Lbs.
Tilt Steering Column
Steering Wheel Bolt
54 40 —
Tilt Steering Column
Mounting Bolts
17 — 150
Tilt Steering Column
Coupler Bolt
49 36 —
Non-Tilt Steering Column
Steering Wheel Bolt
54 40 —
Non-Tilt Steering Column
Mounting Bolts
17 — 150
Non-Tilt Steering Column
Coupler Bolt
49 36 —
Ignition Switch Screws 2 — 17
SPECIAL TOOLS
STEERING COLUMN
IGNITION SWITCH
DESCRIPTION
The electrical ignition switch is located on the
steering column. It is used as the main on/off switch-
ing device for most electrical components. The
mechanical key lock cylinder is used to engage/disen-
gage the electrical ignition switch.
DIAGNOSIS AND TESTING - IGNITION SWITCH
ELECTRICAL DIAGNOSIS
For ignition switch electrical schematics, Refer to
the appropriate section for the component.
MECHANICAL DIAGNOSIS (KEY DIFFICULT TO
ROTATE)
Vehicles equipped with an automatic trans-
mission and a floor mounted shifter: a cable is
used to connect the interlock device in the steering
column assembly, to the transmission floor shift
lever. This interlock system is used to lock the trans-
mission shifter in the PARK position when the key
lock cylinder is rotated to the LOCKED or ACCES-
SORY position. If the ignition key is difficult to
rotate to or from the LOCK or ACCESSORY position,
it may not be the fault of the key cylinder or the
steering column components. The brake transmission
shift interlock cable may be out of adjustment. (Refer
to 21 - TRANSMISSION/TRANSAXLE/AUTOMATIC
- 30RH/GEAR SHIFT CABLE - ADJUSTMENTS).
The interlock system within the steering column is
not serviceable. If repair is necessary, the steering
column assembly must be replaced. (Refer to 19 -
STEERING/COLUMN - REMOVAL).
Vehicles equipped with a manual transmis-
sion and a floor mounted shifter: on certain mod-
els, a button is located on the steering column behind
the ignition key lock cylinder. The button must be
manually depressed to allow rotation of the ignition
key lock cylinder to the LOCK or ACCESSORY posi-
tion. If it is difficult to rotate the key to the LOCK or
ACCESSORY position, the lever mechanism may be
defective. This mechanism is not serviceable. If
repair is necessary, the steering column assembly
must be replaced.(Refer to 19 - STEERING/COL-
UMN - REMOVAL).
Puller C-3894-A
19 - 8 COLUMN KJ
COLUMN (Continued)
REMOVAL
IGNITION SWITCH REMOVAL
The ignition key must be in the key cylinder for
cylinder removal. The key cylinder must be removed
first before removing ignition switch.
(1) Remove lower steering column cover screws
and remove cover.
(2) Remove lock cylinder.(Refer to 19 - STEERING/
COLUMN/KEY/LOCK CYLINDER - REMOVAL).
(3) Remove the multi-function switch.
(4) Disconnect the electrical connector at the rear
of the ignition switch.
(5) Remove the ignition switch mounting screw
(Fig. 7). Use tamper proof torx bit to remove the
screw.
(6) Pull the ignition switch straight out to remove
from the locking tabs (Fig. 8)
INSTALLATION
IGNITION SWITCH INSTALLATION
The ignition key must be in the key cylinder for
cylinder installation. The key cylinder must be
aligned with the ignition switch for installation.
(1) Before installing ignition switch, rotate the slot
in the switch to the ON position (Fig. 9).
(2) Connect the electrical connector to rear of igni-
tion switch. Make sure that locking tab is fully
seated into wiring connector.
(3) Position the switch to the column and install
tamper proof screw. Tighten screw to 2 N·m (17 in.
lbs.).
(4) Install the lock cylinder (Refer to 19 - STEER-
ING/COLUMN/KEY/LOCK CYLINDER - INSTALLA-
TION).
(5) Test the operation of the lock cylinder for
smooth rotating.
(6) Install the multi-function switch.
(7) Install steering column lower cover.
Fig. 7 IGNITION SWITCH MOUNTING SCREW
1 - Tamper Proof Torx Screw
2 - Ignition Switch
Fig. 8 IGNITION SWITCH TABS
1 - Ignition Switch
2 - Locking Tabs
Fig. 9 IGNITION SWITCH ON POSITION
1 - Ignition Switch
2 - Rotate to On Position
KJ COLUMN 19 - 9
IGNITION SWITCH (Continued)
KEY-IN IGNITION SWITCH
DESCRIPTION
The key-in ignition switch is integral to the igni-
tion switch, which is mounted on the left side of the
steering column, opposite the ignition lock cylinder.
It closes a path to ground for the instrument cluster
chime warning circuitry when the ignition key is
inserted in the ignition lock cylinder and the driver
door jamb switch is closed (driver door is open). The
key-in ignition switch opens the ground path when
the key is removed from the ignition lock cylinder.
The key-in ignition switch cannot be repaired and,
if faulty or damaged, the entire ignition switch must
be replaced. (Refer to 19 - STEERING/COLUMN/IG-
NITION SWITCH - REMOVAL).
DIAGNOSIS AND TESTING - KEY-IN IGNITION
SWITCH
For circuit descriptions and diagrams, Refer to the
appropriate sections on the individual components.
WARNING: ON VEHICLES EQUIPPED WITH AIR-
BAGS, REFER TO ELECTRICAL - PASSIVE
RESTRAINT SYSTEMS BEFORE ATTEMPTING ANY
STEERING WHEEL, STEERING COLUMN, OR
INSTRUMENT PANEL COMPONENT DIAGNOSIS OR
SERVICE. FAILURE TO TAKE THE PROPER PRE-
CAUTIONS COULD RESULT IN ACCIDENTAL AIR-
BAG DEPLOYMENT AND POSSIBLE PERSONAL
INJURY.
(1) Disconnect and isolate the battery negative
cable. Remove the steering column shrouds. Unplug
the key-in ignition switch wire harness connector
from the ignition switch.
(2) Check for continuity between the key-in switch
sense circuit and the left front door jamb switch
sense circuit terminals of the key-in ignition switch.
There should be continuity with the key in the igni-
tion lock cylinder, and no continuity with the key
removed from the ignition lock cylinder. If OK, go to
Step 3. If not OK, replace the faulty ignition switch
assembly.
(3) Check for continuity between the left front door
jamb switch sense circuit cavity of the key-in ignition
switch wire harness connector and a good ground.
There should be continuity with the driver door open,
and no continuity with the driver door closed. If OK,
see the diagnosis for Instrument Cluster in this
group. If not OK, repair the circuit to the driver door
jamb switch as required.
LOCK CYLINDER
REMOVAL
The ignition key must be in the key cylinder for
cylinder removal. The key cylinder must be removed
first before removing ignition switch.
(1) If equipped with an automatic transmission,
place shifter in PARK position.
(2) Remove the lower shroud cover.
(3) Remove the remote keyless entry (R.K.E.) mod-
ule.
(4) Remove the halo ring around the lock cylinder.
(5) Rotate key to ON position.
(6) A release tang is located on bottom of key cyl-
inder (Fig. 10).
(7) Position a small screwdriver or pin punch into
tang access hole on bottom of steering column (Fig.
11).
(8) Push the pin punch up while pulling key cylin-
der from steering column.
Fig. 10 LOCK CYLINDER RELEASE TANG
1 - Lock Cylinder
2 - Release Tang
19 - 10 COLUMN KJ
INSTALLATION
The ignition key must be in the key cylinder for
cylinder installation.
(1) Install the lock cylinder into the housing using
care to align the end of the lock cylinder with the
ignition switch.
(2) Push the lock cylinder in until it clicks.
(3) Rotate the key to the lock position.
(4) install the halo ring around the lock cylinder
housing.
(5) Install the R.K.E. module.
(6) Install the lower shroud cover.
INTERMEDIATE SHAFT
REMOVAL
(1) Disconnect the negative battery cable.
(2) Remove knee blocker cover and knee blocker,
(Refer to 23 - BODY/INSTRUMENT PANEL/KNEE
BLOCKER - REMOVAL).
(3) Lock the steering wheel with the tires in the
straight ahead position.
(4) Remove the lower column pinch bolt (Fig. 12).
(5) Lower the steering coupler shaft from the col-
umn.
(6) Remove the intermediate shaft seal by pushing
in the four tangs securing it to the panel (Fig. 12).
(7) Remove the center support bearing bracket
from the mount on the shock tower.
(8) Remove the lower coupler pinch bolt at the
steering gear (Fig. 12).
(9) Remove the coupler at the steering gear (Fig.
12).
(10) Remove the intermediate shaft from the vehi-
cle (Fig. 12).
(11) Remove the center support bracket from the
steering shaft (if replacing the intermediate shaft).
INSTALLATION
(1) Install the center support bracket to the steer-
ing shaft (if removed).
(2) Install the intermediate shaft to the vehicle
(Fig. 12).
(3) Install the coupler at the steering gear (Fig.
12).
(4) Install the lower coupler pinch bolt at the
steering gear and tighten the bolt to 49 N·m (36 ft.
lbs.) (Fig. 12).
(5) Install the center support bearing bracket to
the mounting holes on the shock tower.
(6) Install the intermediate shaft seal by pushing
it in securing the four tangs to the panel (Fig. 12).
(7) Install the steering coupler shaft to the column.
(8) Install the lower column pinch bolt and tighten
the bolt to 49 N·m (36 ft. lbs.) (Fig. 12).
(9) Unlock the steering wheel.
(10) Install the knee blocker cover and knee
blocker (Refer to 23 - BODY/INSTRUMENT PANEL/
KNEE BLOCKER - INSTALLATION).
(11) Reconnect the negative battery cable.
Fig. 11 LOCK CYLINDER RELEASE
1 - LOCK CYLINDER
2 - KEY
3 - PIN PUNCH
Fig. 12 STEERING COUPLER
1 - PINCH BOLT
2 - STEERING SHAFT
3 - STEERING COUPLER
4 - PINCH BOLT
KJ COLUMN 19 - 11
LOCK CYLINDER (Continued)
STEERING WHEEL
REMOVAL
(1) Disable and remove the drivers side airbag.(Re-
fer to 8 - ELECTRICAL/RESTRAINTS/DRIVER AIR-
BAG - REMOVAL).
(2) Partially remove the steering wheel bolt and
leave the bolt in the column.
(3) Install puller C-3894–A or equivalent using the
top of the bolt to push on. (Fig. 13)
(4) Remove the steering wheel.
INSTALLATION
NOTE: Do not reuse the old steering wheel bolt (a
new bolt must be used)
(1) Install steering wheel to the column
NOTE: Be certain that the steering wheel mounting
bolt is tightened to the proper torque specification
to ensure proper clockspring operation.
(2) Install the new steering wheel bolt. Tighten the
bolt to 54 N·m (40 ft. lbs.).
(3) Install the drivers side air bag. (Refer to 8 -
ELECTRICAL/RESTRAINTS/DRIVER AIRBAG -
INSTALLATION).
Fig. 13 Steering Wheel Puller
1 - PULLER C-3894-A
2 - STEERING WHEEL
19 - 12 COLUMN KJ
GEAR
TABLE OF CONTENTS
page page
GEAR
DESCRIPTION . . . . . . . . . . . . . . . . . . . . . . . . . 13
OPERATION . . . . . . . . . . . . . . . . . . . . . . . . . . . 13
REMOVAL
REMOVAL - 4WD . . . . . . . . . . . . . . . . . . . . . . 13
REMOVAL - 2WD . . . . . . . . . . . . . . . . . . . . . . 14
INSTALLATION
INSTALLATION - 4WD . . . . . . . . . . . . . . . . . . 14
INSTALLATION - 2WD . . . . . . . . . . . . . . . . . . 14
SPECIFICATIONS
TORQUE CHART . . . . . . . . . . . . . . . . . . . . . . 15
SPECIAL TOOLS
OUTER TIE ROD END REMOVAL TOOL . . . . 15
GEAR
DESCRIPTION
A rack and pinion steering gear (Fig. 1) is made up
of two main components, the pinon shaft and the
rack. The gear cannot be adjusted or internally ser-
viced. If a malfunction or a fluid leak occurs, the gear
must be replaced as an assembly.
OPERATION
The steering column intermediate shaft is attached
to the gear pinion. The rotation of the pinion moves
the gear rack from side-to-side. This lateral action of
the rack pushes and pulls the tie rods, which are
connected to the steering knuckles to change the
direction of the front wheels.
REMOVAL
REMOVAL - 4WD
(1) Siphon the power steering fluid from the power
steering reservoir.
(2) Lock the steering wheel to prevent spinning of
the clockspring.
(3) Raise and support the vehicle.
(4) Remove the skid plate from under the front
end to gain access to the gear (Refer to 13 - FRAME
& BUMPERS/FRAME/FRONT SKID PLATE -
REMOVAL).
(5) Remove the front tire and wheel assemblies.
NOTE: Mark the alignment adjusting cams for eas-
ier installation.
(6) Remove the lower control arms. (Refer to 2 -
SUSPENSION/FRONT/LOWER CONTROL ARM -
REMOVAL).
(7) Remove the front axle. (Refer to 3 - DIFFER-
ENTIAL & DRIVELINE/FRONT AXLE - REMOV-
AL).
(8) Remove the tie rod end nuts.
(9) Separate tie rod ends from the knuckles with
Puller C-3894-A.
(10) Remove the intermediate shaft lower coupler
bolt and slide the coupler off the gear (Fig. 2).
(11) Remove power steering pressure hose bracket
(Fig. 3).
(12) Remove the power steering lines from the
gear (Fig. 2).
(13) Remove the mounting bolts from the gear to
the front cradle (Fig. 3).
(14) Remove the steering gear from the vehicle.
Fig. 1 Rack & Pinion Steering Gear
1 - TIE ROD - INNER
2 - TIE ROD - INNER
3 - TIE ROD END - OUTER LH
4 - BOOTS
5 - TIE ROD END - OUTER RH
KJ GEAR 19 - 13
REMOVAL - 2WD
(1) Siphon the power steering fluid from the power
steering reservoir.
(2) Lock the steering wheel to prevent spinning of
the clockspring.
(3) Raise and support the vehicle.
(4) Remove the skid plate from under the front
end to gain access to the gear(Refer to 13 - FRAME
& BUMPERS/FRAME/FRONT SKID PLATE -
REMOVAL).
(5) Remove the tire and wheel assembly.
NOTE: Mark the alignment adjusting cams and tie
rod end jam nuts on the steering gear for easier
installation.
(6) Remove the tie rod end nuts.
(7) Separate tie rod ends from the knuckles with
Puller C-3894-A.
(8) Remove the lower intermediate shaft coupler
bolt and slide the coupler off the gear (Fig. 2).
(9) Remove power steering pressure hose bracket
(Fig. 3).
(10) Remove the power steering lines from the
gear (Fig. 2).
(11) Remove the mounting bolts from the gear to
the front cradle (Fig. 3).
(12) Remove the steering gear from the vehicle.
INSTALLATION
INSTALLATION - 4WD
(1) Transfer the tie rod ends to the new steering
gear (if needed).
(2) Install the steering gear to the vehicle.
(3) Install the gear mounting bolts to the front cra-
dle. (Fig. 3). Tighten the gear mounting bolts to 162
N·m (120 ft.lbs.)
(4) Install the power steering lines to the gear
(Fig. 2).
(5) Install the power steering pressure hose
bracket (Fig. 3).
(6) Install the lower coupler bolt and slide the cou-
pler on to the gear (Fig. 2).
(7) Install the tie rod end to the knuckle and
tighten the nuts.
(8) Install the front axle. (Refer to 3 - DIFFEREN-
TIAL & DRIVELINE/FRONT AXLE - INSTALLA-
TION).
(9) Install the lower control arms. (Refer to 2 -
SUSPENSION/FRONT/LOWER CONTROL ARM -
INSTALLATION).
(10) Install the tire and wheel assembly. (Refer to
22 - TIRES/WHEELS/WHEELS - STANDARD PRO-
CEDURE).
(11) Install the skid plate (Refer to 13 - FRAME &
BUMPERS/FRAME/FRONT SKID PLATE - INSTAL-
LATION).
(12) Lower the vehicle.
(13) Unlock the steering wheel.
(14) Fill the power steering fluid (Refer to 19 -
STEERING/PUMP - STANDARD PROCEDURE).
(15) Reset the toe and center the steering wheel
(Refer to 2 - SUSPENSION/WHEEL ALIGNMENT -
STANDARD PROCEDURE).
INSTALLATION - 2WD
(1) Transfer the outer tie rod ends to the new
steering gear (if needed).
(2) Install the steering gear to the vehicle.
(3) Install the gear mounting bolts to the front cra-
dle. (Fig. 3). Tighten the gear mounting bolts to 162
N·m (120 ft.lbs.)
(4) Install the power steering lines to the gear
(Fig. 2).
Fig. 2 COUPLER BOLT
Fig. 3 RACK & PINION
19 - 14 GEAR KJ
GEAR (Continued)
(5) Install the power steering pressure hose
bracket (Fig. 3).
(6) Install the lower coupler bolt and slide the cou-
pler on to the gear (Fig. 2).
(7) Install the tie rod end to the knuckle and
tighten the nuts.
(8) Install the tire and wheel assembly. (Refer to
22 - TIRES/WHEELS/WHEELS - STANDARD PRO-
CEDURE).
(9) Install the skid plate(Refer to 13 - FRAME &
BUMPERS/FRAME/FRONT SKID PLATE - INSTAL-
LATION).
(10) Lower the vehicle.
(11) Unlock the steering wheel.
(12) Fill the power steering fluid (Refer to 19 -
STEERING/PUMP - STANDARD PROCEDURE).
(13) Reset the toe and center the steering wheel
(Refer to 2 - SUSPENSION/WHEEL ALIGNMENT -
STANDARD PROCEDURE).
SPECIFICATIONS
TORQUE CHART
TORQUE SPECIFICATIONS
DESCRIPTION N·m Ft. Lbs. In. Lbs.
Rack and Pinion Steering
Gear
Gear to Frame Bolts
162 120 —
Rack and Pinion Steering
Gear
Intermediate Shaft Bolt
49 36 —
Tie Rod End
Knuckle Nut
108 80 —
Tie Rod End
Jam Nut
75 55 —
Power Steering Line
Pressure Line
35 25 —
Power Steering Line
Return Line
35 25 —
SPECIAL TOOLS
OUTER TIE ROD END REMOVAL TOOL
Puller C-3894-A
KJ GEAR 19 - 15
GEAR (Continued)
LINKAGE
TABLE OF CONTENTS
page page
LINKAGE
STANDARD PROCEDURE - STEERING
LINKAGE . . . . . . . . . . . . . . . . . . . . . . . . . . . . 16
TIE ROD END
REMOVAL . . . . . . . . . . . . . . . . . . . . . . . . . . . . . 16
INSTALLATION . . . . . . . . . . . . . . . . . . . . . . . . . 16
LINKAGE
STANDARD PROCEDURE - STEERING LINKAGE
The tie rod end and ball stud seals should be
inspected during all oil changes. If a seal is damaged,
replace the tie rod.
CAUTION: If any steering components are replaced
or serviced an alignment must be performed, to
ensure the vehicle meets all alignment specifica-
tions.
TIE ROD END
REMOVAL
(1) Raise and support the vehicle.
(2) Remove the tire and wheel assembly.
NOTE: Mark the tie rod end jam nuts on the steer-
ing gear for easier installation.
(3) Loosen the tie rod end jam nut (Fig. 1).
(4) Remove the tie rod end nut (Fig. 1).
(5) Seperate the tie rod end from the knuckle
using tool C3894A.
NOTE: Count the number of turns when removing.
(6) Remove the tie rod end from the rack (Fig. 1).
INSTALLATION
(1) Install the tie rod end to the rack to the exact
number of turns that it was removed (Fig. 1).
(2) Install the tie rod end to the knuckle. Tighten
the nut to 108 N·m (80 ft.lbs).
(3) Tighten the jam nut to 76 N·m (55 ft.lbs). (Fig.
1).
(4) Install the tire and wheel assembly. (Refer to
22 - TIRES/WHEELS/WHEELS - STANDARD PRO-
CEDURE).
(5) Reset the toe and center the steering wheel
(Refer to 2 - SUSPENSION/WHEEL ALIGNMENT -
STANDARD PROCEDURE).
Fig. 1 TIE ROD END
1 - JAM NUT
2 - TIE ROD - INNER
3 - TIE ROD END - OUTER
19 - 16 LINKAGE KJ
PUMP
TABLE OF CONTENTS
page page
PUMP
DESCRIPTION . . . . . . . . . . . . . . . . . . . . . . . . . 17
OPERATION . . . . . . . . . . . . . . . . . . . . . . . . . . . 17
STANDARD PROCEDURE - POWER
STEERING PUMP - INITIAL OPERATION . . . . 18
REMOVAL
REMOVAL - 3.7L . . . . . . . . . . . . . . . . . . . . . . 18
REMOVAL - 2.4L . . . . . . . . . . . . . . . . . . . . . . 18
INSTALLATION
INSTALLATION - 3.7L . . . . . . . . . . . . . . . . . . 19
INSTALLATION - 2.4L . . . . . . . . . . . . . . . . . . 19
SPECIFICATIONS
TORQUE CHART . . . . . . . . . . . . . . . . . . . . . . 19
SPECIAL TOOLS
POWER STEERING PUMP . . . . . . . . . . . . . . 20
FLUID COOLER
DESCRIPTION . . . . . . . . . . . . . . . . . . . . . . . . . 20
OPERATION . . . . . . . . . . . . . . . . . . . . . . . . . . . 20
REMOVAL . . . . . . . . . . . . . . . . . . . . . . . . . . . . . 20
INSTALLATION . . . . . . . . . . . . . . . . . . . . . . . . . 20
HOSES
REMOVAL
REMOVAL - PRESSURE HOSE . . . . . . . . . . . 21
REMOVAL - RETURN HOSE (GEAR TO THE
COOLER) . . . . . . . . . . . . . . . . . . . . . . . . . . . 21
REMOVAL - RETURN HOSE (RESERVOIR
TO THE COOLER) . . . . . . . . . . . . . . . . . . . . . 21
INSTALLATION
INSTALLATION - PRESSURE HOSE . . . . . . . 21
INSTALLATION - RETURN HOSE (GEAR TO
THE COOLER). . . . . . . . . . . . . . . . . . . . . . . . 22
INSTALLATION - RETURN HOSE
(RESERVOIR TO THE COOLER) . . . . . . . . . . 22
POWER STEERING PRESSURE SWITCH
DESCRIPTION . . . . . . . . . . . . . . . . . . . . . . . . . 22
OPERATION . . . . . . . . . . . . . . . . . . . . . . . . . . . 22
REMOVAL . . . . . . . . . . . . . . . . . . . . . . . . . . . . . 22
INSTALLATION . . . . . . . . . . . . . . . . . . . . . . . . . 22
PULLEY
REMOVAL . . . . . . . . . . . . . . . . . . . . . . . . . . . . . 23
INSTALLATION . . . . . . . . . . . . . . . . . . . . . . . . . 23
RESERVOIR
REMOVAL
REMOVAL - 3.7L . . . . . . . . . . . . . . . . . . . . . . 24
REMOVAL - 2.4L . . . . . . . . . . . . . . . . . . . . . . 24
INSTALLATION
INSTALLATION - 3.7L . . . . . . . . . . . . . . . . . . 24
INSTALLATION - 2.4L . . . . . . . . . . . . . . . . . . 24
PUMP
DESCRIPTION
Hydraulic pressure for the power steering system
is provided by a belt driven power steering pump
(Fig. 1). The pump shaft has a pressed-on high
strength plastic drive pulley that is belt driven by
the crankshaft pulley. The integral reservoir used on
the 3.7L only is attached to the pump body with
spring clips (Fig. 1). The 2.4L uses a remote fluid res-
ervoir (Fig. 2). The power steering pump is connected
to the steering gear by the pressure and return
hoses.
OPERATION
The power steering pump is a constant flow rate
and displacement, vane-type pump. The pump inter-
nal parts operate submerged in fluid. The flow con-
trol orifice is part of the high pressure line fitting.
The pressure relief valve inside the flow control valve
limits the pump pressure.
Fig. 1 POWER STEERING PUMP ASSEMBLY
1 - RESERVOIR
2 - CAP
3 - PULLEY
4 - PUMP BODY
5 - RESERVOIR RETAINING CLIPS
KJ PUMP 19 - 17
NOTE: Power steering pumps have different pres-
sure rates and are not interchangeable with other
pumps.
STANDARD PROCEDURE - POWER STEERING
PUMP - INITIAL OPERATION
WARNING: THE FLUID LEVEL SHOULD BE
CHECKED WITH ENGINE OFF TO PREVENT INJURY
FROM MOVING COMPONENTS.
CAUTION: Use MOPAR Power Steering Fluid or
equivalent. Do not use automatic transmission fluid
and do not overfill.
Wipe filler cap clean, then check the fluid level.
The dipstick should indicate COLD when the fluid is
at normal ambient temperature.
(1) Fill the pump fluid reservoir to the proper level
and let the fluid settle for at least two minutes.
(2) Raise the front wheels off the ground.
(3) Slowly turn the steering wheel right and left,
lightly contacting the wheel stops at least 20 times.
(4) Check the fluid level add if necessary.
(5) Lower the vehicle, start the engine and turn
the steering wheel slowly from lock to lock.
(6) Stop the engine and check the fluid level and
refill as required.
CAUTION: Do not run a vehicle with foamy fluid for
an extended period. This may cause pump damage.
(7) If the fluid is extremely foamy or milky look-
ing, allow the vehicle to stand a few minutes and
repeat the procedure.
(8) Add fluid if necessary. Repeat the above proce-
dure until the fluid level remains constant after run-
ning the engine.
REMOVAL
REMOVAL - 3.7L
(1) Siphon out as much power steering fluid as
possible.
(2) Remove the radiator cross member (Refer to 23
- BODY/EXTERIOR/RADIATOR CROSSMEMBER -
REMOVAL).
(3) Remove the engine cooling fan (Refer to 7 -
COOLING/ENGINE/RADIATOR FAN - REMOVAL).
(4) Remove the fan shroud
(5) Remove the serpentine drive belt (Refer to 7 -
COOLING/ACCESSORY DRIVE/DRIVE BELTS -
REMOVAL).
(6) Remove the power steering high pressure hose
at the pump.
(7) Remove the return hose at the pump.
(8) Remove the three bolts securing the pump to
the bracket thru the holes in the pulley. (Fig. 3)
(9) Remove the pump from the vehicle.
REMOVAL - 2.4L
CAUTION: On vehicles equipped with the 2.4L, Do
not reuse the old power steering pump pulley it is
not intended for reuse. A new pulley must be
installed if removed.
(1) Siphon out as much power steering fluid as
possible.
(2) Remove the serpentine drive belt.
(3) Remove the power steering high pressure hose
at the pump using care not to remove the flow con-
trol valve.
(4) Remove the return hose at the pump.
Fig. 2 FLUID RESERVOIR - 2.4L
Fig. 3 POWER STEERING PUMP - 3.7L
1 - MOUNTING BOLTS
2 - RESERVOIR
3 - STEEL PULLEY
19 - 18 PUMP KJ
PUMP (Continued)
(5) Remove the two nuts securing the wire loom
behind the pump bracket.
(6) Remove the three bolts securing the pump to
the bracket thru the holes in the pulley. (Fig. 4)
(7) Remove the pump from the vehicle.
INSTALLATION
INSTALLATION - 3.7L
(1) Install the pump to the vehicle.
(2) Install the three bolts securing the pump to the
engine. (Fig. 3) Tighten the bolts to 47 N·m (35
ft.lbs.).
(3) Install the power steering hoses.
(4) Install the serpentine belt (Refer to 7 - COOL-
ING/ACCESSORY DRIVE/DRIVE BELTS - INSTAL-
LATION).
(5) Install the fan shroud
(6) Install the engine cooling fan (Refer to 7 -
COOLING/ENGINE/RADIATOR FAN - INSTALLA-
TION).
(7) Install the radiator crossmember (Refer to 23 -
BODY/EXTERIOR/RADIATOR CROSSMEMBER -
INSTALLATION).
(8) Refill the power steering fluid and check for
leaks (Refer to 19 - STEERING/PUMP - STANDARD
PROCEDURE).
INSTALLATION - 2.4L
(1) Install the pump to the vehicle.
(2) Install the three bolts securing the pump to the
engine. (Fig. 4) Tighten the bolts to 47 N·m (35
ft.lbs.).
(3) Install the two nuts securing the wire loom to
the pump bracket.
(4) Install the power steering pressure and supply
hoses.
(5) Install the serpentine belt (Refer to 7 - COOL-
ING/ACCESSORY DRIVE/DRIVE BELTS - INSTAL-
LATION).
(6) Refill the power steering fluid and check for
leaks (Refer to 19 - STEERING/PUMP - STANDARD
PROCEDURE).
SPECIFICATIONS
TORQUE CHART
TORQUE SPECIFICATIONS
DESCRIPTION N·m Ft. Lbs. In. Lbs.
Power Steering Pump
Bracket to Pump
28 21 —
Power Steering Pump
Bracket to Engine
47 35 —
Power Steering Pump
Flow Control Valve
75 55 —
Power Steering Pump
Pressure Line
28 21 —
Power Steering Pump
Pressure Line Bracket
12 9 105
Fig. 4 POWER STEERING PUMP - 2.4L
1 - MOUNTING BOLTS
2 - PULLEY
KJ PUMP 19 - 19
PUMP (Continued)
SPECIAL TOOLS
POWER STEERING PUMP
FLUID COOLER
DESCRIPTION
The power steering fluid cooler is located at the
front of the vehicle. It is mounted to the radiator
lower support just forward of the air-conditioning
condenser and just rearward of the front fascia. The
cooler is positioned so it is in the air flow through the
front fascia of the vehicle (Fig. 5)
OPERATION
The purpose of the power steering fluid cooler is to
keep the temperature of the power steering system
fluid from rising to a level that would affect the per-
formance of the power steering system.
The cooler used on this vehicle is referred to as a
fluid-to-air type cooler. This means that the air flow
across the fin/tubes of the cooler is used to extract
the heat from the cooler which it has absorbed from
the power steering fluid flowing through it. The
cooler is placed in series with the power steering
fluid return line, between the steering gear and the
power steering fluid reservoir. This lowers the tem-
perature of the power steering fluid prior to it enter-
ing the power steering fluid reservoir where it is
resupplied to the power steering pump.
REMOVAL
(1) Remove the return line at the gear.
(2) Remove the return line at the reservoir.
(3) Remove the grille (Refer to 23 - BODY/EXTE-
RIOR/GRILLE - REMOVAL).
(4) Remove the two cooler mounting bolts. (Fig. 5)
(5) Remove the cooler from the vehicle.
INSTALLATION
(1) Install the cooler to the vehicle.
(2) Install the two cooler mounting bolts. (Fig. 5).
(3) Install the grille (Refer to 23 - BODY/EXTERI-
OR/GRILLE - INSTALLATION).
(4) Install the return line at the reservoir.
(5) Install the return line at the gear.
(6) Refill the power steering fluid and check for
leaks (Refer to 19 - STEERING/PUMP - STANDARD
PROCEDURE).
Analyzer Set, Power Steering Flow/Pressure 6815
Adapters, Power Steering Flow/Pressure Tester
6893
Puller C-4333
Installer, Power Steering Pulley C-4063B
Fig. 5 FLUID COOLER
1 - FLUID COOLER
2 - MOUNTING BOLTS
19 - 20 PUMP KJ
PUMP (Continued)
HOSES
REMOVAL
REMOVAL - PRESSURE HOSE
(1) Siphon the power steering fluid from the reser-
voir.
(2) Remove the radiator crossmember (Refer to 23
- BODY/EXTERIOR/RADIATOR CROSSMEMBER -
REMOVAL).
(3) Remove the fan (Refer to 7 - COOLING/EN-
GINE/RADIATOR FAN - REMOVAL).
(4) Remove the fan shroud.
(5) Remove the serpentine belt (Refer to 7 - COOL-
ING/ACCESSORY DRIVE/DRIVE BELTS - REMOV-
AL).
(6) Remove the pressure hose at the pump.
(7) Disconnect the pressure switch electrical con-
nector from the pressure hose.
(8) Remove the pressure hose from the gear.
(9) Remove the pressure hose mounting bracket
bolts from behind the headlamp assembly. (Fig. 6)
(10) Remove the pressure hose from the vehicle
and transfer power steering pressure switch if neces-
sary.
REMOVAL - RETURN HOSE (GEAR TO THE
COOLER)
(1) Siphon the power steering fluid from the reser-
voir.
(2) Remove the radiator crossmember (Refer to 23
- BODY/EXTERIOR/RADIATOR CROSSMEMBER -
REMOVAL).
(3) Remove the fan (Refer to 7 - COOLING/EN-
GINE/RADIATOR FAN - REMOVAL).
(4) Remove the fan shroud.
(5) Remove the serpentine belt (Refer to 7 - COOL-
ING/ACCESSORY DRIVE/DRIVE BELTS - REMOV-
AL).
(6) Remove the return hose from the gear.
(7) Remove the return hose at the cooler.
(8) Remove the return hose mounting bracket bolts
from the front cradle. (Fig. 7)
(9) Remove the return hose from the vehicle.
REMOVAL - RETURN HOSE (RESERVOIR TO
THE COOLER)
(1) Siphon the power steering fluid from the reser-
voir.
(2) Remove the return hose from the pump reser-
voir.
(3) Remove the return hose at the cooler.
(4) Remove the return hose from the vehicle.
INSTALLATION
INSTALLATION - PRESSURE HOSE
(1) Install the pressure hose to the vehicle. (Fig. 8)
(2) Install the pressure hose mounting bracket
bolts behind the headlamp assembly. Tighten to to 12
N·m (9 ft.lbs.).
(3) Install the pressure hose to the gear. Tighten
the hose to28 N·m (21 ft.lbs.).
(4) Install the pressure switch electrical connector.
(5) Install the pressure hose at the pump. Tighten
the hose to28 N·m (21 ft.lbs.).
Fig. 6 MOUNTING BRACKET
1 - HIGH PRESSURE POWER STEERING HOSE
2 - MOUNTING BRACKET
Fig. 7 RETURN HOSE TO COOLER
1 - MOUNTING BRACKETS
2 - FLUID COOLER
3 - PRESSURE SWITCH
4 - RETURN HOSE
KJ PUMP 19 - 21
(6) Install the serpentine belt (Refer to 7 - COOL-
ING/ACCESSORY DRIVE/DRIVE BELTS - INSTAL-
LATION).
(7) Install the fan shroud.
(8) Install the fan (Refer to 7 - COOLING/EN-
GINE/RADIATOR FAN - INSTALLATION).
(9) Install the radiator crossmember (Refer to 23 -
BODY/EXTERIOR/RADIATOR CROSSMEMBER -
INSTALLATION).
(10) Refill the power steering fluid (Refer to 19 -
STEERING/PUMP - STANDARD PROCEDURE).
INSTALLATION - RETURN HOSE (GEAR TO THE
COOLER)
(1) Install the return hose to the vehicle. (Fig. 7)
(2) Install the return hose mounting bracket bolts
to the front cradle.
(3) Install the return hose at the cooler.
(4) Install the return hose at the gear 28 N·m (21
ft.lbs.).
(5) Install the serpentine belt (Refer to 7 - COOL-
ING/ACCESSORY DRIVE/DRIVE BELTS - INSTAL-
LATION).
(6) Install the fan shroud.
(7) Install the fan (Refer to 7 - COOLING/EN-
GINE/RADIATOR FAN - INSTALLATION).
(8) Install the radiator crossmember (Refer to 23 -
BODY/EXTERIOR/RADIATOR CROSSMEMBER -
INSTALLATION).
(9) Refill the power steering fluid (Refer to 19 -
STEERING/PUMP - STANDARD PROCEDURE).
INSTALLATION - RETURN HOSE (RESERVOIR
TO THE COOLER)
(1) Install the return hose to the vehicle.
(2) Install the return hose to the pump reservoir.
(3) Install the return hose at the cooler.
(4) Refill the power steering fluid (Refer to 19 -
STEERING/PUMP - STANDARD PROCEDURE).
POWER STEERING PRESSURE
SWITCH
DESCRIPTION
A pressure sensing switch is used in the power
steering system. It is mounted on the high-pressure
steering hose. This switch will be used with both
2.4L and 3.7L engines.
OPERATION
The switch is used on both the 2.4L 4–cylinder and
3.7L V-6 engines.
The power steering pressure switch provides an
input to the Powertrain Control Module (PCM). This
input is provided during periods of high steering
pump load and low engine rpm; such as during park-
ing maneuvers. The PCM increases the idle speed
through the Idle Air Control (IAC) motor. This is
done to prevent the engine from stalling under the
increased load.
When steering pump pressure exceeds 3275 kPa ±
690 kPa (475 psi ± 100 psi), the Normally Closed
(NC) switch will open and the PCM will increase the
engine idle speed. This will prevent the engine from
stalling.
When pump pressure drops to approximately 1379
kPa (200 psi), the switch circuit will re-close and
engine idle speed will return to its previous setting.
REMOVAL
The power steering pressure switch is installed in
the power steering high-pressure hose (Fig. 9).
(1) Remove the high pressure power steering
hose(Refer to 19 - STEERING/PUMP/HOSES -
REMOVAL).
(2) Disconnect electrical connector from power
steering pressure switch.
(3) Place a small container or shop towel beneath
switch to collect any excess fluid.
(4) Remove switch. Use back-up wrench on power
steering line to prevent line bending.
INSTALLATION
(1) Install power steering switch into power steer-
ing line. (Fig. 9)
(2) Tighten to 9.6 N·m (85 in. lbs.) torque.
Fig. 8 HIGH PRESSURE HOSE ASSEMBLY
1 - HIGH PRESSURE POWER STEERING HOSE
2 - MOUNTING BRACKET
3 - POWER STEERING PRESURE SWITCH
19 - 22 PUMP KJ
HOSES (Continued)
(3) Install the high pressure power steering hose
(Refer to 19 - STEERING/PUMP/HOSES - INSTAL-
LATION).
(4) Connect electrical connector to switch.
(5) Check power steering fluid and add as neces-
sary (Refer to 19 - STEERING/PUMP - STANDARD
PROCEDURE).
(6) Start engine and again check power steering
fluid. Add fluid if necessary.
PULLEY
REMOVAL
CAUTION: On vehicles equipped with the 2.4L, Do
not reuse the old power steering pump pulley it is
not intended for reuse. A new pulley must be
installed if removed.
(1) Remove pump assembly. (Refer to 19 - STEER-
ING/PUMP - REMOVAL).
(2) Remove pulley from pump with Puller C-4333
or equivalent puller (Fig. 10).
INSTALLATION
NOTE: The pulley is marked front for installation.
(1) Replace pulley if bent, cracked, or loose.
(2) Install pulley on pump with Installer C-4063-B
or equivalent installer (Fig. 11). The pulley must be
flush with the end of the shaft. Ensure the tool and
pulley are aligned with the pump shaft.
(3) Install pump assembly. (Refer to 19 - STEER-
ING/PUMP - INSTALLATION)
(4) With Serpentine Belt, run engine until warm (5
min.) and note any belt chirp. If chirp exists, move
pulley outward approximately 0.5 mm (0.020 in.). If
noise increases, press on 1.0 mm (0.040 in.). Be
careful that pulley does not contact mounting
bolts.
Fig. 9 POWER STEERING PRESSURE SWITCH
1 - HIGH PRESSURE POWER STEERING HOSE
2 - O-RING
3 - POWER STEERING PRESSURE SWITCH
Fig. 10 Pulley Removal
1 - POWER STEERING PUMP DRIVE PULLEY
2 - SPECIAL TOOL C-4333
Fig. 11 Pulley Installation
1 - POWER STEERING PUMP DRIVE PULLEY
2 - SPECIAL TOOL C-4063–B
KJ PUMP 19 - 23
POWER STEERING PRESSURE SWITCH (Continued)
RESERVOIR
REMOVAL
REMOVAL - 3.7L
(1) Remove the power steering pump. (Refer to 19
- STEERING/PUMP - REMOVAL).
(2) Secure the pump in a holding fixture.
(3) Remove the retaining clips by prying the lock
tab upwards and tap the retaining clips off the pump
body. (Fig. 12)
(4) Remove the reservoir from the pump body.
REMOVAL - 2.4L
(1) Siphon out as much power steering fluid as
possible.
(2) Remove the power steering hoses.
(3) Remove the bolt securing the reservoir to the
mounting bracket. (Fig. 13)
(4) Remove the reservoir.
INSTALLATION
INSTALLATION - 3.7L
(1) Install the reservoir to the pump body.
(2) Install the retaining clips to the pump and res-
ervoir.
(3) Install the pump to the engine. (Refer to 19 -
STEERING/PUMP - INSTALLATION).
(4) Refill the power steering fluid and check for
leaks (Refer to 19 - STEERING/PUMP - STANDARD
PROCEDURE).
INSTALLATION - 2.4L
(1) Install the reservoir to the mounting bracket.
(2) Install and tighten the bolt to
(3) Install the hoses.
(4) Refill the power steering fluid and check for
leaks (Refer to 19 - STEERING/PUMP - STANDARD
PROCEDURE). (Fig. 13)
Fig. 12 FLUID RESERVOIR
1 - FLUID RESERVOIR
2 - RETAINING CLIP
3 - PULLEY
4 - PUMP BODY
Fig. 13 FLUID RESERVOIR - 2.4L
19 - 24 PUMP KJ

More Related Content

What's hot

Manual do Diferencial Meritor MS113
Manual do Diferencial Meritor MS113Manual do Diferencial Meritor MS113
Manual do Diferencial Meritor MS113Marcelo Cardozo
 
New holland ts125 a tractor service repair manual
New holland ts125 a tractor service repair manualNew holland ts125 a tractor service repair manual
New holland ts125 a tractor service repair manualujdjjkskkmdme
 
Tecnología De Camiones
Tecnología De CamionesTecnología De Camiones
Tecnología De Camionesguest07963
 
Isuzu diesel-engine-4 ja1-and-4jb1
Isuzu diesel-engine-4 ja1-and-4jb1Isuzu diesel-engine-4 ja1-and-4jb1
Isuzu diesel-engine-4 ja1-and-4jb1Yoga Ariant
 
Parte mecanica del motor
Parte mecanica del motorParte mecanica del motor
Parte mecanica del motorcildaisabel
 
188051609 manual-tecnico-motor-scania
188051609 manual-tecnico-motor-scania188051609 manual-tecnico-motor-scania
188051609 manual-tecnico-motor-scaniadeltatecnologia
 
Jeep liberty 2002 2005 intro
Jeep liberty 2002 2005 introJeep liberty 2002 2005 intro
Jeep liberty 2002 2005 introJeff Sparks
 
Man marine diesel engine d0836 le401 service repair manual
Man marine diesel engine d0836 le401 service repair manualMan marine diesel engine d0836 le401 service repair manual
Man marine diesel engine d0836 le401 service repair manualregdfcgvdgvf
 
Dd15 engine torque spec
Dd15 engine torque specDd15 engine torque spec
Dd15 engine torque specjhstruckrepair
 
Manual diagramas-frenos-camiones-scania-componentes-sistema-aire-comprimido-f...
Manual diagramas-frenos-camiones-scania-componentes-sistema-aire-comprimido-f...Manual diagramas-frenos-camiones-scania-componentes-sistema-aire-comprimido-f...
Manual diagramas-frenos-camiones-scania-componentes-sistema-aire-comprimido-f...Fredy Muñoz
 
Kubota v3800 di t-e3b diesel engine service repair manual
Kubota v3800 di t-e3b diesel engine service repair manualKubota v3800 di t-e3b diesel engine service repair manual
Kubota v3800 di t-e3b diesel engine service repair manualfujsefksemm
 
2 cargador fronta 950 h cat
2 cargador fronta 950 h cat2 cargador fronta 950 h cat
2 cargador fronta 950 h catraymond linares
 
Manual de serviço cb400 ii polic.
Manual de serviço cb400 ii polic.Manual de serviço cb400 ii polic.
Manual de serviço cb400 ii polic.Thiago Huari
 
Massey Ferguson MF 9790 combine parts catalog
Massey Ferguson MF 9790 combine parts catalogMassey Ferguson MF 9790 combine parts catalog
Massey Ferguson MF 9790 combine parts catalogPartCatalogs Net
 

What's hot (20)

Oem ecm cummins
Oem ecm cumminsOem ecm cummins
Oem ecm cummins
 
Manual do Diferencial Meritor MS113
Manual do Diferencial Meritor MS113Manual do Diferencial Meritor MS113
Manual do Diferencial Meritor MS113
 
New holland ts125 a tractor service repair manual
New holland ts125 a tractor service repair manualNew holland ts125 a tractor service repair manual
New holland ts125 a tractor service repair manual
 
Tecnología De Camiones
Tecnología De CamionesTecnología De Camiones
Tecnología De Camiones
 
Isuzu diesel-engine-4 ja1-and-4jb1
Isuzu diesel-engine-4 ja1-and-4jb1Isuzu diesel-engine-4 ja1-and-4jb1
Isuzu diesel-engine-4 ja1-and-4jb1
 
Parte mecanica del motor
Parte mecanica del motorParte mecanica del motor
Parte mecanica del motor
 
Motor Scania Dc 16
Motor Scania Dc 16 Motor Scania Dc 16
Motor Scania Dc 16
 
188051609 manual-tecnico-motor-scania
188051609 manual-tecnico-motor-scania188051609 manual-tecnico-motor-scania
188051609 manual-tecnico-motor-scania
 
Jeep liberty 2002 2005 intro
Jeep liberty 2002 2005 introJeep liberty 2002 2005 intro
Jeep liberty 2002 2005 intro
 
Manual Nissan QG -15
Manual Nissan QG -15Manual Nissan QG -15
Manual Nissan QG -15
 
Enbrague
EnbragueEnbrague
Enbrague
 
Man marine diesel engine d0836 le401 service repair manual
Man marine diesel engine d0836 le401 service repair manualMan marine diesel engine d0836 le401 service repair manual
Man marine diesel engine d0836 le401 service repair manual
 
Dd15 engine torque spec
Dd15 engine torque specDd15 engine torque spec
Dd15 engine torque spec
 
Fuel d13
Fuel d13Fuel d13
Fuel d13
 
Manual diagramas-frenos-camiones-scania-componentes-sistema-aire-comprimido-f...
Manual diagramas-frenos-camiones-scania-componentes-sistema-aire-comprimido-f...Manual diagramas-frenos-camiones-scania-componentes-sistema-aire-comprimido-f...
Manual diagramas-frenos-camiones-scania-componentes-sistema-aire-comprimido-f...
 
Kubota v3800 di t-e3b diesel engine service repair manual
Kubota v3800 di t-e3b diesel engine service repair manualKubota v3800 di t-e3b diesel engine service repair manual
Kubota v3800 di t-e3b diesel engine service repair manual
 
Plugin nkr 4-jb1
Plugin nkr 4-jb1Plugin nkr 4-jb1
Plugin nkr 4-jb1
 
2 cargador fronta 950 h cat
2 cargador fronta 950 h cat2 cargador fronta 950 h cat
2 cargador fronta 950 h cat
 
Manual de serviço cb400 ii polic.
Manual de serviço cb400 ii polic.Manual de serviço cb400 ii polic.
Manual de serviço cb400 ii polic.
 
Massey Ferguson MF 9790 combine parts catalog
Massey Ferguson MF 9790 combine parts catalogMassey Ferguson MF 9790 combine parts catalog
Massey Ferguson MF 9790 combine parts catalog
 

Viewers also liked

2005 front suspension
2005 front suspension2005 front suspension
2005 front suspensionJeff Sparks
 
Jeep liberty 2002 2005 index 1
Jeep liberty 2002 2005 index 1Jeep liberty 2002 2005 index 1
Jeep liberty 2002 2005 index 1Jeff Sparks
 
2003 power steering
2003 power steering2003 power steering
2003 power steeringJeff Sparks
 
2001 electrical component locator
2001 electrical component locator2001 electrical component locator
2001 electrical component locatorJeff Sparks
 
4th International Conference Advanced Suspension Systems
4th International Conference Advanced Suspension Systems4th International Conference Advanced Suspension Systems
4th International Conference Advanced Suspension SystemsAshleyRowe
 
Service manuals lg_fridge_gr349sqf_gr-349sqf service manual
Service manuals lg_fridge_gr349sqf_gr-349sqf service manualService manuals lg_fridge_gr349sqf_gr-349sqf service manual
Service manuals lg_fridge_gr349sqf_gr-349sqf service manualPaulo Andrade
 
Autonomous Ground Vehicles The Darpa Grand Challenge
Autonomous Ground Vehicles The Darpa Grand ChallengeAutonomous Ground Vehicles The Darpa Grand Challenge
Autonomous Ground Vehicles The Darpa Grand Challengexzhou
 

Viewers also liked (13)

Steering
SteeringSteering
Steering
 
2005 front suspension
2005 front suspension2005 front suspension
2005 front suspension
 
Jeep liberty 2002 2005 index 1
Jeep liberty 2002 2005 index 1Jeep liberty 2002 2005 index 1
Jeep liberty 2002 2005 index 1
 
2003 power steering
2003 power steering2003 power steering
2003 power steering
 
2001 electrical component locator
2001 electrical component locator2001 electrical component locator
2001 electrical component locator
 
1824 02
1824 021824 02
1824 02
 
4th International Conference Advanced Suspension Systems
4th International Conference Advanced Suspension Systems4th International Conference Advanced Suspension Systems
4th International Conference Advanced Suspension Systems
 
Discharge Dampeners for Pulsation Control
Discharge Dampeners for Pulsation ControlDischarge Dampeners for Pulsation Control
Discharge Dampeners for Pulsation Control
 
Suction Stabilizers for Pulsation Control
Suction Stabilizers for Pulsation ControlSuction Stabilizers for Pulsation Control
Suction Stabilizers for Pulsation Control
 
Service manuals lg_fridge_gr349sqf_gr-349sqf service manual
Service manuals lg_fridge_gr349sqf_gr-349sqf service manualService manuals lg_fridge_gr349sqf_gr-349sqf service manual
Service manuals lg_fridge_gr349sqf_gr-349sqf service manual
 
Pumps
PumpsPumps
Pumps
 
Autonomous Ground Vehicles The Darpa Grand Challenge
Autonomous Ground Vehicles The Darpa Grand ChallengeAutonomous Ground Vehicles The Darpa Grand Challenge
Autonomous Ground Vehicles The Darpa Grand Challenge
 
VEHICLE ROLLOVER ANALYSIS
VEHICLE ROLLOVER ANALYSISVEHICLE ROLLOVER ANALYSIS
VEHICLE ROLLOVER ANALYSIS
 

Similar to Jeep liberty 2002 2005 steering

1999 4 eat transmission (video reference booklet) (1)
1999 4 eat transmission (video reference booklet) (1)1999 4 eat transmission (video reference booklet) (1)
1999 4 eat transmission (video reference booklet) (1)Julio Chino BIt Ixcamey
 
17 engine and emission control
17 engine and emission control17 engine and emission control
17 engine and emission controlRuan Moura
 
2000 01 power steering
2000 01 power steering2000 01 power steering
2000 01 power steeringJeff Sparks
 
Deutz fahr agrotrac 150 tractor service repair manual
Deutz fahr agrotrac 150 tractor service repair manualDeutz fahr agrotrac 150 tractor service repair manual
Deutz fahr agrotrac 150 tractor service repair manualfjskefkksem
 
Deutz fahr agrotrac 110 tractor service repair manual
Deutz fahr agrotrac 110 tractor service repair manualDeutz fahr agrotrac 110 tractor service repair manual
Deutz fahr agrotrac 110 tractor service repair manualfjjkefkksem
 
Deutz fahr agrotrac 130 tractor service repair manual
Deutz fahr agrotrac 130 tractor service repair manualDeutz fahr agrotrac 130 tractor service repair manual
Deutz fahr agrotrac 130 tractor service repair manualfjjsekfksmem
 
Deutz fahr agrotrac 130 tractor service repair manual
Deutz fahr agrotrac 130 tractor service repair manualDeutz fahr agrotrac 130 tractor service repair manual
Deutz fahr agrotrac 130 tractor service repair manualfujsjekskem
 
Deutz fahr agrotrac 110 tractor service repair manual
Deutz fahr agrotrac 110 tractor service repair manualDeutz fahr agrotrac 110 tractor service repair manual
Deutz fahr agrotrac 110 tractor service repair manualjfjskeksemmme
 
Deutz fahr agrotrac 150 tractor service repair manual
Deutz fahr agrotrac 150 tractor service repair manualDeutz fahr agrotrac 150 tractor service repair manual
Deutz fahr agrotrac 150 tractor service repair manualujsjfkskemmem
 
JCB JS460 Engine Isuzu AA-6SD1T Service Repair Manual.pdf
JCB JS460 Engine Isuzu AA-6SD1T Service Repair Manual.pdfJCB JS460 Engine Isuzu AA-6SD1T Service Repair Manual.pdf
JCB JS460 Engine Isuzu AA-6SD1T Service Repair Manual.pdfjfkskmdmd3e
 
JCB JS460 Engine Isuzu AA-6SD1T Service Repair Manual.pdf
JCB JS460 Engine Isuzu AA-6SD1T Service Repair Manual.pdfJCB JS460 Engine Isuzu AA-6SD1T Service Repair Manual.pdf
JCB JS460 Engine Isuzu AA-6SD1T Service Repair Manual.pdff8sejdkddmmd
 
JCB JS460 Engine Isuzu AA-6SD1T Service Repair Manual.pdf
JCB JS460 Engine Isuzu AA-6SD1T Service Repair Manual.pdfJCB JS460 Engine Isuzu AA-6SD1T Service Repair Manual.pdf
JCB JS460 Engine Isuzu AA-6SD1T Service Repair Manual.pdff8usejkdmde3
 
JCB JS460 Engine Isuzu AA-6SD1T Service Repair Manual.pdf
JCB JS460 Engine Isuzu AA-6SD1T Service Repair Manual.pdfJCB JS460 Engine Isuzu AA-6SD1T Service Repair Manual.pdf
JCB JS460 Engine Isuzu AA-6SD1T Service Repair Manual.pdffusjekdkjddkm3e
 
JCB JS460 Engine Isuzu AA-6SD1T Service Repair Manual Instant Download.pdf
JCB JS460 Engine Isuzu AA-6SD1T Service Repair Manual Instant Download.pdfJCB JS460 Engine Isuzu AA-6SD1T Service Repair Manual Instant Download.pdf
JCB JS460 Engine Isuzu AA-6SD1T Service Repair Manual Instant Download.pdfzao908wangsa
 
JCB JS460 Engine Isuzu AA-6SD1T Service Repair Manual Instant Download.pdf
JCB JS460 Engine Isuzu AA-6SD1T Service Repair Manual Instant Download.pdfJCB JS460 Engine Isuzu AA-6SD1T Service Repair Manual Instant Download.pdf
JCB JS460 Engine Isuzu AA-6SD1T Service Repair Manual Instant Download.pdftan0033118
 
JCB JS460 Engine Isuzu AA-6SD1T Service Repair Manual.pdf
JCB JS460 Engine Isuzu AA-6SD1T Service Repair Manual.pdfJCB JS460 Engine Isuzu AA-6SD1T Service Repair Manual.pdf
JCB JS460 Engine Isuzu AA-6SD1T Service Repair Manual.pdfuvu724939
 
JCB JS460 Engine Isuzu AA-6SD1T Service Repair Manual Instant Download.pdf
JCB JS460 Engine Isuzu AA-6SD1T Service Repair Manual Instant Download.pdfJCB JS460 Engine Isuzu AA-6SD1T Service Repair Manual Instant Download.pdf
JCB JS460 Engine Isuzu AA-6SD1T Service Repair Manual Instant Download.pdfukdkksmmd
 
JCB JS460 Engine Isuzu AA-6SD1T Service Repair Manual Instant Download.pdf
JCB JS460 Engine Isuzu AA-6SD1T Service Repair Manual Instant Download.pdfJCB JS460 Engine Isuzu AA-6SD1T Service Repair Manual Instant Download.pdf
JCB JS460 Engine Isuzu AA-6SD1T Service Repair Manual Instant Download.pdff8iseoddm9i
 

Similar to Jeep liberty 2002 2005 steering (20)

1999 4 eat transmission (video reference booklet) (1)
1999 4 eat transmission (video reference booklet) (1)1999 4 eat transmission (video reference booklet) (1)
1999 4 eat transmission (video reference booklet) (1)
 
PUMP CATALOGUE.pdf
PUMP CATALOGUE.pdfPUMP CATALOGUE.pdf
PUMP CATALOGUE.pdf
 
Fluid power-data-book
Fluid power-data-bookFluid power-data-book
Fluid power-data-book
 
17 engine and emission control
17 engine and emission control17 engine and emission control
17 engine and emission control
 
2000 01 power steering
2000 01 power steering2000 01 power steering
2000 01 power steering
 
Deutz fahr agrotrac 150 tractor service repair manual
Deutz fahr agrotrac 150 tractor service repair manualDeutz fahr agrotrac 150 tractor service repair manual
Deutz fahr agrotrac 150 tractor service repair manual
 
Deutz fahr agrotrac 110 tractor service repair manual
Deutz fahr agrotrac 110 tractor service repair manualDeutz fahr agrotrac 110 tractor service repair manual
Deutz fahr agrotrac 110 tractor service repair manual
 
Deutz fahr agrotrac 130 tractor service repair manual
Deutz fahr agrotrac 130 tractor service repair manualDeutz fahr agrotrac 130 tractor service repair manual
Deutz fahr agrotrac 130 tractor service repair manual
 
Deutz fahr agrotrac 130 tractor service repair manual
Deutz fahr agrotrac 130 tractor service repair manualDeutz fahr agrotrac 130 tractor service repair manual
Deutz fahr agrotrac 130 tractor service repair manual
 
Deutz fahr agrotrac 110 tractor service repair manual
Deutz fahr agrotrac 110 tractor service repair manualDeutz fahr agrotrac 110 tractor service repair manual
Deutz fahr agrotrac 110 tractor service repair manual
 
Deutz fahr agrotrac 150 tractor service repair manual
Deutz fahr agrotrac 150 tractor service repair manualDeutz fahr agrotrac 150 tractor service repair manual
Deutz fahr agrotrac 150 tractor service repair manual
 
JCB JS460 Engine Isuzu AA-6SD1T Service Repair Manual.pdf
JCB JS460 Engine Isuzu AA-6SD1T Service Repair Manual.pdfJCB JS460 Engine Isuzu AA-6SD1T Service Repair Manual.pdf
JCB JS460 Engine Isuzu AA-6SD1T Service Repair Manual.pdf
 
JCB JS460 Engine Isuzu AA-6SD1T Service Repair Manual.pdf
JCB JS460 Engine Isuzu AA-6SD1T Service Repair Manual.pdfJCB JS460 Engine Isuzu AA-6SD1T Service Repair Manual.pdf
JCB JS460 Engine Isuzu AA-6SD1T Service Repair Manual.pdf
 
JCB JS460 Engine Isuzu AA-6SD1T Service Repair Manual.pdf
JCB JS460 Engine Isuzu AA-6SD1T Service Repair Manual.pdfJCB JS460 Engine Isuzu AA-6SD1T Service Repair Manual.pdf
JCB JS460 Engine Isuzu AA-6SD1T Service Repair Manual.pdf
 
JCB JS460 Engine Isuzu AA-6SD1T Service Repair Manual.pdf
JCB JS460 Engine Isuzu AA-6SD1T Service Repair Manual.pdfJCB JS460 Engine Isuzu AA-6SD1T Service Repair Manual.pdf
JCB JS460 Engine Isuzu AA-6SD1T Service Repair Manual.pdf
 
JCB JS460 Engine Isuzu AA-6SD1T Service Repair Manual Instant Download.pdf
JCB JS460 Engine Isuzu AA-6SD1T Service Repair Manual Instant Download.pdfJCB JS460 Engine Isuzu AA-6SD1T Service Repair Manual Instant Download.pdf
JCB JS460 Engine Isuzu AA-6SD1T Service Repair Manual Instant Download.pdf
 
JCB JS460 Engine Isuzu AA-6SD1T Service Repair Manual Instant Download.pdf
JCB JS460 Engine Isuzu AA-6SD1T Service Repair Manual Instant Download.pdfJCB JS460 Engine Isuzu AA-6SD1T Service Repair Manual Instant Download.pdf
JCB JS460 Engine Isuzu AA-6SD1T Service Repair Manual Instant Download.pdf
 
JCB JS460 Engine Isuzu AA-6SD1T Service Repair Manual.pdf
JCB JS460 Engine Isuzu AA-6SD1T Service Repair Manual.pdfJCB JS460 Engine Isuzu AA-6SD1T Service Repair Manual.pdf
JCB JS460 Engine Isuzu AA-6SD1T Service Repair Manual.pdf
 
JCB JS460 Engine Isuzu AA-6SD1T Service Repair Manual Instant Download.pdf
JCB JS460 Engine Isuzu AA-6SD1T Service Repair Manual Instant Download.pdfJCB JS460 Engine Isuzu AA-6SD1T Service Repair Manual Instant Download.pdf
JCB JS460 Engine Isuzu AA-6SD1T Service Repair Manual Instant Download.pdf
 
JCB JS460 Engine Isuzu AA-6SD1T Service Repair Manual Instant Download.pdf
JCB JS460 Engine Isuzu AA-6SD1T Service Repair Manual Instant Download.pdfJCB JS460 Engine Isuzu AA-6SD1T Service Repair Manual Instant Download.pdf
JCB JS460 Engine Isuzu AA-6SD1T Service Repair Manual Instant Download.pdf
 

More from Jeff Sparks

2005 engine electrical
2005 engine electrical2005 engine electrical
2005 engine electricalJeff Sparks
 
2005 engine cooling
2005 engine cooling2005 engine cooling
2005 engine coolingJeff Sparks
 
2005 elelctrical component locator
2005 elelctrical component locator2005 elelctrical component locator
2005 elelctrical component locatorJeff Sparks
 
2005 disc brakes
2005 disc brakes2005 disc brakes
2005 disc brakesJeff Sparks
 
2005 axle shafts
2005 axle shafts2005 axle shafts
2005 axle shaftsJeff Sparks
 
2005 antilock brakes
2005 antilock brakes2005 antilock brakes
2005 antilock brakesJeff Sparks
 
2004 wiring part 3
2004 wiring part 32004 wiring part 3
2004 wiring part 3Jeff Sparks
 
2004 wiring part 2
2004 wiring part 22004 wiring part 2
2004 wiring part 2Jeff Sparks
 
2001 drive belt routing
2001 drive belt routing2001 drive belt routing
2001 drive belt routingJeff Sparks
 
2000 02 rear suspension
2000 02 rear suspension2000 02 rear suspension
2000 02 rear suspensionJeff Sparks
 
2000 01 steering column
2000 01 steering column2000 01 steering column
2000 01 steering columnJeff Sparks
 
2000 01 engine cooling
2000 01 engine cooling2000 01 engine cooling
2000 01 engine coolingJeff Sparks
 
2000 01 axle shafts
2000 01 axle shafts2000 01 axle shafts
2000 01 axle shaftsJeff Sparks
 
2000 01 altenator
2000 01 altenator2000 01 altenator
2000 01 altenatorJeff Sparks
 
3.0 l timing belt
3.0 l timing belt3.0 l timing belt
3.0 l timing beltJeff Sparks
 

More from Jeff Sparks (20)

2005 engine electrical
2005 engine electrical2005 engine electrical
2005 engine electrical
 
2005 engine cooling
2005 engine cooling2005 engine cooling
2005 engine cooling
 
2005 elelctrical component locator
2005 elelctrical component locator2005 elelctrical component locator
2005 elelctrical component locator
 
2005 disc brakes
2005 disc brakes2005 disc brakes
2005 disc brakes
 
2005 axle shafts
2005 axle shafts2005 axle shafts
2005 axle shafts
 
2005 antilock brakes
2005 antilock brakes2005 antilock brakes
2005 antilock brakes
 
2004 wiring
2004 wiring2004 wiring
2004 wiring
 
2004 wiring part 3
2004 wiring part 32004 wiring part 3
2004 wiring part 3
 
2004 wiring part 2
2004 wiring part 22004 wiring part 2
2004 wiring part 2
 
2001 fuses
2001 fuses2001 fuses
2001 fuses
 
2001 drive belt routing
2001 drive belt routing2001 drive belt routing
2001 drive belt routing
 
2001 airbag
2001 airbag2001 airbag
2001 airbag
 
2000 02 rear suspension
2000 02 rear suspension2000 02 rear suspension
2000 02 rear suspension
 
2000 01 steering column
2000 01 steering column2000 01 steering column
2000 01 steering column
 
2000 01 hvac
2000 01 hvac2000 01 hvac
2000 01 hvac
 
2000 01 engine cooling
2000 01 engine cooling2000 01 engine cooling
2000 01 engine cooling
 
2000 01 brakes
2000 01 brakes2000 01 brakes
2000 01 brakes
 
2000 01 axle shafts
2000 01 axle shafts2000 01 axle shafts
2000 01 axle shafts
 
2000 01 altenator
2000 01 altenator2000 01 altenator
2000 01 altenator
 
3.0 l timing belt
3.0 l timing belt3.0 l timing belt
3.0 l timing belt
 

Recently uploaded

gtyccccccccccccccccccccccccccccccccccccccccccccccccccccccc
gtycccccccccccccccccccccccccccccccccccccccccccccccccccccccgtyccccccccccccccccccccccccccccccccccccccccccccccccccccccc
gtyccccccccccccccccccccccccccccccccccccccccccccccccccccccc4thzenzstar
 
一比一原版SDSU毕业证圣地亚哥州立大学毕业证成绩单如何办理
一比一原版SDSU毕业证圣地亚哥州立大学毕业证成绩单如何办理一比一原版SDSU毕业证圣地亚哥州立大学毕业证成绩单如何办理
一比一原版SDSU毕业证圣地亚哥州立大学毕业证成绩单如何办理psavhef
 
What Should You Do If Your Jaguar XF Bluetooth Isn't Working
What Should You Do If Your Jaguar XF Bluetooth Isn't WorkingWhat Should You Do If Your Jaguar XF Bluetooth Isn't Working
What Should You Do If Your Jaguar XF Bluetooth Isn't WorkingAuto Assets
 
Core technology of Hyundai Motor Group's EV platform 'E-GMP'
Core technology of Hyundai Motor Group's EV platform 'E-GMP'Core technology of Hyundai Motor Group's EV platform 'E-GMP'
Core technology of Hyundai Motor Group's EV platform 'E-GMP'Hyundai Motor Group
 
Essential Maintenance Tips For Commercial Vans.
Essential Maintenance Tips For Commercial Vans.Essential Maintenance Tips For Commercial Vans.
Essential Maintenance Tips For Commercial Vans.commercialvansolutions
 
Advanced Technology for Auto Part Industry Inventory Solutions
Advanced Technology for Auto Part Industry Inventory SolutionsAdvanced Technology for Auto Part Industry Inventory Solutions
Advanced Technology for Auto Part Industry Inventory Solutionscontactcaysonandres
 
Car Seat Covers and Seat Protection Guide
Car Seat Covers and Seat Protection GuideCar Seat Covers and Seat Protection Guide
Car Seat Covers and Seat Protection GuideAskXX.com
 
The Future of Autonomous Vehicles | civilthings.com | Detailed information
The Future of Autonomous Vehicles | civilthings.com |  Detailed informationThe Future of Autonomous Vehicles | civilthings.com |  Detailed information
The Future of Autonomous Vehicles | civilthings.com | Detailed informationgettygaming1
 

Recently uploaded (8)

gtyccccccccccccccccccccccccccccccccccccccccccccccccccccccc
gtycccccccccccccccccccccccccccccccccccccccccccccccccccccccgtyccccccccccccccccccccccccccccccccccccccccccccccccccccccc
gtyccccccccccccccccccccccccccccccccccccccccccccccccccccccc
 
一比一原版SDSU毕业证圣地亚哥州立大学毕业证成绩单如何办理
一比一原版SDSU毕业证圣地亚哥州立大学毕业证成绩单如何办理一比一原版SDSU毕业证圣地亚哥州立大学毕业证成绩单如何办理
一比一原版SDSU毕业证圣地亚哥州立大学毕业证成绩单如何办理
 
What Should You Do If Your Jaguar XF Bluetooth Isn't Working
What Should You Do If Your Jaguar XF Bluetooth Isn't WorkingWhat Should You Do If Your Jaguar XF Bluetooth Isn't Working
What Should You Do If Your Jaguar XF Bluetooth Isn't Working
 
Core technology of Hyundai Motor Group's EV platform 'E-GMP'
Core technology of Hyundai Motor Group's EV platform 'E-GMP'Core technology of Hyundai Motor Group's EV platform 'E-GMP'
Core technology of Hyundai Motor Group's EV platform 'E-GMP'
 
Essential Maintenance Tips For Commercial Vans.
Essential Maintenance Tips For Commercial Vans.Essential Maintenance Tips For Commercial Vans.
Essential Maintenance Tips For Commercial Vans.
 
Advanced Technology for Auto Part Industry Inventory Solutions
Advanced Technology for Auto Part Industry Inventory SolutionsAdvanced Technology for Auto Part Industry Inventory Solutions
Advanced Technology for Auto Part Industry Inventory Solutions
 
Car Seat Covers and Seat Protection Guide
Car Seat Covers and Seat Protection GuideCar Seat Covers and Seat Protection Guide
Car Seat Covers and Seat Protection Guide
 
The Future of Autonomous Vehicles | civilthings.com | Detailed information
The Future of Autonomous Vehicles | civilthings.com |  Detailed informationThe Future of Autonomous Vehicles | civilthings.com |  Detailed information
The Future of Autonomous Vehicles | civilthings.com | Detailed information
 

Jeep liberty 2002 2005 steering

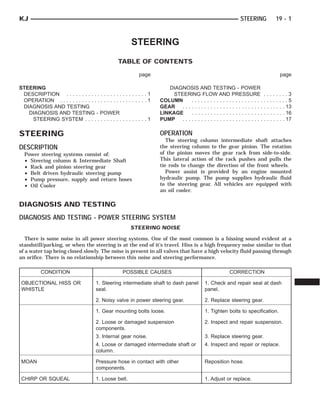
  • 1. STEERING TABLE OF CONTENTS page page STEERING DESCRIPTION . . . . . . . . . . . . . . . . . . . . . . . . . . 1 OPERATION . . . . . . . . . . . . . . . . . . . . . . . . . . . . 1 DIAGNOSIS AND TESTING DIAGNOSIS AND TESTING - POWER STEERING SYSTEM . . . . . . . . . . . . . . . . . . . . 1 DIAGNOSIS AND TESTING - POWER STEERING FLOW AND PRESSURE . . . . . . . . 3 COLUMN . . . . . . . . . . . . . . . . . . . . . . . . . . . . . . . 5 GEAR . . . . . . . . . . . . . . . . . . . . . . . . . . . . . . . . . 13 LINKAGE . . . . . . . . . . . . . . . . . . . . . . . . . . . . . . 16 PUMP . . . . . . . . . . . . . . . . . . . . . . . . . . . . . . . . . 17 STEERING DESCRIPTION Power steering systems consist of: • Steering column & Intermediate Shaft • Rack and pinion steering gear • Belt driven hydraulic steering pump • Pump pressure, supply and return hoses • Oil Cooler OPERATION The steering column intermediate shaft attaches the steering column to the gear pinion. The rotation of the pinion moves the gear rack from side-to-side. This lateral action of the rack pushes and pulls the tie rods to change the direction of the front wheels. Power assist is provided by an engine mounted hydraulic pump. The pump supplies hydraulic fluid to the steering gear. All vehicles are equipped with an oil cooler. DIAGNOSIS AND TESTING DIAGNOSIS AND TESTING - POWER STEERING SYSTEM STEERING NOISE There is some noise in all power steering systems. One of the most common is a hissing sound evident at a standstill/parking, or when the steering is at the end of it’s travel. Hiss is a high frequency noise similar to that of a water tap being closed slowly. The noise is present in all valves that have a high velocity fluid passing through an orifice. There is no relationship between this noise and steering performance. CONDITION POSSIBLE CAUSES CORRECTION OBJECTIONAL HISS OR WHISTLE 1. Steering intermediate shaft to dash panel seal. 1. Check and repair seal at dash panel. 2. Noisy valve in power steering gear. 2. Replace steering gear. 1. Gear mounting bolts loose. 1. Tighten bolts to specification. 2. Loose or damaged suspension components. 2. Inspect and repair suspension. 3. Internal gear noise. 3. Replace steering gear. 4. Loose or damaged intermediate shaft or column. 4. Inspect and repair or replace. MOAN Pressure hose in contact with other components. Reposition hose. CHIRP OR SQUEAL 1. Loose belt. 1. Adjust or replace. KJ STEERING 19 - 1
  • 2. CONDITION POSSIBLE CAUSES CORRECTION WHINE OR GROWL 1. Low fluid level. 1. Fill to proper level. 2. Pressure hose in contact with other components. 2. Reposition hose. 3. Internal pump noise. 3. Replace pump. SUCKING AIR SOUND 1. Loose return line clamp. 1. Replace clamp. 2. O-ring missing or damaged on hose fitting. 2. Replace o-ring. 3. Low fluid level. 3. Fill to proper level. 4. Air leak between pump and reservoir. 4. Repair as necessary. 5. Reservoir cap not installed correctly. 5. Install reservoir cap correctly. SCRUBBING OR KNOCKING 1. Wrong tire size. 1. Verify tire size. 2. Wrong gear. 2. Verify gear. 3. Tire Pressure 3. Adjust Tire Pressure BINDING AND STICKING CONDITION POSSIBLE CAUSE CORRECTION DIFFICULT TO TURN WHEEL STICKS OR BINDS 1. Low fluid level. 1. Fill to proper level. 2. Tire pressure. 2. Adjust tire pressure. 3. Steering components (ball joints/tie rod ends). 3 Inspect and repair as necessary. 4. Loose belt. 4. Adjust or replace. 5. Low pump pressure. 5. Pressure test and replace if necessary. 6. Column Intermediate shaft binding. 6. Replace Intermediate Shaft. 7. Steering gear worn. 7. Replace gear. INSUFFICIENT ASST. OR POOR RETURN TO CENTER CONDITION POSSIBLE CAUSE CORRECTION HARD TURNING OR MOMENTARY INCREASE IN TURNING EFFORT 1. Tire pressure. 1. Adjust tire pressure. 2. Low fluid level. 2. Fill to proper level. 3. Loose belt. 3. Adjust or replace. 4. Low pump pressure. 4. Pressure test and repair as necessary. 5. Internal gear leak. 5. Replace gear. STEERING WHEEL DOES NOT WANT TO RETURN TO CENTER POSITION 1. Tire pressure. 1. Adjust tire pressure. 2. Wheel alignment. 2. Align front end. 3. Lack of lubrication. 3. Inspect and lubricate suspension compnents. 4. High friction in steering gear. 4. Replace gear. 19 - 2 STEERING KJ STEERING (Continued)
  • 3. LOOSE STEERING AND VEHICLE LEAD CONDITION POSSIBLE CAUSE CORRECTION EXCESSIVE PLAY IN STEERING WHEEL 1. Worn or loose suspension or steering components. 1. Inspect and repair as necessary. 2. Worn or loose wheel bearings. 2. Inspect and replace bearings. 3. Steering gear mounting. 3. Tighten / replace gear mounting bolts/ isolators to specification. 4. Gear out of adjustment. 4. Replace gear. 5. Worn or loose steering intermediate shaft. 5. Inspect and replace as necessary. VEHICLE PULLS, DRIFTS OR LEADS TO ONE SIDE. 1. Tire Pressure. 1. Adjust tire pressure. 2. Radial tire lead. 2. Rotate tires. 3. Brakes dragging. 3. Repair as necessary. 4. Wheel alignment. 4. Align front end. DIAGNOSIS AND TESTING - POWER STEERING FLOW AND PRESSURE The following procedure is used to test the opera- tion of the power steering system on the vehicle. This test will provide the gallons per minute (GPM) or flow rate of the power steering pump along with the maximum relief pressure. Perform test any time a power steering system problem is present. This test will determine if the power steering pump or power steering gear is not functioning properly. The follow- ing pressure and flow test is performed using Power Steering Analyzer Tool kit 6815 and (Fig. 1) Adapter Kit 6893. FLOW AND PRESSURE TEST (1) Check the power steering belt to ensure it is in good condition and adjusted properly. (2) Connect pressure gauge hose from the Power Steering Analyzer to Tube 6844. (3) Connect Adapter 6826 to Power Steering Ana- lyzer test valve end. (4) Disconnect the high pressure hose from the power steering pump. (5) Connect the tube to the pump hose fitting. (6) Connect the power steering hose from the steering gear to the adapter. (7) Open the test valve completely. (8) Start engine and let idle long enough to circu- late power steering fluid through flow/pressure test gauge and to get air out of the fluid. Then shut off engine. (9) Check fluid level, add fluid as necessary. Start engine again and let idle. (10) Check for air bubbles, Evacuate if necessary (11) Gauge should read below 862 kPa (125 psi), if above, inspect the hoses for restrictions and repair as necessary. The initial pressure reading should be in the range of 345-552 kPa (50-80 psi). (12) Increase the engine speed to 1500 RPM and read the flow meter. If the flow rate (GPM) is below specification, (refer to pump specification chart for GPM) the pump should be replaced. CAUTION: The following test procedure involves testing maximum pump pressure output and flow control valve operation. Do not leave valve closed for more than three seconds as the pump could be damaged. Fig. 1 Analyzer With Tube and Adapter 1 - TUBE 2 - ADAPTER FITTINGS 3 - ANALYZER 4 - GAUGE HOSE KJ STEERING 19 - 3 STEERING (Continued)
  • 4. (13) Close valve fully three times and record high- est pressure indicated each time. All three read- ings must be above specifications and within 345 kPa (50 psi) of each other. • Pressures above specifications but not within 345 kPa (50 psi) of each other, replace pump. • Pressures within 345 kPa (50 psi) of each other but below specifications, replace pump. (14) Open the test valve and turn the steering wheel to the extreme left and right positions three times against the stops. Record the highest pressure reading at each position. Compare readings to the pump specifications chart. If pressures readings are not within 50 psi of each other, the gear is leaking internally and must be replaced. CAUTION: Do not force the pump to operate against the stops for more than 2 to 3 seconds at a time because, pump damage will result. PUMP SPECIFICATION ENGINE RELIEF PRESSURE ± 50 FLOW RATE (GPM) AT 1500 RPM 3.7L, 2.4L & 2.5L 10342 kPa (1450 psi) 2.4 - 2.8 19 - 4 STEERING KJ STEERING (Continued)
  • 5. COLUMN TABLE OF CONTENTS page page COLUMN DESCRIPTION . . . . . . . . . . . . . . . . . . . . . . . . . . 5 OPERATION - SERVICE PRECAUTIONS . . . . . . 5 REMOVAL . . . . . . . . . . . . . . . . . . . . . . . . . . . . . 5 INSTALLATION . . . . . . . . . . . . . . . . . . . . . . . . . . 7 SPECIFICATIONS TORQUE CHART . . . . . . . . . . . . . . . . . . . . . . 8 SPECIAL TOOLS STEERING COLUMN . . . . . . . . . . . . . . . . . . . . 8 IGNITION SWITCH DESCRIPTION . . . . . . . . . . . . . . . . . . . . . . . . . . 8 DIAGNOSIS AND TESTING - IGNITION SWITCH . . . . . . . . . . . . . . . . . . . . . . . . . . . . . 8 REMOVAL IGNITION SWITCH REMOVAL . . . . . . . . . . . . . 9 INSTALLATION IGNITION SWITCH INSTALLATION . . . . . . . . . 9 KEY-IN IGNITION SWITCH DESCRIPTION . . . . . . . . . . . . . . . . . . . . . . . . . 10 DIAGNOSIS AND TESTING - KEY-IN IGNITION SWITCH . . . . . . . . . . . . . . . . . . . . . . . . . . . . 10 LOCK CYLINDER REMOVAL . . . . . . . . . . . . . . . . . . . . . . . . . . . . . 10 INSTALLATION . . . . . . . . . . . . . . . . . . . . . . . . . 11 INTERMEDIATE SHAFT REMOVAL . . . . . . . . . . . . . . . . . . . . . . . . . . . . . 11 INSTALLATION . . . . . . . . . . . . . . . . . . . . . . . . . 11 STEERING WHEEL REMOVAL . . . . . . . . . . . . . . . . . . . . . . . . . . . . . 12 INSTALLATION . . . . . . . . . . . . . . . . . . . . . . . . . 12 COLUMN DESCRIPTION The standard non-tilt and tilt steering column has been designed to be serviced as an assembly. The col- umn is connected to the steering gear with a one piece shaft. The upper half has a support bearing mounted to a bracket. The bracket mounts to the frame rail with two nuts. The shaft is serviceable. The key cylinder, switches, clock spring, trim shrouds and steering wheel are serviced separately. OPERATION - SERVICE PRECAUTIONS Safety goggles should be worn at all times when working on steering columns. To service the steering wheel, switches or airbag, refer to Electrical - Restraints and follow all WARN- INGS and CAUTIONS. WARNING: THE AIRBAG SYSTEM IS A SENSITIVE, COMPLEX ELECTRO-MECHANICAL UNIT. BEFORE ATTEMPTING TO DIAGNOSE, REMOVE OR INSTALL THE AIRBAG SYSTEM COMPONENTS YOU MUST FIRST DISCONNECT AND ISOLATE THE BATTERY NEGATIVE (GROUND) CABLE. THEN WAIT TWO MINUTES FOR THE SYSTEM CAPACITOR TO DIS- CHARGE. FAILURE TO DO SO COULD RESULT IN ACCIDENTAL DEPLOYMENT OF THE AIRBAG AND POSSIBLE PERSONAL INJURY. THE FASTENERS, SCREWS, AND BOLTS, ORIGINALLY USED FOR THE AIRBAG COMPONENTS, HAVE SPECIAL COAT- INGS AND ARE SPECIFICALLY DESIGNED FOR THE AIRBAG SYSTEM. THEY MUST NEVER BE REPLACED WITH ANY SUBSTITUTES. ANYTIME A NEW FASTENER IS NEEDED, REPLACE WITH THE CORRECT FASTENERS PROVIDED IN THE SERVICE PACKAGE OR FASTENERS LISTED IN THE PARTS BOOKS. REMOVAL (1) Position front wheels straight ahead. (2) Remove and isolate the negative ground cable from the battery. (3) Remove the airbag, (Refer to 8 - ELECTRICAL/ RESTRAINTS/DRIVER AIRBAG - REMOVAL). NOTE: If equipped with cruise control, disconnect clock spring harness from the cruise switch har- ness on the steering wheel. KJ COLUMN 19 - 5
  • 6. (4) Remove the steering wheel with an appropriate puller (Fig. 1) (Refer to 19 - STEERING/COLUMN/ STEERING WHEEL - REMOVAL). (5) Remove knee blocker cover and knee blocker, (Refer to 23 - BODY/INSTRUMENT PANEL/KNEE BLOCKER - REMOVAL). (Fig. 2) (6) Remove screws from the lower column shroud (Fig. 3) and remove both the upper and lower shrouds. (7) Turn ignition key to the on position. (8) If vehicle is equipped with automatic transmis- sion, disconnect shifter interlock cable from the col- umn. (9) Remove the steering coupler bolt and column mounting nuts and bolts (Fig. 4) then lower column off the mounting studs. (10) Disconnect and remove the wiring harness from the column (Fig. 5). (11) Slide the shifter interlock cable from the tie straps. (12) Remove column. (13) Transfer the necessary parts if needed. (14) Remove clock spring (Fig. 6), switches, (SKIM if equipped) (Refer to 8 - ELECTRICAL/RE- STRAINTS/CLOCKSPRING - REMOVAL). Fig. 1 Steering Wheel Puller 1 - PULLER C-3894-A 2 - STEERING WHEEL Fig. 2 KNEE BLOCKER Fig. 3 SHROUD REMOVAL/INSTALL 1 - Upper Shroud 2 - Lower Shroud Fig. 4 STEERING COLUMN MOUNTING 1 - Steering Column 2 - Mounting Holes 19 - 6 COLUMN KJ COLUMN (Continued)
  • 7. INSTALLATION (1) Align and install column into the steering cou- pler. (2) Install column harness and connect harness to switches. (3) Reroute the shifter interlock cable through the tie straps. (4) Install the column onto the mounting studs. (5) Install the two mounting nuts and the two mounting bolts all finger tight. CAUTION: Lower nuts must be installed and tight- ened first then the upper nuts in order to prevent damage to the capsules. (6) Tighten the lower mounting nuts to 17 N·m (150 in. lbs.). (7) Tighten the upper mounting nuts to 17 N·m (150 in. lbs.). (8) Install the steering column coupler bolt and tighten to 49 N·m (36 ft. lbs.). (9) Reconnect the shifter interlock cable. (10) Center the clock spring (if necessary) and install it on the column, (Refer to 8 - ELECTRICAL/ RESTRAINTS/CLOCKSPRING - INSTALLATION). (11) Snap together the column shrouds and install the mounting screws. (12) Install the knee blocker and the knee blocker cover, (Refer to 23 - BODY/INSTRUMENT PANEL/ KNEE BLOCKER - INSTALLATION). (13) NOTE: Do not reuse the old steering wheel bolt (a new bolt must be used) NOTE: Be certain that the steering wheel mounting bolt is tightened to the proper torque specification to ensure proper clockspring operation.Install the steering wheel and tighten bolt to 54 N·m (40 ft. lbs.) (Refer to 19 - STEERING/COLUMN/STEERING WHEEL - INSTALLATION). NOTE: If equipped with cruise control, connect clock spring harness to cruise switch harness on the steering wheel. (14) Install the airbag, (Refer to 8 - ELECTRICAL/ RESTRAINTS/DRIVER AIRBAG - INSTALLATION). (15) Install the negative battery terminal. Fig. 5 WIRING HARNESS COLUMN 1 - Column Wiring Harness 2 - Multi-function Switch 3 - Ignition Switch 4 - Steering Column Fig. 6 CLOCK SPRING 1 - Tilt Lever 2 - Ignition Switch 3 - Clockspring 4 - Steering Column 5 - SKIM KJ COLUMN 19 - 7 COLUMN (Continued)
  • 8. SPECIFICATIONS TORQUE CHART TORQUE SPECIFICATIONS DESCRIPTION N·m Ft. Lbs. In. Lbs. Tilt Steering Column Steering Wheel Bolt 54 40 — Tilt Steering Column Mounting Bolts 17 — 150 Tilt Steering Column Coupler Bolt 49 36 — Non-Tilt Steering Column Steering Wheel Bolt 54 40 — Non-Tilt Steering Column Mounting Bolts 17 — 150 Non-Tilt Steering Column Coupler Bolt 49 36 — Ignition Switch Screws 2 — 17 SPECIAL TOOLS STEERING COLUMN IGNITION SWITCH DESCRIPTION The electrical ignition switch is located on the steering column. It is used as the main on/off switch- ing device for most electrical components. The mechanical key lock cylinder is used to engage/disen- gage the electrical ignition switch. DIAGNOSIS AND TESTING - IGNITION SWITCH ELECTRICAL DIAGNOSIS For ignition switch electrical schematics, Refer to the appropriate section for the component. MECHANICAL DIAGNOSIS (KEY DIFFICULT TO ROTATE) Vehicles equipped with an automatic trans- mission and a floor mounted shifter: a cable is used to connect the interlock device in the steering column assembly, to the transmission floor shift lever. This interlock system is used to lock the trans- mission shifter in the PARK position when the key lock cylinder is rotated to the LOCKED or ACCES- SORY position. If the ignition key is difficult to rotate to or from the LOCK or ACCESSORY position, it may not be the fault of the key cylinder or the steering column components. The brake transmission shift interlock cable may be out of adjustment. (Refer to 21 - TRANSMISSION/TRANSAXLE/AUTOMATIC - 30RH/GEAR SHIFT CABLE - ADJUSTMENTS). The interlock system within the steering column is not serviceable. If repair is necessary, the steering column assembly must be replaced. (Refer to 19 - STEERING/COLUMN - REMOVAL). Vehicles equipped with a manual transmis- sion and a floor mounted shifter: on certain mod- els, a button is located on the steering column behind the ignition key lock cylinder. The button must be manually depressed to allow rotation of the ignition key lock cylinder to the LOCK or ACCESSORY posi- tion. If it is difficult to rotate the key to the LOCK or ACCESSORY position, the lever mechanism may be defective. This mechanism is not serviceable. If repair is necessary, the steering column assembly must be replaced.(Refer to 19 - STEERING/COL- UMN - REMOVAL). Puller C-3894-A 19 - 8 COLUMN KJ COLUMN (Continued)
  • 9. REMOVAL IGNITION SWITCH REMOVAL The ignition key must be in the key cylinder for cylinder removal. The key cylinder must be removed first before removing ignition switch. (1) Remove lower steering column cover screws and remove cover. (2) Remove lock cylinder.(Refer to 19 - STEERING/ COLUMN/KEY/LOCK CYLINDER - REMOVAL). (3) Remove the multi-function switch. (4) Disconnect the electrical connector at the rear of the ignition switch. (5) Remove the ignition switch mounting screw (Fig. 7). Use tamper proof torx bit to remove the screw. (6) Pull the ignition switch straight out to remove from the locking tabs (Fig. 8) INSTALLATION IGNITION SWITCH INSTALLATION The ignition key must be in the key cylinder for cylinder installation. The key cylinder must be aligned with the ignition switch for installation. (1) Before installing ignition switch, rotate the slot in the switch to the ON position (Fig. 9). (2) Connect the electrical connector to rear of igni- tion switch. Make sure that locking tab is fully seated into wiring connector. (3) Position the switch to the column and install tamper proof screw. Tighten screw to 2 N·m (17 in. lbs.). (4) Install the lock cylinder (Refer to 19 - STEER- ING/COLUMN/KEY/LOCK CYLINDER - INSTALLA- TION). (5) Test the operation of the lock cylinder for smooth rotating. (6) Install the multi-function switch. (7) Install steering column lower cover. Fig. 7 IGNITION SWITCH MOUNTING SCREW 1 - Tamper Proof Torx Screw 2 - Ignition Switch Fig. 8 IGNITION SWITCH TABS 1 - Ignition Switch 2 - Locking Tabs Fig. 9 IGNITION SWITCH ON POSITION 1 - Ignition Switch 2 - Rotate to On Position KJ COLUMN 19 - 9 IGNITION SWITCH (Continued)
  • 10. KEY-IN IGNITION SWITCH DESCRIPTION The key-in ignition switch is integral to the igni- tion switch, which is mounted on the left side of the steering column, opposite the ignition lock cylinder. It closes a path to ground for the instrument cluster chime warning circuitry when the ignition key is inserted in the ignition lock cylinder and the driver door jamb switch is closed (driver door is open). The key-in ignition switch opens the ground path when the key is removed from the ignition lock cylinder. The key-in ignition switch cannot be repaired and, if faulty or damaged, the entire ignition switch must be replaced. (Refer to 19 - STEERING/COLUMN/IG- NITION SWITCH - REMOVAL). DIAGNOSIS AND TESTING - KEY-IN IGNITION SWITCH For circuit descriptions and diagrams, Refer to the appropriate sections on the individual components. WARNING: ON VEHICLES EQUIPPED WITH AIR- BAGS, REFER TO ELECTRICAL - PASSIVE RESTRAINT SYSTEMS BEFORE ATTEMPTING ANY STEERING WHEEL, STEERING COLUMN, OR INSTRUMENT PANEL COMPONENT DIAGNOSIS OR SERVICE. FAILURE TO TAKE THE PROPER PRE- CAUTIONS COULD RESULT IN ACCIDENTAL AIR- BAG DEPLOYMENT AND POSSIBLE PERSONAL INJURY. (1) Disconnect and isolate the battery negative cable. Remove the steering column shrouds. Unplug the key-in ignition switch wire harness connector from the ignition switch. (2) Check for continuity between the key-in switch sense circuit and the left front door jamb switch sense circuit terminals of the key-in ignition switch. There should be continuity with the key in the igni- tion lock cylinder, and no continuity with the key removed from the ignition lock cylinder. If OK, go to Step 3. If not OK, replace the faulty ignition switch assembly. (3) Check for continuity between the left front door jamb switch sense circuit cavity of the key-in ignition switch wire harness connector and a good ground. There should be continuity with the driver door open, and no continuity with the driver door closed. If OK, see the diagnosis for Instrument Cluster in this group. If not OK, repair the circuit to the driver door jamb switch as required. LOCK CYLINDER REMOVAL The ignition key must be in the key cylinder for cylinder removal. The key cylinder must be removed first before removing ignition switch. (1) If equipped with an automatic transmission, place shifter in PARK position. (2) Remove the lower shroud cover. (3) Remove the remote keyless entry (R.K.E.) mod- ule. (4) Remove the halo ring around the lock cylinder. (5) Rotate key to ON position. (6) A release tang is located on bottom of key cyl- inder (Fig. 10). (7) Position a small screwdriver or pin punch into tang access hole on bottom of steering column (Fig. 11). (8) Push the pin punch up while pulling key cylin- der from steering column. Fig. 10 LOCK CYLINDER RELEASE TANG 1 - Lock Cylinder 2 - Release Tang 19 - 10 COLUMN KJ
  • 11. INSTALLATION The ignition key must be in the key cylinder for cylinder installation. (1) Install the lock cylinder into the housing using care to align the end of the lock cylinder with the ignition switch. (2) Push the lock cylinder in until it clicks. (3) Rotate the key to the lock position. (4) install the halo ring around the lock cylinder housing. (5) Install the R.K.E. module. (6) Install the lower shroud cover. INTERMEDIATE SHAFT REMOVAL (1) Disconnect the negative battery cable. (2) Remove knee blocker cover and knee blocker, (Refer to 23 - BODY/INSTRUMENT PANEL/KNEE BLOCKER - REMOVAL). (3) Lock the steering wheel with the tires in the straight ahead position. (4) Remove the lower column pinch bolt (Fig. 12). (5) Lower the steering coupler shaft from the col- umn. (6) Remove the intermediate shaft seal by pushing in the four tangs securing it to the panel (Fig. 12). (7) Remove the center support bearing bracket from the mount on the shock tower. (8) Remove the lower coupler pinch bolt at the steering gear (Fig. 12). (9) Remove the coupler at the steering gear (Fig. 12). (10) Remove the intermediate shaft from the vehi- cle (Fig. 12). (11) Remove the center support bracket from the steering shaft (if replacing the intermediate shaft). INSTALLATION (1) Install the center support bracket to the steer- ing shaft (if removed). (2) Install the intermediate shaft to the vehicle (Fig. 12). (3) Install the coupler at the steering gear (Fig. 12). (4) Install the lower coupler pinch bolt at the steering gear and tighten the bolt to 49 N·m (36 ft. lbs.) (Fig. 12). (5) Install the center support bearing bracket to the mounting holes on the shock tower. (6) Install the intermediate shaft seal by pushing it in securing the four tangs to the panel (Fig. 12). (7) Install the steering coupler shaft to the column. (8) Install the lower column pinch bolt and tighten the bolt to 49 N·m (36 ft. lbs.) (Fig. 12). (9) Unlock the steering wheel. (10) Install the knee blocker cover and knee blocker (Refer to 23 - BODY/INSTRUMENT PANEL/ KNEE BLOCKER - INSTALLATION). (11) Reconnect the negative battery cable. Fig. 11 LOCK CYLINDER RELEASE 1 - LOCK CYLINDER 2 - KEY 3 - PIN PUNCH Fig. 12 STEERING COUPLER 1 - PINCH BOLT 2 - STEERING SHAFT 3 - STEERING COUPLER 4 - PINCH BOLT KJ COLUMN 19 - 11 LOCK CYLINDER (Continued)
  • 12. STEERING WHEEL REMOVAL (1) Disable and remove the drivers side airbag.(Re- fer to 8 - ELECTRICAL/RESTRAINTS/DRIVER AIR- BAG - REMOVAL). (2) Partially remove the steering wheel bolt and leave the bolt in the column. (3) Install puller C-3894–A or equivalent using the top of the bolt to push on. (Fig. 13) (4) Remove the steering wheel. INSTALLATION NOTE: Do not reuse the old steering wheel bolt (a new bolt must be used) (1) Install steering wheel to the column NOTE: Be certain that the steering wheel mounting bolt is tightened to the proper torque specification to ensure proper clockspring operation. (2) Install the new steering wheel bolt. Tighten the bolt to 54 N·m (40 ft. lbs.). (3) Install the drivers side air bag. (Refer to 8 - ELECTRICAL/RESTRAINTS/DRIVER AIRBAG - INSTALLATION). Fig. 13 Steering Wheel Puller 1 - PULLER C-3894-A 2 - STEERING WHEEL 19 - 12 COLUMN KJ
  • 13. GEAR TABLE OF CONTENTS page page GEAR DESCRIPTION . . . . . . . . . . . . . . . . . . . . . . . . . 13 OPERATION . . . . . . . . . . . . . . . . . . . . . . . . . . . 13 REMOVAL REMOVAL - 4WD . . . . . . . . . . . . . . . . . . . . . . 13 REMOVAL - 2WD . . . . . . . . . . . . . . . . . . . . . . 14 INSTALLATION INSTALLATION - 4WD . . . . . . . . . . . . . . . . . . 14 INSTALLATION - 2WD . . . . . . . . . . . . . . . . . . 14 SPECIFICATIONS TORQUE CHART . . . . . . . . . . . . . . . . . . . . . . 15 SPECIAL TOOLS OUTER TIE ROD END REMOVAL TOOL . . . . 15 GEAR DESCRIPTION A rack and pinion steering gear (Fig. 1) is made up of two main components, the pinon shaft and the rack. The gear cannot be adjusted or internally ser- viced. If a malfunction or a fluid leak occurs, the gear must be replaced as an assembly. OPERATION The steering column intermediate shaft is attached to the gear pinion. The rotation of the pinion moves the gear rack from side-to-side. This lateral action of the rack pushes and pulls the tie rods, which are connected to the steering knuckles to change the direction of the front wheels. REMOVAL REMOVAL - 4WD (1) Siphon the power steering fluid from the power steering reservoir. (2) Lock the steering wheel to prevent spinning of the clockspring. (3) Raise and support the vehicle. (4) Remove the skid plate from under the front end to gain access to the gear (Refer to 13 - FRAME & BUMPERS/FRAME/FRONT SKID PLATE - REMOVAL). (5) Remove the front tire and wheel assemblies. NOTE: Mark the alignment adjusting cams for eas- ier installation. (6) Remove the lower control arms. (Refer to 2 - SUSPENSION/FRONT/LOWER CONTROL ARM - REMOVAL). (7) Remove the front axle. (Refer to 3 - DIFFER- ENTIAL & DRIVELINE/FRONT AXLE - REMOV- AL). (8) Remove the tie rod end nuts. (9) Separate tie rod ends from the knuckles with Puller C-3894-A. (10) Remove the intermediate shaft lower coupler bolt and slide the coupler off the gear (Fig. 2). (11) Remove power steering pressure hose bracket (Fig. 3). (12) Remove the power steering lines from the gear (Fig. 2). (13) Remove the mounting bolts from the gear to the front cradle (Fig. 3). (14) Remove the steering gear from the vehicle. Fig. 1 Rack & Pinion Steering Gear 1 - TIE ROD - INNER 2 - TIE ROD - INNER 3 - TIE ROD END - OUTER LH 4 - BOOTS 5 - TIE ROD END - OUTER RH KJ GEAR 19 - 13
  • 14. REMOVAL - 2WD (1) Siphon the power steering fluid from the power steering reservoir. (2) Lock the steering wheel to prevent spinning of the clockspring. (3) Raise and support the vehicle. (4) Remove the skid plate from under the front end to gain access to the gear(Refer to 13 - FRAME & BUMPERS/FRAME/FRONT SKID PLATE - REMOVAL). (5) Remove the tire and wheel assembly. NOTE: Mark the alignment adjusting cams and tie rod end jam nuts on the steering gear for easier installation. (6) Remove the tie rod end nuts. (7) Separate tie rod ends from the knuckles with Puller C-3894-A. (8) Remove the lower intermediate shaft coupler bolt and slide the coupler off the gear (Fig. 2). (9) Remove power steering pressure hose bracket (Fig. 3). (10) Remove the power steering lines from the gear (Fig. 2). (11) Remove the mounting bolts from the gear to the front cradle (Fig. 3). (12) Remove the steering gear from the vehicle. INSTALLATION INSTALLATION - 4WD (1) Transfer the tie rod ends to the new steering gear (if needed). (2) Install the steering gear to the vehicle. (3) Install the gear mounting bolts to the front cra- dle. (Fig. 3). Tighten the gear mounting bolts to 162 N·m (120 ft.lbs.) (4) Install the power steering lines to the gear (Fig. 2). (5) Install the power steering pressure hose bracket (Fig. 3). (6) Install the lower coupler bolt and slide the cou- pler on to the gear (Fig. 2). (7) Install the tie rod end to the knuckle and tighten the nuts. (8) Install the front axle. (Refer to 3 - DIFFEREN- TIAL & DRIVELINE/FRONT AXLE - INSTALLA- TION). (9) Install the lower control arms. (Refer to 2 - SUSPENSION/FRONT/LOWER CONTROL ARM - INSTALLATION). (10) Install the tire and wheel assembly. (Refer to 22 - TIRES/WHEELS/WHEELS - STANDARD PRO- CEDURE). (11) Install the skid plate (Refer to 13 - FRAME & BUMPERS/FRAME/FRONT SKID PLATE - INSTAL- LATION). (12) Lower the vehicle. (13) Unlock the steering wheel. (14) Fill the power steering fluid (Refer to 19 - STEERING/PUMP - STANDARD PROCEDURE). (15) Reset the toe and center the steering wheel (Refer to 2 - SUSPENSION/WHEEL ALIGNMENT - STANDARD PROCEDURE). INSTALLATION - 2WD (1) Transfer the outer tie rod ends to the new steering gear (if needed). (2) Install the steering gear to the vehicle. (3) Install the gear mounting bolts to the front cra- dle. (Fig. 3). Tighten the gear mounting bolts to 162 N·m (120 ft.lbs.) (4) Install the power steering lines to the gear (Fig. 2). Fig. 2 COUPLER BOLT Fig. 3 RACK & PINION 19 - 14 GEAR KJ GEAR (Continued)
  • 15. (5) Install the power steering pressure hose bracket (Fig. 3). (6) Install the lower coupler bolt and slide the cou- pler on to the gear (Fig. 2). (7) Install the tie rod end to the knuckle and tighten the nuts. (8) Install the tire and wheel assembly. (Refer to 22 - TIRES/WHEELS/WHEELS - STANDARD PRO- CEDURE). (9) Install the skid plate(Refer to 13 - FRAME & BUMPERS/FRAME/FRONT SKID PLATE - INSTAL- LATION). (10) Lower the vehicle. (11) Unlock the steering wheel. (12) Fill the power steering fluid (Refer to 19 - STEERING/PUMP - STANDARD PROCEDURE). (13) Reset the toe and center the steering wheel (Refer to 2 - SUSPENSION/WHEEL ALIGNMENT - STANDARD PROCEDURE). SPECIFICATIONS TORQUE CHART TORQUE SPECIFICATIONS DESCRIPTION N·m Ft. Lbs. In. Lbs. Rack and Pinion Steering Gear Gear to Frame Bolts 162 120 — Rack and Pinion Steering Gear Intermediate Shaft Bolt 49 36 — Tie Rod End Knuckle Nut 108 80 — Tie Rod End Jam Nut 75 55 — Power Steering Line Pressure Line 35 25 — Power Steering Line Return Line 35 25 — SPECIAL TOOLS OUTER TIE ROD END REMOVAL TOOL Puller C-3894-A KJ GEAR 19 - 15 GEAR (Continued)
  • 16. LINKAGE TABLE OF CONTENTS page page LINKAGE STANDARD PROCEDURE - STEERING LINKAGE . . . . . . . . . . . . . . . . . . . . . . . . . . . . 16 TIE ROD END REMOVAL . . . . . . . . . . . . . . . . . . . . . . . . . . . . . 16 INSTALLATION . . . . . . . . . . . . . . . . . . . . . . . . . 16 LINKAGE STANDARD PROCEDURE - STEERING LINKAGE The tie rod end and ball stud seals should be inspected during all oil changes. If a seal is damaged, replace the tie rod. CAUTION: If any steering components are replaced or serviced an alignment must be performed, to ensure the vehicle meets all alignment specifica- tions. TIE ROD END REMOVAL (1) Raise and support the vehicle. (2) Remove the tire and wheel assembly. NOTE: Mark the tie rod end jam nuts on the steer- ing gear for easier installation. (3) Loosen the tie rod end jam nut (Fig. 1). (4) Remove the tie rod end nut (Fig. 1). (5) Seperate the tie rod end from the knuckle using tool C3894A. NOTE: Count the number of turns when removing. (6) Remove the tie rod end from the rack (Fig. 1). INSTALLATION (1) Install the tie rod end to the rack to the exact number of turns that it was removed (Fig. 1). (2) Install the tie rod end to the knuckle. Tighten the nut to 108 N·m (80 ft.lbs). (3) Tighten the jam nut to 76 N·m (55 ft.lbs). (Fig. 1). (4) Install the tire and wheel assembly. (Refer to 22 - TIRES/WHEELS/WHEELS - STANDARD PRO- CEDURE). (5) Reset the toe and center the steering wheel (Refer to 2 - SUSPENSION/WHEEL ALIGNMENT - STANDARD PROCEDURE). Fig. 1 TIE ROD END 1 - JAM NUT 2 - TIE ROD - INNER 3 - TIE ROD END - OUTER 19 - 16 LINKAGE KJ
  • 17. PUMP TABLE OF CONTENTS page page PUMP DESCRIPTION . . . . . . . . . . . . . . . . . . . . . . . . . 17 OPERATION . . . . . . . . . . . . . . . . . . . . . . . . . . . 17 STANDARD PROCEDURE - POWER STEERING PUMP - INITIAL OPERATION . . . . 18 REMOVAL REMOVAL - 3.7L . . . . . . . . . . . . . . . . . . . . . . 18 REMOVAL - 2.4L . . . . . . . . . . . . . . . . . . . . . . 18 INSTALLATION INSTALLATION - 3.7L . . . . . . . . . . . . . . . . . . 19 INSTALLATION - 2.4L . . . . . . . . . . . . . . . . . . 19 SPECIFICATIONS TORQUE CHART . . . . . . . . . . . . . . . . . . . . . . 19 SPECIAL TOOLS POWER STEERING PUMP . . . . . . . . . . . . . . 20 FLUID COOLER DESCRIPTION . . . . . . . . . . . . . . . . . . . . . . . . . 20 OPERATION . . . . . . . . . . . . . . . . . . . . . . . . . . . 20 REMOVAL . . . . . . . . . . . . . . . . . . . . . . . . . . . . . 20 INSTALLATION . . . . . . . . . . . . . . . . . . . . . . . . . 20 HOSES REMOVAL REMOVAL - PRESSURE HOSE . . . . . . . . . . . 21 REMOVAL - RETURN HOSE (GEAR TO THE COOLER) . . . . . . . . . . . . . . . . . . . . . . . . . . . 21 REMOVAL - RETURN HOSE (RESERVOIR TO THE COOLER) . . . . . . . . . . . . . . . . . . . . . 21 INSTALLATION INSTALLATION - PRESSURE HOSE . . . . . . . 21 INSTALLATION - RETURN HOSE (GEAR TO THE COOLER). . . . . . . . . . . . . . . . . . . . . . . . 22 INSTALLATION - RETURN HOSE (RESERVOIR TO THE COOLER) . . . . . . . . . . 22 POWER STEERING PRESSURE SWITCH DESCRIPTION . . . . . . . . . . . . . . . . . . . . . . . . . 22 OPERATION . . . . . . . . . . . . . . . . . . . . . . . . . . . 22 REMOVAL . . . . . . . . . . . . . . . . . . . . . . . . . . . . . 22 INSTALLATION . . . . . . . . . . . . . . . . . . . . . . . . . 22 PULLEY REMOVAL . . . . . . . . . . . . . . . . . . . . . . . . . . . . . 23 INSTALLATION . . . . . . . . . . . . . . . . . . . . . . . . . 23 RESERVOIR REMOVAL REMOVAL - 3.7L . . . . . . . . . . . . . . . . . . . . . . 24 REMOVAL - 2.4L . . . . . . . . . . . . . . . . . . . . . . 24 INSTALLATION INSTALLATION - 3.7L . . . . . . . . . . . . . . . . . . 24 INSTALLATION - 2.4L . . . . . . . . . . . . . . . . . . 24 PUMP DESCRIPTION Hydraulic pressure for the power steering system is provided by a belt driven power steering pump (Fig. 1). The pump shaft has a pressed-on high strength plastic drive pulley that is belt driven by the crankshaft pulley. The integral reservoir used on the 3.7L only is attached to the pump body with spring clips (Fig. 1). The 2.4L uses a remote fluid res- ervoir (Fig. 2). The power steering pump is connected to the steering gear by the pressure and return hoses. OPERATION The power steering pump is a constant flow rate and displacement, vane-type pump. The pump inter- nal parts operate submerged in fluid. The flow con- trol orifice is part of the high pressure line fitting. The pressure relief valve inside the flow control valve limits the pump pressure. Fig. 1 POWER STEERING PUMP ASSEMBLY 1 - RESERVOIR 2 - CAP 3 - PULLEY 4 - PUMP BODY 5 - RESERVOIR RETAINING CLIPS KJ PUMP 19 - 17
  • 18. NOTE: Power steering pumps have different pres- sure rates and are not interchangeable with other pumps. STANDARD PROCEDURE - POWER STEERING PUMP - INITIAL OPERATION WARNING: THE FLUID LEVEL SHOULD BE CHECKED WITH ENGINE OFF TO PREVENT INJURY FROM MOVING COMPONENTS. CAUTION: Use MOPAR Power Steering Fluid or equivalent. Do not use automatic transmission fluid and do not overfill. Wipe filler cap clean, then check the fluid level. The dipstick should indicate COLD when the fluid is at normal ambient temperature. (1) Fill the pump fluid reservoir to the proper level and let the fluid settle for at least two minutes. (2) Raise the front wheels off the ground. (3) Slowly turn the steering wheel right and left, lightly contacting the wheel stops at least 20 times. (4) Check the fluid level add if necessary. (5) Lower the vehicle, start the engine and turn the steering wheel slowly from lock to lock. (6) Stop the engine and check the fluid level and refill as required. CAUTION: Do not run a vehicle with foamy fluid for an extended period. This may cause pump damage. (7) If the fluid is extremely foamy or milky look- ing, allow the vehicle to stand a few minutes and repeat the procedure. (8) Add fluid if necessary. Repeat the above proce- dure until the fluid level remains constant after run- ning the engine. REMOVAL REMOVAL - 3.7L (1) Siphon out as much power steering fluid as possible. (2) Remove the radiator cross member (Refer to 23 - BODY/EXTERIOR/RADIATOR CROSSMEMBER - REMOVAL). (3) Remove the engine cooling fan (Refer to 7 - COOLING/ENGINE/RADIATOR FAN - REMOVAL). (4) Remove the fan shroud (5) Remove the serpentine drive belt (Refer to 7 - COOLING/ACCESSORY DRIVE/DRIVE BELTS - REMOVAL). (6) Remove the power steering high pressure hose at the pump. (7) Remove the return hose at the pump. (8) Remove the three bolts securing the pump to the bracket thru the holes in the pulley. (Fig. 3) (9) Remove the pump from the vehicle. REMOVAL - 2.4L CAUTION: On vehicles equipped with the 2.4L, Do not reuse the old power steering pump pulley it is not intended for reuse. A new pulley must be installed if removed. (1) Siphon out as much power steering fluid as possible. (2) Remove the serpentine drive belt. (3) Remove the power steering high pressure hose at the pump using care not to remove the flow con- trol valve. (4) Remove the return hose at the pump. Fig. 2 FLUID RESERVOIR - 2.4L Fig. 3 POWER STEERING PUMP - 3.7L 1 - MOUNTING BOLTS 2 - RESERVOIR 3 - STEEL PULLEY 19 - 18 PUMP KJ PUMP (Continued)
  • 19. (5) Remove the two nuts securing the wire loom behind the pump bracket. (6) Remove the three bolts securing the pump to the bracket thru the holes in the pulley. (Fig. 4) (7) Remove the pump from the vehicle. INSTALLATION INSTALLATION - 3.7L (1) Install the pump to the vehicle. (2) Install the three bolts securing the pump to the engine. (Fig. 3) Tighten the bolts to 47 N·m (35 ft.lbs.). (3) Install the power steering hoses. (4) Install the serpentine belt (Refer to 7 - COOL- ING/ACCESSORY DRIVE/DRIVE BELTS - INSTAL- LATION). (5) Install the fan shroud (6) Install the engine cooling fan (Refer to 7 - COOLING/ENGINE/RADIATOR FAN - INSTALLA- TION). (7) Install the radiator crossmember (Refer to 23 - BODY/EXTERIOR/RADIATOR CROSSMEMBER - INSTALLATION). (8) Refill the power steering fluid and check for leaks (Refer to 19 - STEERING/PUMP - STANDARD PROCEDURE). INSTALLATION - 2.4L (1) Install the pump to the vehicle. (2) Install the three bolts securing the pump to the engine. (Fig. 4) Tighten the bolts to 47 N·m (35 ft.lbs.). (3) Install the two nuts securing the wire loom to the pump bracket. (4) Install the power steering pressure and supply hoses. (5) Install the serpentine belt (Refer to 7 - COOL- ING/ACCESSORY DRIVE/DRIVE BELTS - INSTAL- LATION). (6) Refill the power steering fluid and check for leaks (Refer to 19 - STEERING/PUMP - STANDARD PROCEDURE). SPECIFICATIONS TORQUE CHART TORQUE SPECIFICATIONS DESCRIPTION N·m Ft. Lbs. In. Lbs. Power Steering Pump Bracket to Pump 28 21 — Power Steering Pump Bracket to Engine 47 35 — Power Steering Pump Flow Control Valve 75 55 — Power Steering Pump Pressure Line 28 21 — Power Steering Pump Pressure Line Bracket 12 9 105 Fig. 4 POWER STEERING PUMP - 2.4L 1 - MOUNTING BOLTS 2 - PULLEY KJ PUMP 19 - 19 PUMP (Continued)
  • 20. SPECIAL TOOLS POWER STEERING PUMP FLUID COOLER DESCRIPTION The power steering fluid cooler is located at the front of the vehicle. It is mounted to the radiator lower support just forward of the air-conditioning condenser and just rearward of the front fascia. The cooler is positioned so it is in the air flow through the front fascia of the vehicle (Fig. 5) OPERATION The purpose of the power steering fluid cooler is to keep the temperature of the power steering system fluid from rising to a level that would affect the per- formance of the power steering system. The cooler used on this vehicle is referred to as a fluid-to-air type cooler. This means that the air flow across the fin/tubes of the cooler is used to extract the heat from the cooler which it has absorbed from the power steering fluid flowing through it. The cooler is placed in series with the power steering fluid return line, between the steering gear and the power steering fluid reservoir. This lowers the tem- perature of the power steering fluid prior to it enter- ing the power steering fluid reservoir where it is resupplied to the power steering pump. REMOVAL (1) Remove the return line at the gear. (2) Remove the return line at the reservoir. (3) Remove the grille (Refer to 23 - BODY/EXTE- RIOR/GRILLE - REMOVAL). (4) Remove the two cooler mounting bolts. (Fig. 5) (5) Remove the cooler from the vehicle. INSTALLATION (1) Install the cooler to the vehicle. (2) Install the two cooler mounting bolts. (Fig. 5). (3) Install the grille (Refer to 23 - BODY/EXTERI- OR/GRILLE - INSTALLATION). (4) Install the return line at the reservoir. (5) Install the return line at the gear. (6) Refill the power steering fluid and check for leaks (Refer to 19 - STEERING/PUMP - STANDARD PROCEDURE). Analyzer Set, Power Steering Flow/Pressure 6815 Adapters, Power Steering Flow/Pressure Tester 6893 Puller C-4333 Installer, Power Steering Pulley C-4063B Fig. 5 FLUID COOLER 1 - FLUID COOLER 2 - MOUNTING BOLTS 19 - 20 PUMP KJ PUMP (Continued)
  • 21. HOSES REMOVAL REMOVAL - PRESSURE HOSE (1) Siphon the power steering fluid from the reser- voir. (2) Remove the radiator crossmember (Refer to 23 - BODY/EXTERIOR/RADIATOR CROSSMEMBER - REMOVAL). (3) Remove the fan (Refer to 7 - COOLING/EN- GINE/RADIATOR FAN - REMOVAL). (4) Remove the fan shroud. (5) Remove the serpentine belt (Refer to 7 - COOL- ING/ACCESSORY DRIVE/DRIVE BELTS - REMOV- AL). (6) Remove the pressure hose at the pump. (7) Disconnect the pressure switch electrical con- nector from the pressure hose. (8) Remove the pressure hose from the gear. (9) Remove the pressure hose mounting bracket bolts from behind the headlamp assembly. (Fig. 6) (10) Remove the pressure hose from the vehicle and transfer power steering pressure switch if neces- sary. REMOVAL - RETURN HOSE (GEAR TO THE COOLER) (1) Siphon the power steering fluid from the reser- voir. (2) Remove the radiator crossmember (Refer to 23 - BODY/EXTERIOR/RADIATOR CROSSMEMBER - REMOVAL). (3) Remove the fan (Refer to 7 - COOLING/EN- GINE/RADIATOR FAN - REMOVAL). (4) Remove the fan shroud. (5) Remove the serpentine belt (Refer to 7 - COOL- ING/ACCESSORY DRIVE/DRIVE BELTS - REMOV- AL). (6) Remove the return hose from the gear. (7) Remove the return hose at the cooler. (8) Remove the return hose mounting bracket bolts from the front cradle. (Fig. 7) (9) Remove the return hose from the vehicle. REMOVAL - RETURN HOSE (RESERVOIR TO THE COOLER) (1) Siphon the power steering fluid from the reser- voir. (2) Remove the return hose from the pump reser- voir. (3) Remove the return hose at the cooler. (4) Remove the return hose from the vehicle. INSTALLATION INSTALLATION - PRESSURE HOSE (1) Install the pressure hose to the vehicle. (Fig. 8) (2) Install the pressure hose mounting bracket bolts behind the headlamp assembly. Tighten to to 12 N·m (9 ft.lbs.). (3) Install the pressure hose to the gear. Tighten the hose to28 N·m (21 ft.lbs.). (4) Install the pressure switch electrical connector. (5) Install the pressure hose at the pump. Tighten the hose to28 N·m (21 ft.lbs.). Fig. 6 MOUNTING BRACKET 1 - HIGH PRESSURE POWER STEERING HOSE 2 - MOUNTING BRACKET Fig. 7 RETURN HOSE TO COOLER 1 - MOUNTING BRACKETS 2 - FLUID COOLER 3 - PRESSURE SWITCH 4 - RETURN HOSE KJ PUMP 19 - 21
  • 22. (6) Install the serpentine belt (Refer to 7 - COOL- ING/ACCESSORY DRIVE/DRIVE BELTS - INSTAL- LATION). (7) Install the fan shroud. (8) Install the fan (Refer to 7 - COOLING/EN- GINE/RADIATOR FAN - INSTALLATION). (9) Install the radiator crossmember (Refer to 23 - BODY/EXTERIOR/RADIATOR CROSSMEMBER - INSTALLATION). (10) Refill the power steering fluid (Refer to 19 - STEERING/PUMP - STANDARD PROCEDURE). INSTALLATION - RETURN HOSE (GEAR TO THE COOLER) (1) Install the return hose to the vehicle. (Fig. 7) (2) Install the return hose mounting bracket bolts to the front cradle. (3) Install the return hose at the cooler. (4) Install the return hose at the gear 28 N·m (21 ft.lbs.). (5) Install the serpentine belt (Refer to 7 - COOL- ING/ACCESSORY DRIVE/DRIVE BELTS - INSTAL- LATION). (6) Install the fan shroud. (7) Install the fan (Refer to 7 - COOLING/EN- GINE/RADIATOR FAN - INSTALLATION). (8) Install the radiator crossmember (Refer to 23 - BODY/EXTERIOR/RADIATOR CROSSMEMBER - INSTALLATION). (9) Refill the power steering fluid (Refer to 19 - STEERING/PUMP - STANDARD PROCEDURE). INSTALLATION - RETURN HOSE (RESERVOIR TO THE COOLER) (1) Install the return hose to the vehicle. (2) Install the return hose to the pump reservoir. (3) Install the return hose at the cooler. (4) Refill the power steering fluid (Refer to 19 - STEERING/PUMP - STANDARD PROCEDURE). POWER STEERING PRESSURE SWITCH DESCRIPTION A pressure sensing switch is used in the power steering system. It is mounted on the high-pressure steering hose. This switch will be used with both 2.4L and 3.7L engines. OPERATION The switch is used on both the 2.4L 4–cylinder and 3.7L V-6 engines. The power steering pressure switch provides an input to the Powertrain Control Module (PCM). This input is provided during periods of high steering pump load and low engine rpm; such as during park- ing maneuvers. The PCM increases the idle speed through the Idle Air Control (IAC) motor. This is done to prevent the engine from stalling under the increased load. When steering pump pressure exceeds 3275 kPa ± 690 kPa (475 psi ± 100 psi), the Normally Closed (NC) switch will open and the PCM will increase the engine idle speed. This will prevent the engine from stalling. When pump pressure drops to approximately 1379 kPa (200 psi), the switch circuit will re-close and engine idle speed will return to its previous setting. REMOVAL The power steering pressure switch is installed in the power steering high-pressure hose (Fig. 9). (1) Remove the high pressure power steering hose(Refer to 19 - STEERING/PUMP/HOSES - REMOVAL). (2) Disconnect electrical connector from power steering pressure switch. (3) Place a small container or shop towel beneath switch to collect any excess fluid. (4) Remove switch. Use back-up wrench on power steering line to prevent line bending. INSTALLATION (1) Install power steering switch into power steer- ing line. (Fig. 9) (2) Tighten to 9.6 N·m (85 in. lbs.) torque. Fig. 8 HIGH PRESSURE HOSE ASSEMBLY 1 - HIGH PRESSURE POWER STEERING HOSE 2 - MOUNTING BRACKET 3 - POWER STEERING PRESURE SWITCH 19 - 22 PUMP KJ HOSES (Continued)
  • 23. (3) Install the high pressure power steering hose (Refer to 19 - STEERING/PUMP/HOSES - INSTAL- LATION). (4) Connect electrical connector to switch. (5) Check power steering fluid and add as neces- sary (Refer to 19 - STEERING/PUMP - STANDARD PROCEDURE). (6) Start engine and again check power steering fluid. Add fluid if necessary. PULLEY REMOVAL CAUTION: On vehicles equipped with the 2.4L, Do not reuse the old power steering pump pulley it is not intended for reuse. A new pulley must be installed if removed. (1) Remove pump assembly. (Refer to 19 - STEER- ING/PUMP - REMOVAL). (2) Remove pulley from pump with Puller C-4333 or equivalent puller (Fig. 10). INSTALLATION NOTE: The pulley is marked front for installation. (1) Replace pulley if bent, cracked, or loose. (2) Install pulley on pump with Installer C-4063-B or equivalent installer (Fig. 11). The pulley must be flush with the end of the shaft. Ensure the tool and pulley are aligned with the pump shaft. (3) Install pump assembly. (Refer to 19 - STEER- ING/PUMP - INSTALLATION) (4) With Serpentine Belt, run engine until warm (5 min.) and note any belt chirp. If chirp exists, move pulley outward approximately 0.5 mm (0.020 in.). If noise increases, press on 1.0 mm (0.040 in.). Be careful that pulley does not contact mounting bolts. Fig. 9 POWER STEERING PRESSURE SWITCH 1 - HIGH PRESSURE POWER STEERING HOSE 2 - O-RING 3 - POWER STEERING PRESSURE SWITCH Fig. 10 Pulley Removal 1 - POWER STEERING PUMP DRIVE PULLEY 2 - SPECIAL TOOL C-4333 Fig. 11 Pulley Installation 1 - POWER STEERING PUMP DRIVE PULLEY 2 - SPECIAL TOOL C-4063–B KJ PUMP 19 - 23 POWER STEERING PRESSURE SWITCH (Continued)
  • 24. RESERVOIR REMOVAL REMOVAL - 3.7L (1) Remove the power steering pump. (Refer to 19 - STEERING/PUMP - REMOVAL). (2) Secure the pump in a holding fixture. (3) Remove the retaining clips by prying the lock tab upwards and tap the retaining clips off the pump body. (Fig. 12) (4) Remove the reservoir from the pump body. REMOVAL - 2.4L (1) Siphon out as much power steering fluid as possible. (2) Remove the power steering hoses. (3) Remove the bolt securing the reservoir to the mounting bracket. (Fig. 13) (4) Remove the reservoir. INSTALLATION INSTALLATION - 3.7L (1) Install the reservoir to the pump body. (2) Install the retaining clips to the pump and res- ervoir. (3) Install the pump to the engine. (Refer to 19 - STEERING/PUMP - INSTALLATION). (4) Refill the power steering fluid and check for leaks (Refer to 19 - STEERING/PUMP - STANDARD PROCEDURE). INSTALLATION - 2.4L (1) Install the reservoir to the mounting bracket. (2) Install and tighten the bolt to (3) Install the hoses. (4) Refill the power steering fluid and check for leaks (Refer to 19 - STEERING/PUMP - STANDARD PROCEDURE). (Fig. 13) Fig. 12 FLUID RESERVOIR 1 - FLUID RESERVOIR 2 - RETAINING CLIP 3 - PULLEY 4 - PUMP BODY Fig. 13 FLUID RESERVOIR - 2.4L 19 - 24 PUMP KJ