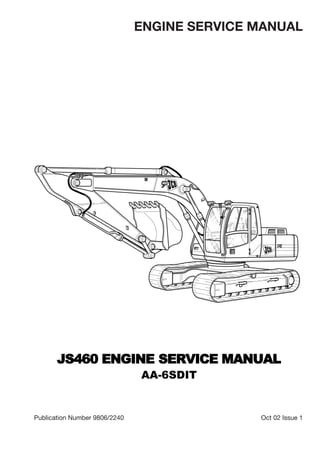
This document is a service manual for the JS460 engine. It provides instructions for servicing and repairing the AA-6SD1T diesel engine. The manual contains 13 chapters covering general information, maintenance, disassembly, inspection, assembly, lubrication, cooling, fuel, turbocharger, electrical, troubleshooting, special tools, and repair standards. It includes exploded diagrams, part numbers, specifications, tightening torques, and step-by-step instructions for repair and maintenance procedures. Technicians are advised to carefully follow the procedures in the manual to properly service the engine.
Manual de servicio del motor isuzu nos permite probar, diagnosticar para dar servicio de mantenimiento preventivo, correctivo de acuerdo a los datos del fabricante a fin de que el motor opere de acuerdo a los estándares reduciendo la contaminación ambiental, se vera el ajuste de las válvulas o calibración de acuerdo al manual del fabricante. para que opere correctamente.
Manual de servicio del motor isuzu nos permite probar, diagnosticar para dar servicio de mantenimiento preventivo, correctivo de acuerdo a los datos del fabricante a fin de que el motor opere de acuerdo a los estándares reduciendo la contaminación ambiental, se vera el ajuste de las válvulas o calibración de acuerdo al manual del fabricante. para que opere correctamente.
This is the Highly Detailed factory service repair manual for the2008 YAMAHA VINO 125, this Service Manual has detailed illustrations as well as step by step instructions,It is 100 percents complete and intact. they are specifically written for the do-it-yourself-er as well as the experienced mechanic.2008 YAMAHA VINO 125 Service Repair Workshop Manual provides step-by-step instructions based on the complete dis-assembly of the machine. It is this level of detail, along with hundreds of photos and illustrations, that guide the reader through each service and repair procedure. Complete download comes in pdf format which can work under all PC based windows operating system and Mac also, All pages are printable. Using this repair manual is an inexpensive way to keep your vehicle working properly.
Service Repair Manual Covers:
General Information
Specifications
Periodic Checks and Adjustments
Chassis
Engine
Carburetor
Electrical System
Troubleshooting
File Format: PDF
Compatible: All Versions of Windows & Mac
Language: English
Requirements: Adobe PDF Reader
NO waiting, Buy from responsible seller and get INSTANT DOWNLOAD, Without wasting your hard-owned money on uncertainty or surprise! All pages are is great to have2008 YAMAHA VINO 125 Service Repair Workshop Manual.
Looking for some other Service Repair Manual,please check:
https://www.aservicemanualpdf.com/
Thanks for visiting!
Why Is Your BMW X3 Hood Not Responding To Release CommandsDart Auto
Experiencing difficulty opening your BMW X3's hood? This guide explores potential issues like mechanical obstruction, hood release mechanism failure, electrical problems, and emergency release malfunctions. Troubleshooting tips include basic checks, clearing obstructions, applying pressure, and using the emergency release.
What Exactly Is The Common Rail Direct Injection System & How Does It WorkMotor Cars International
Learn about Common Rail Direct Injection (CRDi) - the revolutionary technology that has made diesel engines more efficient. Explore its workings, advantages like enhanced fuel efficiency and increased power output, along with drawbacks such as complexity and higher initial cost. Compare CRDi with traditional diesel engines and discover why it's the preferred choice for modern engines.
Core technology of Hyundai Motor Group's EV platform 'E-GMP'Hyundai Motor Group
What’s the force behind Hyundai Motor Group's EV performance and quality?
Maximized driving performance and quick charging time through high-density battery pack and fast charging technology and applicable to various vehicle types!
Discover more about Hyundai Motor Group’s EV platform ‘E-GMP’!
Comprehensive program for Agricultural Finance, the Automotive Sector, and Empowerment . We will define the full scope and provide a detailed two-week plan for identifying strategic partners in each area within Limpopo, including target areas.:
1. Agricultural : Supporting Primary and Secondary Agriculture
• Scope: Provide support solutions to enhance agricultural productivity and sustainability.
• Target Areas: Polokwane, Tzaneen, Thohoyandou, Makhado, and Giyani.
2. Automotive Sector: Partnerships with Mechanics and Panel Beater Shops
• Scope: Develop collaborations with automotive service providers to improve service quality and business operations.
• Target Areas: Polokwane, Lephalale, Mokopane, Phalaborwa, and Bela-Bela.
3. Empowerment : Focusing on Women Empowerment
• Scope: Provide business support support and training to women-owned businesses, promoting economic inclusion.
• Target Areas: Polokwane, Thohoyandou, Musina, Burgersfort, and Louis Trichardt.
We will also prioritize Industrial Economic Zone areas and their priorities.
Sign up on https://profilesmes.online/welcome/
To be eligible:
1. You must have a registered business and operate in Limpopo
2. Generate revenue
3. Sectors : Agriculture ( primary and secondary) and Automative
Women and Youth are encouraged to apply even if you don't fall in those sectors.
What Does the Active Steering Malfunction Warning Mean for Your BMWTanner Motors
Discover the reasons why your BMW’s Active Steering malfunction warning might come on. From electrical glitches to mechanical failures and software anomalies, addressing these promptly with professional inspection and maintenance ensures continued safety and performance on the road, maintaining the integrity of your driving experience.
Symptoms like intermittent starting and key recognition errors signal potential problems with your Mercedes’ EIS. Use diagnostic steps like error code checks and spare key tests. Professional diagnosis and solutions like EIS replacement ensure safe driving. Consult a qualified technician for accurate diagnosis and repair.
𝘼𝙣𝙩𝙞𝙦𝙪𝙚 𝙋𝙡𝙖𝙨𝙩𝙞𝙘 𝙏𝙧𝙖𝙙𝙚𝙧𝙨 𝙞𝙨 𝙫𝙚𝙧𝙮 𝙛𝙖𝙢𝙤𝙪𝙨 𝙛𝙤𝙧 𝙢𝙖𝙣𝙪𝙛𝙖𝙘𝙩𝙪𝙧𝙞𝙣𝙜 𝙩𝙝𝙚𝙞𝙧 𝙥𝙧𝙤𝙙𝙪𝙘𝙩𝙨. 𝙒𝙚 𝙝𝙖𝙫𝙚 𝙖𝙡𝙡 𝙩𝙝𝙚 𝙥𝙡𝙖𝙨𝙩𝙞𝙘 𝙜𝙧𝙖𝙣𝙪𝙡𝙚𝙨 𝙪𝙨𝙚𝙙 𝙞𝙣 𝙖𝙪𝙩𝙤𝙢𝙤𝙩𝙞𝙫𝙚 𝙖𝙣𝙙 𝙖𝙪𝙩𝙤 𝙥𝙖𝙧𝙩𝙨 𝙖𝙣𝙙 𝙖𝙡𝙡 𝙩𝙝𝙚 𝙛𝙖𝙢𝙤𝙪𝙨 𝙘𝙤𝙢𝙥𝙖𝙣𝙞𝙚𝙨 𝙗𝙪𝙮 𝙩𝙝𝙚 𝙜𝙧𝙖𝙣𝙪𝙡𝙚𝙨 𝙛𝙧𝙤𝙢 𝙪𝙨.
Over the 10 years, we have gained a strong foothold in the market due to our range's high quality, competitive prices, and time-lined delivery schedules.
What Does the PARKTRONIC Inoperative, See Owner's Manual Message Mean for You...Autohaus Service and Sales
Learn what "PARKTRONIC Inoperative, See Owner's Manual" means for your Mercedes-Benz. This message indicates a malfunction in the parking assistance system, potentially due to sensor issues or electrical faults. Prompt attention is crucial to ensure safety and functionality. Follow steps outlined for diagnosis and repair in the owner's manual.
"Trans Failsafe Prog" on your BMW X5 indicates potential transmission issues requiring immediate action. This safety feature activates in response to abnormalities like low fluid levels, leaks, faulty sensors, electrical or mechanical failures, and overheating.
Things to remember while upgrading the brakes of your carjennifermiller8137
Upgrading the brakes of your car? Keep these things in mind before doing so. Additionally, start using an OBD 2 GPS tracker so that you never miss a vehicle maintenance appointment. On top of this, a car GPS tracker will also let you master good driving habits that will let you increase the operational life of your car’s brakes.
In this presentation, we have discussed a very important feature of BMW X5 cars… the Comfort Access. Things that can significantly limit its functionality. And things that you can try to restore the functionality of such a convenient feature of your vehicle.
5 Warning Signs Your BMW's Intelligent Battery Sensor Needs AttentionBertini's German Motors
IBS monitors and manages your BMW’s battery performance. If it malfunctions, you will have to deal with an array of electrical issues in your vehicle. Recognize warning signs like dimming headlights, frequent battery replacements, and electrical malfunctions to address potential IBS issues promptly.
2. Foreword
This Workshop Manual has been prepared as a guide for the service and repair of
the Model AA-6SD1T diesel engine.
A general table of contents is shown on the following page, and more detailed
subsections are listed at the beginning of each respective chapter.
This manual was first prepared in April, 2001, but subsequent changes in design
may result in modifications to certain values and other information in this Manual.
3. TABLE OF CONTENTS
Chapter 1 General Information ........................................ 1
Chapter 2 Maintenance................................................. 21
Chapter 3 Engine I (Disassembly) ..................................... 37
Chapter 4 Engine II (Inspection and Repair) ......................... 55
Chapter 5 Engine III (Assembly) ....................................... 85
Chapter 6 Lubricating System......................................... 117
Chapter 7 Cooling system.............................................. 129
Chapter 8 Fuel System.................................................. 139
Chapter 9 Turbocharger ................................................ 153
Chapter 10 Engine Electrical ............................................ 173
Chapter 11 Troubleshooting............................................. 197
Chapter 12 Special Tools................................................. 219
Chapter 13 Repair Standard............................................. 223
Note:
Before using this manual to perform maintenance and repairs, be sure to
read the section “General Servicing Precautions” included in Chapter 1
(General Information).
5. General Information
GENERAL SERVICING PRECAUTIONS
11. Before performing any inspections or maintenance work, disconnect the battery’s ground cable to
prevent any damage from shorted wires.
12. Always use the proper tool for the job.
When a special tool is designated for a job, be sure to use only that special tool.
13. When replacement parts are required, consult the appropriate Isuzu parts catalog and use only
“Genuine Isuzu Parts.”
14. Never reuse any cotter pins, gaskets, seals, o-ring, lock washers, or self-locking nuts removed in the
course of disassembly.
15. To facilitate reassembly, lay out engine parts in logical groups in the order in which they are removed.
Be especially careful to replace nuts and bolts in their proper locations, since characteristics such as
length and hardness may differ depending on the installation position.
16. Use identification labels or tags to mark valves, bearings, and pistons, to prevent confusing their
proper order and sequence.
17. Clean all parts before inspection and reassembly.
Be particularly sure to use compressed air to blow out oil ports and openings, to assure that they are
free of obstructions.
18. Be sure to apply oil or grease as appropriate to all rotating and sliding surfaces before reassembly.
19. Use sealants to prevent leaks where necessary.
10. Tighten all nuts and bolts to specified tightening torques.
11. After completing inspections and repairs, double check your work to confirm that the job has been
done properly.
2
F06E100031
6. General Information
NOTES ON THE FORMAT OF THIS MANUAL
1. Use the Table of Contents at the beginning of the Manual to find the general areas required.
2. Common technical data such as general maintenance, repair specifications, and tightening torques are
listed in the General Information chapter.
3. Each chapter is composed of “disassembly, inspection” and “repair, assembly” sections. the only
exception is the treatment of the engine body itself, which is divided into three independent chapters
for ease of explanation.
4. When similar maintenance procedures are applicable to multiple operations or parts, the manual will
cross-reference the page where the appropriate information can be found.
5. To provide brevity and conciseness, simple disassembly and repair operations are omitted, while more
space is devoted to explaining complex procedures such as adjustments and tightening torques.
6. The descriptions given in each chapter begin with an exploded diagram of the applicable parts, with
numbers indicated as shown below.
3
1
2
3
4
5
7
6
10
9
12
11
14
13
8
Disassembly sequence
1. Cylinder head cover
2. Head cover gasket
3. Camshaft upper bracket
▲4. Camshaft
▲5. Rocker arm shaft assembly
6. Thermostat housing
(with thermostat unit)
▲7. Cylinder head
8. Cylinder head gasket
9. Water pump pulley
10. Water pump
▲11. Crankshaft pulley (with damper)
12. Front cover
▲13. Flywheel
14. Flywheel housing
F06E100035
This number indicates the sequence of the
procedure.
Items enclosed in a frame are removed
and installed as a single unit, and the
order of disassembly and reassembly is
indicated in the illustration.
Parts listed beneath “Disassembly Steps”
or “Assembly Steps” are listed in the
sequence in which they are removed or
assembled.
The triangle mark ▲ indicates a
particularly important part or operation,
and is accompanied by detailed
instructions in the text.
7. General Information
7. The following is a sample of the text in the Workshop Manual.
4
Measurement of cylinder Liner Projection
1. Place a straight edge 1 along the top edge of the
cylinder liner to be measured.
2. Using a feeler gauge 2, measures the projection of
each cylinder liner.
Cylinder liner projection mm (in)
Standard
0.106 ~ 0.134 (0.0042 ~ 0.0053)
The difference in cylinder liner projection between any
two neighboring cylinders must not exceed 0.02 mm.
Cylinder Liner Removal
1.Attach a cylinder liner remover to the cylinder liner.
Cylinder liner remover : 1-85231-016-0
2. Confirm that the remover’s shaft anchor is hooked
firmly on the bottom of the cylinder liner.
3. Slowly rotate the remover’s shaft handle clockwise
to remove the cylinder liner.
Note:
Be careful not to damage the upper face of the cylinder
block when removing cylinder liners.
Cylinder Block Bore Measurement
1. At measuring point 1, measure the cylinder block
bore in the four directions (W-W, X-X, Y-Y, Z-Z).
Measuring point 1: 120 mm from upper face.
2. Calculate the average value of the four measure-
ments to determine the correct liner grade.
1
2
012E100011
012E100012
012EY00036
8. The following symbols appear throughout this Manual, indicating the type of service operation or
procedure to be performed.
.... Removal .... Adjustment
.... Installation .... Cleaning
.... Disassembly ... Important operation; special care required
.... Assembly .... Tighten to specified torque
.... Alignment (marks) .... Special tool use required (Isuzu Tools)
.... Directional indication .... Use commercially available special tool
.... Inspection .... Lubrication with engine oil
.... Measurement .... Apply grease
.... Apply sealant
Special tools are identified by name
and/or number.
The illustration also indicates the
proper procedure for using the special
tool.
Symbols indicate the type of operation
or sequence to be performed. A
detailed explanation of these symbols
is given below.
These tables indicate repair standards.
8. General Information
9. Measurements are indicated by “standard” or “limit”;
a “standard” value refers to the standard values at time of assembly.
A “limit” value is a maximum or minimum; measurements up to that value are usable.
Measurements falling beyond that value mean the part must be serviced, adjusted, or replaced.
10. Directional indications adopted within this manual are as follows;
Front: Toward the cooling fan when viewed from the flywheel side.
Right: Toward the fuel injection pump when viewed from the flywheel side.
Left: Toward the exhaust manifold when viewed from the flywheel side.
Rear: Toward the engine’s flywheel side.
11. “Cylinder numbers” and “Engine rotation direction”: Cylinder numbers are counted in sequence
beginning form the front side of the engine.
As a result, the first cylinder at the very front of the engine is cylinder No. 1, while the last cylinder
toward the rear is cylinder No. 6. The direction of engine rotation is clockwise when viewed from the
cooling fan side.
12. “ASM” is an abbreviation for “assembly.”
5
Flywheel
Right
Left
Front Rear
Exhaust manifold
Cooling fan
F06E100032
9. General Information
6
ABOUT ANGULAR TIGHTENING
At present, the method most commonly used to tighten bolts is to specify a torque value to which the bolts
should be tightened. This method, however, has the disadvantage of being characterized by considerable
fluctuation in axial force for a given torque, with the result that when attempting to maintain the minimum
necessary axial force, the bolt may be sheared at its upper limit value.
In order to produce less fluctuation in axial force, the ideal method would be to tighten the bolt while
measuring the amount of its stretch, but since this is impossible in practice, a substitute method was
conceived, namely considering the relationship of thread pitch to bolt stretch. The angular tightening
method thus focuses on the amount the bolt is turned — directly related to thread pitch — in order to allow
tightening of the bolt up unto the region of plasticity, thus reducing the variation in axial force.
TIGHTENING METHOD
1. Apply molybdenum disulfide grease to the threads and setting faces of the nuts and bolts.
2. Tighten all bolts to the designated tightening torque values.
3. Next, make a mark at a point corresponding to one edge of the bolt as shown in the accompanying
illustration, then tighten the bolt by turning it by the designated angle.
Afterwards, be sure to check the mark to confirm whether the bolt has been tightened to the specified
angle.
If this confirmation is not performed, and if the bolt is subsequently retightened using the angular
tightening method, it may break.
Note:
1. Tighten bolts in their designated sequence.
2. When using the angular tightening method, do not retighten.
LOCATIONS OF USE OF ANGULAR TIGHTENING METHOD
1. Cylinder head bolts (M14 bolts only)
2. Lower crankcase bolts (M14 bolts only)
3. Connecting rods, bearing cap nuts
4. Flywheel bolts
5. Idle gear shaft bolt (A)
Tighten
A
B
C D
E
F
After tightening Before tightning
A B C D
E
F
Designated
tightening angle
Use a wrench to rotate the bolt until the
line (A — B) on the bolt is aligned with the
designated angle line on the material (line
E — F).
On the surface of the bolt and material to
be tightened, draw a line extending
through the center of the bolt (A — B on the
bolt, C — D on the material), and a line on
the material surface which is aligned with
the center of the bolt at the designated
tightening angle (line E — F).
F06E100033 F06E100034
10. General Information
7
MAIN DATA AND SPECIFICATIONS
Engine Model
AA-6SD1T
Item
Engine type 4-cycle, water-cooled
vertical in-line overhead camshaft
Combustion chamber type Direct injection
Cylinder liner type Dry type
Number of cylinders; bore x stroke mm 6 – 120 x 145
Total exhaust displacement L (cid) 9.839 (601)
Compression ratio 16.8 : 1
Dimensions (L x W x H) mm 1379 x 859 x 1158
Weight kg 693
Ignition sequence 1-5-3-6-2-4
Fuel used Diesel (2-D)
Fuel-injection pump type In-line Bosch
Governor Variable speed, mechanical, RSV type
or electrically controlled type (Red IV)
Injection nozzle type Multi-hole type
Injection starting pressure MPa (kg/cm2/psi) 17.7 – 22.1 (180 – 225/2570 – 3200)
Fuel injection timing (BTDC) 7°
Compression pressure MPa (kg/cm2/psi) 2.84 (29/412)
(warm engine, 200 rpm)
Inlet valve Open (BTDC) 15°
Close (ATDC) 39°
Exhaust valve Open (BTDC) 40°
Close (ATDC) 14°
Valve clearance Inlet valve mm 0.4
(cold engine)
Exhaust valve 0.4
Lubricating system Forced circulation type
Engine oil capacity; Oil pan L (qts) Max 30 (31.7), Min 25 (26.4)
Total system capacity L (qts) Max 35 (37), Min 30 (31.7)
Lubricating engine oil API service type CD, or Isuzu Besco S-3
Oil cooler Water-cooled, internally mounted
Cooling method Forced circulation, pressurized water-cooled type
Cooling system volume L (qts) About 19 (20) (engine only)
Cooling fan Dia. 850 mm, 6-blade, sucker type
Alternator V–A 24 – 50
Starter V–kW 24 – 5.5
Specifications marked with an asterisk (*) will vary according to engine application.
*
*
*
*
*
*
*
*
*
16. General Information
13
Front cover, flywheel housing, idler gear
N·m (kgf·m/lb·ft)
F06E100065
5 3 6 4 8 A
一般輸
01/06/13
175 230
14~24(1.4~2.4/10~17)
20~29(2.0~3.0/14~22)
20~29(2.0~3.0/14~22)
68~83(6.9~8.5/50~61)
32~36(3.3~3.7/24~27)
↓
60°~90°
68~83(6.9~8.5/50~61)
76~116(7.8~11.8/56~85)
34~46(3.5~4.7/25~34)
Idler gear shaft A fixing
Apply molybdenum
disulfide grease
17. Suggest:
If the above button click is invalid.
Please download this document
first, and then click the above link
to download the complete manual.
Thank you so much for reading
18. General Information
14
Intake manifold, exhaust manifold, turbocharger
N·m (kgf·m/lb·ft)
34~46(3.5~4.7/25~34)
36~46(3.7~4.7/27~34)
14~24(1.4~2.4/10~17)
25~30(2.5~3.1/18~22)
F06E100024
19. General Information
15
Cooling system
N·m (kgf·m/lb·ft)
F06E100029
5 3 6 4 8 A
一般輸
01/04/16
175 230
44~60(4.5~6.1/33~44)
44~60(4.5~6.1/33~44)
(FAN FIX)
14~24(1.4~2.4/10~17)
14~24(1.4~2.4/10~17)
14~24(1.4~2.4/10~17)
M8 bolt
31~45(3.2~4.6/23~33)
M10 bolt
(PULLEY FIX)