Download to read offline

![Chapter 4: Software support
Intel®
Smart Response Technology
Intel®
Smart Response Technology boosts overall system performance. It uses an installed
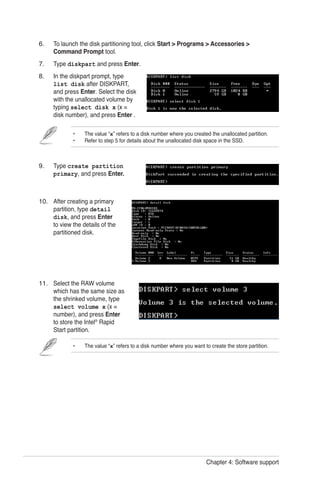
fast SSD (min. 20GB available) as a cache for frequently accessed operations, speeding up
hard drive/main memory interaction. Key benefits are expedited hard drive speeds, reduced
load and wait times, and maximized storage utilization. Power consumption also goes down
by reducing unnecessary hard drive spin.
Before applying Intel®
Smart Response Technology, setting the SATA Mode BIOS item to
[RAID mode] in BIOS setup is necessary. Refer to section 3.5.3 SATA Configuration for
details
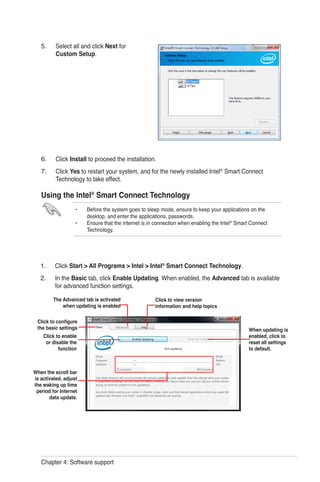
Installing Intel®
Smart Response Technology
Place the support DVD to the optical drive. The Drivers installation tab appears if your
computer has enabled the Autorun feature.
Click the Drivers tab, then click Intel®
Rapid Storage Technology Driver software.
Follow the onscreen instructions to complete the installation.
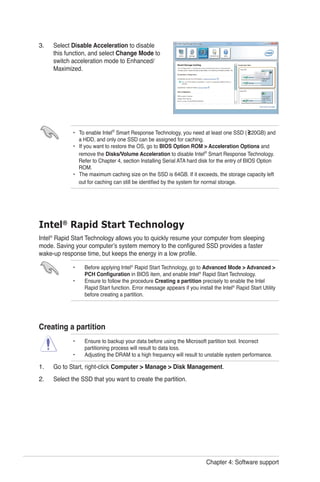
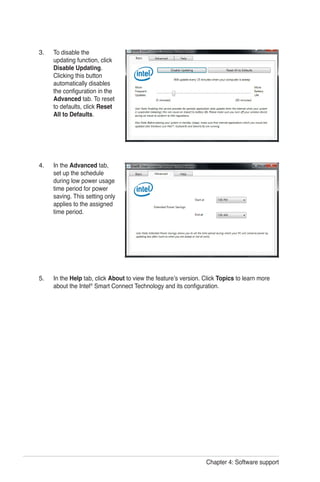
Using the Intel®
Smart Response Technology
Click Accelerate to launch Smart
Response Technology settings.
a. Select the SSD you want to use to
accelerate your storage system.
b. Select the size allocated for SSD
caching.
c. Select which HDD for caching.
d. Enhanced mode: WRITE THROUGH,
write to SSD and HDD at the same
time.
Maximized mode: WRITE BACK, write
to SSD and write back to HDD in a later
time.
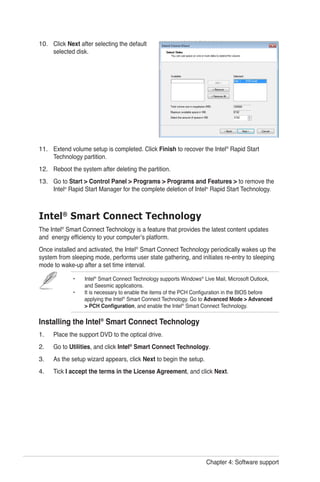
1.
2.
3.
1.
2.](https://image.slidesharecdn.com/inteltechnologymanual-130922181010-phpapp02/85/Intel-technology-manual-3-320.jpg)

This document provides an overview of Intel's 2012 Desktop responsiveness technologies, including Intel Smart Response Technology, Intel Rapid Start Technology, and Intel Smart Connect Technology. It details the system requirements and installation procedures for each technology. The key requirements are a 3rd/2nd generation Intel Core Processor, Windows 7, and a dedicated SSD of at least 20GB for Smart Response and Rapid Start.


![Paises ingles[1]](https://cdn.slidesharecdn.com/ss_thumbnails/paises-ingles1-101108110456-phpapp02-thumbnail.jpg?width=640&height=640&fit=bounds)


