For more course tutorials visit
www.newtonhelp.com
BIS 155 Course Project Excel Project
BIS 155 Lab 1 of 7: Saddle River Marching Band
BIS 155 iLab 1 Upper Saddle River Marching Band (New)
For more course tutorials visit
www.newtonhelp.com
BIS 155 Course Project Excel Project
BIS 155 Lab 1 of 7: Saddle River Marching Band
BIS 155 iLab 1 Upper Saddle River Marching Band (New)
bis 155,devry bis 155,devry bis 155 complete course,devry bis 155 entire course,bis 155 final exams,devry bis 155 week 1,devry bis 155 week2,devry bis 155 week 3,devry bis 155 week 4,devry bis 155 week 5,devry bis 155 week 6,devry bis 155 tutorials,devry bis 155 assignments,bis 155 help
BIS 155 Lessons in Excellence / bis155.comkopiko33
For more course tutorials visit
www.bis155.com
BIS 155 Course Project Excel Project
BIS 155 Lab 1 of 7: Saddle River Marching Band
BIS 155 iLab 1 Upper Saddle River Marching Band (New)
BIS 155 Lab 2 of 7: Excel's Advanced Formulas & Functions
BIS 155 Inspiring Innovation -- bis155.comkopiko101
For more course tutorials visit
www.bis155.com
BIS 155 Course Project Excel Project
BIS 155 Lab 1 of 7: Saddle River Marching Band
BIS 155 iLab 1 Upper Saddle River Marching Band (New)
Devry bis 155 final exam guide (music on demand) newuopassignment
bis 155 week 1 ilab data analysis with spreadsheets with lab,bis 155 week 1 quiz data analysis with spreadsheets with lab,bis 155 week 1 to week 5 all quiz,bis 155 week 1 to week 7 all discussions,devry bis 155 week 1,bis 155 week 1,devry bis 155,bis 155,devry bis 155 week 1 tutorial,devry bis 155 week 1 assignment,devry bis 155 week 1 help
BIS 155 Education Specialist / snaptutorial.comMcdonaldRyan131
For more classes visit
www.snaptutorial.com
BIS 155 Course Project Excel Project
BIS 155 Lab 1 of 7: Saddle River Marching Band
BIS 155 iLab 1 Upper Saddle River Marching Band (New)
BIS 155 Lab 2 of 7: Excel's Advanced Formulas & Functions
BIS 155 iLab 2: First National Bank (New)
Bis 155 Exceptional Education / snaptutorial.comDavis142
For more classes visit
www.snaptutorial.com
BIS 155 Course Project Excel Project
BIS 155 Lab 1 of 7: Saddle River Marching Band
BIS 155 iLab 1 Upper Saddle
Bis 155 Enhance teaching / snaptutorial.comHarrisGeorg46
BIS 155 Course Project Excel Project
BIS 155 Lab 1 of 7: Saddle River Marching Band
BIS 155 iLab 1 Upper Saddle River Marching Band (New)
BIS 155 Lab 2 of 7: Excel's Advanced Formulas & Functions
BIS 155 iLab 2: First National Bank (New)
BIS 155 Lab 3 of 7: Alice Barr Realty Analysis
Grader - Instructions Excel 2019 ProjectExcel_Comprehensive_Capstone2_Summer_Revenue
Project Description:
In this project, you will apply skills you practiced from the objectives in Excel Chapters 4 through 10. You will develop a workbook for Frank Osei, the Vice President of Finance, that includes financial information and analysis regarding summer product revenue.
Steps to Perform:
Step
Instructions
Points Possible
1
Open the Excel file
Student_
Excel_Comp_Cap2_Summer_Revenue.xlsx downloaded with this project.
0
2
On the Maine Store worksheet, in the range B9:B16, use the Fill Series feature to enter interest rates beginning with
8.00%. Decrease the amounts by
.50% ending with
4.50%. Format the rates as Percent Style with two decimal places and apply bold and center.
4
3
In cell B8, enter a PMT function using the information in the range B2:B4 to calculate a monthly payment. Be sure that the result displays as a positive number.
2
4
In cells B8:H16, create a Data Table using the information in cells B2:B4 where the row input cell is the Period and the column input cell is the rate. Apply the format in B8 to the results in the data table, and then AutoFit columns C:H. Format the payment option closest to and less than $10,000 per month with the Note cell style. Change the Orientation to Landscape.
4
5
On the Quarterly Apparel Costs worksheet, apply the Currency [0] cell style to the range B6:E6. Apply the Comma [0] cell style to the range B7:E17. To the range B18:E18, apply the Currency [0] and Total cell styles.
2
6
Name the ranges B6:E10
Swim_Costs; B11:E14
Shirt_Costs; B15:E16
Jacket_Costs; and B17:E17
Hats_Costs.
2
7
Insert a new row 15. In cell A15, type
Go Explore Shirts. In cell B15, type
9500. In cell C15, type
9695. In cell D15, type
8315. In cell E15, type
9275. Display the Name Manager, and then edit the
Shirt_Costs name to include row 15. Select
Hats_Costs, and edit the name to
Headwear_Costs. (Mac users, click Define Name and make edits using the Define Name dialog box.)
4
8
Click cell B19. On the Formulas tab, in the Formula Auditing group, click Error Checking, and then select Update Formula to Include Cells. Use the fill handle to copy the corrected formula from cell B19 across through cell E19.
2
9
On the Quarterly Apparel Costs worksheet, in cell B25, insert a SUM function to sum the Swim_Costs named range, using the name in the formula. Cr.
Marina Andros works in the Financials Department of Eastern Mobile- a.pdfPierschdJohnstonb
Marina Andros works in the Financials Department of Eastern Mobile, a communications
company in Alexandria, Virginia. She is using an Excel workbook to analyze the company's
recent financial performance, and asks for your help in creating advanced types of charts and
PivotTables to provide an overview of mobile phone plans, customers, and orders. Go to the
Plans worksheet, which contains a column chart in the range F18:K31 showing sales of each plan
type in Quarter 2. Marina wants to create a similar chart showing the Quarter 1 data.
Provide a chart showing Quarter 1 data as follows:
Copy the Q2 Sales chart.
Paste the chart in cell A18.
Select the copied chart and drag the blue outline from the range G4:G16 to the range F4:F16 to
change the data shown in the chart.
The Ads table in the range I4:K16 compares the amount of advertising purchased in the previous
year and the number of mobile phone plans sold. Marina asks you to create a chart that shows the
relationship between the advertising spent and the plans sold.
Insert a Scatter chart that shows the relationship between the advertising amount (range J4:J16)
and the number of plans sold (range K4:K16).
Resize and position the Scatter chart so that it covers the range L3:R16.
Use Ad Amount and Plans Sold as the chart title.
Marina wants to analyze the relationship between advertising spent and the plans sold.
Add a Linear trendline to the scatter chart.
Go to the Customers worksheet, which contains customer details in a table named Customers.
Marina wants to display the payments customers made in each of five states where Eastern
Mobile does business.
Insert a recommended PivotTable based on the Customers table as follows:
Insert the Sum of Payment by State recommended PivotTable. [Mac Hint: Use the State field in
the Rows area, the Payments field in the Values area, and show grand totals for rows and
columns.]
Use Payments by State Pivot as the name of the new worksheet.
Apply the Light Orange, Pivot Style Medium 12 style to the PivotTable.
Add a second copy of the Payment field to the Values area of the Field List, and then change its
summary function to Average so that Marina can compare the average payments to the totals.
Change the Number format of the two value fields to Currency with 0 decimal places and the $
symbol.
Use Total Payments as the column heading in cell B3, and use Average Payment as the column
heading in cell C3.
Insert a PivotChart based on the new PivotTable as follows to help Marina visualize the data:
Insert a Combo PivotChart based on the Payments by State PivotTable.
Display the Total Payments as a Clustered Column chart and the Average Payment as a Line
chart.
Include a secondary axis for the Average Payment data.
Hide the Field List so that you can format the value axis of the chart.
Change the maximum bounds for the value axis on the left to 1,400.
Change the PivotChart colors to Monochromatic Palette 4.
Resize and position the chart so that it covers the range .
need step by step instruction If you can do visual so I kno.pdfsaravanan544051
need step by step instruction. If you can do visual so I know what's it suppose to look like.
There are no results for 6. Using the data in the range B4:C28 of the Recent Website Sales
worksheet, create a Forecast sheet, forecasting website revenue through 12/31/2022.
Assume a seasonality in the data of 12 periods (or months). Name the Forecast sheet as
Forecasts. 7. Move the forecast chart to the Summary Report worksheet in the range
B18:H29. Remove the chart legend and add the chart title Two-Year Forecast. 8. Dmitry has
a sampling of product sales from three Cup and Platter classes. Create a query that
retrieves the Customers, Customer Orders, Items, Item Sales, and Stores tables from the
Support_EX_10_Sales03.accdb Access database. Create a connection to the database file
and add the tables in the Excel Data Model. Do not load any tables in an Excel table,
PivotTable, or PivotChart. 9. Go to Power Pivot and create the following table relations
between the five database tables: Connect the Customer Orders and Customers tables
through the Cust ID field. Connect the Customer Orders and Stores tables through Store ID
field Connect the Customer Orders and Item Sales tables through the Order ID field.
Connect the Item Sales and Items tables through the Item ID field. 10. Add a hierarchy to
the Items table named Item Tree and add the Class, Subclass, and Group fields to it in that
order. 11. Close Power Pivot and return to the workbook. In the Items Pivot worksheet, in
cell B4, insert a PivotTable from the Data Model. Rename the table as Items Pivot. Add the
Item Tree hierarchy from the Items table to the Rows area box, add the Type field from the
Stores table to Column area box, and add the Revenue field from the Item Sales table to the
Values area box (displaying the revenue sum). 12. Create a clustered bar PivotChart from
the Items Pivot PivotTable. Move the chart to the Summary Report worksheet in the range
J11:P29. Remove the field buttons, primary horizontal axis, and gridlines from the chart.
Move the chart legend to the bottom of the chart area. Add data labels to the chart. 13.
Dmitry wants to examine revenue from coffee maker sales. Use the Quick Explore tool to
drill down the bar chart categories through the Electrics class and the Coffee Makers
subclass down to the group level, displaying total revenue of three coffee maker types. 14.
Dmitry wants to view sales by state. In the State Revenue worksheet, add a PivotTable from
the Data Model to cell B4. Name the PivotTable as State Revenue. Place the State field from
the Customers table in the Rows area and the Revenue field from the Item Sales table in the
Values area. In the PivotTable Options dialog box, on the Display tab, click the check boxes
to show items with no data on the rows and columns. 15. Copy the data in the range
B5:C55. Use Paste Link to paste references to the data values in the range E5:F55. Format
the values in the range F5:F55 as currency. Enter State in cell E4 an.
Excel Project 3 – MS Excel (Fall 2018)Use the project descriptiogalinagrabow44ms
Excel Project 3 – MS Excel (Fall 2018)
Use the project description HERE to complete this activity. For a review of the complete rubric used in grading this exercise, click on the Assignments tab, then on the title Excel Project #3. Click on Show Rubrics if the rubric is not already displayed.
Summary
Create a Microsoft Excel file with four worksheets that provides extensive use of Excel capabilities for charting. The charts will be copied into a Microsoft PowerPoint file and the student will develop appropriate findings and recommendations based on analysis of the data.
A large rental car company has two metropolitan locations, one at the airport and another centrally located in downtown. It has been operating since 2015 and each location summarizes its car rental revenue quarterly. Both locations rent four classes of cars: economy, premium, hybrid, SUV. Rental revenue is maintained separately for the four classes of rental vehicles.
The data for this case resides in the file fall2018rentalcars.txt and can be downloaded by clicking on the Assignments tab, then on the data tile name. It is a text file (with the file type .txt).
Do not create your own data, you must use the data provided and only the data provided.
Default Formatting. All labels, text, and numbers will be Arial 10, There will be $ and comma and decimal point variations for numeric data, but Arial 10 will be the default font and font size.
Step Requirement Comments 1 Open Excel and save a blank workbook with the following name: a. “Student’s First InitialLast Name Excel Project 3” Example: JSmith Excel Project 3 b. Set Page Layout Orientation to Landscape Use Print Preview to review how the first worksheet would print. 2 Change the name of the worksheet to Analysis by. 3 In the Analysis by worksheet: a. Beginning in Row 1, enter the four labels in column A (one label per row) in the following order: Name:, Class/Section:, Project:, Date Due: b. Place a blank row between each label. Please note the colon : after each label. c. Align the labels to the right side in the cells It may be necessary to adjust the column width so the four labels are clearly visible within Column C (not extending into Column D). Format for text in column A: • Arial 10 point • Normal font • Right-align all four labels in the cells
Step Requirement Comments 4 In the Analysis by worksheet with all entries in column C: a. Enter the appropriate values for your Name, Class and Section, Project, Date Due across from the appropriate label in column A. b. Use the formatting in the Comments column (to the right). It may be necessary to adjust the column width so the four labels are clearly visible within Column C (not extending into Column D). Format for text in column C: • Arial 10 point • Bold • Left-align all four values in the cells 5 a. Create four new worksheets: Data, Slide 2, Slide 3, Filter Analysis. Upon completion, there must be the Analysis by worksheet as well as the four newly created worksh ...
Excel Project 3 – MS Excel Use the project description H.docxSANSKAR20
Excel Project 3 – MS Excel
Use the project description HERE to complete this activity. For a review of the complete
rubric used in grading this exercise, click on the Assignments tab, then on the title Excel
Project 3. Click on Show Rubrics if the rubric is not already displayed.
Summary
Create a Microsoft Excel file with four worksheets that provides extensive use of Excel
capabilities for graphing. The graphs will be copied into a Microsoft PowerPoint file and
the student will develop appropriate findings and recommendations based on analysis
of the data.
A large rental car company has two metropolitan locations, one at the airport and
another centrally located in downtown. It has been operating since 2015 and each
location summarizes its car rental revenue quarterly. Both locations rent two classes of
cars: economy and premium. Rental revenue is maintained separately for the two
classes of rental vehicles.
The data for this case resides in the file Excel Project 3-data.txt and can be downloaded
by clicking on the Assignments tab, then on the data tile name. It is a text file (with the
file type .txt).
Do not create your own data, you must use the data provided and only the data
provided.
Element
Requirement
Points
Allocated
Comments
#
1
1 - Open Excel and save a blank worksheet with
the following name:
0.2
Use Print Preview
to review how
spreadsheet
would print.
a.“Student’s First InitialLast Name Excel Project 1”
Example: JSmith Excel Project 1
b. Set Page Layout to Landscape
2
Change the name of the worksheet to Analysis
by.
0.1
3
a. In the Analysis by worksheet, enter the four
labels vertically in column A in the following order:
Name:, Class/Section:, Project:, Date Due:
0.3
Use the following
text format:
b. with a row between each label, please note the
colon, (:) , after each label.
Arial 10 point
Bold
It may be necessary to adjust the column width so
the four labels are clearly visible.
Align values
Right in the cell
4
a. In the Analysis by worksheet, with all entries in
column C, enter the appropriate values for Name,
Class and Section, Project, Date Due.
0.3
Use the following
text format:
It may be necessary to adjust the column width so
the four labels are clearly visible.
Arial 10 point
Bold
b. formatting
Align values left
in the cells
5
a. Create three new worksheets: Data, Slide 2,
Slide 3. Upon completion, there should be
Analysis by as well as the three newly created
worksheets.
0.4
b. Delete any other worksheets.
6
If necessary, reorder the four worksheets so they
are in the following order: Analysis by, Data,
Slide 2, Slide 3.
0.1
7
a. In the Data worksheet, import the text file Excel
Project 3.txt.
0.5
The field names
should be in the
top row of the
worksheet with
the data directly
under it in rows.
This action may
not be necessary
as this is part of
th ...
Choose a journal article related to project status reporting, budgVinaOconner450
Choose a journal article related to project status reporting, budgeting, or risk analysis (do not re-use a journal from a prior course). Write a 2-3 page review of your chosen journal article. Please choose a peer reviewed journal, and an article that has been published in the past five (5) years.
The review should contain the journal article title, author's name and year of publication.
Your paper should contain the following headings:
· Introduction
· Summary of the article
· Relevant points made by the author
· Critique of the article
· Application of the concepts in the article
You are going to review a single journal article, therefore your reference page should only contain the information from the article you reviewed. There is no need to introduce other journals into this paper.
.
Course - Monitor/Controlling & Closing the Project
Choose
a
journal
article
related
to
project
status
reporting,
budgeting,
or
risk
analysis
(do
not
re
-
use
a
journal
from
a
prior
course).
Write
a
2
-
3
page
review
of
your
chosen
journal
article.
Please
choose
a
peer
reviewed
journal,
and
an
article
that
h
as
been
published
in
the
past
five
(5)
years.
The
review
should
contain
the
journal
article
title,
author's
name
and
year
of
publication.
Your
paper
should
contain
the
following
headings:
·
Introduction
·
Summary
of
the
article
·
Relevant
points
made
by
the
author
·
Critique
of
the
article
·
Application
of
the
concepts
in
the
article
You
are
going
to
review
a
single
journal
article,
therefore
your
reference
page
should
only
contain
the
information
from
the
article
you
reviewed.
There
is
no
need
to
introduce
other
journals
into
this
paper.
.
Course
-
Monitor/Con
trolling
& Closing the
Project
Choose a journal article related to project status reporting, budgeting, or risk analysis (do not re-use a
journal from a prior course). Write a 2-3 page review of your chosen journal article. Please choose a
peer reviewed journal, and an article that has been published in the past five (5) years.
The review should contain the journal article title, author's name and year of publication.
Your paper should contain the following headings:
Introduction
Summary of the article
Relevant points made by the author
Critique of the article
Application of the concepts in the article
You are going to review a single journal article, therefore your reference page should only contain the
information from the article you reviewed. There is no need to introduce other journals into this paper.
.
Course - Monitor/Controlling & Closing the Project
Grader - Instructions Excel 2019 ProjectExcel_3F_Streets
Project Description:
In the following project, you will edit a worksheet that will be used to prepare a five-year forecast of the cos ...
Excel Project 2 – MS Excel (Summer 2019) Use the pro.docxAASTHA76
Excel Project 2 – MS Excel
(Summer 2019)
Use the project description below to complete this activity (all the details are included in this document). For a
review of the complete rubric used in grading this exercise, click on the Assignments tab, then on the title
"Excel Project 2." Click on Show Rubrics if the rubric is not already displayed.
Summary
Create a Microsoft Excel workbook with four worksheets that provides extensive use of Excel capabilities
including charting, and written analysis and recommendations in support of a business enterprise.
A large rental car company has two metropolitan locations, one at the airport and another centrally located in
downtown. It has been operating since 2015 and each location summarizes its car rental revenue
quarterly. Both locations rent four classes of cars: economy, premium, hybrid, SUV. Rental revenue is
maintained separately for the four classes of rental vehicles.
The data for this case resides in the file summer2019rentalcars.txt and can be downloaded by clicking on the
Assignments tab, then on the data file name. It is a text file (with the file type .txt).
Do not create your own data. You must use the data provided and only the data provided.
Default Formatting. All labels, text, and numbers will be Arial 10, There will be $ and comma and
decimal point variations for numeric data, but Arial 10 will be the default font and font size.
Tutorials
Note: Tutorials that address activities used in this project have been assigned in Week 1, 2 and 3.
Step
Requirement
Comments
1
Open Excel and save a blank workbook with the following
name:
a. “Student’s LastFirstInitial Name Excel Project 2” Example:
SmithJaneP Excel Project 2.
b. Set Page Layout Orientation to Landscape.
Use Print Preview to
review how the first
worksheet would
print.
2 Change the name of the worksheet to Analysis by.
3
In the Analysis by worksheet:
a. Beginning in Row 1, enter the four labels in column
A (one label per row) in the following order: Name:,
Class/Section:, Project:, Date Due:
b. Place a blank row between each label. Please note
the colon : after each label.
c. Align the labels to the right side in the cells.
It may be necessary to adjust the column width so the four labels are
clearly visible within Column A (not extending into Column B).
Format for column A:
• Arial 10 point
• Normal font
• Right-align all
four labels in the
cells
Step
Requirement
Comments
4
In the Analysis by worksheet with all entries in column C:
a. Enter the appropriate values for your Name (in cell C1),
Class and Section (cell C3), Project (cell C5), and Date
(cell C7) across from the appropriate label in column A.
b. Use the formatting in the Comments column (to the right).
It may be necessary to adjust the column width so the four labels
are clearly visible within Column C (not extending into Colu.
Office 2013 – myitlab:grader – Instructions GO! - Access Chapter 3: Homework Project 3
Career Books
Project Description:
In this project, you will use a database to track publishers and book titles that assist students in finding employment. You will create forms, add and delete records by using a form, filter records, and modify a form in Layout view and Design view. You will create reports, modify a report in Layout view and Design view, group data in a report, and keep grouped data together for a printed report.
Instructions:
For the purpose of grading the project you are required to perform the following tasks:
Step Instructions Points Possible
1 Start Access. Open the downloaded file named go_a03_grader_h3_Career_Books, and then enable the content. View the relationship between the Publishers table and the Career Books table. One publisher can publish many career books. Close the Relationships window. 0
2 Use the Form tool to create a form based on the Career Books table. Save the form as Career Book Form and then display the form in Form view. Using the Career Book Form, add the following new record to the underlying Career Books table:
Field Data Title ID T-25 Title Effective Networking Author Last Name Nunez Author First Name Charlene Publisher ID PUB-109 Category Job Search Copies On Hand 6 Value of Books 180
6
3
Find the record for the Title ID of T-19, and then delete the record. Find the record for the Title ID of T-25. From the Print dialog box and the Setup option, change the column size width of a printed form to 7.5 inches. Save the form. 2
4 Use the Filter By Form tool to create a filter for the Career Book Form that displays records with a Category of Interviewing Strategies or Resumes. After verifying that 10 records match the filter criteria, toggle the filter off to display all 24 records. Save and close the form. 5
5 Use the Form Wizard to create a form based on the Publishers table. Add the following fields (in this order) to the form: Company Name, Rep Last Name, Rep First Name, Job Title, and Phone Number. Apply a columnar layout and name the form Publisher Form. 12
6 With the Publisher Form displayed in Layout view, apply the Stacked layout to all of the controls. Apply the Integral theme to this form only. Select the title—Publisher Form. Change the font size to 16, apply bold, and change the font color to Dark Teal, Text 2, Darker 50% (under Theme Colors, in the fourth column, the last color). Save the form. 5
7
With the Publisher Form displayed in Layout view, from the Field List pane, add the Publisher ID field to the form directly above the Company Name controls. Close the Field List pane. In the form, move the Rep First Name controls directly above the Rep Last Name controls. Change the width of the Job Title text box control to 2.5 inches. Save the form. 3
8 W.
1 Mashing Up Data with PowerPivot When Filter, .docxkarisariddell
1
Mashing Up Data with PowerPivot*
When “Filter, Then Calculate” Does Not Work in DAX Measures
This time you need to open the file with the worksheet Sls and have it linked to the
PowerPivot window, using Add to Data Model as in the last hands-on assignment.
1. Please create a pivot table first showing the sum of sales by each representative
on each date. Now the task is made so easy. However, if you want to compare
the sales to the total sales for a month, you need to do some calculation. In DAX,
instead of using SUMIFS, you need to use Calculate. Calculate asks for an
expression and then one or more filters. For those filters, you are going to use a
special function called ALL. ALL says that you want it to look not just at one
representative’s sales for a particular date, but all the sales in the table.
2. Suppose you want to see % of Grand Total Sales. You need to create a new
measure (Hint: right click on Table1 to select Add Measure) by using
=SUM(Sls[Sales])/Calculate(SUM(Sls[Sales]), ALL(Sls)). The pivot table shows
that % of Grand Total for Bill’s sales of $851 on June 2, 2011 represents 0.9
percent of the grand total sales.
3. Now you want to calculate how Bill’s $851 sale on June 2 compared to all sales
on June 2. The numerator of the DAX measure is =SUM(Sls[Sales]). The
denominator is going to be hard. Instead of ALL(Sls), you need to ask for
AllExcept(Sls, Sls[Date]). It means go ahead and throw out all the filters except
for the Date filter. Keep filtering by date. Please create a new measure, % of
Daily Sales, by using the formula
2
=SUM(Sls[Sales])/Calculate(SUM(Sls[Sales]),AllExcept(Sls,Sls[Date])). Bill’s
$851 sales is now 25% of the daily sales on June 2, 2011.
4. You can also override the filters by specifying other filters in the Calculate
Function. The actual syntax of the Calculate function is Calculate (Expression,
[filter 1], [filter 2], [filter 3], ….). Please create a new measure, Amber Sales, to
calculate all Amber’s sales. The Calculated Field formula should be
=CALCULATE(SUM(Sls[Sales]),Sls[Rep]="Amber").
5. If Amber is the sales star in the store, perhaps you would want to show
everyone’s sales as a percentage of Amber’s Sales.
=SUM(Sls[Sales])/Calculate(SUM(Sls[Sales]), Sls[Rep]="Amber") shows sales as
a percentage of Amber’s total sales for that day. Please create such a new
measure
3
4
Mix in Time Intelligence Functions
You can apply many filters in the Calculate function. You can replace the first argument
in Calculate with MAX, MIN, AVERAGE, or any function. There are 34 Time Intelligence
functions. If you want to calculate a running month to date (MTD) total, you can use the
Calculate function and specify a filter of DatesMTD(Sls[Date]). But only for reps that
match, use AllExcept(Sls, Sls[Rep]).
1. To show MTD sales for each rep, create a new measure, MTDThisRep, using the
formula =Calculate(.
Excel Project 3 – MS Excel (Fall 2018) Use the project.docxcravennichole326
Excel Project 3 – MS Excel
(Fall 2018)
Use the project description HERE to complete this activity. For a review of the complete rubric used in grading
this exercise, click on the Assignments tab, then on the title Excel Project #3. Click on Show Rubrics if the
rubric is not already displayed.
Summary
Create a Microsoft Excel file with four worksheets that provides extensive use of Excel capabilities for charting.
The charts will be copied into a Microsoft PowerPoint file and the student will develop appropriate findings and
recommendations based on analysis of the data.
A large rental car company has two metropolitan locations, one at the airport and another centrally located in
downtown. It has been operating since 2015 and each location summarizes its car rental revenue quarterly.
Both locations rent four classes of cars: economy, premium, hybrid, SUV. Rental revenue is maintained
separately for the four classes of rental vehicles.
The data for this case resides in the file fall2018rentalcars.txt and can be downloaded by clicking on the
Assignments tab, then on the data tile name. It is a text file (with the file type .txt).
Do not create your own data, you must use the data provided and only the data provided.
Default Formatting. All labels, text, and numbers will be Arial 10, There will be $ and comma and
decimal point variations for numeric data, but Arial 10 will be the default font and font size.
Step Requirement Comments
1
Open Excel and save a blank workbook with the following
name:
a. “Student’s First InitialLast Name Excel Project 3”
Example: JSmith Excel Project 3
b. Set Page Layout Orientation to Landscape
Use Print Preview to review
how the first worksheet
would print.
2 Change the name of the worksheet to Analysis by.
3
In the Analysis by worksheet:
a. Beginning in Row 1, enter the four labels in column
A (one label per row) in the following order:
Name:, Class/Section:, Project:, Date Due:
b. Place a blank row between each label. Please note
the colon : after each label.
c. Align the labels to the right side in the cells
It may be necessary to adjust the column width so the four
labels are clearly visible within Column C (not extending into
Column D).
Format for text in column
A:
• Arial 10 point
• Normal font
• Right-align all four
labels in the cells
Step Requirement Comments
4
In the Analysis by worksheet with all entries in column C:
a. Enter the appropriate values for your Name, Class
and Section, Project, Date Due across from the
appropriate label in column A.
b. Use the formatting in the Comments column (to the
right).
It may be necessary to adjust the column width so the four
labels are clearly visible within Column C (not extending into
Column D).
Format for text in column
C:
• Arial 10 point
• Bold
• Left-align all four
values in the cells
5
a. Create four new worksheets: Data, Slide 2, Slide 3.
Wk 3 - Market Penetration Plan [due Mon]Top of FormBottom of F.docxhelzerpatrina
Wk 3 - Market Penetration Plan [due Mon]
Top of Form
Bottom of Form
Assignment Content
1.
Top of Form
Resource: Marketing Penetration Plan Grading Guide
Create a 700-word plan for market penetration of a 3-year period of time:
· Explain the major components of your marketing plan.
· Examine your distribution and pricing plans.
· Explain your business purpose.
· Explain your pricing strategy.
· Evaluate which type of advertising is the most beneficial to your business/product.
· Evaluate whether that type of advertising matches up to your offering and pricing, and whether you can afford it.
· Explain whether it fits your image of your business.
· Determine whether your customers will need to be educated about your business/product.
· Explain whether you will need to hire a marketing expert.
Format your assignment consistent with APA guidelines.
Submit your assignment.
Resources
· Center for Writing Excellence
· Reference and Citation Generator
· Grammar and Writing Guides
· Learning Team Toolkit
Bottom of Form
LESSON 8: Project Schedule Formatting Fundamentals
LESSON SKILL MATRIX
SKILLS
TASKS
Gantt Chart Formatting
Modify the Gantt Chart using the Bar Styles dialog box
Modify the Gantt Chart using Gantt Chart Styles
Modifying Text Appearance in a View
Modify the appearance of text in a view
Modify the appearance of a single piece of text
Creating Custom Fields
Create a custom text field
Creating and Editing Tables
Create a custom table
Creating Custom Views
Create a custom view
As a video production manager for Southridge Video and the project manager for the new Don Funk music video, you have the foundation of your project schedule in place. However, a project manager doesn’t usually look at all of the data in a project schedule at once. In this lesson, you will learn to use some of the tools in Microsoft Project 2013, such as views and reports, to look at the element or aspect of the project schedule in which you are currently interested. With these tools, you can significantly impact how your data appears by the way in which you change the data format to meet your needs.
KEY TERMS
Charts view
custom field
diagram view
forms view
sheets view
usage view
view
SOFTWARE ORIENTATION: Microsoft Project’s Bar Styles Dialog Box
In Microsoft Project, you can use the Bar Styles dialog box (see Figure 8-1) to customize the appearance of items on the Gantt Chart. This dialog box enables you to change the appearance of items such as task bars, milestones, summary bars, and text that appear on the Gantt Chart. You can change characteristics such as bar types, patterns, colors, splits, and shapes.
Figure 8-1: Bar Styles dialog box
You will now use one of the features of the ribbon interface in Project 2013, the Format ribbon. With this ribbon you have faster access to formatting options in views. You may have seen in the various views of previous lessons a tab at the very top of the screen, above the ribbon. This is the Format ribbon. This tab provide ...
Connect Conference 2022: Passive House - Economic and Environmental Solution...TE Studio
Passive House: The Economic and Environmental Solution for Sustainable Real Estate. Lecture by Tim Eian of TE Studio Passive House Design in November 2022 in Minneapolis.
- The Built Environment
- Let's imagine the perfect building
- The Passive House standard
- Why Passive House targets
- Clean Energy Plans?!
- How does Passive House compare and fit in?
- The business case for Passive House real estate
- Tools to quantify the value of Passive House
- What can I do?
- Resources
Technoblade The Legacy of a Minecraft Legend.Techno Merch
Technoblade, born Alex on June 1, 1999, was a legendary Minecraft YouTuber known for his sharp wit and exceptional PvP skills. Starting his channel in 2013, he gained nearly 11 million subscribers. His private battle with metastatic sarcoma ended in June 2022, but his enduring legacy continues to inspire millions.
White wonder, Work developed by Eva TschoppMansi Shah
White Wonder by Eva Tschopp
A tale about our culture around the use of fertilizers and pesticides visiting small farms around Ahmedabad in Matar and Shilaj.
Maximize Your Content with Beautiful Assets : Content & Asset for Landing Page pmgdscunsri
Figma is a cloud-based design tool widely used by designers for prototyping, UI/UX design, and real-time collaboration. With features such as precision pen tools, grid system, and reusable components, Figma makes it easy for teams to work together on design projects. Its flexibility and accessibility make Figma a top choice in the digital age.
Hello everyone! I am thrilled to present my latest portfolio on LinkedIn, marking the culmination of my architectural journey thus far. Over the span of five years, I've been fortunate to acquire a wealth of knowledge under the guidance of esteemed professors and industry mentors. From rigorous academic pursuits to practical engagements, each experience has contributed to my growth and refinement as an architecture student. This portfolio not only showcases my projects but also underscores my attention to detail and to innovative architecture as a profession.
Expert Accessory Dwelling Unit (ADU) Drafting ServicesResDraft
Whether you’re looking to create a guest house, a rental unit, or a private retreat, our experienced team will design a space that complements your existing home and maximizes your investment. We provide personalized, comprehensive expert accessory dwelling unit (ADU)drafting solutions tailored to your needs, ensuring a seamless process from concept to completion.
Expert Accessory Dwelling Unit (ADU) Drafting Services
Instructions sc ex16_8a
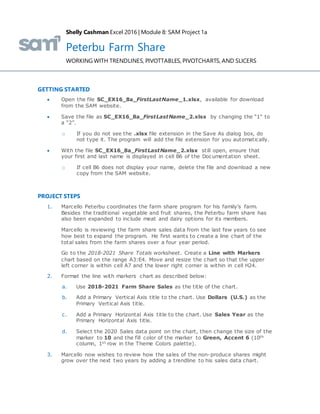
1. Shelly Cashman Excel 2016 | Module 8: SAM Project 1a
Peterbu Farm Share
WORKING WITH TRENDLINES, PIVOTTABLES, PIVOTCHARTS, AND SLICERS
GETTING STARTED
Open the file SC_EX16_8a_FirstLastName_1.xlsx, available for download
from the SAM website.
Save the file as SC_EX16_8a_FirstLastName_2.xlsx by changing the “1” to
a “2”.
o If you do not see the .xlsx file extension in the Save As dialog box, do
not type it. The program will add the file extension for you automatically.
With the file SC_EX16_8a_FirstLastName_2.xlsx still open, ensure that
your first and last name is displayed in cell B6 of the Documentation sheet.
o If cell B6 does not display your name, delete the file and download a new
copy from the SAM website.
PROJECT STEPS
1. Marcello Peterbu coordinates the farm share program for his family’s farm.
Besides the traditional vegetable and fruit shares, the Peterbu farm share has
also been expanded to include meat and dairy options for its members.
Marcello is reviewing the farm share sales data from the last few years to see
how best to expand the program. He first wants to create a line chart of the
total sales from the farm shares over a four year period.
Go to the 2018-2021 Share Totals worksheet. Create a Line with Markers
chart based on the range A3:E4. Move and resize the chart so that the upper
left corner is within cell A7 and the lower right corner is within in cell H24.
2. Format the line with markers chart as described below:
a. Use 2018-2021 Farm Share Sales as the title of the chart.
b. Add a Primary Vertical Axis title to the chart. Use Dollars (U.S.) as the
Primary Vertical Axis title.
c. Add a Primary Horizontal Axis title to the chart. Use Sales Year as the
Primary Horizontal Axis title.
d. Select the 2020 Sales data point on the chart, then change the size of the
marker to 10 and the fill color of the marker to Green, Accent 6 (10th
column, 1st row in the Theme Colors palette).
3. Marcello now wishes to review how the sales of the non-produce shares might
grow over the next two years by adding a trendline to his sales data chart.
2. Shelly Cashman Excel 2016 | Module 8: SAM Project 1a
Go to the Non-Produce Chart - Trends worksheet. Add a linear trendline to the
chart with the following options:
a. Set the trendline to forecast forward 2 periods.
b. Display the R-squared value on the chart.
4. Peterbu farm shares come in three different sizes: small, large, and regular (for
those shares without different size options). Marcello wants to visually display
how the sales of different share sizes have changed over time.
Go to the 2018-2021 Share Size Chart worksheet. Remove the Average Share
Cost series from the PivotChart.
5. Format the PivotChart as described below:
a. Change the format of all four data series to Cylinder.
b. Change the fill color of the Back Wall of the chart to Blue, Accent 1,
Lighter 80% (5th column, 2nd row in the Theme Colors palette) and fill
color of the Side Wall of the chart to Orange, Accent 2, Lighter 80%
(6th column, 2nd row in the Theme Colors palette).
6. Go to the 2018-2021 Share Sales worksheet. Select cell A4 and create a
PivotChart & PivotTable on a new worksheet as described below:
a. Use Share Size Pivot as the name of the worksheet.
b. If necessary, move the worksheet directly after the 2018-2021 Share Size
Chart worksheet.
c. Add the Share Size field to the Axis (Category) area of the Pivot Chart field
task pane.
d. Add the Share Type field to the Values area of the PivotChart field task
pane. (Hint: The field name will be updated to Count of Share Type.)
e. Move the PivotChart so that the upper left corner is located within cell A9
and the lower right corner is located within cell G23.
f. Use Share Options by Size as the title of the PivotChart.
g. Add a Primary Vertical Axis title to the PivotChart. Use Number of Share
Options as the Primary Vertical Axis title.
h. Add a Primary Horizontal Axis title to the PivotChart. Use Share Size as
the Primary Horizontal Axis title.
7. Customers can pick up their weekly farm shares at designated locations in
town. If Marcello decides to expand his program, he needs to know how each
location will be impacted by farm share pick up.
Go to the 2021 North Region Participants worksheet and select cell A4. Create a
blank PivotTable report in a new worksheet. (Hint: The PivotTable report should
be based on the table NorthRegion2021.)
a. Use North Pickup Location Report as the name of the worksheet.
b. Add the Pickup Location and Share Type (in that order) to the Rows area
of the PivotTable Fields task pane.
3. Shelly Cashman Excel 2016 | Module 8: SAM Project 1a
c. Add the Share Cost field to the Values area of the PivotTable Fields task
pane. (Hint: The name of the field will be updated to Sum of Share Cost.)
d. Apply the Currency number format, with 0 decimal places and $ as the
symbol, to the Sum of Share Cost field.
e. Add the Share Size field to the Filters area of the PivotTable Fields task
pane. Use the filter to display only records for L in the PivotTable report.
8. Return to the 2021 North Region Participants worksheet. Select cell A4 and
create a PivotChart directly from the data in that table in a new worksheet as
described below:
a. Use Season Size PivotChart as the name of the worksheet.
b. If necessary, move the worksheet directly after the 2021 North Region
Participants worksheet.
c. Add the Share Size field to the Legend (Series) area of the PivotChart
Fields task pane.
d. Add the Season field to the Axis (Category) area of the PivotChart Fields
task pane.
e. Add the Share Type field to the Values area of the PivotChart Fields task
pane. Use Shares Sold in North Region as the title of this field.
f. Move and resize the PivotChart so that the upper left corner is located
within cell G2 and the lower right corner is located within cell O18.
9. Marcello already created a PivotTable to determine how many sales were
associated with each pickup location. He now wishes to format the chart to
make it easier to read and determine the average sales per participant at each
location.
Go to the Location Report worksheet. Refresh the PivotTable report data. (Hint:
After refreshing the PivotTable data, the value in cell D18 should be 17410.)
10. Apply the Pivot Style Medium 14 to the PivotTable report.
11. Modify the Sum of Share Cost field as described below:
a. Summarize the values in the column using the AVERAGE function.
b. Use Average Sale per Share as the name of the field.
12. Modify the number format of the Total Share Sales field, so that the values
display in the Accounting number format, with 0 decimal places and $ as the
symbol.
13. Change the Report Layout so that the report is viewed in Outline Form.
14. Switch to the Sales Total Report worksheet. Each customer has purchased the
same farm share package each year they have participated in the program.
Add a new calculated field to the end of the PivotTable report to calculate the
cumulative share sales for each customer as described below:
a. Create a formula without using a function that multiplies the Share Cost
by the Years Participating. (Hint: The calculated field will automatically
be added to your PivotTable.)
4. Shelly Cashman Excel 2016 | Module 8: SAM Project 1a
b. Apply the Accounting number format, with 0 decimal places and the $
symbol, to the newly created column.
c. Use Cumulative Share Sales as the custom name of the field.
15. Go to the Share Type Report worksheet. Format the Season Slicer as described
below:
a. Format the Slicer using the Slicer Style Light 6.
b. Use the Slicer to filter the PivotTable report to display only data for the
Summer-Fall field.
16. Add another Slicer to the Model PivotTable report based on the Share Type
field, then complete the following actions:
a. Resize and reposition the Share Type Slicer, so that the upper left corner
is located within cell D10 and the lower right corner is located within cell
G26.
b. Format the Slicer using the Slicer Style Light 6.
c. Use the Slicer to filter the PivotTable report to display only data for Fruit,
Fruit & Vegetable, and Vegetable fields. (Hint: The PivotTable should
already be filtered using the Season Slicer.)
Your workbook should look like the Final Figures on the following pages. Save your
changes, close the workbook, and then exit Excel. Follow the directions on the SAM
website to submit your completed project.
Final Figure 1: 2018-2021 Share Totals Worksheet
5. Shelly Cashman Excel 2016 | Module 8: SAM Project 1a
Final Figure 2: Non-Produce Chart - Trends Worksheet
Final Figure 3: 2018-2021 Share Size Chart Worksheet
6. Shelly Cashman Excel 2016 | Module 8: SAM Project 1a
Final Figure 4: Share Size Pivot Worksheet
Final Figure 5: 2018-2021 Share Sales Worksheet
7. Shelly Cashman Excel 2016 | Module 8: SAM Project 1a
Final Figure 6: North Pickup Location Report Worksheet
Final Figure 7: Season Size PivotChart Worksheet
8. Shelly Cashman Excel 2016 | Module 8: SAM Project 1a
Final Figure 8: Location Report Worksheet
Final Figure 9: Sales Total Report Worksheet
9. Shelly Cashman Excel 2016 | Module 8: SAM Project 1a
Final Figure 10: Share Type Report Worksheet