
Recommended
More Related Content
What's hot
Viewers also liked
Viewers also liked (13)
Similar to Ies covarrubias manners survey
Similar to Ies covarrubias manners survey (10)
More from paginawebcovarrubias
More from paginawebcovarrubias (20)
Recently uploaded
Recently uploaded (20)
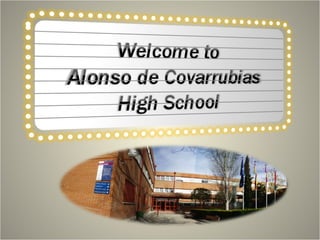
Ies covarrubias manners survey
- 2. At the table Hat or Cup Students Parents GrandParents
- 3. At the table E lbows on the table Students Parents GrandParents
- 4. At the table Wait for the others on the table Students Parents GrandParents
- 5. At the table To pull the chair out for the ladies. Students Parents GrandParents
- 6. At the table Cutlery: Fork Students Parents GrandParents
- 7. At the table Cutlery: Knife Students Parents GrandParents
- 8. WHILE HAVING A CONVERSATION Chewing gum Students Parents GrandParents
- 9. WHILE HAVING A CONVERSATION Hand in your pockets Students Parents GrandParents
- 10. WHILE HAVING A CONVERSATION If you were talking to someone that was smoking and you didn't like it, what was the polite way to ask him/her to stop? Students Parents GrandParents
- 11. WHILE HAVING A CONVERSATION To interrupt someone Students Parents GrandParents
- 12. WHILE HAVING A CONVERSATION Use bad word Students Parents GrandParents
- 13. GREETING PEOPLE Did boys/men use to raise their caps/hats when gretting other people or ladies? Students Parents GrandParents
- 14. GREETING PEOPLE When saying “Hello” to a friend, what gestures did you use to make? Students Parents GrandParents
- 15. GREETING PEOPLE What gestures did you use to make when meeting someone in formal circustances? Students Parents GrandParents
- 16. AT HOME Did you use to help your parents? Students Parents GrandParents
- 17. Students Parents GrandParents AT HOME Was it polite to kiss you boyfriend/girlfriend in front of you parents?
- 18. Students Parents GrandParents AT HOME When visiting someone, did you use to bring anything for him/her?
- 19. Students Parents GrandParents AT HOME How did you use to receive your guests?
- 20. POLITENESS TOWARDS OLD PEOPLE What did you use to do when, on the bus/train, you saw old people standing up? Students Parents GrandParents
- 21. POLITENESS TOWARDS OLD PEOPLE If you were entering a building and you were next to an old person, what would you do? Students Parents GrandParents
- 22. Students Parents GrandParents POLITENESS TOWARDS OLD PEOPLE If you saw an old person struggling to cross the street would you help him/her?
- 23. Students Parents GrandParents ON THE STREET Did you use to throw rubbish on the street?
- 24. Students Parents GrandParents ON THE STREET Did you ever pick up the rubbish thrown by someone else on the street?
- 25. Students Parents GrandParents ON THE STREET Was it acceptable to smoke on the street?
- 26. Students Parents GrandParents ON THE STREET If you saw a friend on the other side of the street, what was the polite way to make him/her notice you?
Editor's Notes
- For reproduction steps for this slide, refer to the PowerPoint template titled “Static text effects for PowerPoint slides” (STATIC_TEXT.potx), slide number 17.
- Custom animation effects: recolored picture with full-color section and motion path (Advanced) To reproduce the picture effects on this slide, do the following: On the Home tab, in the Slides group, click Layout and then click Blank . On the Insert tab, in the Illustrations group, click Picture . In the Insert Picture dialog box, select a picture, and then click Insert . Select the picture. Under Picture Tools , on the Format tab, in the bottom right corner of the Size group, click the Size and Position dialog box launcher. In the Size and Position dialog box, on the Size tab, resize or crop the picture as needed so that under Size and rotate , the Height box is set to 3.58” and the Width box is set to 8” . Resize the picture under Size and rotate by entering values into the Height and Width boxes. Crop the picture under Crop from by entering values into the Left , Right , Top , and Bottom boxes. Under Picture Tools , on the Format tab, in the Adjust group, click Recolor , and then under Dark Variations click Text color 2 Dark (first option from the left). Under Picture Tools , on the Format tab, in the Picture Styles group, click Picture Effects , point to Shadow , and then under Inner click Inside Diagonal Top Left (first row, first option from the left). Drag the picture so that it is positioned above the middle of the slide. On the Home tab, in the Clipboard group, click the arrow next to Paste , and then click Duplicate . Press and hold CTRL and select both pictures on the slide. On the Home tab, in the Drawing group, click Arrange , point to Align , and then do the following: Click Align to Slide . Click Align Center . Click Align Selected Objects . Click Align Middle . Click the slide background area to cancel the selection of both pictures. Select the duplicate (top) picture. Under Picture Tools , on the Format tab, in the bottom right corner of the Size group, click the Size and Position dialog box launcher. In the Size and Position dialog box, on the Size tab, under Crop from , enter values into the Left and Right boxes so that under Size and rotate , and the Width box is set to 2.33” . ( Note: For best results, crop the duplicate picture to tightly focus on a single element in the original picture.) Under Picture Tools , on the Format tab, in the Adjust group, click Recolor , and then under No Recolor click No Recolor . On the Home tab, in the Drawing group, click Shapes , and then under Rectangles click Rectangle (first option from the left). On the slide, drag to draw a rectangle. Select the rectangle. Under Drawing Tools , on the Format tab, in the Size group, do the following: In the Shape Height box, enter 7.5” . In the Shape Width box, enter 2.33” . Under Drawing Tools , on the Format tab, in the Shape Styles group, click the arrow next to Shape Fill , point to Gradient , and then click More Gradients . In the Format Shape dialog box, click Fill in the left pane, select Gradient fill in the Fill pane, and then do the following: In the Type list, select Linear . Click the button next to Direction , and then click Linear Down (first row, second option from the left). Under Gradient stops , click Add or Remove until two stops appear in the drop-down list. Also under Gradient stops , customize the gradient stops that you added as follows: Select Stop 1 from the list, and then do the following: In the Stop position box, enter 0% . Click the button next to Color , then under Theme Colors click White, Background 1 (first row, first option from the left). In the Transparency box, enter 55% . Select Stop 2 from the list, and then do the following: In the Stop position box, enter 100% . Click the button next to Color , and then under Theme Colors click White, Background 1 (first row, first option from the left). In the Transparency box, enter 100% . On the slide, drag the rectangle to cover the duplicate picture. Select the rectangle. On the Home tab, in the Drawing group, click Arrange , and then do the following: Point to Align , and then click Align to Slide . Point to Align , and then click Align Middle . Click Send Backward . On the Home tab, in the Drawing group, click Shapes , and then under Rectangles click Rectangle (first option from the left). On the slide, drag to draw another rectangle. Select the rectangle. Under Drawing Tools , on the Format tab, in the Size group, do the following: In the Shape Height box, enter 4” . In the Shape Width box, enter 2.67” . Under Drawing Tools , on the Format tab, in the Shape Styles group, click the arrow next to Shape Fill , point to Gradient , and then click More Gradients . In the Format Shape dialog box, click Fill in the left pane. In the Fill pane, select No fill . Also in the Format Shape dialog box, click Line Color in the left pane, select Solid line in the Line Color pane, and then do the following: Click the button next to Color , and then under Theme Colors click White, Background 1 (first row, first option from the left). In the Transparency box, enter 70% . Also in the Format Shape dialog box, click Line Style in the left pane, and then do the following in the Line Style pane: In the Width box, enter 0.75 pt . Click the button next to Dash type , and then click Square Dot (third option from the top). Drag the dotted rectangle on top of the small, full-color picture. Press and hold SHIFT and select the dotted rectangle, the small picture, and the large picture on the slide. On the Home tab, in the Drawing group, click Arrange , point to Align , and then do the following: Click Align Selected Objects . Click Align Middle . On the Insert tab, in the Text group, click Text Box , and then on the slide, drag to draw the text box. Enter text in the text box, select the text, and then on the Home tab, in the Font group, select Gill Sans MT Condensed from the Font list, select 24 from the Font Size list, click the button next to Font Color , and then under Theme Colors click White, Background 1 (first row, first option from the left). On the Home tab, in the Paragraph group, click Center to center the text within the text box. On the slide, drag the text box below the dotted rectangle. To reproduce the background effects on this slide, do the following: Right-click the slide background area, and then click Format Background . In the Format Background dialog box, click Fill in the left pane, and then select Solid fill in the Fill pane. Also in the Fill pane, click the button next to Color , and then under Theme Colors click Black, Text 1, Lighter 15% (fifth row, second option from the left). To reproduce the animation effects on this slide, do the following: To view the area beyond the slide, on the View tab, click Zoom , and then in the Zoom dialog box, in the Percent box, enter 70% . ( Note: Make sure that Fit is not selected in the Zoom dialog box.) On the Animations tab, in the Animations group, click Custom Animation . On the slide, select the dotted rectangle. In the Custom Animation task pane, click Add Effect , point to Motion Paths , point to Draw Custom Path , and then click Freeform . Press and hold SHIFT to conform the path to a straight, horizontal line, and then do the following on the slide: Click the center of the dotted rectangle to create the first motion-path point. Click approximately ½” beyond the right edge of the rectangle to create the second motion-path point. Double-click approximately 2” beyond the left edge of the slide to create the third and final motion-path point. On the slide, right-click the freeform motion path, and then click Reverse Path Direction . On the slide, select the freeform motion path. In the Custom Animation task pane, under Modify: Custom Path , in the Start list, select With Previous . On the slide, select the gradient-filled rectangle. In the Custom Animation task pane, do the following: Click Add Effect , point to Entrance , and then click More Effects . In the Add Entrance Effect dialog box, under Subtle , click Fade , and then click OK . Under Modify: Fade , in the Start list, select With Previous . Under Modify: Fade , in the Speed list, select Very Fast . Click Add Effect , point to Motion Paths , and then click Down . Under Modify: Down , in the Start list, select With Previous . Under Modify: Down , in the Speed list, select Medium . On the slide, right-click the down motion path and click Reverse Path Direction . On the slide, select the smaller, full-color picture. In the Custom Animation task pane, do the following: Click Add Effect , point to Entrance , and then click More Effects . In the Add Entrance Effect dialog box, under Subtle , click Fade , and then click OK . Under Modify: Fade , in the Start list, select With Previous . Under Modify: Fade , in the Speed list, select Very Fast . Right-click the picture fade effect in the pane, and then click Timing . In the Fade dialog box, on the Timing tab, in the Delay box, enter 1.5 . On the slide, select the text box. In the Custom Animation task pane, do the following: Click Add Effect , point to Entrance , and then click More Effects . In the Add Entrance Effect dialog box, under Moderate , click Descend , and then click OK . Under Modify: Descend , in the Start list, select With Previous . Under Modify: Descend , in the Speed list, select Fast .
- Custom animation effects: recolored picture with full-color section and motion path (Advanced) To reproduce the picture effects on this slide, do the following: On the Home tab, in the Slides group, click Layout and then click Blank . On the Insert tab, in the Illustrations group, click Picture . In the Insert Picture dialog box, select a picture, and then click Insert . Select the picture. Under Picture Tools , on the Format tab, in the bottom right corner of the Size group, click the Size and Position dialog box launcher. In the Size and Position dialog box, on the Size tab, resize or crop the picture as needed so that under Size and rotate , the Height box is set to 3.58” and the Width box is set to 8” . Resize the picture under Size and rotate by entering values into the Height and Width boxes. Crop the picture under Crop from by entering values into the Left , Right , Top , and Bottom boxes. Under Picture Tools , on the Format tab, in the Adjust group, click Recolor , and then under Dark Variations click Text color 2 Dark (first option from the left). Under Picture Tools , on the Format tab, in the Picture Styles group, click Picture Effects , point to Shadow , and then under Inner click Inside Diagonal Top Left (first row, first option from the left). Drag the picture so that it is positioned above the middle of the slide. On the Home tab, in the Clipboard group, click the arrow next to Paste , and then click Duplicate . Press and hold CTRL and select both pictures on the slide. On the Home tab, in the Drawing group, click Arrange , point to Align , and then do the following: Click Align to Slide . Click Align Center . Click Align Selected Objects . Click Align Middle . Click the slide background area to cancel the selection of both pictures. Select the duplicate (top) picture. Under Picture Tools , on the Format tab, in the bottom right corner of the Size group, click the Size and Position dialog box launcher. In the Size and Position dialog box, on the Size tab, under Crop from , enter values into the Left and Right boxes so that under Size and rotate , and the Width box is set to 2.33” . ( Note: For best results, crop the duplicate picture to tightly focus on a single element in the original picture.) Under Picture Tools , on the Format tab, in the Adjust group, click Recolor , and then under No Recolor click No Recolor . On the Home tab, in the Drawing group, click Shapes , and then under Rectangles click Rectangle (first option from the left). On the slide, drag to draw a rectangle. Select the rectangle. Under Drawing Tools , on the Format tab, in the Size group, do the following: In the Shape Height box, enter 7.5” . In the Shape Width box, enter 2.33” . Under Drawing Tools , on the Format tab, in the Shape Styles group, click the arrow next to Shape Fill , point to Gradient , and then click More Gradients . In the Format Shape dialog box, click Fill in the left pane, select Gradient fill in the Fill pane, and then do the following: In the Type list, select Linear . Click the button next to Direction , and then click Linear Down (first row, second option from the left). Under Gradient stops , click Add or Remove until two stops appear in the drop-down list. Also under Gradient stops , customize the gradient stops that you added as follows: Select Stop 1 from the list, and then do the following: In the Stop position box, enter 0% . Click the button next to Color , then under Theme Colors click White, Background 1 (first row, first option from the left). In the Transparency box, enter 55% . Select Stop 2 from the list, and then do the following: In the Stop position box, enter 100% . Click the button next to Color , and then under Theme Colors click White, Background 1 (first row, first option from the left). In the Transparency box, enter 100% . On the slide, drag the rectangle to cover the duplicate picture. Select the rectangle. On the Home tab, in the Drawing group, click Arrange , and then do the following: Point to Align , and then click Align to Slide . Point to Align , and then click Align Middle . Click Send Backward . On the Home tab, in the Drawing group, click Shapes , and then under Rectangles click Rectangle (first option from the left). On the slide, drag to draw another rectangle. Select the rectangle. Under Drawing Tools , on the Format tab, in the Size group, do the following: In the Shape Height box, enter 4” . In the Shape Width box, enter 2.67” . Under Drawing Tools , on the Format tab, in the Shape Styles group, click the arrow next to Shape Fill , point to Gradient , and then click More Gradients . In the Format Shape dialog box, click Fill in the left pane. In the Fill pane, select No fill . Also in the Format Shape dialog box, click Line Color in the left pane, select Solid line in the Line Color pane, and then do the following: Click the button next to Color , and then under Theme Colors click White, Background 1 (first row, first option from the left). In the Transparency box, enter 70% . Also in the Format Shape dialog box, click Line Style in the left pane, and then do the following in the Line Style pane: In the Width box, enter 0.75 pt . Click the button next to Dash type , and then click Square Dot (third option from the top). Drag the dotted rectangle on top of the small, full-color picture. Press and hold SHIFT and select the dotted rectangle, the small picture, and the large picture on the slide. On the Home tab, in the Drawing group, click Arrange , point to Align , and then do the following: Click Align Selected Objects . Click Align Middle . On the Insert tab, in the Text group, click Text Box , and then on the slide, drag to draw the text box. Enter text in the text box, select the text, and then on the Home tab, in the Font group, select Gill Sans MT Condensed from the Font list, select 24 from the Font Size list, click the button next to Font Color , and then under Theme Colors click White, Background 1 (first row, first option from the left). On the Home tab, in the Paragraph group, click Center to center the text within the text box. On the slide, drag the text box below the dotted rectangle. To reproduce the background effects on this slide, do the following: Right-click the slide background area, and then click Format Background . In the Format Background dialog box, click Fill in the left pane, and then select Solid fill in the Fill pane. Also in the Fill pane, click the button next to Color , and then under Theme Colors click Black, Text 1, Lighter 15% (fifth row, second option from the left). To reproduce the animation effects on this slide, do the following: To view the area beyond the slide, on the View tab, click Zoom , and then in the Zoom dialog box, in the Percent box, enter 70% . ( Note: Make sure that Fit is not selected in the Zoom dialog box.) On the Animations tab, in the Animations group, click Custom Animation . On the slide, select the dotted rectangle. In the Custom Animation task pane, click Add Effect , point to Motion Paths , point to Draw Custom Path , and then click Freeform . Press and hold SHIFT to conform the path to a straight, horizontal line, and then do the following on the slide: Click the center of the dotted rectangle to create the first motion-path point. Click approximately ½” beyond the right edge of the rectangle to create the second motion-path point. Double-click approximately 2” beyond the left edge of the slide to create the third and final motion-path point. On the slide, right-click the freeform motion path, and then click Reverse Path Direction . On the slide, select the freeform motion path. In the Custom Animation task pane, under Modify: Custom Path , in the Start list, select With Previous . On the slide, select the gradient-filled rectangle. In the Custom Animation task pane, do the following: Click Add Effect , point to Entrance , and then click More Effects . In the Add Entrance Effect dialog box, under Subtle , click Fade , and then click OK . Under Modify: Fade , in the Start list, select With Previous . Under Modify: Fade , in the Speed list, select Very Fast . Click Add Effect , point to Motion Paths , and then click Down . Under Modify: Down , in the Start list, select With Previous . Under Modify: Down , in the Speed list, select Medium . On the slide, right-click the down motion path and click Reverse Path Direction . On the slide, select the smaller, full-color picture. In the Custom Animation task pane, do the following: Click Add Effect , point to Entrance , and then click More Effects . In the Add Entrance Effect dialog box, under Subtle , click Fade , and then click OK . Under Modify: Fade , in the Start list, select With Previous . Under Modify: Fade , in the Speed list, select Very Fast . Right-click the picture fade effect in the pane, and then click Timing . In the Fade dialog box, on the Timing tab, in the Delay box, enter 1.5 . On the slide, select the text box. In the Custom Animation task pane, do the following: Click Add Effect , point to Entrance , and then click More Effects . In the Add Entrance Effect dialog box, under Moderate , click Descend , and then click OK . Under Modify: Descend , in the Start list, select With Previous . Under Modify: Descend , in the Speed list, select Fast .
- Custom animation effects: recolored picture with full-color section and motion path (Advanced) To reproduce the picture effects on this slide, do the following: On the Home tab, in the Slides group, click Layout and then click Blank . On the Insert tab, in the Illustrations group, click Picture . In the Insert Picture dialog box, select a picture, and then click Insert . Select the picture. Under Picture Tools , on the Format tab, in the bottom right corner of the Size group, click the Size and Position dialog box launcher. In the Size and Position dialog box, on the Size tab, resize or crop the picture as needed so that under Size and rotate , the Height box is set to 3.58” and the Width box is set to 8” . Resize the picture under Size and rotate by entering values into the Height and Width boxes. Crop the picture under Crop from by entering values into the Left , Right , Top , and Bottom boxes. Under Picture Tools , on the Format tab, in the Adjust group, click Recolor , and then under Dark Variations click Text color 2 Dark (first option from the left). Under Picture Tools , on the Format tab, in the Picture Styles group, click Picture Effects , point to Shadow , and then under Inner click Inside Diagonal Top Left (first row, first option from the left). Drag the picture so that it is positioned above the middle of the slide. On the Home tab, in the Clipboard group, click the arrow next to Paste , and then click Duplicate . Press and hold CTRL and select both pictures on the slide. On the Home tab, in the Drawing group, click Arrange , point to Align , and then do the following: Click Align to Slide . Click Align Center . Click Align Selected Objects . Click Align Middle . Click the slide background area to cancel the selection of both pictures. Select the duplicate (top) picture. Under Picture Tools , on the Format tab, in the bottom right corner of the Size group, click the Size and Position dialog box launcher. In the Size and Position dialog box, on the Size tab, under Crop from , enter values into the Left and Right boxes so that under Size and rotate , and the Width box is set to 2.33” . ( Note: For best results, crop the duplicate picture to tightly focus on a single element in the original picture.) Under Picture Tools , on the Format tab, in the Adjust group, click Recolor , and then under No Recolor click No Recolor . On the Home tab, in the Drawing group, click Shapes , and then under Rectangles click Rectangle (first option from the left). On the slide, drag to draw a rectangle. Select the rectangle. Under Drawing Tools , on the Format tab, in the Size group, do the following: In the Shape Height box, enter 7.5” . In the Shape Width box, enter 2.33” . Under Drawing Tools , on the Format tab, in the Shape Styles group, click the arrow next to Shape Fill , point to Gradient , and then click More Gradients . In the Format Shape dialog box, click Fill in the left pane, select Gradient fill in the Fill pane, and then do the following: In the Type list, select Linear . Click the button next to Direction , and then click Linear Down (first row, second option from the left). Under Gradient stops , click Add or Remove until two stops appear in the drop-down list. Also under Gradient stops , customize the gradient stops that you added as follows: Select Stop 1 from the list, and then do the following: In the Stop position box, enter 0% . Click the button next to Color , then under Theme Colors click White, Background 1 (first row, first option from the left). In the Transparency box, enter 55% . Select Stop 2 from the list, and then do the following: In the Stop position box, enter 100% . Click the button next to Color , and then under Theme Colors click White, Background 1 (first row, first option from the left). In the Transparency box, enter 100% . On the slide, drag the rectangle to cover the duplicate picture. Select the rectangle. On the Home tab, in the Drawing group, click Arrange , and then do the following: Point to Align , and then click Align to Slide . Point to Align , and then click Align Middle . Click Send Backward . On the Home tab, in the Drawing group, click Shapes , and then under Rectangles click Rectangle (first option from the left). On the slide, drag to draw another rectangle. Select the rectangle. Under Drawing Tools , on the Format tab, in the Size group, do the following: In the Shape Height box, enter 4” . In the Shape Width box, enter 2.67” . Under Drawing Tools , on the Format tab, in the Shape Styles group, click the arrow next to Shape Fill , point to Gradient , and then click More Gradients . In the Format Shape dialog box, click Fill in the left pane. In the Fill pane, select No fill . Also in the Format Shape dialog box, click Line Color in the left pane, select Solid line in the Line Color pane, and then do the following: Click the button next to Color , and then under Theme Colors click White, Background 1 (first row, first option from the left). In the Transparency box, enter 70% . Also in the Format Shape dialog box, click Line Style in the left pane, and then do the following in the Line Style pane: In the Width box, enter 0.75 pt . Click the button next to Dash type , and then click Square Dot (third option from the top). Drag the dotted rectangle on top of the small, full-color picture. Press and hold SHIFT and select the dotted rectangle, the small picture, and the large picture on the slide. On the Home tab, in the Drawing group, click Arrange , point to Align , and then do the following: Click Align Selected Objects . Click Align Middle . On the Insert tab, in the Text group, click Text Box , and then on the slide, drag to draw the text box. Enter text in the text box, select the text, and then on the Home tab, in the Font group, select Gill Sans MT Condensed from the Font list, select 24 from the Font Size list, click the button next to Font Color , and then under Theme Colors click White, Background 1 (first row, first option from the left). On the Home tab, in the Paragraph group, click Center to center the text within the text box. On the slide, drag the text box below the dotted rectangle. To reproduce the background effects on this slide, do the following: Right-click the slide background area, and then click Format Background . In the Format Background dialog box, click Fill in the left pane, and then select Solid fill in the Fill pane. Also in the Fill pane, click the button next to Color , and then under Theme Colors click Black, Text 1, Lighter 15% (fifth row, second option from the left). To reproduce the animation effects on this slide, do the following: To view the area beyond the slide, on the View tab, click Zoom , and then in the Zoom dialog box, in the Percent box, enter 70% . ( Note: Make sure that Fit is not selected in the Zoom dialog box.) On the Animations tab, in the Animations group, click Custom Animation . On the slide, select the dotted rectangle. In the Custom Animation task pane, click Add Effect , point to Motion Paths , point to Draw Custom Path , and then click Freeform . Press and hold SHIFT to conform the path to a straight, horizontal line, and then do the following on the slide: Click the center of the dotted rectangle to create the first motion-path point. Click approximately ½” beyond the right edge of the rectangle to create the second motion-path point. Double-click approximately 2” beyond the left edge of the slide to create the third and final motion-path point. On the slide, right-click the freeform motion path, and then click Reverse Path Direction . On the slide, select the freeform motion path. In the Custom Animation task pane, under Modify: Custom Path , in the Start list, select With Previous . On the slide, select the gradient-filled rectangle. In the Custom Animation task pane, do the following: Click Add Effect , point to Entrance , and then click More Effects . In the Add Entrance Effect dialog box, under Subtle , click Fade , and then click OK . Under Modify: Fade , in the Start list, select With Previous . Under Modify: Fade , in the Speed list, select Very Fast . Click Add Effect , point to Motion Paths , and then click Down . Under Modify: Down , in the Start list, select With Previous . Under Modify: Down , in the Speed list, select Medium . On the slide, right-click the down motion path and click Reverse Path Direction . On the slide, select the smaller, full-color picture. In the Custom Animation task pane, do the following: Click Add Effect , point to Entrance , and then click More Effects . In the Add Entrance Effect dialog box, under Subtle , click Fade , and then click OK . Under Modify: Fade , in the Start list, select With Previous . Under Modify: Fade , in the Speed list, select Very Fast . Right-click the picture fade effect in the pane, and then click Timing . In the Fade dialog box, on the Timing tab, in the Delay box, enter 1.5 . On the slide, select the text box. In the Custom Animation task pane, do the following: Click Add Effect , point to Entrance , and then click More Effects . In the Add Entrance Effect dialog box, under Moderate , click Descend , and then click OK . Under Modify: Descend , in the Start list, select With Previous . Under Modify: Descend , in the Speed list, select Fast .
- Custom animation effects: recolored picture with full-color section and motion path (Advanced) To reproduce the picture effects on this slide, do the following: On the Home tab, in the Slides group, click Layout and then click Blank . On the Insert tab, in the Illustrations group, click Picture . In the Insert Picture dialog box, select a picture, and then click Insert . Select the picture. Under Picture Tools , on the Format tab, in the bottom right corner of the Size group, click the Size and Position dialog box launcher. In the Size and Position dialog box, on the Size tab, resize or crop the picture as needed so that under Size and rotate , the Height box is set to 3.58” and the Width box is set to 8” . Resize the picture under Size and rotate by entering values into the Height and Width boxes. Crop the picture under Crop from by entering values into the Left , Right , Top , and Bottom boxes. Under Picture Tools , on the Format tab, in the Adjust group, click Recolor , and then under Dark Variations click Text color 2 Dark (first option from the left). Under Picture Tools , on the Format tab, in the Picture Styles group, click Picture Effects , point to Shadow , and then under Inner click Inside Diagonal Top Left (first row, first option from the left). Drag the picture so that it is positioned above the middle of the slide. On the Home tab, in the Clipboard group, click the arrow next to Paste , and then click Duplicate . Press and hold CTRL and select both pictures on the slide. On the Home tab, in the Drawing group, click Arrange , point to Align , and then do the following: Click Align to Slide . Click Align Center . Click Align Selected Objects . Click Align Middle . Click the slide background area to cancel the selection of both pictures. Select the duplicate (top) picture. Under Picture Tools , on the Format tab, in the bottom right corner of the Size group, click the Size and Position dialog box launcher. In the Size and Position dialog box, on the Size tab, under Crop from , enter values into the Left and Right boxes so that under Size and rotate , and the Width box is set to 2.33” . ( Note: For best results, crop the duplicate picture to tightly focus on a single element in the original picture.) Under Picture Tools , on the Format tab, in the Adjust group, click Recolor , and then under No Recolor click No Recolor . On the Home tab, in the Drawing group, click Shapes , and then under Rectangles click Rectangle (first option from the left). On the slide, drag to draw a rectangle. Select the rectangle. Under Drawing Tools , on the Format tab, in the Size group, do the following: In the Shape Height box, enter 7.5” . In the Shape Width box, enter 2.33” . Under Drawing Tools , on the Format tab, in the Shape Styles group, click the arrow next to Shape Fill , point to Gradient , and then click More Gradients . In the Format Shape dialog box, click Fill in the left pane, select Gradient fill in the Fill pane, and then do the following: In the Type list, select Linear . Click the button next to Direction , and then click Linear Down (first row, second option from the left). Under Gradient stops , click Add or Remove until two stops appear in the drop-down list. Also under Gradient stops , customize the gradient stops that you added as follows: Select Stop 1 from the list, and then do the following: In the Stop position box, enter 0% . Click the button next to Color , then under Theme Colors click White, Background 1 (first row, first option from the left). In the Transparency box, enter 55% . Select Stop 2 from the list, and then do the following: In the Stop position box, enter 100% . Click the button next to Color , and then under Theme Colors click White, Background 1 (first row, first option from the left). In the Transparency box, enter 100% . On the slide, drag the rectangle to cover the duplicate picture. Select the rectangle. On the Home tab, in the Drawing group, click Arrange , and then do the following: Point to Align , and then click Align to Slide . Point to Align , and then click Align Middle . Click Send Backward . On the Home tab, in the Drawing group, click Shapes , and then under Rectangles click Rectangle (first option from the left). On the slide, drag to draw another rectangle. Select the rectangle. Under Drawing Tools , on the Format tab, in the Size group, do the following: In the Shape Height box, enter 4” . In the Shape Width box, enter 2.67” . Under Drawing Tools , on the Format tab, in the Shape Styles group, click the arrow next to Shape Fill , point to Gradient , and then click More Gradients . In the Format Shape dialog box, click Fill in the left pane. In the Fill pane, select No fill . Also in the Format Shape dialog box, click Line Color in the left pane, select Solid line in the Line Color pane, and then do the following: Click the button next to Color , and then under Theme Colors click White, Background 1 (first row, first option from the left). In the Transparency box, enter 70% . Also in the Format Shape dialog box, click Line Style in the left pane, and then do the following in the Line Style pane: In the Width box, enter 0.75 pt . Click the button next to Dash type , and then click Square Dot (third option from the top). Drag the dotted rectangle on top of the small, full-color picture. Press and hold SHIFT and select the dotted rectangle, the small picture, and the large picture on the slide. On the Home tab, in the Drawing group, click Arrange , point to Align , and then do the following: Click Align Selected Objects . Click Align Middle . On the Insert tab, in the Text group, click Text Box , and then on the slide, drag to draw the text box. Enter text in the text box, select the text, and then on the Home tab, in the Font group, select Gill Sans MT Condensed from the Font list, select 24 from the Font Size list, click the button next to Font Color , and then under Theme Colors click White, Background 1 (first row, first option from the left). On the Home tab, in the Paragraph group, click Center to center the text within the text box. On the slide, drag the text box below the dotted rectangle. To reproduce the background effects on this slide, do the following: Right-click the slide background area, and then click Format Background . In the Format Background dialog box, click Fill in the left pane, and then select Solid fill in the Fill pane. Also in the Fill pane, click the button next to Color , and then under Theme Colors click Black, Text 1, Lighter 15% (fifth row, second option from the left). To reproduce the animation effects on this slide, do the following: To view the area beyond the slide, on the View tab, click Zoom , and then in the Zoom dialog box, in the Percent box, enter 70% . ( Note: Make sure that Fit is not selected in the Zoom dialog box.) On the Animations tab, in the Animations group, click Custom Animation . On the slide, select the dotted rectangle. In the Custom Animation task pane, click Add Effect , point to Motion Paths , point to Draw Custom Path , and then click Freeform . Press and hold SHIFT to conform the path to a straight, horizontal line, and then do the following on the slide: Click the center of the dotted rectangle to create the first motion-path point. Click approximately ½” beyond the right edge of the rectangle to create the second motion-path point. Double-click approximately 2” beyond the left edge of the slide to create the third and final motion-path point. On the slide, right-click the freeform motion path, and then click Reverse Path Direction . On the slide, select the freeform motion path. In the Custom Animation task pane, under Modify: Custom Path , in the Start list, select With Previous . On the slide, select the gradient-filled rectangle. In the Custom Animation task pane, do the following: Click Add Effect , point to Entrance , and then click More Effects . In the Add Entrance Effect dialog box, under Subtle , click Fade , and then click OK . Under Modify: Fade , in the Start list, select With Previous . Under Modify: Fade , in the Speed list, select Very Fast . Click Add Effect , point to Motion Paths , and then click Down . Under Modify: Down , in the Start list, select With Previous . Under Modify: Down , in the Speed list, select Medium . On the slide, right-click the down motion path and click Reverse Path Direction . On the slide, select the smaller, full-color picture. In the Custom Animation task pane, do the following: Click Add Effect , point to Entrance , and then click More Effects . In the Add Entrance Effect dialog box, under Subtle , click Fade , and then click OK . Under Modify: Fade , in the Start list, select With Previous . Under Modify: Fade , in the Speed list, select Very Fast . Right-click the picture fade effect in the pane, and then click Timing . In the Fade dialog box, on the Timing tab, in the Delay box, enter 1.5 . On the slide, select the text box. In the Custom Animation task pane, do the following: Click Add Effect , point to Entrance , and then click More Effects . In the Add Entrance Effect dialog box, under Moderate , click Descend , and then click OK . Under Modify: Descend , in the Start list, select With Previous . Under Modify: Descend , in the Speed list, select Fast .
- Custom animation effects: recolored picture with full-color section and motion path (Advanced) To reproduce the picture effects on this slide, do the following: On the Home tab, in the Slides group, click Layout and then click Blank . On the Insert tab, in the Illustrations group, click Picture . In the Insert Picture dialog box, select a picture, and then click Insert . Select the picture. Under Picture Tools , on the Format tab, in the bottom right corner of the Size group, click the Size and Position dialog box launcher. In the Size and Position dialog box, on the Size tab, resize or crop the picture as needed so that under Size and rotate , the Height box is set to 3.58” and the Width box is set to 8” . Resize the picture under Size and rotate by entering values into the Height and Width boxes. Crop the picture under Crop from by entering values into the Left , Right , Top , and Bottom boxes. Under Picture Tools , on the Format tab, in the Adjust group, click Recolor , and then under Dark Variations click Text color 2 Dark (first option from the left). Under Picture Tools , on the Format tab, in the Picture Styles group, click Picture Effects , point to Shadow , and then under Inner click Inside Diagonal Top Left (first row, first option from the left). Drag the picture so that it is positioned above the middle of the slide. On the Home tab, in the Clipboard group, click the arrow next to Paste , and then click Duplicate . Press and hold CTRL and select both pictures on the slide. On the Home tab, in the Drawing group, click Arrange , point to Align , and then do the following: Click Align to Slide . Click Align Center . Click Align Selected Objects . Click Align Middle . Click the slide background area to cancel the selection of both pictures. Select the duplicate (top) picture. Under Picture Tools , on the Format tab, in the bottom right corner of the Size group, click the Size and Position dialog box launcher. In the Size and Position dialog box, on the Size tab, under Crop from , enter values into the Left and Right boxes so that under Size and rotate , and the Width box is set to 2.33” . ( Note: For best results, crop the duplicate picture to tightly focus on a single element in the original picture.) Under Picture Tools , on the Format tab, in the Adjust group, click Recolor , and then under No Recolor click No Recolor . On the Home tab, in the Drawing group, click Shapes , and then under Rectangles click Rectangle (first option from the left). On the slide, drag to draw a rectangle. Select the rectangle. Under Drawing Tools , on the Format tab, in the Size group, do the following: In the Shape Height box, enter 7.5” . In the Shape Width box, enter 2.33” . Under Drawing Tools , on the Format tab, in the Shape Styles group, click the arrow next to Shape Fill , point to Gradient , and then click More Gradients . In the Format Shape dialog box, click Fill in the left pane, select Gradient fill in the Fill pane, and then do the following: In the Type list, select Linear . Click the button next to Direction , and then click Linear Down (first row, second option from the left). Under Gradient stops , click Add or Remove until two stops appear in the drop-down list. Also under Gradient stops , customize the gradient stops that you added as follows: Select Stop 1 from the list, and then do the following: In the Stop position box, enter 0% . Click the button next to Color , then under Theme Colors click White, Background 1 (first row, first option from the left). In the Transparency box, enter 55% . Select Stop 2 from the list, and then do the following: In the Stop position box, enter 100% . Click the button next to Color , and then under Theme Colors click White, Background 1 (first row, first option from the left). In the Transparency box, enter 100% . On the slide, drag the rectangle to cover the duplicate picture. Select the rectangle. On the Home tab, in the Drawing group, click Arrange , and then do the following: Point to Align , and then click Align to Slide . Point to Align , and then click Align Middle . Click Send Backward . On the Home tab, in the Drawing group, click Shapes , and then under Rectangles click Rectangle (first option from the left). On the slide, drag to draw another rectangle. Select the rectangle. Under Drawing Tools , on the Format tab, in the Size group, do the following: In the Shape Height box, enter 4” . In the Shape Width box, enter 2.67” . Under Drawing Tools , on the Format tab, in the Shape Styles group, click the arrow next to Shape Fill , point to Gradient , and then click More Gradients . In the Format Shape dialog box, click Fill in the left pane. In the Fill pane, select No fill . Also in the Format Shape dialog box, click Line Color in the left pane, select Solid line in the Line Color pane, and then do the following: Click the button next to Color , and then under Theme Colors click White, Background 1 (first row, first option from the left). In the Transparency box, enter 70% . Also in the Format Shape dialog box, click Line Style in the left pane, and then do the following in the Line Style pane: In the Width box, enter 0.75 pt . Click the button next to Dash type , and then click Square Dot (third option from the top). Drag the dotted rectangle on top of the small, full-color picture. Press and hold SHIFT and select the dotted rectangle, the small picture, and the large picture on the slide. On the Home tab, in the Drawing group, click Arrange , point to Align , and then do the following: Click Align Selected Objects . Click Align Middle . On the Insert tab, in the Text group, click Text Box , and then on the slide, drag to draw the text box. Enter text in the text box, select the text, and then on the Home tab, in the Font group, select Gill Sans MT Condensed from the Font list, select 24 from the Font Size list, click the button next to Font Color , and then under Theme Colors click White, Background 1 (first row, first option from the left). On the Home tab, in the Paragraph group, click Center to center the text within the text box. On the slide, drag the text box below the dotted rectangle. To reproduce the background effects on this slide, do the following: Right-click the slide background area, and then click Format Background . In the Format Background dialog box, click Fill in the left pane, and then select Solid fill in the Fill pane. Also in the Fill pane, click the button next to Color , and then under Theme Colors click Black, Text 1, Lighter 15% (fifth row, second option from the left). To reproduce the animation effects on this slide, do the following: To view the area beyond the slide, on the View tab, click Zoom , and then in the Zoom dialog box, in the Percent box, enter 70% . ( Note: Make sure that Fit is not selected in the Zoom dialog box.) On the Animations tab, in the Animations group, click Custom Animation . On the slide, select the dotted rectangle. In the Custom Animation task pane, click Add Effect , point to Motion Paths , point to Draw Custom Path , and then click Freeform . Press and hold SHIFT to conform the path to a straight, horizontal line, and then do the following on the slide: Click the center of the dotted rectangle to create the first motion-path point. Click approximately ½” beyond the right edge of the rectangle to create the second motion-path point. Double-click approximately 2” beyond the left edge of the slide to create the third and final motion-path point. On the slide, right-click the freeform motion path, and then click Reverse Path Direction . On the slide, select the freeform motion path. In the Custom Animation task pane, under Modify: Custom Path , in the Start list, select With Previous . On the slide, select the gradient-filled rectangle. In the Custom Animation task pane, do the following: Click Add Effect , point to Entrance , and then click More Effects . In the Add Entrance Effect dialog box, under Subtle , click Fade , and then click OK . Under Modify: Fade , in the Start list, select With Previous . Under Modify: Fade , in the Speed list, select Very Fast . Click Add Effect , point to Motion Paths , and then click Down . Under Modify: Down , in the Start list, select With Previous . Under Modify: Down , in the Speed list, select Medium . On the slide, right-click the down motion path and click Reverse Path Direction . On the slide, select the smaller, full-color picture. In the Custom Animation task pane, do the following: Click Add Effect , point to Entrance , and then click More Effects . In the Add Entrance Effect dialog box, under Subtle , click Fade , and then click OK . Under Modify: Fade , in the Start list, select With Previous . Under Modify: Fade , in the Speed list, select Very Fast . Right-click the picture fade effect in the pane, and then click Timing . In the Fade dialog box, on the Timing tab, in the Delay box, enter 1.5 . On the slide, select the text box. In the Custom Animation task pane, do the following: Click Add Effect , point to Entrance , and then click More Effects . In the Add Entrance Effect dialog box, under Moderate , click Descend , and then click OK . Under Modify: Descend , in the Start list, select With Previous . Under Modify: Descend , in the Speed list, select Fast .
- Custom animation effects: recolored picture with full-color section and motion path (Advanced) To reproduce the picture effects on this slide, do the following: On the Home tab, in the Slides group, click Layout and then click Blank . On the Insert tab, in the Illustrations group, click Picture . In the Insert Picture dialog box, select a picture, and then click Insert . Select the picture. Under Picture Tools , on the Format tab, in the bottom right corner of the Size group, click the Size and Position dialog box launcher. In the Size and Position dialog box, on the Size tab, resize or crop the picture as needed so that under Size and rotate , the Height box is set to 3.58” and the Width box is set to 8” . Resize the picture under Size and rotate by entering values into the Height and Width boxes. Crop the picture under Crop from by entering values into the Left , Right , Top , and Bottom boxes. Under Picture Tools , on the Format tab, in the Adjust group, click Recolor , and then under Dark Variations click Text color 2 Dark (first option from the left). Under Picture Tools , on the Format tab, in the Picture Styles group, click Picture Effects , point to Shadow , and then under Inner click Inside Diagonal Top Left (first row, first option from the left). Drag the picture so that it is positioned above the middle of the slide. On the Home tab, in the Clipboard group, click the arrow next to Paste , and then click Duplicate . Press and hold CTRL and select both pictures on the slide. On the Home tab, in the Drawing group, click Arrange , point to Align , and then do the following: Click Align to Slide . Click Align Center . Click Align Selected Objects . Click Align Middle . Click the slide background area to cancel the selection of both pictures. Select the duplicate (top) picture. Under Picture Tools , on the Format tab, in the bottom right corner of the Size group, click the Size and Position dialog box launcher. In the Size and Position dialog box, on the Size tab, under Crop from , enter values into the Left and Right boxes so that under Size and rotate , and the Width box is set to 2.33” . ( Note: For best results, crop the duplicate picture to tightly focus on a single element in the original picture.) Under Picture Tools , on the Format tab, in the Adjust group, click Recolor , and then under No Recolor click No Recolor . On the Home tab, in the Drawing group, click Shapes , and then under Rectangles click Rectangle (first option from the left). On the slide, drag to draw a rectangle. Select the rectangle. Under Drawing Tools , on the Format tab, in the Size group, do the following: In the Shape Height box, enter 7.5” . In the Shape Width box, enter 2.33” . Under Drawing Tools , on the Format tab, in the Shape Styles group, click the arrow next to Shape Fill , point to Gradient , and then click More Gradients . In the Format Shape dialog box, click Fill in the left pane, select Gradient fill in the Fill pane, and then do the following: In the Type list, select Linear . Click the button next to Direction , and then click Linear Down (first row, second option from the left). Under Gradient stops , click Add or Remove until two stops appear in the drop-down list. Also under Gradient stops , customize the gradient stops that you added as follows: Select Stop 1 from the list, and then do the following: In the Stop position box, enter 0% . Click the button next to Color , then under Theme Colors click White, Background 1 (first row, first option from the left). In the Transparency box, enter 55% . Select Stop 2 from the list, and then do the following: In the Stop position box, enter 100% . Click the button next to Color , and then under Theme Colors click White, Background 1 (first row, first option from the left). In the Transparency box, enter 100% . On the slide, drag the rectangle to cover the duplicate picture. Select the rectangle. On the Home tab, in the Drawing group, click Arrange , and then do the following: Point to Align , and then click Align to Slide . Point to Align , and then click Align Middle . Click Send Backward . On the Home tab, in the Drawing group, click Shapes , and then under Rectangles click Rectangle (first option from the left). On the slide, drag to draw another rectangle. Select the rectangle. Under Drawing Tools , on the Format tab, in the Size group, do the following: In the Shape Height box, enter 4” . In the Shape Width box, enter 2.67” . Under Drawing Tools , on the Format tab, in the Shape Styles group, click the arrow next to Shape Fill , point to Gradient , and then click More Gradients . In the Format Shape dialog box, click Fill in the left pane. In the Fill pane, select No fill . Also in the Format Shape dialog box, click Line Color in the left pane, select Solid line in the Line Color pane, and then do the following: Click the button next to Color , and then under Theme Colors click White, Background 1 (first row, first option from the left). In the Transparency box, enter 70% . Also in the Format Shape dialog box, click Line Style in the left pane, and then do the following in the Line Style pane: In the Width box, enter 0.75 pt . Click the button next to Dash type , and then click Square Dot (third option from the top). Drag the dotted rectangle on top of the small, full-color picture. Press and hold SHIFT and select the dotted rectangle, the small picture, and the large picture on the slide. On the Home tab, in the Drawing group, click Arrange , point to Align , and then do the following: Click Align Selected Objects . Click Align Middle . On the Insert tab, in the Text group, click Text Box , and then on the slide, drag to draw the text box. Enter text in the text box, select the text, and then on the Home tab, in the Font group, select Gill Sans MT Condensed from the Font list, select 24 from the Font Size list, click the button next to Font Color , and then under Theme Colors click White, Background 1 (first row, first option from the left). On the Home tab, in the Paragraph group, click Center to center the text within the text box. On the slide, drag the text box below the dotted rectangle. To reproduce the background effects on this slide, do the following: Right-click the slide background area, and then click Format Background . In the Format Background dialog box, click Fill in the left pane, and then select Solid fill in the Fill pane. Also in the Fill pane, click the button next to Color , and then under Theme Colors click Black, Text 1, Lighter 15% (fifth row, second option from the left). To reproduce the animation effects on this slide, do the following: To view the area beyond the slide, on the View tab, click Zoom , and then in the Zoom dialog box, in the Percent box, enter 70% . ( Note: Make sure that Fit is not selected in the Zoom dialog box.) On the Animations tab, in the Animations group, click Custom Animation . On the slide, select the dotted rectangle. In the Custom Animation task pane, click Add Effect , point to Motion Paths , point to Draw Custom Path , and then click Freeform . Press and hold SHIFT to conform the path to a straight, horizontal line, and then do the following on the slide: Click the center of the dotted rectangle to create the first motion-path point. Click approximately ½” beyond the right edge of the rectangle to create the second motion-path point. Double-click approximately 2” beyond the left edge of the slide to create the third and final motion-path point. On the slide, right-click the freeform motion path, and then click Reverse Path Direction . On the slide, select the freeform motion path. In the Custom Animation task pane, under Modify: Custom Path , in the Start list, select With Previous . On the slide, select the gradient-filled rectangle. In the Custom Animation task pane, do the following: Click Add Effect , point to Entrance , and then click More Effects . In the Add Entrance Effect dialog box, under Subtle , click Fade , and then click OK . Under Modify: Fade , in the Start list, select With Previous . Under Modify: Fade , in the Speed list, select Very Fast . Click Add Effect , point to Motion Paths , and then click Down . Under Modify: Down , in the Start list, select With Previous . Under Modify: Down , in the Speed list, select Medium . On the slide, right-click the down motion path and click Reverse Path Direction . On the slide, select the smaller, full-color picture. In the Custom Animation task pane, do the following: Click Add Effect , point to Entrance , and then click More Effects . In the Add Entrance Effect dialog box, under Subtle , click Fade , and then click OK . Under Modify: Fade , in the Start list, select With Previous . Under Modify: Fade , in the Speed list, select Very Fast . Right-click the picture fade effect in the pane, and then click Timing . In the Fade dialog box, on the Timing tab, in the Delay box, enter 1.5 . On the slide, select the text box. In the Custom Animation task pane, do the following: Click Add Effect , point to Entrance , and then click More Effects . In the Add Entrance Effect dialog box, under Moderate , click Descend , and then click OK . Under Modify: Descend , in the Start list, select With Previous . Under Modify: Descend , in the Speed list, select Fast .
- Custom animation effects: recolored picture with full-color section and motion path (Advanced) To reproduce the picture effects on this slide, do the following: On the Home tab, in the Slides group, click Layout and then click Blank . On the Insert tab, in the Illustrations group, click Picture . In the Insert Picture dialog box, select a picture, and then click Insert . Select the picture. Under Picture Tools , on the Format tab, in the bottom right corner of the Size group, click the Size and Position dialog box launcher. In the Size and Position dialog box, on the Size tab, resize or crop the picture as needed so that under Size and rotate , the Height box is set to 3.58” and the Width box is set to 8” . Resize the picture under Size and rotate by entering values into the Height and Width boxes. Crop the picture under Crop from by entering values into the Left , Right , Top , and Bottom boxes. Under Picture Tools , on the Format tab, in the Adjust group, click Recolor , and then under Dark Variations click Text color 2 Dark (first option from the left). Under Picture Tools , on the Format tab, in the Picture Styles group, click Picture Effects , point to Shadow , and then under Inner click Inside Diagonal Top Left (first row, first option from the left). Drag the picture so that it is positioned above the middle of the slide. On the Home tab, in the Clipboard group, click the arrow next to Paste , and then click Duplicate . Press and hold CTRL and select both pictures on the slide. On the Home tab, in the Drawing group, click Arrange , point to Align , and then do the following: Click Align to Slide . Click Align Center . Click Align Selected Objects . Click Align Middle . Click the slide background area to cancel the selection of both pictures. Select the duplicate (top) picture. Under Picture Tools , on the Format tab, in the bottom right corner of the Size group, click the Size and Position dialog box launcher. In the Size and Position dialog box, on the Size tab, under Crop from , enter values into the Left and Right boxes so that under Size and rotate , and the Width box is set to 2.33” . ( Note: For best results, crop the duplicate picture to tightly focus on a single element in the original picture.) Under Picture Tools , on the Format tab, in the Adjust group, click Recolor , and then under No Recolor click No Recolor . On the Home tab, in the Drawing group, click Shapes , and then under Rectangles click Rectangle (first option from the left). On the slide, drag to draw a rectangle. Select the rectangle. Under Drawing Tools , on the Format tab, in the Size group, do the following: In the Shape Height box, enter 7.5” . In the Shape Width box, enter 2.33” . Under Drawing Tools , on the Format tab, in the Shape Styles group, click the arrow next to Shape Fill , point to Gradient , and then click More Gradients . In the Format Shape dialog box, click Fill in the left pane, select Gradient fill in the Fill pane, and then do the following: In the Type list, select Linear . Click the button next to Direction , and then click Linear Down (first row, second option from the left). Under Gradient stops , click Add or Remove until two stops appear in the drop-down list. Also under Gradient stops , customize the gradient stops that you added as follows: Select Stop 1 from the list, and then do the following: In the Stop position box, enter 0% . Click the button next to Color , then under Theme Colors click White, Background 1 (first row, first option from the left). In the Transparency box, enter 55% . Select Stop 2 from the list, and then do the following: In the Stop position box, enter 100% . Click the button next to Color , and then under Theme Colors click White, Background 1 (first row, first option from the left). In the Transparency box, enter 100% . On the slide, drag the rectangle to cover the duplicate picture. Select the rectangle. On the Home tab, in the Drawing group, click Arrange , and then do the following: Point to Align , and then click Align to Slide . Point to Align , and then click Align Middle . Click Send Backward . On the Home tab, in the Drawing group, click Shapes , and then under Rectangles click Rectangle (first option from the left). On the slide, drag to draw another rectangle. Select the rectangle. Under Drawing Tools , on the Format tab, in the Size group, do the following: In the Shape Height box, enter 4” . In the Shape Width box, enter 2.67” . Under Drawing Tools , on the Format tab, in the Shape Styles group, click the arrow next to Shape Fill , point to Gradient , and then click More Gradients . In the Format Shape dialog box, click Fill in the left pane. In the Fill pane, select No fill . Also in the Format Shape dialog box, click Line Color in the left pane, select Solid line in the Line Color pane, and then do the following: Click the button next to Color , and then under Theme Colors click White, Background 1 (first row, first option from the left). In the Transparency box, enter 70% . Also in the Format Shape dialog box, click Line Style in the left pane, and then do the following in the Line Style pane: In the Width box, enter 0.75 pt . Click the button next to Dash type , and then click Square Dot (third option from the top). Drag the dotted rectangle on top of the small, full-color picture. Press and hold SHIFT and select the dotted rectangle, the small picture, and the large picture on the slide. On the Home tab, in the Drawing group, click Arrange , point to Align , and then do the following: Click Align Selected Objects . Click Align Middle . On the Insert tab, in the Text group, click Text Box , and then on the slide, drag to draw the text box. Enter text in the text box, select the text, and then on the Home tab, in the Font group, select Gill Sans MT Condensed from the Font list, select 24 from the Font Size list, click the button next to Font Color , and then under Theme Colors click White, Background 1 (first row, first option from the left). On the Home tab, in the Paragraph group, click Center to center the text within the text box. On the slide, drag the text box below the dotted rectangle. To reproduce the background effects on this slide, do the following: Right-click the slide background area, and then click Format Background . In the Format Background dialog box, click Fill in the left pane, and then select Solid fill in the Fill pane. Also in the Fill pane, click the button next to Color , and then under Theme Colors click Black, Text 1, Lighter 15% (fifth row, second option from the left). To reproduce the animation effects on this slide, do the following: To view the area beyond the slide, on the View tab, click Zoom , and then in the Zoom dialog box, in the Percent box, enter 70% . ( Note: Make sure that Fit is not selected in the Zoom dialog box.) On the Animations tab, in the Animations group, click Custom Animation . On the slide, select the dotted rectangle. In the Custom Animation task pane, click Add Effect , point to Motion Paths , point to Draw Custom Path , and then click Freeform . Press and hold SHIFT to conform the path to a straight, horizontal line, and then do the following on the slide: Click the center of the dotted rectangle to create the first motion-path point. Click approximately ½” beyond the right edge of the rectangle to create the second motion-path point. Double-click approximately 2” beyond the left edge of the slide to create the third and final motion-path point. On the slide, right-click the freeform motion path, and then click Reverse Path Direction . On the slide, select the freeform motion path. In the Custom Animation task pane, under Modify: Custom Path , in the Start list, select With Previous . On the slide, select the gradient-filled rectangle. In the Custom Animation task pane, do the following: Click Add Effect , point to Entrance , and then click More Effects . In the Add Entrance Effect dialog box, under Subtle , click Fade , and then click OK . Under Modify: Fade , in the Start list, select With Previous . Under Modify: Fade , in the Speed list, select Very Fast . Click Add Effect , point to Motion Paths , and then click Down . Under Modify: Down , in the Start list, select With Previous . Under Modify: Down , in the Speed list, select Medium . On the slide, right-click the down motion path and click Reverse Path Direction . On the slide, select the smaller, full-color picture. In the Custom Animation task pane, do the following: Click Add Effect , point to Entrance , and then click More Effects . In the Add Entrance Effect dialog box, under Subtle , click Fade , and then click OK . Under Modify: Fade , in the Start list, select With Previous . Under Modify: Fade , in the Speed list, select Very Fast . Right-click the picture fade effect in the pane, and then click Timing . In the Fade dialog box, on the Timing tab, in the Delay box, enter 1.5 . On the slide, select the text box. In the Custom Animation task pane, do the following: Click Add Effect , point to Entrance , and then click More Effects . In the Add Entrance Effect dialog box, under Moderate , click Descend , and then click OK . Under Modify: Descend , in the Start list, select With Previous . Under Modify: Descend , in the Speed list, select Fast .
- Custom animation effects: recolored picture with full-color section and motion path (Advanced) To reproduce the picture effects on this slide, do the following: On the Home tab, in the Slides group, click Layout and then click Blank . On the Insert tab, in the Illustrations group, click Picture . In the Insert Picture dialog box, select a picture, and then click Insert . Select the picture. Under Picture Tools , on the Format tab, in the bottom right corner of the Size group, click the Size and Position dialog box launcher. In the Size and Position dialog box, on the Size tab, resize or crop the picture as needed so that under Size and rotate , the Height box is set to 3.58” and the Width box is set to 8” . Resize the picture under Size and rotate by entering values into the Height and Width boxes. Crop the picture under Crop from by entering values into the Left , Right , Top , and Bottom boxes. Under Picture Tools , on the Format tab, in the Adjust group, click Recolor , and then under Dark Variations click Text color 2 Dark (first option from the left). Under Picture Tools , on the Format tab, in the Picture Styles group, click Picture Effects , point to Shadow , and then under Inner click Inside Diagonal Top Left (first row, first option from the left). Drag the picture so that it is positioned above the middle of the slide. On the Home tab, in the Clipboard group, click the arrow next to Paste , and then click Duplicate . Press and hold CTRL and select both pictures on the slide. On the Home tab, in the Drawing group, click Arrange , point to Align , and then do the following: Click Align to Slide . Click Align Center . Click Align Selected Objects . Click Align Middle . Click the slide background area to cancel the selection of both pictures. Select the duplicate (top) picture. Under Picture Tools , on the Format tab, in the bottom right corner of the Size group, click the Size and Position dialog box launcher. In the Size and Position dialog box, on the Size tab, under Crop from , enter values into the Left and Right boxes so that under Size and rotate , and the Width box is set to 2.33” . ( Note: For best results, crop the duplicate picture to tightly focus on a single element in the original picture.) Under Picture Tools , on the Format tab, in the Adjust group, click Recolor , and then under No Recolor click No Recolor . On the Home tab, in the Drawing group, click Shapes , and then under Rectangles click Rectangle (first option from the left). On the slide, drag to draw a rectangle. Select the rectangle. Under Drawing Tools , on the Format tab, in the Size group, do the following: In the Shape Height box, enter 7.5” . In the Shape Width box, enter 2.33” . Under Drawing Tools , on the Format tab, in the Shape Styles group, click the arrow next to Shape Fill , point to Gradient , and then click More Gradients . In the Format Shape dialog box, click Fill in the left pane, select Gradient fill in the Fill pane, and then do the following: In the Type list, select Linear . Click the button next to Direction , and then click Linear Down (first row, second option from the left). Under Gradient stops , click Add or Remove until two stops appear in the drop-down list. Also under Gradient stops , customize the gradient stops that you added as follows: Select Stop 1 from the list, and then do the following: In the Stop position box, enter 0% . Click the button next to Color , then under Theme Colors click White, Background 1 (first row, first option from the left). In the Transparency box, enter 55% . Select Stop 2 from the list, and then do the following: In the Stop position box, enter 100% . Click the button next to Color , and then under Theme Colors click White, Background 1 (first row, first option from the left). In the Transparency box, enter 100% . On the slide, drag the rectangle to cover the duplicate picture. Select the rectangle. On the Home tab, in the Drawing group, click Arrange , and then do the following: Point to Align , and then click Align to Slide . Point to Align , and then click Align Middle . Click Send Backward . On the Home tab, in the Drawing group, click Shapes , and then under Rectangles click Rectangle (first option from the left). On the slide, drag to draw another rectangle. Select the rectangle. Under Drawing Tools , on the Format tab, in the Size group, do the following: In the Shape Height box, enter 4” . In the Shape Width box, enter 2.67” . Under Drawing Tools , on the Format tab, in the Shape Styles group, click the arrow next to Shape Fill , point to Gradient , and then click More Gradients . In the Format Shape dialog box, click Fill in the left pane. In the Fill pane, select No fill . Also in the Format Shape dialog box, click Line Color in the left pane, select Solid line in the Line Color pane, and then do the following: Click the button next to Color , and then under Theme Colors click White, Background 1 (first row, first option from the left). In the Transparency box, enter 70% . Also in the Format Shape dialog box, click Line Style in the left pane, and then do the following in the Line Style pane: In the Width box, enter 0.75 pt . Click the button next to Dash type , and then click Square Dot (third option from the top). Drag the dotted rectangle on top of the small, full-color picture. Press and hold SHIFT and select the dotted rectangle, the small picture, and the large picture on the slide. On the Home tab, in the Drawing group, click Arrange , point to Align , and then do the following: Click Align Selected Objects . Click Align Middle . On the Insert tab, in the Text group, click Text Box , and then on the slide, drag to draw the text box. Enter text in the text box, select the text, and then on the Home tab, in the Font group, select Gill Sans MT Condensed from the Font list, select 24 from the Font Size list, click the button next to Font Color , and then under Theme Colors click White, Background 1 (first row, first option from the left). On the Home tab, in the Paragraph group, click Center to center the text within the text box. On the slide, drag the text box below the dotted rectangle. To reproduce the background effects on this slide, do the following: Right-click the slide background area, and then click Format Background . In the Format Background dialog box, click Fill in the left pane, and then select Solid fill in the Fill pane. Also in the Fill pane, click the button next to Color , and then under Theme Colors click Black, Text 1, Lighter 15% (fifth row, second option from the left). To reproduce the animation effects on this slide, do the following: To view the area beyond the slide, on the View tab, click Zoom , and then in the Zoom dialog box, in the Percent box, enter 70% . ( Note: Make sure that Fit is not selected in the Zoom dialog box.) On the Animations tab, in the Animations group, click Custom Animation . On the slide, select the dotted rectangle. In the Custom Animation task pane, click Add Effect , point to Motion Paths , point to Draw Custom Path , and then click Freeform . Press and hold SHIFT to conform the path to a straight, horizontal line, and then do the following on the slide: Click the center of the dotted rectangle to create the first motion-path point. Click approximately ½” beyond the right edge of the rectangle to create the second motion-path point. Double-click approximately 2” beyond the left edge of the slide to create the third and final motion-path point. On the slide, right-click the freeform motion path, and then click Reverse Path Direction . On the slide, select the freeform motion path. In the Custom Animation task pane, under Modify: Custom Path , in the Start list, select With Previous . On the slide, select the gradient-filled rectangle. In the Custom Animation task pane, do the following: Click Add Effect , point to Entrance , and then click More Effects . In the Add Entrance Effect dialog box, under Subtle , click Fade , and then click OK . Under Modify: Fade , in the Start list, select With Previous . Under Modify: Fade , in the Speed list, select Very Fast . Click Add Effect , point to Motion Paths , and then click Down . Under Modify: Down , in the Start list, select With Previous . Under Modify: Down , in the Speed list, select Medium . On the slide, right-click the down motion path and click Reverse Path Direction . On the slide, select the smaller, full-color picture. In the Custom Animation task pane, do the following: Click Add Effect , point to Entrance , and then click More Effects . In the Add Entrance Effect dialog box, under Subtle , click Fade , and then click OK . Under Modify: Fade , in the Start list, select With Previous . Under Modify: Fade , in the Speed list, select Very Fast . Right-click the picture fade effect in the pane, and then click Timing . In the Fade dialog box, on the Timing tab, in the Delay box, enter 1.5 . On the slide, select the text box. In the Custom Animation task pane, do the following: Click Add Effect , point to Entrance , and then click More Effects . In the Add Entrance Effect dialog box, under Moderate , click Descend , and then click OK . Under Modify: Descend , in the Start list, select With Previous . Under Modify: Descend , in the Speed list, select Fast .
- Custom animation effects: recolored picture with full-color section and motion path (Advanced) To reproduce the picture effects on this slide, do the following: On the Home tab, in the Slides group, click Layout and then click Blank . On the Insert tab, in the Illustrations group, click Picture . In the Insert Picture dialog box, select a picture, and then click Insert . Select the picture. Under Picture Tools , on the Format tab, in the bottom right corner of the Size group, click the Size and Position dialog box launcher. In the Size and Position dialog box, on the Size tab, resize or crop the picture as needed so that under Size and rotate , the Height box is set to 3.58” and the Width box is set to 8” . Resize the picture under Size and rotate by entering values into the Height and Width boxes. Crop the picture under Crop from by entering values into the Left , Right , Top , and Bottom boxes. Under Picture Tools , on the Format tab, in the Adjust group, click Recolor , and then under Dark Variations click Text color 2 Dark (first option from the left). Under Picture Tools , on the Format tab, in the Picture Styles group, click Picture Effects , point to Shadow , and then under Inner click Inside Diagonal Top Left (first row, first option from the left). Drag the picture so that it is positioned above the middle of the slide. On the Home tab, in the Clipboard group, click the arrow next to Paste , and then click Duplicate . Press and hold CTRL and select both pictures on the slide. On the Home tab, in the Drawing group, click Arrange , point to Align , and then do the following: Click Align to Slide . Click Align Center . Click Align Selected Objects . Click Align Middle . Click the slide background area to cancel the selection of both pictures. Select the duplicate (top) picture. Under Picture Tools , on the Format tab, in the bottom right corner of the Size group, click the Size and Position dialog box launcher. In the Size and Position dialog box, on the Size tab, under Crop from , enter values into the Left and Right boxes so that under Size and rotate , and the Width box is set to 2.33” . ( Note: For best results, crop the duplicate picture to tightly focus on a single element in the original picture.) Under Picture Tools , on the Format tab, in the Adjust group, click Recolor , and then under No Recolor click No Recolor . On the Home tab, in the Drawing group, click Shapes , and then under Rectangles click Rectangle (first option from the left). On the slide, drag to draw a rectangle. Select the rectangle. Under Drawing Tools , on the Format tab, in the Size group, do the following: In the Shape Height box, enter 7.5” . In the Shape Width box, enter 2.33” . Under Drawing Tools , on the Format tab, in the Shape Styles group, click the arrow next to Shape Fill , point to Gradient , and then click More Gradients . In the Format Shape dialog box, click Fill in the left pane, select Gradient fill in the Fill pane, and then do the following: In the Type list, select Linear . Click the button next to Direction , and then click Linear Down (first row, second option from the left). Under Gradient stops , click Add or Remove until two stops appear in the drop-down list. Also under Gradient stops , customize the gradient stops that you added as follows: Select Stop 1 from the list, and then do the following: In the Stop position box, enter 0% . Click the button next to Color , then under Theme Colors click White, Background 1 (first row, first option from the left). In the Transparency box, enter 55% . Select Stop 2 from the list, and then do the following: In the Stop position box, enter 100% . Click the button next to Color , and then under Theme Colors click White, Background 1 (first row, first option from the left). In the Transparency box, enter 100% . On the slide, drag the rectangle to cover the duplicate picture. Select the rectangle. On the Home tab, in the Drawing group, click Arrange , and then do the following: Point to Align , and then click Align to Slide . Point to Align , and then click Align Middle . Click Send Backward . On the Home tab, in the Drawing group, click Shapes , and then under Rectangles click Rectangle (first option from the left). On the slide, drag to draw another rectangle. Select the rectangle. Under Drawing Tools , on the Format tab, in the Size group, do the following: In the Shape Height box, enter 4” . In the Shape Width box, enter 2.67” . Under Drawing Tools , on the Format tab, in the Shape Styles group, click the arrow next to Shape Fill , point to Gradient , and then click More Gradients . In the Format Shape dialog box, click Fill in the left pane. In the Fill pane, select No fill . Also in the Format Shape dialog box, click Line Color in the left pane, select Solid line in the Line Color pane, and then do the following: Click the button next to Color , and then under Theme Colors click White, Background 1 (first row, first option from the left). In the Transparency box, enter 70% . Also in the Format Shape dialog box, click Line Style in the left pane, and then do the following in the Line Style pane: In the Width box, enter 0.75 pt . Click the button next to Dash type , and then click Square Dot (third option from the top). Drag the dotted rectangle on top of the small, full-color picture. Press and hold SHIFT and select the dotted rectangle, the small picture, and the large picture on the slide. On the Home tab, in the Drawing group, click Arrange , point to Align , and then do the following: Click Align Selected Objects . Click Align Middle . On the Insert tab, in the Text group, click Text Box , and then on the slide, drag to draw the text box. Enter text in the text box, select the text, and then on the Home tab, in the Font group, select Gill Sans MT Condensed from the Font list, select 24 from the Font Size list, click the button next to Font Color , and then under Theme Colors click White, Background 1 (first row, first option from the left). On the Home tab, in the Paragraph group, click Center to center the text within the text box. On the slide, drag the text box below the dotted rectangle. To reproduce the background effects on this slide, do the following: Right-click the slide background area, and then click Format Background . In the Format Background dialog box, click Fill in the left pane, and then select Solid fill in the Fill pane. Also in the Fill pane, click the button next to Color , and then under Theme Colors click Black, Text 1, Lighter 15% (fifth row, second option from the left). To reproduce the animation effects on this slide, do the following: To view the area beyond the slide, on the View tab, click Zoom , and then in the Zoom dialog box, in the Percent box, enter 70% . ( Note: Make sure that Fit is not selected in the Zoom dialog box.) On the Animations tab, in the Animations group, click Custom Animation . On the slide, select the dotted rectangle. In the Custom Animation task pane, click Add Effect , point to Motion Paths , point to Draw Custom Path , and then click Freeform . Press and hold SHIFT to conform the path to a straight, horizontal line, and then do the following on the slide: Click the center of the dotted rectangle to create the first motion-path point. Click approximately ½” beyond the right edge of the rectangle to create the second motion-path point. Double-click approximately 2” beyond the left edge of the slide to create the third and final motion-path point. On the slide, right-click the freeform motion path, and then click Reverse Path Direction . On the slide, select the freeform motion path. In the Custom Animation task pane, under Modify: Custom Path , in the Start list, select With Previous . On the slide, select the gradient-filled rectangle. In the Custom Animation task pane, do the following: Click Add Effect , point to Entrance , and then click More Effects . In the Add Entrance Effect dialog box, under Subtle , click Fade , and then click OK . Under Modify: Fade , in the Start list, select With Previous . Under Modify: Fade , in the Speed list, select Very Fast . Click Add Effect , point to Motion Paths , and then click Down . Under Modify: Down , in the Start list, select With Previous . Under Modify: Down , in the Speed list, select Medium . On the slide, right-click the down motion path and click Reverse Path Direction . On the slide, select the smaller, full-color picture. In the Custom Animation task pane, do the following: Click Add Effect , point to Entrance , and then click More Effects . In the Add Entrance Effect dialog box, under Subtle , click Fade , and then click OK . Under Modify: Fade , in the Start list, select With Previous . Under Modify: Fade , in the Speed list, select Very Fast . Right-click the picture fade effect in the pane, and then click Timing . In the Fade dialog box, on the Timing tab, in the Delay box, enter 1.5 . On the slide, select the text box. In the Custom Animation task pane, do the following: Click Add Effect , point to Entrance , and then click More Effects . In the Add Entrance Effect dialog box, under Moderate , click Descend , and then click OK . Under Modify: Descend , in the Start list, select With Previous . Under Modify: Descend , in the Speed list, select Fast .
- Custom animation effects: recolored picture with full-color section and motion path (Advanced) To reproduce the picture effects on this slide, do the following: On the Home tab, in the Slides group, click Layout and then click Blank . On the Insert tab, in the Illustrations group, click Picture . In the Insert Picture dialog box, select a picture, and then click Insert . Select the picture. Under Picture Tools , on the Format tab, in the bottom right corner of the Size group, click the Size and Position dialog box launcher. In the Size and Position dialog box, on the Size tab, resize or crop the picture as needed so that under Size and rotate , the Height box is set to 3.58” and the Width box is set to 8” . Resize the picture under Size and rotate by entering values into the Height and Width boxes. Crop the picture under Crop from by entering values into the Left , Right , Top , and Bottom boxes. Under Picture Tools , on the Format tab, in the Adjust group, click Recolor , and then under Dark Variations click Text color 2 Dark (first option from the left). Under Picture Tools , on the Format tab, in the Picture Styles group, click Picture Effects , point to Shadow , and then under Inner click Inside Diagonal Top Left (first row, first option from the left). Drag the picture so that it is positioned above the middle of the slide. On the Home tab, in the Clipboard group, click the arrow next to Paste , and then click Duplicate . Press and hold CTRL and select both pictures on the slide. On the Home tab, in the Drawing group, click Arrange , point to Align , and then do the following: Click Align to Slide . Click Align Center . Click Align Selected Objects . Click Align Middle . Click the slide background area to cancel the selection of both pictures. Select the duplicate (top) picture. Under Picture Tools , on the Format tab, in the bottom right corner of the Size group, click the Size and Position dialog box launcher. In the Size and Position dialog box, on the Size tab, under Crop from , enter values into the Left and Right boxes so that under Size and rotate , and the Width box is set to 2.33” . ( Note: For best results, crop the duplicate picture to tightly focus on a single element in the original picture.) Under Picture Tools , on the Format tab, in the Adjust group, click Recolor , and then under No Recolor click No Recolor . On the Home tab, in the Drawing group, click Shapes , and then under Rectangles click Rectangle (first option from the left). On the slide, drag to draw a rectangle. Select the rectangle. Under Drawing Tools , on the Format tab, in the Size group, do the following: In the Shape Height box, enter 7.5” . In the Shape Width box, enter 2.33” . Under Drawing Tools , on the Format tab, in the Shape Styles group, click the arrow next to Shape Fill , point to Gradient , and then click More Gradients . In the Format Shape dialog box, click Fill in the left pane, select Gradient fill in the Fill pane, and then do the following: In the Type list, select Linear . Click the button next to Direction , and then click Linear Down (first row, second option from the left). Under Gradient stops , click Add or Remove until two stops appear in the drop-down list. Also under Gradient stops , customize the gradient stops that you added as follows: Select Stop 1 from the list, and then do the following: In the Stop position box, enter 0% . Click the button next to Color , then under Theme Colors click White, Background 1 (first row, first option from the left). In the Transparency box, enter 55% . Select Stop 2 from the list, and then do the following: In the Stop position box, enter 100% . Click the button next to Color , and then under Theme Colors click White, Background 1 (first row, first option from the left). In the Transparency box, enter 100% . On the slide, drag the rectangle to cover the duplicate picture. Select the rectangle. On the Home tab, in the Drawing group, click Arrange , and then do the following: Point to Align , and then click Align to Slide . Point to Align , and then click Align Middle . Click Send Backward . On the Home tab, in the Drawing group, click Shapes , and then under Rectangles click Rectangle (first option from the left). On the slide, drag to draw another rectangle. Select the rectangle. Under Drawing Tools , on the Format tab, in the Size group, do the following: In the Shape Height box, enter 4” . In the Shape Width box, enter 2.67” . Under Drawing Tools , on the Format tab, in the Shape Styles group, click the arrow next to Shape Fill , point to Gradient , and then click More Gradients . In the Format Shape dialog box, click Fill in the left pane. In the Fill pane, select No fill . Also in the Format Shape dialog box, click Line Color in the left pane, select Solid line in the Line Color pane, and then do the following: Click the button next to Color , and then under Theme Colors click White, Background 1 (first row, first option from the left). In the Transparency box, enter 70% . Also in the Format Shape dialog box, click Line Style in the left pane, and then do the following in the Line Style pane: In the Width box, enter 0.75 pt . Click the button next to Dash type , and then click Square Dot (third option from the top). Drag the dotted rectangle on top of the small, full-color picture. Press and hold SHIFT and select the dotted rectangle, the small picture, and the large picture on the slide. On the Home tab, in the Drawing group, click Arrange , point to Align , and then do the following: Click Align Selected Objects . Click Align Middle . On the Insert tab, in the Text group, click Text Box , and then on the slide, drag to draw the text box. Enter text in the text box, select the text, and then on the Home tab, in the Font group, select Gill Sans MT Condensed from the Font list, select 24 from the Font Size list, click the button next to Font Color , and then under Theme Colors click White, Background 1 (first row, first option from the left). On the Home tab, in the Paragraph group, click Center to center the text within the text box. On the slide, drag the text box below the dotted rectangle. To reproduce the background effects on this slide, do the following: Right-click the slide background area, and then click Format Background . In the Format Background dialog box, click Fill in the left pane, and then select Solid fill in the Fill pane. Also in the Fill pane, click the button next to Color , and then under Theme Colors click Black, Text 1, Lighter 15% (fifth row, second option from the left). To reproduce the animation effects on this slide, do the following: To view the area beyond the slide, on the View tab, click Zoom , and then in the Zoom dialog box, in the Percent box, enter 70% . ( Note: Make sure that Fit is not selected in the Zoom dialog box.) On the Animations tab, in the Animations group, click Custom Animation . On the slide, select the dotted rectangle. In the Custom Animation task pane, click Add Effect , point to Motion Paths , point to Draw Custom Path , and then click Freeform . Press and hold SHIFT to conform the path to a straight, horizontal line, and then do the following on the slide: Click the center of the dotted rectangle to create the first motion-path point. Click approximately ½” beyond the right edge of the rectangle to create the second motion-path point. Double-click approximately 2” beyond the left edge of the slide to create the third and final motion-path point. On the slide, right-click the freeform motion path, and then click Reverse Path Direction . On the slide, select the freeform motion path. In the Custom Animation task pane, under Modify: Custom Path , in the Start list, select With Previous . On the slide, select the gradient-filled rectangle. In the Custom Animation task pane, do the following: Click Add Effect , point to Entrance , and then click More Effects . In the Add Entrance Effect dialog box, under Subtle , click Fade , and then click OK . Under Modify: Fade , in the Start list, select With Previous . Under Modify: Fade , in the Speed list, select Very Fast . Click Add Effect , point to Motion Paths , and then click Down . Under Modify: Down , in the Start list, select With Previous . Under Modify: Down , in the Speed list, select Medium . On the slide, right-click the down motion path and click Reverse Path Direction . On the slide, select the smaller, full-color picture. In the Custom Animation task pane, do the following: Click Add Effect , point to Entrance , and then click More Effects . In the Add Entrance Effect dialog box, under Subtle , click Fade , and then click OK . Under Modify: Fade , in the Start list, select With Previous . Under Modify: Fade , in the Speed list, select Very Fast . Right-click the picture fade effect in the pane, and then click Timing . In the Fade dialog box, on the Timing tab, in the Delay box, enter 1.5 . On the slide, select the text box. In the Custom Animation task pane, do the following: Click Add Effect , point to Entrance , and then click More Effects . In the Add Entrance Effect dialog box, under Moderate , click Descend , and then click OK . Under Modify: Descend , in the Start list, select With Previous . Under Modify: Descend , in the Speed list, select Fast .
- Custom animation effects: recolored picture with full-color section and motion path (Advanced) To reproduce the picture effects on this slide, do the following: On the Home tab, in the Slides group, click Layout and then click Blank . On the Insert tab, in the Illustrations group, click Picture . In the Insert Picture dialog box, select a picture, and then click Insert . Select the picture. Under Picture Tools , on the Format tab, in the bottom right corner of the Size group, click the Size and Position dialog box launcher. In the Size and Position dialog box, on the Size tab, resize or crop the picture as needed so that under Size and rotate , the Height box is set to 3.58” and the Width box is set to 8” . Resize the picture under Size and rotate by entering values into the Height and Width boxes. Crop the picture under Crop from by entering values into the Left , Right , Top , and Bottom boxes. Under Picture Tools , on the Format tab, in the Adjust group, click Recolor , and then under Dark Variations click Text color 2 Dark (first option from the left). Under Picture Tools , on the Format tab, in the Picture Styles group, click Picture Effects , point to Shadow , and then under Inner click Inside Diagonal Top Left (first row, first option from the left). Drag the picture so that it is positioned above the middle of the slide. On the Home tab, in the Clipboard group, click the arrow next to Paste , and then click Duplicate . Press and hold CTRL and select both pictures on the slide. On the Home tab, in the Drawing group, click Arrange , point to Align , and then do the following: Click Align to Slide . Click Align Center . Click Align Selected Objects . Click Align Middle . Click the slide background area to cancel the selection of both pictures. Select the duplicate (top) picture. Under Picture Tools , on the Format tab, in the bottom right corner of the Size group, click the Size and Position dialog box launcher. In the Size and Position dialog box, on the Size tab, under Crop from , enter values into the Left and Right boxes so that under Size and rotate , and the Width box is set to 2.33” . ( Note: For best results, crop the duplicate picture to tightly focus on a single element in the original picture.) Under Picture Tools , on the Format tab, in the Adjust group, click Recolor , and then under No Recolor click No Recolor . On the Home tab, in the Drawing group, click Shapes , and then under Rectangles click Rectangle (first option from the left). On the slide, drag to draw a rectangle. Select the rectangle. Under Drawing Tools , on the Format tab, in the Size group, do the following: In the Shape Height box, enter 7.5” . In the Shape Width box, enter 2.33” . Under Drawing Tools , on the Format tab, in the Shape Styles group, click the arrow next to Shape Fill , point to Gradient , and then click More Gradients . In the Format Shape dialog box, click Fill in the left pane, select Gradient fill in the Fill pane, and then do the following: In the Type list, select Linear . Click the button next to Direction , and then click Linear Down (first row, second option from the left). Under Gradient stops , click Add or Remove until two stops appear in the drop-down list. Also under Gradient stops , customize the gradient stops that you added as follows: Select Stop 1 from the list, and then do the following: In the Stop position box, enter 0% . Click the button next to Color , then under Theme Colors click White, Background 1 (first row, first option from the left). In the Transparency box, enter 55% . Select Stop 2 from the list, and then do the following: In the Stop position box, enter 100% . Click the button next to Color , and then under Theme Colors click White, Background 1 (first row, first option from the left). In the Transparency box, enter 100% . On the slide, drag the rectangle to cover the duplicate picture. Select the rectangle. On the Home tab, in the Drawing group, click Arrange , and then do the following: Point to Align , and then click Align to Slide . Point to Align , and then click Align Middle . Click Send Backward . On the Home tab, in the Drawing group, click Shapes , and then under Rectangles click Rectangle (first option from the left). On the slide, drag to draw another rectangle. Select the rectangle. Under Drawing Tools , on the Format tab, in the Size group, do the following: In the Shape Height box, enter 4” . In the Shape Width box, enter 2.67” . Under Drawing Tools , on the Format tab, in the Shape Styles group, click the arrow next to Shape Fill , point to Gradient , and then click More Gradients . In the Format Shape dialog box, click Fill in the left pane. In the Fill pane, select No fill . Also in the Format Shape dialog box, click Line Color in the left pane, select Solid line in the Line Color pane, and then do the following: Click the button next to Color , and then under Theme Colors click White, Background 1 (first row, first option from the left). In the Transparency box, enter 70% . Also in the Format Shape dialog box, click Line Style in the left pane, and then do the following in the Line Style pane: In the Width box, enter 0.75 pt . Click the button next to Dash type , and then click Square Dot (third option from the top). Drag the dotted rectangle on top of the small, full-color picture. Press and hold SHIFT and select the dotted rectangle, the small picture, and the large picture on the slide. On the Home tab, in the Drawing group, click Arrange , point to Align , and then do the following: Click Align Selected Objects . Click Align Middle . On the Insert tab, in the Text group, click Text Box , and then on the slide, drag to draw the text box. Enter text in the text box, select the text, and then on the Home tab, in the Font group, select Gill Sans MT Condensed from the Font list, select 24 from the Font Size list, click the button next to Font Color , and then under Theme Colors click White, Background 1 (first row, first option from the left). On the Home tab, in the Paragraph group, click Center to center the text within the text box. On the slide, drag the text box below the dotted rectangle. To reproduce the background effects on this slide, do the following: Right-click the slide background area, and then click Format Background . In the Format Background dialog box, click Fill in the left pane, and then select Solid fill in the Fill pane. Also in the Fill pane, click the button next to Color , and then under Theme Colors click Black, Text 1, Lighter 15% (fifth row, second option from the left). To reproduce the animation effects on this slide, do the following: To view the area beyond the slide, on the View tab, click Zoom , and then in the Zoom dialog box, in the Percent box, enter 70% . ( Note: Make sure that Fit is not selected in the Zoom dialog box.) On the Animations tab, in the Animations group, click Custom Animation . On the slide, select the dotted rectangle. In the Custom Animation task pane, click Add Effect , point to Motion Paths , point to Draw Custom Path , and then click Freeform . Press and hold SHIFT to conform the path to a straight, horizontal line, and then do the following on the slide: Click the center of the dotted rectangle to create the first motion-path point. Click approximately ½” beyond the right edge of the rectangle to create the second motion-path point. Double-click approximately 2” beyond the left edge of the slide to create the third and final motion-path point. On the slide, right-click the freeform motion path, and then click Reverse Path Direction . On the slide, select the freeform motion path. In the Custom Animation task pane, under Modify: Custom Path , in the Start list, select With Previous . On the slide, select the gradient-filled rectangle. In the Custom Animation task pane, do the following: Click Add Effect , point to Entrance , and then click More Effects . In the Add Entrance Effect dialog box, under Subtle , click Fade , and then click OK . Under Modify: Fade , in the Start list, select With Previous . Under Modify: Fade , in the Speed list, select Very Fast . Click Add Effect , point to Motion Paths , and then click Down . Under Modify: Down , in the Start list, select With Previous . Under Modify: Down , in the Speed list, select Medium . On the slide, right-click the down motion path and click Reverse Path Direction . On the slide, select the smaller, full-color picture. In the Custom Animation task pane, do the following: Click Add Effect , point to Entrance , and then click More Effects . In the Add Entrance Effect dialog box, under Subtle , click Fade , and then click OK . Under Modify: Fade , in the Start list, select With Previous . Under Modify: Fade , in the Speed list, select Very Fast . Right-click the picture fade effect in the pane, and then click Timing . In the Fade dialog box, on the Timing tab, in the Delay box, enter 1.5 . On the slide, select the text box. In the Custom Animation task pane, do the following: Click Add Effect , point to Entrance , and then click More Effects . In the Add Entrance Effect dialog box, under Moderate , click Descend , and then click OK . Under Modify: Descend , in the Start list, select With Previous . Under Modify: Descend , in the Speed list, select Fast .
- Custom animation effects: recolored picture with full-color section and motion path (Advanced) To reproduce the picture effects on this slide, do the following: On the Home tab, in the Slides group, click Layout and then click Blank . On the Insert tab, in the Illustrations group, click Picture . In the Insert Picture dialog box, select a picture, and then click Insert . Select the picture. Under Picture Tools , on the Format tab, in the bottom right corner of the Size group, click the Size and Position dialog box launcher. In the Size and Position dialog box, on the Size tab, resize or crop the picture as needed so that under Size and rotate , the Height box is set to 3.58” and the Width box is set to 8” . Resize the picture under Size and rotate by entering values into the Height and Width boxes. Crop the picture under Crop from by entering values into the Left , Right , Top , and Bottom boxes. Under Picture Tools , on the Format tab, in the Adjust group, click Recolor , and then under Dark Variations click Text color 2 Dark (first option from the left). Under Picture Tools , on the Format tab, in the Picture Styles group, click Picture Effects , point to Shadow , and then under Inner click Inside Diagonal Top Left (first row, first option from the left). Drag the picture so that it is positioned above the middle of the slide. On the Home tab, in the Clipboard group, click the arrow next to Paste , and then click Duplicate . Press and hold CTRL and select both pictures on the slide. On the Home tab, in the Drawing group, click Arrange , point to Align , and then do the following: Click Align to Slide . Click Align Center . Click Align Selected Objects . Click Align Middle . Click the slide background area to cancel the selection of both pictures. Select the duplicate (top) picture. Under Picture Tools , on the Format tab, in the bottom right corner of the Size group, click the Size and Position dialog box launcher. In the Size and Position dialog box, on the Size tab, under Crop from , enter values into the Left and Right boxes so that under Size and rotate , and the Width box is set to 2.33” . ( Note: For best results, crop the duplicate picture to tightly focus on a single element in the original picture.) Under Picture Tools , on the Format tab, in the Adjust group, click Recolor , and then under No Recolor click No Recolor . On the Home tab, in the Drawing group, click Shapes , and then under Rectangles click Rectangle (first option from the left). On the slide, drag to draw a rectangle. Select the rectangle. Under Drawing Tools , on the Format tab, in the Size group, do the following: In the Shape Height box, enter 7.5” . In the Shape Width box, enter 2.33” . Under Drawing Tools , on the Format tab, in the Shape Styles group, click the arrow next to Shape Fill , point to Gradient , and then click More Gradients . In the Format Shape dialog box, click Fill in the left pane, select Gradient fill in the Fill pane, and then do the following: In the Type list, select Linear . Click the button next to Direction , and then click Linear Down (first row, second option from the left). Under Gradient stops , click Add or Remove until two stops appear in the drop-down list. Also under Gradient stops , customize the gradient stops that you added as follows: Select Stop 1 from the list, and then do the following: In the Stop position box, enter 0% . Click the button next to Color , then under Theme Colors click White, Background 1 (first row, first option from the left). In the Transparency box, enter 55% . Select Stop 2 from the list, and then do the following: In the Stop position box, enter 100% . Click the button next to Color , and then under Theme Colors click White, Background 1 (first row, first option from the left). In the Transparency box, enter 100% . On the slide, drag the rectangle to cover the duplicate picture. Select the rectangle. On the Home tab, in the Drawing group, click Arrange , and then do the following: Point to Align , and then click Align to Slide . Point to Align , and then click Align Middle . Click Send Backward . On the Home tab, in the Drawing group, click Shapes , and then under Rectangles click Rectangle (first option from the left). On the slide, drag to draw another rectangle. Select the rectangle. Under Drawing Tools , on the Format tab, in the Size group, do the following: In the Shape Height box, enter 4” . In the Shape Width box, enter 2.67” . Under Drawing Tools , on the Format tab, in the Shape Styles group, click the arrow next to Shape Fill , point to Gradient , and then click More Gradients . In the Format Shape dialog box, click Fill in the left pane. In the Fill pane, select No fill . Also in the Format Shape dialog box, click Line Color in the left pane, select Solid line in the Line Color pane, and then do the following: Click the button next to Color , and then under Theme Colors click White, Background 1 (first row, first option from the left). In the Transparency box, enter 70% . Also in the Format Shape dialog box, click Line Style in the left pane, and then do the following in the Line Style pane: In the Width box, enter 0.75 pt . Click the button next to Dash type , and then click Square Dot (third option from the top). Drag the dotted rectangle on top of the small, full-color picture. Press and hold SHIFT and select the dotted rectangle, the small picture, and the large picture on the slide. On the Home tab, in the Drawing group, click Arrange , point to Align , and then do the following: Click Align Selected Objects . Click Align Middle . On the Insert tab, in the Text group, click Text Box , and then on the slide, drag to draw the text box. Enter text in the text box, select the text, and then on the Home tab, in the Font group, select Gill Sans MT Condensed from the Font list, select 24 from the Font Size list, click the button next to Font Color , and then under Theme Colors click White, Background 1 (first row, first option from the left). On the Home tab, in the Paragraph group, click Center to center the text within the text box. On the slide, drag the text box below the dotted rectangle. To reproduce the background effects on this slide, do the following: Right-click the slide background area, and then click Format Background . In the Format Background dialog box, click Fill in the left pane, and then select Solid fill in the Fill pane. Also in the Fill pane, click the button next to Color , and then under Theme Colors click Black, Text 1, Lighter 15% (fifth row, second option from the left). To reproduce the animation effects on this slide, do the following: To view the area beyond the slide, on the View tab, click Zoom , and then in the Zoom dialog box, in the Percent box, enter 70% . ( Note: Make sure that Fit is not selected in the Zoom dialog box.) On the Animations tab, in the Animations group, click Custom Animation . On the slide, select the dotted rectangle. In the Custom Animation task pane, click Add Effect , point to Motion Paths , point to Draw Custom Path , and then click Freeform . Press and hold SHIFT to conform the path to a straight, horizontal line, and then do the following on the slide: Click the center of the dotted rectangle to create the first motion-path point. Click approximately ½” beyond the right edge of the rectangle to create the second motion-path point. Double-click approximately 2” beyond the left edge of the slide to create the third and final motion-path point. On the slide, right-click the freeform motion path, and then click Reverse Path Direction . On the slide, select the freeform motion path. In the Custom Animation task pane, under Modify: Custom Path , in the Start list, select With Previous . On the slide, select the gradient-filled rectangle. In the Custom Animation task pane, do the following: Click Add Effect , point to Entrance , and then click More Effects . In the Add Entrance Effect dialog box, under Subtle , click Fade , and then click OK . Under Modify: Fade , in the Start list, select With Previous . Under Modify: Fade , in the Speed list, select Very Fast . Click Add Effect , point to Motion Paths , and then click Down . Under Modify: Down , in the Start list, select With Previous . Under Modify: Down , in the Speed list, select Medium . On the slide, right-click the down motion path and click Reverse Path Direction . On the slide, select the smaller, full-color picture. In the Custom Animation task pane, do the following: Click Add Effect , point to Entrance , and then click More Effects . In the Add Entrance Effect dialog box, under Subtle , click Fade , and then click OK . Under Modify: Fade , in the Start list, select With Previous . Under Modify: Fade , in the Speed list, select Very Fast . Right-click the picture fade effect in the pane, and then click Timing . In the Fade dialog box, on the Timing tab, in the Delay box, enter 1.5 . On the slide, select the text box. In the Custom Animation task pane, do the following: Click Add Effect , point to Entrance , and then click More Effects . In the Add Entrance Effect dialog box, under Moderate , click Descend , and then click OK . Under Modify: Descend , in the Start list, select With Previous . Under Modify: Descend , in the Speed list, select Fast .
- Custom animation effects: recolored picture with full-color section and motion path (Advanced) To reproduce the picture effects on this slide, do the following: On the Home tab, in the Slides group, click Layout and then click Blank . On the Insert tab, in the Illustrations group, click Picture . In the Insert Picture dialog box, select a picture, and then click Insert . Select the picture. Under Picture Tools , on the Format tab, in the bottom right corner of the Size group, click the Size and Position dialog box launcher. In the Size and Position dialog box, on the Size tab, resize or crop the picture as needed so that under Size and rotate , the Height box is set to 3.58” and the Width box is set to 8” . Resize the picture under Size and rotate by entering values into the Height and Width boxes. Crop the picture under Crop from by entering values into the Left , Right , Top , and Bottom boxes. Under Picture Tools , on the Format tab, in the Adjust group, click Recolor , and then under Dark Variations click Text color 2 Dark (first option from the left). Under Picture Tools , on the Format tab, in the Picture Styles group, click Picture Effects , point to Shadow , and then under Inner click Inside Diagonal Top Left (first row, first option from the left). Drag the picture so that it is positioned above the middle of the slide. On the Home tab, in the Clipboard group, click the arrow next to Paste , and then click Duplicate . Press and hold CTRL and select both pictures on the slide. On the Home tab, in the Drawing group, click Arrange , point to Align , and then do the following: Click Align to Slide . Click Align Center . Click Align Selected Objects . Click Align Middle . Click the slide background area to cancel the selection of both pictures. Select the duplicate (top) picture. Under Picture Tools , on the Format tab, in the bottom right corner of the Size group, click the Size and Position dialog box launcher. In the Size and Position dialog box, on the Size tab, under Crop from , enter values into the Left and Right boxes so that under Size and rotate , and the Width box is set to 2.33” . ( Note: For best results, crop the duplicate picture to tightly focus on a single element in the original picture.) Under Picture Tools , on the Format tab, in the Adjust group, click Recolor , and then under No Recolor click No Recolor . On the Home tab, in the Drawing group, click Shapes , and then under Rectangles click Rectangle (first option from the left). On the slide, drag to draw a rectangle. Select the rectangle. Under Drawing Tools , on the Format tab, in the Size group, do the following: In the Shape Height box, enter 7.5” . In the Shape Width box, enter 2.33” . Under Drawing Tools , on the Format tab, in the Shape Styles group, click the arrow next to Shape Fill , point to Gradient , and then click More Gradients . In the Format Shape dialog box, click Fill in the left pane, select Gradient fill in the Fill pane, and then do the following: In the Type list, select Linear . Click the button next to Direction , and then click Linear Down (first row, second option from the left). Under Gradient stops , click Add or Remove until two stops appear in the drop-down list. Also under Gradient stops , customize the gradient stops that you added as follows: Select Stop 1 from the list, and then do the following: In the Stop position box, enter 0% . Click the button next to Color , then under Theme Colors click White, Background 1 (first row, first option from the left). In the Transparency box, enter 55% . Select Stop 2 from the list, and then do the following: In the Stop position box, enter 100% . Click the button next to Color , and then under Theme Colors click White, Background 1 (first row, first option from the left). In the Transparency box, enter 100% . On the slide, drag the rectangle to cover the duplicate picture. Select the rectangle. On the Home tab, in the Drawing group, click Arrange , and then do the following: Point to Align , and then click Align to Slide . Point to Align , and then click Align Middle . Click Send Backward . On the Home tab, in the Drawing group, click Shapes , and then under Rectangles click Rectangle (first option from the left). On the slide, drag to draw another rectangle. Select the rectangle. Under Drawing Tools , on the Format tab, in the Size group, do the following: In the Shape Height box, enter 4” . In the Shape Width box, enter 2.67” . Under Drawing Tools , on the Format tab, in the Shape Styles group, click the arrow next to Shape Fill , point to Gradient , and then click More Gradients . In the Format Shape dialog box, click Fill in the left pane. In the Fill pane, select No fill . Also in the Format Shape dialog box, click Line Color in the left pane, select Solid line in the Line Color pane, and then do the following: Click the button next to Color , and then under Theme Colors click White, Background 1 (first row, first option from the left). In the Transparency box, enter 70% . Also in the Format Shape dialog box, click Line Style in the left pane, and then do the following in the Line Style pane: In the Width box, enter 0.75 pt . Click the button next to Dash type , and then click Square Dot (third option from the top). Drag the dotted rectangle on top of the small, full-color picture. Press and hold SHIFT and select the dotted rectangle, the small picture, and the large picture on the slide. On the Home tab, in the Drawing group, click Arrange , point to Align , and then do the following: Click Align Selected Objects . Click Align Middle . On the Insert tab, in the Text group, click Text Box , and then on the slide, drag to draw the text box. Enter text in the text box, select the text, and then on the Home tab, in the Font group, select Gill Sans MT Condensed from the Font list, select 24 from the Font Size list, click the button next to Font Color , and then under Theme Colors click White, Background 1 (first row, first option from the left). On the Home tab, in the Paragraph group, click Center to center the text within the text box. On the slide, drag the text box below the dotted rectangle. To reproduce the background effects on this slide, do the following: Right-click the slide background area, and then click Format Background . In the Format Background dialog box, click Fill in the left pane, and then select Solid fill in the Fill pane. Also in the Fill pane, click the button next to Color , and then under Theme Colors click Black, Text 1, Lighter 15% (fifth row, second option from the left). To reproduce the animation effects on this slide, do the following: To view the area beyond the slide, on the View tab, click Zoom , and then in the Zoom dialog box, in the Percent box, enter 70% . ( Note: Make sure that Fit is not selected in the Zoom dialog box.) On the Animations tab, in the Animations group, click Custom Animation . On the slide, select the dotted rectangle. In the Custom Animation task pane, click Add Effect , point to Motion Paths , point to Draw Custom Path , and then click Freeform . Press and hold SHIFT to conform the path to a straight, horizontal line, and then do the following on the slide: Click the center of the dotted rectangle to create the first motion-path point. Click approximately ½” beyond the right edge of the rectangle to create the second motion-path point. Double-click approximately 2” beyond the left edge of the slide to create the third and final motion-path point. On the slide, right-click the freeform motion path, and then click Reverse Path Direction . On the slide, select the freeform motion path. In the Custom Animation task pane, under Modify: Custom Path , in the Start list, select With Previous . On the slide, select the gradient-filled rectangle. In the Custom Animation task pane, do the following: Click Add Effect , point to Entrance , and then click More Effects . In the Add Entrance Effect dialog box, under Subtle , click Fade , and then click OK . Under Modify: Fade , in the Start list, select With Previous . Under Modify: Fade , in the Speed list, select Very Fast . Click Add Effect , point to Motion Paths , and then click Down . Under Modify: Down , in the Start list, select With Previous . Under Modify: Down , in the Speed list, select Medium . On the slide, right-click the down motion path and click Reverse Path Direction . On the slide, select the smaller, full-color picture. In the Custom Animation task pane, do the following: Click Add Effect , point to Entrance , and then click More Effects . In the Add Entrance Effect dialog box, under Subtle , click Fade , and then click OK . Under Modify: Fade , in the Start list, select With Previous . Under Modify: Fade , in the Speed list, select Very Fast . Right-click the picture fade effect in the pane, and then click Timing . In the Fade dialog box, on the Timing tab, in the Delay box, enter 1.5 . On the slide, select the text box. In the Custom Animation task pane, do the following: Click Add Effect , point to Entrance , and then click More Effects . In the Add Entrance Effect dialog box, under Moderate , click Descend , and then click OK . Under Modify: Descend , in the Start list, select With Previous . Under Modify: Descend , in the Speed list, select Fast .
- Custom animation effects: recolored picture with full-color section and motion path (Advanced) To reproduce the picture effects on this slide, do the following: On the Home tab, in the Slides group, click Layout and then click Blank . On the Insert tab, in the Illustrations group, click Picture . In the Insert Picture dialog box, select a picture, and then click Insert . Select the picture. Under Picture Tools , on the Format tab, in the bottom right corner of the Size group, click the Size and Position dialog box launcher. In the Size and Position dialog box, on the Size tab, resize or crop the picture as needed so that under Size and rotate , the Height box is set to 3.58” and the Width box is set to 8” . Resize the picture under Size and rotate by entering values into the Height and Width boxes. Crop the picture under Crop from by entering values into the Left , Right , Top , and Bottom boxes. Under Picture Tools , on the Format tab, in the Adjust group, click Recolor , and then under Dark Variations click Text color 2 Dark (first option from the left). Under Picture Tools , on the Format tab, in the Picture Styles group, click Picture Effects , point to Shadow , and then under Inner click Inside Diagonal Top Left (first row, first option from the left). Drag the picture so that it is positioned above the middle of the slide. On the Home tab, in the Clipboard group, click the arrow next to Paste , and then click Duplicate . Press and hold CTRL and select both pictures on the slide. On the Home tab, in the Drawing group, click Arrange , point to Align , and then do the following: Click Align to Slide . Click Align Center . Click Align Selected Objects . Click Align Middle . Click the slide background area to cancel the selection of both pictures. Select the duplicate (top) picture. Under Picture Tools , on the Format tab, in the bottom right corner of the Size group, click the Size and Position dialog box launcher. In the Size and Position dialog box, on the Size tab, under Crop from , enter values into the Left and Right boxes so that under Size and rotate , and the Width box is set to 2.33” . ( Note: For best results, crop the duplicate picture to tightly focus on a single element in the original picture.) Under Picture Tools , on the Format tab, in the Adjust group, click Recolor , and then under No Recolor click No Recolor . On the Home tab, in the Drawing group, click Shapes , and then under Rectangles click Rectangle (first option from the left). On the slide, drag to draw a rectangle. Select the rectangle. Under Drawing Tools , on the Format tab, in the Size group, do the following: In the Shape Height box, enter 7.5” . In the Shape Width box, enter 2.33” . Under Drawing Tools , on the Format tab, in the Shape Styles group, click the arrow next to Shape Fill , point to Gradient , and then click More Gradients . In the Format Shape dialog box, click Fill in the left pane, select Gradient fill in the Fill pane, and then do the following: In the Type list, select Linear . Click the button next to Direction , and then click Linear Down (first row, second option from the left). Under Gradient stops , click Add or Remove until two stops appear in the drop-down list. Also under Gradient stops , customize the gradient stops that you added as follows: Select Stop 1 from the list, and then do the following: In the Stop position box, enter 0% . Click the button next to Color , then under Theme Colors click White, Background 1 (first row, first option from the left). In the Transparency box, enter 55% . Select Stop 2 from the list, and then do the following: In the Stop position box, enter 100% . Click the button next to Color , and then under Theme Colors click White, Background 1 (first row, first option from the left). In the Transparency box, enter 100% . On the slide, drag the rectangle to cover the duplicate picture. Select the rectangle. On the Home tab, in the Drawing group, click Arrange , and then do the following: Point to Align , and then click Align to Slide . Point to Align , and then click Align Middle . Click Send Backward . On the Home tab, in the Drawing group, click Shapes , and then under Rectangles click Rectangle (first option from the left). On the slide, drag to draw another rectangle. Select the rectangle. Under Drawing Tools , on the Format tab, in the Size group, do the following: In the Shape Height box, enter 4” . In the Shape Width box, enter 2.67” . Under Drawing Tools , on the Format tab, in the Shape Styles group, click the arrow next to Shape Fill , point to Gradient , and then click More Gradients . In the Format Shape dialog box, click Fill in the left pane. In the Fill pane, select No fill . Also in the Format Shape dialog box, click Line Color in the left pane, select Solid line in the Line Color pane, and then do the following: Click the button next to Color , and then under Theme Colors click White, Background 1 (first row, first option from the left). In the Transparency box, enter 70% . Also in the Format Shape dialog box, click Line Style in the left pane, and then do the following in the Line Style pane: In the Width box, enter 0.75 pt . Click the button next to Dash type , and then click Square Dot (third option from the top). Drag the dotted rectangle on top of the small, full-color picture. Press and hold SHIFT and select the dotted rectangle, the small picture, and the large picture on the slide. On the Home tab, in the Drawing group, click Arrange , point to Align , and then do the following: Click Align Selected Objects . Click Align Middle . On the Insert tab, in the Text group, click Text Box , and then on the slide, drag to draw the text box. Enter text in the text box, select the text, and then on the Home tab, in the Font group, select Gill Sans MT Condensed from the Font list, select 24 from the Font Size list, click the button next to Font Color , and then under Theme Colors click White, Background 1 (first row, first option from the left). On the Home tab, in the Paragraph group, click Center to center the text within the text box. On the slide, drag the text box below the dotted rectangle. To reproduce the background effects on this slide, do the following: Right-click the slide background area, and then click Format Background . In the Format Background dialog box, click Fill in the left pane, and then select Solid fill in the Fill pane. Also in the Fill pane, click the button next to Color , and then under Theme Colors click Black, Text 1, Lighter 15% (fifth row, second option from the left). To reproduce the animation effects on this slide, do the following: To view the area beyond the slide, on the View tab, click Zoom , and then in the Zoom dialog box, in the Percent box, enter 70% . ( Note: Make sure that Fit is not selected in the Zoom dialog box.) On the Animations tab, in the Animations group, click Custom Animation . On the slide, select the dotted rectangle. In the Custom Animation task pane, click Add Effect , point to Motion Paths , point to Draw Custom Path , and then click Freeform . Press and hold SHIFT to conform the path to a straight, horizontal line, and then do the following on the slide: Click the center of the dotted rectangle to create the first motion-path point. Click approximately ½” beyond the right edge of the rectangle to create the second motion-path point. Double-click approximately 2” beyond the left edge of the slide to create the third and final motion-path point. On the slide, right-click the freeform motion path, and then click Reverse Path Direction . On the slide, select the freeform motion path. In the Custom Animation task pane, under Modify: Custom Path , in the Start list, select With Previous . On the slide, select the gradient-filled rectangle. In the Custom Animation task pane, do the following: Click Add Effect , point to Entrance , and then click More Effects . In the Add Entrance Effect dialog box, under Subtle , click Fade , and then click OK . Under Modify: Fade , in the Start list, select With Previous . Under Modify: Fade , in the Speed list, select Very Fast . Click Add Effect , point to Motion Paths , and then click Down . Under Modify: Down , in the Start list, select With Previous . Under Modify: Down , in the Speed list, select Medium . On the slide, right-click the down motion path and click Reverse Path Direction . On the slide, select the smaller, full-color picture. In the Custom Animation task pane, do the following: Click Add Effect , point to Entrance , and then click More Effects . In the Add Entrance Effect dialog box, under Subtle , click Fade , and then click OK . Under Modify: Fade , in the Start list, select With Previous . Under Modify: Fade , in the Speed list, select Very Fast . Right-click the picture fade effect in the pane, and then click Timing . In the Fade dialog box, on the Timing tab, in the Delay box, enter 1.5 . On the slide, select the text box. In the Custom Animation task pane, do the following: Click Add Effect , point to Entrance , and then click More Effects . In the Add Entrance Effect dialog box, under Moderate , click Descend , and then click OK . Under Modify: Descend , in the Start list, select With Previous . Under Modify: Descend , in the Speed list, select Fast .
- Custom animation effects: recolored picture with full-color section and motion path (Advanced) To reproduce the picture effects on this slide, do the following: On the Home tab, in the Slides group, click Layout and then click Blank . On the Insert tab, in the Illustrations group, click Picture . In the Insert Picture dialog box, select a picture, and then click Insert . Select the picture. Under Picture Tools , on the Format tab, in the bottom right corner of the Size group, click the Size and Position dialog box launcher. In the Size and Position dialog box, on the Size tab, resize or crop the picture as needed so that under Size and rotate , the Height box is set to 3.58” and the Width box is set to 8” . Resize the picture under Size and rotate by entering values into the Height and Width boxes. Crop the picture under Crop from by entering values into the Left , Right , Top , and Bottom boxes. Under Picture Tools , on the Format tab, in the Adjust group, click Recolor , and then under Dark Variations click Text color 2 Dark (first option from the left). Under Picture Tools , on the Format tab, in the Picture Styles group, click Picture Effects , point to Shadow , and then under Inner click Inside Diagonal Top Left (first row, first option from the left). Drag the picture so that it is positioned above the middle of the slide. On the Home tab, in the Clipboard group, click the arrow next to Paste , and then click Duplicate . Press and hold CTRL and select both pictures on the slide. On the Home tab, in the Drawing group, click Arrange , point to Align , and then do the following: Click Align to Slide . Click Align Center . Click Align Selected Objects . Click Align Middle . Click the slide background area to cancel the selection of both pictures. Select the duplicate (top) picture. Under Picture Tools , on the Format tab, in the bottom right corner of the Size group, click the Size and Position dialog box launcher. In the Size and Position dialog box, on the Size tab, under Crop from , enter values into the Left and Right boxes so that under Size and rotate , and the Width box is set to 2.33” . ( Note: For best results, crop the duplicate picture to tightly focus on a single element in the original picture.) Under Picture Tools , on the Format tab, in the Adjust group, click Recolor , and then under No Recolor click No Recolor . On the Home tab, in the Drawing group, click Shapes , and then under Rectangles click Rectangle (first option from the left). On the slide, drag to draw a rectangle. Select the rectangle. Under Drawing Tools , on the Format tab, in the Size group, do the following: In the Shape Height box, enter 7.5” . In the Shape Width box, enter 2.33” . Under Drawing Tools , on the Format tab, in the Shape Styles group, click the arrow next to Shape Fill , point to Gradient , and then click More Gradients . In the Format Shape dialog box, click Fill in the left pane, select Gradient fill in the Fill pane, and then do the following: In the Type list, select Linear . Click the button next to Direction , and then click Linear Down (first row, second option from the left). Under Gradient stops , click Add or Remove until two stops appear in the drop-down list. Also under Gradient stops , customize the gradient stops that you added as follows: Select Stop 1 from the list, and then do the following: In the Stop position box, enter 0% . Click the button next to Color , then under Theme Colors click White, Background 1 (first row, first option from the left). In the Transparency box, enter 55% . Select Stop 2 from the list, and then do the following: In the Stop position box, enter 100% . Click the button next to Color , and then under Theme Colors click White, Background 1 (first row, first option from the left). In the Transparency box, enter 100% . On the slide, drag the rectangle to cover the duplicate picture. Select the rectangle. On the Home tab, in the Drawing group, click Arrange , and then do the following: Point to Align , and then click Align to Slide . Point to Align , and then click Align Middle . Click Send Backward . On the Home tab, in the Drawing group, click Shapes , and then under Rectangles click Rectangle (first option from the left). On the slide, drag to draw another rectangle. Select the rectangle. Under Drawing Tools , on the Format tab, in the Size group, do the following: In the Shape Height box, enter 4” . In the Shape Width box, enter 2.67” . Under Drawing Tools , on the Format tab, in the Shape Styles group, click the arrow next to Shape Fill , point to Gradient , and then click More Gradients . In the Format Shape dialog box, click Fill in the left pane. In the Fill pane, select No fill . Also in the Format Shape dialog box, click Line Color in the left pane, select Solid line in the Line Color pane, and then do the following: Click the button next to Color , and then under Theme Colors click White, Background 1 (first row, first option from the left). In the Transparency box, enter 70% . Also in the Format Shape dialog box, click Line Style in the left pane, and then do the following in the Line Style pane: In the Width box, enter 0.75 pt . Click the button next to Dash type , and then click Square Dot (third option from the top). Drag the dotted rectangle on top of the small, full-color picture. Press and hold SHIFT and select the dotted rectangle, the small picture, and the large picture on the slide. On the Home tab, in the Drawing group, click Arrange , point to Align , and then do the following: Click Align Selected Objects . Click Align Middle . On the Insert tab, in the Text group, click Text Box , and then on the slide, drag to draw the text box. Enter text in the text box, select the text, and then on the Home tab, in the Font group, select Gill Sans MT Condensed from the Font list, select 24 from the Font Size list, click the button next to Font Color , and then under Theme Colors click White, Background 1 (first row, first option from the left). On the Home tab, in the Paragraph group, click Center to center the text within the text box. On the slide, drag the text box below the dotted rectangle. To reproduce the background effects on this slide, do the following: Right-click the slide background area, and then click Format Background . In the Format Background dialog box, click Fill in the left pane, and then select Solid fill in the Fill pane. Also in the Fill pane, click the button next to Color , and then under Theme Colors click Black, Text 1, Lighter 15% (fifth row, second option from the left). To reproduce the animation effects on this slide, do the following: To view the area beyond the slide, on the View tab, click Zoom , and then in the Zoom dialog box, in the Percent box, enter 70% . ( Note: Make sure that Fit is not selected in the Zoom dialog box.) On the Animations tab, in the Animations group, click Custom Animation . On the slide, select the dotted rectangle. In the Custom Animation task pane, click Add Effect , point to Motion Paths , point to Draw Custom Path , and then click Freeform . Press and hold SHIFT to conform the path to a straight, horizontal line, and then do the following on the slide: Click the center of the dotted rectangle to create the first motion-path point. Click approximately ½” beyond the right edge of the rectangle to create the second motion-path point. Double-click approximately 2” beyond the left edge of the slide to create the third and final motion-path point. On the slide, right-click the freeform motion path, and then click Reverse Path Direction . On the slide, select the freeform motion path. In the Custom Animation task pane, under Modify: Custom Path , in the Start list, select With Previous . On the slide, select the gradient-filled rectangle. In the Custom Animation task pane, do the following: Click Add Effect , point to Entrance , and then click More Effects . In the Add Entrance Effect dialog box, under Subtle , click Fade , and then click OK . Under Modify: Fade , in the Start list, select With Previous . Under Modify: Fade , in the Speed list, select Very Fast . Click Add Effect , point to Motion Paths , and then click Down . Under Modify: Down , in the Start list, select With Previous . Under Modify: Down , in the Speed list, select Medium . On the slide, right-click the down motion path and click Reverse Path Direction . On the slide, select the smaller, full-color picture. In the Custom Animation task pane, do the following: Click Add Effect , point to Entrance , and then click More Effects . In the Add Entrance Effect dialog box, under Subtle , click Fade , and then click OK . Under Modify: Fade , in the Start list, select With Previous . Under Modify: Fade , in the Speed list, select Very Fast . Right-click the picture fade effect in the pane, and then click Timing . In the Fade dialog box, on the Timing tab, in the Delay box, enter 1.5 . On the slide, select the text box. In the Custom Animation task pane, do the following: Click Add Effect , point to Entrance , and then click More Effects . In the Add Entrance Effect dialog box, under Moderate , click Descend , and then click OK . Under Modify: Descend , in the Start list, select With Previous . Under Modify: Descend , in the Speed list, select Fast .
- Custom animation effects: recolored picture with full-color section and motion path (Advanced) To reproduce the picture effects on this slide, do the following: On the Home tab, in the Slides group, click Layout and then click Blank . On the Insert tab, in the Illustrations group, click Picture . In the Insert Picture dialog box, select a picture, and then click Insert . Select the picture. Under Picture Tools , on the Format tab, in the bottom right corner of the Size group, click the Size and Position dialog box launcher. In the Size and Position dialog box, on the Size tab, resize or crop the picture as needed so that under Size and rotate , the Height box is set to 3.58” and the Width box is set to 8” . Resize the picture under Size and rotate by entering values into the Height and Width boxes. Crop the picture under Crop from by entering values into the Left , Right , Top , and Bottom boxes. Under Picture Tools , on the Format tab, in the Adjust group, click Recolor , and then under Dark Variations click Text color 2 Dark (first option from the left). Under Picture Tools , on the Format tab, in the Picture Styles group, click Picture Effects , point to Shadow , and then under Inner click Inside Diagonal Top Left (first row, first option from the left). Drag the picture so that it is positioned above the middle of the slide. On the Home tab, in the Clipboard group, click the arrow next to Paste , and then click Duplicate . Press and hold CTRL and select both pictures on the slide. On the Home tab, in the Drawing group, click Arrange , point to Align , and then do the following: Click Align to Slide . Click Align Center . Click Align Selected Objects . Click Align Middle . Click the slide background area to cancel the selection of both pictures. Select the duplicate (top) picture. Under Picture Tools , on the Format tab, in the bottom right corner of the Size group, click the Size and Position dialog box launcher. In the Size and Position dialog box, on the Size tab, under Crop from , enter values into the Left and Right boxes so that under Size and rotate , and the Width box is set to 2.33” . ( Note: For best results, crop the duplicate picture to tightly focus on a single element in the original picture.) Under Picture Tools , on the Format tab, in the Adjust group, click Recolor , and then under No Recolor click No Recolor . On the Home tab, in the Drawing group, click Shapes , and then under Rectangles click Rectangle (first option from the left). On the slide, drag to draw a rectangle. Select the rectangle. Under Drawing Tools , on the Format tab, in the Size group, do the following: In the Shape Height box, enter 7.5” . In the Shape Width box, enter 2.33” . Under Drawing Tools , on the Format tab, in the Shape Styles group, click the arrow next to Shape Fill , point to Gradient , and then click More Gradients . In the Format Shape dialog box, click Fill in the left pane, select Gradient fill in the Fill pane, and then do the following: In the Type list, select Linear . Click the button next to Direction , and then click Linear Down (first row, second option from the left). Under Gradient stops , click Add or Remove until two stops appear in the drop-down list. Also under Gradient stops , customize the gradient stops that you added as follows: Select Stop 1 from the list, and then do the following: In the Stop position box, enter 0% . Click the button next to Color , then under Theme Colors click White, Background 1 (first row, first option from the left). In the Transparency box, enter 55% . Select Stop 2 from the list, and then do the following: In the Stop position box, enter 100% . Click the button next to Color , and then under Theme Colors click White, Background 1 (first row, first option from the left). In the Transparency box, enter 100% . On the slide, drag the rectangle to cover the duplicate picture. Select the rectangle. On the Home tab, in the Drawing group, click Arrange , and then do the following: Point to Align , and then click Align to Slide . Point to Align , and then click Align Middle . Click Send Backward . On the Home tab, in the Drawing group, click Shapes , and then under Rectangles click Rectangle (first option from the left). On the slide, drag to draw another rectangle. Select the rectangle. Under Drawing Tools , on the Format tab, in the Size group, do the following: In the Shape Height box, enter 4” . In the Shape Width box, enter 2.67” . Under Drawing Tools , on the Format tab, in the Shape Styles group, click the arrow next to Shape Fill , point to Gradient , and then click More Gradients . In the Format Shape dialog box, click Fill in the left pane. In the Fill pane, select No fill . Also in the Format Shape dialog box, click Line Color in the left pane, select Solid line in the Line Color pane, and then do the following: Click the button next to Color , and then under Theme Colors click White, Background 1 (first row, first option from the left). In the Transparency box, enter 70% . Also in the Format Shape dialog box, click Line Style in the left pane, and then do the following in the Line Style pane: In the Width box, enter 0.75 pt . Click the button next to Dash type , and then click Square Dot (third option from the top). Drag the dotted rectangle on top of the small, full-color picture. Press and hold SHIFT and select the dotted rectangle, the small picture, and the large picture on the slide. On the Home tab, in the Drawing group, click Arrange , point to Align , and then do the following: Click Align Selected Objects . Click Align Middle . On the Insert tab, in the Text group, click Text Box , and then on the slide, drag to draw the text box. Enter text in the text box, select the text, and then on the Home tab, in the Font group, select Gill Sans MT Condensed from the Font list, select 24 from the Font Size list, click the button next to Font Color , and then under Theme Colors click White, Background 1 (first row, first option from the left). On the Home tab, in the Paragraph group, click Center to center the text within the text box. On the slide, drag the text box below the dotted rectangle. To reproduce the background effects on this slide, do the following: Right-click the slide background area, and then click Format Background . In the Format Background dialog box, click Fill in the left pane, and then select Solid fill in the Fill pane. Also in the Fill pane, click the button next to Color , and then under Theme Colors click Black, Text 1, Lighter 15% (fifth row, second option from the left). To reproduce the animation effects on this slide, do the following: To view the area beyond the slide, on the View tab, click Zoom , and then in the Zoom dialog box, in the Percent box, enter 70% . ( Note: Make sure that Fit is not selected in the Zoom dialog box.) On the Animations tab, in the Animations group, click Custom Animation . On the slide, select the dotted rectangle. In the Custom Animation task pane, click Add Effect , point to Motion Paths , point to Draw Custom Path , and then click Freeform . Press and hold SHIFT to conform the path to a straight, horizontal line, and then do the following on the slide: Click the center of the dotted rectangle to create the first motion-path point. Click approximately ½” beyond the right edge of the rectangle to create the second motion-path point. Double-click approximately 2” beyond the left edge of the slide to create the third and final motion-path point. On the slide, right-click the freeform motion path, and then click Reverse Path Direction . On the slide, select the freeform motion path. In the Custom Animation task pane, under Modify: Custom Path , in the Start list, select With Previous . On the slide, select the gradient-filled rectangle. In the Custom Animation task pane, do the following: Click Add Effect , point to Entrance , and then click More Effects . In the Add Entrance Effect dialog box, under Subtle , click Fade , and then click OK . Under Modify: Fade , in the Start list, select With Previous . Under Modify: Fade , in the Speed list, select Very Fast . Click Add Effect , point to Motion Paths , and then click Down . Under Modify: Down , in the Start list, select With Previous . Under Modify: Down , in the Speed list, select Medium . On the slide, right-click the down motion path and click Reverse Path Direction . On the slide, select the smaller, full-color picture. In the Custom Animation task pane, do the following: Click Add Effect , point to Entrance , and then click More Effects . In the Add Entrance Effect dialog box, under Subtle , click Fade , and then click OK . Under Modify: Fade , in the Start list, select With Previous . Under Modify: Fade , in the Speed list, select Very Fast . Right-click the picture fade effect in the pane, and then click Timing . In the Fade dialog box, on the Timing tab, in the Delay box, enter 1.5 . On the slide, select the text box. In the Custom Animation task pane, do the following: Click Add Effect , point to Entrance , and then click More Effects . In the Add Entrance Effect dialog box, under Moderate , click Descend , and then click OK . Under Modify: Descend , in the Start list, select With Previous . Under Modify: Descend , in the Speed list, select Fast .
- Custom animation effects: recolored picture with full-color section and motion path (Advanced) To reproduce the picture effects on this slide, do the following: On the Home tab, in the Slides group, click Layout and then click Blank . On the Insert tab, in the Illustrations group, click Picture . In the Insert Picture dialog box, select a picture, and then click Insert . Select the picture. Under Picture Tools , on the Format tab, in the bottom right corner of the Size group, click the Size and Position dialog box launcher. In the Size and Position dialog box, on the Size tab, resize or crop the picture as needed so that under Size and rotate , the Height box is set to 3.58” and the Width box is set to 8” . Resize the picture under Size and rotate by entering values into the Height and Width boxes. Crop the picture under Crop from by entering values into the Left , Right , Top , and Bottom boxes. Under Picture Tools , on the Format tab, in the Adjust group, click Recolor , and then under Dark Variations click Text color 2 Dark (first option from the left). Under Picture Tools , on the Format tab, in the Picture Styles group, click Picture Effects , point to Shadow , and then under Inner click Inside Diagonal Top Left (first row, first option from the left). Drag the picture so that it is positioned above the middle of the slide. On the Home tab, in the Clipboard group, click the arrow next to Paste , and then click Duplicate . Press and hold CTRL and select both pictures on the slide. On the Home tab, in the Drawing group, click Arrange , point to Align , and then do the following: Click Align to Slide . Click Align Center . Click Align Selected Objects . Click Align Middle . Click the slide background area to cancel the selection of both pictures. Select the duplicate (top) picture. Under Picture Tools , on the Format tab, in the bottom right corner of the Size group, click the Size and Position dialog box launcher. In the Size and Position dialog box, on the Size tab, under Crop from , enter values into the Left and Right boxes so that under Size and rotate , and the Width box is set to 2.33” . ( Note: For best results, crop the duplicate picture to tightly focus on a single element in the original picture.) Under Picture Tools , on the Format tab, in the Adjust group, click Recolor , and then under No Recolor click No Recolor . On the Home tab, in the Drawing group, click Shapes , and then under Rectangles click Rectangle (first option from the left). On the slide, drag to draw a rectangle. Select the rectangle. Under Drawing Tools , on the Format tab, in the Size group, do the following: In the Shape Height box, enter 7.5” . In the Shape Width box, enter 2.33” . Under Drawing Tools , on the Format tab, in the Shape Styles group, click the arrow next to Shape Fill , point to Gradient , and then click More Gradients . In the Format Shape dialog box, click Fill in the left pane, select Gradient fill in the Fill pane, and then do the following: In the Type list, select Linear . Click the button next to Direction , and then click Linear Down (first row, second option from the left). Under Gradient stops , click Add or Remove until two stops appear in the drop-down list. Also under Gradient stops , customize the gradient stops that you added as follows: Select Stop 1 from the list, and then do the following: In the Stop position box, enter 0% . Click the button next to Color , then under Theme Colors click White, Background 1 (first row, first option from the left). In the Transparency box, enter 55% . Select Stop 2 from the list, and then do the following: In the Stop position box, enter 100% . Click the button next to Color , and then under Theme Colors click White, Background 1 (first row, first option from the left). In the Transparency box, enter 100% . On the slide, drag the rectangle to cover the duplicate picture. Select the rectangle. On the Home tab, in the Drawing group, click Arrange , and then do the following: Point to Align , and then click Align to Slide . Point to Align , and then click Align Middle . Click Send Backward . On the Home tab, in the Drawing group, click Shapes , and then under Rectangles click Rectangle (first option from the left). On the slide, drag to draw another rectangle. Select the rectangle. Under Drawing Tools , on the Format tab, in the Size group, do the following: In the Shape Height box, enter 4” . In the Shape Width box, enter 2.67” . Under Drawing Tools , on the Format tab, in the Shape Styles group, click the arrow next to Shape Fill , point to Gradient , and then click More Gradients . In the Format Shape dialog box, click Fill in the left pane. In the Fill pane, select No fill . Also in the Format Shape dialog box, click Line Color in the left pane, select Solid line in the Line Color pane, and then do the following: Click the button next to Color , and then under Theme Colors click White, Background 1 (first row, first option from the left). In the Transparency box, enter 70% . Also in the Format Shape dialog box, click Line Style in the left pane, and then do the following in the Line Style pane: In the Width box, enter 0.75 pt . Click the button next to Dash type , and then click Square Dot (third option from the top). Drag the dotted rectangle on top of the small, full-color picture. Press and hold SHIFT and select the dotted rectangle, the small picture, and the large picture on the slide. On the Home tab, in the Drawing group, click Arrange , point to Align , and then do the following: Click Align Selected Objects . Click Align Middle . On the Insert tab, in the Text group, click Text Box , and then on the slide, drag to draw the text box. Enter text in the text box, select the text, and then on the Home tab, in the Font group, select Gill Sans MT Condensed from the Font list, select 24 from the Font Size list, click the button next to Font Color , and then under Theme Colors click White, Background 1 (first row, first option from the left). On the Home tab, in the Paragraph group, click Center to center the text within the text box. On the slide, drag the text box below the dotted rectangle. To reproduce the background effects on this slide, do the following: Right-click the slide background area, and then click Format Background . In the Format Background dialog box, click Fill in the left pane, and then select Solid fill in the Fill pane. Also in the Fill pane, click the button next to Color , and then under Theme Colors click Black, Text 1, Lighter 15% (fifth row, second option from the left). To reproduce the animation effects on this slide, do the following: To view the area beyond the slide, on the View tab, click Zoom , and then in the Zoom dialog box, in the Percent box, enter 70% . ( Note: Make sure that Fit is not selected in the Zoom dialog box.) On the Animations tab, in the Animations group, click Custom Animation . On the slide, select the dotted rectangle. In the Custom Animation task pane, click Add Effect , point to Motion Paths , point to Draw Custom Path , and then click Freeform . Press and hold SHIFT to conform the path to a straight, horizontal line, and then do the following on the slide: Click the center of the dotted rectangle to create the first motion-path point. Click approximately ½” beyond the right edge of the rectangle to create the second motion-path point. Double-click approximately 2” beyond the left edge of the slide to create the third and final motion-path point. On the slide, right-click the freeform motion path, and then click Reverse Path Direction . On the slide, select the freeform motion path. In the Custom Animation task pane, under Modify: Custom Path , in the Start list, select With Previous . On the slide, select the gradient-filled rectangle. In the Custom Animation task pane, do the following: Click Add Effect , point to Entrance , and then click More Effects . In the Add Entrance Effect dialog box, under Subtle , click Fade , and then click OK . Under Modify: Fade , in the Start list, select With Previous . Under Modify: Fade , in the Speed list, select Very Fast . Click Add Effect , point to Motion Paths , and then click Down . Under Modify: Down , in the Start list, select With Previous . Under Modify: Down , in the Speed list, select Medium . On the slide, right-click the down motion path and click Reverse Path Direction . On the slide, select the smaller, full-color picture. In the Custom Animation task pane, do the following: Click Add Effect , point to Entrance , and then click More Effects . In the Add Entrance Effect dialog box, under Subtle , click Fade , and then click OK . Under Modify: Fade , in the Start list, select With Previous . Under Modify: Fade , in the Speed list, select Very Fast . Right-click the picture fade effect in the pane, and then click Timing . In the Fade dialog box, on the Timing tab, in the Delay box, enter 1.5 . On the slide, select the text box. In the Custom Animation task pane, do the following: Click Add Effect , point to Entrance , and then click More Effects . In the Add Entrance Effect dialog box, under Moderate , click Descend , and then click OK . Under Modify: Descend , in the Start list, select With Previous . Under Modify: Descend , in the Speed list, select Fast .
- Custom animation effects: recolored picture with full-color section and motion path (Advanced) To reproduce the picture effects on this slide, do the following: On the Home tab, in the Slides group, click Layout and then click Blank . On the Insert tab, in the Illustrations group, click Picture . In the Insert Picture dialog box, select a picture, and then click Insert . Select the picture. Under Picture Tools , on the Format tab, in the bottom right corner of the Size group, click the Size and Position dialog box launcher. In the Size and Position dialog box, on the Size tab, resize or crop the picture as needed so that under Size and rotate , the Height box is set to 3.58” and the Width box is set to 8” . Resize the picture under Size and rotate by entering values into the Height and Width boxes. Crop the picture under Crop from by entering values into the Left , Right , Top , and Bottom boxes. Under Picture Tools , on the Format tab, in the Adjust group, click Recolor , and then under Dark Variations click Text color 2 Dark (first option from the left). Under Picture Tools , on the Format tab, in the Picture Styles group, click Picture Effects , point to Shadow , and then under Inner click Inside Diagonal Top Left (first row, first option from the left). Drag the picture so that it is positioned above the middle of the slide. On the Home tab, in the Clipboard group, click the arrow next to Paste , and then click Duplicate . Press and hold CTRL and select both pictures on the slide. On the Home tab, in the Drawing group, click Arrange , point to Align , and then do the following: Click Align to Slide . Click Align Center . Click Align Selected Objects . Click Align Middle . Click the slide background area to cancel the selection of both pictures. Select the duplicate (top) picture. Under Picture Tools , on the Format tab, in the bottom right corner of the Size group, click the Size and Position dialog box launcher. In the Size and Position dialog box, on the Size tab, under Crop from , enter values into the Left and Right boxes so that under Size and rotate , and the Width box is set to 2.33” . ( Note: For best results, crop the duplicate picture to tightly focus on a single element in the original picture.) Under Picture Tools , on the Format tab, in the Adjust group, click Recolor , and then under No Recolor click No Recolor . On the Home tab, in the Drawing group, click Shapes , and then under Rectangles click Rectangle (first option from the left). On the slide, drag to draw a rectangle. Select the rectangle. Under Drawing Tools , on the Format tab, in the Size group, do the following: In the Shape Height box, enter 7.5” . In the Shape Width box, enter 2.33” . Under Drawing Tools , on the Format tab, in the Shape Styles group, click the arrow next to Shape Fill , point to Gradient , and then click More Gradients . In the Format Shape dialog box, click Fill in the left pane, select Gradient fill in the Fill pane, and then do the following: In the Type list, select Linear . Click the button next to Direction , and then click Linear Down (first row, second option from the left). Under Gradient stops , click Add or Remove until two stops appear in the drop-down list. Also under Gradient stops , customize the gradient stops that you added as follows: Select Stop 1 from the list, and then do the following: In the Stop position box, enter 0% . Click the button next to Color , then under Theme Colors click White, Background 1 (first row, first option from the left). In the Transparency box, enter 55% . Select Stop 2 from the list, and then do the following: In the Stop position box, enter 100% . Click the button next to Color , and then under Theme Colors click White, Background 1 (first row, first option from the left). In the Transparency box, enter 100% . On the slide, drag the rectangle to cover the duplicate picture. Select the rectangle. On the Home tab, in the Drawing group, click Arrange , and then do the following: Point to Align , and then click Align to Slide . Point to Align , and then click Align Middle . Click Send Backward . On the Home tab, in the Drawing group, click Shapes , and then under Rectangles click Rectangle (first option from the left). On the slide, drag to draw another rectangle. Select the rectangle. Under Drawing Tools , on the Format tab, in the Size group, do the following: In the Shape Height box, enter 4” . In the Shape Width box, enter 2.67” . Under Drawing Tools , on the Format tab, in the Shape Styles group, click the arrow next to Shape Fill , point to Gradient , and then click More Gradients . In the Format Shape dialog box, click Fill in the left pane. In the Fill pane, select No fill . Also in the Format Shape dialog box, click Line Color in the left pane, select Solid line in the Line Color pane, and then do the following: Click the button next to Color , and then under Theme Colors click White, Background 1 (first row, first option from the left). In the Transparency box, enter 70% . Also in the Format Shape dialog box, click Line Style in the left pane, and then do the following in the Line Style pane: In the Width box, enter 0.75 pt . Click the button next to Dash type , and then click Square Dot (third option from the top). Drag the dotted rectangle on top of the small, full-color picture. Press and hold SHIFT and select the dotted rectangle, the small picture, and the large picture on the slide. On the Home tab, in the Drawing group, click Arrange , point to Align , and then do the following: Click Align Selected Objects . Click Align Middle . On the Insert tab, in the Text group, click Text Box , and then on the slide, drag to draw the text box. Enter text in the text box, select the text, and then on the Home tab, in the Font group, select Gill Sans MT Condensed from the Font list, select 24 from the Font Size list, click the button next to Font Color , and then under Theme Colors click White, Background 1 (first row, first option from the left). On the Home tab, in the Paragraph group, click Center to center the text within the text box. On the slide, drag the text box below the dotted rectangle. To reproduce the background effects on this slide, do the following: Right-click the slide background area, and then click Format Background . In the Format Background dialog box, click Fill in the left pane, and then select Solid fill in the Fill pane. Also in the Fill pane, click the button next to Color , and then under Theme Colors click Black, Text 1, Lighter 15% (fifth row, second option from the left). To reproduce the animation effects on this slide, do the following: To view the area beyond the slide, on the View tab, click Zoom , and then in the Zoom dialog box, in the Percent box, enter 70% . ( Note: Make sure that Fit is not selected in the Zoom dialog box.) On the Animations tab, in the Animations group, click Custom Animation . On the slide, select the dotted rectangle. In the Custom Animation task pane, click Add Effect , point to Motion Paths , point to Draw Custom Path , and then click Freeform . Press and hold SHIFT to conform the path to a straight, horizontal line, and then do the following on the slide: Click the center of the dotted rectangle to create the first motion-path point. Click approximately ½” beyond the right edge of the rectangle to create the second motion-path point. Double-click approximately 2” beyond the left edge of the slide to create the third and final motion-path point. On the slide, right-click the freeform motion path, and then click Reverse Path Direction . On the slide, select the freeform motion path. In the Custom Animation task pane, under Modify: Custom Path , in the Start list, select With Previous . On the slide, select the gradient-filled rectangle. In the Custom Animation task pane, do the following: Click Add Effect , point to Entrance , and then click More Effects . In the Add Entrance Effect dialog box, under Subtle , click Fade , and then click OK . Under Modify: Fade , in the Start list, select With Previous . Under Modify: Fade , in the Speed list, select Very Fast . Click Add Effect , point to Motion Paths , and then click Down . Under Modify: Down , in the Start list, select With Previous . Under Modify: Down , in the Speed list, select Medium . On the slide, right-click the down motion path and click Reverse Path Direction . On the slide, select the smaller, full-color picture. In the Custom Animation task pane, do the following: Click Add Effect , point to Entrance , and then click More Effects . In the Add Entrance Effect dialog box, under Subtle , click Fade , and then click OK . Under Modify: Fade , in the Start list, select With Previous . Under Modify: Fade , in the Speed list, select Very Fast . Right-click the picture fade effect in the pane, and then click Timing . In the Fade dialog box, on the Timing tab, in the Delay box, enter 1.5 . On the slide, select the text box. In the Custom Animation task pane, do the following: Click Add Effect , point to Entrance , and then click More Effects . In the Add Entrance Effect dialog box, under Moderate , click Descend , and then click OK . Under Modify: Descend , in the Start list, select With Previous . Under Modify: Descend , in the Speed list, select Fast .
- Custom animation effects: recolored picture with full-color section and motion path (Advanced) To reproduce the picture effects on this slide, do the following: On the Home tab, in the Slides group, click Layout and then click Blank . On the Insert tab, in the Illustrations group, click Picture . In the Insert Picture dialog box, select a picture, and then click Insert . Select the picture. Under Picture Tools , on the Format tab, in the bottom right corner of the Size group, click the Size and Position dialog box launcher. In the Size and Position dialog box, on the Size tab, resize or crop the picture as needed so that under Size and rotate , the Height box is set to 3.58” and the Width box is set to 8” . Resize the picture under Size and rotate by entering values into the Height and Width boxes. Crop the picture under Crop from by entering values into the Left , Right , Top , and Bottom boxes. Under Picture Tools , on the Format tab, in the Adjust group, click Recolor , and then under Dark Variations click Text color 2 Dark (first option from the left). Under Picture Tools , on the Format tab, in the Picture Styles group, click Picture Effects , point to Shadow , and then under Inner click Inside Diagonal Top Left (first row, first option from the left). Drag the picture so that it is positioned above the middle of the slide. On the Home tab, in the Clipboard group, click the arrow next to Paste , and then click Duplicate . Press and hold CTRL and select both pictures on the slide. On the Home tab, in the Drawing group, click Arrange , point to Align , and then do the following: Click Align to Slide . Click Align Center . Click Align Selected Objects . Click Align Middle . Click the slide background area to cancel the selection of both pictures. Select the duplicate (top) picture. Under Picture Tools , on the Format tab, in the bottom right corner of the Size group, click the Size and Position dialog box launcher. In the Size and Position dialog box, on the Size tab, under Crop from , enter values into the Left and Right boxes so that under Size and rotate , and the Width box is set to 2.33” . ( Note: For best results, crop the duplicate picture to tightly focus on a single element in the original picture.) Under Picture Tools , on the Format tab, in the Adjust group, click Recolor , and then under No Recolor click No Recolor . On the Home tab, in the Drawing group, click Shapes , and then under Rectangles click Rectangle (first option from the left). On the slide, drag to draw a rectangle. Select the rectangle. Under Drawing Tools , on the Format tab, in the Size group, do the following: In the Shape Height box, enter 7.5” . In the Shape Width box, enter 2.33” . Under Drawing Tools , on the Format tab, in the Shape Styles group, click the arrow next to Shape Fill , point to Gradient , and then click More Gradients . In the Format Shape dialog box, click Fill in the left pane, select Gradient fill in the Fill pane, and then do the following: In the Type list, select Linear . Click the button next to Direction , and then click Linear Down (first row, second option from the left). Under Gradient stops , click Add or Remove until two stops appear in the drop-down list. Also under Gradient stops , customize the gradient stops that you added as follows: Select Stop 1 from the list, and then do the following: In the Stop position box, enter 0% . Click the button next to Color , then under Theme Colors click White, Background 1 (first row, first option from the left). In the Transparency box, enter 55% . Select Stop 2 from the list, and then do the following: In the Stop position box, enter 100% . Click the button next to Color , and then under Theme Colors click White, Background 1 (first row, first option from the left). In the Transparency box, enter 100% . On the slide, drag the rectangle to cover the duplicate picture. Select the rectangle. On the Home tab, in the Drawing group, click Arrange , and then do the following: Point to Align , and then click Align to Slide . Point to Align , and then click Align Middle . Click Send Backward . On the Home tab, in the Drawing group, click Shapes , and then under Rectangles click Rectangle (first option from the left). On the slide, drag to draw another rectangle. Select the rectangle. Under Drawing Tools , on the Format tab, in the Size group, do the following: In the Shape Height box, enter 4” . In the Shape Width box, enter 2.67” . Under Drawing Tools , on the Format tab, in the Shape Styles group, click the arrow next to Shape Fill , point to Gradient , and then click More Gradients . In the Format Shape dialog box, click Fill in the left pane. In the Fill pane, select No fill . Also in the Format Shape dialog box, click Line Color in the left pane, select Solid line in the Line Color pane, and then do the following: Click the button next to Color , and then under Theme Colors click White, Background 1 (first row, first option from the left). In the Transparency box, enter 70% . Also in the Format Shape dialog box, click Line Style in the left pane, and then do the following in the Line Style pane: In the Width box, enter 0.75 pt . Click the button next to Dash type , and then click Square Dot (third option from the top). Drag the dotted rectangle on top of the small, full-color picture. Press and hold SHIFT and select the dotted rectangle, the small picture, and the large picture on the slide. On the Home tab, in the Drawing group, click Arrange , point to Align , and then do the following: Click Align Selected Objects . Click Align Middle . On the Insert tab, in the Text group, click Text Box , and then on the slide, drag to draw the text box. Enter text in the text box, select the text, and then on the Home tab, in the Font group, select Gill Sans MT Condensed from the Font list, select 24 from the Font Size list, click the button next to Font Color , and then under Theme Colors click White, Background 1 (first row, first option from the left). On the Home tab, in the Paragraph group, click Center to center the text within the text box. On the slide, drag the text box below the dotted rectangle. To reproduce the background effects on this slide, do the following: Right-click the slide background area, and then click Format Background . In the Format Background dialog box, click Fill in the left pane, and then select Solid fill in the Fill pane. Also in the Fill pane, click the button next to Color , and then under Theme Colors click Black, Text 1, Lighter 15% (fifth row, second option from the left). To reproduce the animation effects on this slide, do the following: To view the area beyond the slide, on the View tab, click Zoom , and then in the Zoom dialog box, in the Percent box, enter 70% . ( Note: Make sure that Fit is not selected in the Zoom dialog box.) On the Animations tab, in the Animations group, click Custom Animation . On the slide, select the dotted rectangle. In the Custom Animation task pane, click Add Effect , point to Motion Paths , point to Draw Custom Path , and then click Freeform . Press and hold SHIFT to conform the path to a straight, horizontal line, and then do the following on the slide: Click the center of the dotted rectangle to create the first motion-path point. Click approximately ½” beyond the right edge of the rectangle to create the second motion-path point. Double-click approximately 2” beyond the left edge of the slide to create the third and final motion-path point. On the slide, right-click the freeform motion path, and then click Reverse Path Direction . On the slide, select the freeform motion path. In the Custom Animation task pane, under Modify: Custom Path , in the Start list, select With Previous . On the slide, select the gradient-filled rectangle. In the Custom Animation task pane, do the following: Click Add Effect , point to Entrance , and then click More Effects . In the Add Entrance Effect dialog box, under Subtle , click Fade , and then click OK . Under Modify: Fade , in the Start list, select With Previous . Under Modify: Fade , in the Speed list, select Very Fast . Click Add Effect , point to Motion Paths , and then click Down . Under Modify: Down , in the Start list, select With Previous . Under Modify: Down , in the Speed list, select Medium . On the slide, right-click the down motion path and click Reverse Path Direction . On the slide, select the smaller, full-color picture. In the Custom Animation task pane, do the following: Click Add Effect , point to Entrance , and then click More Effects . In the Add Entrance Effect dialog box, under Subtle , click Fade , and then click OK . Under Modify: Fade , in the Start list, select With Previous . Under Modify: Fade , in the Speed list, select Very Fast . Right-click the picture fade effect in the pane, and then click Timing . In the Fade dialog box, on the Timing tab, in the Delay box, enter 1.5 . On the slide, select the text box. In the Custom Animation task pane, do the following: Click Add Effect , point to Entrance , and then click More Effects . In the Add Entrance Effect dialog box, under Moderate , click Descend , and then click OK . Under Modify: Descend , in the Start list, select With Previous . Under Modify: Descend , in the Speed list, select Fast .
- Custom animation effects: recolored picture with full-color section and motion path (Advanced) To reproduce the picture effects on this slide, do the following: On the Home tab, in the Slides group, click Layout and then click Blank . On the Insert tab, in the Illustrations group, click Picture . In the Insert Picture dialog box, select a picture, and then click Insert . Select the picture. Under Picture Tools , on the Format tab, in the bottom right corner of the Size group, click the Size and Position dialog box launcher. In the Size and Position dialog box, on the Size tab, resize or crop the picture as needed so that under Size and rotate , the Height box is set to 3.58” and the Width box is set to 8” . Resize the picture under Size and rotate by entering values into the Height and Width boxes. Crop the picture under Crop from by entering values into the Left , Right , Top , and Bottom boxes. Under Picture Tools , on the Format tab, in the Adjust group, click Recolor , and then under Dark Variations click Text color 2 Dark (first option from the left). Under Picture Tools , on the Format tab, in the Picture Styles group, click Picture Effects , point to Shadow , and then under Inner click Inside Diagonal Top Left (first row, first option from the left). Drag the picture so that it is positioned above the middle of the slide. On the Home tab, in the Clipboard group, click the arrow next to Paste , and then click Duplicate . Press and hold CTRL and select both pictures on the slide. On the Home tab, in the Drawing group, click Arrange , point to Align , and then do the following: Click Align to Slide . Click Align Center . Click Align Selected Objects . Click Align Middle . Click the slide background area to cancel the selection of both pictures. Select the duplicate (top) picture. Under Picture Tools , on the Format tab, in the bottom right corner of the Size group, click the Size and Position dialog box launcher. In the Size and Position dialog box, on the Size tab, under Crop from , enter values into the Left and Right boxes so that under Size and rotate , and the Width box is set to 2.33” . ( Note: For best results, crop the duplicate picture to tightly focus on a single element in the original picture.) Under Picture Tools , on the Format tab, in the Adjust group, click Recolor , and then under No Recolor click No Recolor . On the Home tab, in the Drawing group, click Shapes , and then under Rectangles click Rectangle (first option from the left). On the slide, drag to draw a rectangle. Select the rectangle. Under Drawing Tools , on the Format tab, in the Size group, do the following: In the Shape Height box, enter 7.5” . In the Shape Width box, enter 2.33” . Under Drawing Tools , on the Format tab, in the Shape Styles group, click the arrow next to Shape Fill , point to Gradient , and then click More Gradients . In the Format Shape dialog box, click Fill in the left pane, select Gradient fill in the Fill pane, and then do the following: In the Type list, select Linear . Click the button next to Direction , and then click Linear Down (first row, second option from the left). Under Gradient stops , click Add or Remove until two stops appear in the drop-down list. Also under Gradient stops , customize the gradient stops that you added as follows: Select Stop 1 from the list, and then do the following: In the Stop position box, enter 0% . Click the button next to Color , then under Theme Colors click White, Background 1 (first row, first option from the left). In the Transparency box, enter 55% . Select Stop 2 from the list, and then do the following: In the Stop position box, enter 100% . Click the button next to Color , and then under Theme Colors click White, Background 1 (first row, first option from the left). In the Transparency box, enter 100% . On the slide, drag the rectangle to cover the duplicate picture. Select the rectangle. On the Home tab, in the Drawing group, click Arrange , and then do the following: Point to Align , and then click Align to Slide . Point to Align , and then click Align Middle . Click Send Backward . On the Home tab, in the Drawing group, click Shapes , and then under Rectangles click Rectangle (first option from the left). On the slide, drag to draw another rectangle. Select the rectangle. Under Drawing Tools , on the Format tab, in the Size group, do the following: In the Shape Height box, enter 4” . In the Shape Width box, enter 2.67” . Under Drawing Tools , on the Format tab, in the Shape Styles group, click the arrow next to Shape Fill , point to Gradient , and then click More Gradients . In the Format Shape dialog box, click Fill in the left pane. In the Fill pane, select No fill . Also in the Format Shape dialog box, click Line Color in the left pane, select Solid line in the Line Color pane, and then do the following: Click the button next to Color , and then under Theme Colors click White, Background 1 (first row, first option from the left). In the Transparency box, enter 70% . Also in the Format Shape dialog box, click Line Style in the left pane, and then do the following in the Line Style pane: In the Width box, enter 0.75 pt . Click the button next to Dash type , and then click Square Dot (third option from the top). Drag the dotted rectangle on top of the small, full-color picture. Press and hold SHIFT and select the dotted rectangle, the small picture, and the large picture on the slide. On the Home tab, in the Drawing group, click Arrange , point to Align , and then do the following: Click Align Selected Objects . Click Align Middle . On the Insert tab, in the Text group, click Text Box , and then on the slide, drag to draw the text box. Enter text in the text box, select the text, and then on the Home tab, in the Font group, select Gill Sans MT Condensed from the Font list, select 24 from the Font Size list, click the button next to Font Color , and then under Theme Colors click White, Background 1 (first row, first option from the left). On the Home tab, in the Paragraph group, click Center to center the text within the text box. On the slide, drag the text box below the dotted rectangle. To reproduce the background effects on this slide, do the following: Right-click the slide background area, and then click Format Background . In the Format Background dialog box, click Fill in the left pane, and then select Solid fill in the Fill pane. Also in the Fill pane, click the button next to Color , and then under Theme Colors click Black, Text 1, Lighter 15% (fifth row, second option from the left). To reproduce the animation effects on this slide, do the following: To view the area beyond the slide, on the View tab, click Zoom , and then in the Zoom dialog box, in the Percent box, enter 70% . ( Note: Make sure that Fit is not selected in the Zoom dialog box.) On the Animations tab, in the Animations group, click Custom Animation . On the slide, select the dotted rectangle. In the Custom Animation task pane, click Add Effect , point to Motion Paths , point to Draw Custom Path , and then click Freeform . Press and hold SHIFT to conform the path to a straight, horizontal line, and then do the following on the slide: Click the center of the dotted rectangle to create the first motion-path point. Click approximately ½” beyond the right edge of the rectangle to create the second motion-path point. Double-click approximately 2” beyond the left edge of the slide to create the third and final motion-path point. On the slide, right-click the freeform motion path, and then click Reverse Path Direction . On the slide, select the freeform motion path. In the Custom Animation task pane, under Modify: Custom Path , in the Start list, select With Previous . On the slide, select the gradient-filled rectangle. In the Custom Animation task pane, do the following: Click Add Effect , point to Entrance , and then click More Effects . In the Add Entrance Effect dialog box, under Subtle , click Fade , and then click OK . Under Modify: Fade , in the Start list, select With Previous . Under Modify: Fade , in the Speed list, select Very Fast . Click Add Effect , point to Motion Paths , and then click Down . Under Modify: Down , in the Start list, select With Previous . Under Modify: Down , in the Speed list, select Medium . On the slide, right-click the down motion path and click Reverse Path Direction . On the slide, select the smaller, full-color picture. In the Custom Animation task pane, do the following: Click Add Effect , point to Entrance , and then click More Effects . In the Add Entrance Effect dialog box, under Subtle , click Fade , and then click OK . Under Modify: Fade , in the Start list, select With Previous . Under Modify: Fade , in the Speed list, select Very Fast . Right-click the picture fade effect in the pane, and then click Timing . In the Fade dialog box, on the Timing tab, in the Delay box, enter 1.5 . On the slide, select the text box. In the Custom Animation task pane, do the following: Click Add Effect , point to Entrance , and then click More Effects . In the Add Entrance Effect dialog box, under Moderate , click Descend , and then click OK . Under Modify: Descend , in the Start list, select With Previous . Under Modify: Descend , in the Speed list, select Fast .
- Custom animation effects: recolored picture with full-color section and motion path (Advanced) To reproduce the picture effects on this slide, do the following: On the Home tab, in the Slides group, click Layout and then click Blank . On the Insert tab, in the Illustrations group, click Picture . In the Insert Picture dialog box, select a picture, and then click Insert . Select the picture. Under Picture Tools , on the Format tab, in the bottom right corner of the Size group, click the Size and Position dialog box launcher. In the Size and Position dialog box, on the Size tab, resize or crop the picture as needed so that under Size and rotate , the Height box is set to 3.58” and the Width box is set to 8” . Resize the picture under Size and rotate by entering values into the Height and Width boxes. Crop the picture under Crop from by entering values into the Left , Right , Top , and Bottom boxes. Under Picture Tools , on the Format tab, in the Adjust group, click Recolor , and then under Dark Variations click Text color 2 Dark (first option from the left). Under Picture Tools , on the Format tab, in the Picture Styles group, click Picture Effects , point to Shadow , and then under Inner click Inside Diagonal Top Left (first row, first option from the left). Drag the picture so that it is positioned above the middle of the slide. On the Home tab, in the Clipboard group, click the arrow next to Paste , and then click Duplicate . Press and hold CTRL and select both pictures on the slide. On the Home tab, in the Drawing group, click Arrange , point to Align , and then do the following: Click Align to Slide . Click Align Center . Click Align Selected Objects . Click Align Middle . Click the slide background area to cancel the selection of both pictures. Select the duplicate (top) picture. Under Picture Tools , on the Format tab, in the bottom right corner of the Size group, click the Size and Position dialog box launcher. In the Size and Position dialog box, on the Size tab, under Crop from , enter values into the Left and Right boxes so that under Size and rotate , and the Width box is set to 2.33” . ( Note: For best results, crop the duplicate picture to tightly focus on a single element in the original picture.) Under Picture Tools , on the Format tab, in the Adjust group, click Recolor , and then under No Recolor click No Recolor . On the Home tab, in the Drawing group, click Shapes , and then under Rectangles click Rectangle (first option from the left). On the slide, drag to draw a rectangle. Select the rectangle. Under Drawing Tools , on the Format tab, in the Size group, do the following: In the Shape Height box, enter 7.5” . In the Shape Width box, enter 2.33” . Under Drawing Tools , on the Format tab, in the Shape Styles group, click the arrow next to Shape Fill , point to Gradient , and then click More Gradients . In the Format Shape dialog box, click Fill in the left pane, select Gradient fill in the Fill pane, and then do the following: In the Type list, select Linear . Click the button next to Direction , and then click Linear Down (first row, second option from the left). Under Gradient stops , click Add or Remove until two stops appear in the drop-down list. Also under Gradient stops , customize the gradient stops that you added as follows: Select Stop 1 from the list, and then do the following: In the Stop position box, enter 0% . Click the button next to Color , then under Theme Colors click White, Background 1 (first row, first option from the left). In the Transparency box, enter 55% . Select Stop 2 from the list, and then do the following: In the Stop position box, enter 100% . Click the button next to Color , and then under Theme Colors click White, Background 1 (first row, first option from the left). In the Transparency box, enter 100% . On the slide, drag the rectangle to cover the duplicate picture. Select the rectangle. On the Home tab, in the Drawing group, click Arrange , and then do the following: Point to Align , and then click Align to Slide . Point to Align , and then click Align Middle . Click Send Backward . On the Home tab, in the Drawing group, click Shapes , and then under Rectangles click Rectangle (first option from the left). On the slide, drag to draw another rectangle. Select the rectangle. Under Drawing Tools , on the Format tab, in the Size group, do the following: In the Shape Height box, enter 4” . In the Shape Width box, enter 2.67” . Under Drawing Tools , on the Format tab, in the Shape Styles group, click the arrow next to Shape Fill , point to Gradient , and then click More Gradients . In the Format Shape dialog box, click Fill in the left pane. In the Fill pane, select No fill . Also in the Format Shape dialog box, click Line Color in the left pane, select Solid line in the Line Color pane, and then do the following: Click the button next to Color , and then under Theme Colors click White, Background 1 (first row, first option from the left). In the Transparency box, enter 70% . Also in the Format Shape dialog box, click Line Style in the left pane, and then do the following in the Line Style pane: In the Width box, enter 0.75 pt . Click the button next to Dash type , and then click Square Dot (third option from the top). Drag the dotted rectangle on top of the small, full-color picture. Press and hold SHIFT and select the dotted rectangle, the small picture, and the large picture on the slide. On the Home tab, in the Drawing group, click Arrange , point to Align , and then do the following: Click Align Selected Objects . Click Align Middle . On the Insert tab, in the Text group, click Text Box , and then on the slide, drag to draw the text box. Enter text in the text box, select the text, and then on the Home tab, in the Font group, select Gill Sans MT Condensed from the Font list, select 24 from the Font Size list, click the button next to Font Color , and then under Theme Colors click White, Background 1 (first row, first option from the left). On the Home tab, in the Paragraph group, click Center to center the text within the text box. On the slide, drag the text box below the dotted rectangle. To reproduce the background effects on this slide, do the following: Right-click the slide background area, and then click Format Background . In the Format Background dialog box, click Fill in the left pane, and then select Solid fill in the Fill pane. Also in the Fill pane, click the button next to Color , and then under Theme Colors click Black, Text 1, Lighter 15% (fifth row, second option from the left). To reproduce the animation effects on this slide, do the following: To view the area beyond the slide, on the View tab, click Zoom , and then in the Zoom dialog box, in the Percent box, enter 70% . ( Note: Make sure that Fit is not selected in the Zoom dialog box.) On the Animations tab, in the Animations group, click Custom Animation . On the slide, select the dotted rectangle. In the Custom Animation task pane, click Add Effect , point to Motion Paths , point to Draw Custom Path , and then click Freeform . Press and hold SHIFT to conform the path to a straight, horizontal line, and then do the following on the slide: Click the center of the dotted rectangle to create the first motion-path point. Click approximately ½” beyond the right edge of the rectangle to create the second motion-path point. Double-click approximately 2” beyond the left edge of the slide to create the third and final motion-path point. On the slide, right-click the freeform motion path, and then click Reverse Path Direction . On the slide, select the freeform motion path. In the Custom Animation task pane, under Modify: Custom Path , in the Start list, select With Previous . On the slide, select the gradient-filled rectangle. In the Custom Animation task pane, do the following: Click Add Effect , point to Entrance , and then click More Effects . In the Add Entrance Effect dialog box, under Subtle , click Fade , and then click OK . Under Modify: Fade , in the Start list, select With Previous . Under Modify: Fade , in the Speed list, select Very Fast . Click Add Effect , point to Motion Paths , and then click Down . Under Modify: Down , in the Start list, select With Previous . Under Modify: Down , in the Speed list, select Medium . On the slide, right-click the down motion path and click Reverse Path Direction . On the slide, select the smaller, full-color picture. In the Custom Animation task pane, do the following: Click Add Effect , point to Entrance , and then click More Effects . In the Add Entrance Effect dialog box, under Subtle , click Fade , and then click OK . Under Modify: Fade , in the Start list, select With Previous . Under Modify: Fade , in the Speed list, select Very Fast . Right-click the picture fade effect in the pane, and then click Timing . In the Fade dialog box, on the Timing tab, in the Delay box, enter 1.5 . On the slide, select the text box. In the Custom Animation task pane, do the following: Click Add Effect , point to Entrance , and then click More Effects . In the Add Entrance Effect dialog box, under Moderate , click Descend , and then click OK . Under Modify: Descend , in the Start list, select With Previous . Under Modify: Descend , in the Speed list, select Fast .
- Custom animation effects: recolored picture with full-color section and motion path (Advanced) To reproduce the picture effects on this slide, do the following: On the Home tab, in the Slides group, click Layout and then click Blank . On the Insert tab, in the Illustrations group, click Picture . In the Insert Picture dialog box, select a picture, and then click Insert . Select the picture. Under Picture Tools , on the Format tab, in the bottom right corner of the Size group, click the Size and Position dialog box launcher. In the Size and Position dialog box, on the Size tab, resize or crop the picture as needed so that under Size and rotate , the Height box is set to 3.58” and the Width box is set to 8” . Resize the picture under Size and rotate by entering values into the Height and Width boxes. Crop the picture under Crop from by entering values into the Left , Right , Top , and Bottom boxes. Under Picture Tools , on the Format tab, in the Adjust group, click Recolor , and then under Dark Variations click Text color 2 Dark (first option from the left). Under Picture Tools , on the Format tab, in the Picture Styles group, click Picture Effects , point to Shadow , and then under Inner click Inside Diagonal Top Left (first row, first option from the left). Drag the picture so that it is positioned above the middle of the slide. On the Home tab, in the Clipboard group, click the arrow next to Paste , and then click Duplicate . Press and hold CTRL and select both pictures on the slide. On the Home tab, in the Drawing group, click Arrange , point to Align , and then do the following: Click Align to Slide . Click Align Center . Click Align Selected Objects . Click Align Middle . Click the slide background area to cancel the selection of both pictures. Select the duplicate (top) picture. Under Picture Tools , on the Format tab, in the bottom right corner of the Size group, click the Size and Position dialog box launcher. In the Size and Position dialog box, on the Size tab, under Crop from , enter values into the Left and Right boxes so that under Size and rotate , and the Width box is set to 2.33” . ( Note: For best results, crop the duplicate picture to tightly focus on a single element in the original picture.) Under Picture Tools , on the Format tab, in the Adjust group, click Recolor , and then under No Recolor click No Recolor . On the Home tab, in the Drawing group, click Shapes , and then under Rectangles click Rectangle (first option from the left). On the slide, drag to draw a rectangle. Select the rectangle. Under Drawing Tools , on the Format tab, in the Size group, do the following: In the Shape Height box, enter 7.5” . In the Shape Width box, enter 2.33” . Under Drawing Tools , on the Format tab, in the Shape Styles group, click the arrow next to Shape Fill , point to Gradient , and then click More Gradients . In the Format Shape dialog box, click Fill in the left pane, select Gradient fill in the Fill pane, and then do the following: In the Type list, select Linear . Click the button next to Direction , and then click Linear Down (first row, second option from the left). Under Gradient stops , click Add or Remove until two stops appear in the drop-down list. Also under Gradient stops , customize the gradient stops that you added as follows: Select Stop 1 from the list, and then do the following: In the Stop position box, enter 0% . Click the button next to Color , then under Theme Colors click White, Background 1 (first row, first option from the left). In the Transparency box, enter 55% . Select Stop 2 from the list, and then do the following: In the Stop position box, enter 100% . Click the button next to Color , and then under Theme Colors click White, Background 1 (first row, first option from the left). In the Transparency box, enter 100% . On the slide, drag the rectangle to cover the duplicate picture. Select the rectangle. On the Home tab, in the Drawing group, click Arrange , and then do the following: Point to Align , and then click Align to Slide . Point to Align , and then click Align Middle . Click Send Backward . On the Home tab, in the Drawing group, click Shapes , and then under Rectangles click Rectangle (first option from the left). On the slide, drag to draw another rectangle. Select the rectangle. Under Drawing Tools , on the Format tab, in the Size group, do the following: In the Shape Height box, enter 4” . In the Shape Width box, enter 2.67” . Under Drawing Tools , on the Format tab, in the Shape Styles group, click the arrow next to Shape Fill , point to Gradient , and then click More Gradients . In the Format Shape dialog box, click Fill in the left pane. In the Fill pane, select No fill . Also in the Format Shape dialog box, click Line Color in the left pane, select Solid line in the Line Color pane, and then do the following: Click the button next to Color , and then under Theme Colors click White, Background 1 (first row, first option from the left). In the Transparency box, enter 70% . Also in the Format Shape dialog box, click Line Style in the left pane, and then do the following in the Line Style pane: In the Width box, enter 0.75 pt . Click the button next to Dash type , and then click Square Dot (third option from the top). Drag the dotted rectangle on top of the small, full-color picture. Press and hold SHIFT and select the dotted rectangle, the small picture, and the large picture on the slide. On the Home tab, in the Drawing group, click Arrange , point to Align , and then do the following: Click Align Selected Objects . Click Align Middle . On the Insert tab, in the Text group, click Text Box , and then on the slide, drag to draw the text box. Enter text in the text box, select the text, and then on the Home tab, in the Font group, select Gill Sans MT Condensed from the Font list, select 24 from the Font Size list, click the button next to Font Color , and then under Theme Colors click White, Background 1 (first row, first option from the left). On the Home tab, in the Paragraph group, click Center to center the text within the text box. On the slide, drag the text box below the dotted rectangle. To reproduce the background effects on this slide, do the following: Right-click the slide background area, and then click Format Background . In the Format Background dialog box, click Fill in the left pane, and then select Solid fill in the Fill pane. Also in the Fill pane, click the button next to Color , and then under Theme Colors click Black, Text 1, Lighter 15% (fifth row, second option from the left). To reproduce the animation effects on this slide, do the following: To view the area beyond the slide, on the View tab, click Zoom , and then in the Zoom dialog box, in the Percent box, enter 70% . ( Note: Make sure that Fit is not selected in the Zoom dialog box.) On the Animations tab, in the Animations group, click Custom Animation . On the slide, select the dotted rectangle. In the Custom Animation task pane, click Add Effect , point to Motion Paths , point to Draw Custom Path , and then click Freeform . Press and hold SHIFT to conform the path to a straight, horizontal line, and then do the following on the slide: Click the center of the dotted rectangle to create the first motion-path point. Click approximately ½” beyond the right edge of the rectangle to create the second motion-path point. Double-click approximately 2” beyond the left edge of the slide to create the third and final motion-path point. On the slide, right-click the freeform motion path, and then click Reverse Path Direction . On the slide, select the freeform motion path. In the Custom Animation task pane, under Modify: Custom Path , in the Start list, select With Previous . On the slide, select the gradient-filled rectangle. In the Custom Animation task pane, do the following: Click Add Effect , point to Entrance , and then click More Effects . In the Add Entrance Effect dialog box, under Subtle , click Fade , and then click OK . Under Modify: Fade , in the Start list, select With Previous . Under Modify: Fade , in the Speed list, select Very Fast . Click Add Effect , point to Motion Paths , and then click Down . Under Modify: Down , in the Start list, select With Previous . Under Modify: Down , in the Speed list, select Medium . On the slide, right-click the down motion path and click Reverse Path Direction . On the slide, select the smaller, full-color picture. In the Custom Animation task pane, do the following: Click Add Effect , point to Entrance , and then click More Effects . In the Add Entrance Effect dialog box, under Subtle , click Fade , and then click OK . Under Modify: Fade , in the Start list, select With Previous . Under Modify: Fade , in the Speed list, select Very Fast . Right-click the picture fade effect in the pane, and then click Timing . In the Fade dialog box, on the Timing tab, in the Delay box, enter 1.5 . On the slide, select the text box. In the Custom Animation task pane, do the following: Click Add Effect , point to Entrance , and then click More Effects . In the Add Entrance Effect dialog box, under Moderate , click Descend , and then click OK . Under Modify: Descend , in the Start list, select With Previous . Under Modify: Descend , in the Speed list, select Fast .
- Custom animation effects: recolored picture with full-color section and motion path (Advanced) To reproduce the picture effects on this slide, do the following: On the Home tab, in the Slides group, click Layout and then click Blank . On the Insert tab, in the Illustrations group, click Picture . In the Insert Picture dialog box, select a picture, and then click Insert . Select the picture. Under Picture Tools , on the Format tab, in the bottom right corner of the Size group, click the Size and Position dialog box launcher. In the Size and Position dialog box, on the Size tab, resize or crop the picture as needed so that under Size and rotate , the Height box is set to 3.58” and the Width box is set to 8” . Resize the picture under Size and rotate by entering values into the Height and Width boxes. Crop the picture under Crop from by entering values into the Left , Right , Top , and Bottom boxes. Under Picture Tools , on the Format tab, in the Adjust group, click Recolor , and then under Dark Variations click Text color 2 Dark (first option from the left). Under Picture Tools , on the Format tab, in the Picture Styles group, click Picture Effects , point to Shadow , and then under Inner click Inside Diagonal Top Left (first row, first option from the left). Drag the picture so that it is positioned above the middle of the slide. On the Home tab, in the Clipboard group, click the arrow next to Paste , and then click Duplicate . Press and hold CTRL and select both pictures on the slide. On the Home tab, in the Drawing group, click Arrange , point to Align , and then do the following: Click Align to Slide . Click Align Center . Click Align Selected Objects . Click Align Middle . Click the slide background area to cancel the selection of both pictures. Select the duplicate (top) picture. Under Picture Tools , on the Format tab, in the bottom right corner of the Size group, click the Size and Position dialog box launcher. In the Size and Position dialog box, on the Size tab, under Crop from , enter values into the Left and Right boxes so that under Size and rotate , and the Width box is set to 2.33” . ( Note: For best results, crop the duplicate picture to tightly focus on a single element in the original picture.) Under Picture Tools , on the Format tab, in the Adjust group, click Recolor , and then under No Recolor click No Recolor . On the Home tab, in the Drawing group, click Shapes , and then under Rectangles click Rectangle (first option from the left). On the slide, drag to draw a rectangle. Select the rectangle. Under Drawing Tools , on the Format tab, in the Size group, do the following: In the Shape Height box, enter 7.5” . In the Shape Width box, enter 2.33” . Under Drawing Tools , on the Format tab, in the Shape Styles group, click the arrow next to Shape Fill , point to Gradient , and then click More Gradients . In the Format Shape dialog box, click Fill in the left pane, select Gradient fill in the Fill pane, and then do the following: In the Type list, select Linear . Click the button next to Direction , and then click Linear Down (first row, second option from the left). Under Gradient stops , click Add or Remove until two stops appear in the drop-down list. Also under Gradient stops , customize the gradient stops that you added as follows: Select Stop 1 from the list, and then do the following: In the Stop position box, enter 0% . Click the button next to Color , then under Theme Colors click White, Background 1 (first row, first option from the left). In the Transparency box, enter 55% . Select Stop 2 from the list, and then do the following: In the Stop position box, enter 100% . Click the button next to Color , and then under Theme Colors click White, Background 1 (first row, first option from the left). In the Transparency box, enter 100% . On the slide, drag the rectangle to cover the duplicate picture. Select the rectangle. On the Home tab, in the Drawing group, click Arrange , and then do the following: Point to Align , and then click Align to Slide . Point to Align , and then click Align Middle . Click Send Backward . On the Home tab, in the Drawing group, click Shapes , and then under Rectangles click Rectangle (first option from the left). On the slide, drag to draw another rectangle. Select the rectangle. Under Drawing Tools , on the Format tab, in the Size group, do the following: In the Shape Height box, enter 4” . In the Shape Width box, enter 2.67” . Under Drawing Tools , on the Format tab, in the Shape Styles group, click the arrow next to Shape Fill , point to Gradient , and then click More Gradients . In the Format Shape dialog box, click Fill in the left pane. In the Fill pane, select No fill . Also in the Format Shape dialog box, click Line Color in the left pane, select Solid line in the Line Color pane, and then do the following: Click the button next to Color , and then under Theme Colors click White, Background 1 (first row, first option from the left). In the Transparency box, enter 70% . Also in the Format Shape dialog box, click Line Style in the left pane, and then do the following in the Line Style pane: In the Width box, enter 0.75 pt . Click the button next to Dash type , and then click Square Dot (third option from the top). Drag the dotted rectangle on top of the small, full-color picture. Press and hold SHIFT and select the dotted rectangle, the small picture, and the large picture on the slide. On the Home tab, in the Drawing group, click Arrange , point to Align , and then do the following: Click Align Selected Objects . Click Align Middle . On the Insert tab, in the Text group, click Text Box , and then on the slide, drag to draw the text box. Enter text in the text box, select the text, and then on the Home tab, in the Font group, select Gill Sans MT Condensed from the Font list, select 24 from the Font Size list, click the button next to Font Color , and then under Theme Colors click White, Background 1 (first row, first option from the left). On the Home tab, in the Paragraph group, click Center to center the text within the text box. On the slide, drag the text box below the dotted rectangle. To reproduce the background effects on this slide, do the following: Right-click the slide background area, and then click Format Background . In the Format Background dialog box, click Fill in the left pane, and then select Solid fill in the Fill pane. Also in the Fill pane, click the button next to Color , and then under Theme Colors click Black, Text 1, Lighter 15% (fifth row, second option from the left). To reproduce the animation effects on this slide, do the following: To view the area beyond the slide, on the View tab, click Zoom , and then in the Zoom dialog box, in the Percent box, enter 70% . ( Note: Make sure that Fit is not selected in the Zoom dialog box.) On the Animations tab, in the Animations group, click Custom Animation . On the slide, select the dotted rectangle. In the Custom Animation task pane, click Add Effect , point to Motion Paths , point to Draw Custom Path , and then click Freeform . Press and hold SHIFT to conform the path to a straight, horizontal line, and then do the following on the slide: Click the center of the dotted rectangle to create the first motion-path point. Click approximately ½” beyond the right edge of the rectangle to create the second motion-path point. Double-click approximately 2” beyond the left edge of the slide to create the third and final motion-path point. On the slide, right-click the freeform motion path, and then click Reverse Path Direction . On the slide, select the freeform motion path. In the Custom Animation task pane, under Modify: Custom Path , in the Start list, select With Previous . On the slide, select the gradient-filled rectangle. In the Custom Animation task pane, do the following: Click Add Effect , point to Entrance , and then click More Effects . In the Add Entrance Effect dialog box, under Subtle , click Fade , and then click OK . Under Modify: Fade , in the Start list, select With Previous . Under Modify: Fade , in the Speed list, select Very Fast . Click Add Effect , point to Motion Paths , and then click Down . Under Modify: Down , in the Start list, select With Previous . Under Modify: Down , in the Speed list, select Medium . On the slide, right-click the down motion path and click Reverse Path Direction . On the slide, select the smaller, full-color picture. In the Custom Animation task pane, do the following: Click Add Effect , point to Entrance , and then click More Effects . In the Add Entrance Effect dialog box, under Subtle , click Fade , and then click OK . Under Modify: Fade , in the Start list, select With Previous . Under Modify: Fade , in the Speed list, select Very Fast . Right-click the picture fade effect in the pane, and then click Timing . In the Fade dialog box, on the Timing tab, in the Delay box, enter 1.5 . On the slide, select the text box. In the Custom Animation task pane, do the following: Click Add Effect , point to Entrance , and then click More Effects . In the Add Entrance Effect dialog box, under Moderate , click Descend , and then click OK . Under Modify: Descend , in the Start list, select With Previous . Under Modify: Descend , in the Speed list, select Fast .
- Custom animation effects: recolored picture with full-color section and motion path (Advanced) To reproduce the picture effects on this slide, do the following: On the Home tab, in the Slides group, click Layout and then click Blank . On the Insert tab, in the Illustrations group, click Picture . In the Insert Picture dialog box, select a picture, and then click Insert . Select the picture. Under Picture Tools , on the Format tab, in the bottom right corner of the Size group, click the Size and Position dialog box launcher. In the Size and Position dialog box, on the Size tab, resize or crop the picture as needed so that under Size and rotate , the Height box is set to 3.58” and the Width box is set to 8” . Resize the picture under Size and rotate by entering values into the Height and Width boxes. Crop the picture under Crop from by entering values into the Left , Right , Top , and Bottom boxes. Under Picture Tools , on the Format tab, in the Adjust group, click Recolor , and then under Dark Variations click Text color 2 Dark (first option from the left). Under Picture Tools , on the Format tab, in the Picture Styles group, click Picture Effects , point to Shadow , and then under Inner click Inside Diagonal Top Left (first row, first option from the left). Drag the picture so that it is positioned above the middle of the slide. On the Home tab, in the Clipboard group, click the arrow next to Paste , and then click Duplicate . Press and hold CTRL and select both pictures on the slide. On the Home tab, in the Drawing group, click Arrange , point to Align , and then do the following: Click Align to Slide . Click Align Center . Click Align Selected Objects . Click Align Middle . Click the slide background area to cancel the selection of both pictures. Select the duplicate (top) picture. Under Picture Tools , on the Format tab, in the bottom right corner of the Size group, click the Size and Position dialog box launcher. In the Size and Position dialog box, on the Size tab, under Crop from , enter values into the Left and Right boxes so that under Size and rotate , and the Width box is set to 2.33” . ( Note: For best results, crop the duplicate picture to tightly focus on a single element in the original picture.) Under Picture Tools , on the Format tab, in the Adjust group, click Recolor , and then under No Recolor click No Recolor . On the Home tab, in the Drawing group, click Shapes , and then under Rectangles click Rectangle (first option from the left). On the slide, drag to draw a rectangle. Select the rectangle. Under Drawing Tools , on the Format tab, in the Size group, do the following: In the Shape Height box, enter 7.5” . In the Shape Width box, enter 2.33” . Under Drawing Tools , on the Format tab, in the Shape Styles group, click the arrow next to Shape Fill , point to Gradient , and then click More Gradients . In the Format Shape dialog box, click Fill in the left pane, select Gradient fill in the Fill pane, and then do the following: In the Type list, select Linear . Click the button next to Direction , and then click Linear Down (first row, second option from the left). Under Gradient stops , click Add or Remove until two stops appear in the drop-down list. Also under Gradient stops , customize the gradient stops that you added as follows: Select Stop 1 from the list, and then do the following: In the Stop position box, enter 0% . Click the button next to Color , then under Theme Colors click White, Background 1 (first row, first option from the left). In the Transparency box, enter 55% . Select Stop 2 from the list, and then do the following: In the Stop position box, enter 100% . Click the button next to Color , and then under Theme Colors click White, Background 1 (first row, first option from the left). In the Transparency box, enter 100% . On the slide, drag the rectangle to cover the duplicate picture. Select the rectangle. On the Home tab, in the Drawing group, click Arrange , and then do the following: Point to Align , and then click Align to Slide . Point to Align , and then click Align Middle . Click Send Backward . On the Home tab, in the Drawing group, click Shapes , and then under Rectangles click Rectangle (first option from the left). On the slide, drag to draw another rectangle. Select the rectangle. Under Drawing Tools , on the Format tab, in the Size group, do the following: In the Shape Height box, enter 4” . In the Shape Width box, enter 2.67” . Under Drawing Tools , on the Format tab, in the Shape Styles group, click the arrow next to Shape Fill , point to Gradient , and then click More Gradients . In the Format Shape dialog box, click Fill in the left pane. In the Fill pane, select No fill . Also in the Format Shape dialog box, click Line Color in the left pane, select Solid line in the Line Color pane, and then do the following: Click the button next to Color , and then under Theme Colors click White, Background 1 (first row, first option from the left). In the Transparency box, enter 70% . Also in the Format Shape dialog box, click Line Style in the left pane, and then do the following in the Line Style pane: In the Width box, enter 0.75 pt . Click the button next to Dash type , and then click Square Dot (third option from the top). Drag the dotted rectangle on top of the small, full-color picture. Press and hold SHIFT and select the dotted rectangle, the small picture, and the large picture on the slide. On the Home tab, in the Drawing group, click Arrange , point to Align , and then do the following: Click Align Selected Objects . Click Align Middle . On the Insert tab, in the Text group, click Text Box , and then on the slide, drag to draw the text box. Enter text in the text box, select the text, and then on the Home tab, in the Font group, select Gill Sans MT Condensed from the Font list, select 24 from the Font Size list, click the button next to Font Color , and then under Theme Colors click White, Background 1 (first row, first option from the left). On the Home tab, in the Paragraph group, click Center to center the text within the text box. On the slide, drag the text box below the dotted rectangle. To reproduce the background effects on this slide, do the following: Right-click the slide background area, and then click Format Background . In the Format Background dialog box, click Fill in the left pane, and then select Solid fill in the Fill pane. Also in the Fill pane, click the button next to Color , and then under Theme Colors click Black, Text 1, Lighter 15% (fifth row, second option from the left). To reproduce the animation effects on this slide, do the following: To view the area beyond the slide, on the View tab, click Zoom , and then in the Zoom dialog box, in the Percent box, enter 70% . ( Note: Make sure that Fit is not selected in the Zoom dialog box.) On the Animations tab, in the Animations group, click Custom Animation . On the slide, select the dotted rectangle. In the Custom Animation task pane, click Add Effect , point to Motion Paths , point to Draw Custom Path , and then click Freeform . Press and hold SHIFT to conform the path to a straight, horizontal line, and then do the following on the slide: Click the center of the dotted rectangle to create the first motion-path point. Click approximately ½” beyond the right edge of the rectangle to create the second motion-path point. Double-click approximately 2” beyond the left edge of the slide to create the third and final motion-path point. On the slide, right-click the freeform motion path, and then click Reverse Path Direction . On the slide, select the freeform motion path. In the Custom Animation task pane, under Modify: Custom Path , in the Start list, select With Previous . On the slide, select the gradient-filled rectangle. In the Custom Animation task pane, do the following: Click Add Effect , point to Entrance , and then click More Effects . In the Add Entrance Effect dialog box, under Subtle , click Fade , and then click OK . Under Modify: Fade , in the Start list, select With Previous . Under Modify: Fade , in the Speed list, select Very Fast . Click Add Effect , point to Motion Paths , and then click Down . Under Modify: Down , in the Start list, select With Previous . Under Modify: Down , in the Speed list, select Medium . On the slide, right-click the down motion path and click Reverse Path Direction . On the slide, select the smaller, full-color picture. In the Custom Animation task pane, do the following: Click Add Effect , point to Entrance , and then click More Effects . In the Add Entrance Effect dialog box, under Subtle , click Fade , and then click OK . Under Modify: Fade , in the Start list, select With Previous . Under Modify: Fade , in the Speed list, select Very Fast . Right-click the picture fade effect in the pane, and then click Timing . In the Fade dialog box, on the Timing tab, in the Delay box, enter 1.5 . On the slide, select the text box. In the Custom Animation task pane, do the following: Click Add Effect , point to Entrance , and then click More Effects . In the Add Entrance Effect dialog box, under Moderate , click Descend , and then click OK . Under Modify: Descend , in the Start list, select With Previous . Under Modify: Descend , in the Speed list, select Fast .
- Custom animation effects: recolored picture with full-color section and motion path (Advanced) To reproduce the picture effects on this slide, do the following: On the Home tab, in the Slides group, click Layout and then click Blank . On the Insert tab, in the Illustrations group, click Picture . In the Insert Picture dialog box, select a picture, and then click Insert . Select the picture. Under Picture Tools , on the Format tab, in the bottom right corner of the Size group, click the Size and Position dialog box launcher. In the Size and Position dialog box, on the Size tab, resize or crop the picture as needed so that under Size and rotate , the Height box is set to 3.58” and the Width box is set to 8” . Resize the picture under Size and rotate by entering values into the Height and Width boxes. Crop the picture under Crop from by entering values into the Left , Right , Top , and Bottom boxes. Under Picture Tools , on the Format tab, in the Adjust group, click Recolor , and then under Dark Variations click Text color 2 Dark (first option from the left). Under Picture Tools , on the Format tab, in the Picture Styles group, click Picture Effects , point to Shadow , and then under Inner click Inside Diagonal Top Left (first row, first option from the left). Drag the picture so that it is positioned above the middle of the slide. On the Home tab, in the Clipboard group, click the arrow next to Paste , and then click Duplicate . Press and hold CTRL and select both pictures on the slide. On the Home tab, in the Drawing group, click Arrange , point to Align , and then do the following: Click Align to Slide . Click Align Center . Click Align Selected Objects . Click Align Middle . Click the slide background area to cancel the selection of both pictures. Select the duplicate (top) picture. Under Picture Tools , on the Format tab, in the bottom right corner of the Size group, click the Size and Position dialog box launcher. In the Size and Position dialog box, on the Size tab, under Crop from , enter values into the Left and Right boxes so that under Size and rotate , and the Width box is set to 2.33” . ( Note: For best results, crop the duplicate picture to tightly focus on a single element in the original picture.) Under Picture Tools , on the Format tab, in the Adjust group, click Recolor , and then under No Recolor click No Recolor . On the Home tab, in the Drawing group, click Shapes , and then under Rectangles click Rectangle (first option from the left). On the slide, drag to draw a rectangle. Select the rectangle. Under Drawing Tools , on the Format tab, in the Size group, do the following: In the Shape Height box, enter 7.5” . In the Shape Width box, enter 2.33” . Under Drawing Tools , on the Format tab, in the Shape Styles group, click the arrow next to Shape Fill , point to Gradient , and then click More Gradients . In the Format Shape dialog box, click Fill in the left pane, select Gradient fill in the Fill pane, and then do the following: In the Type list, select Linear . Click the button next to Direction , and then click Linear Down (first row, second option from the left). Under Gradient stops , click Add or Remove until two stops appear in the drop-down list. Also under Gradient stops , customize the gradient stops that you added as follows: Select Stop 1 from the list, and then do the following: In the Stop position box, enter 0% . Click the button next to Color , then under Theme Colors click White, Background 1 (first row, first option from the left). In the Transparency box, enter 55% . Select Stop 2 from the list, and then do the following: In the Stop position box, enter 100% . Click the button next to Color , and then under Theme Colors click White, Background 1 (first row, first option from the left). In the Transparency box, enter 100% . On the slide, drag the rectangle to cover the duplicate picture. Select the rectangle. On the Home tab, in the Drawing group, click Arrange , and then do the following: Point to Align , and then click Align to Slide . Point to Align , and then click Align Middle . Click Send Backward . On the Home tab, in the Drawing group, click Shapes , and then under Rectangles click Rectangle (first option from the left). On the slide, drag to draw another rectangle. Select the rectangle. Under Drawing Tools , on the Format tab, in the Size group, do the following: In the Shape Height box, enter 4” . In the Shape Width box, enter 2.67” . Under Drawing Tools , on the Format tab, in the Shape Styles group, click the arrow next to Shape Fill , point to Gradient , and then click More Gradients . In the Format Shape dialog box, click Fill in the left pane. In the Fill pane, select No fill . Also in the Format Shape dialog box, click Line Color in the left pane, select Solid line in the Line Color pane, and then do the following: Click the button next to Color , and then under Theme Colors click White, Background 1 (first row, first option from the left). In the Transparency box, enter 70% . Also in the Format Shape dialog box, click Line Style in the left pane, and then do the following in the Line Style pane: In the Width box, enter 0.75 pt . Click the button next to Dash type , and then click Square Dot (third option from the top). Drag the dotted rectangle on top of the small, full-color picture. Press and hold SHIFT and select the dotted rectangle, the small picture, and the large picture on the slide. On the Home tab, in the Drawing group, click Arrange , point to Align , and then do the following: Click Align Selected Objects . Click Align Middle . On the Insert tab, in the Text group, click Text Box , and then on the slide, drag to draw the text box. Enter text in the text box, select the text, and then on the Home tab, in the Font group, select Gill Sans MT Condensed from the Font list, select 24 from the Font Size list, click the button next to Font Color , and then under Theme Colors click White, Background 1 (first row, first option from the left). On the Home tab, in the Paragraph group, click Center to center the text within the text box. On the slide, drag the text box below the dotted rectangle. To reproduce the background effects on this slide, do the following: Right-click the slide background area, and then click Format Background . In the Format Background dialog box, click Fill in the left pane, and then select Solid fill in the Fill pane. Also in the Fill pane, click the button next to Color , and then under Theme Colors click Black, Text 1, Lighter 15% (fifth row, second option from the left). To reproduce the animation effects on this slide, do the following: To view the area beyond the slide, on the View tab, click Zoom , and then in the Zoom dialog box, in the Percent box, enter 70% . ( Note: Make sure that Fit is not selected in the Zoom dialog box.) On the Animations tab, in the Animations group, click Custom Animation . On the slide, select the dotted rectangle. In the Custom Animation task pane, click Add Effect , point to Motion Paths , point to Draw Custom Path , and then click Freeform . Press and hold SHIFT to conform the path to a straight, horizontal line, and then do the following on the slide: Click the center of the dotted rectangle to create the first motion-path point. Click approximately ½” beyond the right edge of the rectangle to create the second motion-path point. Double-click approximately 2” beyond the left edge of the slide to create the third and final motion-path point. On the slide, right-click the freeform motion path, and then click Reverse Path Direction . On the slide, select the freeform motion path. In the Custom Animation task pane, under Modify: Custom Path , in the Start list, select With Previous . On the slide, select the gradient-filled rectangle. In the Custom Animation task pane, do the following: Click Add Effect , point to Entrance , and then click More Effects . In the Add Entrance Effect dialog box, under Subtle , click Fade , and then click OK . Under Modify: Fade , in the Start list, select With Previous . Under Modify: Fade , in the Speed list, select Very Fast . Click Add Effect , point to Motion Paths , and then click Down . Under Modify: Down , in the Start list, select With Previous . Under Modify: Down , in the Speed list, select Medium . On the slide, right-click the down motion path and click Reverse Path Direction . On the slide, select the smaller, full-color picture. In the Custom Animation task pane, do the following: Click Add Effect , point to Entrance , and then click More Effects . In the Add Entrance Effect dialog box, under Subtle , click Fade , and then click OK . Under Modify: Fade , in the Start list, select With Previous . Under Modify: Fade , in the Speed list, select Very Fast . Right-click the picture fade effect in the pane, and then click Timing . In the Fade dialog box, on the Timing tab, in the Delay box, enter 1.5 . On the slide, select the text box. In the Custom Animation task pane, do the following: Click Add Effect , point to Entrance , and then click More Effects . In the Add Entrance Effect dialog box, under Moderate , click Descend , and then click OK . Under Modify: Descend , in the Start list, select With Previous . Under Modify: Descend , in the Speed list, select Fast .