This presentation provides a complete overview of fundamental web development concepts for beginners and students. It covers the structure and working of the web, including the World Wide Web (WWW), web browsers, HTML basics, and the use of tags, attributes, lists, tables, and forms.
You’ll learn how to create well-structured web pages using HTML elements like headings, paragraphs, images, links, and multimedia. The content also explains the importance of semantic elements, form controls, and best practices for building user-friendly and accessible web pages.
Ideal for BCA, B.Sc. (CS/IT), MCA, and Engineering students, as well as anyone starting with frontend web development.
Topics Covered:
Introduction to the Internet and WWW
Client–Server architecture
Web browsers and their functions
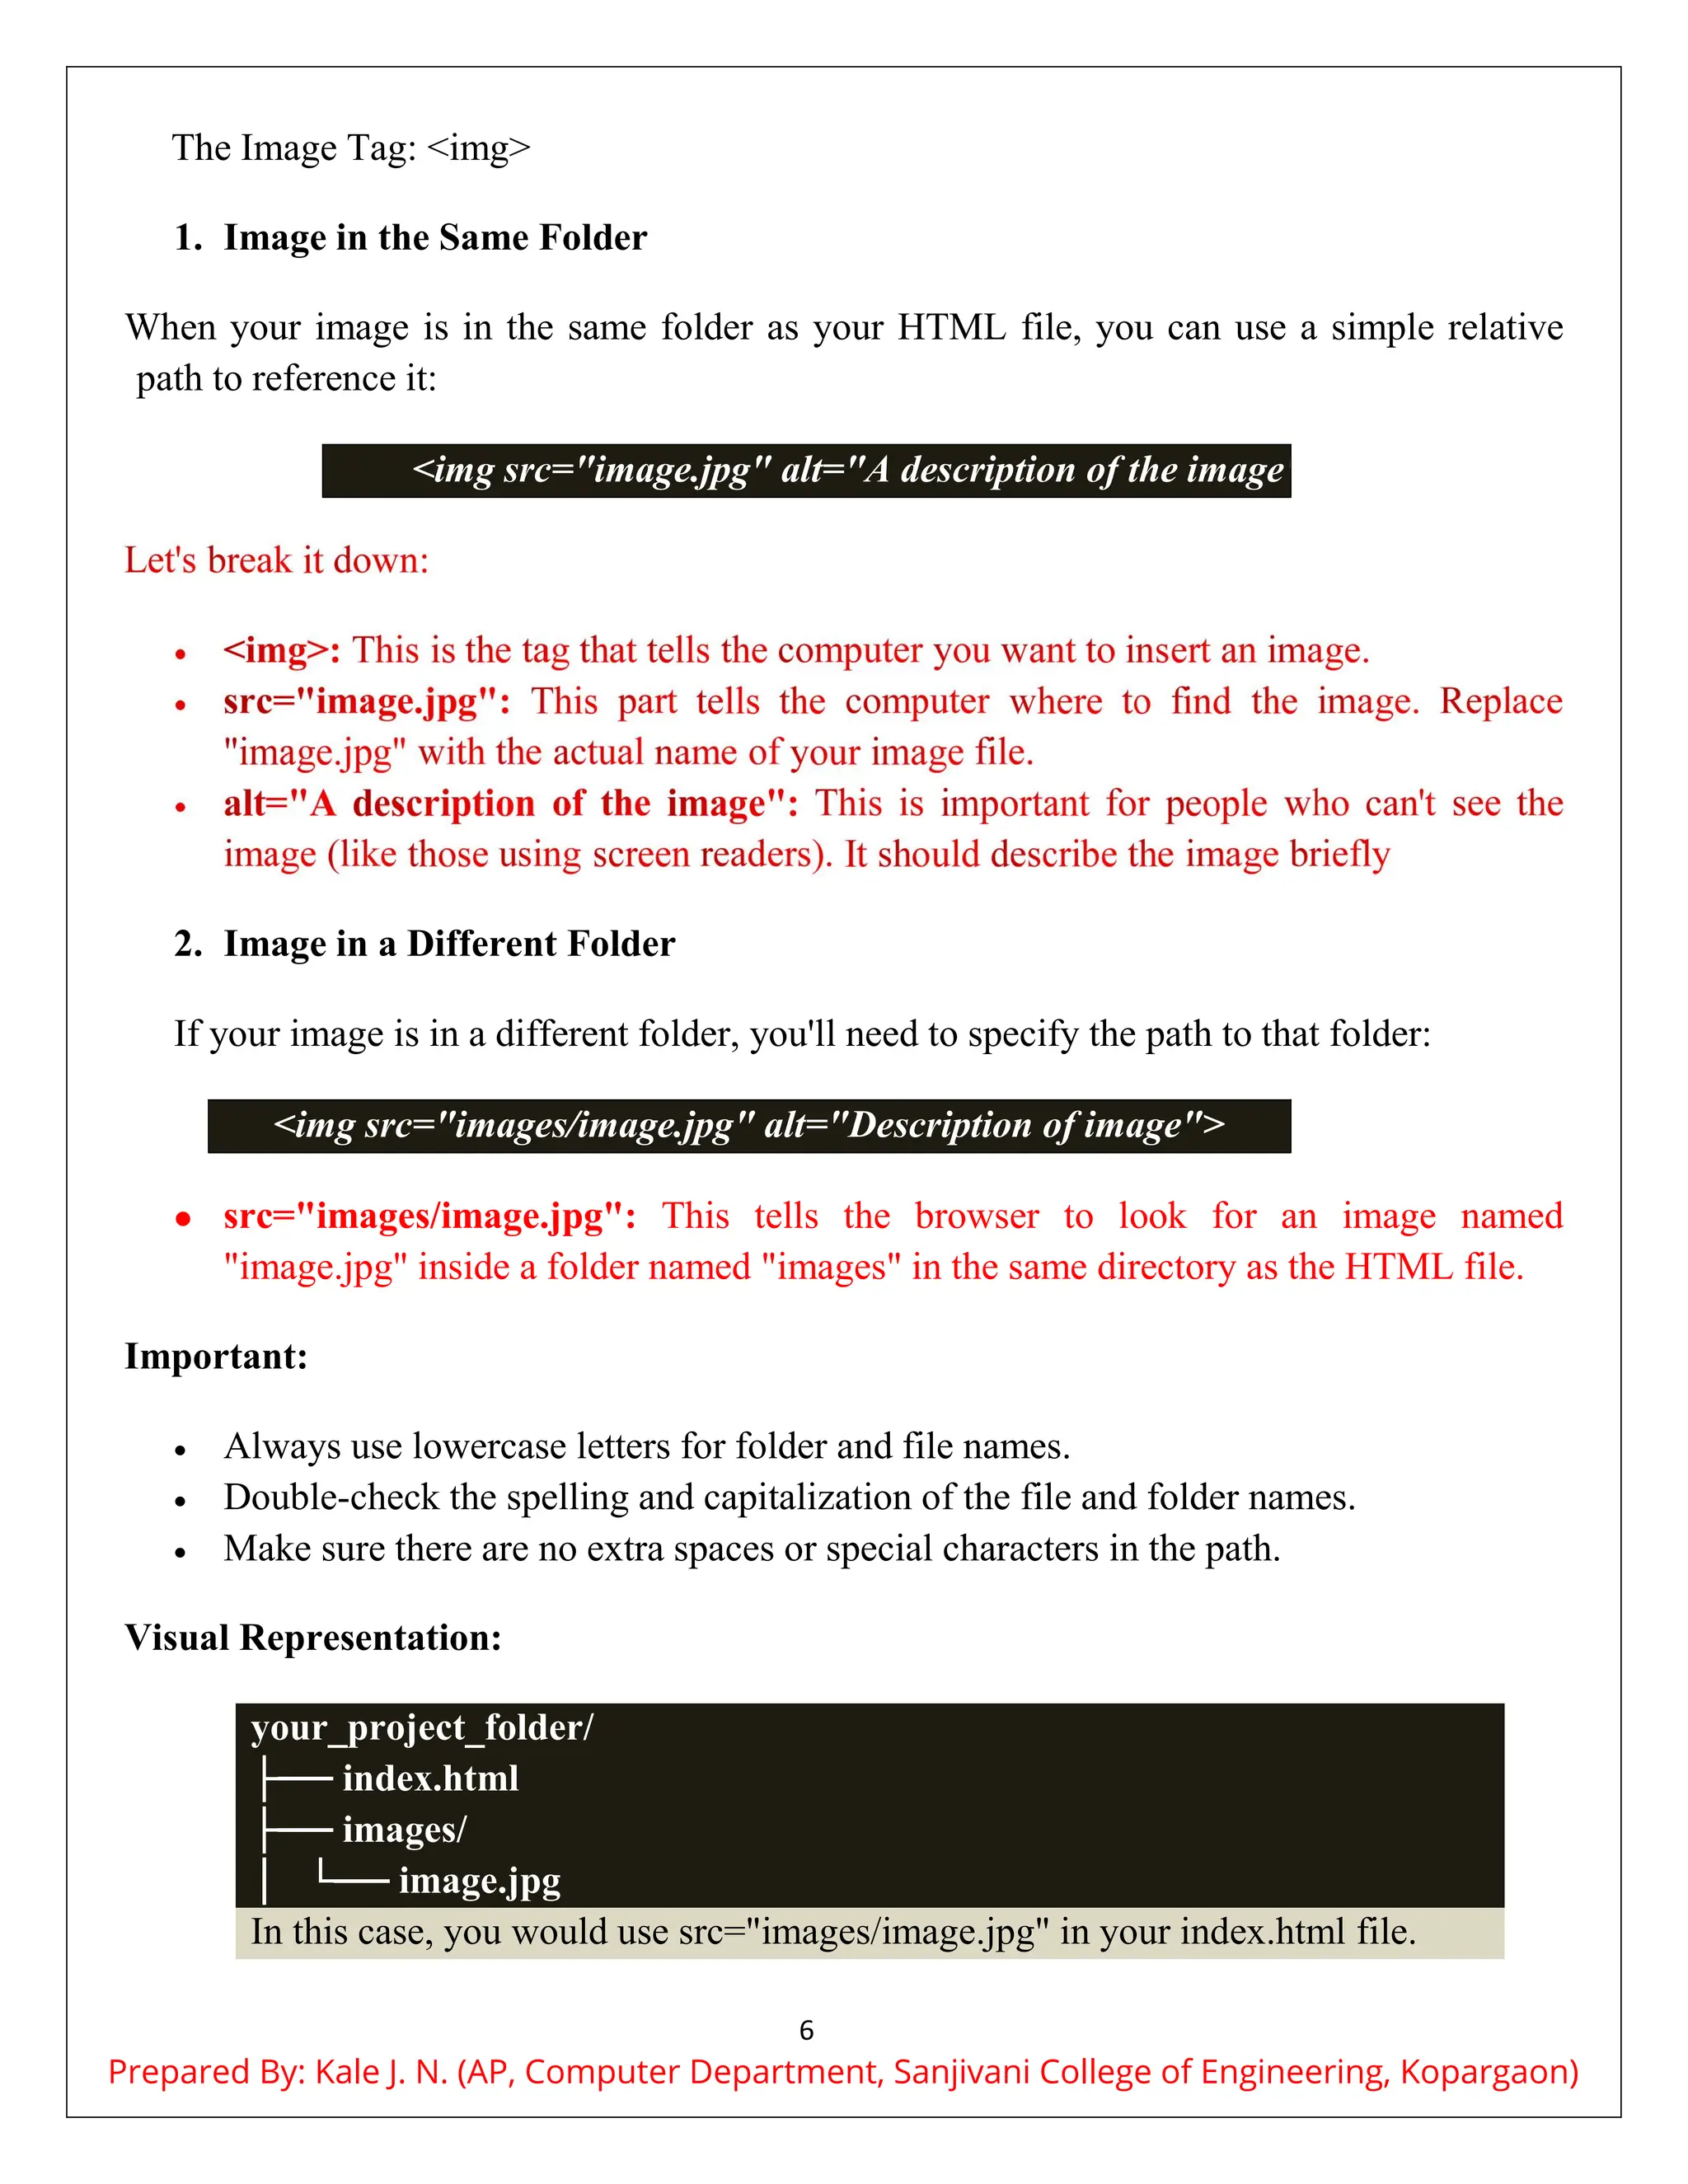
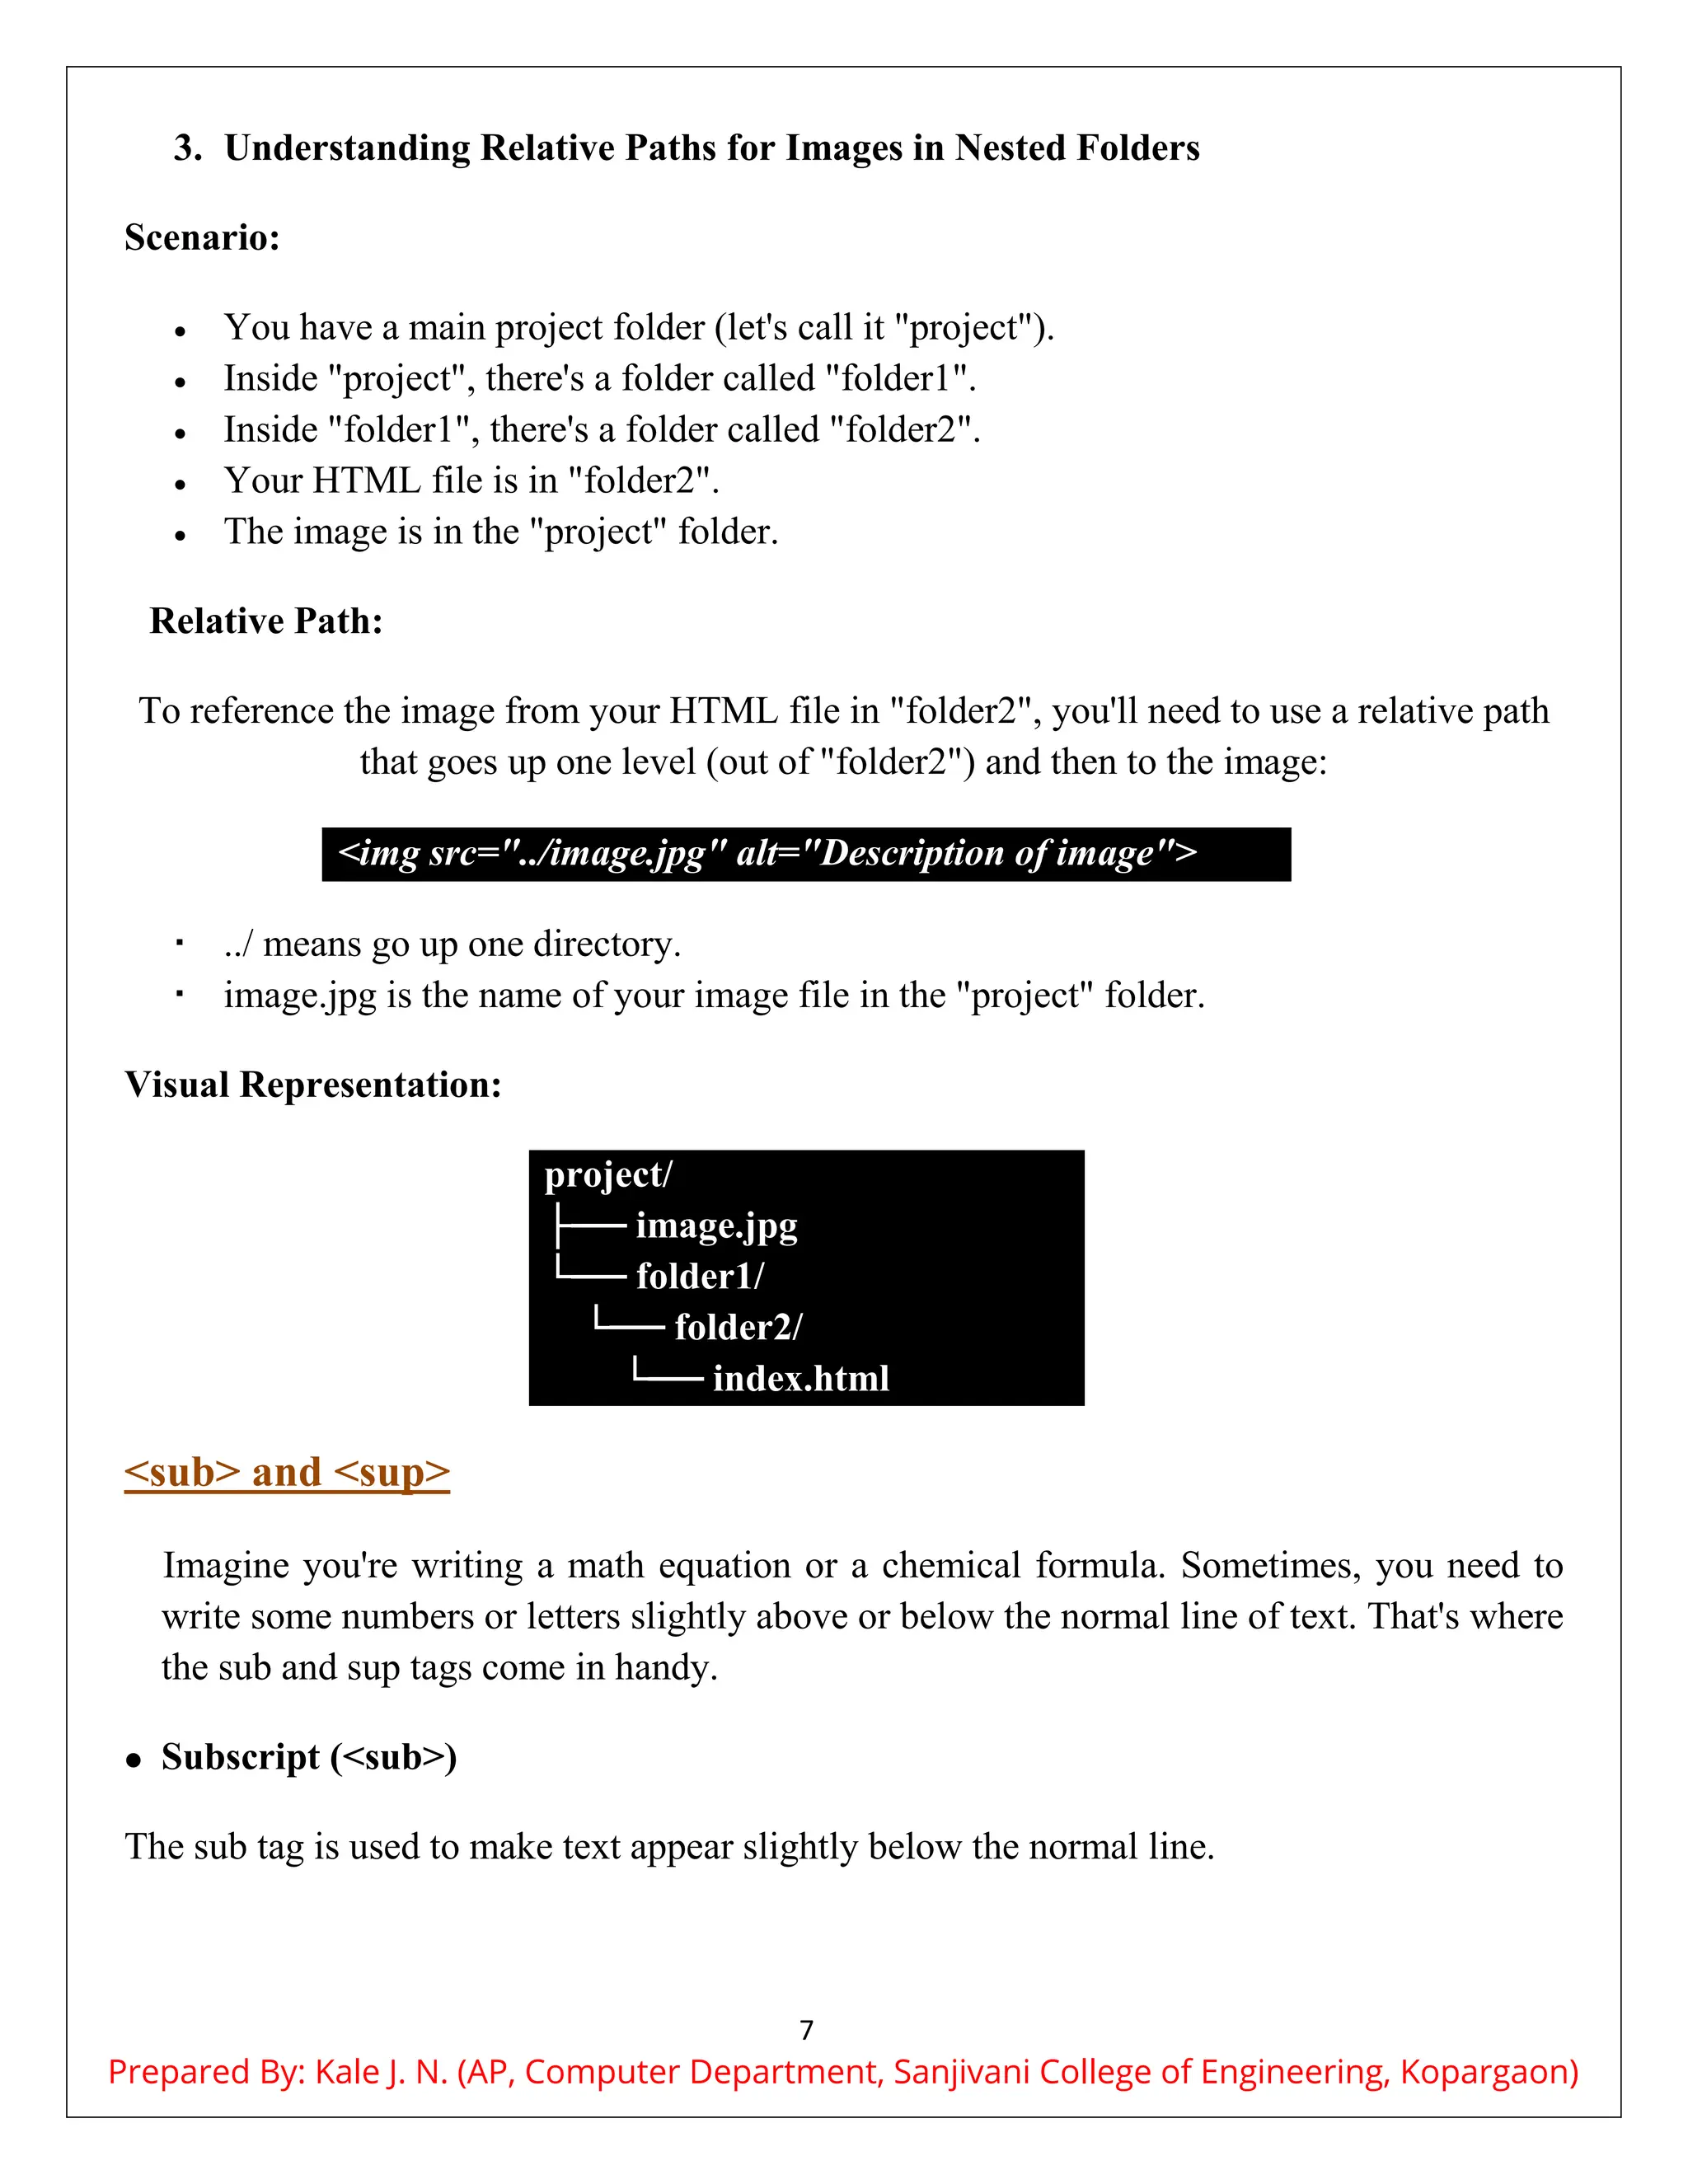
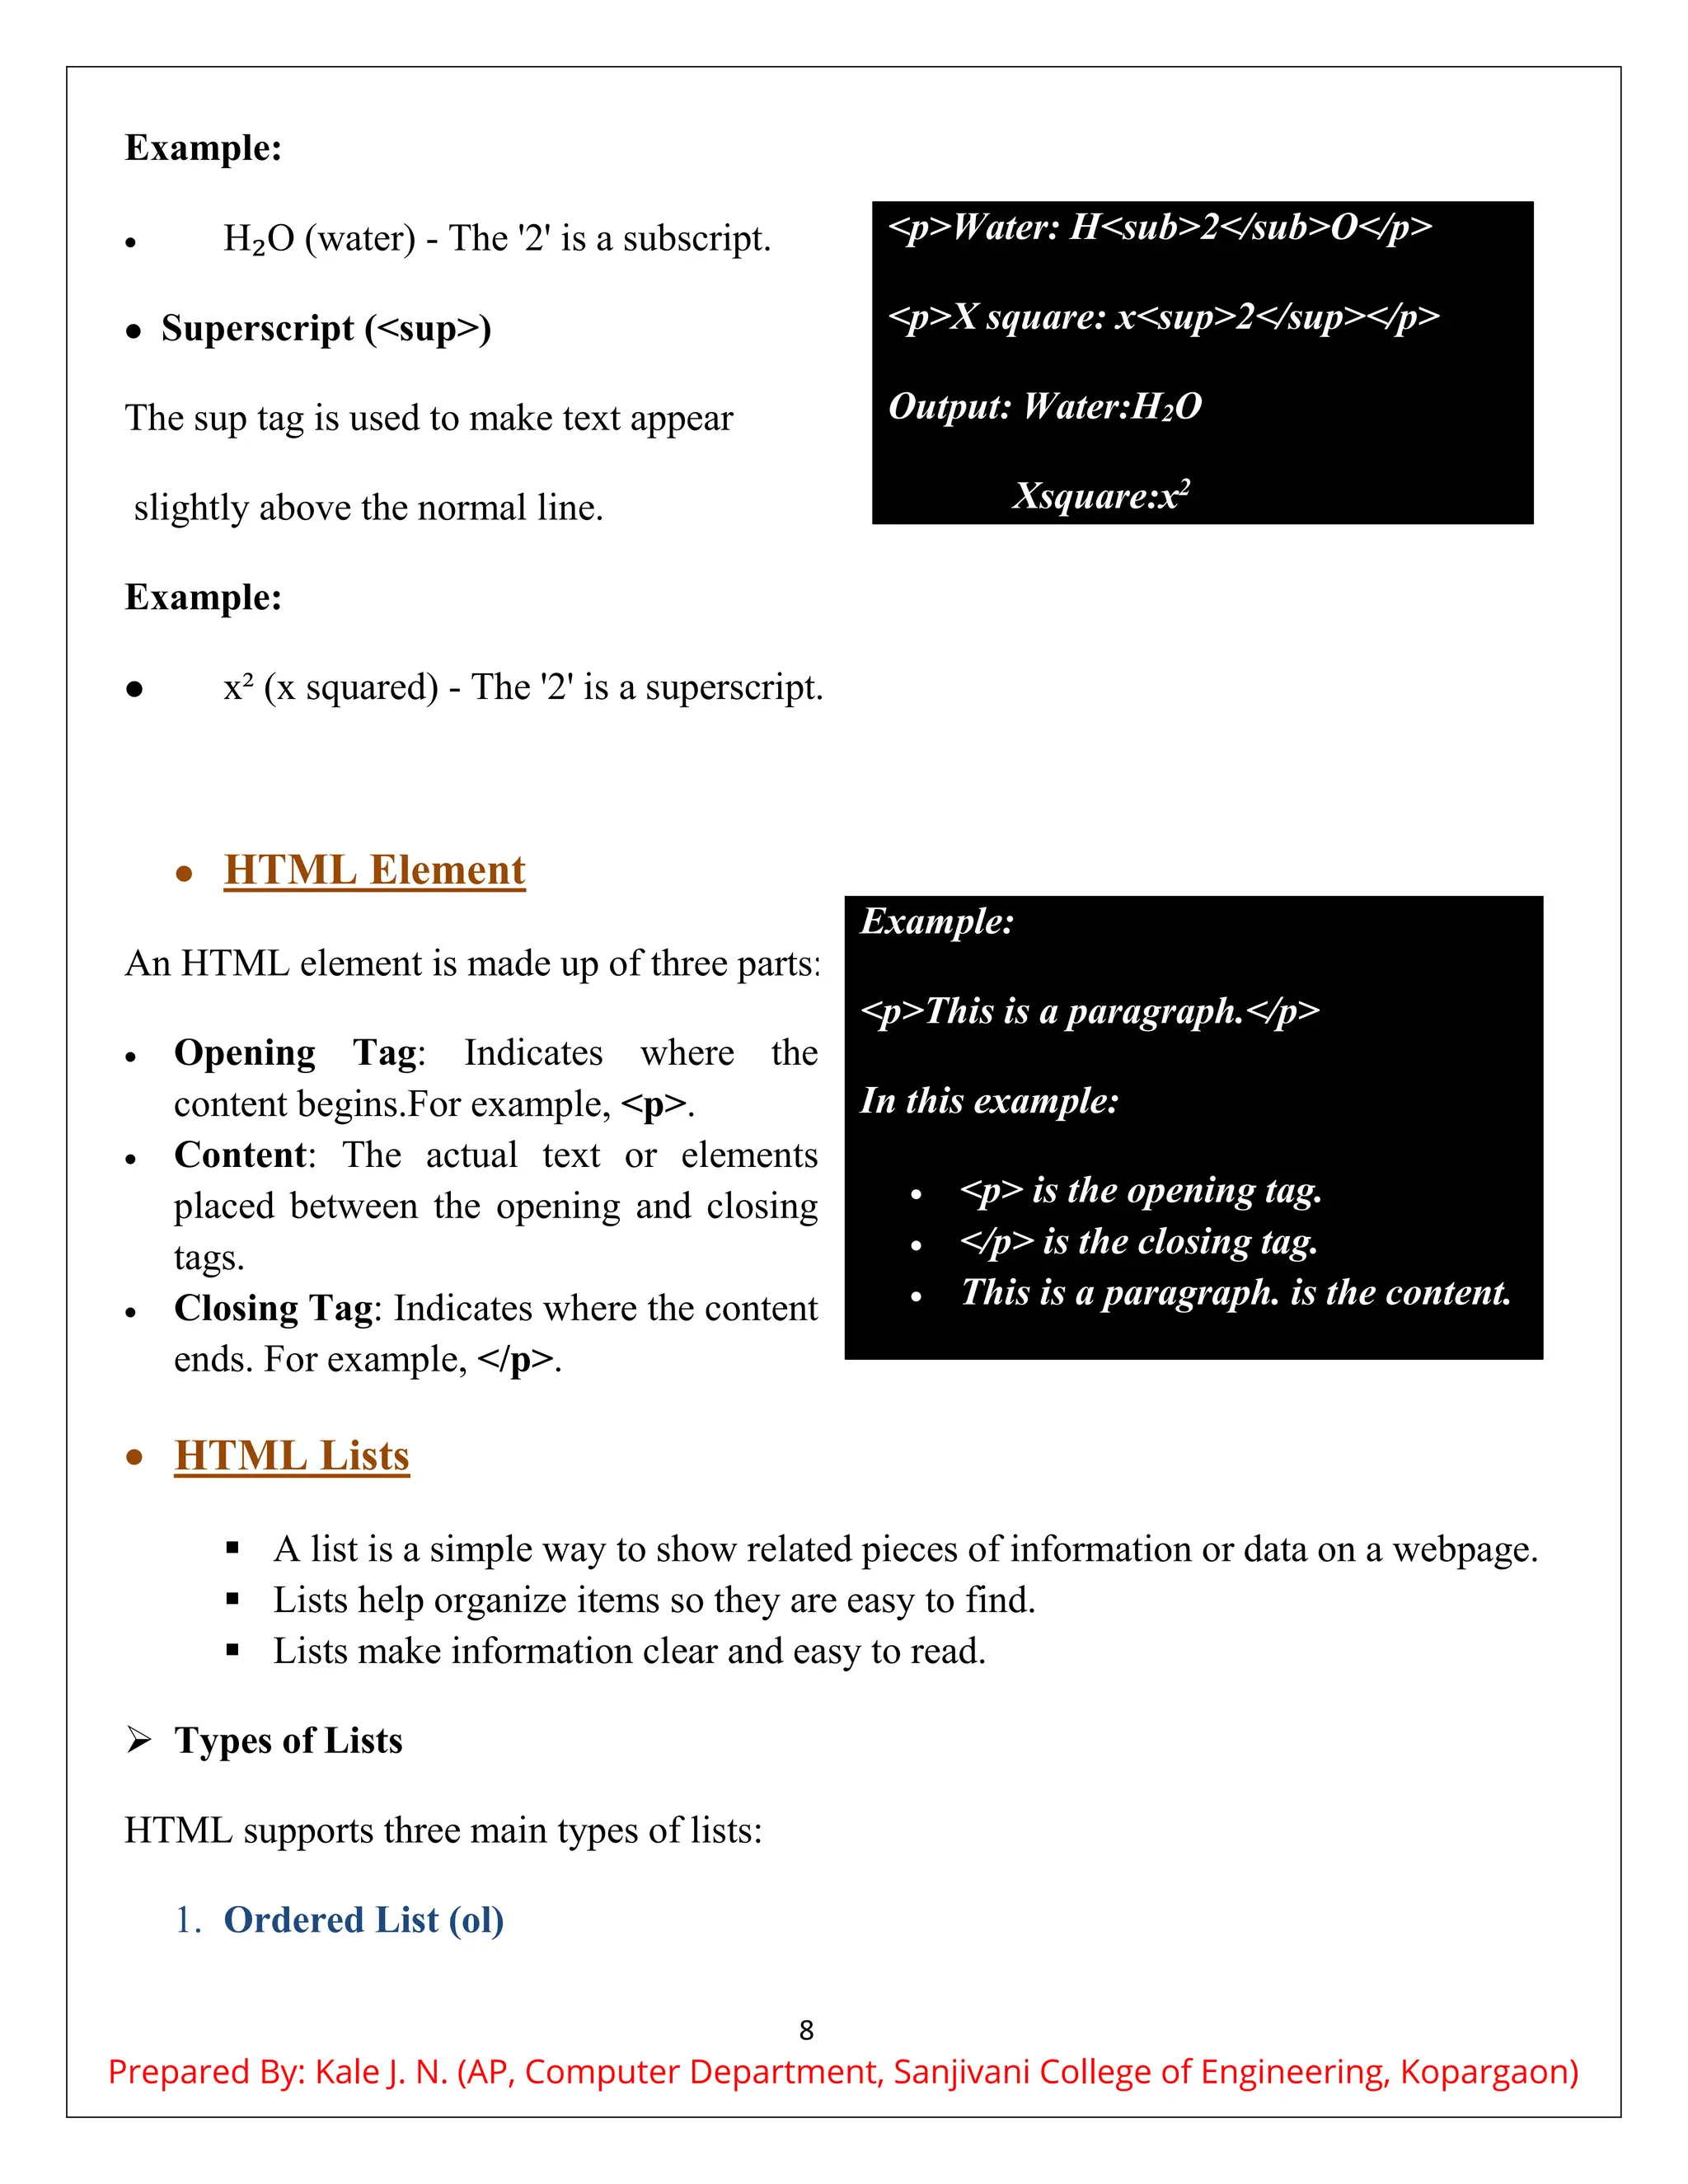
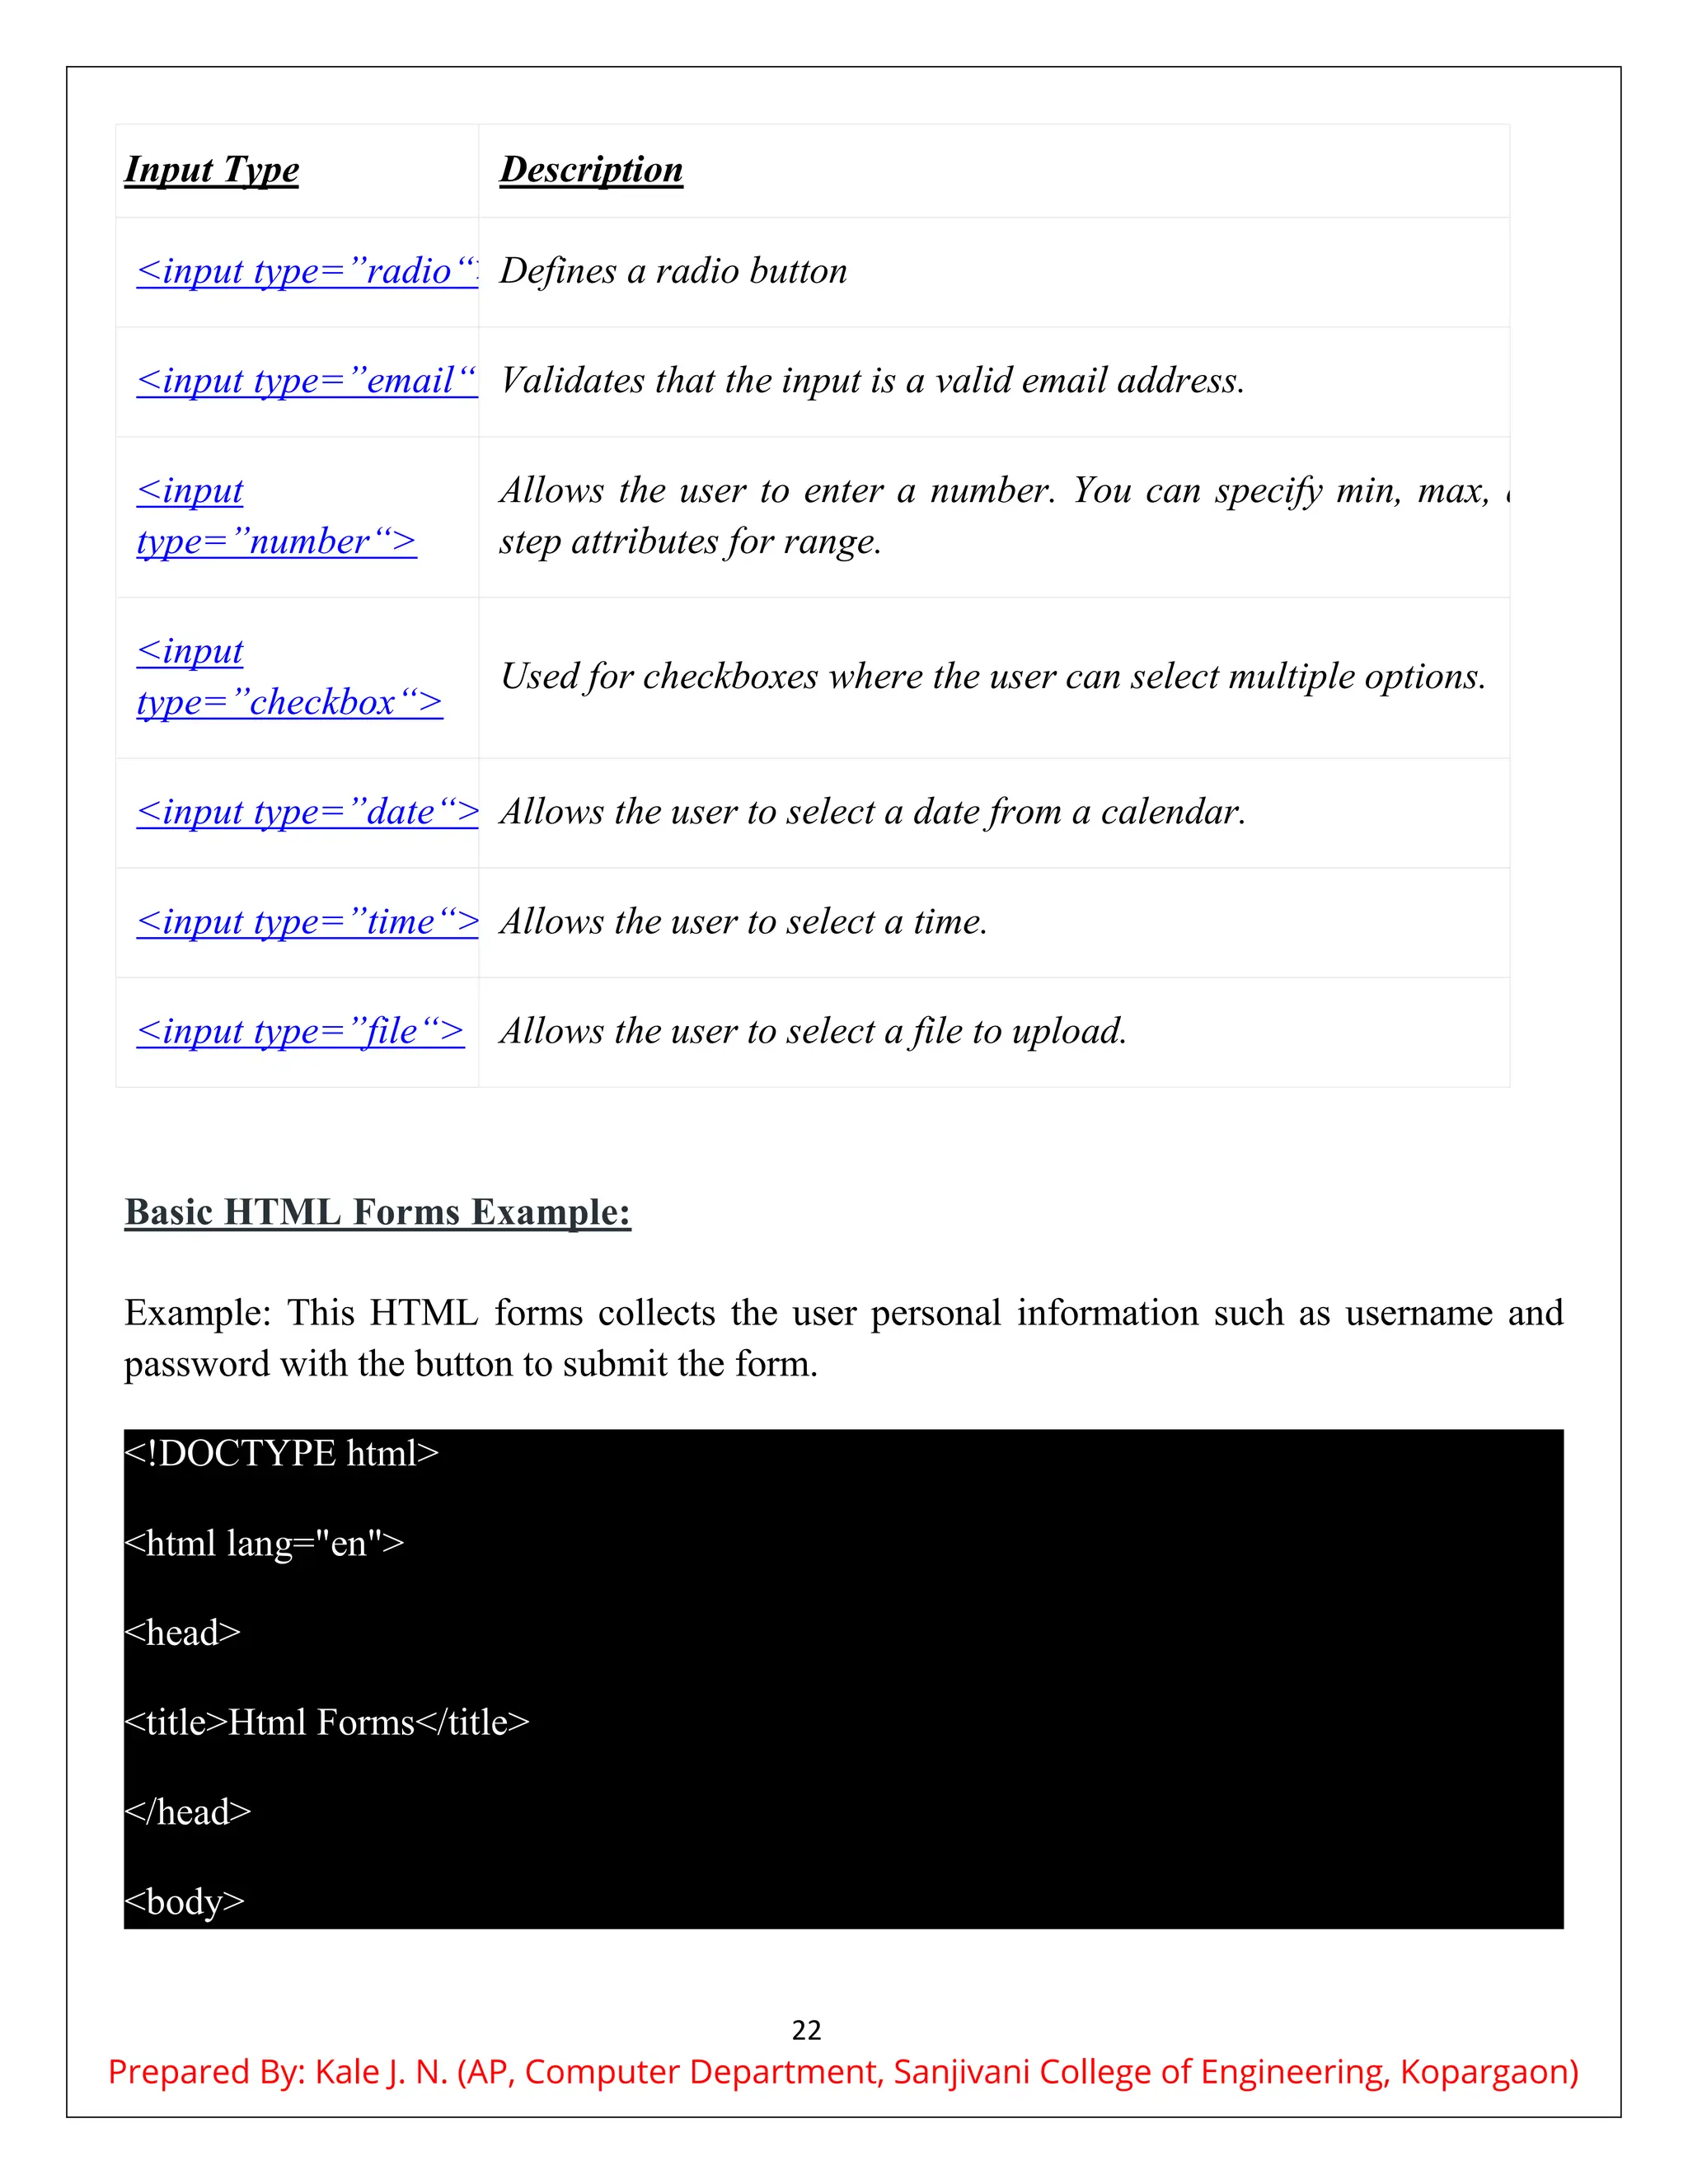
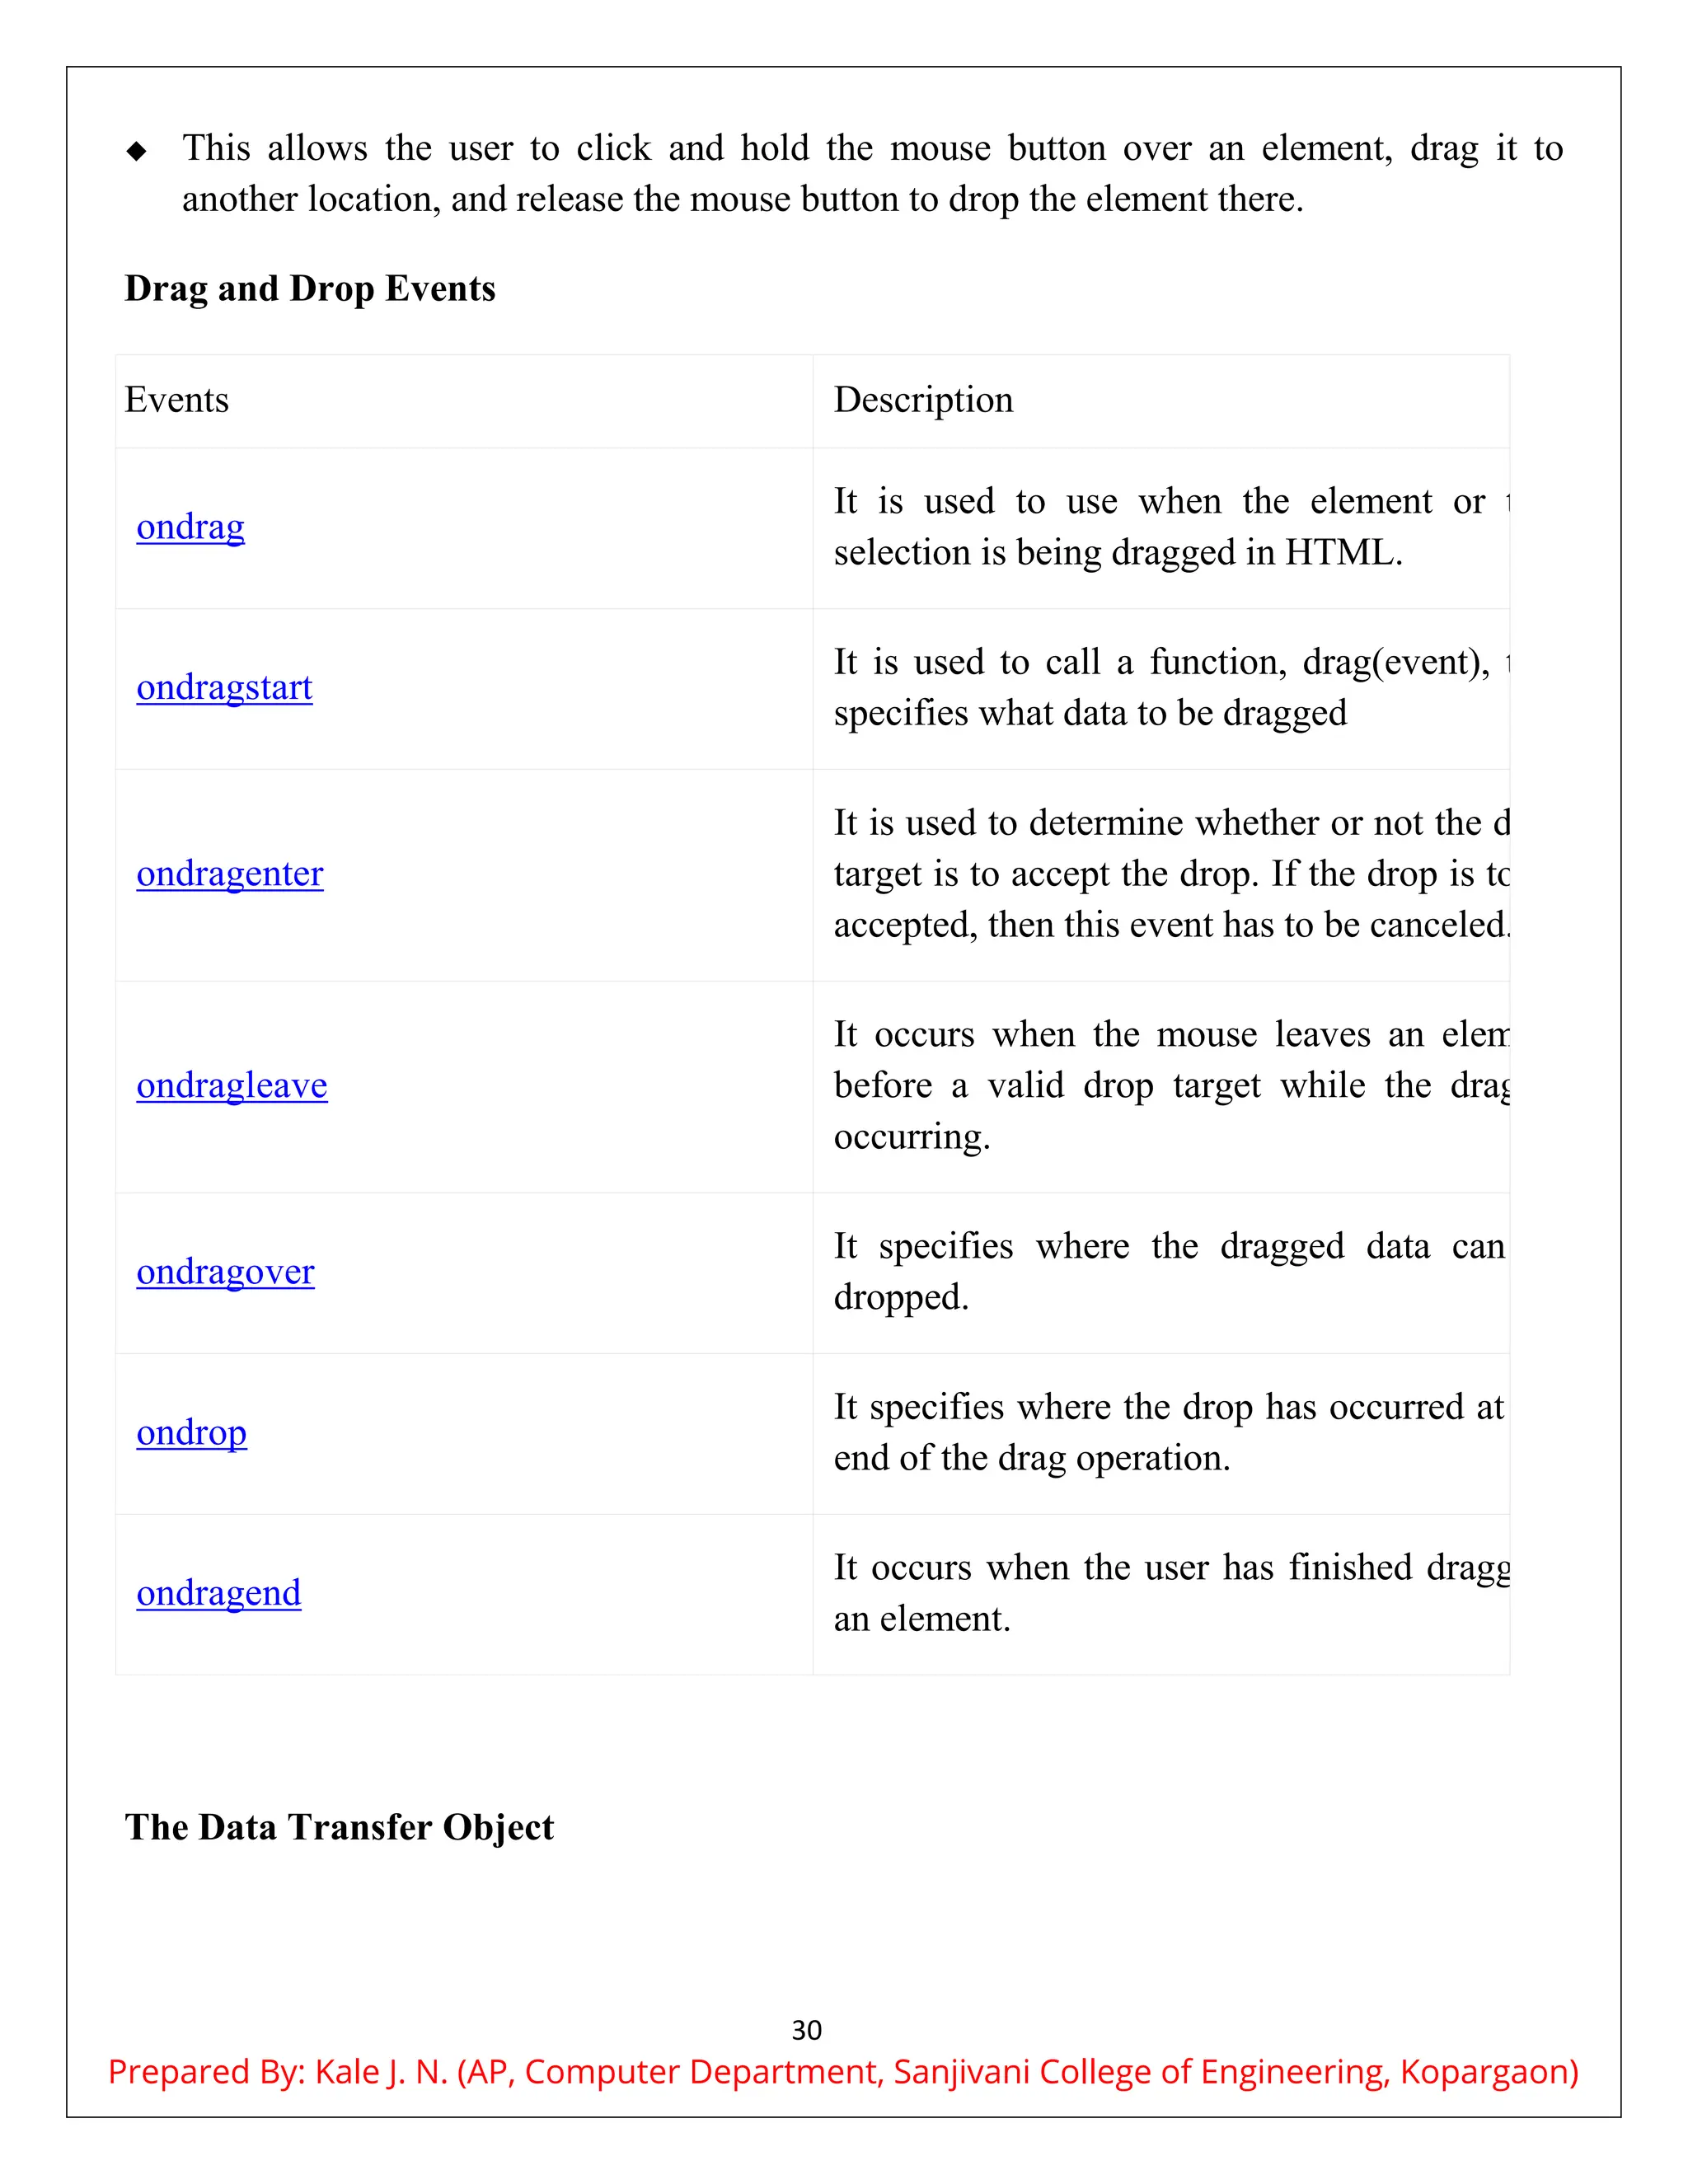
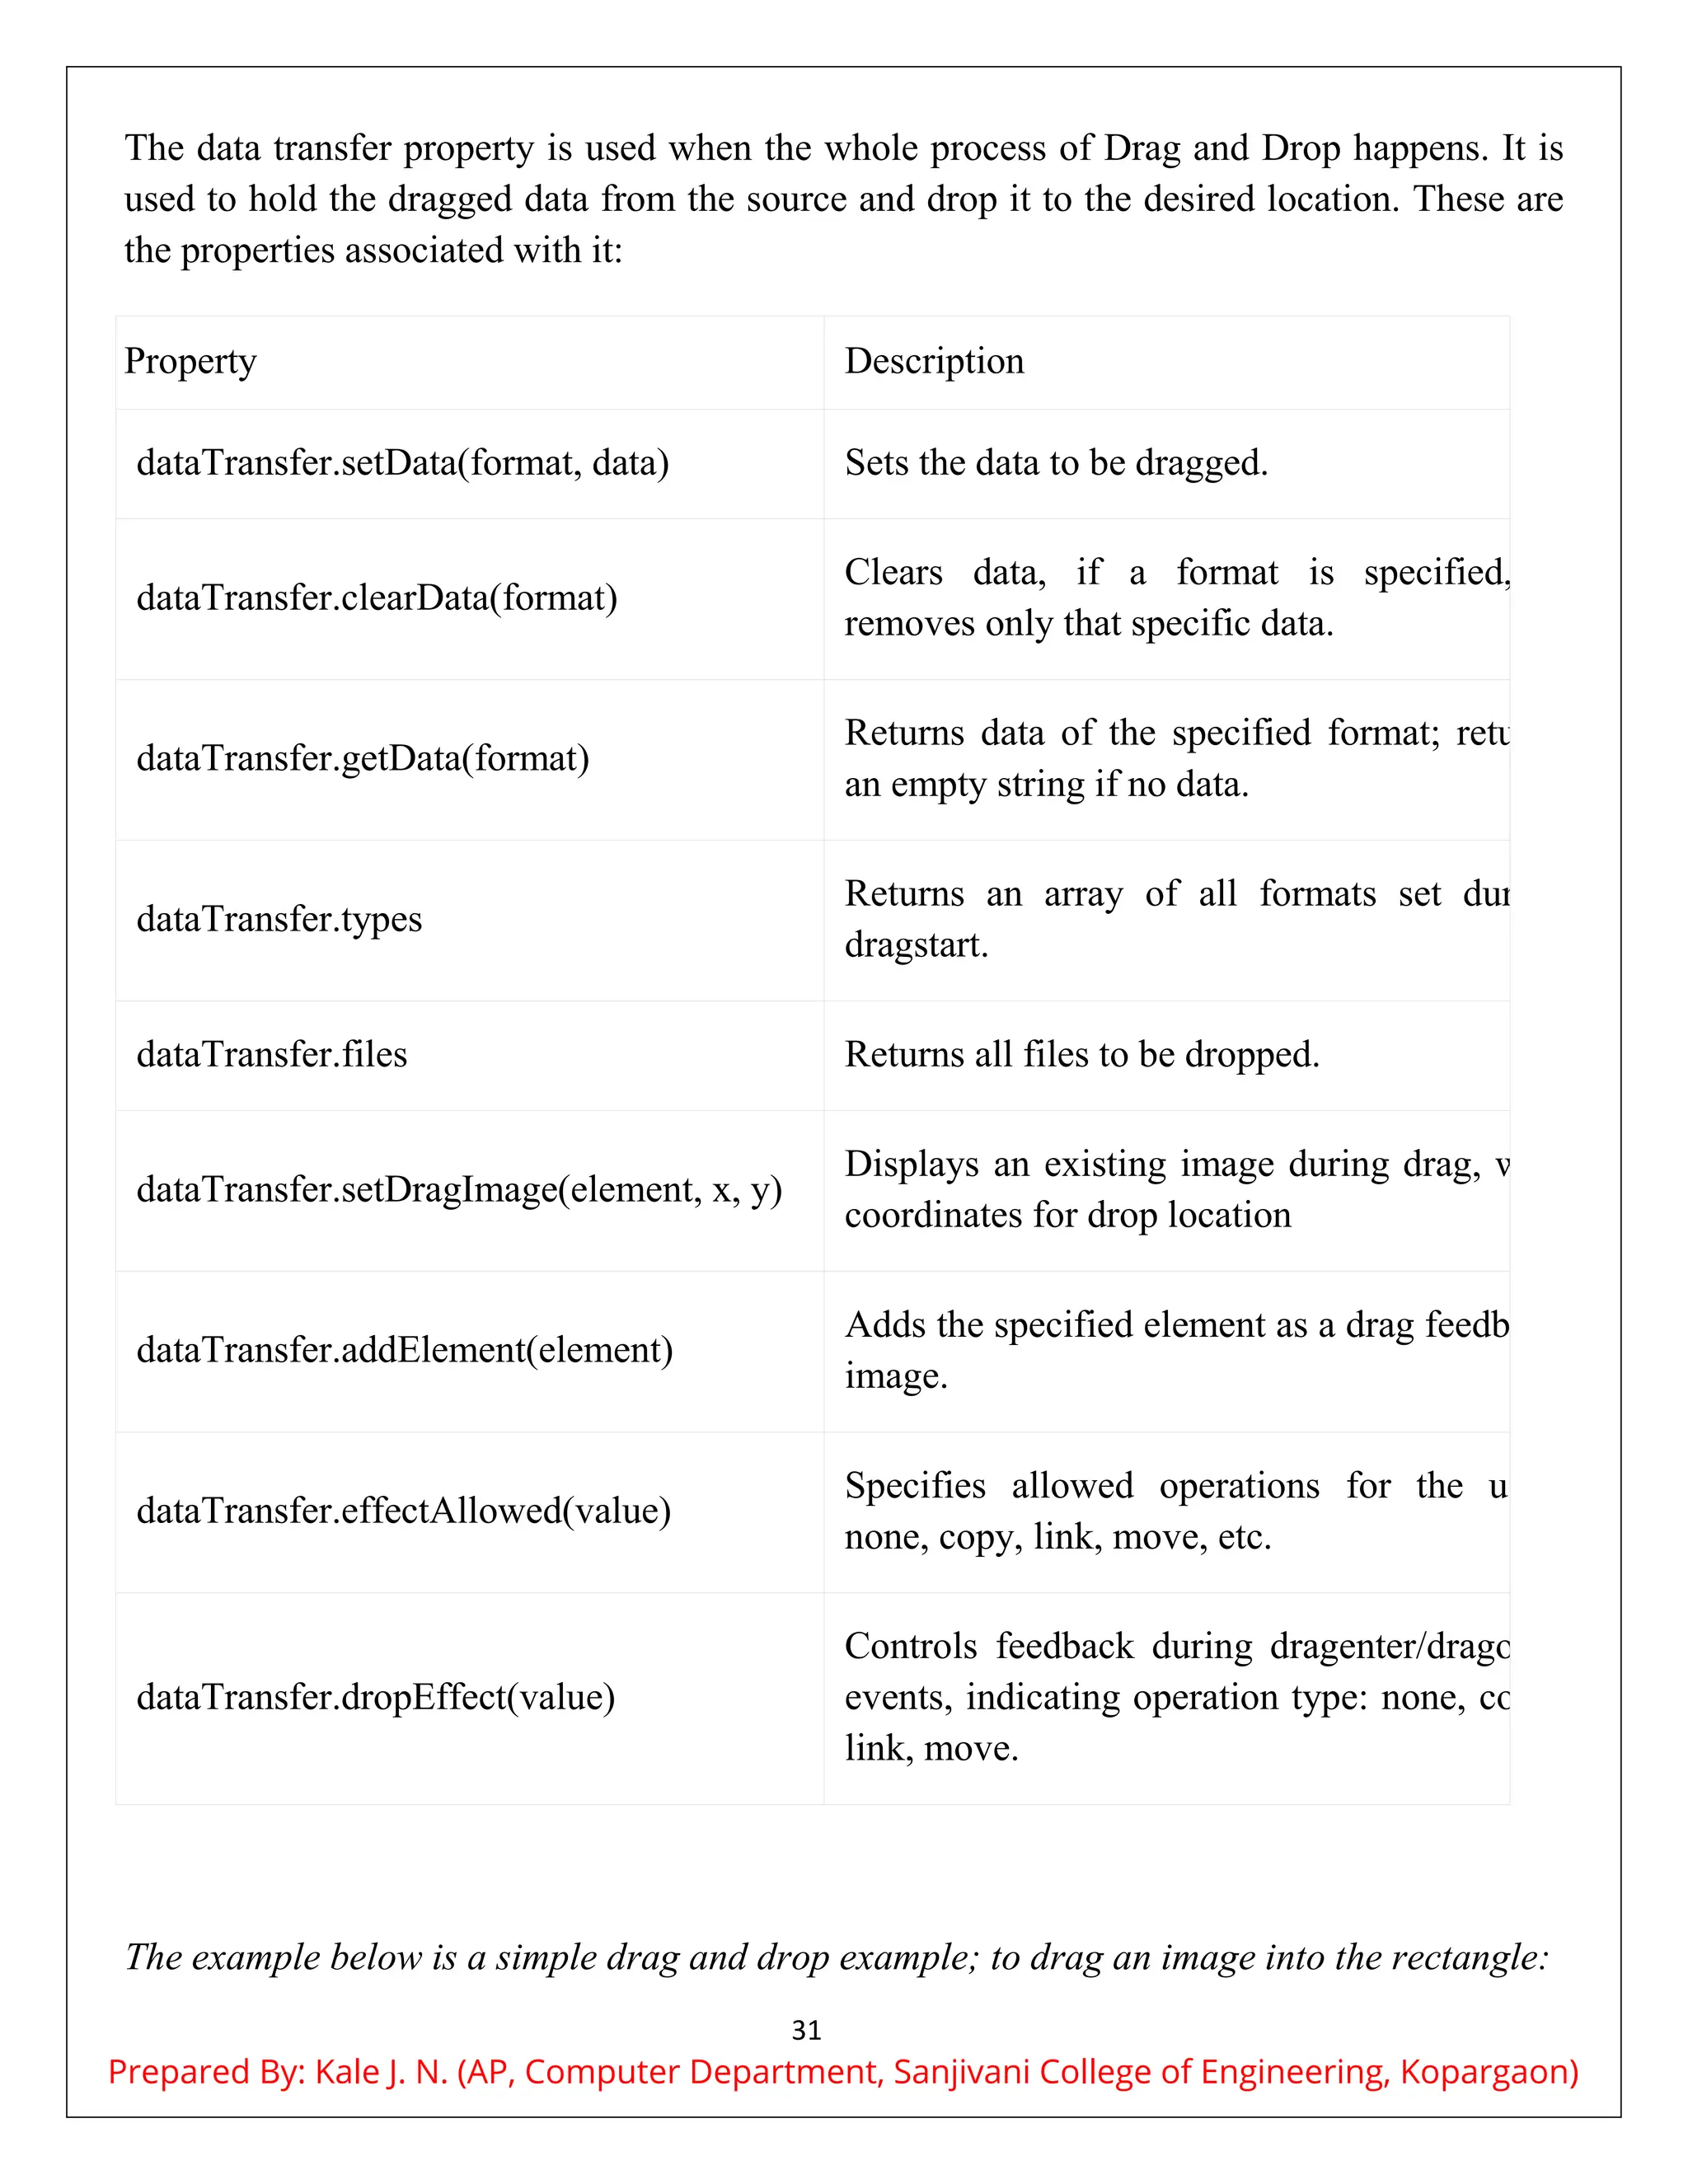
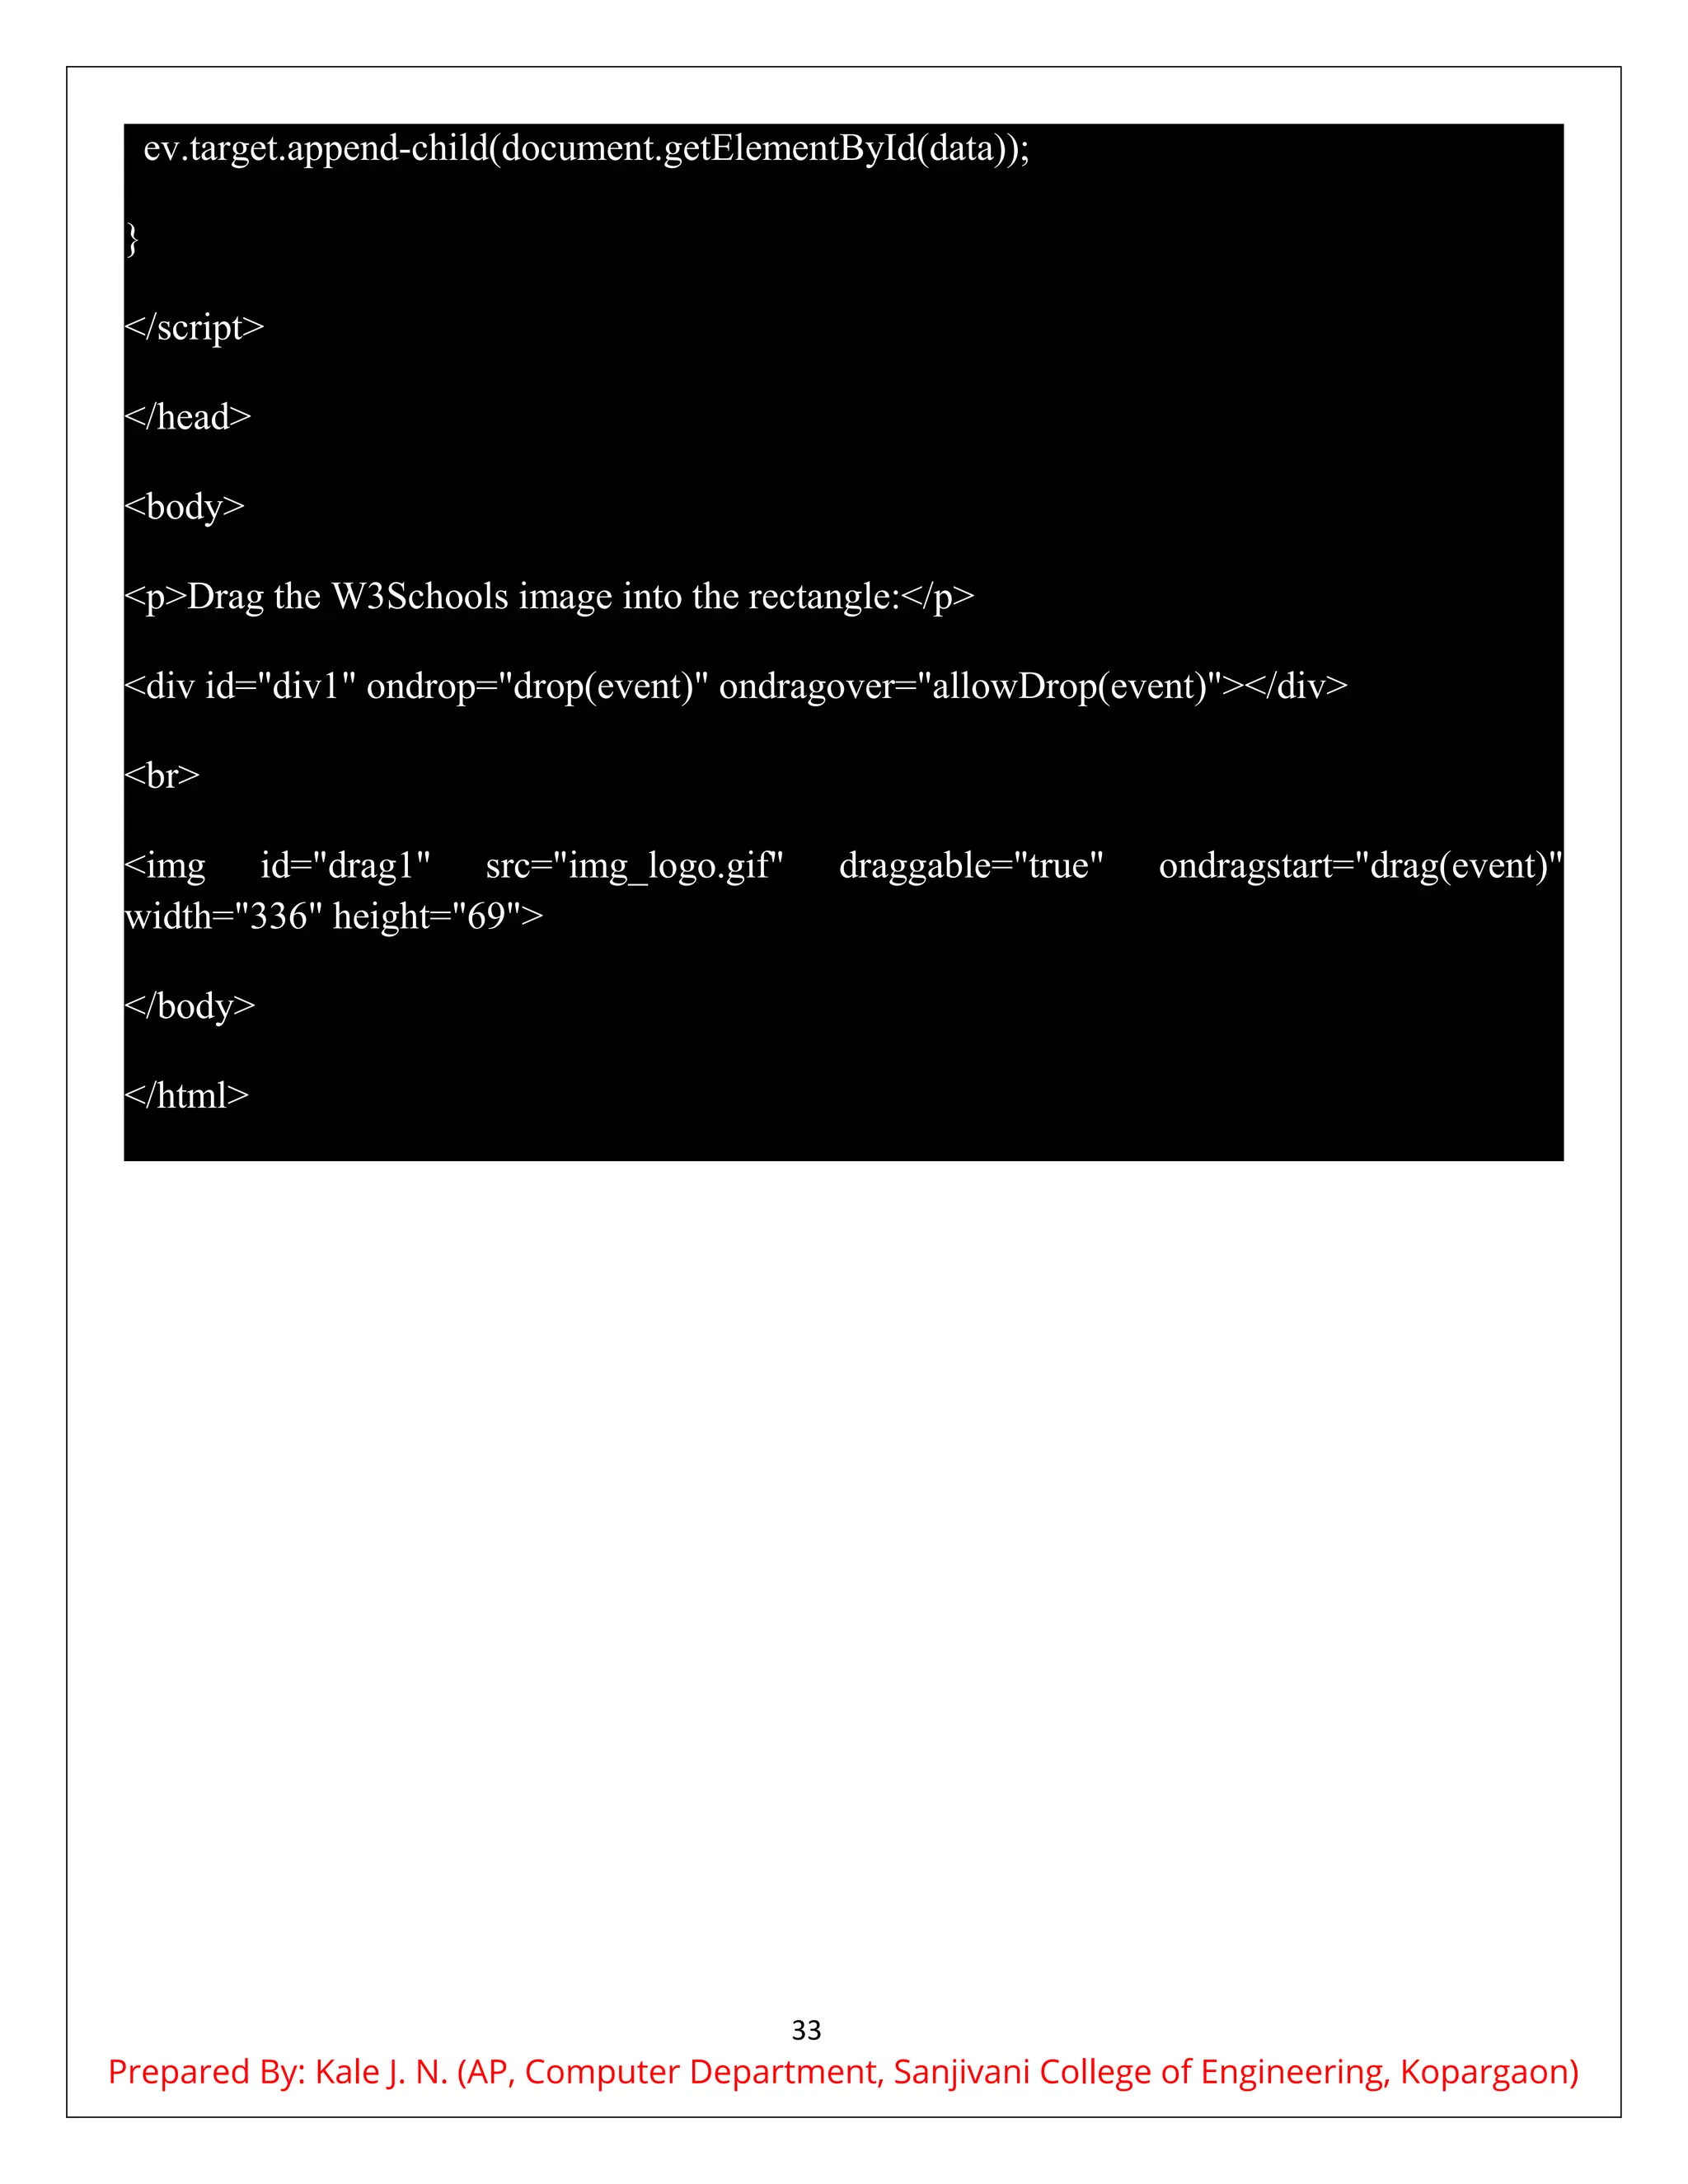
HTML document structure and syntax
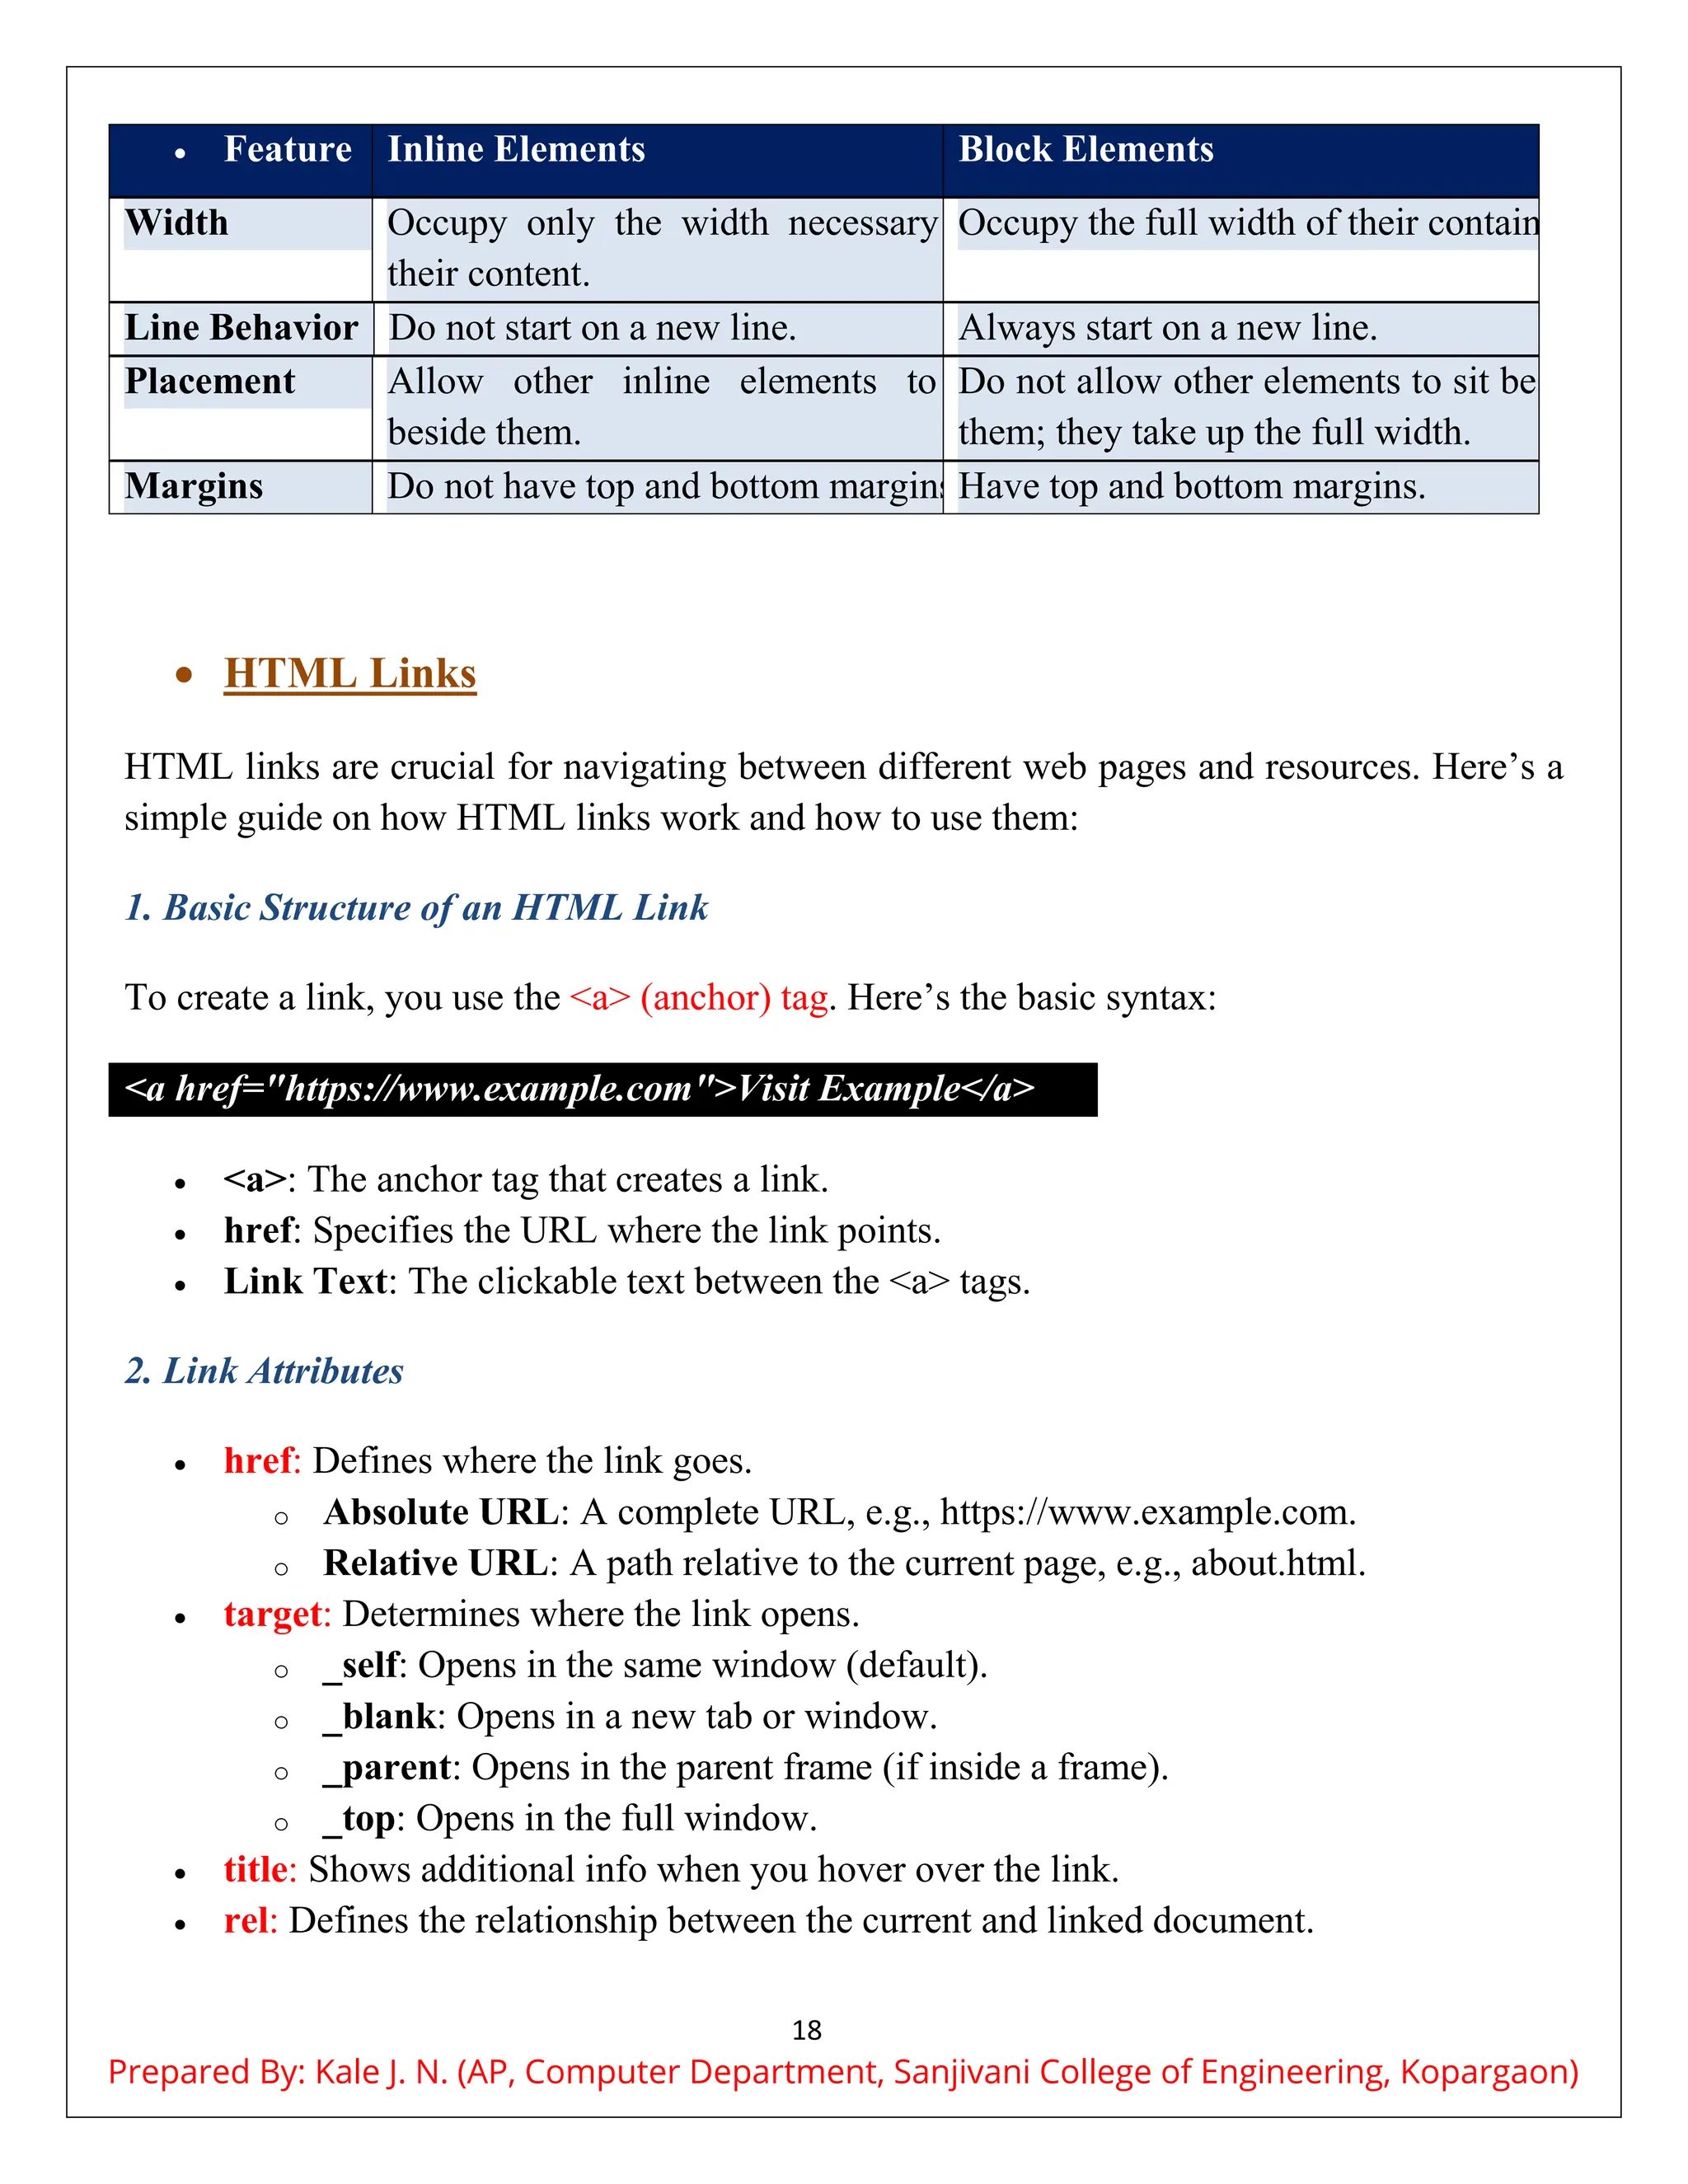
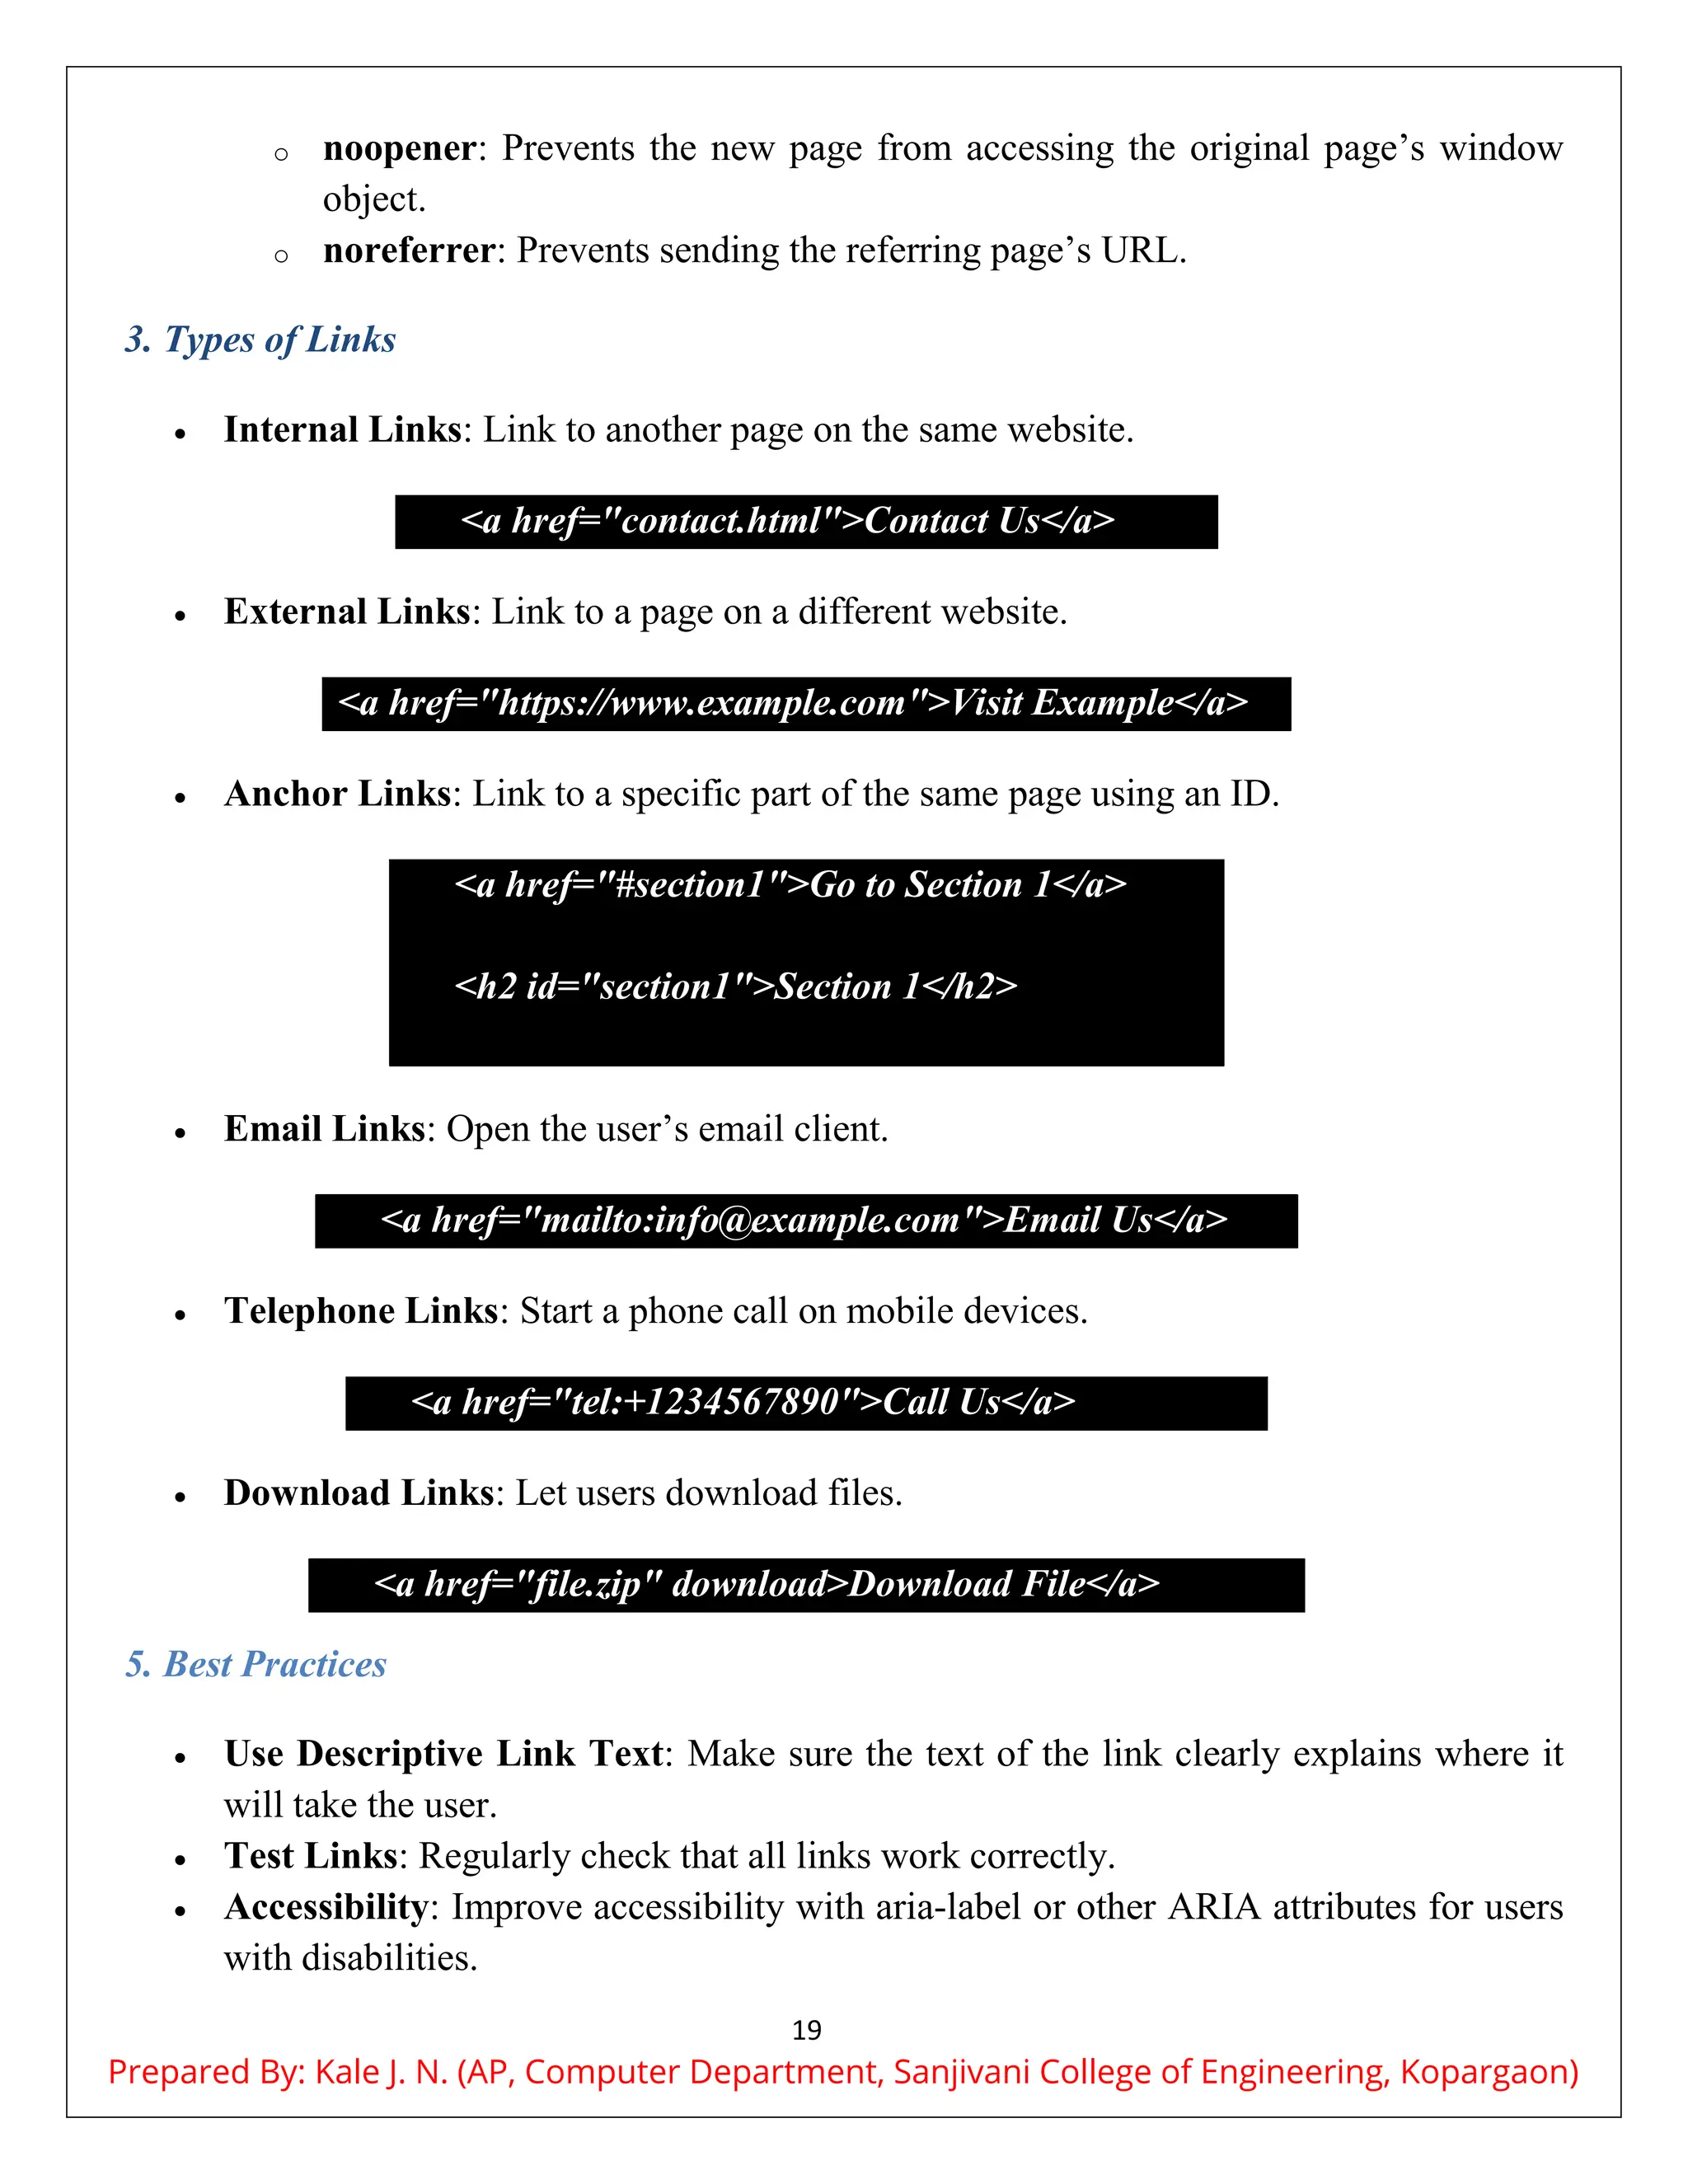
Common tags and attributes
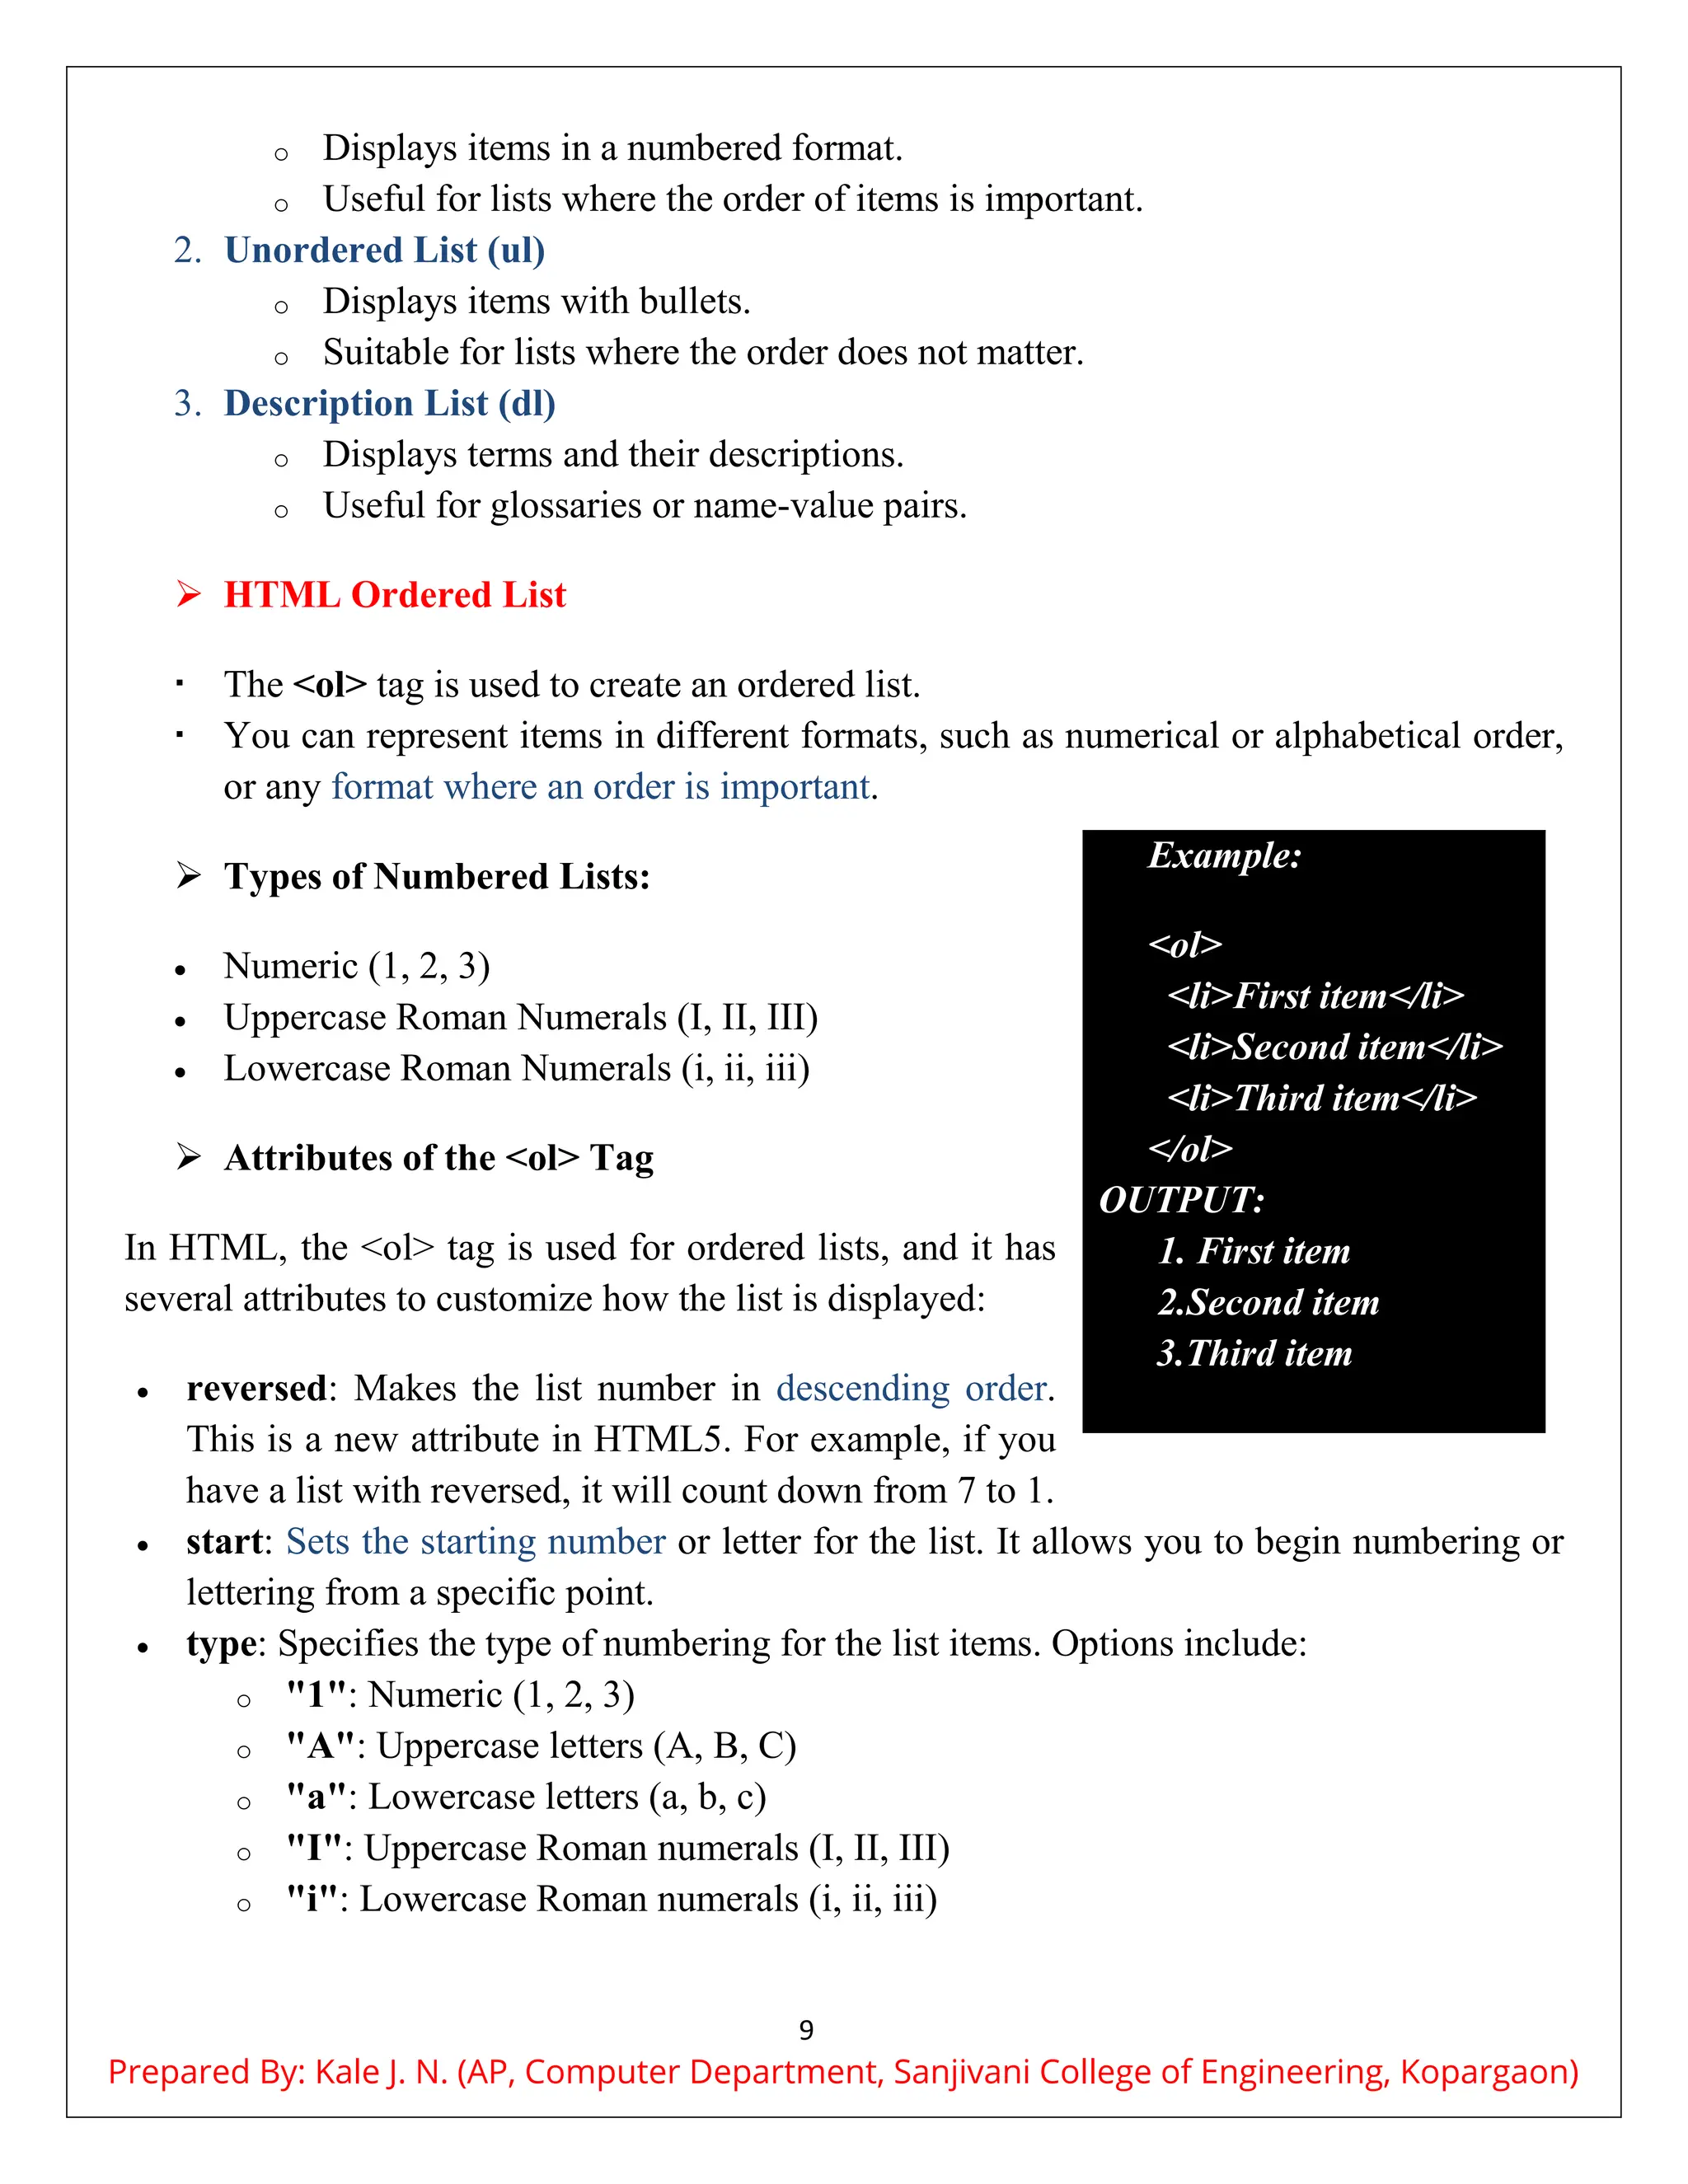
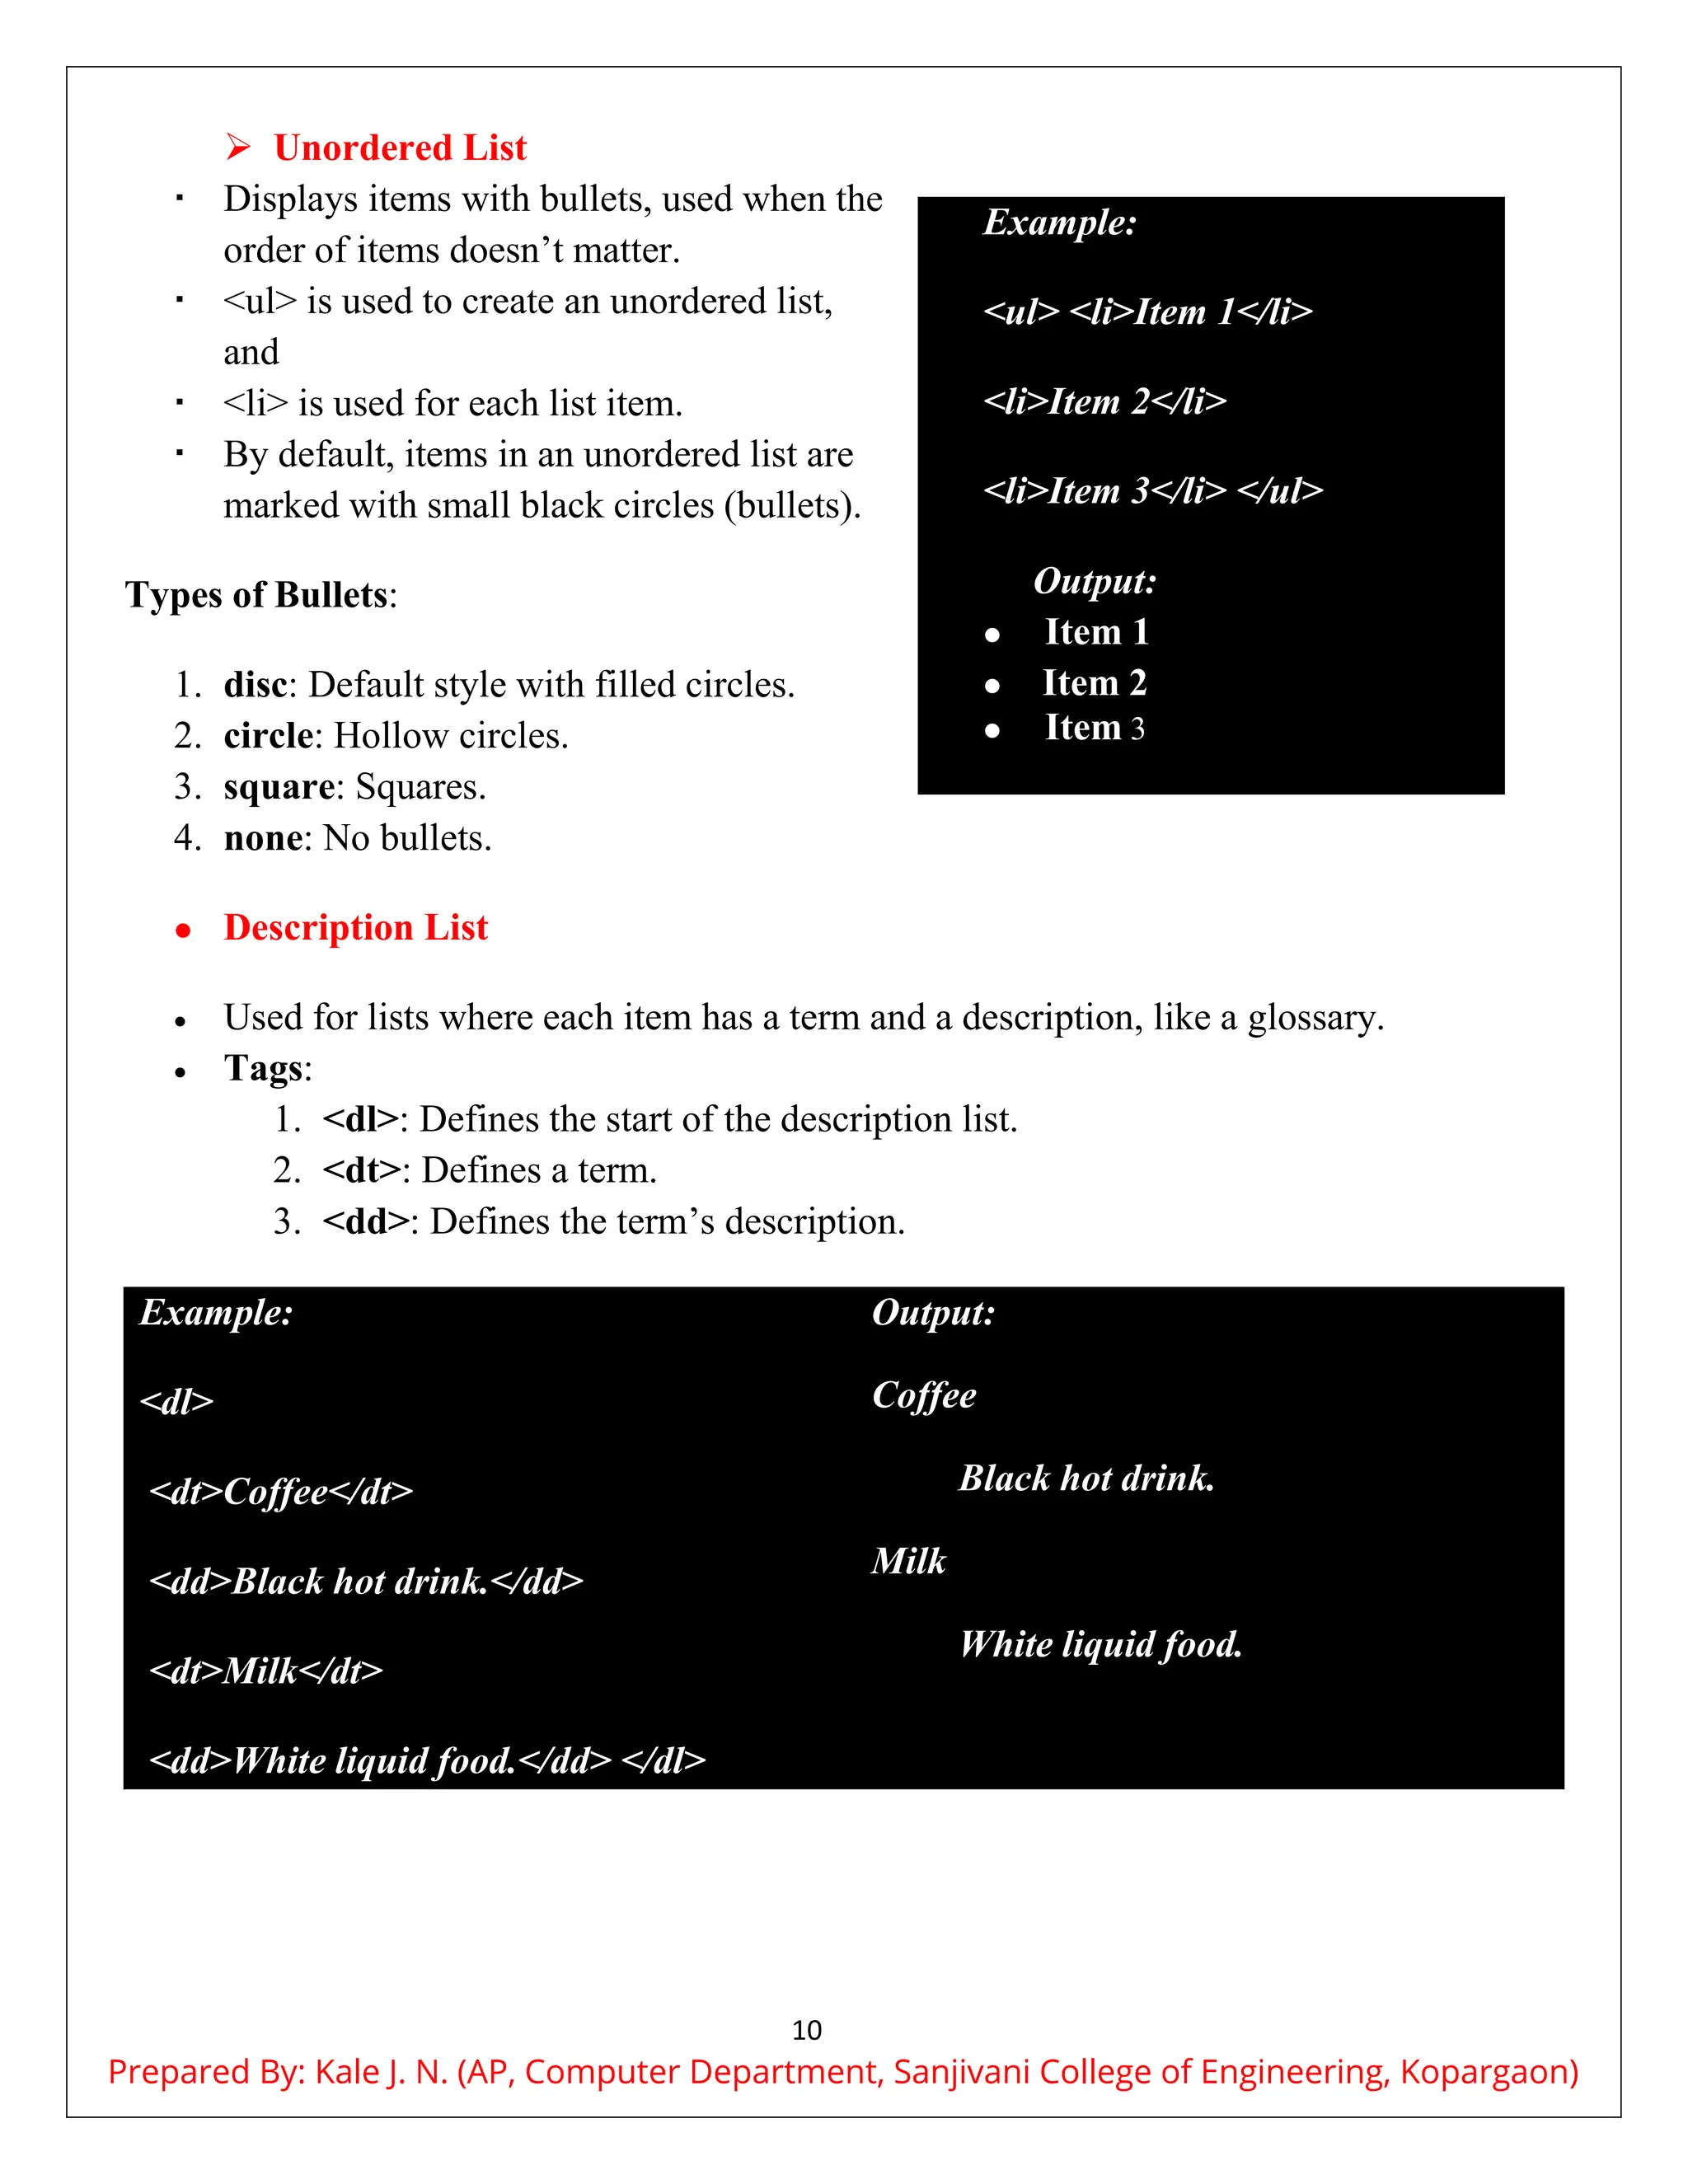
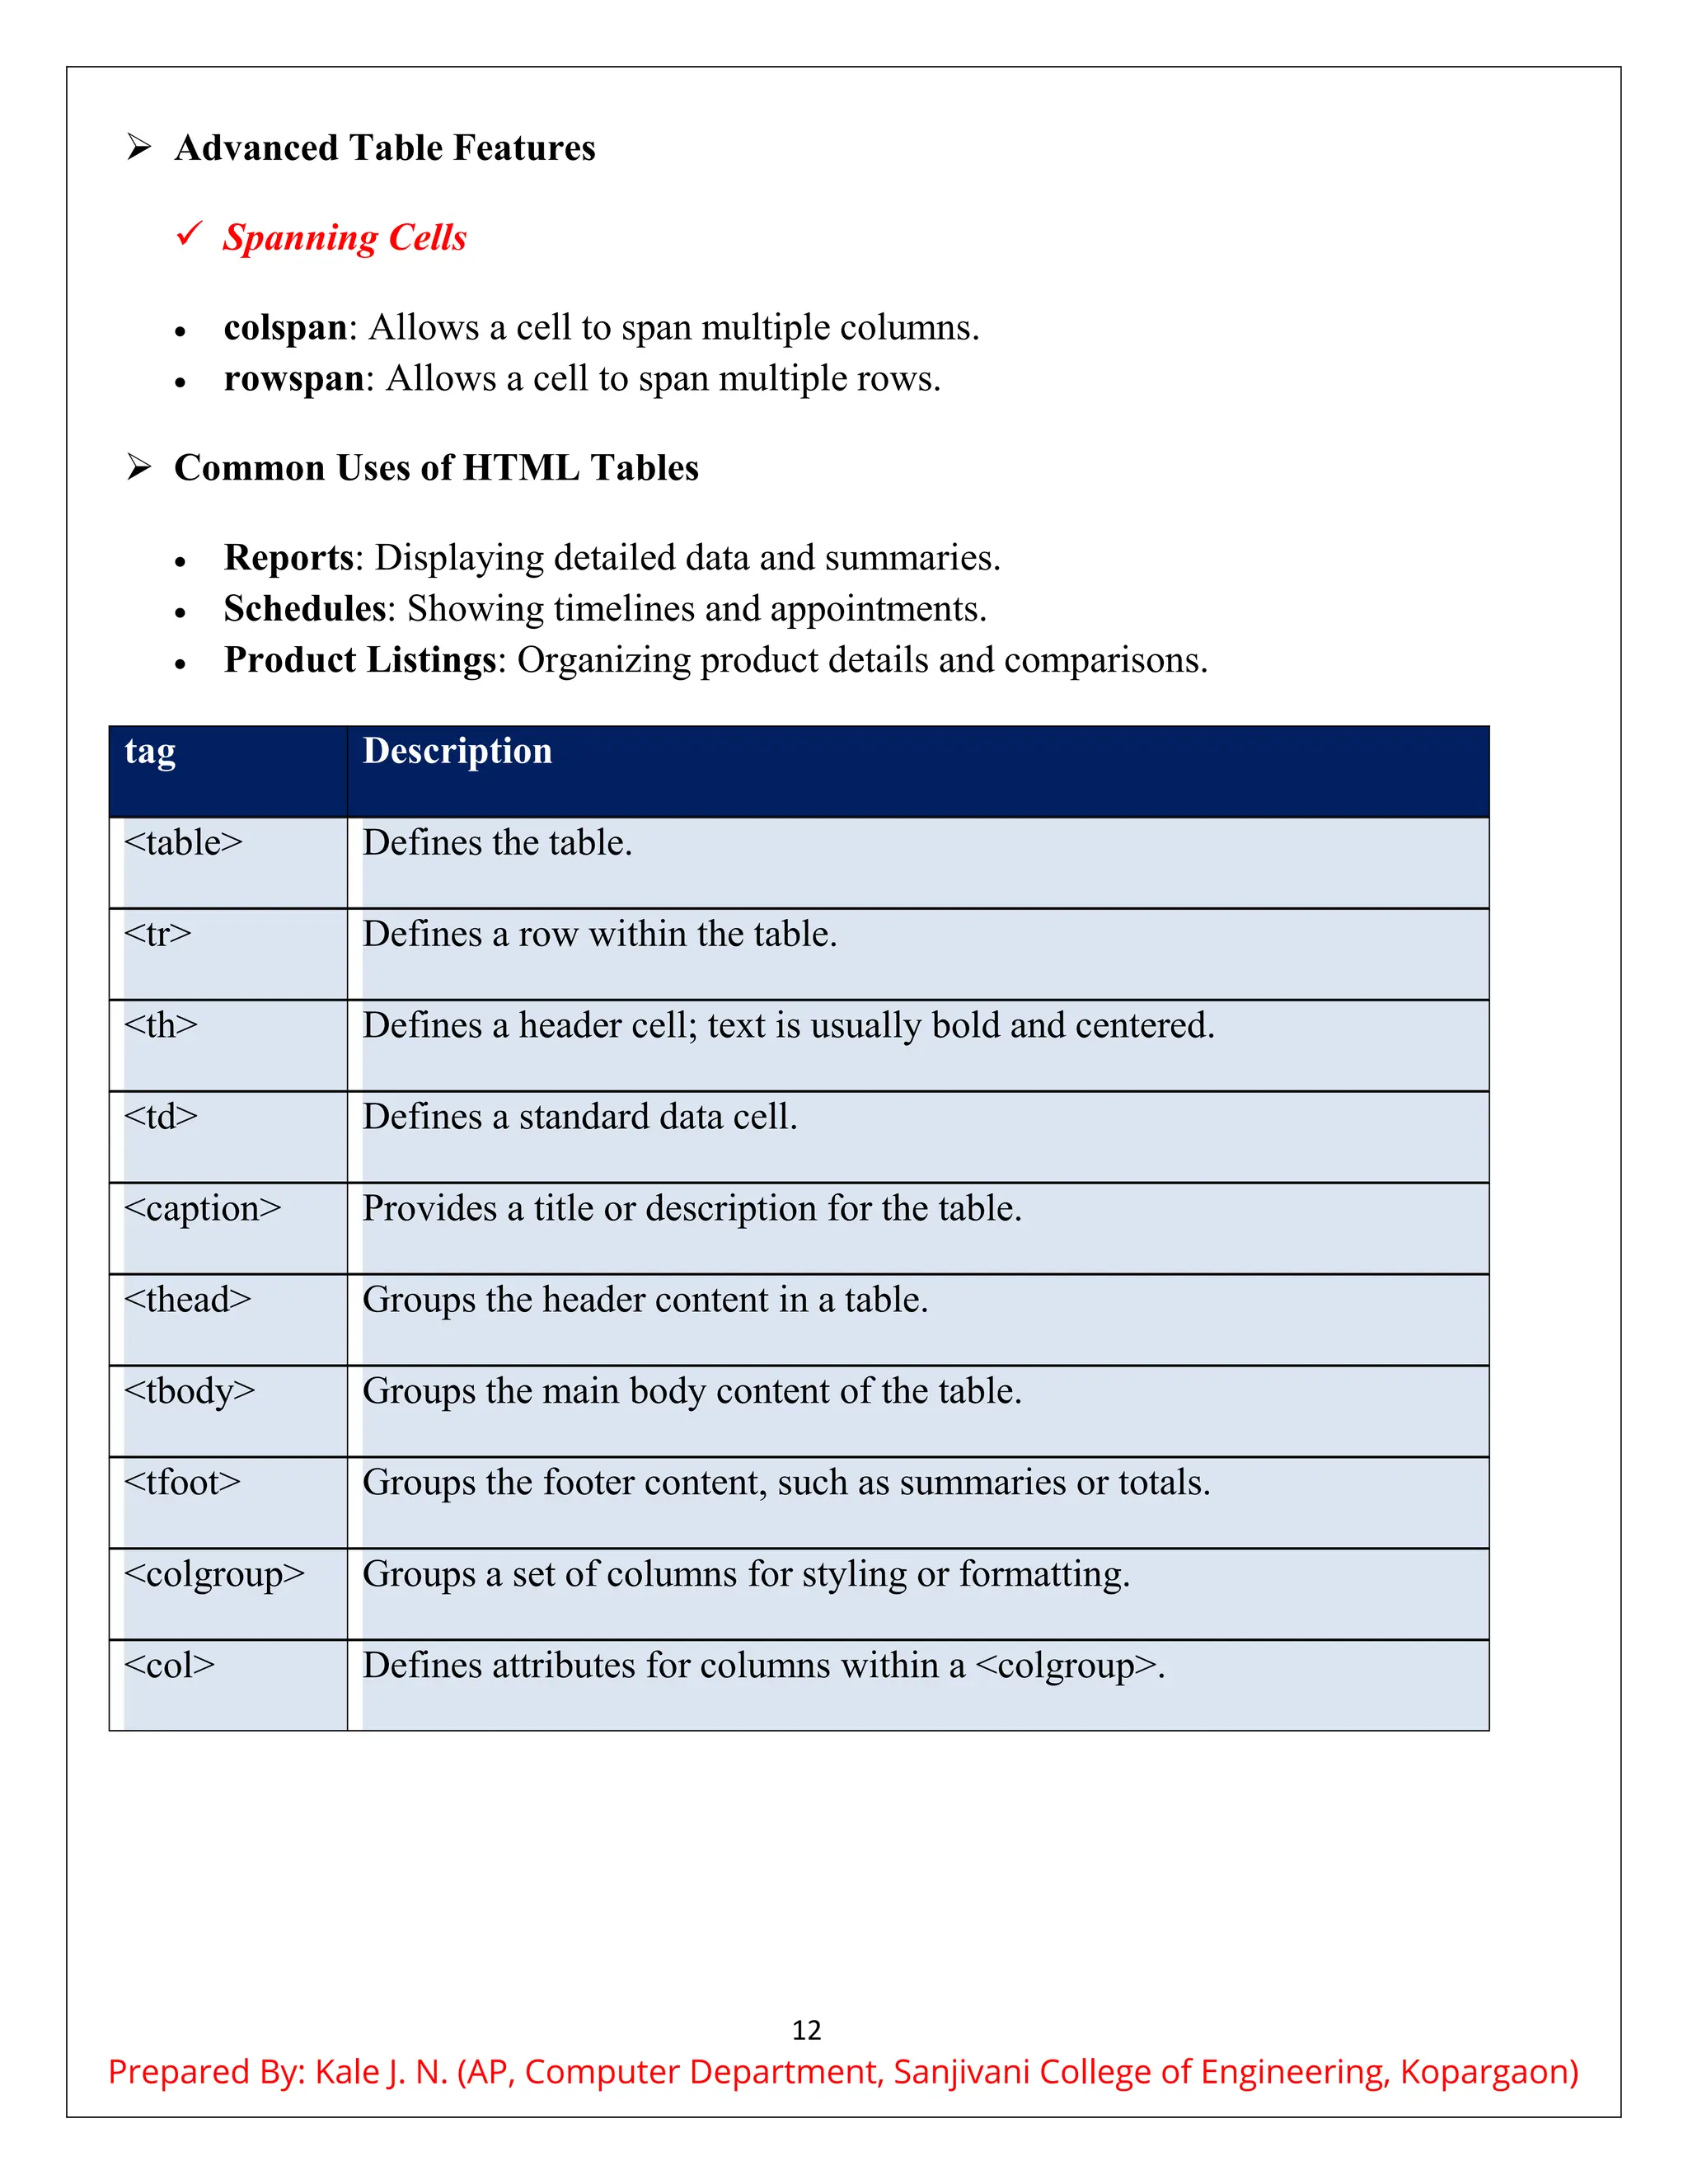
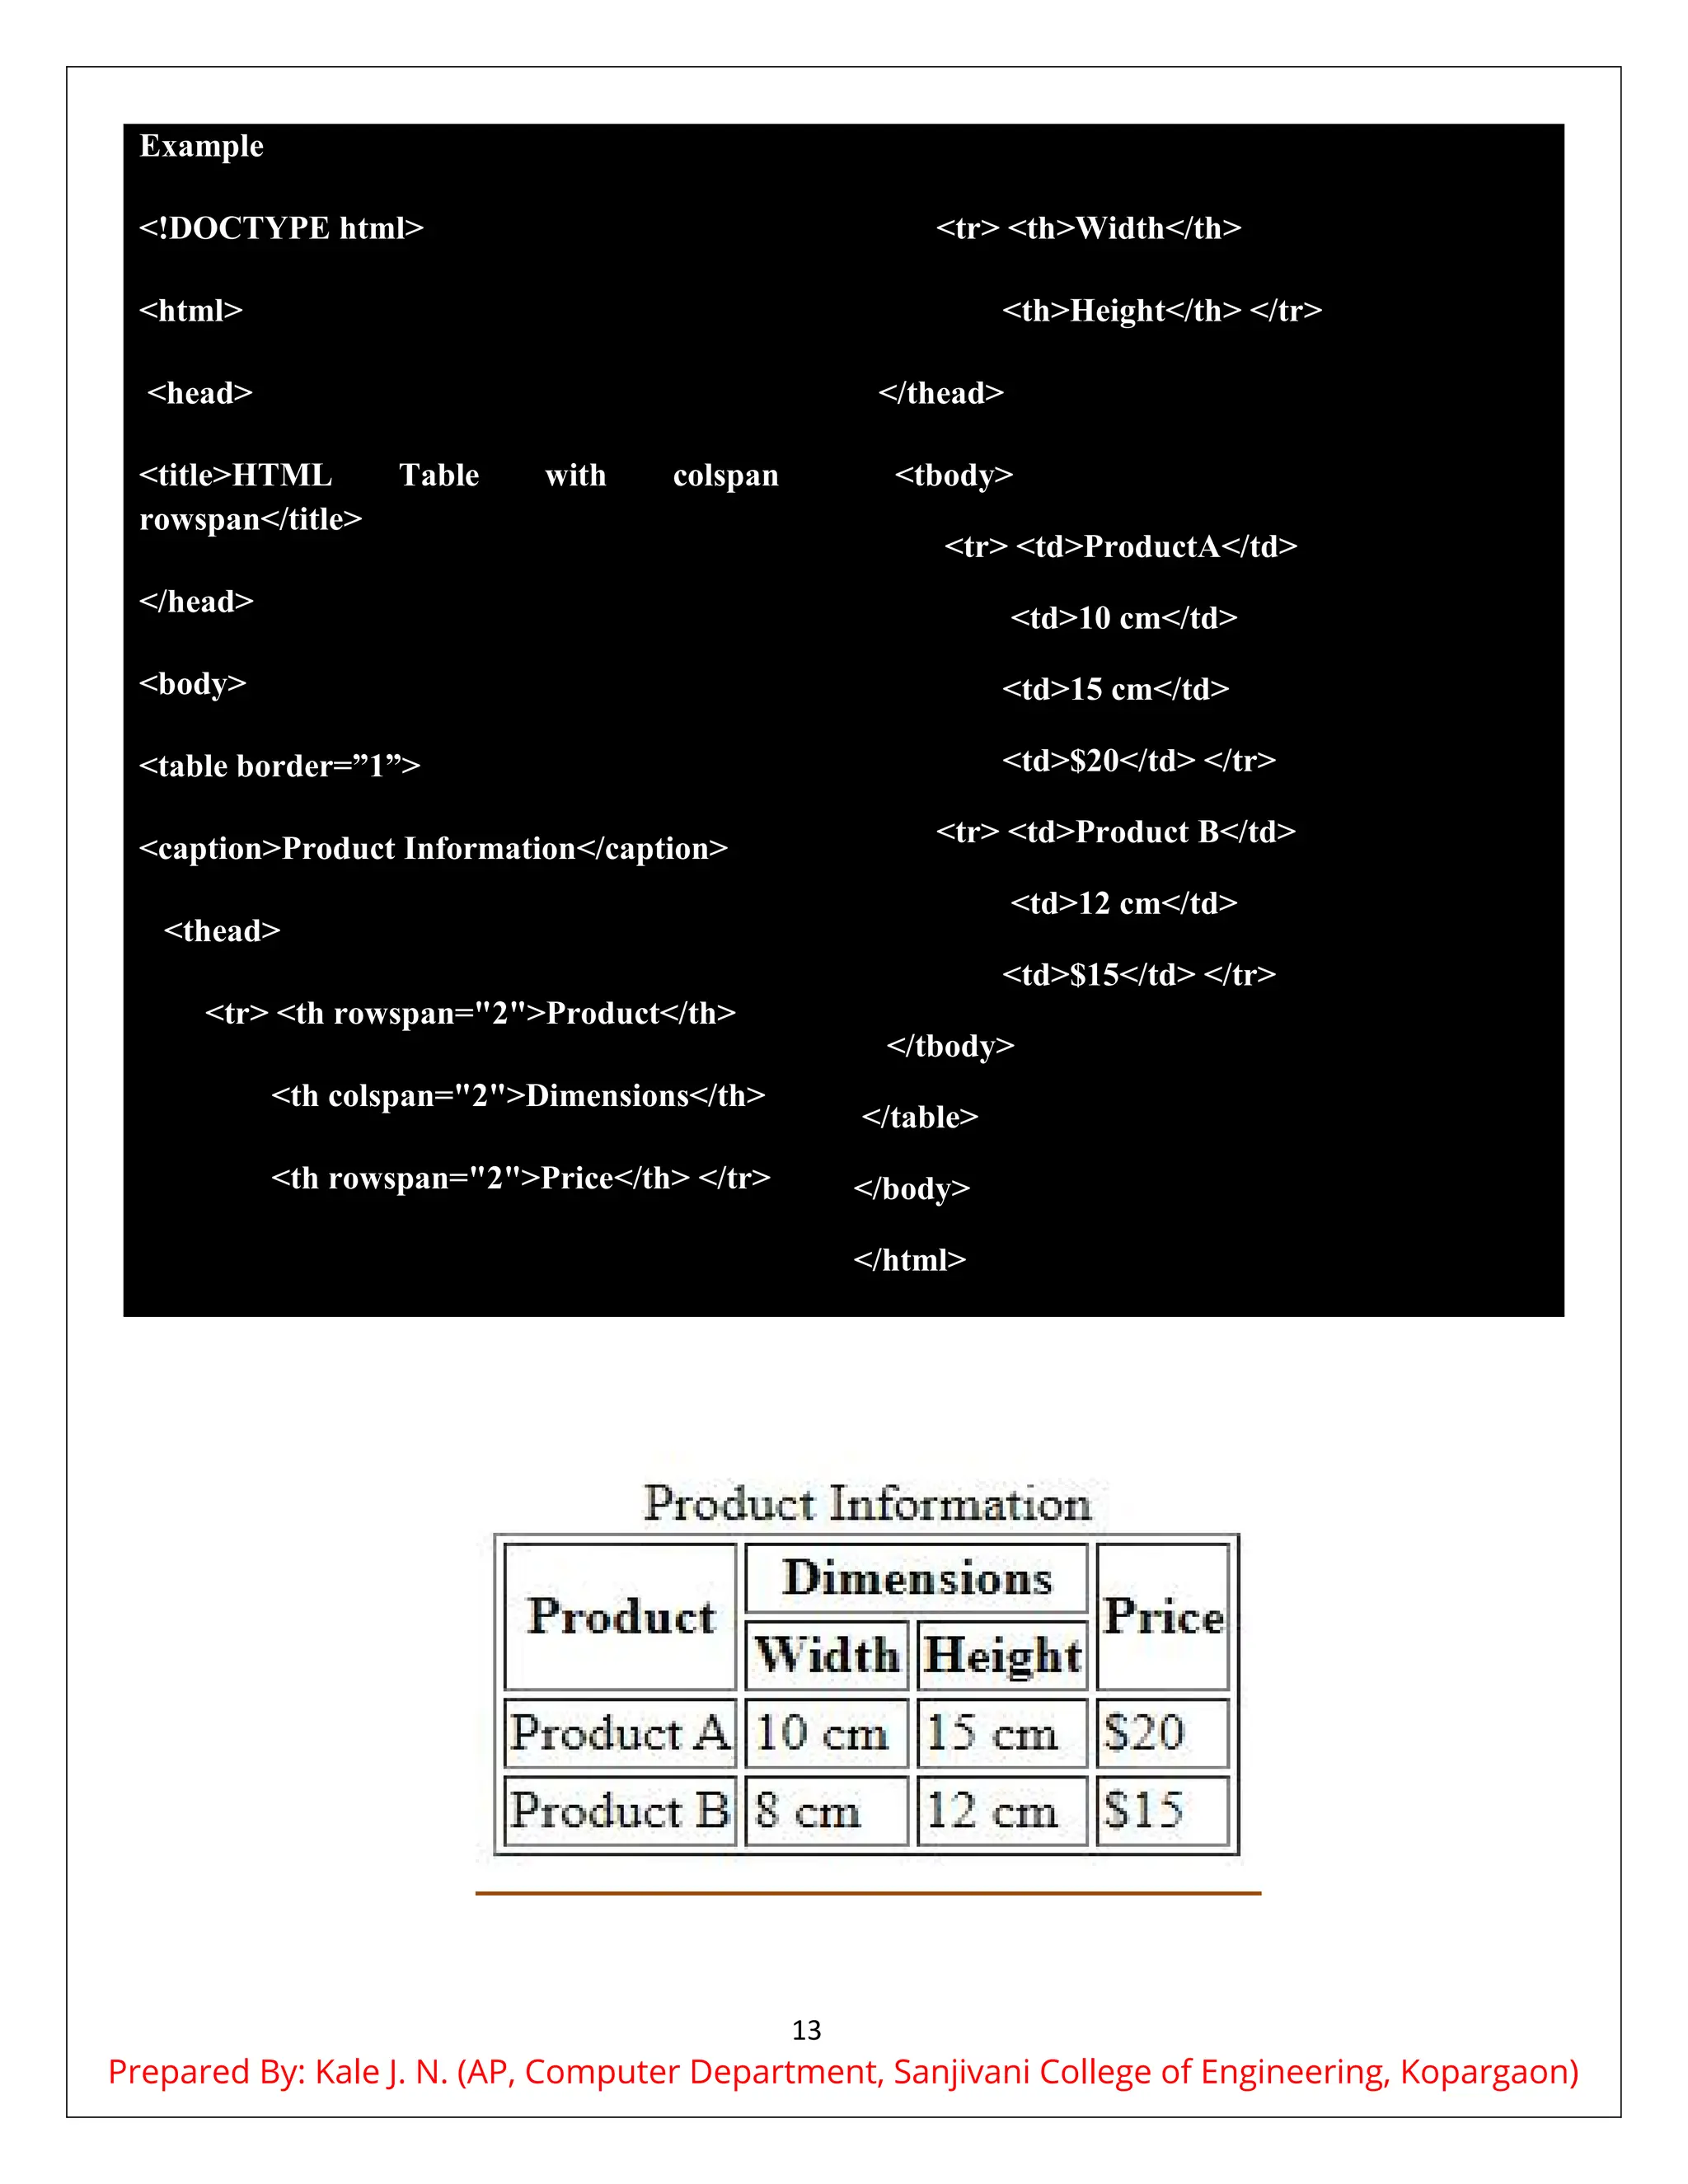
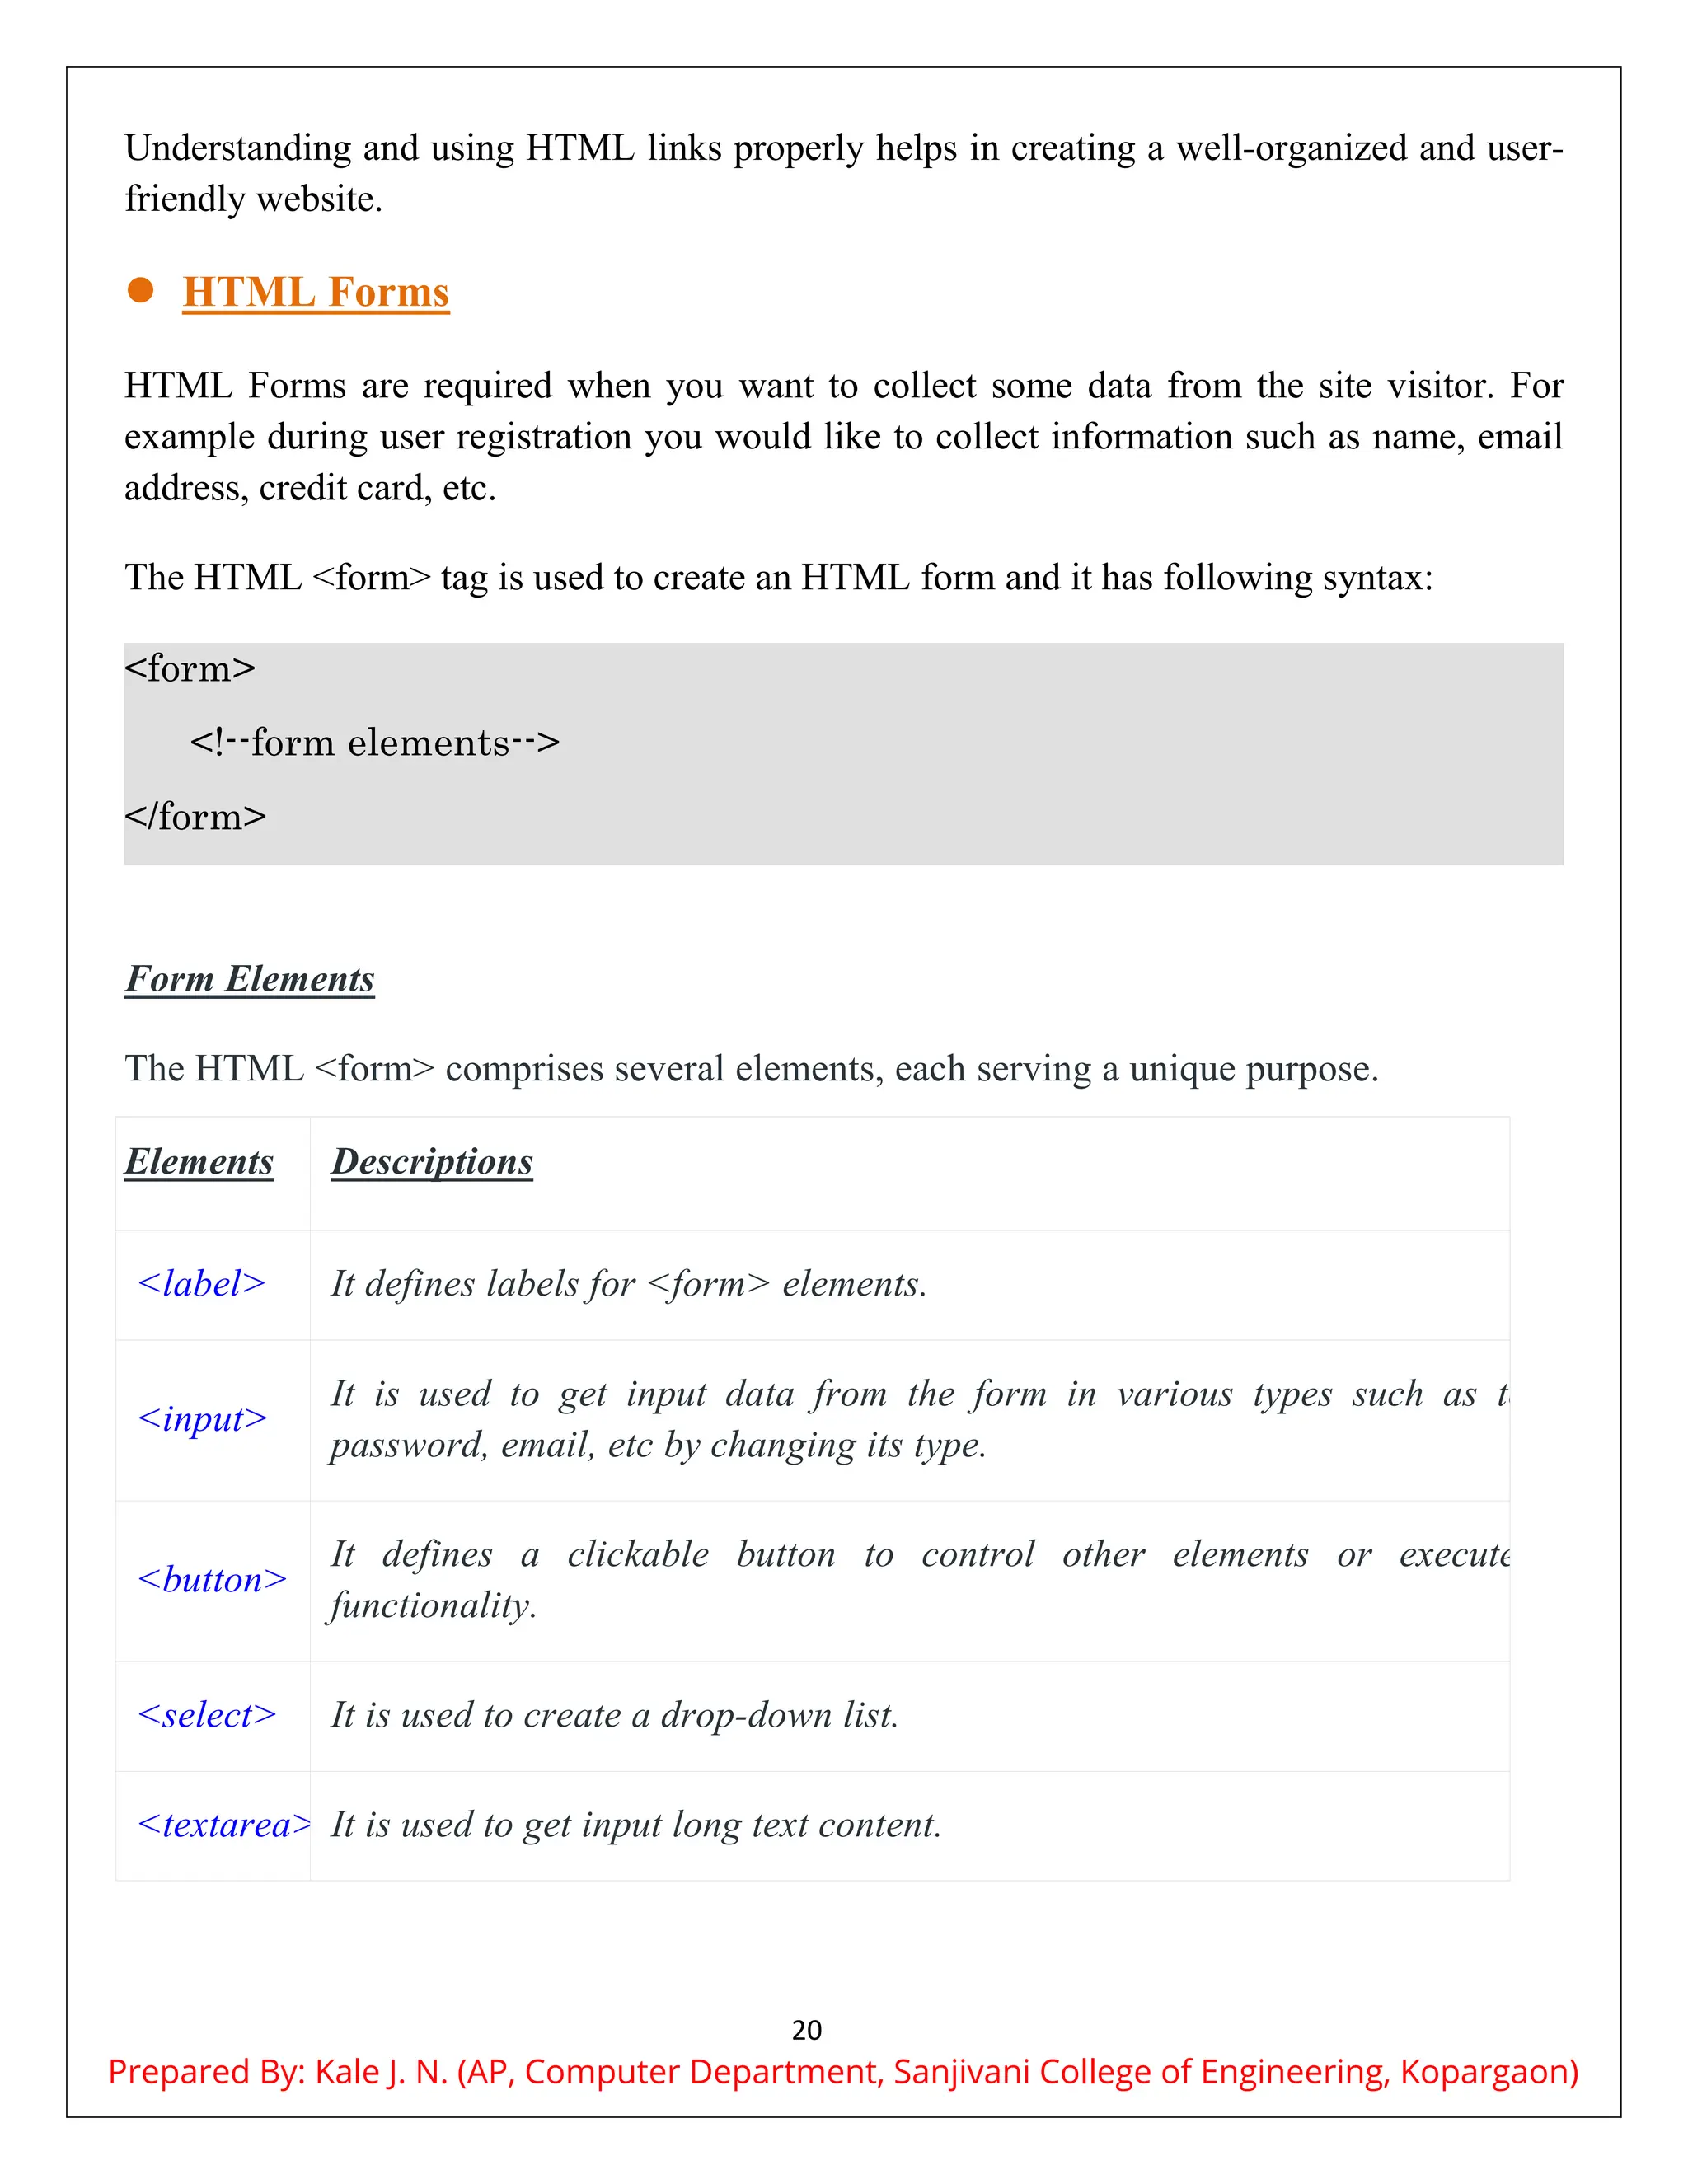
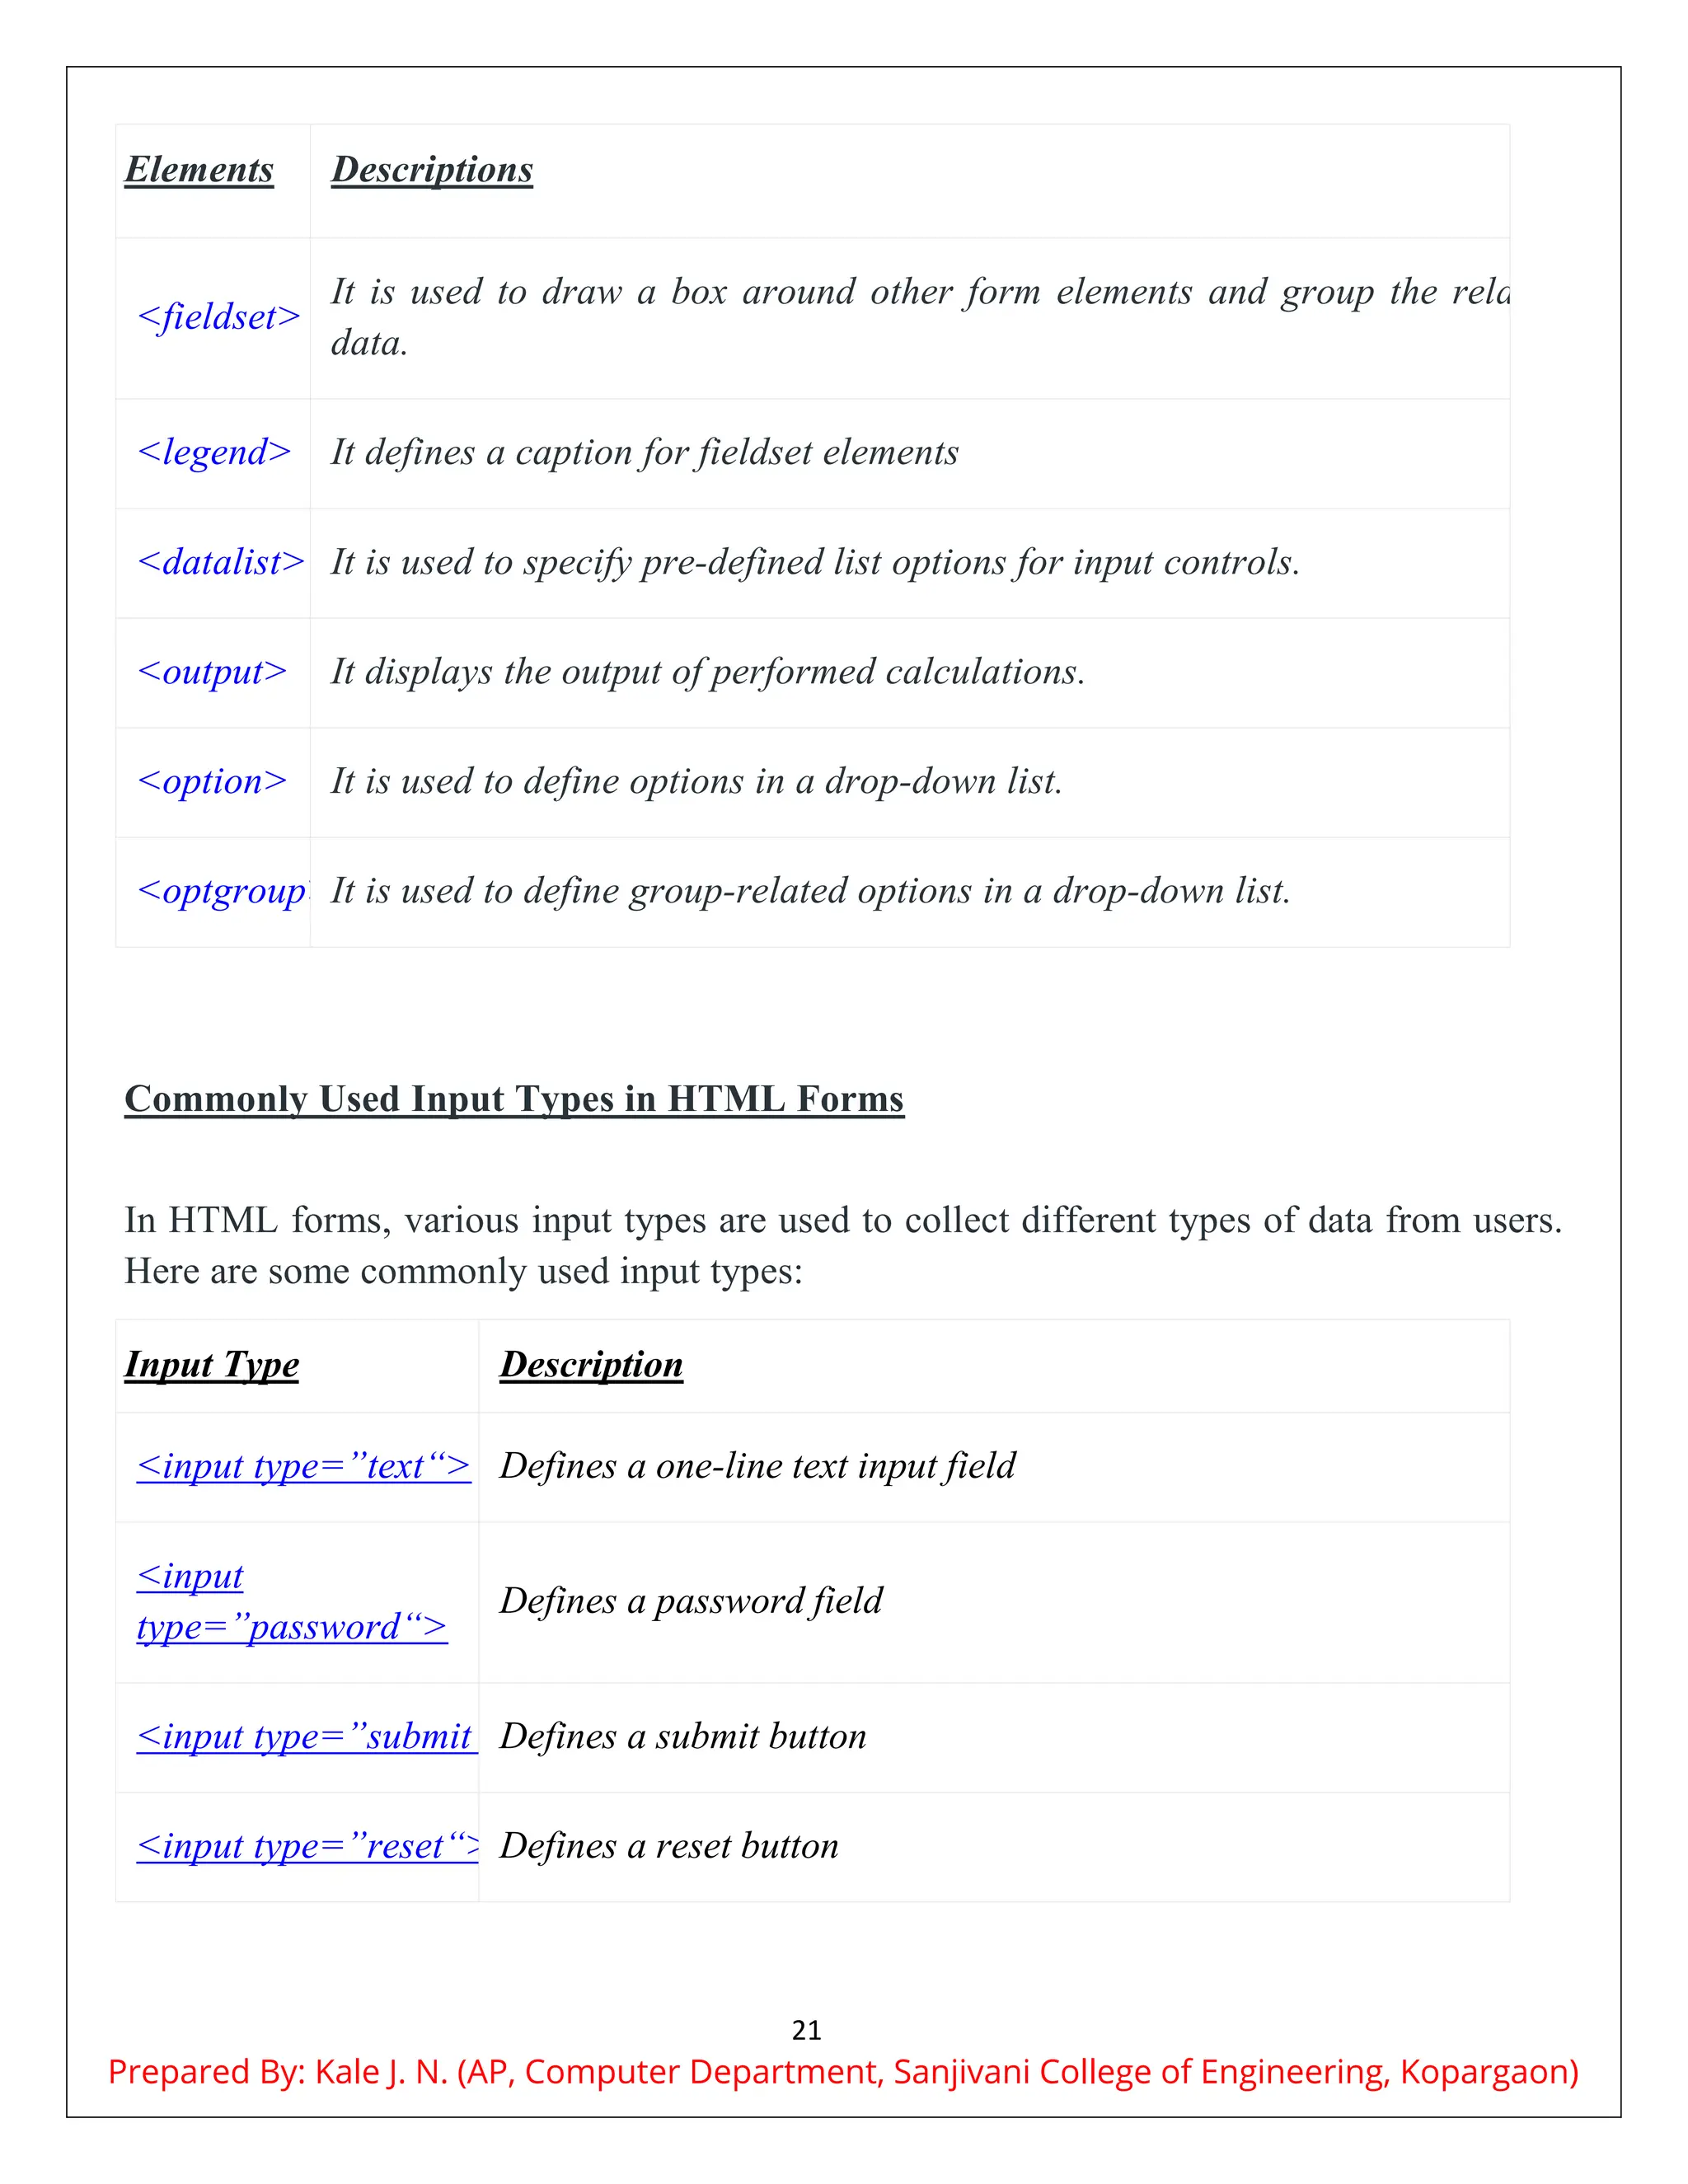
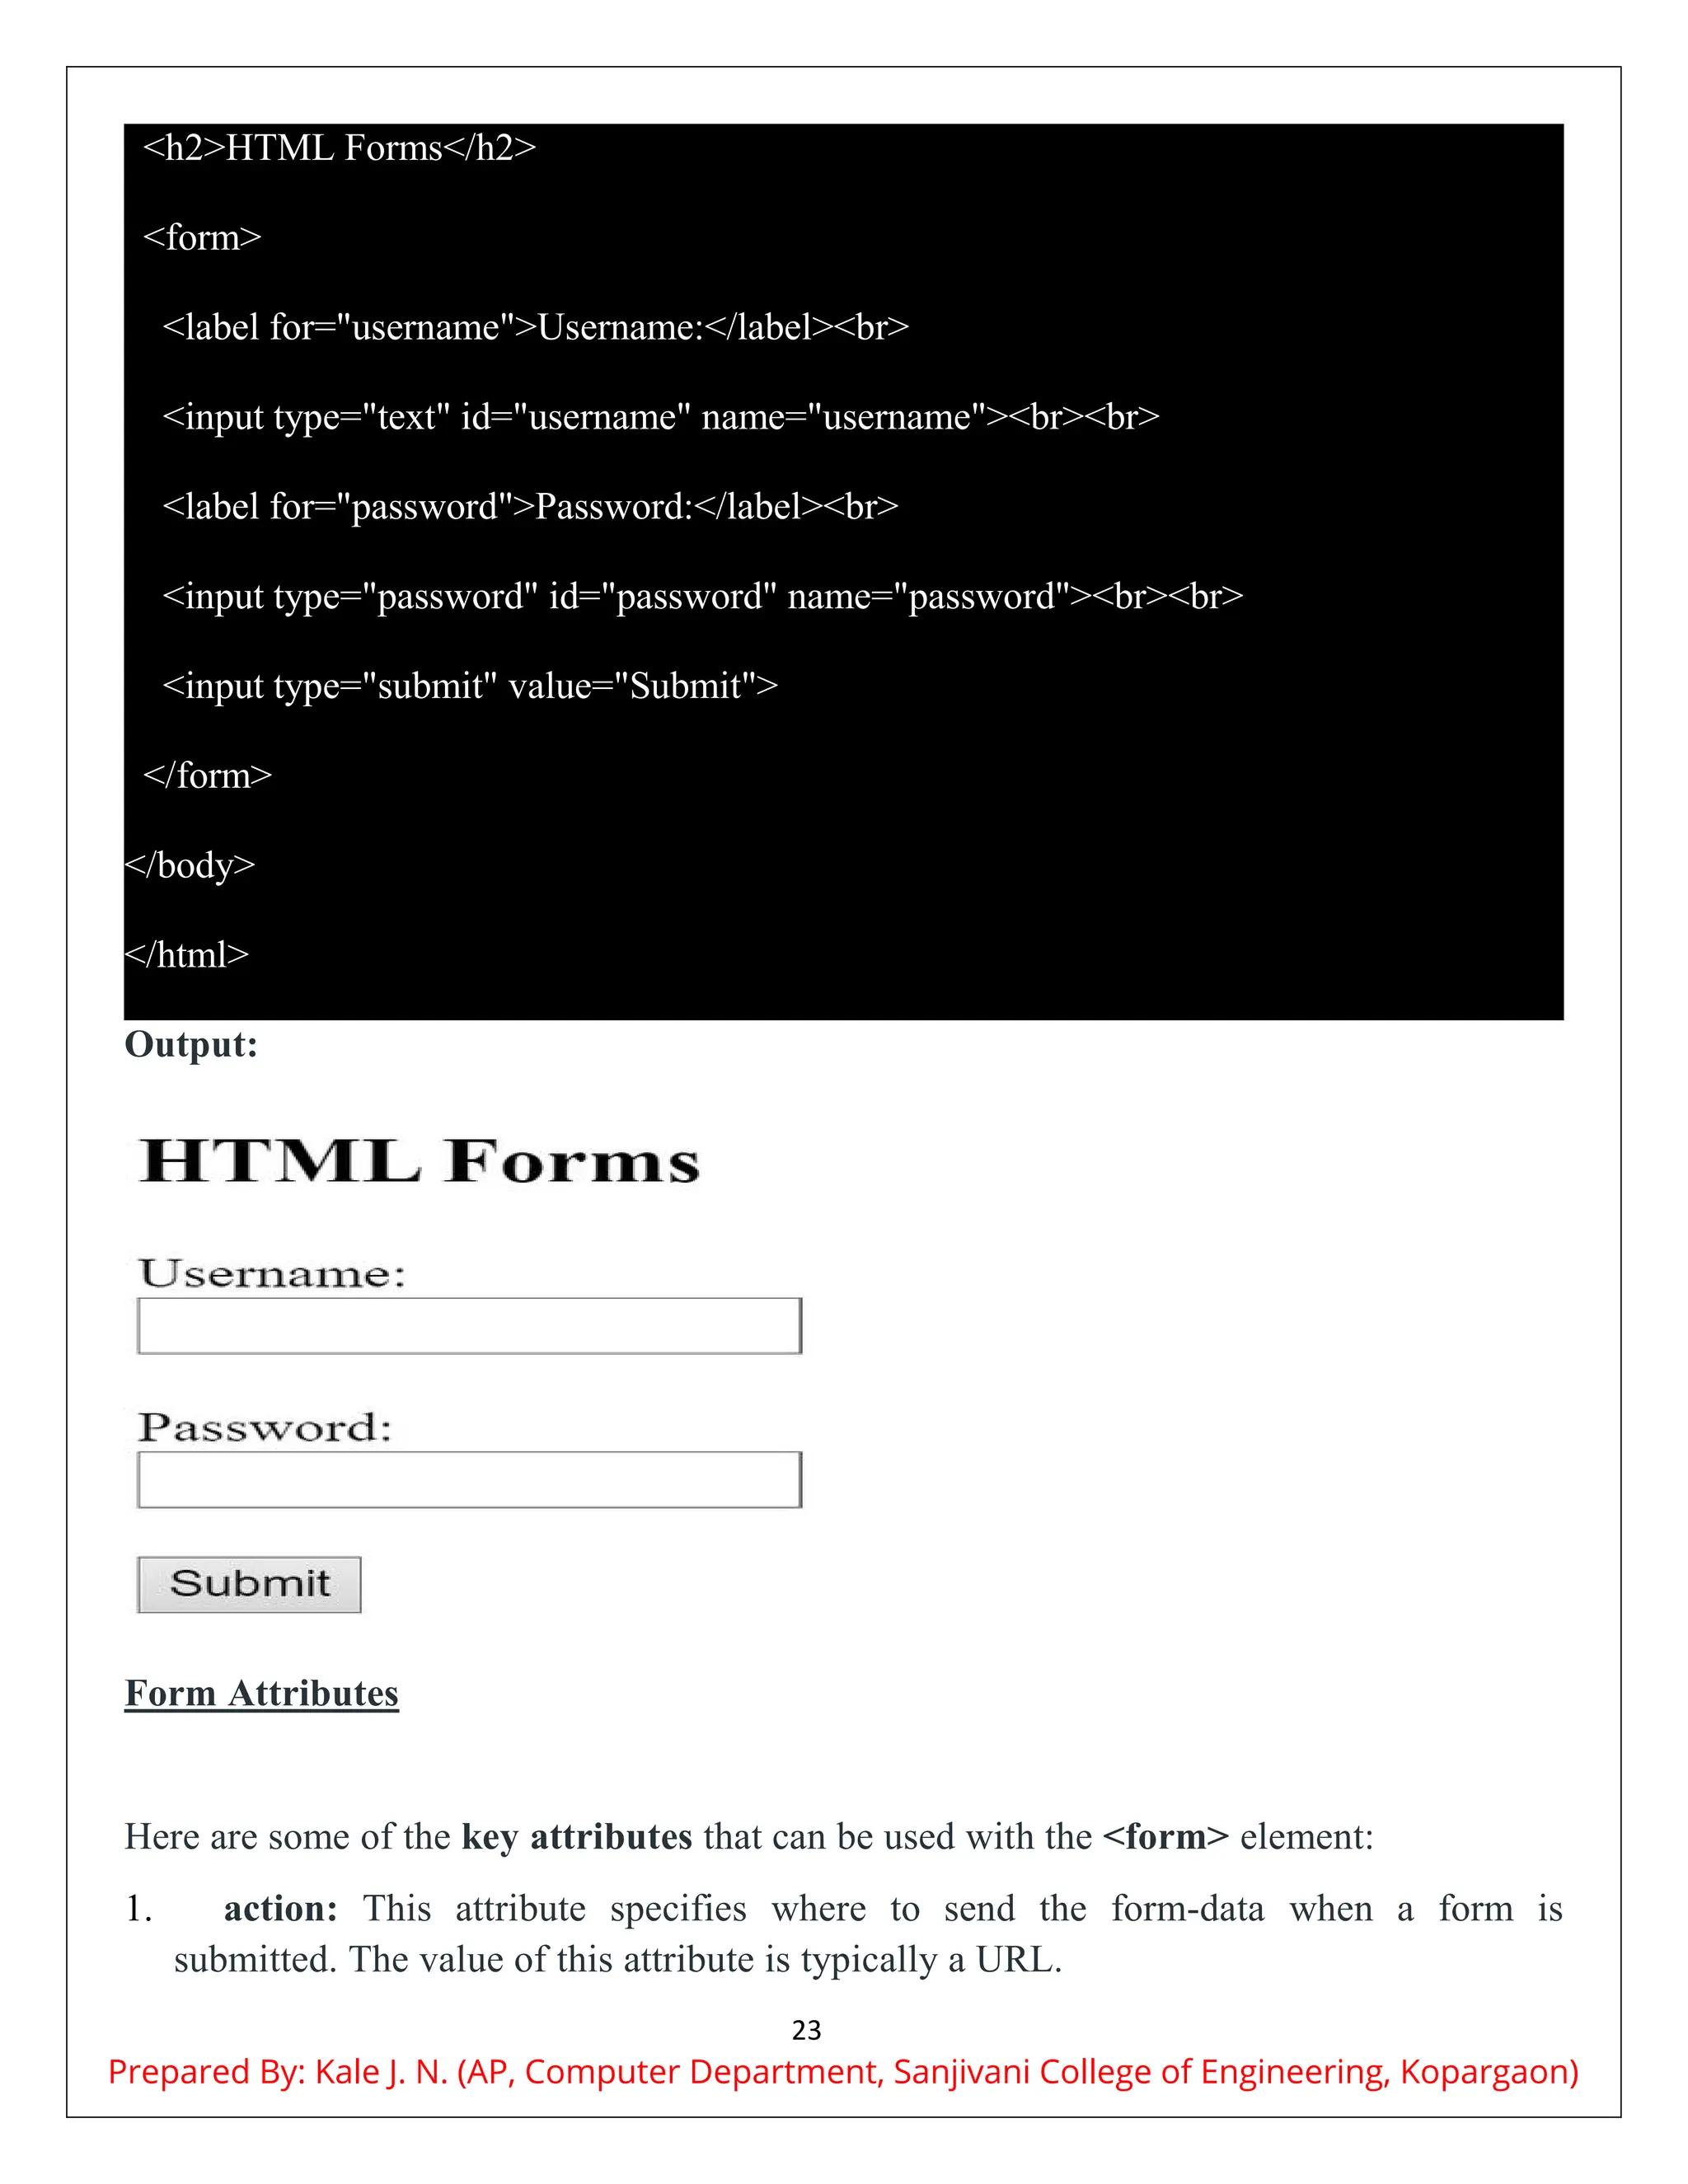
Lists, tables, and forms
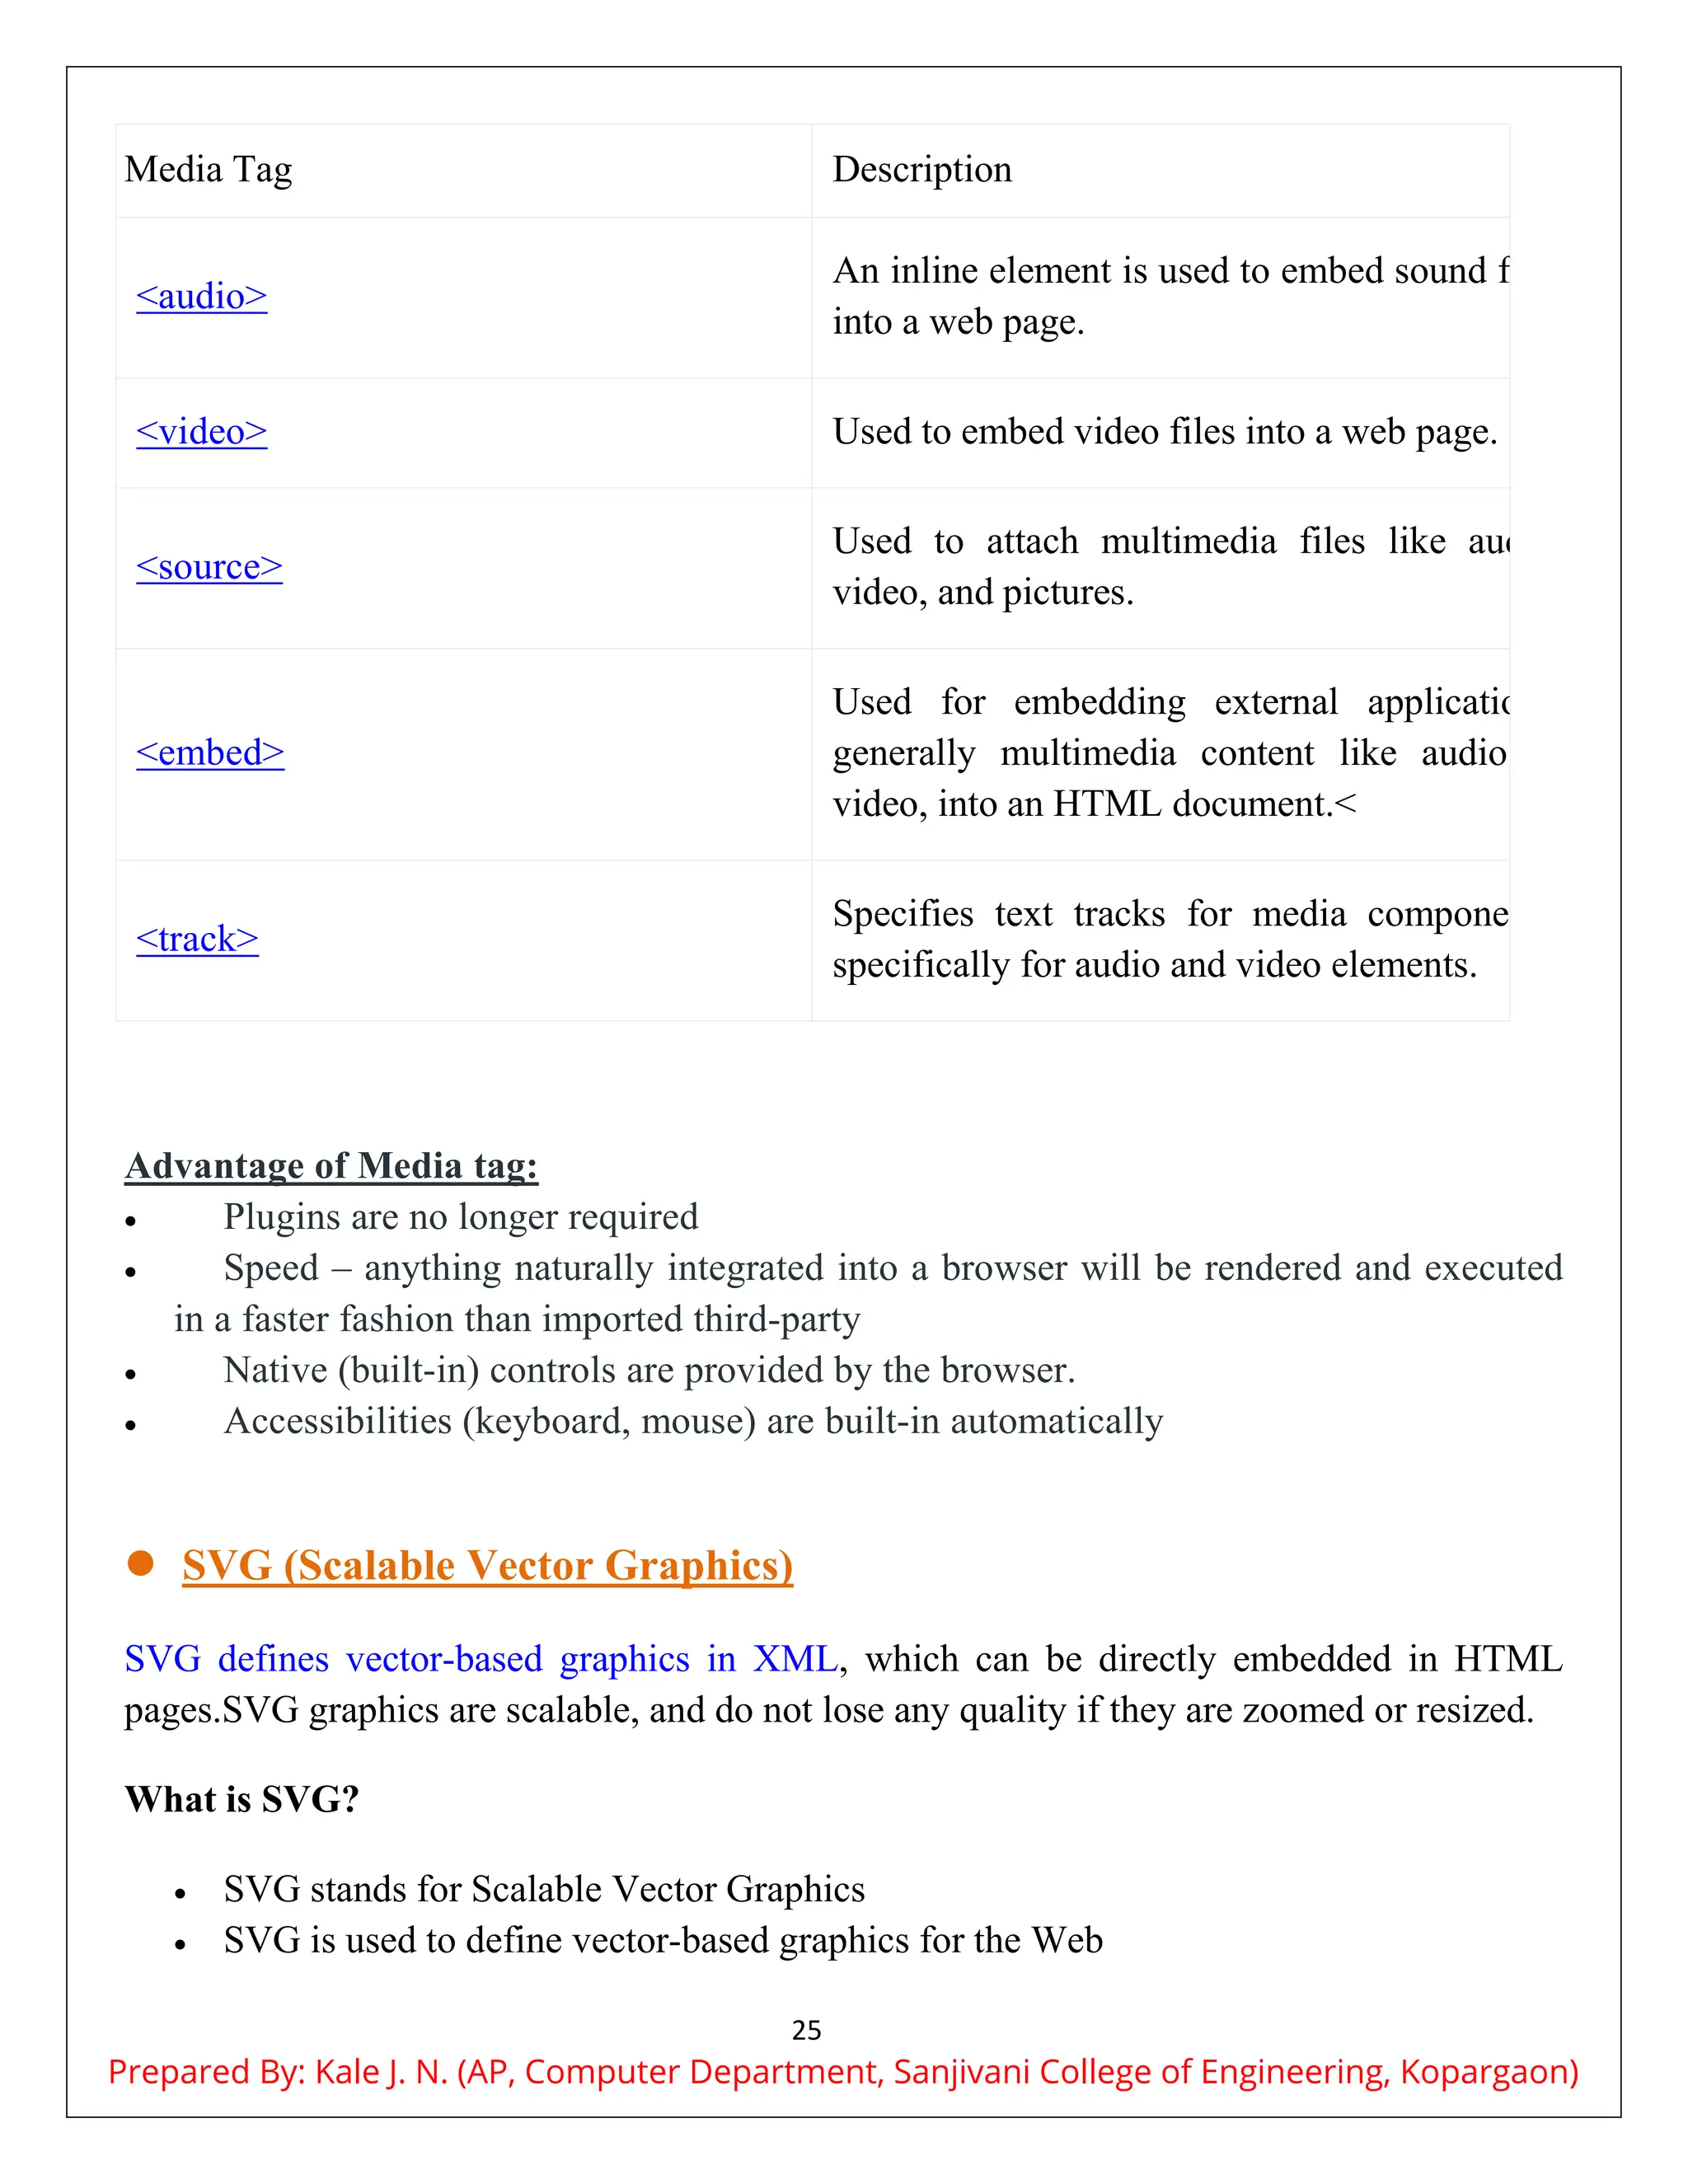
Semantic HTML and multimedia elements